
11. Preparing for OpenGL
GLKit is an amazing framework that makes the power of OpenGL ES 2.0 easy to use. However, with that great power come limitations. While OpenGL ES allows you to realize excellent results, it does restrict you to devices running iOS 5 or greater. In the long term, this won’t be a problem; but in the short term, it means your GLKit-developed product won’t run on many legacy iOS devices.
With that in mind, we’ll delve a little deeper into OpenGL ES and show you how to realize results similar to those attained with GLKit-based code using vanilla OpenGL ES 2.0 programming.
Creating a New Project
Unfortunately, as of Xcode 4.2, the OpenGL ES 2.0 template has GLKit embedded in it, so you can’t use that template as a starting point, nor can you easily port the existing Raiders game to use standard OpenGL ES 2.0.
Your only option is to create a new project in Xcode and copy the required files to the new project.
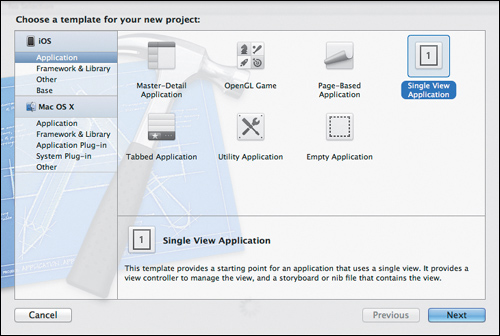
1. In Xcode, choose File > New > New Project.
2. Choose Single View Application (Figure 11.1) and click Next.
Figure 11.1 Choose Single View Application.
3. Type a Product Name for your project, deselect Use Storyboard, and select Use Automatic Reference Counting (Figure 11.2).
Figure 11.2 Enter an app name into the Product Name field; make sure Use Automatic Reference Counting is selected.

4. Click Next.
This will create an empty project with a ViewController, an AppDelegate, and a ViewController.xib file, along with some supporting files (that aren’t important for this discussion).
If you run the app, only a blank screen will appear. At this point, the app doesn’t reference OpenGL at all; it is just a standard AppKit app.
Note

Remember that an OpenGL ES context is rendered inside a standard iOS window.
Readying the App for OpenGL ES Conversion
You’ll have to perform several steps to change your game from a GLKit-based app to an OpenGL ES 2.0 app (Figure 11.3). The first requirement is to add the OpenGL ES and QuartzCore frameworks.
1. In the Files pane, click the Project icon.
2. In the Files pane, click the Frameworks group.
3. In the main window, click the Target icon.
4. Click Build Phases.
5. Click the Link Binary With Libraries disclosure triangle.
6. Click the Add (+) button, and select QuartzCore and OpenGL ES from the list.
Now you need to create the View for the OpenGL ES rendering code.
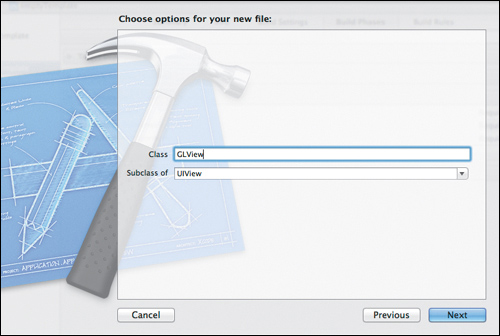
7. Choose File > New.
8. Add a new Objective-C Class and make sure it is a subclass of UIView.
You can call it what you like, but GLView is a good choice (Figure 11.4).
9. Now open GLView.h and add the following imports:
#import <QuartzCore/QuartzCore.h>
#import <OpenGLES/ES2/gl.h>
#import <OpenGLES/ES2/glext.h>
The rendering view needs a context to bind against, and also a way to update the scene. In GLKit, this is handled internally; but with standard OpenGL ES, this needs to be programmed manually.
10. To do this, add the following properties to the header file:
@property (nonatomic, retain) EAGLContext *context;
@property (nonatomic, retain) CADisplayLink *displayLink;
11. Then synthesize the properties in the implementation file:
@synthesize context, displayLink;
The view needs to know if it is animating or not, which indicates if the scene is rendering. As noted previously, in a standard OpenGL ES app, you need to update the rendering manually using a special timer called a CADisplayLink.
You also need to start and stop animation in the view, that, in turn, starts and stops the CADisplayLink timer.
12. To achieve this, add the following code to the header file of GLView:
@property (readonly, nonatomic) BOOL animating;
@property (nonatomic) NSInteger animationFrameInterval;
- (void)startAnimation;
- (void)stopAnimation;
13. In the implementation file, synthesize the two properties and add the following code:
- (void)startAnimation
{
if (!animating)
{
self.displayLink = [CADisplayLink displayLinkWithTarget:self selector: @selector(drawView)];
[displayLink setFrameInterval:animationFrameInterval];
[displayLink addToRunLoop:[NSRunLoop currentRunLoop] forMode:NSDefaultRunLoopMode];
animating = YES;
}
}
- (void)stopAnimation
{
if (animating)
{
[displayLink invalidate];
self.displayLink = nil;
animating = NO;
}
}
Figure 11.3 Steps to add the frameworks to the empty app

Figure 11.4 Creating the new file to be a subclass of UIView
startAnimation checks to see if the animation has started yet. If not, it creates a new CADisplayLink and sets its selector to drawView, which will fire every tick of the CADisplayLink.
stopAnimation functions in the opposite way. If the view is animating, then it stops the CADisplayLink.
Creating Buffers
Now that the code to allow rendering updates is complete, you must add code to actually do the rendering. Before that, however, some buffers should be created. In this case, two buffers are set up:
Render buffer—A simple 2D image in a specified format generally used in conjunction with frame buffers. The render buffer can also hold information about the depth of an image, or how far away it is from the eye. In 2D games, the depth values are usually all the same, but the depth information is important for 3D games.
Frame buffer—The frame buffer is the final destination in the graphics pipeline. A frame buffer is effectively a container that holds information about the objects to be rendered. It contains all the render buffers, and information about the objects in the scene. The frame buffer is then sent to the renderer; in iOS this framebuffer is sent to the EAGLContext which renders the scene to the display.
1. To create the buffers, first add the following ivars to the header of GLView:
GLint backingWidth;
GLint backingHeight;
GLuint frameBuffer;
GLuint renderBuffer;
GLuint depthBuffer;
2. Then add the following methods to the implementation file:
- (void)createBuffers {
glGenFramebuffers(1, &frameBuffer);
glGenRenderbuffers(1, &renderBuffer);
glBindFramebuffer(GL_FRAMEBUFFER, frameBuffer);
glBindRenderbuffer(GL_RENDERBUFFER, renderBuffer);
[context renderbufferStorage:GL_RENDERBUFFER fromDrawable:(CAEAGLLayer *)self.layer];
glFramebufferRenderbuffer(GL_FRAMEBUFFER, GL_COLOR_ATTACHMENT0, GL_RENDERBUFFER, renderBuffer);
glGetRenderbufferParameteriv(GL_RENDERBUFFER, GL_RENDERBUFFER_WIDTH, &backingWidth);
glGetRenderbufferParameteriv(GL_RENDERBUFFER, GL_RENDERBUFFER_HEIGHT, &backingHeight);
glGenRenderbuffers(1, &depthBuffer);
glBindRenderbuffer(GL_RENDERBUFFER, depthBuffer);
glRenderbufferStorage(GL_RENDERBUFFER, GL_DEPTH_COMPONENT16, backingWidth, backingHeight);
glFramebufferRenderbuffer(GL_FRAMEBUFFER, GL_DEPTH_ATTACHMENT, GL_RENDERBUFFER, depthBuffer);
}
- (void)destroyBuffers {
glDeleteFramebuffers(1, &frameBuffer);
frameBuffer = 0;
glDeleteRenderbuffers(1, &renderBuffer);
renderBuffer = 0;
if(depthBuffer)
{
glDeleteRenderbuffers(1, &depthBuffer);
depthBuffer = 0;
}
}
Preparing the Rendering Code
With buffers created to render the view and a timer set up to update that view, you’ll generate some code to actually use this code. The first step is to create an initialization method that will be called when the view is instantiated.
1. In this instance the view will be instantiated by a parent ViewController which in turn will be created from a .nib file. The init code takes the form:
- (id)initWithCoder:(NSCoder *)coder {
if (self = [super initWithCoder:coder]) {
CAEAGLLayer *eaglLayer = (CAEAGLLayer *)self.layer;
eaglLayer.opaque = YES;
EAGLContext *theContext = [[EAGLContext alloc] initWithAPI:kEAGLRenderingAPIOpenGLES2];
self.context = theContext;
if (!self.context || ![EAGLContext setCurrentContext: self.context]) {
return nil;
}
animating = NO;
animationFrameInterval = 2;
}
return self;
}
The compiler needs to know that GLView uses an EAGLView layer and not a standard UIView layer.
2. You do this by adding the following method to the implementation file:
+ (Class)layerClass
{
return [CAEAGLLayer class];
}
That completes the init code, but you still need the actual code to perform the rendering. If you remember, the CADisplayLink calls a selector on every update, which is called drawView. That code doesn’t actually exist yet.
3. To implement drawView, add the following:
- (void)drawView
{
glBindFramebuffer(GL_FRAMEBUFFER, frameBuffer);
[controller draw];
glBindRenderbuffer(GL_RENDERBUFFER, renderBuffer);
[context presentRenderbuffer:GL_RENDERBUFFER];
}
4. You need to add one last method to GLView:
- (void)layoutSubviews
{
[EAGLContext setCurrentContext:context];
[self destroyBuffers];
[self createBuffers];
[self drawView];
glBindRenderbuffer(GL_RENDERBUFFER, renderBuffer);
glGetRenderbufferParameteriv(GL_RENDERBUFFER, GL_RENDERBUFFER_WIDTH, &backingWidth);
glGetRenderbufferParameteriv(GL_RENDERBUFFER, GL_RENDERBUFFER_HEIGHT, &backingHeight);
if (glCheckFramebufferStatus(GL_FRAMEBUFFER) != GL_FRAMEBUFFER_COMPLETE)
NSLog(@"Failed to make complete framebuffer object %x", glCheckFramebufferStatus(GL_FRAMEBUFFER));
glViewport(0, 0, backingWidth, backingHeight);
[controller setup];
}
layoutSubviews is called when the view is added to a ViewController, or in certain circumstances, when the screen needs to redraw.
Changing the ViewController
You’ve completed all the major changes required for the GLView. You may have noticed that GLView sends a message to the controller object that doesn’t yet exist. controller is an IBOutlet to the parent ViewController.
1. Add the following property to the header file of GLView, and add controller to the @synthesize line in the implementation file:
@property (nonatomic, retain) IBOutlet ViewController *controller;
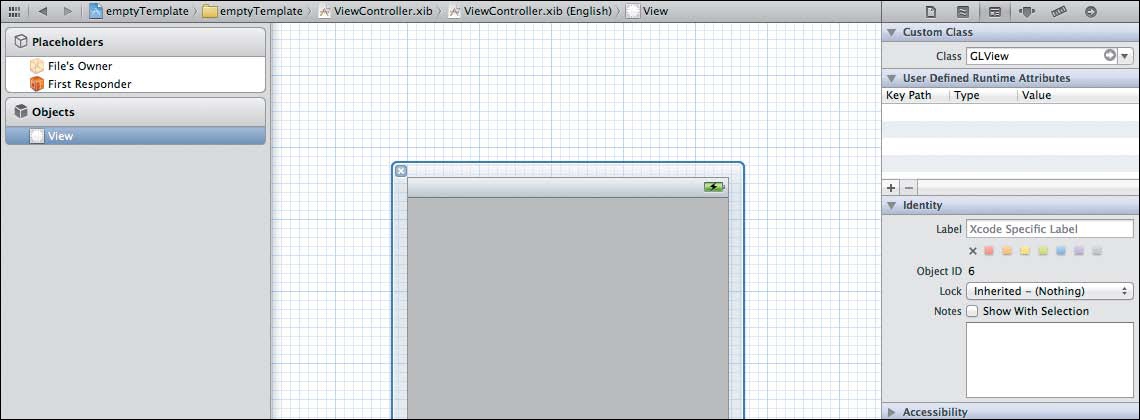
2. Click the ViewController.xib file, then click in the View area.
3. Make sure the Utilities pane is open, and switch to the Identity inspector.
4. Change the class from UIView to GLView (Figure 11.5).
Figure 11.5 Changing the class from UIView to GLView
5. To attach the outlet of the view to the ViewController, Control-click the view, then Control-drag the mouse over File Owner, and select controller.
The ViewController will contain the actual code rendering, and it will also set up, compile, and link the shaders.
Previously, you were told to forget about shaders. However, because you cannot render a scene in OpenGL ES 2.0 without using them, some knowledge of shaders is required. (In fact, shaders are very powerful and quite easy to understand; you’ll learn more about them in Chapter 12.)
For now, you will create shaders and the code to compile them as a starting point.
Creating the Program Object and Linking Shaders
Using shaders is a multi-step process. First, you must write shader code for the vertex and the fragment shaders. In iOS, you do this in a separate code file.
Then, each shader must be compiled and, if no issues arise during compilation, the two shaders are attached to a program object, which then links the two shaders for final drawing.
You achieve all this with the following (lengthy) code:
- (BOOL)compileShader:(GLuint *)shader type:(GLenum)type file: (NSString *)file
{
GLint status;
const GLchar *source;
source = (GLchar *)[[NSString stringWithContentsOfFile:file encoding:NSUTF8StringEncoding error:nil] UTF8String];
if (!source)
{
NSLog(@"Failed to load vertex shader");
return FALSE;
}
*shader = glCreateShader(type);
glShaderSource(*shader, 1, &source, NULL);
glCompileShader(*shader);
#if defined(DEBUG)
GLint logLength;
glGetShaderiv(*shader, GL_INFO_LOG_LENGTH, &logLength);
if (logLength > 0)
{
GLchar *log = (GLchar *)malloc(logLength);
glGetShaderInfoLog(*shader, logLength, &logLength, log);
NSLog(@"Shader compile log:
%s", log);
free(log);
}
#endif
glGetShaderiv(*shader, GL_COMPILE_STATUS, &status);
if (status == 0)
{
glDeleteShader(*shader);
return FALSE;
}
return TRUE;
}
- (BOOL)linkProgram:(GLuint)prog
{
GLint status;
glLinkProgram(prog);
#if defined(DEBUG)
GLint logLength;
glGetProgramiv(prog, GL_INFO_LOG_LENGTH, &logLength);
if (logLength > 0)
{
GLchar *log = (GLchar *)malloc(logLength);
glGetProgramInfoLog(prog, logLength, &logLength, log);
NSLog(@"Program link log:
%s", log);
free(log);
}
#endif
glGetProgramiv(prog, GL_LINK_STATUS, &status);
if (status == 0)
return FALSE;
return TRUE;
}
- (BOOL)validateProgram:(GLuint)prog
{
GLint logLength, status;
glValidateProgram(prog);
glGetProgramiv(prog, GL_INFO_LOG_LENGTH, &logLength);
if (logLength > 0)
{
GLchar *log = (GLchar *)malloc(logLength);
glGetProgramInfoLog(prog, logLength, &logLength, log);
NSLog(@"Program validate log:
%s", log);
free(log);
}
glGetProgramiv(prog, GL_VALIDATE_STATUS, &status);
if (status == 0)
return FALSE;
return TRUE;
}
- (BOOL)loadShaders
{
GLuint vertShader, fragShader;
NSString *vertShaderPathname, *fragShaderPathname;
// Create shader program.
program = glCreateProgram();
// Create and compile vertex shader.
vertShaderPathname = [[NSBundle mainBundle] pathForResource: @"Shader" ofType:@"vsh"];
if (![self compileShader:&vertShader type:GL_VERTEX_SHADER file:vertShaderPathname])
{
NSLog(@"Failed to compile vertex shader");
return FALSE;
}
// Create and compile fragment shader.
fragShaderPathname = [[NSBundle mainBundle] pathForResource: @"Shader" ofType:@"fsh"];
if (![self compileShader:&fragShader type:GL_FRAGMENT_SHADER file:fragShaderPathname])
{
NSLog(@"Failed to compile fragment shader");
return FALSE;
}
// Attach vertex shader to program.
glAttachShader(program, vertShader);
// Attach fragment shader to program.
glAttachShader(program, fragShader);
// Bind attribute locations.
// This needs to be done prior to linking.
glBindAttribLocation(program, 0, "position");
// Link program.
if (![self linkProgram:program])
{
NSLog(@"Failed to link program: %d", program);
if (vertShader)
{
glDeleteShader(vertShader);
vertShader = 0;
}
if (fragShader)
{
glDeleteShader(fragShader);
fragShader = 0;
}
if (program)
{
glDeleteProgram(program);
program = 0;
}
return FALSE;
}
// Release vertex and fragment shaders.
if (vertShader)
glDeleteShader(vertShader);
if (fragShader)
glDeleteShader(fragShader);
return TRUE;
}
As this code compiles, it links the shaders and creates the program object; but before it can be useful, the shaders have to exist in the project.
1. Choose File > New.
2. Choose Other Empty file, and call the file Shader.fsh.
3. Create another empty file, and call it Shader.vsh.
These two files are for the fragment (.fsh) and vertex shaders (.vsh), respectively.
4. Add the following code to Shader.fsh:
precision mediump float;
void main()
{
gl_FragColor = vec4(1.0, 0.0, 0.0, 1.0);
}
This code merely sets the object color to red using RGBA (red, green, blue, alpha) values from 0-1.
5. Now add the following code to Shader.vsh:
attribute vec4 position;
void main()
{
gl_Position = position;
}
This code sets the position to render the object.
This line of code:
attribute vec4 position;
is actually a parameter that you would usually set in your compiling code. In this instance, it is set to zero, so the model is rendered in the center of the screen.
6. To get this code to work, the rendering has to take place as the final piece of the jigsaw. You do this using two methods:
- (void)setup {
[self loadShaders];
glViewport(0, 0, 320, 480);
}
- (void)draw
{
static const GLfloat squareVertices[] = {
-0.5f, -0.33f,
0.5f , -0.33f,
-0.5f, 0.33f,
0.5f , 0.33f,
};
glClearColor(0.5f, 0.5f, 0.5f, 1.0f);
glClear(GL_COLOR_BUFFER_BIT);
// Use shader program.
glUseProgram(program);
// Update attribute values.
glVertexAttribPointer(positionAttribute, 2, GL_FLOAT, 0, 0, squareVertices);
glEnableVertexAttribArray(positionAttribute);
glDrawArrays(GL_TRIANGLE_STRIP, 0, 4);
}
As you remember, setup is called from the view when it is initialized in the layoutSubview. It calls loadShaders, which deals with the shaders; and if all went well with the shaders, a compiled program object is available for the renderer.
As its name suggests, draw executes the actual drawing code. In this demo template, a 2D red square is drawn at the center of the screen.
squareVertices is a simple C array that holds the vertices information for the square. The screen is then cleared and OpenGL ES is told to use the program object that was created in loadShaders.
The next three lines tell OpenGL ES to use the squareVertices array as the vertices to draw, and then does the actual drawing.
As you can see, to render a simple scene, OpenGL ES requires a lot more processes and steps and code compared to GLKit.
You have just one more thing to do.
7. In the AppDelegate implementation file add one line to:
(BOOL)application:(UIApplication *)application didFinishLaunchingWithOptions:(NSDictionary *)launchOptions
so that the complete method looks like:
self.window = [[UIWindow alloc] initWithFrame: [[UIScreen mainScreen] bounds]];
// Override point for customization after application launch.
self.viewController = [[ViewController alloc] initWithNibName:@"ViewController" bundle:nil];
self.window.rootViewController = self.viewController;
[self.window makeKeyAndVisible];
[(GLView *)self.viewController.view startAnimation];
return YES;
The actual line to add is the line just above return YES.
Wrapping Up
You have seen how to set up an empty template in OpenGL ES 2.0, as opposed to using the supplied template in Xcode. Along the way, you have learned a bit about how shaders work, a little shader logic code, and you’ve added a subclass of UIView to create the buffers needed for OpenGL ES 2.0 rendering.
In the next chapter, you will learn how to change your GLKit version of Raiders to use standard OpenGL ES 2.0.