Chapter 3. Advanced iPhone Styling
In our quest to build an iPhone app without Objective-C, we’ve so far learned how to use CSS to style a collection of HTML pages to look like an iPhone app. In this chapter, we’ll lay the groundwork to make those same pages behave like an iPhone app. Specifically, we’ll discuss using Ajax to turn a full website into a single-page app, how to create a back button with history using JavaScript, and how to take advantage of the Web Clip icon and full screen mode features of the iPhone to launch your app without Mobile Safari intruding upon the user experience.
Adding a Touch of Ajax
The term Ajax has become such a buzzword that I’m not even sure I know what it means anymore. For the purposes of this book, I’m going to use Ajax to refer to the technique of using JavaScript to send requests to a web server without reloading the current page (e.g., to retrieve some HTML, submit a form, and so on). This approach makes for a very smooth user experience, but does require that you reinvent a lot of wheels.
For example, if you are loading external pages dynamically, the browser will not give any indication of progress or errors to the users. Furthermore, the back button will not work as expected unless you take pains to support it. In other words, you have to do a lot of work to make a sweet Ajax app. Even so, there are some very good reasons to go to the trouble. In particular, it opens the door to creating iPhone apps that can run full-screen (Full Screen Mode) and even offline (Chapter 6).
Traffic Cop
For my next series of examples, I’m going to write a
single page called iphone.html that
will sit in front of all of the site’s other pages and will handle
requests, sort of like a traffic cop. Here’s how it works. On first
load, iphone.html will present the
user with a nicely formatted version of the site navigation. I’ll then
use jQuery to “hijack” the onclick actions of the
nav links so that when the user clicks on one, the browser
page will not navigate to the target link. Rather,
jQuery will load a portion of the HTML from the remote page and deliver
the data to the user by updating the current page. I’ll start with the
most basic functional version of the code and improve it as we go
along.
The HTML for the iphone.html wrapper page is extremely simple
(see Example 3-1). In the head section,
I set the title and viewport options, and
include links to a stylesheet (iphone.css) and two JavaScript files:
jquery.js and a custom JavaScript
file named iphone.js.
Note
For more information on where to get jquery.js and what to do with it, see Intro to JavaScript.
The body just has two div
containers: a header with the initial title in an h1 tag,
and an empty div container, which will end up holding HTML
snippets retrieved from other pages.
<html>
<head>
    <title>Jonathan Stark</title>
    <meta name="viewport" content="user-scalable=no, width=device-width" />
    <link rel="stylesheet" href="iphone.css" type="text/css" media="screen" />
    <script type="text/javascript" src="jquery.js"></script>
    <script type="text/javascript" src="iphone.js"></script>
</head>
<body>
    <div id="header"><h1>Jonathan Stark</h1></div>
    <div id="container"></div>
</body>
</html>
Moving on to the iphone.css file, you can see in Example 3-2 that I’ve reshuffled some of the properties from
previous examples (e.g., some of the #header h1 properties
have been moved up to #header). Overall, though, everything
should look familiar (if not, please review ).
body {
    background-color: #ddd;
    color: #222;
    font-family: Helvetica;
    font-size: 14px;
    margin: 0;
    padding: 0;
}
#header {
    background-color: #ccc;
    background-image: -webkit-gradient(linear, left top, left bottom, from(#ccc), to(#999));
    border-color: #666;
    border-style: solid;
    border-width: 0 0 1px 0;
}
#header h1 {
    color: #222;
    font-size: 20px;
    font-weight: bold;
    margin: 0 auto;
    padding: 10px 0;
    text-align: center;
    text-shadow: 0px 1px 0px #fff;
}
ul {
    list-style: none;
    margin: 10px;
    padding: 0;
}
ul li a {
    background-color: #FFF;
    border: 1px solid #999;
    color: #222;
    display: block;
    font-size: 17px;
    font-weight: bold;
    margin-bottom: -1px;
    padding: 12px 10px;
    text-decoration: none;
}
ul li:first-child a {
    -webkit-border-top-left-radius: 8px;
    -webkit-border-top-right-radius: 8px;
}
ul li:last-child a {
    -webkit-border-bottom-left-radius: 8px;
    -webkit-border-bottom-right-radius: 8px;
}
ul li a:active,ul li a:hover {
    background-color:blue;
    color:white;
}
#content {
    padding: 10px;
    text-shadow: 0px 1px 0px #fff;
}
#content a {
    color: blue;
}
The JavaScript in iphone.js is where all the magic happens in this example. Please refer to Example 3-3 as I go through it line by line.
Note
This JavaScript loads a document called
index.html, and will not work
without it. You should reuse the HTML file from Chapter 2, being sure to save it as index.html in the same directory as the
iphone.html you created earlier
in this chapter. However, none of the links in it will work unless the
targets of the links actually exist. You can create these files
yourself or download the example code from the book’s website.
Creating about.html, blog.html, and consulting-clinic.html will give you a few
links to play with. To do so, just duplicate index.html a few times and change the
filename of each copy to match the related link. For added effect, you
can change the content of the h2 tag in each file to
match the filename. For example, the h2 in blog.html would be
<h2>Blog</h2>.
$(document).ready(function(){  loadPage();
});
function loadPage(url) {
loadPage();
});
function loadPage(url) { if (url == undefined) {
$('#container').load('index.html #header ul', hijackLinks);
if (url == undefined) {
$('#container').load('index.html #header ul', hijackLinks); } else {
$('#container').load(url + ' #content', hijackLinks);
} else {
$('#container').load(url + ' #content', hijackLinks); }
}
function hijackLinks() {
}
}
function hijackLinks() { $('#container a').click(function(e){
 e.preventDefault();
 loadPage(e.target.href);
 });
}
});
}-
Here I’m using jQuery’s document ready function to have the browser run the
loadPage()function when the DOM is complete.-
The
loadPage()function accepts a single parameter calledurl, and then checks (on the next line) whether a value has been sent.-
If a value is not sent into the function,
urlwill be undefined and this line will execute. This line and the following are examples of jQuery’sload()function. Theload()function is excellent for adding quick and dirty Ajax functionality to a page. If this line were translated into English, it would read: “Get all of theulelements from the#headerelement ofindex.htmland insert them into the#containerelement of the current page. When you’re done, run thehijackLinks()function.” Note that index.html refers to the home page of the site. If your home page is named differently, you’d use that filename here instead.-
This line is executed if the
urlparameter has a value. It says, in effect: “Get the#contentelement from theurlthat was passed into theloadPages()function and insert it into the#containerelement of the current page. When you’re done, run thehijackLinks()function.”-
Once the
load()function has completed, the#containerelement of the current page will contain the HTML snippet that was retrieved. Then,load()will run thehijackLinks()function.-
On this line,
hijackLinks()finds all of the links that are in the new HTML, and binds a click handler to them using the lines of code that follow. Click handlers are automatically passed an event object, which I’m capturing as the function parametere. The event object of a clicked link contains the URL of the remote page ine.target.href.-
Normally, a web browser will navigate to a new page when a link is clicked. This navigation response is called the “default behavior” of the link. Since we are handling clicks and loading pages manually, we need to prevent this default behavior. On this line, I’ve done so by calling the built-in
preventDefault()method of the event object. If I had left that line out, the browser would have dutifully left the current page and navigated to the URL of the clicked link.-
When the user clicks, I pass the URL of the remote page to the
loadPage()function and the cycle starts all over again.
Tip
One of my favorite things about JavaScript is that you can pass a function as a parameter to another function. Although this looks weird at first, it’s extremely powerful and allows you to make your code modular and reusable. If you’d like to learn more, you should check out JavaScript: The Good Parts by Douglas Crockford (O’Reilly). In fact, if you are working with JavaScript, you should check out everything by Douglas Crockford; you’ll be glad you did.
Click handlers do not run when the page first loads; they run when the user has read some stuff on the page and decides to click a link. Assigning click handlers is like setting booby traps; you do some initial setup work for something that may or may not be triggered later.
Tip
It’s worth taking a few minutes to read up on the properties of the event object that JavaScript creates in response to user actions in the browser. A good reference is located at http://www.w3schools.com/htmldom/dom_obj_event.asp.
Simple Bells and Whistles
With this tiny bit of HTML, CSS, and JavaScript, we have essentially turned an entire website into a single-page application. However, it still leaves quite a bit to be desired. Let’s slick things up a bit.
Since we are not allowing the browser to navigate from page to page, the user will not see any indication of progress while data is loading. We need to provide some feedback to let users know that something is, in fact, happening. Without this feedback, users will wonder if they actually clicked the link or missed it, and will often start clicking all over the place in frustration. This can lead to increased server load and application instability (i.e., crashing).
Note
If you are testing this web application on a local network, the network
speeds will be so fast you won’t ever see the progress indicator. If
you are using Mac OS X, you can slow all incoming web traffic by
typing a couple of ipfw commands at
the terminal. For example, these commands will slow all web traffic to
4 kilobytes per second:
sudo ipfw pipe 1 config bw 4KByte/s
sudo ipfw add 100 pipe 1 tcp from any to me 80
If you are using the Safari desktop browser to view the pages, you’ll need to use
your Mac’s hostname or external IP address in the URL (for example,
mymac.local rather than localhost). When
you’re done testing, delete the rule with sudo ipfw delete
100 (you can delete all custom rules with ipfw
flush).
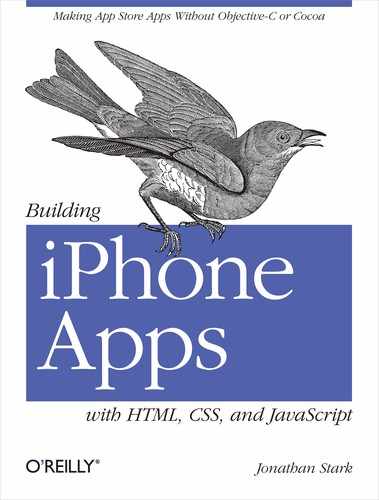
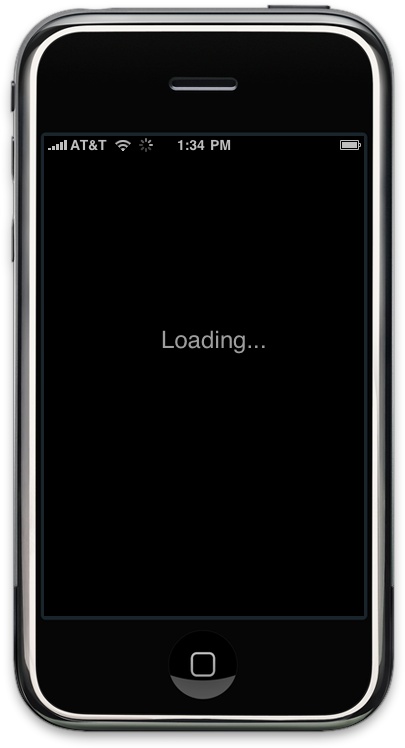
Thanks to jQuery, providing this sort of feedback only takes two lines of
code. We’ll just append a loading div to the body when
loadPage() starts, and remove the loading div
when hijackLinks() is done. Example 3-4 shows a modified version of Example 3-3. The lines you need to add to iphone.js are shown in bold.
$(document).ready(function(){
    loadPage();
});
function loadPage(url) {
    $('body').append('<div id="progress">Loading...</div>'),
    if (url == undefined) {
        $('#container').load('index.html #header ul', hijackLinks);
    } else {
        $('#container').load(url + ' #content', hijackLinks);
    }
}
function hijackLinks() {
    $('#container a').click(function(e){
        e.preventDefault();
        loadPage(e.target.href);
    });
    $('#progress').remove();
}
See Example 3-5 for the CSS that needs to be
added to iphone.css to style the
progress div. The result can be seen in Figure 3-1.
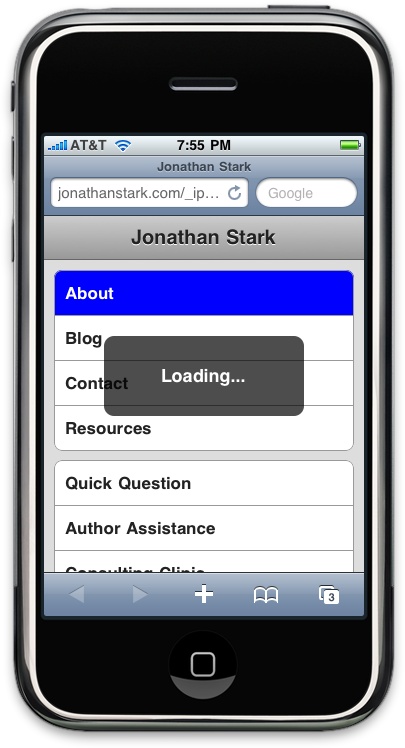
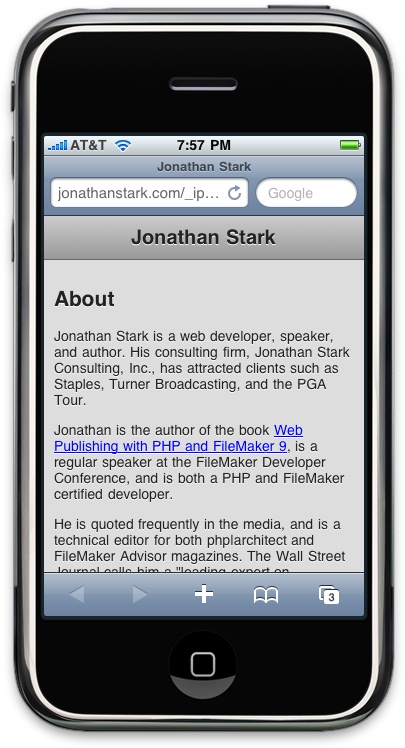
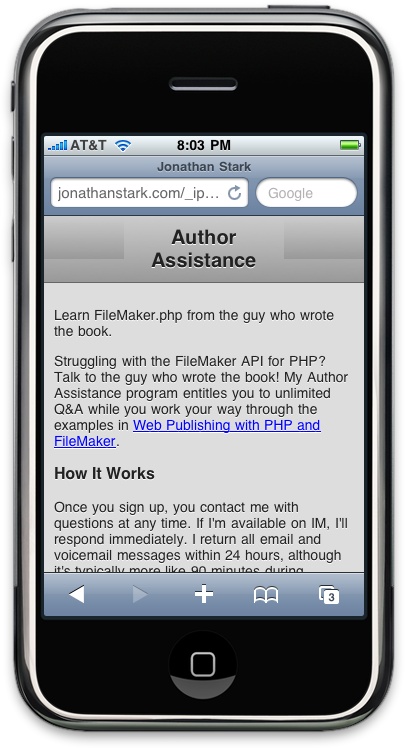
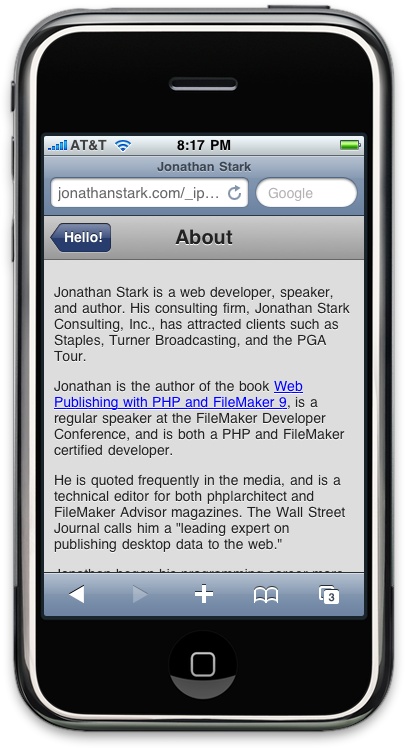
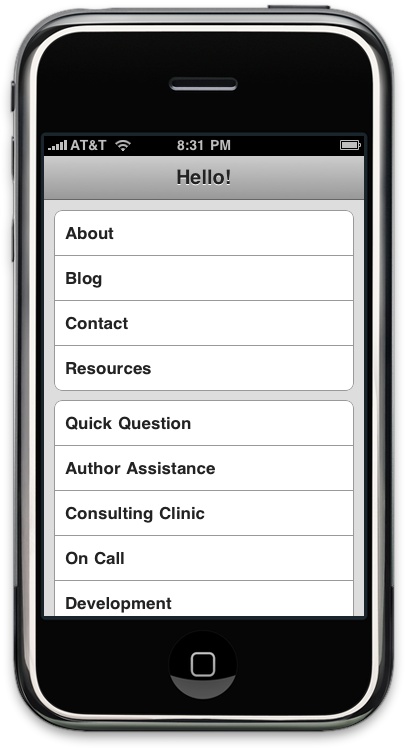
My site happens to have a single
h2 at the beginning of each page that would make a nice
page title (see Figure 3-2). You
can see this in the HTML source shown in Chapter 2. To be more iPhone-esque, I’m going to pull
that title out of the content and put it in the header (see Figure 3-3). Again, jQuery to the rescue:
you can just add three lines to the hijackLinks() function
to make it happen. Example 3-6 shows the hijackLinks function with these
changes.
Note
Note that I added the title lines before the line that removes the progress indicator. I like to remove the progress indicator as the very last action because I think it makes the application feel more responsive.
The double pipe (||) in the
first line of inserted code (shown in bold) is the JavaScript logical
operator OR. Translated into English, that line would read: “Set the
title variable to the HTML contents of the h2 element, or
to the string ‘Hello!’ if there is no h2 element.” This is
important because the first page load won’t contain an h2,
as we are just grabbing the nav uls.
Note
This point probably needs some clarification. When users first load the iphone.html URL, they are only going to see the overall site navigation elements, as opposed to any site content. They won’t see any site content until they tap a link on this initial navigation page.
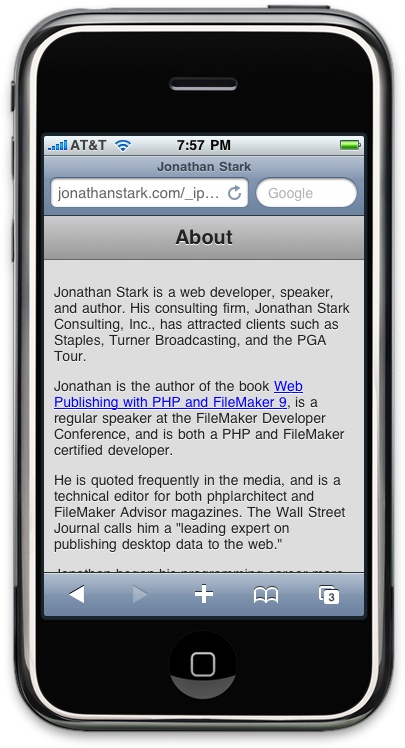
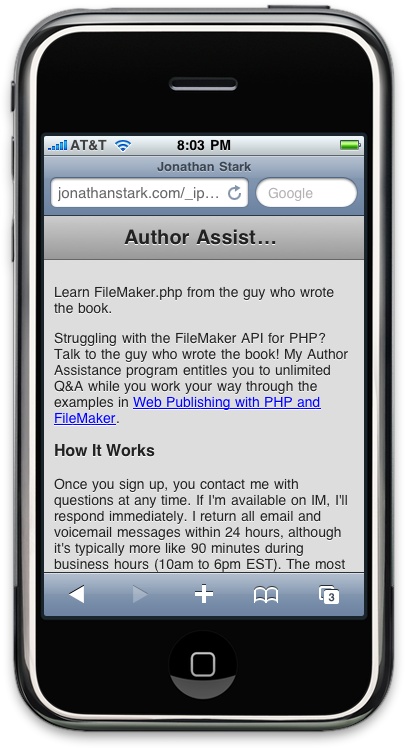
A few pages on my site have titles that are
longer than can fit in the header bar (Figure 3-4). I could just let the text break onto more
than one line, but that would not be very iPhone-ish. Rather, I’ve
updated the #header h1 styles such that long text will be
truncated with a trailing ellipsis (see Figure 3-5
and Example 3-7). This might be my favorite
little-known CSS trick.
Here’s the rundown:
max-width: 160px instructs the browser not to allow the
h1 element to grow wider than 160px. Then, overflow:
hidden instructs the browser to chop off any content that extends
outside of the element borders. Next, white-space: nowrap
prevents the browser from breaking the line into two. Without this line,
the h1 would just get taller to accommodate the text at the
defined width. Finally, text-overflow: ellipsis appends
three dots to the end of any chopped-off text to indicate to users that
they are not seeing the entire string.
Let’s say you have an About page that is longer than the viewable area on the iPhone. The user visits the page, scrolls down to the bottom, and clicks on a link to your Contact page. If you have more than a screenful of text on your Contact page, the new data will appear with the window still scrolled all the way to the bottom.
Technically, this makes sense because we are
not actually leaving the current (scrolled) page, but it’s certainly
confusing for the user. To rectify the situation, I have added a
scrollTo() command to the loadPage() function
(see Example 3-8).
Now whenever a user clicks a link, the page will first jump to the top. This has the added benefit of ensuring that the loading graphic is visible if the user clicks a link at the bottom of a long page.
Like most sites, mine has links to external pages (i.e., pages hosted on other domains). I don’t want to hijack these external links because it wouldn’t make sense to inject their HTML into my iPhone-specific layout. In Example 3-9, I have added a conditional that checks the URL for the existence of my domain name. If it’s found, the link is hijacked and the content is loaded into the current page; that is, Ajax is in effect. If not, the browser will navigate to the URL normally.
Caution
You must change
jonathanstark.com to the appropriate domain or hostname
for your website, or the links to pages on your website will no longer
be hijacked.
Tip
The url.match function uses a
language, regular expressions, that is often embedded within other
programming languages such as JavaScript, PHP, and Perl. Although this
regular expression is simple, more complex expressions can be a bit
intimidating, but are well worth becoming familiar with. My favorite
regex page is located at http://www.regular-expressions.info/javascriptexample.html.
Roll Your Own Back Button
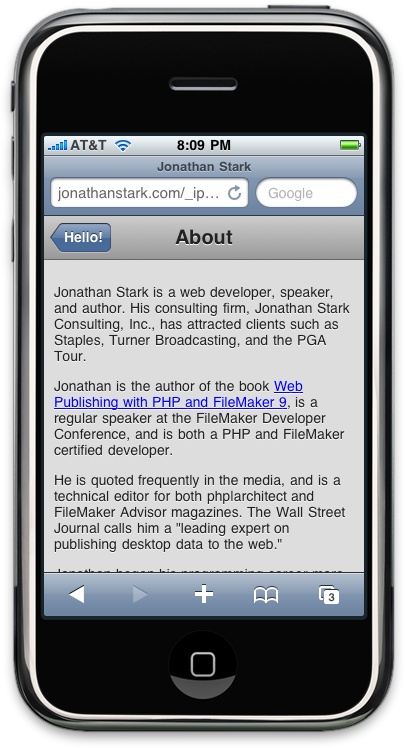
The elephant in the room at this point is that the user has no way to navigate back to previous pages (remember that we’ve hijacked all the links, so the Safari page history won’t work). Let’s address that by adding a back button to the top-left corner of the screen. First, I’ll update the JavaScript, and then I’ll do the CSS.
Adding a standard iPhone-ized back button to the app means keeping track of the user’s click history. To do this, we’ll have to A) store the URL of the previous page so we know where to go back to, and B) store the title of the previous page so we know what label to put on the back button.
Adding this feature touches on most of the JavaScript we’ve written so far in this chapter, so I’ll go over the entire new version of iphone.js line by line (see Example 3-10). The result will look like Figure 3-6.
var hist = [];$('#header').append('<div class="leftButton">'+hist[1].title+'</div>'),
$('#header .leftButton').click(function(){
var thisPage = hist.shift();
var previousPage = hist.shift(); loadPage(previousPage.url); }); } $('#container a').click(function(e){
var url = e.target.href; if (url.match(/jonathanstark.com/)) {
e.preventDefault(); loadPage(url); } }); $('#progress').remove(); }); }
-
On this line, I’m initializing a variable named
histas an empty array. Since I’ve defined it outside of any functions, it exists in the global scope and will be available everywhere in the page. Note that I didn’t use the full wordhistoryas my variable name because that is a predefined object property in JavaScript and should be avoided in your own code.-
Here I’m defining the relative URL of the remote page to load when the user first visits iphone.html. You might recall from earlier examples that I just checked for
url == undefinedto handle the first page load, but in this example we are going to use the start page in a few places. Therefore, it makes sense to define it globally.-
This line and the next make up the document ready function definition. Note that unlike previous examples, I’m passing the start page to the
loadPage()function.-
On to the
loadPage()function. This line and the next are verbatim from previous examples.-
This
if...elsestatement determines which elements to load from the remote page. For example, if we want the start page, we grab theuls from the header; otherwise, we grab the contentdiv.-
On this line, the URL parameter and the appropriate source element are concatenated as the first parameter passed to the load function. As for the second parameter, I’m passing an anonymous function (an unnamed function that is defined inline) directly. As we go through the anonymous function, you’ll notice a strong resemblance to the
hijackLinks()function, which this anonymous function has replaced. For example, the following three lines are identical to previous examples.-
On this line, I’m removing the
.leftButtonobject from the page. (This might seem weird because I haven’t yet added it to the page; we’ll be adding it a couple steps down.)-
Here I’m using the built-in
unshiftmethod of the JavaScript array to add an object to the beginning of thehistarray. The object I’m adding has two properties,urlandtitle, which are the two pieces of information we need to support the back button display and behavior.-
On this line, I’m using the built-in
lengthmethod of the JavaScript array to find out how many objects are in the history array. If there is only one object in the history array, it means that the user is on the first page, and therefore we don’t need to display a back button. However, if there is more than one object in thehistarray, we need to add a button to the header.-
Next, I’m adding that
.leftButtonI mentioned earlier. The text of the button will be the same as the title of the page before the current page, which is what I’m accessing with thehist[1].titlecode. JavaScript arrays are zero-based, so the first item in the array (the current page) has an index of 0. In other words, index 0 is the current page, index 1 is the previous page, index 2 is the page before that, and so on.-
In this block of code, I’m binding an anonymous function to the click handler of the back button. Remember, click handler code executes when the user clicks, not when the page loads. So, after the page loads and the user clicks to go back, the code inside this function will run.
-
This line and the next use the built-in
shiftmethod of the array to remove the first two items from thehistarray, and the last line in the function sends the URL of the previous page to theloadPage()function.-
The remaining lines were copied exactly from previous examples, so I won’t rehash them here.
-
This is the URL matching code introduced earlier in this chapter. Remember to replace
jonathanstark.comwith part of your website’s domain or hostname, or none of the local links will be hijacked and loaded into the page.
Tip
Please visit http://www.hunlock.com/blogs/Mastering_Javascript_Arrays for a full listing of JavaScript array functions with descriptions and examples.
Now that we have our back button, all that
remains is to purty it up with some CSS (see Example 3-11). I start off by styling the text with
font-weight, text-align,
line-height, color, and
text-shadow. I continue by placing the div
precisely where I want it on the page with position,
top, and left. Then, I make sure that long
text on the button label will truncate with an ellipsis using
max-width, white-space, overflow,
and text-overflow. Finally, I apply a graphic with
border-width and -webkit-border-image. Unlike
my earlier border image example, this image has a different width for
the left and right borders, because the image is made asymmetrical by
the arrowhead on the left side.
Note
Don’t forget that you’ll need an image for this button. You’ll need to save it as back_button.png in the images folder underneath the folder that holds your HTML file. See Adding Basic Behavior with jQuery for tips on finding or creating your own button images.
#header div.leftButton {
font-weight: bold;
text-align: center;
line-height: 28px;
color: white;
text-shadow: rgba(0,0,0,0.6) 0px -1px 0px;
position: absolute;
top: 7px;
left: 6px;
max-width: 50px;
white-space: nowrap;
overflow: hidden;
text-overflow: ellipsis;
border-width: 0 8px 0 14px;
-webkit-border-image: url(images/back_button.png) 0 8 0 14;
}By default, Mobile Safari briefly displays a translucent gray box over clickable
objects that have been tapped (Figure 3-7).
Since our back button is not rectangular, this effect looks a little
lame, but removing it is easy and makes the app look much better. Mobile
Safari supports a property called
-webkit-tap-highlight-color that allows you to change the
default to whatever color you like. I want to remove the highlight
completely, which I’ve done here by setting the tap highlight to a fully
transparent color (see Example 3-12).
#header div.leftButton {
    font-weight: bold;
    text-align: center;
    line-height: 28px;
    color: white;
    text-shadow: rgba(0,0,0,0.6) 0px -1px 0px;
    position: absolute;
    top: 7px;
    left: 6px;
    max-width: 50px;
    white-space: nowrap;
    overflow: hidden;
    text-overflow: ellipsis;
    border-width: 0 8px 0 14px;
    -webkit-border-image: url(images/back_button.png) 0 8 0 14;
    -webkit-tap-highlight-color: rgba(0,0,0,0);
}
In the case of the back button, there can be
at least a second or two of delay before the content from the previous
page appears. To avoid frustration, I want the button to look clicked
the instant it’s tapped. In a desktop browser, this would be a simple
process; you’d just add a declaration to your CSS using the :active pseudoclass to specify an alternate
style for the object that was clicked. I don’t know whether it’s a bug
or a feature, but this approach does not work on the iPhone; the
:active style is ignored.
I toyed around with combinations of :active and :hover, which brought me some success with
non-Ajax apps. However, with an Ajax app like the one we are using here,
the :hover style is sticky (i.e., the
button appears to remain “clicked” even after the finger is
removed).
Fortunately, the fix is pretty simple. I use
jQuery to add the class clicked to the button when the user
taps it. I’ve opted to apply a darker version of the button image to the
button in the example (see Figure 3-8
and Example 3-13). You’ll need to
make sure you have a button image called back_button_clicked.png in the images subfolder. See Adding Basic Behavior with jQuery for tips on finding or creating your
own button images.
Note
Since I’m using an image for the clicked style, it would be smart to preload the image. Otherwise, the unclicked button graphic will disappear the first time it’s tapped while the clicked graphic downloads. I’ll cover image preloading in the next chapter.
With the CSS in place, I can now update the
portion of iphone.js that assigns
the click handler to the back button. First, I add a variable,
e, to the anonymous function in order to capture the
incoming click event. Then, I wrap the event target in a jQuery selector
and call jQuery’s addClass() function to assign my clicked
CSS class to the button:
$('#header .leftButton').click(function(e){
    $(e.target).addClass('clicked'),
    var thisPage = hist.shift();
    var previousPage = hist.shift();
    loadPage(previousPage.url);
});Adding an Icon to the Home Screen
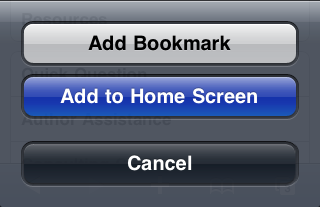
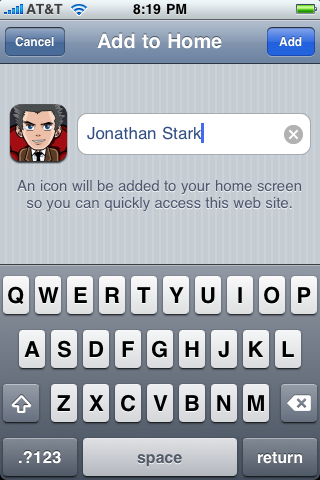
Hopefully users will want to add an icon for your web app (called a “Web Clip icon”) to their home screens. They do this by tapping the plus button at the bottom of the Safari window (Figure 3-9), tapping Add to Home Screen (Figure 3-10), and clicking the Add button (Figure 3-11). By default, the iPhone will create this icon by thumbnailing the current page (including position and zoom) and applying rounded corners and a glossy effect (Figure 3-12).


To customize the home screen image, the cool kids provide a custom Web Clip icon. The simplest way to do this is to specify a single icon for your entire site by uploading a file named apple-touch-icon.png to your web root. The file should be 57 pixels square, and without gloss or rounded corners because the iPhone will add these automatically. If you don’t want the iPhone to add effects to your Web Clip icon, change the name of the file to apple-touch-icon-precomposed.png.
In some cases, you may want to provide a Web
Clip icon for a page that is different from the rest of your site. You
can do this by adding one of the following lines to the
head section of the “traffic cop” HTML document, iphone.html (replacing myCustomIcon.png with the absolute or
relative path to the image):
<link rel="apple-touch-icon" href="myCustomIcon.png" />

<link rel="apple-touch-icon-precomposed" href="myCustomIcon.png" />
Full Screen Mode
Feel like reclaiming a quarter of the available vertical
space from Mobile Safari (104 pixels, to be precise)? Add the following line to the
head section of the “traffic cop” HTML document, iphone.html, and your web app will display in
full screen mode when launched from the Web Clip icon:
<meta name="apple-mobile-web-app-capable" content="yes" />
I would’ve told you about this feature earlier, but it’s only useful once you have hijacked all of your hyperlinks with Ajax. As soon as a user clicks on a nonhijacked link—one that actually navigates to a new page—Mobile Safari will launch and load the page normally. This behavior is perfect for the example we’ve been working with because external links (Amazon, Twitter, Facebook, etc.) will open in Safari.
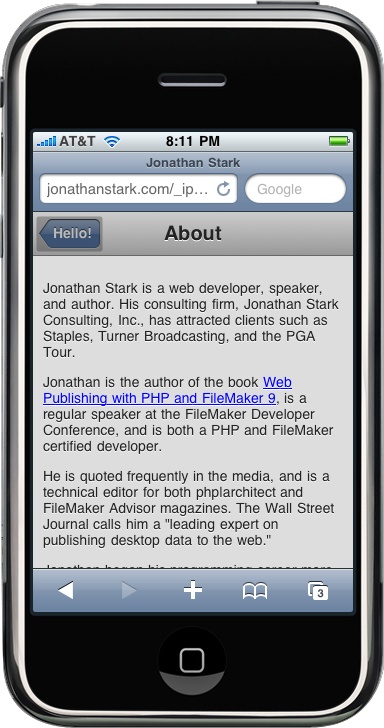
Changing the Status Bar
Once you’ve added the
apple-mobile-web-app-capable meta tag, you have the
option to control the background color of the 20-pixel status bar at
the top of the screen using the
apple-mobile-web-app-status-bar-style meta tag. The normal gray Safari status bar is the default, or
you can change it to black (see Figure 3-13). You can also set it to
black-translucent, which makes it partially transparent
and additionally removes it from the document flow. In other words,
your content will be shifted up by 20 pixels and behind the status bar
when the page first loads, so you might have to position your header a
little lower to compensate:
<meta name="apple-mobile-web-app-status-bar-style" content="black" />
Providing a Custom Startup Graphic
When an app is launched in full screen mode, the user is presented with a screenshot of the app while the first page is loading. I’m not a fan of this because it looks like the app is ready to be interacted with, when in reality tapping a link will do nothing. Furthermore, the screenshot is based on the last page from the user’s previous visit, scrolled to wherever he left off—not very attractive.
Fortunately, Mobile Safari allows us to
define a startup graphic that will be displayed while the page is
loading. To add a custom startup graphic, create a 320px × 460px PNG
file and place it in the same directory with iphone.html. Next, add the following line
to the head section of iphone.html (you’d replace
myCustomStartupGraphic.png with the absolute or relative
path to your image):
<link rel="apple-touch-startup-image" href="myCustomStartupGraphic.png" />
The next time we launch our app from the Web Clip icon, the default loading behavior will take place while the new custom graphic is downloaded. On the subsequent launch, the custom startup graphic will be displayed (Figure 3-14).
What You’ve Learned
In this chapter, you’ve learned how to convert a normal website into a full-screen Ajax application, complete with progress indicators, a native-looking back button, and a custom Web Clip icon. In the next chapter, you’ll learn how to make your app come alive by adding native user interface animations. That’s right; here comes the fun stuff!