
7
Backstage
Preparing Your Presentation
Key Topics Covered in This Chapter
- Defining your objective
- Understanding the audience
- Deciding what to say
- Getting organized
- Developing effective visuals
- Rehearsing
CHAPTER 6 described time-tested principles that you can use as a foundation for your presentations. This chapter moves from principles to six practical steps you can take in preparing those presentations.1
Step 1: Define Your Objective
The objective of your presentation is the outcome you seek—shared information, discussion, buy-in, feedback, or a sale, for example. It drives the development of your presentation. Ask yourself, “Why am I making this presentation, and what do I want my audience to do as a result?”
Do you want to inform, persuade, or sell? Do you want the audience to understand, learn, or take action? Do you want commitment from the audience? Note the difference between presenting a budget so that your audience understands it and presenting a budget so that your audience will vote in favor of it. The objective of the first is to inform; the second is to persuade. Once you are clear about the objective, you will have a better idea about the following issues:
- Whether to give the presentation at all
- Whether to give it to this particular audience under these particular circumstances
- What to say and how to say it
- What the follow-up needs to be
- Possible objections
Step 2: Understand the Audience
A presentation creates a connection between you and your audience. The better you understand that audience, the more you can customize your presentation, making it more appealing and effective in its impact. Everything we said about understanding the audience in the chapters on writing applies here:
- Who are your audience members, and what is their relationship to the topic?
- How well informed are they about the subject? What do they need to know about it?
- What do they expect from the presentation?
You should also determine if the audience is accustomed to a certain type of presentation. For example, all the sales personnel in a stock brokerage office were accustomed to a twenty-minutes sales briefing every Monday morning.They expected to receive practical ideas about timely investments or news about new stock and bond issues that would be available in the coming week. They were annoyed by speakers who went beyond twenty minutes or who failed to convey commission-producing ideas or information.
In addition to establishing what your audience knows about the subject, you should determine what the audience knows about you and what more they need to know. If you understand your audience’s level of knowledge, then you’ll know how much of your presentation must be devoted to your own introduction and your standing on the subject.You should also determine how the audience feels about you and your subject. Are they likely to be enthusiastic ? Polite? Apathetic? Hostile? A hostile or apathetic audience must be handled with care. A securities analyst whose recent stock recommendations had been lousy considered his audience of stockbrokers carefully before he returned to face them. Many were upset, since his advice had encouraged them to promote a number of losing stocks to their clients. The analyst used humor to diffuse those bad feelings. “As I stand before you this morning,” he began, “I feel like the Olympic javelin thrower who has just won the coin toss and elected to receive.” That statement got plenty of laughs and helped diffuse the anger of many brokers.
Step 3: Decide What to Say
Many of us have experienced the paralysis of knowing what we want to accomplish, but having trouble putting down the actual words and ideas. One approach is to break the task into three parts.
Tips on Reviewing the Content of Your Presentation
As you review the content of your presentation, make sure of the following:
- Your key message supports the objectives of the presentation.
- The arguments you have marshaled are well developed and understandable to all members of the audience.
- The content will convince the audience to agree with you.
- Contrary arguments are effectively neutralized.
Remember: Include only those details that will persuade. If you are not sure about the impact of a particular detail, leave it out.
- Define your key message, that is, what you want people to remember and what action you want them to take. This message flows directly from your objective.You can have a number of supporting arguments, ideas, and facts, but only one key message.
- Next, identify the arguments that best support your message. Avoid excessive detail, but be sure to talk about more than just the facts. It is important to identify and address the emotional underpinnings of your message. Why should the audience care about it?
- Finally, identify at which point you need audience participation, agreement, or buy-in.
After you have generated your initial set of ideas on what to say, you are ready to review and refine them.
Step 4: Get Organized
Once you have the raw material for your presentation, you need to organize it. A well-organized presentation will make the audience’s listening job easier, boosting the likelihood that you will accomplish your objective.
As described in chapter 6, the ancient Greeks saw the ideal presentation as having five parts: the introduction, the narrative, the argument, the refutation (of competing ideas), and the conclusion. What worked then works today, but modern presenters favor a similar but slightly truncated version of four parts: the opening, the problem (or need), the solution, and the action step.
During the opening, use a “hook”—a comment, a question, a relevant story, a statement, or an example—to get your audience’s interest and attention. Additionally, use the opening to do the following :
- Define the purpose of the presentation.
- Establish your credibility. Ask yourself, “Which of my credentials will impress this particular audience?” and emphasize those. Or, if appropriate, have another person with authority or credibility introduce your presentation.
- Describe the importance of the topic for the audience. Explain what’s in it for them.
- Preview very briefly the main points to be covered.
The second part of your presentation is the need or problem statement. Here you should accomplish several tasks:
- Make it clear to the audience members why they should care about your message.
- Develop a clear need or problem that you and the audience will solve together. Incorporate relevant arguments, examples, and a variety of supporting material to sustain interest without distracting from the point.
- Involve the audience by asking for their suggestions and addressing their needs and issues.
- Test acceptance by periodically asking for feedback.
The solution, the third part of your presentation, explains to the audience how you think the problem should be solved or the need satisfied. Here you will help the audience visualize the benefits of the solution. As you do so, phrase your solution in terms of the audience’s needs, and make sure that your solution matches those needs.
In the fourth and final step of your presentation, you wrap up with a strong call to action. This call requires you to take several steps:
- Reiterate the presentation’s key message.
- Integrate your opening points into your closing comments.
- Recommend action.
- Suggest agreement.
- Obtain commitment or buy-in.
- Provide closure.
Tips on Adding Interest
To keep your audience’s interest level high, incorporate some of the following visual, verbal, and physical techniques:
Variety in pitch, time, speed,
and body language
Personal stories
Analogies
Humor
Examples
Quotes
Illustrations
Expert testimony
Statistics
Charts and graphs
Audience involvement
Personal energy and eye contact
Whatever you do, don’t use the action step to summarize what you’ve already said. That’s boring and will rob you of an opportunity to advance your agenda. Instead, use the ending to thrust your point home. Give the audience something to do with information you’ve now imparted. As John F. Kennedy told listeners at the conclusion of his inaugural address, “Ask not what your country can do for you; ask what you can do for your country.” Few of us get the chance to ask our audiences to do something that exciting, but we do owe them our best efforts toward real action, because audiences tend to remember what comes last in a presentation.
Step 5: Develop Effective Visuals
As described in chapter 6, everyone has a preferred learning style, but most people respond better to visuals than to the spoken word alone. Research has shown that 75 percent of what people know is acquired visually. In addition, a picture is three times more effective in conveying information than words alone. Words and pictures together are six times more effective than words alone.
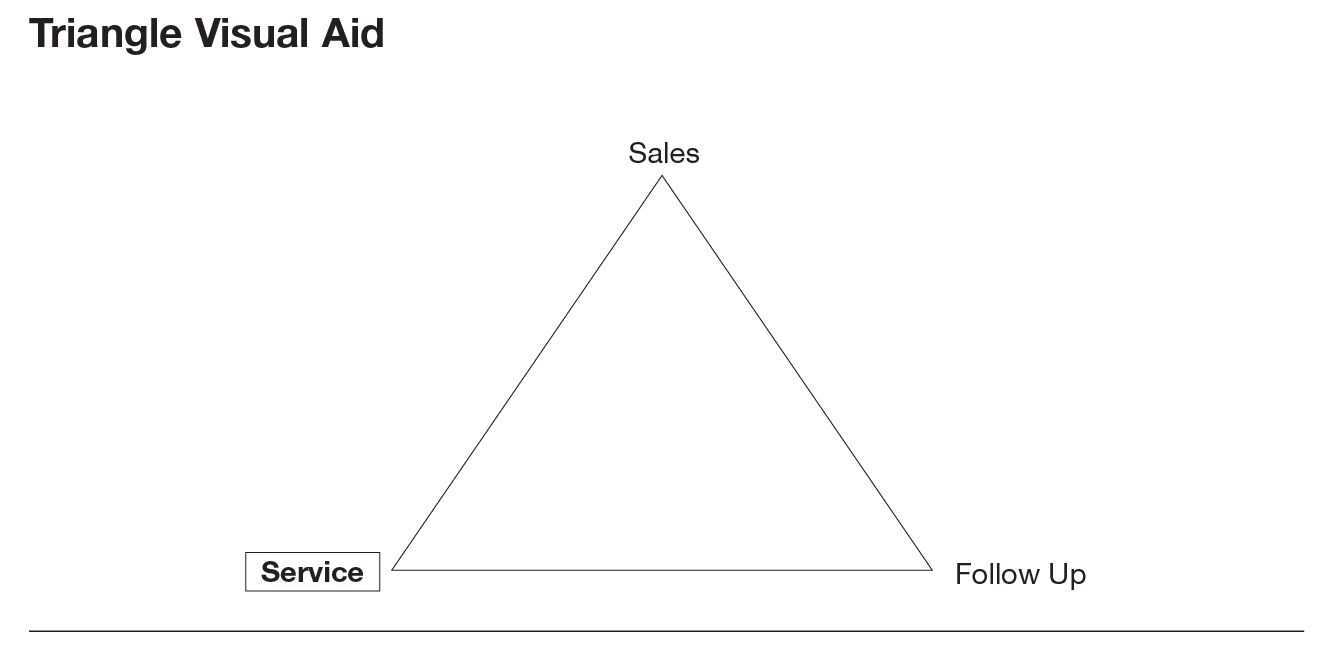
You can use visual aids to help your audience maintain attention, remember facts, and understand ideas or physical layouts. Visuals can also be used to signal your listeners that you are moving on to a new topic. For example, if your presentation involves three related points—sales, service, and follow-up—you can arrange these around the points of a triangle. Then when you move from one to the other, the point you’re discussing could be highlighted in the next slide (figure 7-1). In the figure, the boldface and boxed “Service” indicates that this topic will now be taken up. The technical capabilities of presentation software allow for even more eye-catching formatting.
Remember, however, that when the audience is looking at a visual, it is not looking at you so keep visuals to a minimum. Moreover, do not use a lot of word slides as a speaker’s outline; instead, know your speech thoroughly.
You have many choices for your visuals, including overheads, slides, PC-based slides, flip charts, and handouts. When selecting from among these media, consider their pros and cons (table 7-1).
Effective visuals share two virtues: simplicity and clarity. Nothing is less helpful than a slide crammed border to border with either text or complex graphics. For this reason, use key words instead of full sentences and paragraphs, as in the following example, and limit the number of ideas you present on any one visual.
| The Pros and Cons of Different Media | ||
|---|---|---|
| Medium | Pros | Cons |
| Overheads | Flexible | Can be awkward putting up and switching between overheads |
| Easy to create | ||
| Can allow light in the room for continued eye contact | ||
| Good for both formal and informal situations | ||
| Slides | Easy to create | Take time to produce |
| Good for formal presentations | Require a darkened room and allow for minimal eye contact | |
| PC-Based Slides | Easy to create, to update, and to transport | Do not always project clearly |
| Technology can break down, necessitating a backup set of overhead slides | ||
| Flip Charts | Encourage interaction | Not effective for large groups |
| Flexible | Difficult to transport | |
| Easy to create | ||
| Handouts | Can contain supplemental background information | Can become the audience’s focal point, distracting them from listening to you |
| Useful for informal, short presentations | ||
| (Avoid handing out reading material during the presentation. It detracts from your presentation.) | ||
| Provide a place for note-taking and a take-away for later reference | ||
Our Value Proposition to Customers
- Quality materials and workmanship
- Reasonable price
- Unmatched service
When you use graphic images, reduce them to their essentials. A good graphic is practically self-explanatory. If you find that you must go to great lengths to explain a graphic verbally, then it is not serving your purpose. The graphic should be eliminated or simplified to the point that it clarifies what you have told your audience.
Tips on Using Visuals
Visuals are effective partners if you use them for certain tasks:
Open: Help your audience focus on the purpose of the presentation.
Present the agenda: List the key elements of what is to come.
Highlight key points: Use memorable words and phrases, or illustrate points with charts or graphs.
Review a structured process: Analyze the whole process and relevant key points.
Close: End with a powerful image of the message you want the audience to carry away.
Finally, exercise simplicity and clarity in your use of color, highlighting, and the many other design features included in today’s presentation software. Inexperienced presenters often go to excesses in their attempts to develop professional-looking slides and overheads. A real pro, on the other hand, knows that the message comes first. The professional uses fancy design features only to the extent that they serve the message.
For more on the subject of visuals, see appendix C in the back of this book.
Step 6: Rehearse
When would you like to learn about the holes, the dull spots, and the excessive details in your presentation—before or after it’s delivered ? Naturally, you’d like to find and repair these problems beforehand . Identifying weaknesses and honing your delivery are the two purposes of rehearsing.
Consider approaching your presentation as a stage actor would:
- Learn your lines, fine-tuning them as needed. Pay particular attention to the opening and the closing. These should be particularly solid.
- Practice delivering your lines—perhaps into a tape recorder.
- Go back over the rough spots until they’re up to par.
- Wrap it up with a dress rehearsal.
This last point, a dress rehearsal, is especially important if yours is a high-stakes presentation. If you conduct a dress rehearsal, try to do it in the same meeting room or hall where your presentation is scheduled. This will give you a sense of the room, your entryway and exit, and how loud you’ll have to be to reach the back row of the audience. If you’re lucky, you’ll also be able to experiment with the room’s sound system and the visual display technology you plan to use.
To make the most of a dress rehearsal, bring along a few objective colleagues. Place some in front, some in the middle, and others in the back row of seats. Then ask them to critique your performance and the effectiveness of the visual aids. Use their comments to bring any weak parts of the presentation up to standard.
Summing Up
This chapter offered a six-step approach to preparing for a speech or presentation.
- Define your objective. Here you clarify the outcome you seek. All preparation will serve that objective.
- Understand the audience. The better you understand the audience—their familiarity with the subject, how what you have to say will affect them, and so forth—the more you’ll be able to craft a presentation that achieves your objective.
- Decide what to say. A three-part approach to resolving this important problem was offered: First, define the key message. Second, identify the arguments that support the message. Last, identify where it is important to get audience participation, agreement, or buy-in.
- Get organized. This step involves planning what you will say or do in each part of the presentation—the introduction, the narrative, and the other parts.
- Develop effective visuals. Many business presentations use visuals to add interest, get information across, and make key points stick with the audience. The chapter offered some tips for creating effective visuals.
- Rehearse. Presenters were urged to adopt the rehearsing routine of stage actors: Learn your lines, practice your delivery, go over the rough spots, and use a dress rehearsal.