
The Crumb Coat
Creating a crumb coat on a cake before it receives its final icing sets you up for success. A crumb coat is a light buttercream coating spread on the cake’s surface. This locks in all those little crumbs that may break free from the surface and become a nuisance during the official icing of the cake.
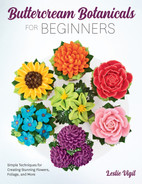
- 1Start with a cake that has been filled. Apply a thin coat of buttercream to the cake with a small metal spatula, being sure to cover the entire surface. You can use an offset or straight spatula, depending on your preference. Chill the cake in the refrigerator for about 5 minutes or until the crumb coating is slightly firm to the touch.

The Icing on the Cake
Once the cake has been crumb coated, it can be formally iced. Before you ice the cake, however, consider the type of finish you want. Although a smooth finish may first come to mind, I’d like to offer other icing possibilities.
Smooth Finish
A smooth finish is the most versatile canvas for buttercream botanicals and is often the ideal finish for any cake. Basic white buttercream is never a bad choice, but a pop of color can set a playful tone for a buttercream arrangement. To ice a cake, you’ll need the tools listed above. These can be easily found at craft and cake supply stores or online. (For the buttercream recipe, see here.)
- 1Place a crumb-coated cake (see previous here) that’s sitting atop a cake board onto the center of the turntable. Centering the cake will ensure the table turns smoothly, allowing for easy smoothing of the icing.
- 2Scoop a generous amount of buttercream on top of the cake and smooth it with the spatula, using fluid back-and-forth motions. Rotate the turntable as you spread the icing to help distribute the buttercream evenly on the surface.

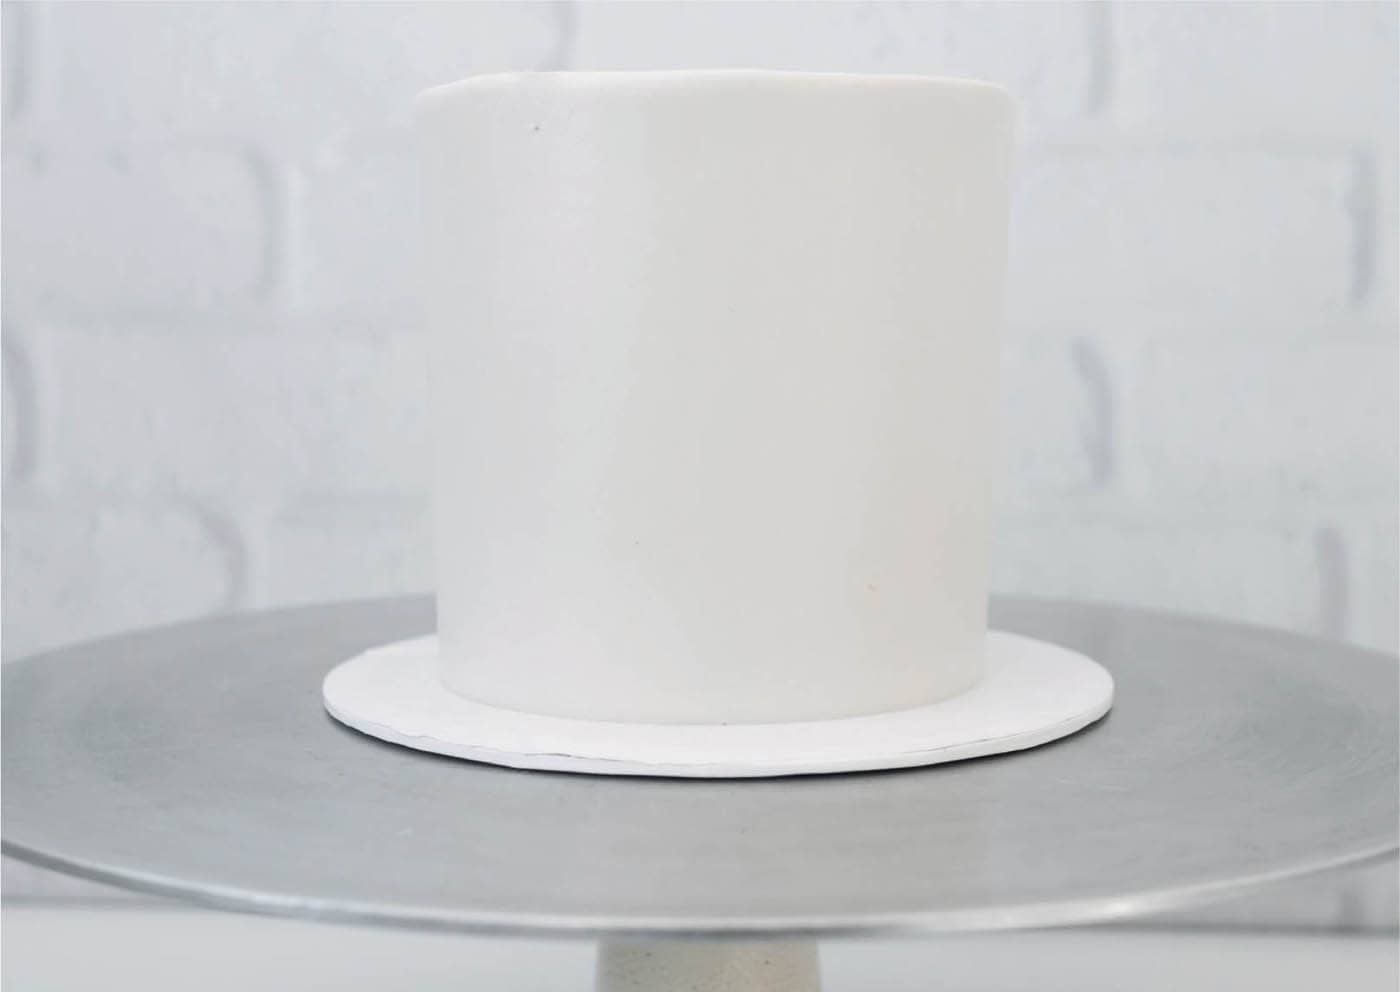
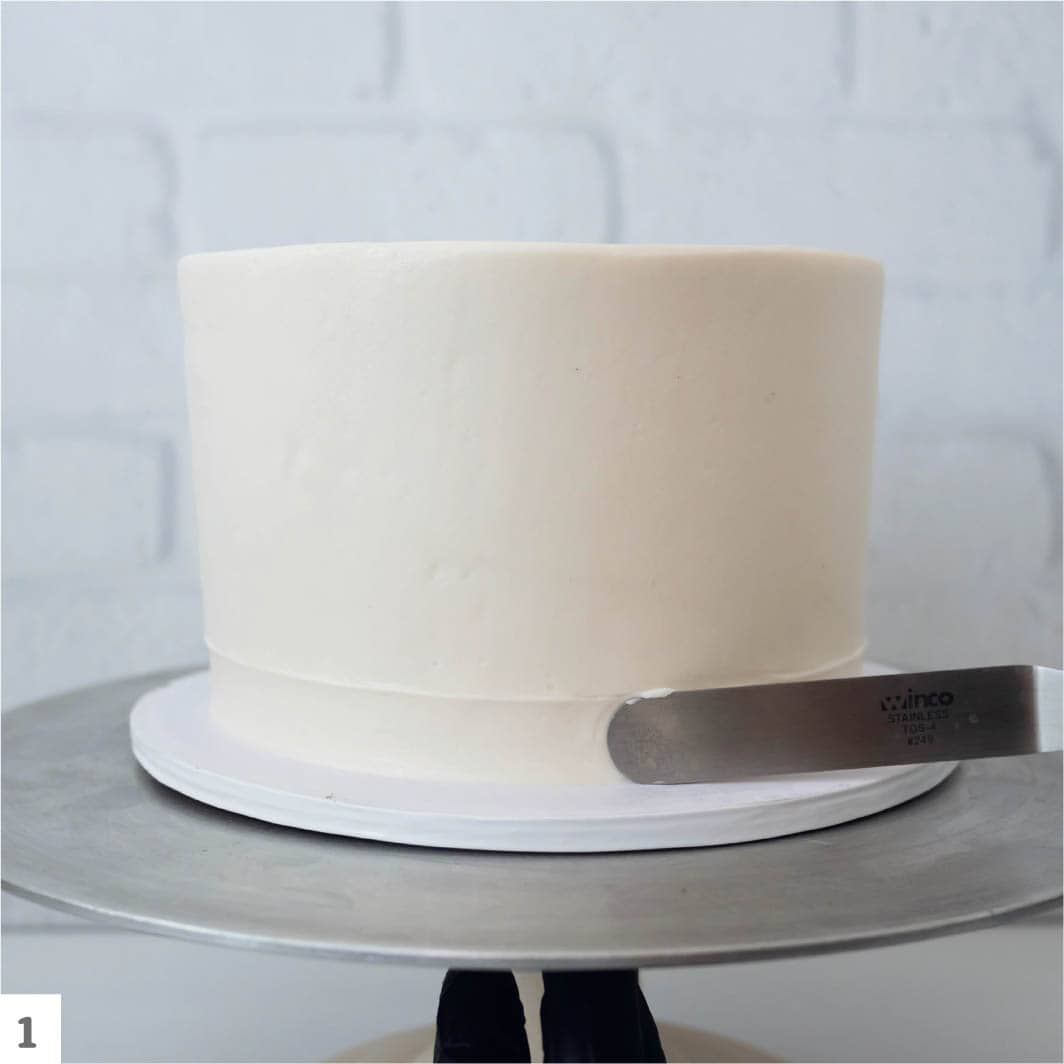
- 3Once the top of the cake appears even, apply buttercream to the sides of the cake. Scrape enough buttercream with the spatula so the flat side of the spatula is covered but not so heavy that the buttercream falls off.
- 4Smooth the buttercream on the sides of the cake using fluid back-and-forth motions, evenly distributing the buttercream along the sides. Repeat until the sides of the cake are entirely covered with a layer of buttercream.
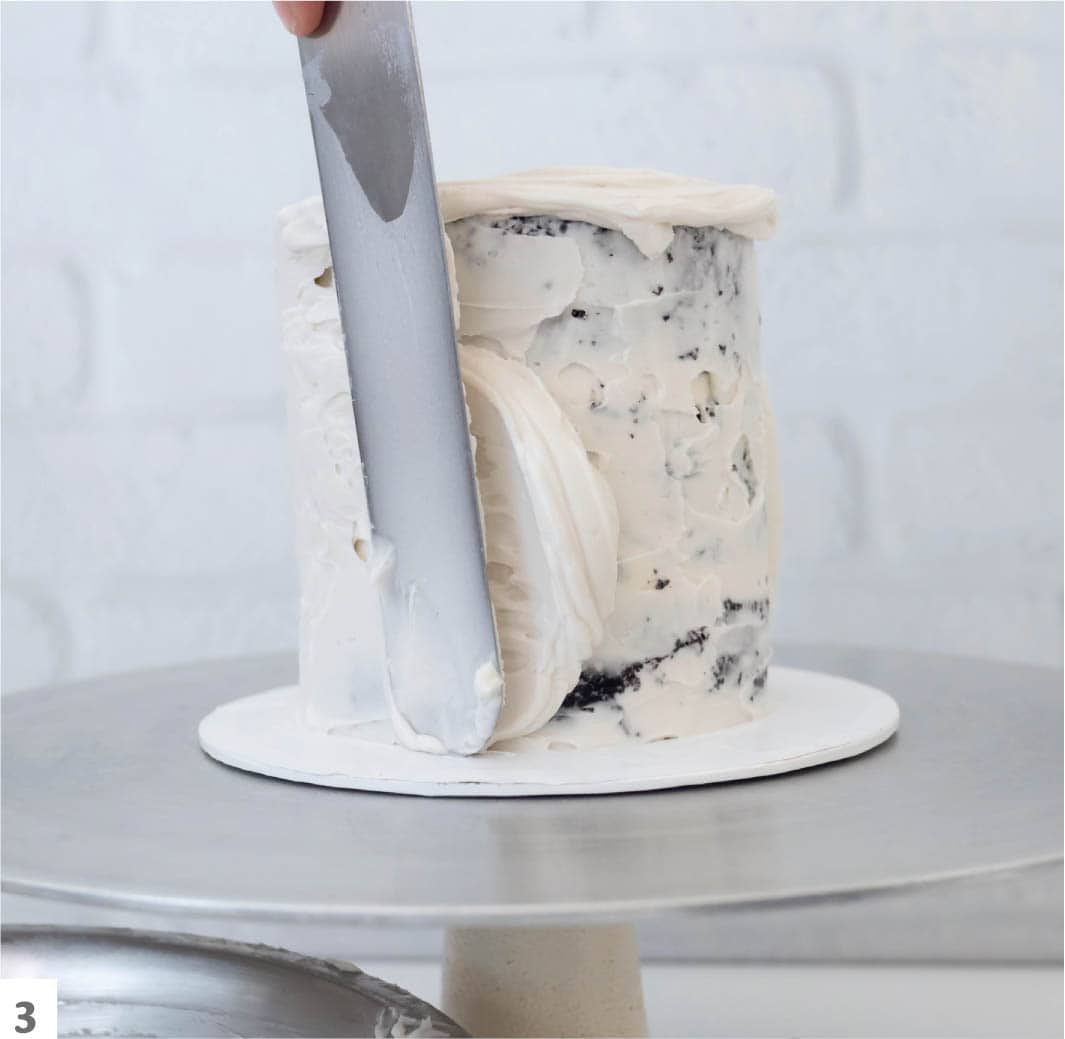
- 5Place the spatula vertically against the side of the cake. Hold your arm and spatula steady while you gradually spin the turntable. This distributes the buttercream more evenly.
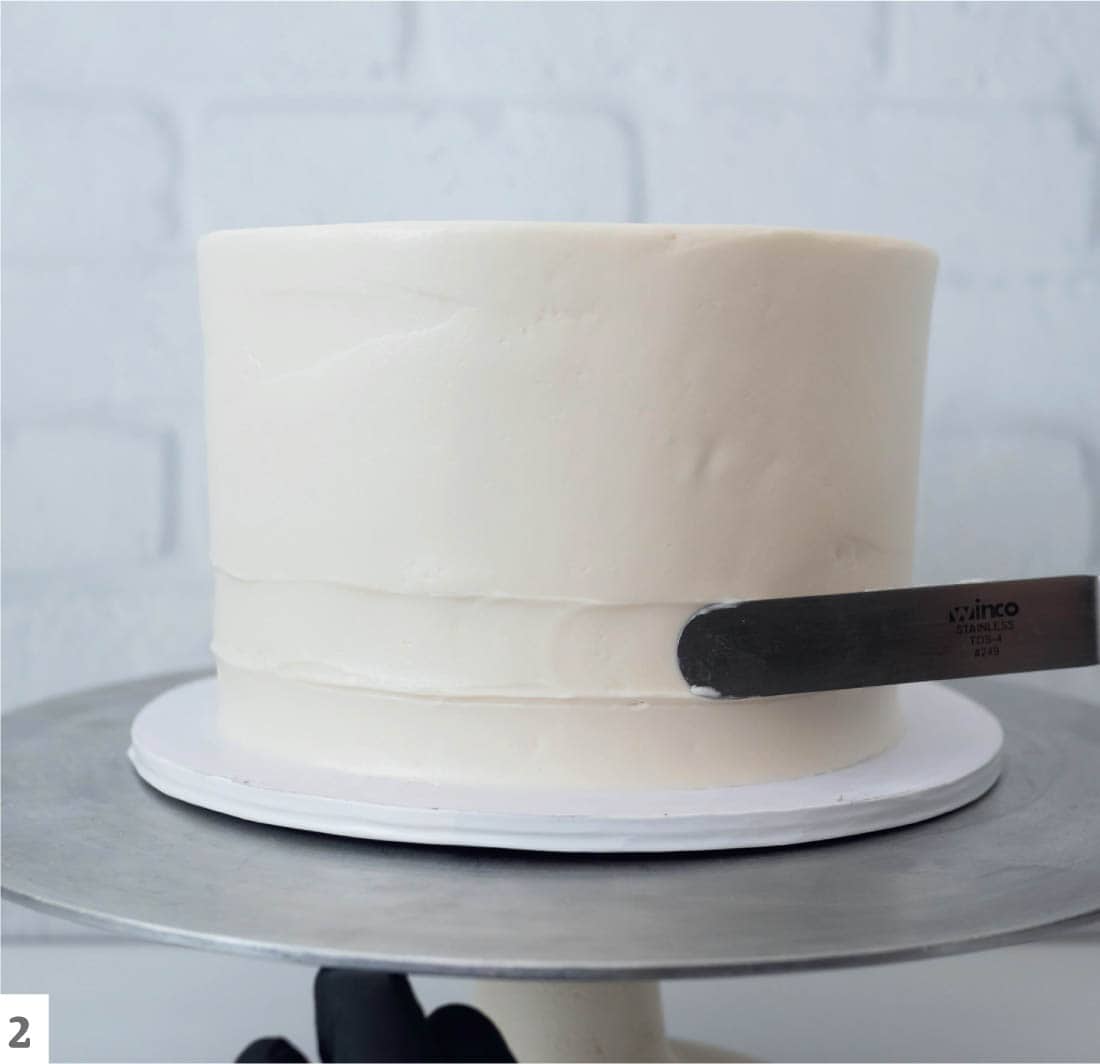
- 6Finish the sides with the cake scraper. Hold the scraper against the cake, making sure the bottom edge of the scraper is flat against the cake board. Be sure to use a cake scraper that is at least the full height of your cake or taller as a scraper that’s too short may add unwanted lines on the surface. Slowly rotate the turntable as you hold the cake scraper steady. This process will scrape off some of the buttercream while smoothing out the surface.

- 7Remove any excess buttercream from the cake scraper and continue rotating the turntable until the sides of the cake are fully smooth.
- 8As in step 7, remove any excess buttercream from the cake scraper. Turn the cake scraper horizontally. Glide it along the top edge of the cake to remove any excess buttercream, creating a flat top. Rotate the cake and smooth the top with the cake scraper to remove excess icing.

- 9Rotate the turntable to reposition the cake and repeat step 8 until the top is flat and smooth.
Rustic Textures
A rustic texture is a fantastic option for the first-time cake icer or for days when creating a perfectly smooth finish feels too demanding. Rustic textures, created with a small metal spatula, lend a vintage artisan aesthetic to a cake.
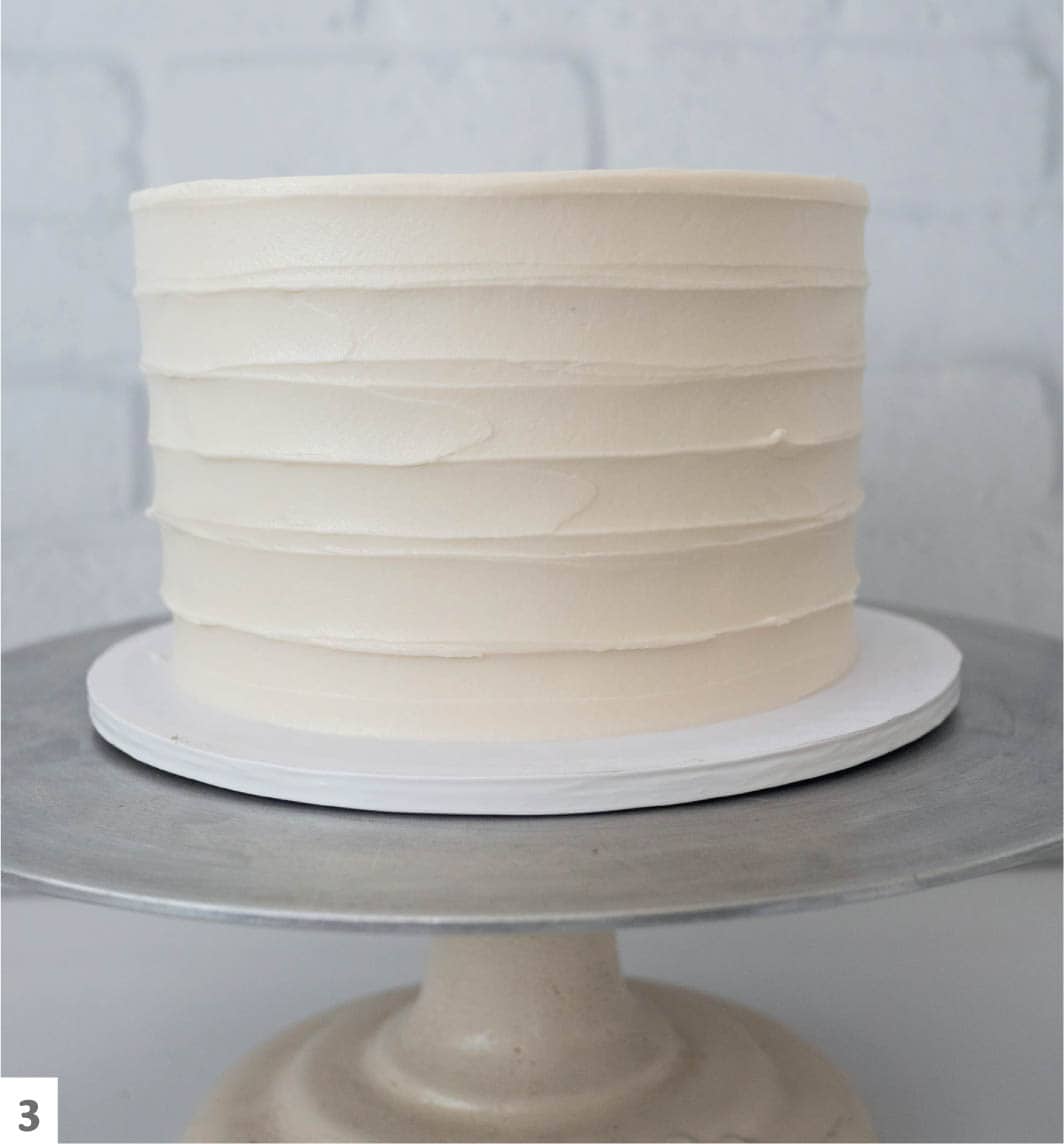
FOR A HORIZONTAL TEXTURE
- 1Hold a small metal spatula horizontally and position it at the base of the iced cake. Rotate the turntable while holding the spatula steady to create an indent around the perimeter of the cake.
- 2Once the cake has made a full rotation and the spatula is at the starting point, slowly slide the spatula horizontally away from the cake surface and reposition it just above the first indent.
- 3Repeat steps 1 and 2, working your way up the sides of the cake until you reach the top edge.
FOR A VERTICAL TEXTURE
- 1Hold a small metal spatula vertically and position it at the base of the iced cake.

- 2Using a slow, upward stroke, glide the spatula along the surface of the cake until you reach the top edge.

- 3Reposition the spatula at the base, next to the first indent, and repeat the process until you’ve created the texture all the way around the cake.

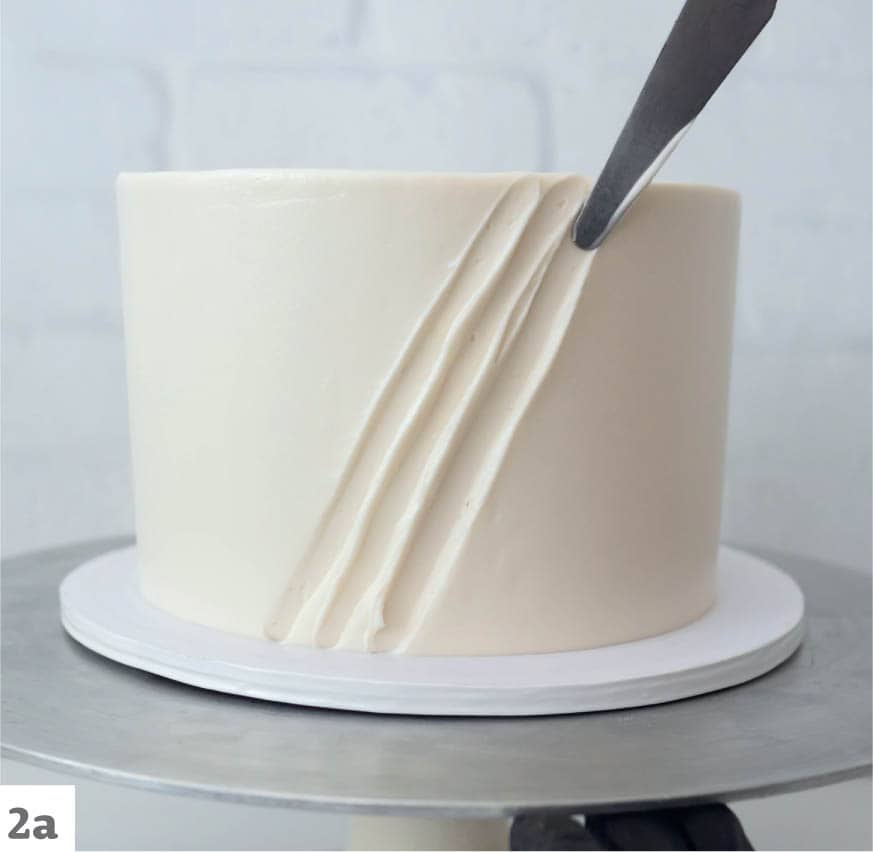
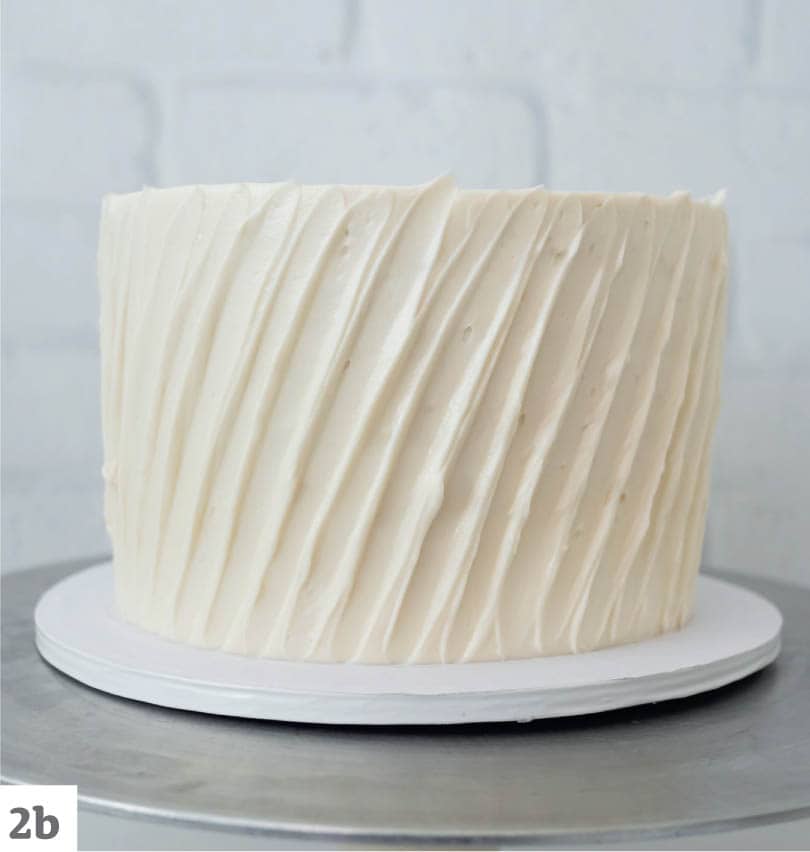
FOR A DIAGONAL TEXTURE
- 1For this technique you’ll need a small metal spatula with a narrow tip. Place the spatula at the base of the iced cake, holding it at a diagonal.

- 2Using a slow, upward stroke, glide the spatula along the surface of the cake until you reach the top edge (a). Reposition the spatula at the base, next to the first indent, and repeat the process until you’ve created the texture around the sides of the cake (b).
Piped Textures
Inspired by textiles, these piped textures elevate the look of a cake. Simple, repetitive piping motions and, in some cases, playful use of color, create gorgeous patterns that imitate woven or embroidered fabric.
Use metal or plastic cookie cutters to imprint shapes as a guide on the sides of the cake. You can also use a scribe tool (a sharp, pointy needlelike tool used to scratch designs into buttercream) or toothpick to create an outline to guide the piped buttercream designs.

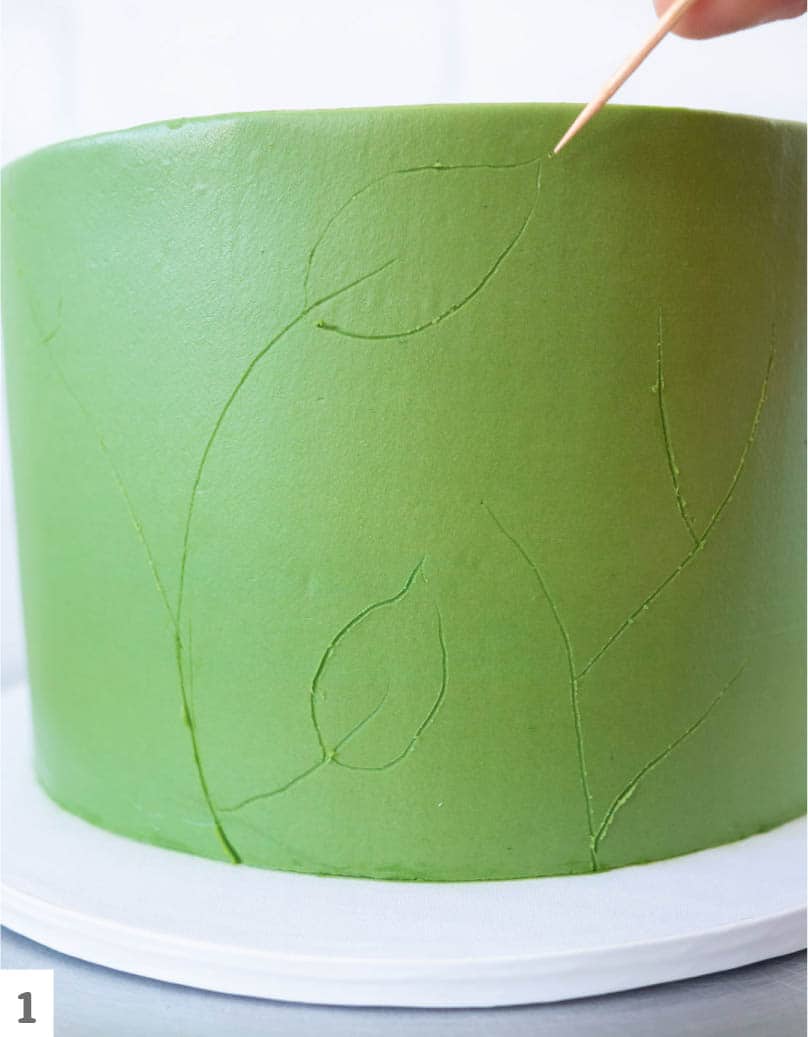
Stitch Piping
This stitch technique is an introduction to embroidery-style piping. Delicate stitching along the sides of your cake lends a charming and handmade quality to the overall decor. Stitched patterns can be displayed throughout the surface of your canvas for an intricate pattern, or they can be piped strategically for an extra touch of decor.
- 1Begin with a cake iced with a smooth finish (see here to here). Make sure the surface is completely smooth; a rough or bumpy surface will cause the piped detail to sit unevenly on the cake surface. Using a scribe tool or toothpick, gently graze the point along the surface of the cake, creating the outline of the desired pattern. I created a freehand leaf and stem pattern for an organic look. Be careful not to gouge the sides of the cake as you create the design. If a more uniform pattern is desired, opt for fondant leaf- or paisley-shaped cutters. Gently press the cutter against the side of the cake surface and carefully pull away to reveal the design.
- 2Fit a piping bag with the small round tip and fill it with the shade of buttercream you’ve chosen for the stitches. Following the pattern, squeeze the bag and deposit a short line of buttercream to resemble a stitch.
- 3Follow the outline, creating evenly spaced lines of buttercream until the pattern is complete (a and b).
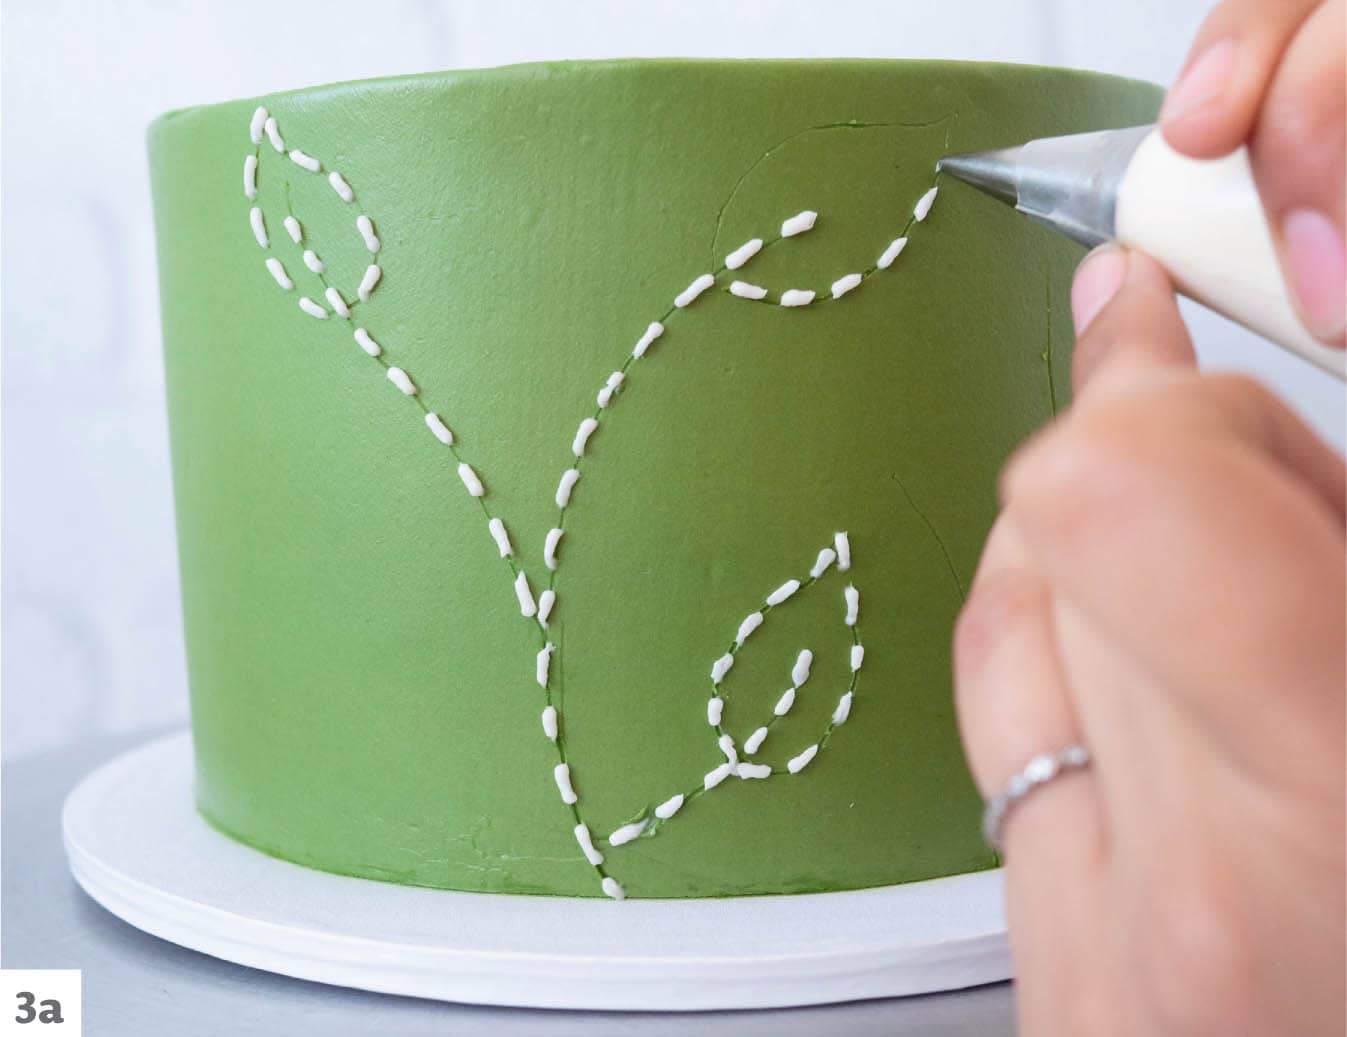

- 4Optional: Fit another piping bag with a small round tip and fill it with another shade of buttercream. Add a few small buttercream dots at the tips of some of the piped stems. This is a great way to break up the pattern and add a touch of color.

Embroidery Piping
Embroidery piping adds bold and eclectic texture to your canvas. Choose a series of strong colors for a festive look or soft, muted colors for a more subtle approach.

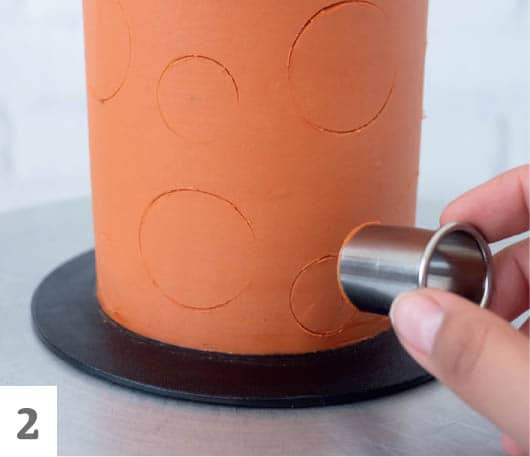
- 1Touch the sides of the cake with the 1½" (4 cm) round cutter to create imprinted circular outlines. Stagger the circles and space them evenly around the cake, making sure to leave space for smaller circles.
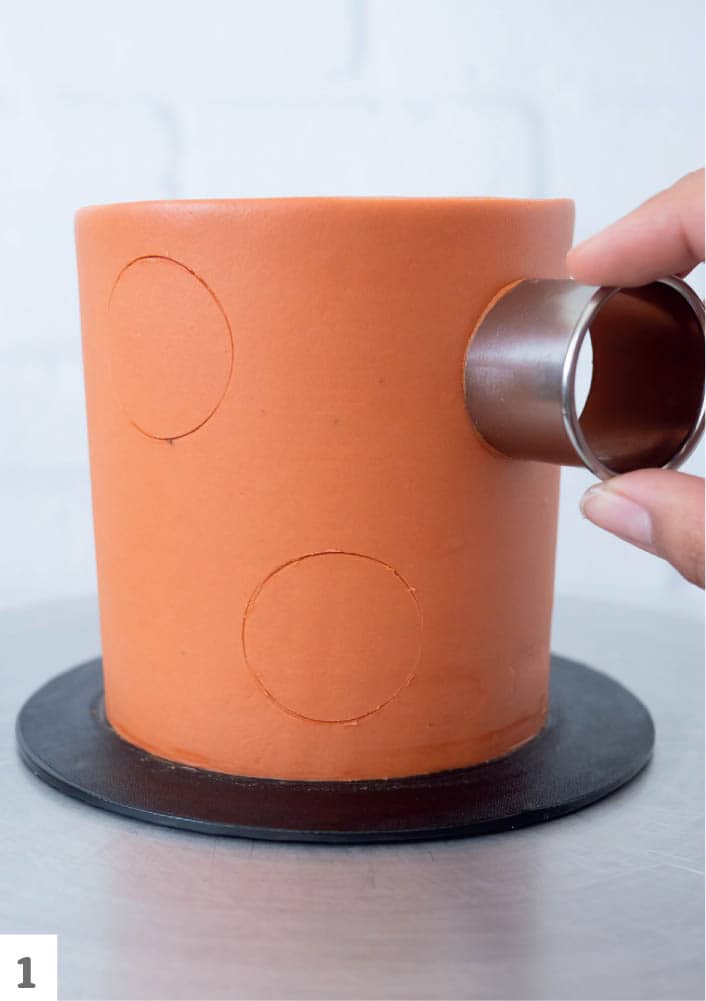
- 2Fill in the empty spaces with smaller circular outlines using the 1" (2.5 cm) round cutter.
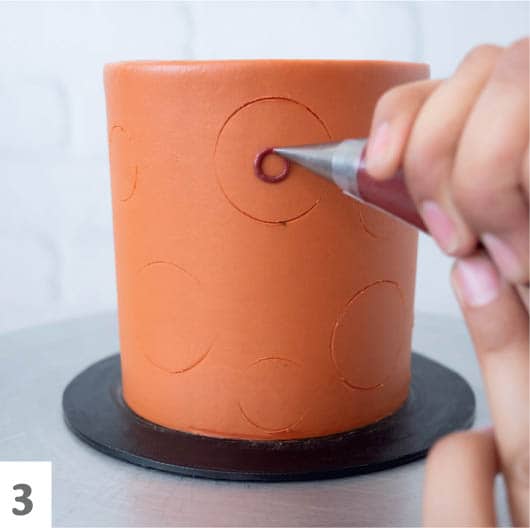
- 3Fit several piping bags with small round tips and fill them with your chosen colors. Pipe a small circle in the center of one of the 1½" (4 cm) circle outlines.
- 4Using a side-to-side motion, pipe horizontal strands of buttercream starting from the top of the circle and working your way around until the circle has been filled in.

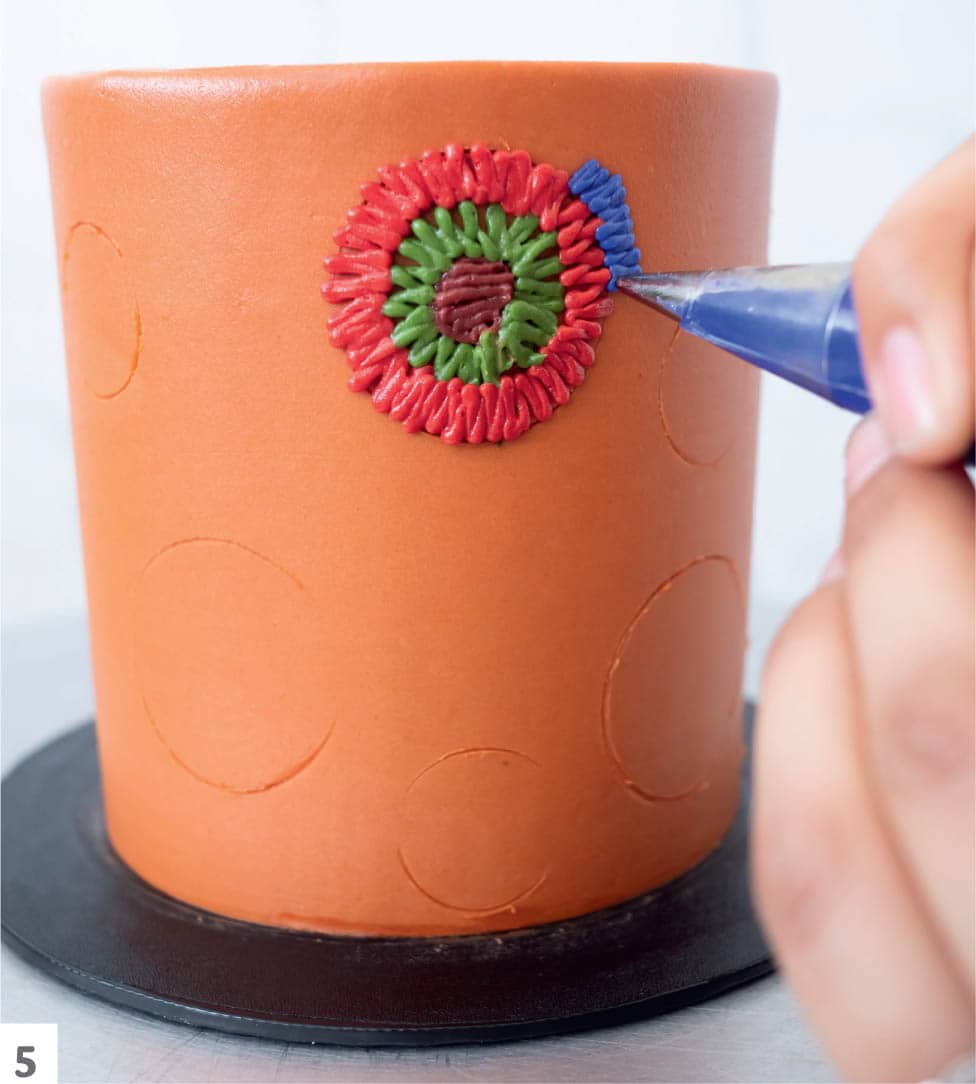
- 5Choose another color of buttercream. Starting just outside the center circle, pipe buttercream strands that go from the outer edge of the center circle to about halfway into the circular outline, creating a zigzag pattern. The design should look like a flower or starburst. Repeat the pattern once or twice more using different colors, following the outer perimeter of each piped circle until the initial outline has been filled.
- 6Repeat steps 3 through 6 to fill in the remaining circular outlines, using a variety of colors.

- 7Optional: Add small dots of buttercream (I used white) around the embroidered appliqués to add texture and balance the distribution of color.
