
In asynchronous programming, the async methods can have three possible return types. These are:
voidTaskTask<TResult>
We will have a look at each return type in the following recipe.
What could be the use of a void return type in asynchronous methods? Generally, void is used with event handlers. Just bear in mind that void returns nothing, so you can't wait for it. Therefore, if you call a void return type asynchronous method, your calling code should be able to continue executing code without having to wait for the asynchronous method to complete.
With asynchronous methods that have a return type of Task, you can utilize the await operator to pause the execution of the current thread until the called asynchronous method has completed. Keep in mind that an asynchronous method that returns a type of Task basically does not return an operand. Therefore, if it was written as a synchronous method, it would be a void return type method. This statement might be confusing, but it will become clear in the following recipes.
Finally, asynchronous methods that have a return statement have a return type of TResult. In other words, if the asynchronous method returns a Boolean, you would create an asynchronous method with a return type of Task<bool>.
- Create a new class library by right-clicking on your solution and selecting Add and then New Project from the context menu:
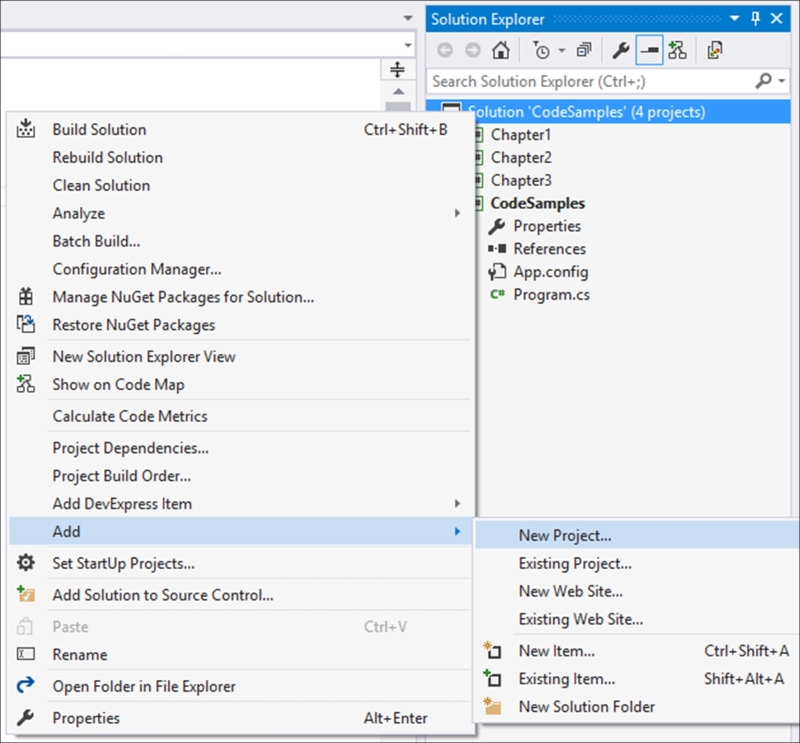
- From the Add New Project dialog screen, select Class Library from the installed templates and call your class
Chapter6: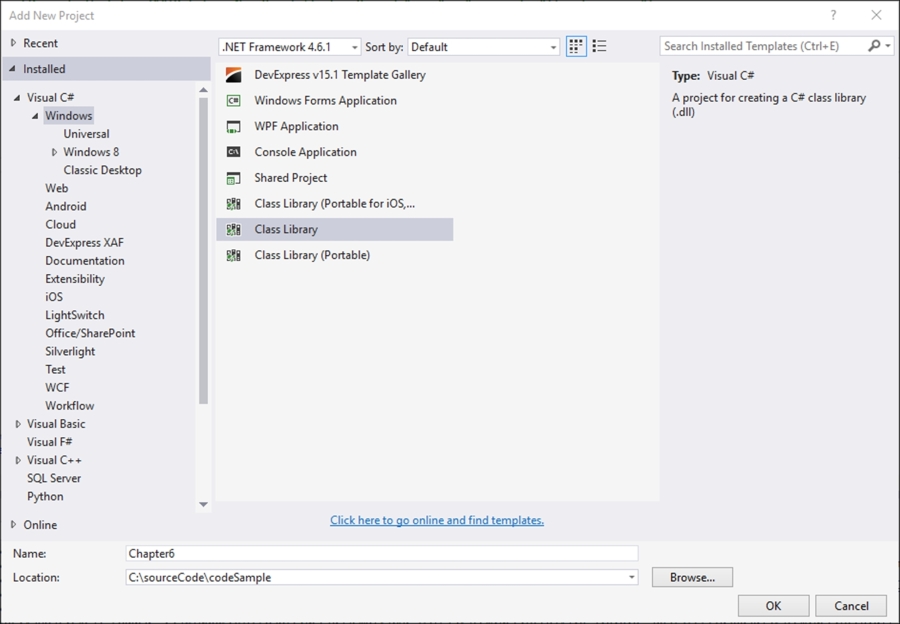
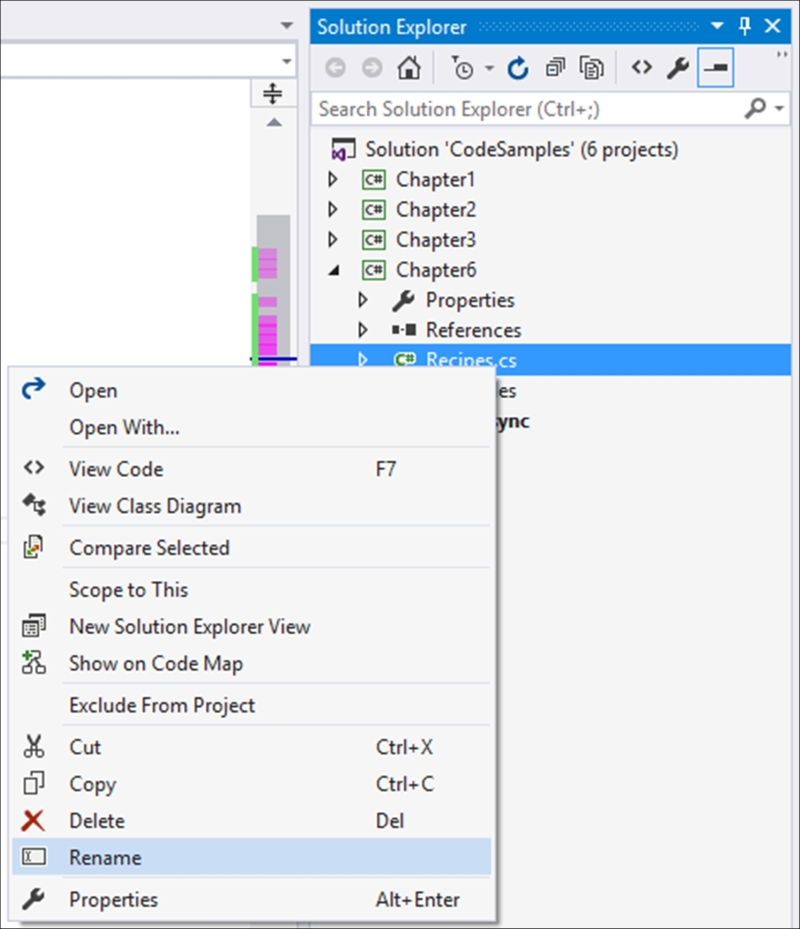
- Your new class library will be added to your solution with a default name of
Class1.cs, which we renamed toRecipes.csin order to distinguish the code properly. You can, however, rename your class to whatever you like, if it makes more sense to you. - To rename your class, simply click on the class name in Solution Explorer and select Rename from the context menu:
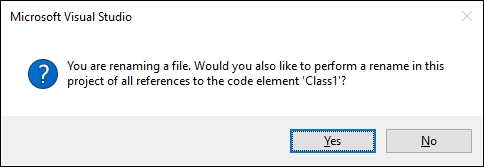
- Visual Studio will ask you to confirm the new names of all references to the code element Class1 in the project. Just click on Yes:
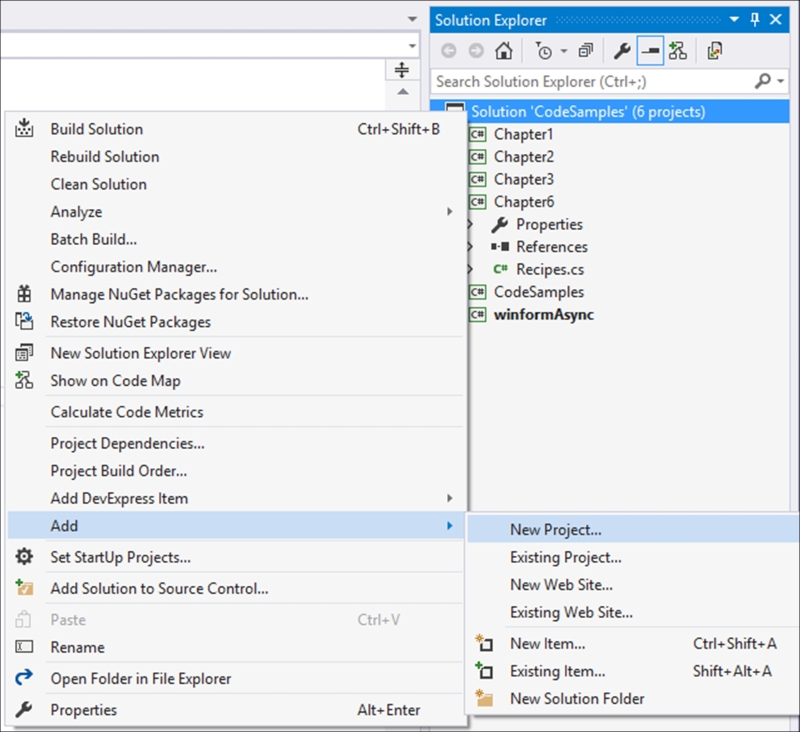
- The next step is to add another new project. Right-click on the solution and select Add and then New Project from the context menu:
- This time, you will be creating a new Windows Forms application for your solution. We need to do this so that we can create a button click event. We called our project
winformAsync: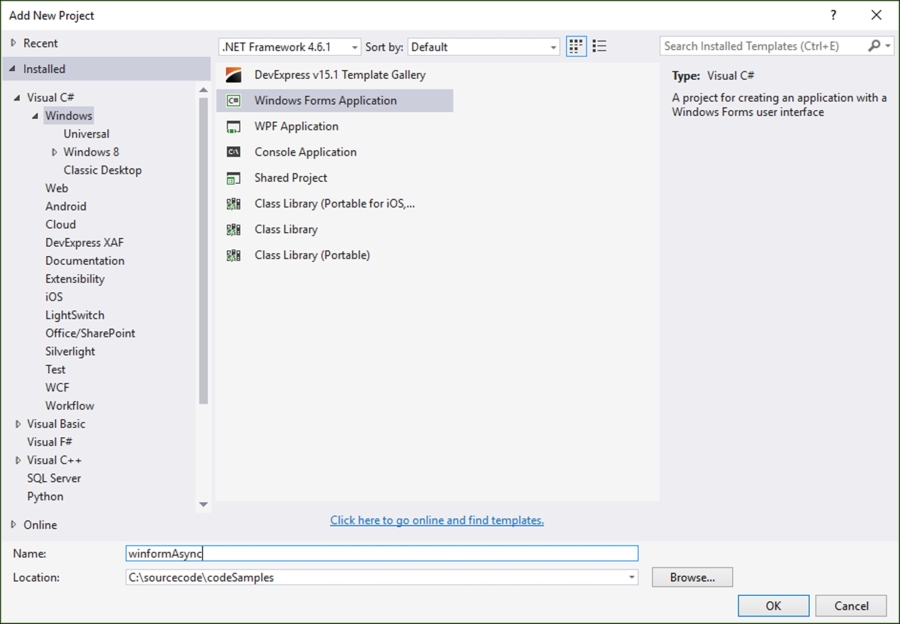
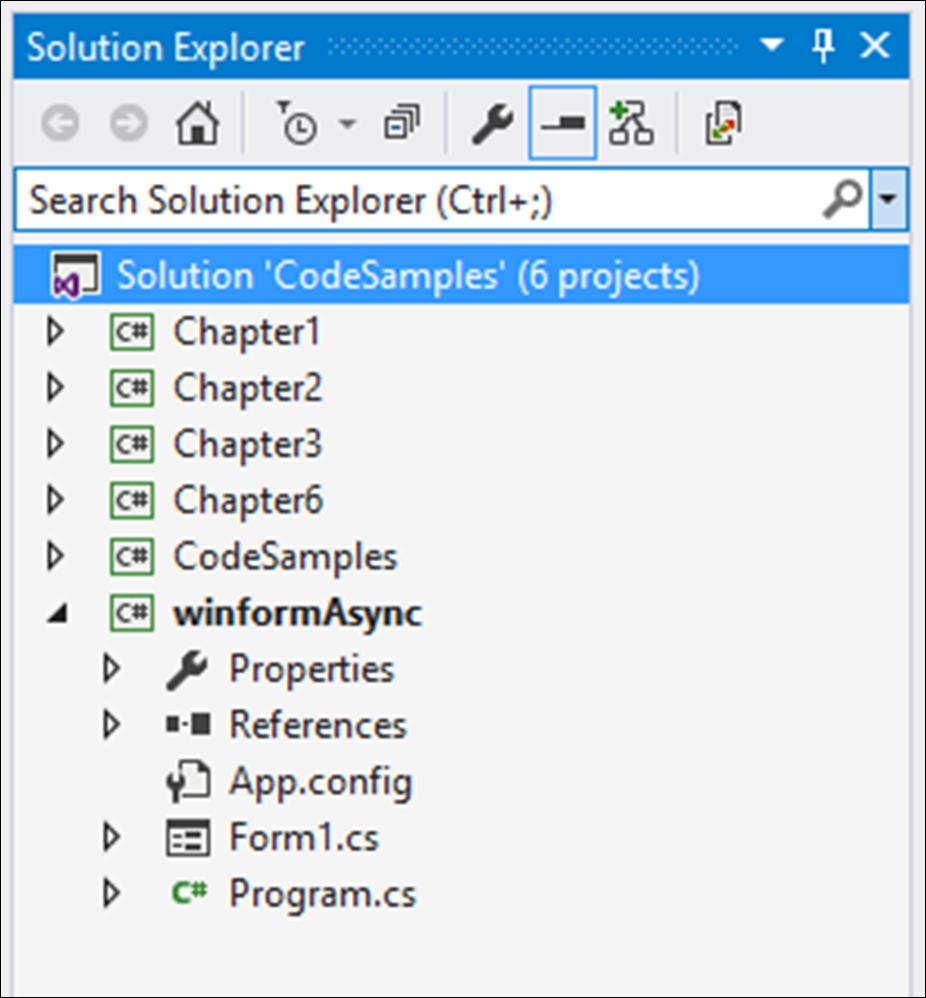
- Your Solution Explorer will now look similar to the following screenshot, with the Winforms application added:
- After you have added your Winforms application, add a reference to the
Chapter6class you created earlier. To do this, right-click on References under the winformAsync project and click on the Add Reference menu item from the context menu: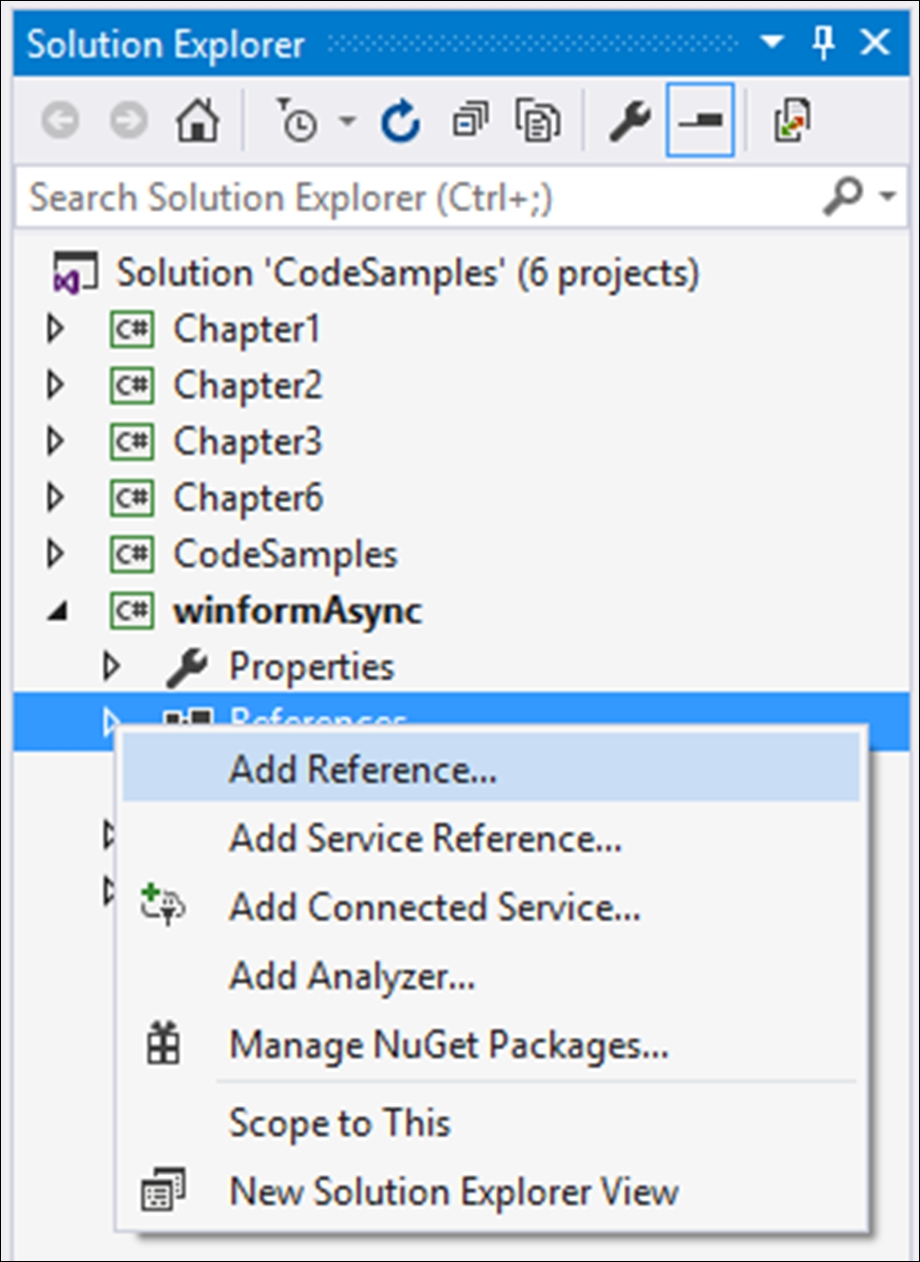
- From the Reference Manager screen, select the
Chapter6class, which is found under the Projects | Solution node in the tree view to the left. Then, click on the OK button: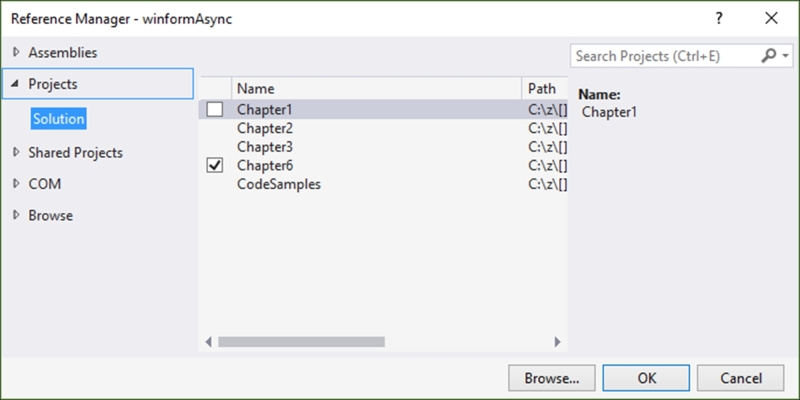
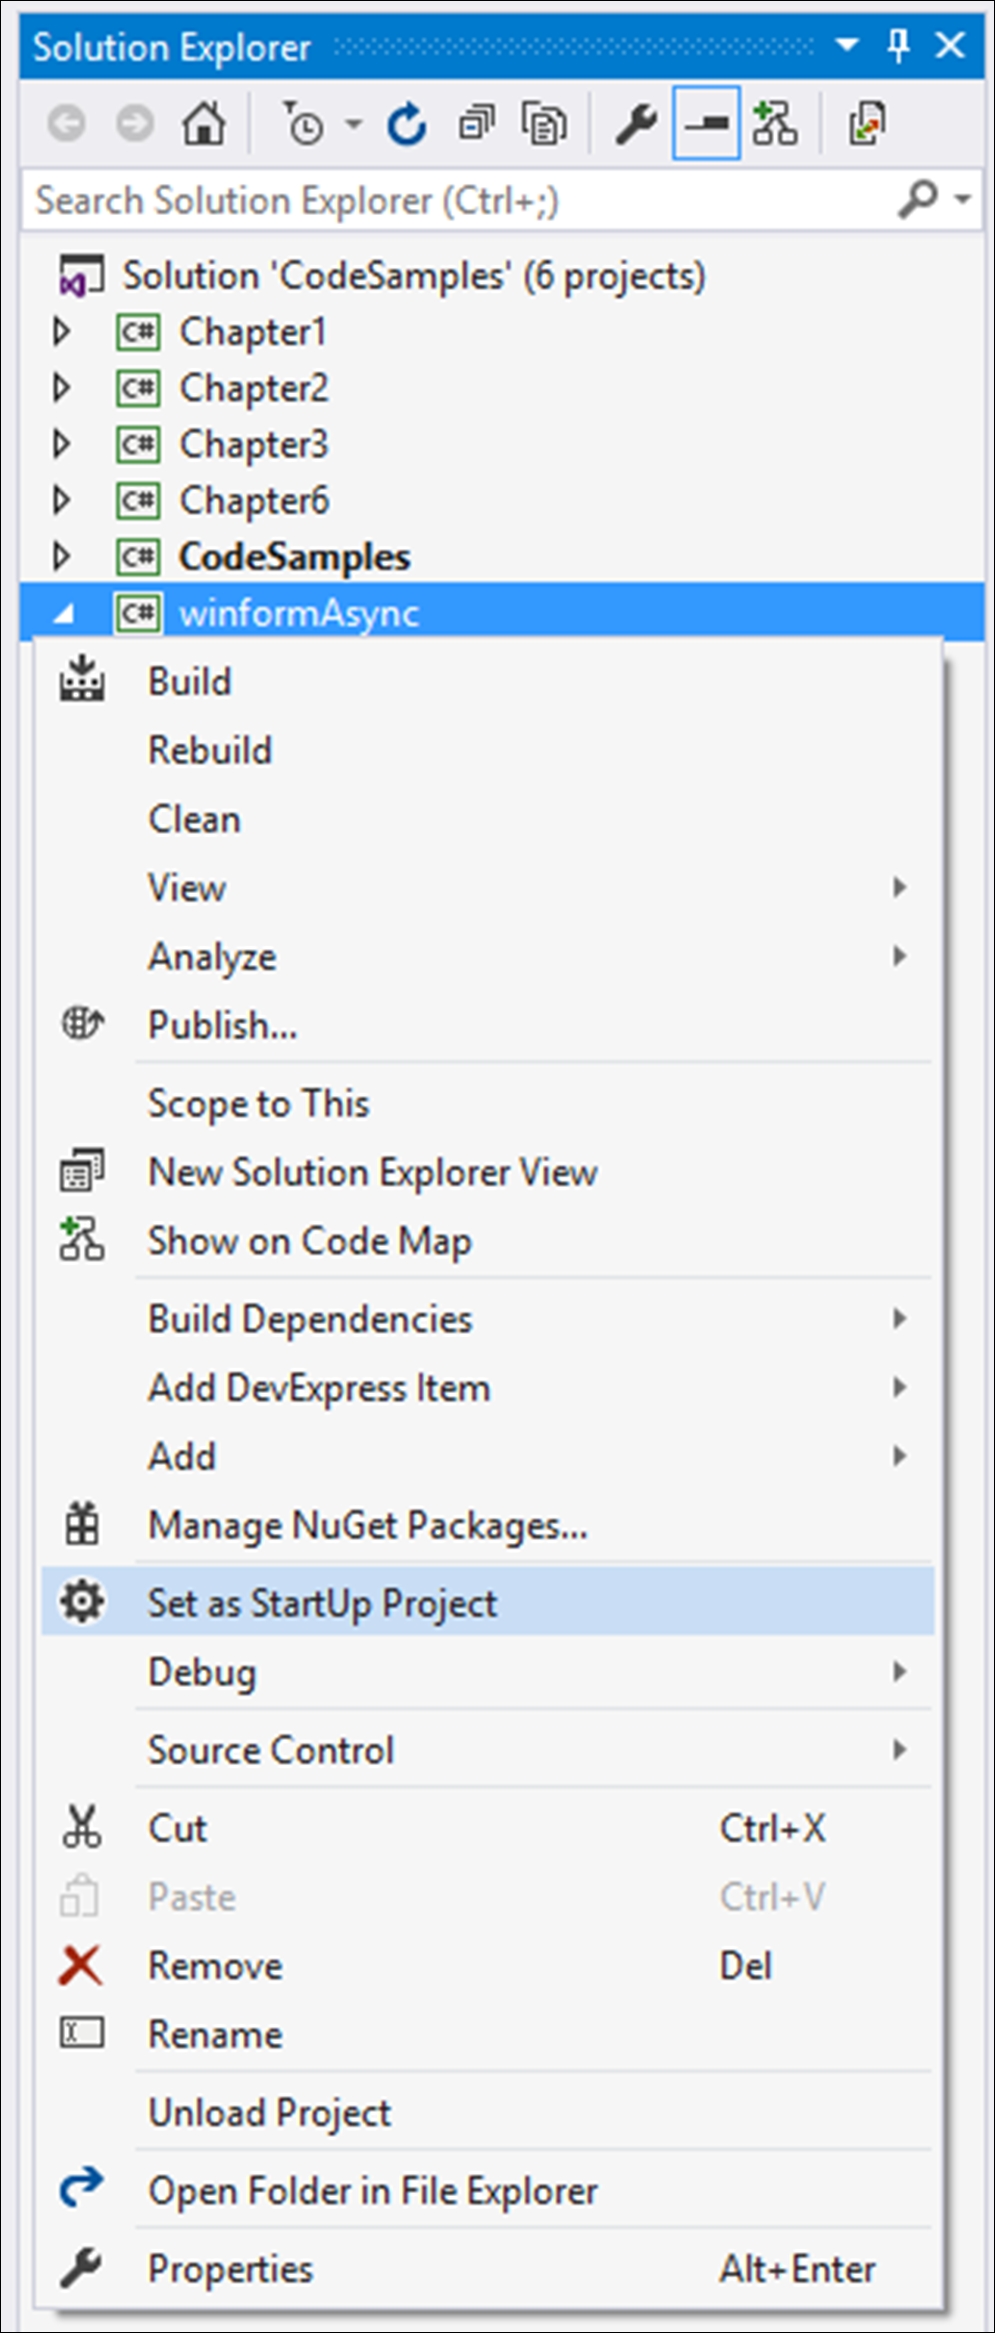
- Another important step is to set the winformAsync project as the startup project in the solution. To do this, right-click the winformAsync project and select the Set as StartUp Project menu item from the context menu:
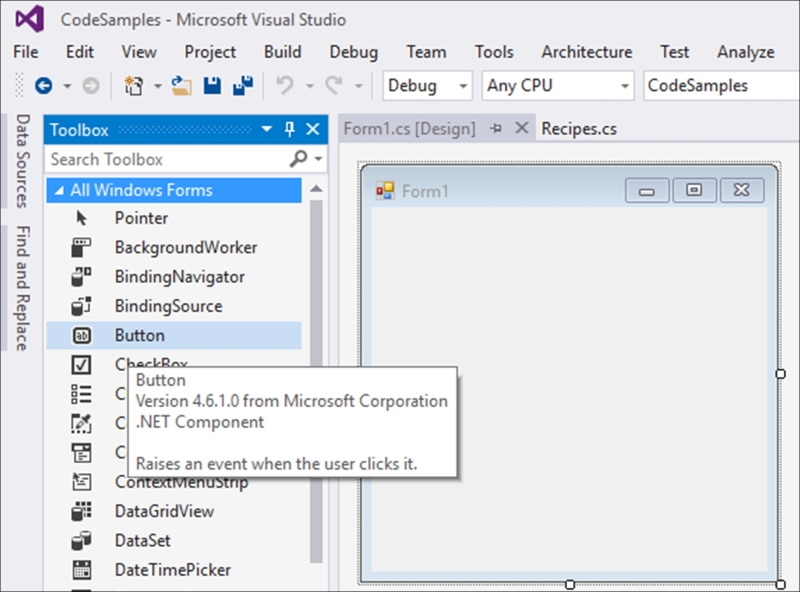
- On the winformAsync form designer, open Toolbox and select the Button control, which is found under the All Windows Forms node:
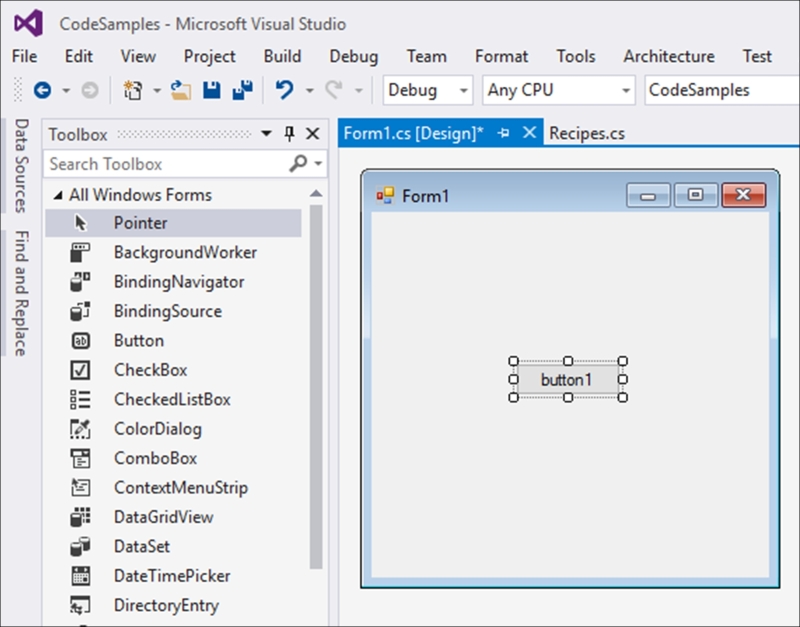
- Drag the button control onto the Form1 designer:
- With the button control selected, double-click on the control to create the click event in the code behind. Visual Studio will insert the event code for you:
namespace winformAsync { public partial class Form1 : Form { public Form1() { InitializeComponent(); } private void button1_Click(object sender, EventArgs e) { } } } - Change the
button1_Clickevent and add theasynckeyword to the click event. This is an example of avoidreturning an asynchronous method:private async void button1_Click(object sender, EventArgs e) { } - In the
Chapter6class library, add a new class calledAsyncDemo:public class AsyncDemo { } - The next method to add to the
AsyncDemoclass is the asynchronous method that returnsTResult(in this case, a Boolean). This method simply checks whether the current year is a leap year. It then returns a Boolean to the calling code:async Task<bool> TaskOfTResultReturning_AsyncMethod() { return await Task.FromResult<bool> (DateTime.IsLeapYear(DateTime.Now.Year)); } - The next method to add is the
voidreturning method that returns aTasktype so that it allows you to await the method. The method itself does not return any result, making it avoidreturning method. However, in order to use theawaitkeyword, you return theTasktype from this asynchronous method:async Task TaskReturning_AsyncMethod() { await Task.Delay(5000); Console.WriteLine("5 second delay"); } - Finally, add a method that will call the previous asynchronous methods and display the result of the leap year check. You will notice that we are using the
awaitkeyword with both method calls:public async Task LongTask() { bool isLeapYear = await TaskOfTResultReturning_AsyncMethod(); Console.WriteLine($"{DateTime.Now.Year} {(isLeapYear ? " is " : " is not ")} a leap year"); await TaskReturning_AsyncMethod(); } - In the button click, add the following code that calls the long-running task asynchronously:
private async void button1_Click(object sender, EventArgs e) { Console.WriteLine("Button Clicked"); Chapter6.AsyncDemo oAsync = new Chapter6.AsyncDemo(); await oAsync.LongTask(); Console.WriteLine("Button Click Ended"); } - Running your application will display the Windows Forms application:
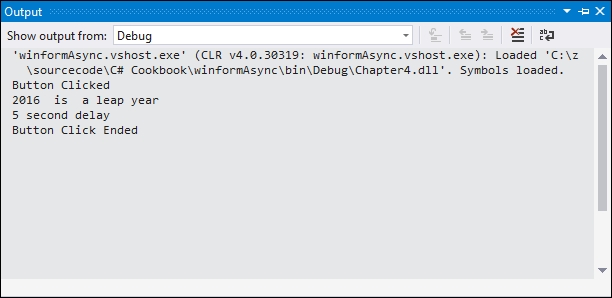
- Before clicking on the button1 button, ensure that the Output window is visible:
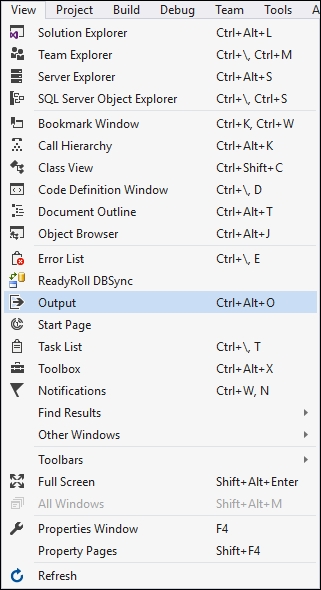
- From the View menu, click on the Output menu item or type Ctrl + Alt + O to display the Output window. This will allow us to see the
Console.Writeline()outputs as we have added them to the code in theChapter6class and in the Windows application. - Clicking on the button1 button will display the outputs to our Output window. Throughout this code execution, the form remains responsive:
- Finally, you can also use the
awaitoperator in separate calls. Modify the code in theLongTask()method as follows:public async Task LongTask() { Task<bool> blnIsLeapYear = TaskOfTResultReturning_AsyncMethod(); for (int i = 0; i <= 10000; i++) { // Do other work that does not rely on blnIsLeapYear before awaiting } bool isLeapYear = await TaskOfTResultReturning_AsyncMethod(); Console.WriteLine($"{DateTime.Now.Year} {(isLeapYear ? " is " : " is not ")} a leap year"); Task taskReturnMethhod = TaskReturning_AsyncMethod(); for (int i = 0; i <= 10000; i++) { // Do other work that does not rely on taskReturnMethhod before awaiting } await taskReturnMethhod; }
In the preceding code, we have seen the void returning type asynchronous method that was used in the button1_Click event. We also created a Task returning method that returns nothing (that would be a void if used in synchronous programming), but returning Task type allows us to await the method. Finally, we created a Task<TResult> returning method that performs some task and returns the result to the calling code.