Let us solve it step-by-step by performing the following steps:
- Create a new
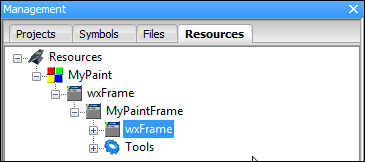
wxWidgetsproject and set the project name toMyPaint. Choose wxSmith as the Preferred GUI Builder. - Click on the wxFrame in the Management pane as shown in the following screenshot:
- Set the
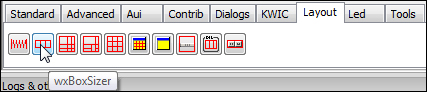
Titleproperty toMyPaint. - Click on the Layout tab and click on the wxBoxSizer button as shown in the following screenshot. Then click on the frame shown inside wxSmith window:
- Next add a wxGridSizer to the newly added wxBoxSizer in a similar manner. Refer to the following screenshot for the wxGridSizer button. After wxGridSizer is added set the Cols property to
1.
- Click on the Standard tab and add a wxScrolledWindow to the wxGridSizer as per the following screenshot:

- Set the following properties for wxScrolledWindow:
- Var name to
MyPaintWindow - Min Width to
640and Min Height to480 - Border Width to 5.
- Var name to
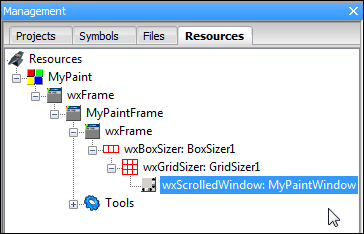
- At this step the Management pane shall look similar to the following screenshot:
- Click on the Dialogs tab and click on the wxFileDialog button. Set the following properties according to the bullet list:
- Message to
Select file - Wildcard to
*.bmp;*.jpg;*.png - Var name to
MyPaintFileDialog
- Message to
- Click on the Tools in the Management pane can click on the wxStatusBar item. Set the following properties:
- Var name to
StatusBarMain - Fields to
2 - In Field 1, Width to
5 - In Field 2, Width to
10.
- Var name to
- Next open the MenuBar Editor and add menu items as per the next screenshot:
Menu item
ID
Label
Accelerator
Help item
&File | &Open Image
idFileOpen&Open ImageCtrl + OOpens an Image file...&View | Zoom &In
idViewZoomInZoom &InCtrl++Zooms +10%&View | Zoom &Out
idViewZoomOutZoom &OutCtrl+-Zooms -10%The final menu bar editor window shall look similar to the following screenshot:

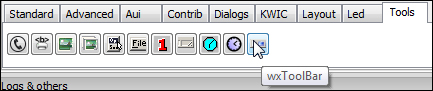
- We'll now add a wxToolBar to our app. Click on the Tools tab as shown in the following screenshot and click on the wxToolBar button to add a wxToolBar to our app.
- Double-click on the wxToolBar icon in the wxSmith window and add the following items.
Label
Options
Bitmap
Tooltip/Help text
Open an image…
Normal
Image from wxArtProvider—wxART_FILE_OPEN
Opens an image file–
Separator
–
–
Zoom in
Normal
zoom_in.pngfile from the project folderZoom in by 10%Zoom out
Normal
zoom_out.pngfile from the project folderZoom out by 10%The final ToolBar editor window will look similar to the following screenshot.

We have completed addition of most GUI elements. We need to write code to complete our app. Before doing that please note that wxSmith generated code remains inside the matching
//(*and//*)block. Do not write your code inside this block as wxSmith will delete any custom code within this block while regenerating code. - Add the following code inside the
MyPaintFrameclass declaration in theMyPaintFrame.hfile as a private member variable and function.wxImage* m_Image; // To store loaded image double m_zoomFactor; // To store current zoom factor void RefreshPaintWindow(void); // To paint image - Add the following code inside the
MyPaintFrame()constructor function. We will be creating a new image class and assign it tom_Imagevariable. We'll useSetScrollbars()andShowScrollbars()function to assign scroll bar related properties. We'll assign initial zoom factor of 100 percent and use thewxInitAllImageHandlers()function to initialize image processing engine for our app. Finally we'll use theSetStatusText()function to set status bar text.m_Image = new wxImage(640, 480); MyPaintWindow->SetScrollbars(10, 10, 10, 10); MyPaintWindow->ShowScrollbars(wxSHOW_SB_ALWAYS, wxSHOW_SB_ALWAYS); m_zoomFactor = 1.0; wxInitAllImageHandlers(); StatusBarMain->SetStatusText(_T("Ready!"), 0); wxString msg; msg.Printf(_T("%d %%"), static_cast<int>(m_zoomFactor*100)); StatusBarMain->SetStatusText(msg, 1); - Click on the resources tree and navigate to &File | &Open Image menu option. Go to the Events tab (identified by {}), click on the dropdown menu next to EVT_MENU and select the --- Add new handler --- menu option. Enter
OnFileOpenas the name of the event handler. Then enter the following code inside theMyPaintFrame::OnFileOpen()function:int result; result = MyPaintFileDialog->ShowModal(); if (result == wxID_OK) { m_Image->LoadFile(MyPaintFileDialog->GetPath()); m_zoomFactor = 1.0; RefreshPaintWindow(); } - Next add the
OnViewZoomInandOnViewZoomOutevent handler function to Zoom &In and Zoom &Out by navigating to &View | Zoom &In and &View | Zoom &Out menu options respectively. Refer completed exercise for the code to be added to each handler. - Select MyPaintWindow from the resources tree and click on the Events tab. Add the
OnMyPaintWindowPaintevent handler to EVT_PAINT and paste the following code. This code paints loaded image onwxScrolledWindow:wxPaintDC paintDC(MyPaintWindow); wxRect rect; const wxBitmap bitmap(m_Image->Scale(m_Image->GetWidth() * m_zoomFactor, m_Image->GetHeight()* m_zoomFactor)); rect.SetSize(m_Image->GetSize() * m_zoomFactor); MyPaintWindow->SetVirtualSize(m_Image->GetSize() * m_zoomFactor); if ( (rect.GetWidth() < MyPaintWindow->GetVirtualSize().GetWidth()) || (rect.GetHeight() < MyPaintWindow->GetVirtualSize().GetHeight()) ) { rect = rect.CenterIn(MyPaintWindow->GetVirtualSize()); } MyPaintWindow->DoPrepareDC(paintDC); paintDC.DrawBitmap(bitmap, rect.GetTopLeft()); - Add
OnResizeevent handler to MyPaintWindow and add the following line of code:RefreshPaintWindow();
- Next add
RefreshPaintWindow()function to theMyPaintFrameclass and add the following code inside that function:wxString msg; MyPaintWindow->ClearBackground(); MyPaintWindow->Refresh(); msg.Printf(_T("%d %%"), static_cast<int>(m_zoomFactor*100)); StatusBarMain->SetStatusText(msg, 1); - Now we'll add code to our toolbar buttons. Select the Item: Open an image… item in the resource tree and go to the Events tab. Add the existing
OnFileOpenevent handler to EVT_TOOL. This will connect the existingOnFileOpen()function to this toolbar button. So clicking on this toolbar button will emulate navigating to the File | Open menu options. - Follow previous steps and connect the Zoom in and Zoom out toolbar buttons to
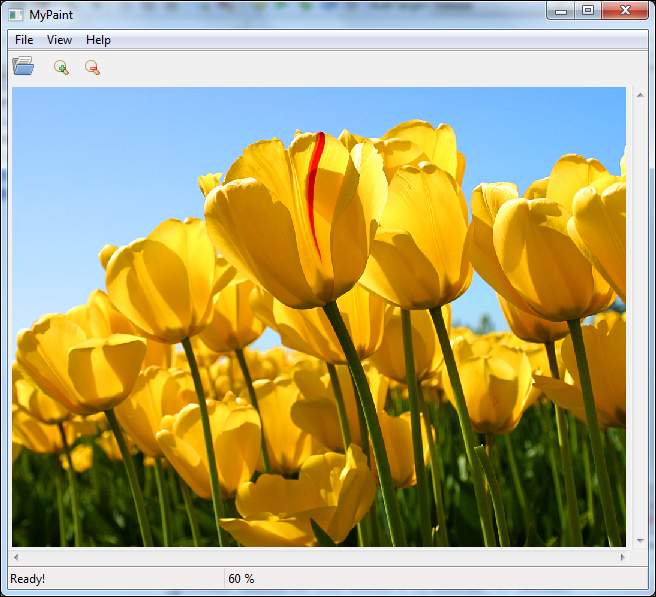
OnViewZoomInandOnViewZoomOutevent handlers respectively. - Our app is now complete. Hit F9 key to build and run. Upon successful build app will be run and we'll be presented with app window. Now open any image file and enjoy viewing it inside your freshly written app. Our app will now look as per the following screenshot: