
In the previous chapters, focus of our app development was on console based app. This is also known as text only app as console based apps can only display text and ASCII art. However, our focus in this chapter will be on app development for Windows.
Windows is one of the most widely used operating systems around the world. Code::Blocks can be used to develop apps for Windows, Linux, or Mac. Keeping in view the popularity of the Windows platform we shall restrict our focus to Windows platforms only.
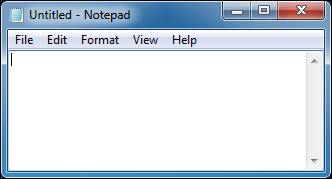
Apps for Windows are also known as GUI (Graphical User Interface) based apps. User interaction with app is done by mouse and keyboard. Notepad app is an example of GUI based apps that come bundled with Windows operating system. The following screenshot displays the Notepad app:
Code::Blocks comes along with all the tools required for Windows app development. Let's develop an app and learn it.
Following the tradition of Hello World app, we'll create our first Windows app. To do so perform the following steps:
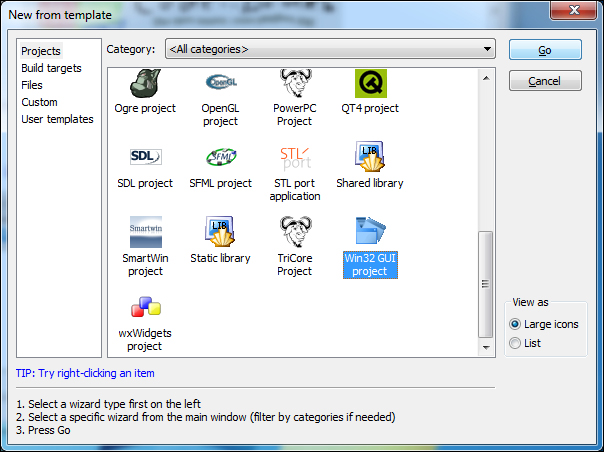
- Go to File | New | Project… menu option. Choose the Win32 GUI project option as in the following screenshot and click on the Go button:
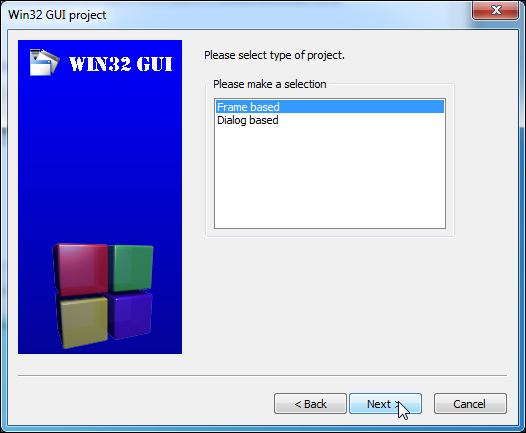
- Click on the Next button on the first page of wizard as shown in the following screenshot. Choose Frame based option and click on the Next button. Dialog based apps can't contain menu bar or a toolbar. So we are choosing Frame based app.
- Enter
App9as project title and choose folder to create project. Now click on the Next button and then click on the Finish button to complete the wizard. - Replace code inside the
main.cppfile with following code:#include <windows.h> int WINAPI WinMain(HINSTANCE thisInstance, HINSTANCE prevInstance, LPSTR commandLine, int cmdShow ) { MessageBox(NULL, "Hello World!", "Title", MB_OK | MB_ICONINFORMATION); return 0; } - Now click on the build icon in compiler toolbar. Click on the run button in compiler toolbar. Our
App9window will be similar to the following screenshot: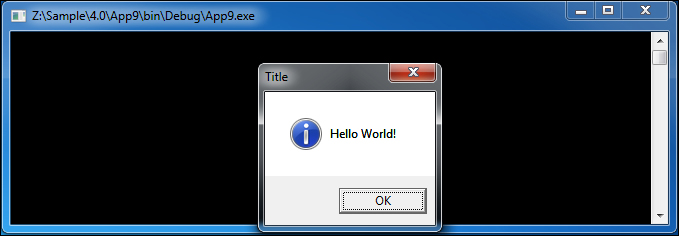
- Congratulations! We have successfully compiled our first app for Windows.
Let's understand the code we have written for this app. We are including windows.h file in the beginning of code. This file must be included in all Windows app as it contains relevant function declarations for Windows. Subsequently we have a function called WinMain() and this is the entry point of a Windows app. An entry point is the first function that is called at app start up.
The WinMain() functions accepts four parameters—handle to the current instance, handle to the previous instance, command line string pointer, and show state of window that controls how a app should be displayed.
We are calling the MessageBox() function to display a message box. It accepts four parameters—handle to the parent window (NULL or no one in our case), message text, dialog box title, and a combination of flags that controls buttons and icons to be shown. In our case we have used a combination of MB_OK and MB_ICONINFORMATION, which instructs the MessageBox() function to display a OK button and an information icon respectively.
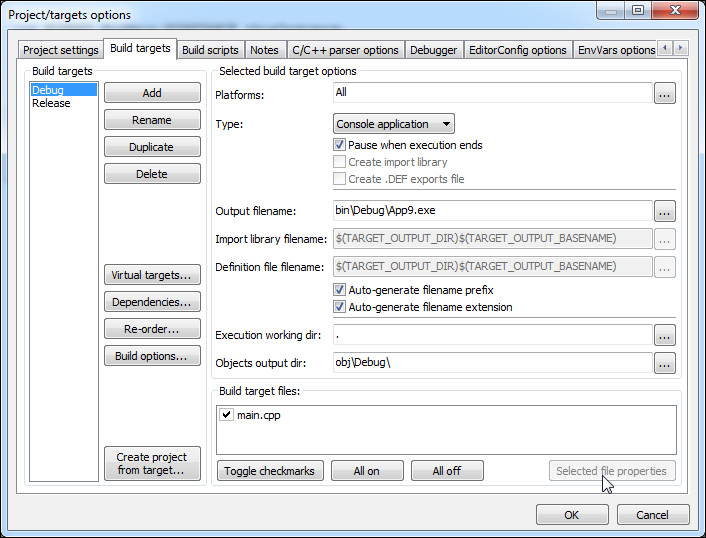
But why are we getting a console for a GUI app? Answer is that by default Code::Blocks creates debug target as a console app. We can confirm this by navigating to Project | Properties… menu option and then clicking on the Build targets tab. Refer to the following screenshot:
Advantage of this method is that debug output can be printed to that console for easier debugging. This can be disabled by changing app type to GUI application in the Type: combo box as shown in the following screenshot:
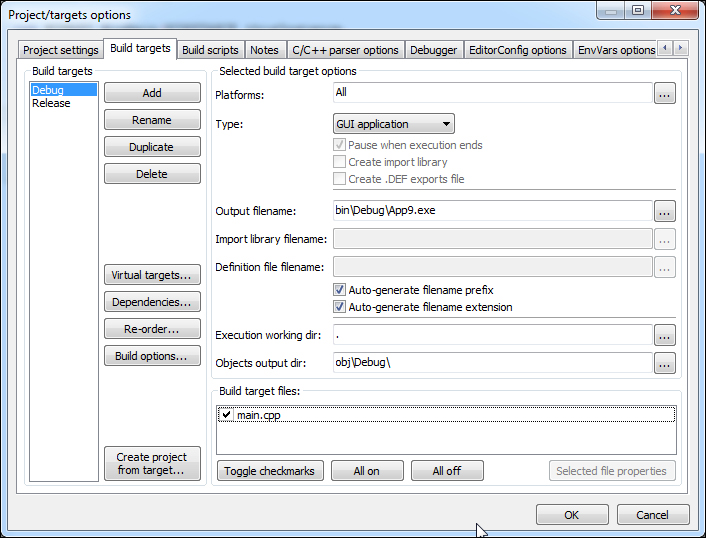
This will stop launching that console window.
Unicode is a standard to encode, store and represent text in World's most languages. C++ char data type is 1 byte in size. It is only able to represent text available in English language. To enable Unicode support in a Windows app we have to use a special data type called wchar_t, which is 2 byte in size. Let's say Hello World in the Hindi language. To do this we will replace previous MessageBox() code with the following code:
MessageBox(NULL, TEXT("holaao valD-"), TEXT("Title"), MB_OK | MB_ICONINFORMATION);The Code::Blocks editor window will look similar to the following screenshot. Editor font size has been changed to 16 point in order to work with Devnagiri script:

We have decorated Hindi text with a TEXT() macro. This macro is used to translated a Unicode string to a wchar_t* when a UNICODE or _UNICODE pre-processor definition is defined. It returns a char* when Unicode support is not enabled.
Next we'll define following pre-processor defines. Go to Project | Build options… menu option. Then select App9 in the tree on the left side and click on the Compiler settings and then #defines tab.
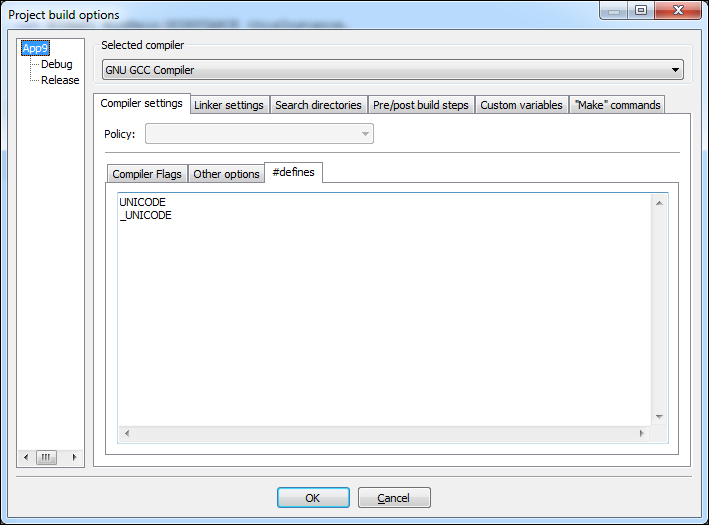
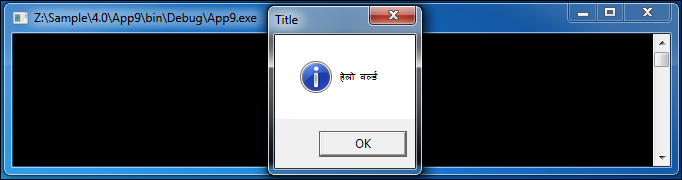
Add UNICODE and _UNICODE to the text control and click on the OK button. Click on the build button and then click on the run button in compiler toolbar. Now App9 will show Hello World in Hindi language, as shown in the following screenshot:
Please note that we'll enable Unicode support in all subsequent apps.