
A GUI toolkit is a set of header files and libraries that makes GUI development easier for developers. There are several GUI toolkits available in the market, few of them are stated as follows:
- Microsoft Foundation Class (MFC): It is a set of classes that acts as a wrapper to Win32 api. This comes bundled with commercial versions of Visual Studio. MFC is proprietary and requires a Visual Studio license in order to use it. MFC app have native look and feel.
- Qt (pronounced as "cute"): It is a Open source and cross-platform GUI toolkit developed by Digia. Qt is licensed under both commercial and GPL/LGPL license. It is available on wide range of platforms including Windows, Linux, Mac, and so on. Qt drawn GUI is a custom drawn UI and may differ from a standard app on a platform.
- wxWidgets: It is another open source and cross-platform GUI toolkit licensed under wxWindows license (based on LGPL but less restrictive). It's generated UI has native look and feel as it uses platform standard UI elements.
We'll focus on wxWidgets toolkit in this book due to its simpler licensing model, native look and feel, and cross-platform development capability. A compiled copy of wxWidgets is also provided with the book. This book assumes that reader has extracted compiled wxWidgets to Z:wxWidgets folder.
In order to understand similarities between Win32 API and wxWidgets we will recreate App9 functionalities with wxWidgets.
- Go to File | New | Project… menu option. Then choose the wxWidgets project wizard.
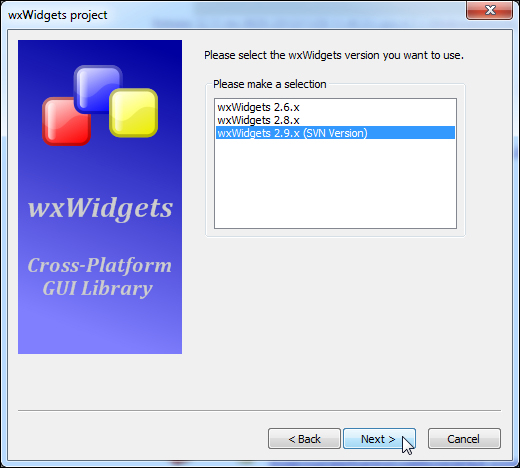
- Next click on the Go button and then click on the Next button in the next window. Choose wxWidgets 2.9.x (SVN Version) option in the wizard page and click on the Next button, as shown in the following screenshot:
- Enter
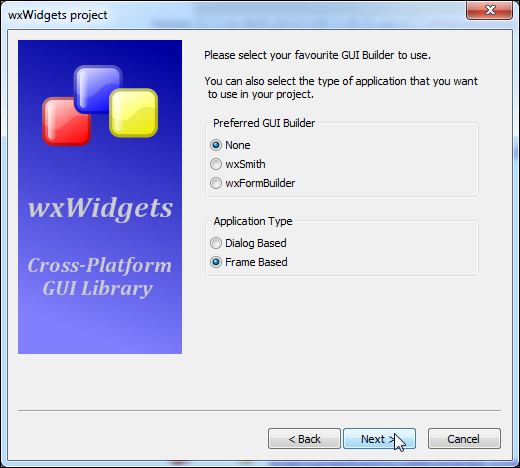
App11as the Project title and click on the Next button. Click on the Next button to skip Project details page. - Choose Frame Based application type as shown in the following screenshot. Frame based apps are apps which can have menus, toolbars, and are suitable for large apps. Leave Preferred GUI Builder option to None as we'll be writing GUI code ourselves.
- In the following window
$(#wx) is a global variable, which is pointing to wxWidgets installation directory. Alternatively full path to wxWidgets that isZ:wxWidgetsin our case may be entered here: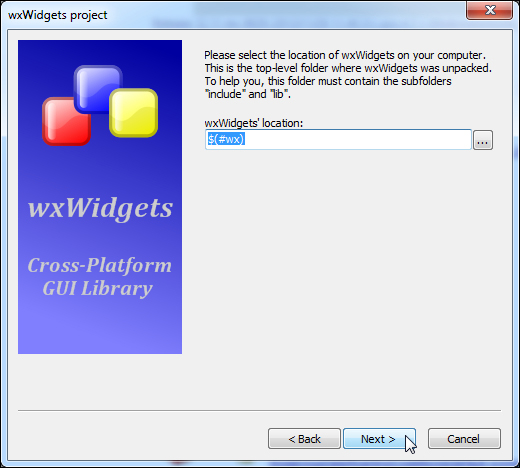
- If this global variable is undefined at this point following window will pop up. It will not pop up if the global variable has already been defined.
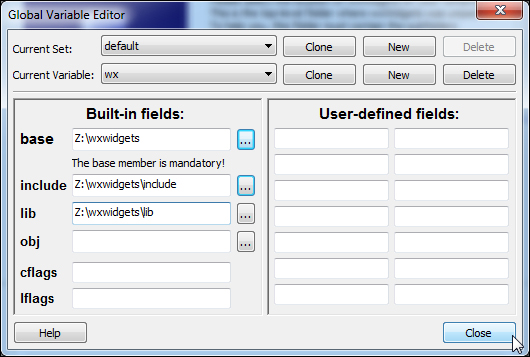
- Complete the text boxes as per the previous screenshot and click on the Close button. Then click on the Next button twice.
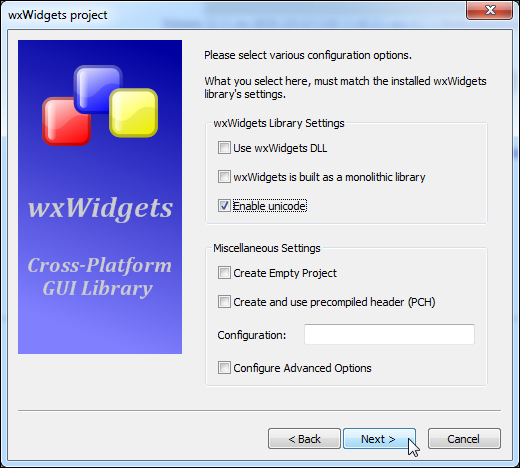
- Check the Enable unicode option in the following screenshot to enable Unicode support and click on the Next button. Click on the Finish button in the next page to close this wizard. Wizard will generate necessary code and set up a project to develop app using the wxWidgets toolkit.
- Replace code in the
App11Main.hfile with the following code:#ifndef APP11MAIN_H #define APP11MAIN_H #include <wx/wx.h> #include <wx/sizer.h> #include <wx/button.h> class App11Frame: public wxFrame { public: App11Frame(wxFrame *frame, const wxString& title); ~App11Frame(); private: static const long idBtnClickMe; wxBoxSizer* m_boxSizerMain; wxButton* m_btnClickMe; void OnClickMe(wxCommandEvent& event); void OnClose(wxCloseEvent& event); DECLARE_EVENT_TABLE() };An
App11Frameclass has been derived from awxFrameclass. AwxFrameclass represents a basic window. Member variablem_btnClickMehas been defined to create and store button andidBtnClickwill store it's ID for event processing. We have placed aDECLARE_EVENT_TABLE()function macro to create boiler plate code for event handling related to this class. - Next replace code in the
App11Main.cppfile with the following code:#include "App11Main.h" const long App11Frame::idBtnClickMe = ::wxNewId(); BEGIN_EVENT_TABLE(App11Frame, wxFrame) EVT_BUTTON(idBtnClickMe, App11Frame::OnClickMe) EVT_CLOSE(App11Frame::OnClose) END_EVENT_TABLE() App11Frame::App11Frame(wxFrame *frame, const wxString& title) : wxFrame(frame, -1, title) { this->SetSizeHints(wxDefaultSize, wxDefaultSize); m_boxSizerMain = new wxBoxSizer(wxHORIZONTAL); m_btnClickMe = new wxButton(this, idBtnClickMe, _T("Click Me!"), wxDefaultPosition, wxDefaultSize, 0); m_boxSizerMain->Add(m_btnClickMe, 0, wxALL, 5); this->SetSizer(m_boxSizerMain); this->Layout(); } App11Frame::~App11Frame() { } void App11Frame::OnClose(wxCloseEvent &event) { Destroy(); } void App11Frame::OnClickMe(wxCommandEvent& event) { wxMessageBox(_T("Hello World!"), _T("Information"), wxOK | wxICON_INFORMATION, this); }An event table has been laid out using
BEGIN_EVENT_TABLE()andEND_EVENT_TABLE()macros. This defines relationship of callback functions with respective events. TheOnClickMe()function has been connected to button press event. It will show a message whenever the Click Me! button is pressed by the user.The
OnClose()function will be called when app closed. It calls aDestroy()function that initiates app shutdown. - Now replace code in the
App11App.hfile with the following code:#ifndef APP11APP_H #define APP11APP_H #include <wx/app.h> class App11App : public wxApp { public: virtual bool OnInit(); }; #endif // APP11APP_HIn the preceding file we have derived a class
App11AppfromwxApp. A virtual functionOnInit()is implemented in this class. - Next type the following code in the
App11App.cppfile:#include "App11App.h" #include "App11Main.h" IMPLEMENT_APP(App11App); bool App11App::OnInit() { App11Frame* frame = new App11Frame(0L, _("wxWidgets Application Template")); #ifdef __WXMSW__ frame->SetIcon(wxICON(aaaa)); // To Set App Icon #endif frame->Show(); return true; }In the implementation of
OnInit()function an object namedframehas been derived from theApp11Frameclass. Resource files are available only on Windows platform. Thus it has been enclosed within a pre-processor macro__WXMSW__and subsequently app is launched in line number12. - Leave code inside
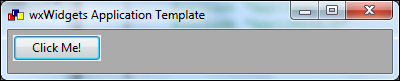
resource.rcfile as it is. - Hit F9 button to compile and run. Following window will be launched. We find that our application is now working fine:
Earlier we mentioned about cross-platform development capability of wxWidgets. Let's put that capability into action. We'll compile App11 source without any change on Linux platform. For this example, we are using CentOS 6 Linux.
In order to compile on Linux platform, we'll use a Makefile. Remember we can also use the Code::Blocks wxWidgets project wizard to generate a project targeted at Linux platform. However in my opinion developers should be familiar with the Make tool.
Make is a build tool that can be used any number of source files to a binary based files on a set of rules inside a text file known as a Makefile. Make handles build dependencies efficiently and for a large project make will only compile relevant files, which has changed since last build. This saves time and also eliminates any human error in the entire build process.
Perform the following steps:
- Paste the following code into a file and save it with filename
Makefile:CPP=g++ CXXFLAGS=-c $(shell wx-config --cflags) LDFLAGS=$(shell wx-config --libs) SOURCES=App11Main.cpp App11App.cpp App11: App11Main.o App11App.o $(CPP) $(LDFLAGS) App11Main.o App11App.o -o App11 App11Main.o: $(CPP) $(CXXFLAGS) App11Main.cpp App11App.o: $(CPP) $(CXXFLAGS) App11App.cpp clean: rm -rf *.o App11
In this file several variables are defined in first four lines. The
CPPvariable defines C++ compiler binary,CXXFLAGSstores necessary compiler flags for awxWidgetsproject by running a scriptwx-config. The wxWidgets project provides a shell script known aswx-configthat can be used determine compiler and linker flags.LDFLAGSstores necessary linker flags used for executable binary generation.SOURCESvariable define the sources that are to be compiled. Do note that we are not usingresource.rcfile anymore as resource compiler doesn't exist on Linux platform.App11:line defines a make targetApp11which comprises two sub-targetsApp11Main.oandApp11App.o. There is a shell command defined in the following line which indicates the command to be executed after all sub-targets are built successfully. Subsequently both these targets are also defined in a similar manner.clean: target executes a command to delete all object files and our executable binary.
- Next issue the following command in Linux shell prompt to compile our app:
[biplab@centos App11]$ make - To run our app use the following command:
[biplab@centos App11]$ ./App11 - Following window will be displayed:
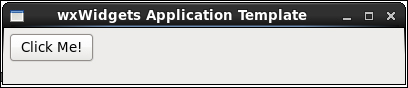
We find that our app now runs on Linux platform flawlessly. It behaves exactly as we wanted it to. We didn't make any changes to the code we wrote for Windows platform. But our GUI toolkit has internally mapped our code to appropriate functions for Linux platform. This gives an immense advantage to a developer as targeting multiple platforms becomes a lot easier.