
When working with Jenkins, you may need to use different tools/technologies like Java, Maven, etc. This chapter explains how to configure JDK and Maven from the Global Tool Configuration page.
Global Tool Configuration Settings
- 1.
First, log in to Jenkins. Once you are logged in, you will see the Jenkins dashboard.
- 2.
Click the Manage Jenkins link available on the Jenkins dashboard to open the Manage Jenkins page.
- 3.
Go to the Global Tool Configuration page by clicking the Global Tool Configuration link highlighted in Figure 6-1.

The user interface of the Manage Jenkins section from the Jenkins dashboard. System Configuration, Security, and Status Information are some of the functions under the Manage Jenkins section with their sub-functions, except for Status Information, observable. Global Tool Configuration under System Configuration is marked by a rectangle.
The Manage Jenkins page

The Global Tool Configuration page after clicking the Global Tool Configuration link under the System Configuration. The default settings provider and default global settings provider are set to default under the Maven Configuration section. Add J D K and Maven installation functions are observed in their respective section.
The Global Tool Configuration page
If you have plugins related to other third-party tools such as Gradle or Git installed in Jenkins, you will see settings related to these tools on this page.
Understanding the Global Tool Configuration Settings
The Maven install (called the global settings): The default location of this file is ${maven.home}conf and the file is called settings.xml file. maven.home refers to the Maven installation directory.
A user’s install (called the user settings): The default location of this file is {user.home}/.m2 and this file is also called settings.xml. The {user.home} part refers to the current user directory. We cover Maven in detail in Chapter 11.
These files contain settings required to execute Maven in order to build different Java projects. If different users working on the same machine want to keep their specific Maven settings, they keep these settings in the user settings file, whereas all common Maven settings that will be shared by all user profiles go in the global settings file.
You don’t have to have the Maven settings.xml in the user’s install, i.e., ${user.home}/.m2/settings.xml. If this file is not present, the required settings are taken from the Maven install’s settings.xml file. If the same setting is present in both settings.xml files, the setting in the ${user.home}/.m2/settings.xml gets preference.

A zoomed portion of the Maven Configuration section under the Global Tool Configuration page. Default settings provider and Default global settings provider sub-sections have their picklist menu where the observed inputs of choice are the default Maven-related settings.
The Maven Configuration section
Maven Configuration

A zoomed portion of the Maven Configuration section exhibiting the file path settings for the Default settings provider and Default global settings provider. D colon backslash User Settings dot x m l and E colon backslash Common Settings dot x m l are their respective file path from the Settings file and Global settings file in filesystems inputs.
Maven Configuration section with settings.xml paths
The second part that you need to understand related to Maven is its installation. Let’s look at how you configure the Maven installations.
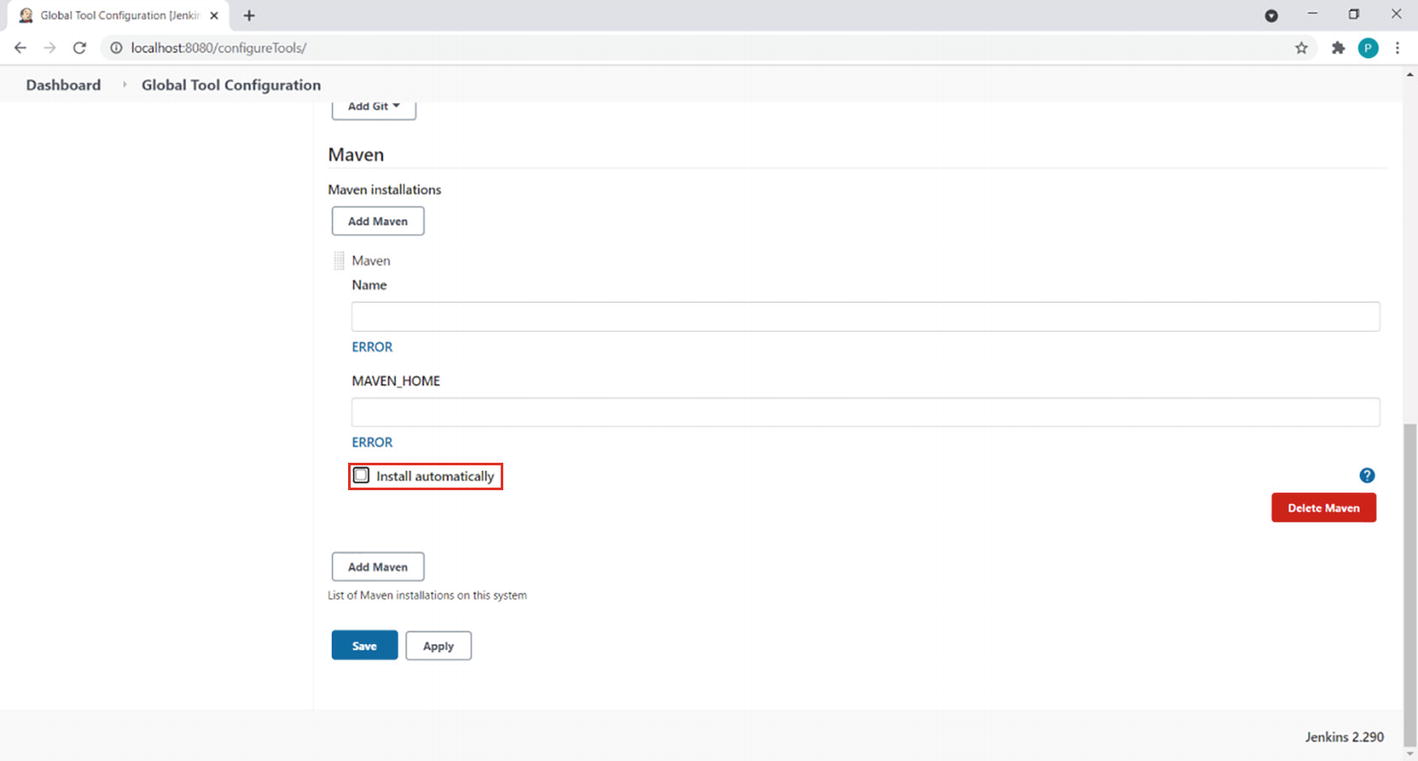
The marked Install automatically checkbox in the Maven Installations sub-section under the Maven main section. The fields with input boxes are Name and Maven underscore Home, in which both return Error results probably due to their empty input boxes. The options to Add or Delete Maven are observed as well as the Save and Apply buttons.
Install Automatically checkbox from the advanced settings related to the Maven Installation section

The required fields under the Maven Installations sub-section of the Maven main section. The Name and Maven underscore Home fields have their inputs set to My Maven Configuration and D colon backslash apache dash maven dash 3.6.3, respectively. The Maven underscore Home field is boxed.
The Required fields filled in inside the Maven Installation section
Click the Save button to save the configuration.
If the machine running the Jenkins job does not have Maven installed and you want Jenkins to install it automatically while running a job, you have to check the Install Automatically checkbox and configure the installer. Jenkins will do this only the first time it runs a job on a machine where Maven isn’t installed.
Let’s see how to configure a Maven installation whereby a Maven .ZIP/.TAR file is extracted.

The installer configuration options under the Maven Installations sub-section. The checkbox for the Install automatically option is checked. The Install from Apache with 3.8.1 Version is observed underneath. The Add Installer button exhibits a list to choose from. The chosen option is Extract asterisk zip slash asterisk dot tar dot g z.
Configuring the Maven Installer

The installers under the Maven Installations sub-section. The Install automatically checkbox is checked, while Install from Apache with 3.8.1 Version and Extract asterisk p dot zip slash asterisk dot tar dot g z are exhibited underneath. The Download U R L for binary archive field under the latter is boxed.
Maven download URL configured in Maven Installer
In the Subdirectory of Extracted Archive field, provide the name of the directory that will contain the Maven installation after unzipping the folder.

The File Explorer exhibits the contents inside the apache-maven-3.8.1 file. The bin, boot, c o n f, and l i b folders, the License and Notice files, and Read Me text document are the observed content. The address bar exhibits the access flow from This PC, Data D open and close parentheses D colon, New Folder, and apache-maven-3.8.1.
The directory structure of Maven
As shown in Figure 6-9, the Maven tool is inside a directory named apache-maven-3.8.1. So apache-maven-3.8.1 should be the value in the Subdirectory of Extracted Archive field. That way, Jenkins will consider this directory the Maven installation location and can access Maven using the mvn command present in the bin folder.
Click the Save button on the page to save the configuration.
Java Configuration
Click the Add JDK button

A zoomed portion of the J D K Configuration section exhibiting the required Name, and Jave Home fields in the J D K Installations sub-section. Both have the inputs J D K 11 and D colon backslash open j d k dash 11 underscore windows dash x 64 underscore bin backslash j d k dash 11, respectively. Add J D K and Delete J D K buttons are given.
The Name and JAVA_HOME fields configured in the JDK Configuration section
If you do not have JDK installed and want Jenkins to install it on demand, then check the Installed Automatically checkbox and configure the installer as explained in the previous Maven configuration section.
Summary
This chapter explained how to set up important tools like Maven and JDK. If any Jenkins job needs these tools and job execution machine does not have them, those jobs will fail. Jenkins installs these tools using configured installers, which is considered a very important feature of Jenkins. The next chapter talks about how to manage security in Jenkins using its different security related features to implement authentication and authorization in Jenkins.