
If there is one task we can hardly avoid when building web applications it is sending out e-mails. It is such a basic need that CakePHP provides us with a ready-to-go component that can send e-mails, either through SMTP, or using PHP's mail() function.
In this recipe we will learn how to use the Email component to send out e-mails through SMTP using a Google Mail account, and how to use e-mail layouts to proper render the e-mails.
We only need some place to put our code, and that place will be a model-less controller. Create a file named emails_controller.php and place it in your app/controllers folder, with the following contents:
class EmailsController extends AppController {
public $uses = null;
public function index() {
$this->_stop();
}
}
- Edit your
app/controllers/emails_controller.phpand add the following property to theEmailsControllerclass (right below theusesproperty declaration), replacing theusernameandpasswordsettings highlighted with your Google Mail account, and password:public $components = array( 'Email' => array( 'delivery' => 'smtp', 'smtpOptions' => array( 'host' => 'ssl://smtp.gmail.com', 'port' => 465, 'username' => '[email protected]', 'password' => 'password' ) ) ); - While still editing the controller, add the following code to its
index()method, right above the call to the_stop()method (replace thetoproperty highlighted with the e-mail address where you wish to receive the test e-mail):$this->Email->to = 'Destination <[email protected]>'; $this->Email->subject = 'Testing the Email component'; $sent = $this->Email->send('Hello world!'), if (!$sent) { echo 'ERROR: ' . $this->Email->smtpError . '<br />'; } else { echo 'Email sent!'; }
- If you now browse to
http://localhost/emails, you should see the message Email sent!, and you should then receive the test e-mail message in your inbox, as shown in the following screenshot: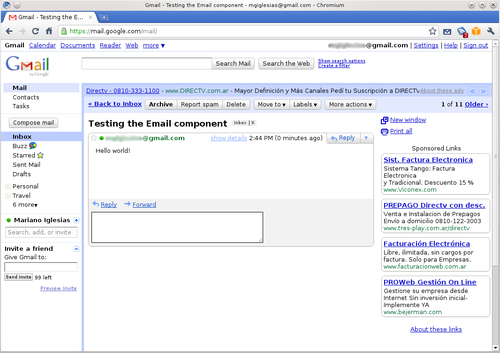
Let us now continue by sending an HTML e-mail, using layouts and templates.
- Make the following changes to the
index()method in yourapp/controllers/emails_controller.phpfile (remember to change the highlightedtoproperty to your desired destination e-mail):$this->set(array( 'name' => 'Mariano Iglesias', 'url' => Router::url('/', true) )); $this->Email->to = 'Destination <[email protected]>'; $this->Email->subject = 'Testing the Email component'; $this->Email->sendAs = 'both'; $this->Email->template = 'test'; $sent = $this->Email->send(); if (!$sent) { echo 'ERROR: ' . $this->Email->smtpError . '<br />'; } else { echo 'Email sent!'; }
- Create a file named
default.ctpand place it in yourapp/views/layouts/email/htmlfolder with the following contents:<html> <head><title><?php echo $title_for_layout;?></title></head> <body> <?php echo $content_for_layout; ?> <p><small>This email was sent on: <?php echo date('F d, Y H:i'), ?></small></p> </body> </html> - Create a file named
default.ctpand place it in yourapp/views/layouts/email/textfolder with the following contents:<?php echo $content_for_layout; ?> This email was sent on: <?php echo date('F d, Y H:i'), ?> - Create a file named
test.ctpand place it in yourapp/views/elements/email/htmlfolder, with the following contents:<p>Hello <?php echo $name; ?>!</p> <p>This is a test email from <?php echo $this->Html->link('My Test Application', $url); ?></p> - Create a file named
test.ctpand place it in yourapp/views/elements/email/textfolder, with the following contents:Hello <?php echo $name; ?>! This is a test email from My Test Application: <?php echo $url; ?>
If you now browse to http://localhost/emails you should see the message Email sent!, and you should then receive the test e-mail message in your inbox in HTML format, and with a link to your web application.
We start by adding the Email component to our controller's list of components. While adding it, we set the settings required to specify the type of delivery we wish to use. The connection settings available in the Email component are:
delivery: It is the type of delivery to use, and can be either:mail(uses PHP'smail()function),smtp(uses SMTP, and requires proper configuration of thesmtpOptionssetting), anddebug(which tells theEmailcomponent to avoid sending the e-mail, and instead create a session flash message with the message contents.)smtpOptions: If delivery is set tosmtp, it defines an array of settings to specify the type of SMTP connection to attempt. Available settings for this setting are:protocol: Protocol to use when connecting. Defaults tosmtp.host: SMTP host to connect to. Defaults tolocalhost.port: Port to use when connecting tohost. Defaults to25.username: Username.password: Password to use.client: What is the client connecting to the SMTP server. Defaults to theHTTP_HOSTenvironment variable.timeout: How many seconds to wait until the attempt to reach the server times out. Defaults to30.
We set delivery to smtp, and set the smtpOptions to what is required when attempting to send e-mails through Google Mail's SMTP server. Once the Email component is added to the controller and properly configured, we are ready to build and send e-mails.
The controller's index() method builds the e-mail by setting some properties. The Email component takes most of its configuration through public properties, some of which are:
to: Destination, in the form:name <email>, whereemailis a valid e-mail address. It can also simply be an email address.from: E-mail address that is sending the e-mail. This property uses the same format as thetoproperty. Notice that if you use Google Mail's SMTP, only the name part of this setting will be used (as the e-mail address will be set to your Google Mail e-mail address.)replyTo: Email address to which responses should be sent to. Same format as thetoproperty.return: E-mail address to send any delivery errors, sent by the remote mail server. Same format as thetoproperty.readReceipt: An e-mail address (using the same format as thetoproperty) to where to send read receipt e-mails. Defaults to none.cc: An array containing the e-mail address to where to send copies of this e-mail. Each e-mail address should be specified using the same format as thetoproperty.bcc: An array containing e-mail address to send blind copies of this e-mail. Each e-mail address should be specified using the same format as thetoproperty.subject: Subject for the e-mail.headers: An array containing additional headers to send with the e-mail; each of those headers will be prefixed withX-as perRFC 2822.attachments: An array if paths to files that should be attached to the e-mail.
Using the to and subject property we specify the destination and subject of the e-mail. We did not have to define the from property since Google Mail uses the account specified when connecting to the SMTP server.
We then issue a call to the send() method, passing the body of the e-mail as its argument, and based on its boolean response we inform if the e-mail was successfully sent or if it failed, in which case we use the smtpError property to show the error.
The next part of the recipe uses templates and layouts to properly build the e-mail in two formats: HTML, and text, and uses replacement variables to show the flexibility of the e-mail component. E-mail layouts and templates are no different than controller layouts and views, as they inherit the controller properties (such as its replacement variables, and available helpers.)
E-mail layouts wrap the contents of e-mail templates, by means of their content_for_layout variable, just as controllers layouts do. There are two types of email layouts: HTML layouts, stored in app/views/layouts/email/html, and text layouts, stored in app/views/layouts/email/text. Similarly, you can define templates for HTML emails by storing them in the folder app/views/elements/emails/html, and text email templates in app/views/elements/emails/text.
We set the layout of the e-mail through the layout property of the Email component. If no layout is set, the default is used. Therefore, we start by creating the HTML layout in the file app/views/layouts/email/html/default.ctp, and the text layout in app/views/layouts/email/text/default.ctp.
We create two versions of the same template, called test: its HTML version is stored in app/views/elements/email/html/test.ctp, and its text version in app/views/elements/email/html/test.ctp.
The recipe continues by modifying the index() action. We start by defining two replacement variables: name and url, which are used in the test template. We then use the sendAs property of the Email component to say we are sending an HTML and text friendly e-mail. This property can be set to: html, to send HTML only e-mails; text, to send text only e-mails; and both, to send emails that support HTML and text e-mail clients.
We use the template property of the Email component to specify that we wish to use our test template, and we finalize with a call to the send() method to send out the e-mail.
A common mistake that web application developers make is sending out e-mails as part of a controller action that is triggered by the visitor. Strictly speaking, e-mail sending is a non-interactive task, and as such should not be tied to the user browsing experience.
It is therefore recommended that the email sending task be performed in a non-interactive manner, which in CakePHP terms means from the console, also known as shell.
To exemplify this solution, consider a subscription website, where users enter their information (including their e-mail address), and, as a result, the application sends out a confirmation e-mail. Instead of sending the e-mail as part of the controller action that is triggered from the submission form, we may set a database field that shows that those users have not yet been sent out the confirmation e-mail, and then have a CakePHP shell periodically check for users that need their confirmation e-mails, sending out those e-mails from the shell.
This means that we find ourselves needing to be able to send e-mails from the shell, a topic covered in the recipe Sending e-mails from shells in Chapter 8,
Sending e-mails from shells in Chapter 8, Working with Shells.