The first task to be completed when we are in the process of adding authentication to an application is to identify which controllers will need user access. Normally we would make every controller and action protected by default, and then we would specify which areas of our application allow public access.
We must have a users table that should contain, at least, two fields: username (to hold the username) and password (to hold a hash made out of the user's password).
If you don't have a table for this purpose, you can use the following SQL statement to create it:
CREATE TABLE `users`(
`id` INT UNSIGNED AUTO_INCREMENT NOT NULL,
`username` VARCHAR(255) NOT NULL,
`password` CHAR(40) NOT NULL,
PRIMARY KEY(`id`)
);
- Create a file named
users_controller.phpand place it inside yourapp/controllersfolder with the following contents:<?php class UsersController extends AppController { public function login() { } public function logout() { $this->redirect($this->Auth->logout()); } } ?> - Create a file named
login.ctpin yourapp/views/usersfolder (create the folder if you don't have one already), and add the following contents:<?php echo $this->Form->create(array('action'=>'login')); echo $this->Form->inputs(array( 'legend' => 'Login', 'username', 'password' )); echo $this->Form->end('Login'), ?> - Create a file named
app_controller.phpin yourapp/folder with the following contents:<?php class AppController extends Controller { public $components = array( 'Auth' => array( 'authorize' => 'controller' ), 'Session' ); public function isAuthorized() { return true; } } ?> - Modify the
UsersController, and add the following code before theloginmethod:public function beforeFilter() { parent::beforeFilter(); $this->Auth->allow('add'), } public function add() { if (!empty($this->data)) { $this->User->create(); if ($this->User->save($this->data)) { $this->Session->setFlash('User created!'), $this->redirect(array('action'=>'login')); } else { $this->Session->setFlash('Please correct the errors'), } } } - Create a file named
add.ctpand place it in yourapp/views/usersfolder with the following contents:<?php echo $this->Form->create(); echo $this->Form->inputs(array( 'legend' => 'Signup', 'username', 'password' )); echo $this->Form->end('Submit'), ?>We now have a fully working authentication system. We can add new users by browsing to
http://localhost/users/add, logging in by browsing tohttp://localhost/users/login, and finally logging out by browsing tohttp://localhost/users/logout.After creating a user, you should see the login form with a success message, as shown in the following screenshot:
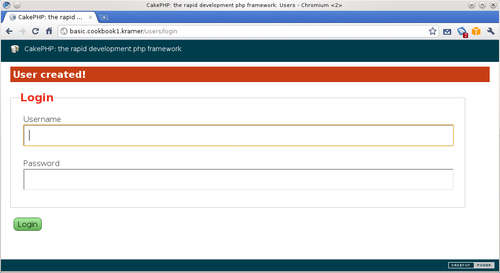
We start by creating two actions in the UsersController class: login(), to show and process submissions of the login form, and logout(), to handle users logging out.
You may be surprised that the login() method has no logic whatsoever. To display the form, all we need to do is display the action's view. The form submission is taken care of by the Auth component, leaving us with no need to implement any controller logic. Therefore, the only implementation we need is to create a view for this action, which includes a simple form with two fields: username, and password.
Note
The inputs method of CakePHP's FormHelper is a shortcut designed to avoid multiple calls to the input method. By using it, we can create a full form with elements without the need to call FormHelper::input() several times.
The logout() controller action simply calls the Auth component's logout() method. This method removes the logged-in user data from the session, and returns the address to which the user should be redirected after logging out, obtained from the previously configured logoutRedirect setting of the component (defaults to the application's home page if the setting was not configured.)
Next, we add two components to the controller: Session, and Auth. The Session component is needed to create the messages (through the use of its setflash() method) that informs the user if a login attempt was unsuccessful, or if a user was created.
The Auth component operates between your controller's actions and the incoming request by means of the beforeFilter callback method. It uses it's authorize setting to check what type of authentication scheme is to be used.
Note
To obtain more information about the authorize setting, see the recipe Using and configuring the Auth component.
Once the Auth component is added to a controller, all actions in that controller are not accessible unless there is a valid user logged in. This means that if we had any actions that should be public (such as the login() and add() actions in our controller), we would have to tell the Auth component about them.
If one wishes to make some actions public, one can add the name of these actions to the allowedActions setting of the Auth component, or by calling its allow() method. We use the later approach to tell the Auth component that the add() action should be reachable without a logged-in user. The login() action is automatically added to the list of public actions by the Auth component.
When the user attempts to reach an action that is not within the public actions, the Auth component checks the session to see if a user is already logged in. If a valid user is not found, it redirects the browser to the login action. If there is a user who is logged in, it uses the controller's isAuthorized method to check if the user has access. If its return value is true, it allows access, otherwise access is rejected. In our case, we implemented this method in AppController, our base controller class. If the attempted action requires a user who is logged in, the login() action is executed. After the user submits data using the login form, the component will first hash the password field, and then issue a find operation on the User model to find a valid account, using the posted username and password. If a valid record is found, it is saved to the session, marking the user as logged in.
When the Auth component is enabled on a controller and the user submits a form with a field named password (regardless if it is being rendered in the login form), the component will automatically hash the password field before executing the controller's action.
Note
The Auth component uses the salt defined in the configuration setting Security.salt (in your app/config/core.php file) to calculate the hash. Different salt values will produce different hashes even when using the same password. Therefore, make sure you change the salt on all your CakePHP applications, thus enhancing the security of your authentication system.
This means that the action will never hold the plain password value, and this should be particularly noted when utilizing mechanisms to confirm password validations. When you are implementing such validation, make sure you hash the confirmation field using the proper method:
if (!empty($this->data)) {
$this->data['User']['confirm_password'] = $this->Auth->password($this->data['User']['confirm_password']);
// Continue with processing
}