Part 6
Accessories
_____________________

Accessories
ACCESSORY FLASH
As you become more familiar with your Rebel XS/1000D, you’ll discover that there are things you wish you had to make your shooting life easier. Canon has manufactured a significant number of accessories for the Rebel that will do the job for you, whatever that job may be.
It’s not necessary to rely solely on the built-in flash. The accessory shoe on the top of the camera will communicate directly with Canon flash units, Speedlites, to deliver flash images beyond the capabilities of the built-in unit.
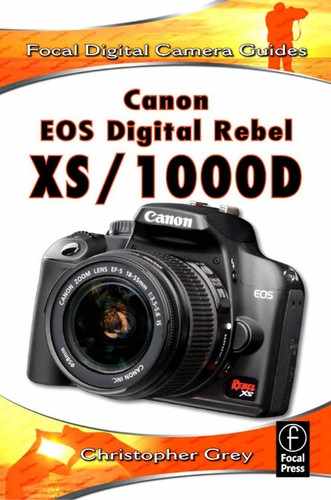
At the time of this writing, Canon’s accessory strobe flagship is the 580EX-II. Along with its full-featured little brother, the 430EX II, these slim, relatively lightweight products will do wonderful things by themselves or linked with additional units (I’ve heard of as many as 36!). Unlike earlier units, the EX-II adds Auto to its Mode list (via a Custom Function), a feature many photographers feel gives the Speedlite line an option the photographic community says it wants.
Canon also makes the 430 EX Speedlite, a lower-powered flash (Guide Number 43) with all the features of the 580.
E-TTL mode fires a small flash immediately before firing the main burst. The unit reads the amount of light bouncing back from the measuring point and shortens or lengthens the second flash duration accordingly. Auto mode fires one shot at essentially full power, reads the bounce, and turns the strobe
off when the correct amount of light has hit the sensor. Many photog raphers feel Auto to be more accurate than E-TTL.
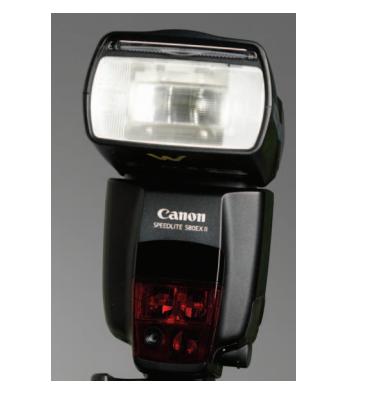
When using the flash with a wide-angle lens, use the built-in plastic baffle to spread the light more evenly to the sides. Without it, you may find the light will fall off and form a vignette.
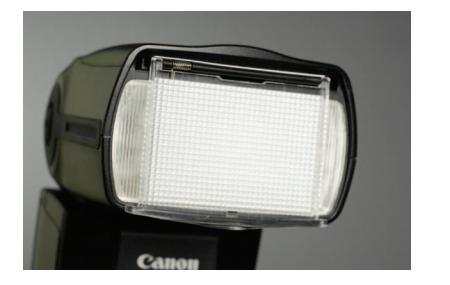
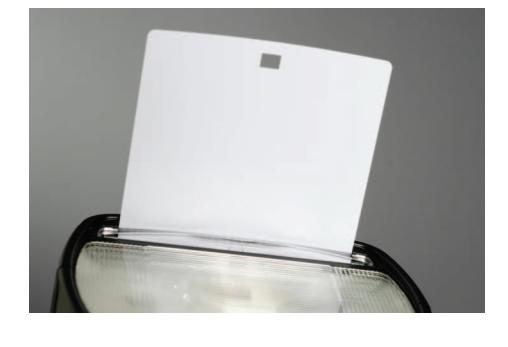
One drawback to using bounce flash, when the unit is aimed to the ceiling or wall, is that your subject’s eyes may not show a catchlight. To add life to eyes, use the white, popup reflector to direct a small amount of the main flash toward your subject.
No matter how you cut it, the 580EX II is considered a small unit, with a guide number of 58. Although it’s capable of a strong burst at full power, it isn’t typically used that way in E-TTL, where recycle speed is important.
I’ve found a few tricks, over the years, to get more consistent results from my Canon flash in E-TTL, and I’m happy to share them with you. Some of these tricks are based only on my experience and observation, but they seem to work nicely and improve my shot-to-shot success ratio.
The most important tip is that E-TTL seems to work better with an ISO higher than 100. When I fire up my flash unit, I’ll set my camera’s ISO to at least 400. This helps because the unit doesn’t have to push out as much light as it does at my preferred ISO of 100, and it can light the scene more efficiently.
The units have a built-in power adjustment that you can use to increase or decrease the output power relative to what the camera thinks it wants. This is just like the Flash Exposure Compensation function dialed in on the camera with built-in flash, except that the adjustments are made on the flash unit itself.

I’ve also found that zoom lenses are definitely the way to go when using accessory flash because, at 7 to 10 feet, the flash is working at its best. The distance from the subject is not so far that the flash has to work overtime but far enough so that the spread of light is even and consistent. My preferred lens in this circumstance is the 24-105 mm f4 IS L zoom, because I can let the lens do the work of moving in or out of the frame. It’s also a good idea to use a maximum aperture of f5.6 (larger is better) whenever possible.
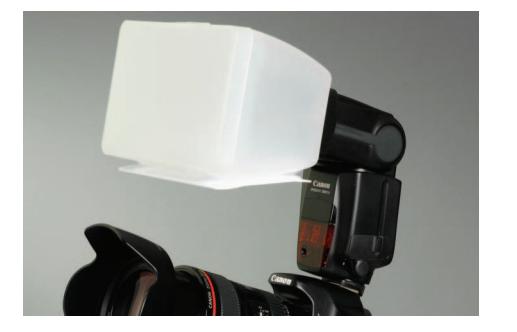
Even when you’ve nailed your E-TTL flash, you’re still dealing with a small, specular, light source. Better results are obtained when you use a third-party diffuser to broaden and soften the light source. Many of these devices are on the market, and I certainly haven’t tried all of them, but there are some characteristics that each exhibit: Any of them will spread the light, creating a larger, softer, source, and each will cut the efficiency of the source, the power of the strobe’s output, by at least one full stop.
My favorite, the Ultimate Light Box System, is a beautiful mini-softbox that’s engineered to fit snugly right over the flash head. It’s supplied with a series of baffles that can be inserted or removed; these modify the output for a softer or more specular light. It’s a beautiful, modular system.
SHOOTING TIP
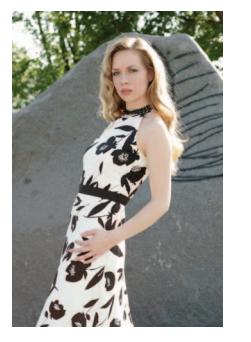
A look that i really like is when a flash fill is not noticeable but looks like it was part of the ambient. In other words, the fill is so soft that it is unrecognizable as fill flash, perhaps, in the catchlights of the eyes.
Try this with you favorite third-party modifider.From a working distance of not more than 10 feet, and with your modifier in place and your camera set to Av mode, dial the E-TTL power to – ![]() stop. Be sure to use an aperture that will not require a high power discharge from the flash unit, I think you’ll find that the strobe fills in the shadows just enough to make the image truly believable and much prettier than it would have been without the fill. This image was made using the Ultra Light Box.
stop. Be sure to use an aperture that will not require a high power discharge from the flash unit, I think you’ll find that the strobe fills in the shadows just enough to make the image truly believable and much prettier than it would have been without the fill. This image was made using the Ultra Light Box.
If you want the most controllable results from your Speedlites, you must learn and note their power output in Manual mode. When you know what the true output is, and at what f-stop, a whole new world of controlled imagery is literally at your fingertips.
Canon’s Speedlites have many other features, all designed to help you make better pictures.
Flash Exposure Bracketing (FEB) let’s you take three flash shots in a row at three different strengths. You can symmetrically vary the power in ![]() -stop increments up to a plus/minus of three whole stops. The camera will have to wait for the flash to recycle, of course, but if
-stop increments up to a plus/minus of three whole stops. The camera will have to wait for the flash to recycle, of course, but if
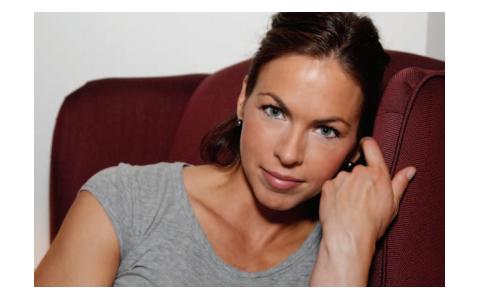
Normal flash exposure.

FEB delivers plus one stop.
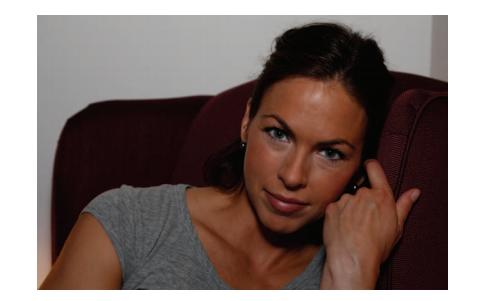
FEB underexposes by one full stop.
you jump the gun and fire the camera before the flash is ready, you won’t have to reset the bracket. The flash will hold the setting until a successful discharge can be made and, if you have dialed in a basic E-TTL exposure correction, the flash will add or subtract that correction automatically. You will have to reselect FEB each time you wish to make a new bracket series.
Speedlites offer HIGH-SPEED Sync (FP Flash), which lets you use flash at any shutter speed, up to the maximum 1/4000 of a second. To
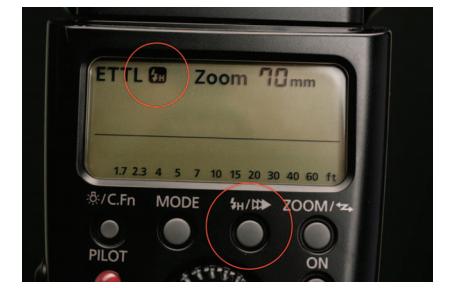
access it, select the high-speed option from the back of the flash. An icon next to the E-TTL designation will appear in the LCD panel. Note that as shutter speeds increase in speed, the working distance of the strobe decreases. There is a distance scale on the bottom of the LCD showing you the effective range, but only for an unmodified strobe. If you’d like to use a diffuser to soften the light, your best bet might be to use the camera in Av mode and make adjustments via Flash Exposure Compensation. Increasing the ISO accomplishes much the same thing.

Pushing the ISO to 800 allowed more distance between the camera and the subject. Shutter speed was 1/4000 second, the Rebel’s maximum.
Toggling the same button that controls HIGH-SPEED Sync will access SECOND-CURTAIN Sync, a cool tool that fires the flash at the end of the exposure rather than the outset. If you wish to intentionally create a motion blur, flash at the end of a long exposure will freeze time at the end of the blur. The images will have a more realistic look to them. For the most realistic look, be sure all the lights are, or have been gelled to, the same color temperature.

MULTI STROBOSCOPIC FLASH
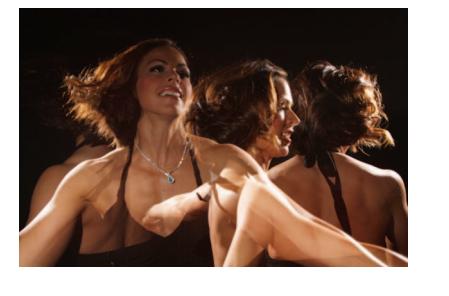
Multi Stroboscopic Flash is yet another option for the creative photographer. This mode gives you multiple, rapid bursts of strobe fires that freeze movement in multiple positions. Use the images for analysis, like a golf swing, or just for drama or fun.
This feature is just slightly more difficult to use than other modes, but it’s not that tough. You’ll need to determine the correct exposure strength of one flash, in Manual mode, that falls on your subject. Use an external meter or photograph a gray card, adjusting either the flash-to-subject distance or the strength of the flash until you get a perfect, centered, histogram. Make note of the correct power setting.
Now, press the Mode button until Multi is displayed on the LCD. Dial in the same power setting.
For moving subjects that will not significantly overlap, decide how many times the flash should fire, and use the Dial button to find the burst number (it will blink when selected) and the dial to select the number of flashes that will make up the burst. Note that finding a lower power setting at the start of the process will allow for more flashes.
The Hz setting determines the speed of the burst. Higher Hz numbers mean shorter times between flashes but they also require more power, which is another reason to use a lower power setting if possible.
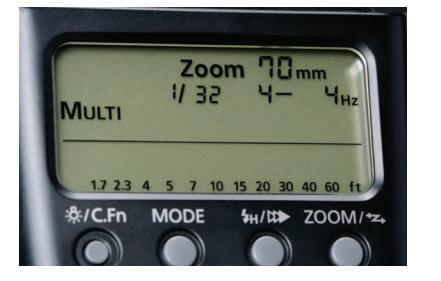
To find the correct shutter speed for your image, divide the number of flashes by the Hz rate. In this case, the number of flashes is four, as is the Hz rate: 4/4 = 1. The shutter speed needs to be at least a full second long. For this image, I used two additional units for the side highlights.
SPEEDLITES IN STUDIO OR LOCATION
Speedlites can talk to each other and, like humans, can set each other off. You can connect a network of Speedlites together for a basic portrait light setup or to provide accent and background lights for a wedding or other such event. Although Speedlites are small, specular sources, they are, like all auxiliary lighting, tools to boost your creativity and realize your vision. It’s simply a matter of how you work with them and how you get them to do what you want.
Earlier 580 Speedlites have a switch on the bottom, just above the shoe mount, that assigns the role of Master or Slave to individual units, but the 580 EX II Master/Slave selection happens in the Speedlite’s menu. The unit on the camera is always the Master, and with it, you can control every other Slave unit. Now, there are some caveats. Because the Slave units must “see” the camera unit, you are limited to a spread of 40? left and right of the lens axis. You will also need to tilt or swing each flash so the infrared signal window (the red window on the front of the unit) is facing the Master. This 80? total is the limit of the infrared signal that the Master will transmit. Working with multiple Speedlites outside, according to Canon, gives you a maximum working outdoor distance of about 26 feet, indoors, almost 50 feet. These are average results, and yours may vary, so test any setup before your put your money on it.
You can program Flash Exposure Compensation, High-Speed Sync, Stroboscopic Flash, or any other feature of the Speedlite (with the exception of Second-Curtain Sync) into the Master stand that the same settings will be applied to each of the Slave units. For many images this is totally acceptable. Wedding and event photographers often set several Slave units on clamp mounts in multiple locations in a reception hall, to illuminate backgrounds or add hair lights to create depth and dimension to their images. Should you decide to mak change to the Master, such as adding or subtracting ![]() stop of exposure value, the change will be made symmetrically to every Slave unit, although they can be ratioed separately against each other.
stop of exposure value, the change will be made symmetrically to every Slave unit, although they can be ratioed separately against each other.
SHOOTING TIP
The little stand, the foot, provided with the 580EX II, is best used when the strobe can be placed on a flat, level surface such as a floor or shelf. If you want to place the unit on a stand and have the ability to change its angle, check out the R 4130 Umbrella Stand Adapter from Norman (www.photo-control.com). It’s inexpensive and you can thread an umbrella through it, turning your Canon flash into a broader, softer source. If you find yourself in a pinch and need to position another flash at an angle, just screw the foot onto your tripod and use its controls to angle the flash where you need it.
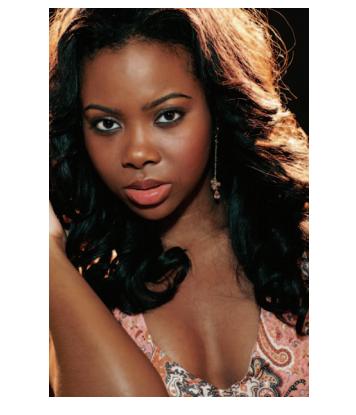
I’m not a fan of on-camera flash as a key (main) light, although I’ll admit I’ve made beautiful shots that way. I much prefer to have my key light off-camera, set to camera right or camera left, just to give my subject dimension by throwing a nice shadow. When I do have the Master on-camera, I prefer to use a modifier. The key light for this shot of R&B singer Sahata was modified with the Ultimate Light Box. The Slave units, slightly behind and to the sides of her at camera right and camera left, were gelled with orange.
Canon allows you the option of prohibiting the Master unit from firing, even though it will still send out a signal flash to alert the other units. Being able to disable the Master is an extremely valuable feature because it frees you from the flat-light look that’s so common to on-camera flash images made without modifiers.
For studio or location, a nifty trick to increase the apparent size of the light is to place a translucent diffusion screen close to the subject and place the flash a few feet behind it. When the screen lights up from the flash, it acts as a softbox and becomes a softer, broader source. It is best, in my opinion, to set the flash on Manual and meter with an external device. For this image, the on-camera Master was disabled, with only the Slave firing. An additional white bounce panel was placed at camera right.

MACRO TWIN LITE
Canon makes two special accessory flashes, the Macro Twin Lite and the Ring Lite. Each is mounted on the lens and meant to be a closeto-the-lens source. Although they are similar to the popup flashes of the Rebel, in that they are next to or around the lens, the Twin Lite is a two-light source that can be controlled, whereas the Ring Lite is a bi-tubed, split circle of light around the lens. Both have applications for anyone who wishes to expand his or her visual vocabulary.
Should you be one of the many shooters looking for an edge over your competition or just someone looking for a cool and unusual accessory, check out Canon’s Macro Twin Lite MT24EX.
The first thing you’ll notice, of course, are the dual strobe heads, designated A and B. Mounted on a ring that is, in turn, mounted on the lens barrel, both heads can be moved in
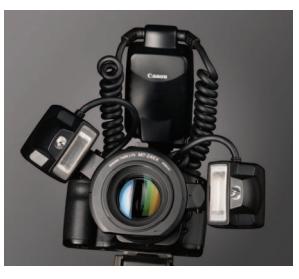
tandem around the lens or moved independently by pushing a small release button to any other position. Additionally, each head swivels on its own mount, allowing you to place head A at an angle of 45°to the lens while positioning head B at, perhaps, 75° Being able to move the two heads separately gives you a great deal of control. Think of one head as the key light and the other as the fill. You may wish to use a hard angle for the key and a lesser angle for the fill, which produces a lighting scenario impossible to achieve with other macroflashes such as ring lights.
In E-TTL, each head can be ratioed against the other, allowing even more control of key (head A) to fill (head B), up to three stops in either direction. Note that, on the back of the unit, the ratio is marked as A:B. This cannot be changed, which is why the ratio scale runs from 8:1 (A being three stops brighter than B, and B is the correct f-stop according to E-TTL) to 1:8 (B now being three stops brighter than A, according to the E-TTL computations). Because the two lights are so close together, the actual difference is a blend of the two lights, although one will be truly brighter than the other.

Relatively strong for a macrolight, with a guide number of 78 (in feet, 24 in meters), this innovative flash does a terrific job lighting a wide variety of subjects and works well in both E-TTL and Manual modes. In some situations, it’s even strong enough to overpower the strength of the sun when a subject is fully backlit and close to the camera, a feature that gives you a great deal of versatility within the realm of your work.
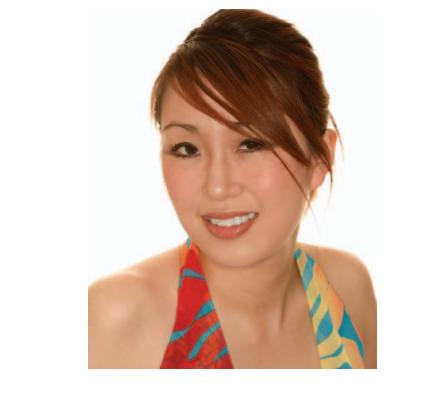
In the studio environment, the Canon Twin Lite makes a terrific key light for snappy, on-the-fly headshots whether you use it with other Speedlites, using the built-in infrared triggering device, or simply to set off studio packs. My Twin Lite was set to a 1:4 ratio, with the upper flash being dominant. Notice how nicely the lower strobe fills in the small shadow under the chin.
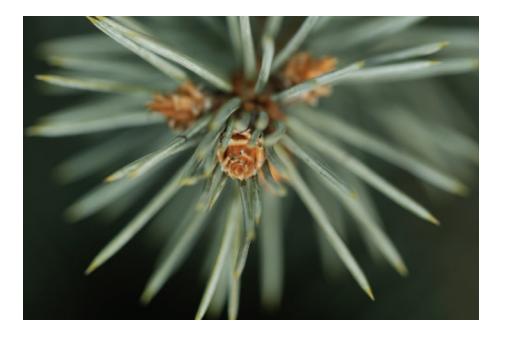
Foliage in deep shadow can be easily photographed in relief with the Twin Lite. This image, made in E-TTL at f5 in Manual mode and with a 100 mm macro, shows just enough depth of field to give the viewer a strong impression of shape and form.

I was able to overpower the strength of the sun by setting my aperture to f32 and letting the E-TTL function of the Twin Lite throw more light at the subject than the ambient light would ever show. Be aware that proper eye protection is necessary when making images when full sunlight can shine directly into your focusing eye. An optic nerve is a terrible thing to waste.
RING LITE
Canon’s Ring Light, MR-14EX, like the Canon Twin Lite, is built to fit onto the 58 mm front of the 100 mm macro, but you can buy stepdown or step-up rings so that the flashes can be mounted on lenses with filter diameters other than 58 mm. Because it can act like a continuous flashtube around the lens, it can produce a beautiful, virtually shadow-free light onto any subject. However, the strobe tube is not a single piece, but rather two semicircular tubes that can be proportioned against each other to create a key:fill ratio.
Even though it wraps around the lens, the light it throws is not shadow-free. Instead, a small shadow is formed, symmetrically, around the entire periphery of the subject. The width of this shadow is controlled by the distance of the subject to the background, which many photographers exploit as a compositional element. Canon’s ring light, though certainly usable for fashion photography, is also extremely useful as a macrolight. Insurance documentarians and collectors use it routinely, as it adequately represents the planes of important artifacts well enough to establish monetary value. The light is flat but modeled enough so it sees cosmetic damage easily.

Most of Canon’s Speedlites work together as a wireless unit, which means you could set up a portrait shot using a Ring Light as the key, a Twin Lite to accent the hair, and a head-modified, standard flash for the background, controlling all of them from a Master flash on camera that you’ve set not to fire.
There is so much more to Canon’s Speedlite system than first meets the eye. Yes, the gear is more expensive than similar equipment from a third-party manufacturer, but the other stuff can’t do as much or talk to the camera like native equipment can. If you have doubts about what a Canon flash can do for you and your camera, rent or borrow one for a weekend. Make sure you have the instruction manual. Play, and don’t be afraid to mess up. Working with flash is not a trouble-free experience, but I know that when you understand the system, you’ll be a true believer.
CAMERA ACCESSORIES
One of my favorite accessories for the Rebel is the remote switch, RS60E3. In the studio, if I’m shooting reflective subjects, I may need to duck behind a black shield so my reflection won’t be picked up. This accessory allows me to stand at least 3 feet away from the lens. Additionally, if I’m shooting time exposures with the mirror locked up, I can trip the shutter when I’m ready without having to touch the camera and possibly shake it.

You can extend the shooting limits of your Rebel by purchasing the BG-E5 Battery Grip accessory. The BG-E5, unavailable for photography at the time of this writing, can be purchased with either the BGM-E5L magazine, which holds two LP-E5 batteries, or the BGM-E5A, which draws power from AA batteries. For those of you who need more image capabilities but shoot locally, I would lean toward the BGM-E5L because it can be recharged hundreds of times. For those of you who like to hike through the wilderness, the BGM-E5A would be a better option, as it’s easy to carry additional AA batteries with you or purchase them as you go.
Don’t like batteries? The aforementioned power adapter, CA-PS700, allows you to run your camera off household power.
Charge your camera’s battery in your vehicle with the CBC-E5 Car Battery Charger. This is an invaluable accessory if you frequently travel between shoots and have time to top off the battery.
Another favorite is the Angle Finder C, a right-angle viewfinder that allows you to see through the lens even if you’re backed into a corner. You can also use this accessory to look and focus over a crowd, using the camera much like a periscope.
There are many other accessories, too. Check the Rebel’s manual to see what’s best for you.
PRINTERS
Canon manufactures a full line of printers, ready for whatever job you care to throw at them. Smaller units, available as inkjet or dye sublimation printers, will do a great job for 4 × 6 prints. Canon’s larger units, available as inkjet printers only, can be used to print images up to 36 inches wide, with a length limited only by the limits of your computer or the length of the paper roll or single sheet. All Canon printers are PictBridge enabled, which means you can tether your camera directly to the printer and make prints straight from the SD card.
OTHER ACCESSORIES
So many manufacturers are creating tools for you that it’s impossible to list them all or to explain what their goods might do for you. Be assured that, whatever you like to shoot, you’ll find tripods, bags, or gadgets to fit your shooting style. For example, you can readily find shoulder bags, backpacks, or rolling gear backs to carry virtually any configuration of equipment. A little more research will turn up a myriad of tripods, monopods, and specialty pods, from an 18-inch extension to one that is 12 feet or higher. It’s all up to you.
I’ve assembled a list of favorite website links for photographic gear and photographic help, which you’ll find at the back of this book. Feel free to surf through them or use your file browser to find others. Take some time to search before putting your money down—there are always alternatives, some of which might do a better job for you than your first choice.