
11. Shooting Video
Because Everything in Front of the Lens is Moving
It’s now rare to find a digital camera that does not record video, and in the case of the EOS M, the high-definition (HD) video is quite impressive. I wouldn’t go so far as to say you could completely replace a digital camcorder with it for some situations, but the EOS M is currently my favorite video-recording device for grabbing clips on the go or capturing short projects. Capturing video entails most of the same techniques covered in this book, but as you’ll discover, wrangling moving pictures requires a few extra considerations that I cover in this chapter.
Shooting Video
To get started, turn the Mode dial to the Movie shooting position (Figure 11.1). Just as with shooting still photos in Auto mode, the camera attempts to make adjustments automatically before starting to record video. Some aspects—such as manual focus and, to a limited extent, exposure—can be adjusted before you start recording. Just don’t expect to wield the same degree of control over video that you enjoy over still photos.
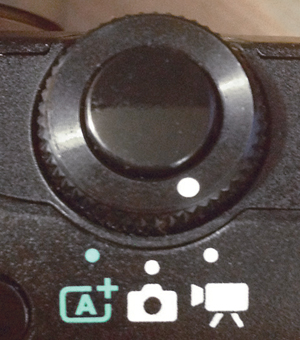
Figure 11.1. Movie mode
Capturing Video
1. Compose your shot, and then tap an area of the screen to set the focus. You can also press the shutter button halfway to lock focus.
2. If you’re not happy with the camera’s light meter reading of the scene, use the Exposure Compensation control to brighten or darken the shot.
3. Press the Movie Start/Stop button to begin recording. A red indicator ![]() appears to let you know you’re recording live, along with a count of the time elapsed (Figure 11.2).
appears to let you know you’re recording live, along with a count of the time elapsed (Figure 11.2).

Figure 11.2. The EOS M takes a no-frills approach when actually recording video.
4. To stop the video recording, press the Movie Start/Stop button a second time.
Video Quality
The highest-quality video setting on your EOS M will render high-definition video with a resolution of 1920 x 1080, also referred to as 1080p; it will also capture at 1280 x 720 pixels, known as 720p. The “1080” and “720” represent the height of the video image in pixels, and the “p” stands for progressive, which is how the camera records/draws the video on the screen. A lower-resolution video setting, 640 x 480, is also available, which requires less storage space on a memory card. Unless you have a specific need to shoot in the lower quality, I recommend sticking to the HD sizes; you can always downsize the video on a computer later.
The other thing to consider when selecting a quality setting is the capture frame rate. At the 1920 x 1080 size, you have two frame rates to choose from: 30 frames per second or 24 frames per second (fps). The 30 fps setting is more of a TV standard and complies with the NTSC video standards used in the United States. This should be your choice for most of your video recording. If you are going to use the video for DVD or for movies with a “Hollywood” look, you should go with the 24 fps option.
The 60 fps on the 1280 x 720 option should render smooth video sequences, but they might also look a little like slow motion. One reason for using this frame rate is that it helps with fast movement of the camera or subject.
Setting the Movie Quality
1. Press the Quick Control button.
2. Tap the Movie record size option (A).

3. Select the desired movie quality setting by tapping one of the options or pressing the Left or Right cross key (B).

4. Press the Set button to return to Movie mode.
Sound
The EOS M can record audio to go along with your video, but there are a couple of things to keep in mind when using it. The first is to make sure you don’t block the microphones on the top of the camera, to the left of the hot shoe (Figure 11.3).

Figure 11.3. The EOS M’s built-in microphones
The next thing you need to know about the sound is that because the microphone is part of the camera, any noise that the camera makes, such as when it’s focusing the lens, will be audible in your movies. If you find that the lens focus noise is distracting or you plan to add your own soundtrack to the video at a later time, you can turn the audio recording off.
Turning Off the Sound
1. Press the Menu button and navigate to the movie-shooting tab.
2. Highlight Sound recording and press the Set button (A).
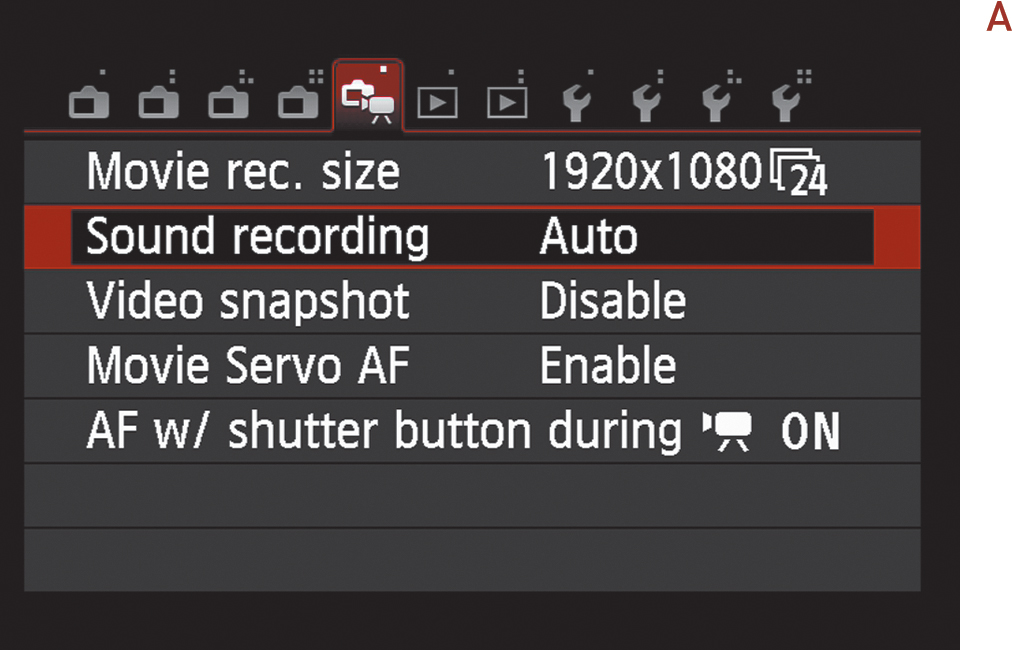
3. Select the Disable option, and press Set to lock in the change (B). Press the Menu button to return to recording mode.
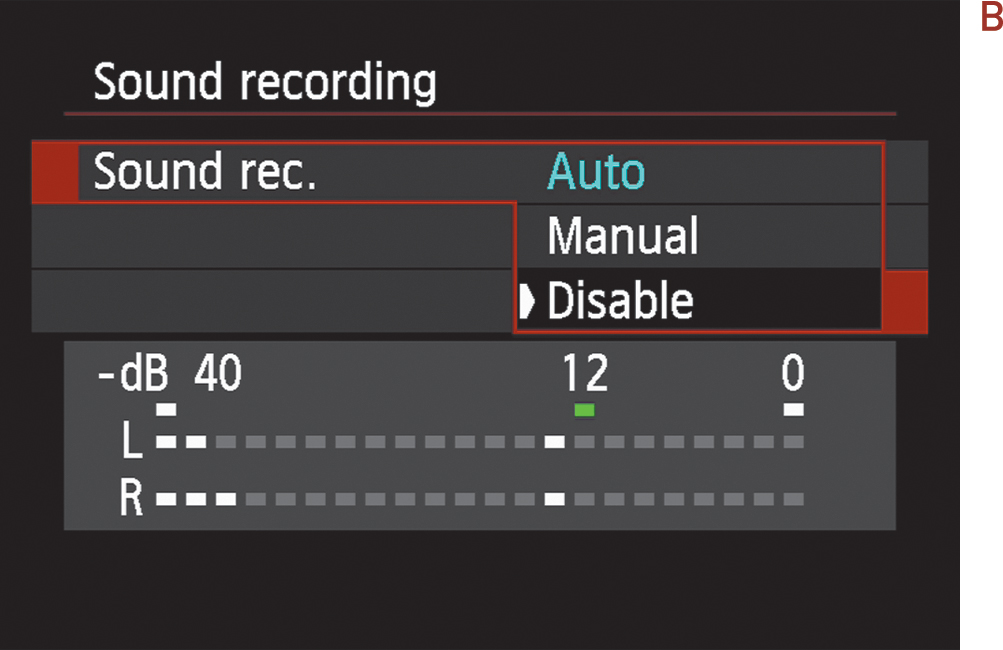
That same menu also allows you to manually adjust the sound input, which can be helpful if the surrounding audio is too loud or soft. Watch the audio levels—if they’re consistently yellow or red, you’ll want to reduce the overall volume. You can also enable a wind filter and attenuator to bring levels in line; these options are available in both the Auto and Manual sound-recording modes.
Better Sound for Your Movies
If you want to eliminate the camera noise that comes with recording sound with your camera, consider using an external microphone. You gain much more control over the quality of the audio because the mic is separate from the camera body and its sole purpose is to record audio. There is a growing market of microphones for DSLR cameras, including mics with hot shoe adapters that allow you to mount the mic to the camera so you can record without having to hold it.
Another advantage of using external microphones is that you can use ones that are designed to do a better job of recording directional audio, such as that coming from subjects in front of the camera. Most of these microphones are long and slender and are referred to as shotgun mics.
Focusing the Camera
The EOS M uses a focusing system it calls Movie Servo AF, which can refocus the scene during recording. If your subject moves closer to or farther from the camera position, it will be necessary for you to refocus in order to maintain sharp focus. Tap an area on the LCD to specify the focus point—I recommend using the FlexiZone – Single focus mode for better control. If you don’t specify a focus point, the camera will continually maintain focus on wherever the focus box is placed.
However, that can be problematic when recording video, because the image “bounces” as the camera adjusts the lens to find focus. So even if you’re shooting a stationary subject, small changes (a person leans slightly forward or back, for example) could cause a distracting refocus. If that’s the case, tap the Servo AF button in the lower-left corner to temporarily turn the feature off.
Movie Servo AF can be disabled in the menus (under the movie-shooting tab). When it is disabled, the only ways to focus while recording are with a half-press of the shutter button or by switching to manual focus (MF) mode and using the focus ring on the lens.
Capturing Video Snapshots
So, what if you don’t need more than a short video clip, say, 4 seconds or so? Or perhaps you want a longer sequence that is made up of smaller video clips. Well, you might want to consider setting up the Video Snapshot feature. When this is activated, you can be in Movie mode and then press the Record button to grab a small snippet of video (2, 4, or 8 seconds in length). Once the camera has completed recording, you can save the clip to an album. You can add additional video snapshot clips to the album to create one longer video from the snapshots. This feature allows you to make some very creative video sequences right in your camera.
1. Press the Menu button and navigate to the movie-shooting tab.
2. Use the Down cross key to select Video snapshot, and press Set (A).

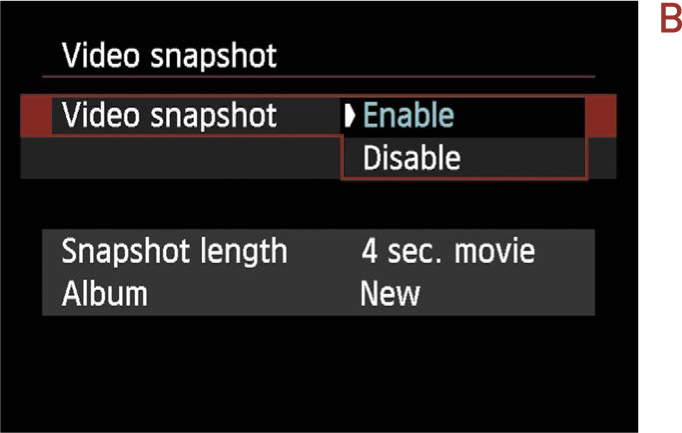
3. Select Video snapshot, press the Set button, and then select Enable (B) (if it’s not already selected) and press Set.
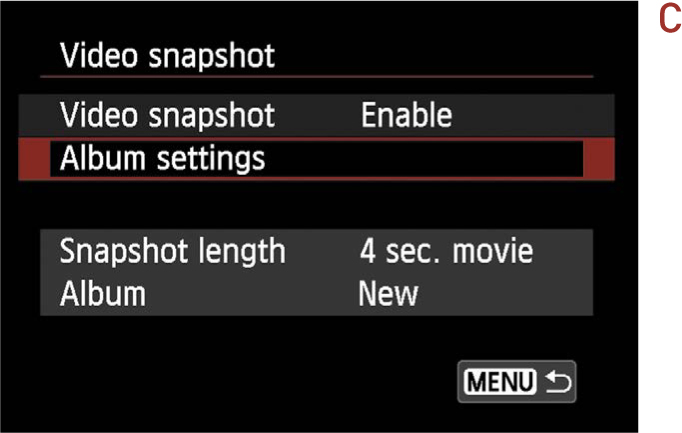
4. Select Album settings (C), and press Set.
5. Select Create a new album, and press Set.
6. Press the Set button to view the Snapshot length options, and choose a clip length of 2, 4, or 8 seconds (D). Select OK and press Set.

7. Exit the menu by pressing the Menu button or pressing the shutter button halfway.
8. Set up your movie shooting just like you normally would, and press the Record button to begin the recording process. The video recording will cease once the time limit has been reached.
9. Now you can add the clip to your album, save it as a new album, play back the video, or delete it without saving (E).

Locking the Exposure Level
Not everything is automatically locked once you begin recording. The camera tries to dynamically compensate for exposure fluctuations (moving from bright to shaded areas, for example) as you record, which can often be a distraction. Fortunately, you can manually adjust and lock the exposure level before recording.
Setting the Exposure
1. With the camera in Movie mode, press the ![]() AE Lock button when the exposure level is to your liking.
AE Lock button when the exposure level is to your liking.
2. Press the shutter button to begin recording, or press the ![]() AE Lock button again to disable the lock.
AE Lock button again to disable the lock.
3. Once you do start recording, you can tap the Exposure Compensation button and adjust the exposure manually by pressing the Left/Right cross keys or tapping the + and – buttons that appear.
Capturing Stills while Recording
As you record video, pressing the shutter button fully captures a still image without halting the video recording. The photo is saved as a separate file, but there’s a catch: The camera pauses recording while processing the image, so when you watch the video you’ll find a 1-second freeze-frame of the event. Personally, I find that makes the feature useless.
Video Shooting Tips
From a technical standpoint, shooting video with the EOS M isn’t that much different from capturing stills. Instead, shooting video requires a slightly different mind-set.
Shooting Smooth, not Jerky
My best advice is to, as much as possible, take your time and be calm while shooting. If you whip the camera around like a caffeinated toddler, you’ll end up with blurry, nausea-inducing footage. Be deliberate about holding the camera steady and panning slowly and smoothly. Your viewers will thank you.
If possible, set the camera on something when you need to move as you shoot. It’s possible to buy or make rail systems for making smooth dolly moves (a Web search will reveal lots of solutions), but don’t discount anything on wheels you may have at hand (Figure 11.4).

Figure 11.4. To pan across a scene, I pressed into service one of my daughter’s toy cars.
A Tripod Becomes More Important
Speaking of shooting smooth footage, a tripod can be even more important for capturing video than for capturing stills. With video, the motion of the camera is as noticeable as what’s in the frame. A tripod also gives you the opportunity to make sure the camera is level with the horizon. If a tripod isn’t available, I highly recommend activating the EOS M’s onscreen grid (found in the menus).
Shooting Extra Footage
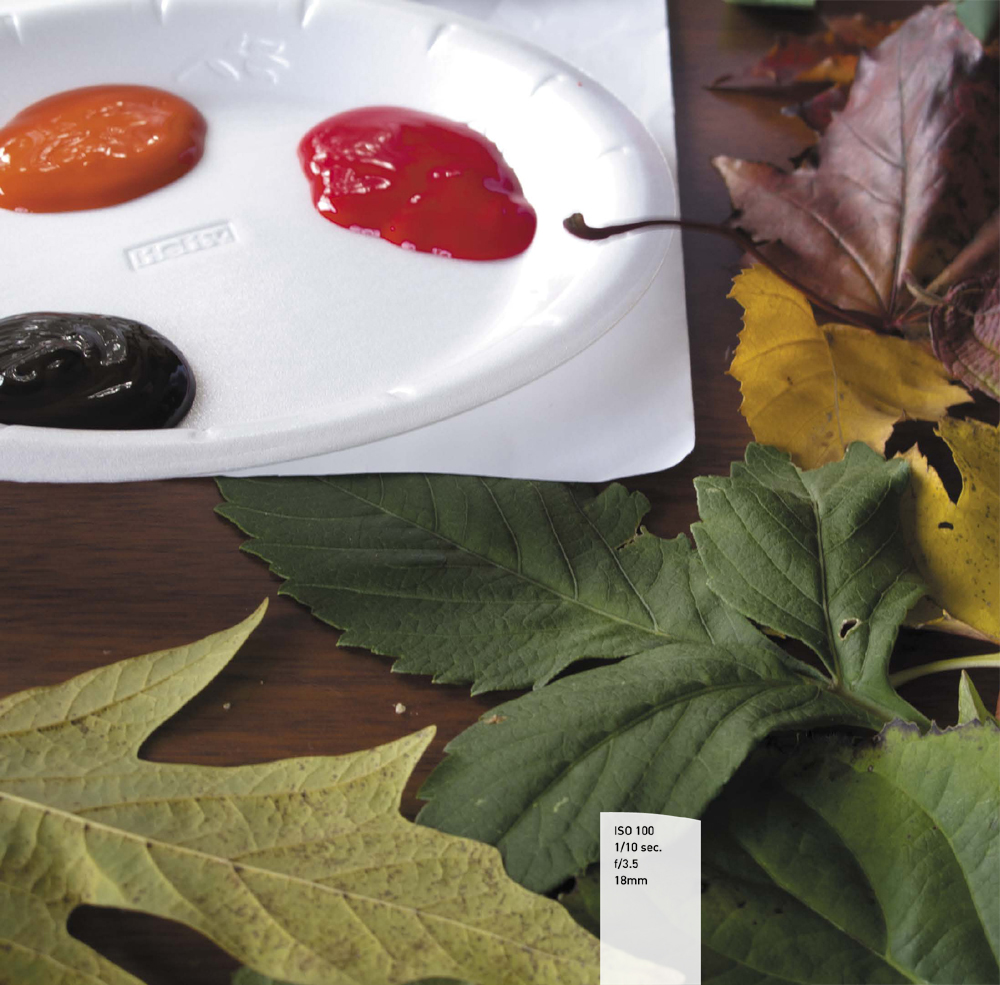
I’m assuming that you plan to edit your footage later, so here’s another essential tip: Shoot lots of video. Not just of the event happening in front of you, but of what’s going on around it. When my wife and daughter were painting leaves last autumn, I made a point to capture footage of visually appealing things nearby (Figure 11.5). A shot of a lone leaf against the blue sky became a nice place to put a title, for example, and an overhead clip of the leaves and paints provided an establishing shot when segueing between gathering the leaves and painting them. These types of supplemental clips add flavor and texture to your movie.

Figure 11.5. Shoot plenty of extra video so you can add visual interest to your movie when editing it.
Watching Your Videos
There are a couple of options you can use to review your video once you have finished recording. The first is probably the easiest: Press the Playback button to bring up the recorded image on the LCD, and then press the Set button to start playing the video. The Left/Right cross keys act as the video controller and allow you to rewind and fast-forward as well as stop the video altogether.
If you would like to get a larger look at things, you will need to either watch the video on your TV or move the video files to your computer. To watch on your TV, you can use the video cable that came with your camera and plug it in to the small port on the side of the camera body (Figure 11.6). This will let you watch low-resolution video on your TV. To get the full effect from your HD videos, you will need to purchase an HDMI cable (your TV needs to support at least 720 HD and have an HDMI port to use this option). Make sure you purchase a Mini-HDMI-to-HDMI cable, since the camera does not use a standard-sized HDMI jack for outputting video. Once you have the cable hooked up to your TV, simply use the same camera controls that you used for watching the video on the LCD.

Figure 11.6. The video ports on the EOS M
If you want to watch or use the videos on your computer, you will need to download the images by using the Canon software or by using an SD card reader attached to your computer. The video files will have the extension “.mov” at the end of the file name. These files should play on either a Mac or a Windows PC, using software that came with your operating system or that can be downloaded for free (Apple’s QuickTime for Mac and Windows is available at www.apple.com/quicktime/download/). If you are using an SDXC card, make sure that you have a compatible card reader to attach to your computer.
Manual Callout
You can check out all of the video features of your camera by turning to page 177 of the EOS M owner’s manual.
Chapter 11 Assignments
Shooting video is fun and makes you stretch your photographer’s mind-set in ways you don’t when capturing still photos.
Recording some video clips
Set the video quality to 1920/30 (1920 x 1080 at 30 fps) and record a short sequence, and then try it with the 1920/24, 1280, and 640 settings.
Recording video snapshots
Enable the Video Snapshots feature and record a few 2-, 4-, or 8-second clips. Add them all to the same album and play back the result.
Locking the exposure
Shoot a scene with the EOS M in its automatic video mode, and then shoot the same scene using the AE Lock feature to see how the exposure levels change.
Grab extra footage
Spend some time intentionally shooting anything but the main focus of the video to see what kinds of footage you can bring to your editing software later.
Watch and enjoy
Open the video clips on your computer or hook the camera up to your TV, review the different video clips to see how the quality settings affect the video, and compare them to how they appear on the camera’s LCD.
Share your results with the book’s Flickr group!
Join the group here: flickr.com/groups/eosmfromsnapshotstogreatshots