4
Hands, Feet, and Accessories
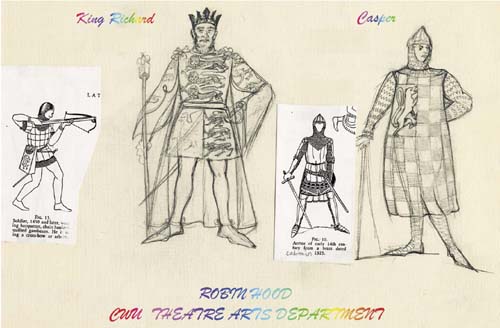
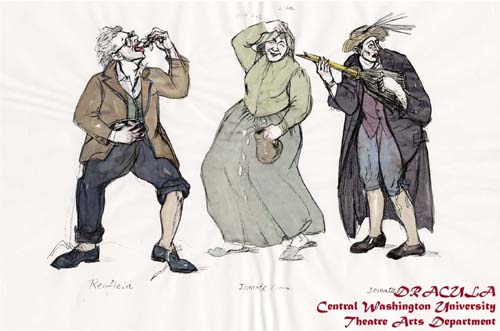
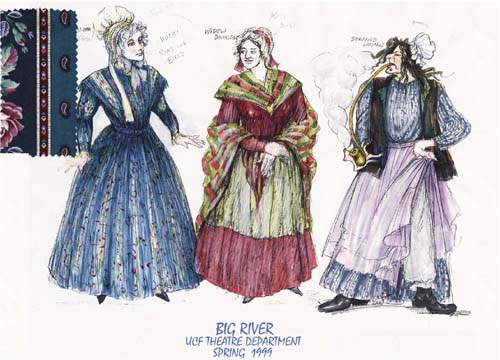
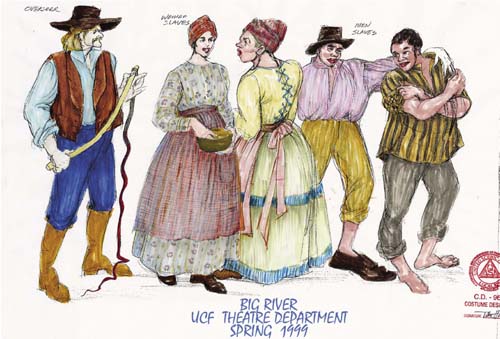
Incorporating necessary accessories such as hats, gloves, eyeglasses, jewelry, scarves, shoes, handbags, parasols, and so forth into costume-design figures is essential for completion of the design and displaying fashions of the time. Adding necessary props such as pipes, brooms, baskets, cooking accessories, instruments, and lanterns strengthens the activity and attitude of the character and can help to represent status, personality, and mannerisms. The props added with the character tell a story. The pose designed for handling the prop brings more excitement than just a standing figure without any props displaying the costume. Therefore, incorporating accessories or props into designs shows current fashion styles, completes the design, and creates a more dramatic and expressive demeanor for the character.
HEADS AND HATS
Hats are associated with fashion and the wearer's social attitudes and status. Hats are also worn as fashionable adornments, rather than just for warmth. How they are worn is a style of the time. There are three basic ways to wear hats: commonly fitted on the head, slanted at an angle, and high on top of the head. In Chapter 2, I discussed the proportions of the head and face in relation to the body. Now I will talk about adding hats in positions on the head. A hat has two basic parts: crown and brim. A common-fitted hat's crown attaches to the head's circumference; the tilted, angle-fitted hat attaches and conforms to the contour of the head; the hat sitting on top of the head attaches to the contour of the top of the head (the hat mostly sits on top of a hairdo). The following are suggestions for creating hats (see Figures 4-1 through 4-4):
![]() Complete the shape of the head and be ready to add a hat on the head.
Complete the shape of the head and be ready to add a hat on the head.
![]() Establish a contact line around the head.
Establish a contact line around the head.
![]() Build the shape of the hat—such as a crown, both crown and brim, turban, or other decorations or styles.
Build the shape of the hat—such as a crown, both crown and brim, turban, or other decorations or styles.
Completing the shape and position of the head is the foundation for creating and building the hat, because the head position affects the view of the hat. Some people do it the other way around. I suggest that you do the head first; I personally find it easier. Establishing a contact line around the head is the next step for drawing a hat. The contact line determines the look of the hat and how the hat sits on the head. The contact line for a common-fitted hat follows the circumference line of the head. The contact line for tilt-fitted hats follows the line you designed. It can be placed more forward, backward, or tilted to one side. Once you establish the contact line, the hat continues to be drawn from that. If the hat tilts forward, consider how much of the face needs to be covered. If the hat tilts backward or sideways, consider how the hat will stay on the head.
Figures 4-5 through 4-12 are design samples of headdresses.
4-1 Female Heads and Hats in Common Positions


4-3 Male Heads and Hats in Common Positions


HANDS, GLOVES, AND PROPS
The hand is complex in shape and therefore difficult to draw. Sometimes I hide a hand or hands in the pockets, behind the back, or I cover the hand with a scarf or coat. It is understandable to become frustrated when sketching hands, but you cannot hide hands forever. Once the character's hands are seen, we should allow them to tell a story and magnify and support the character's personality. As I mentioned, the hand is very complex, but it is not necessary to draw every detail. We are not capable of acting like a camera and catching every realistic detail. The complex details of hands can be simplified and reduced to a few basic lines and shapes. Sometimes the hands may just be a frame to suggest the action. Because of time restrictions during production periods, we all work under pressure and don't have much time to do everything in detail. Abstract hands work for costume designs, but they should be well proportioned and active.
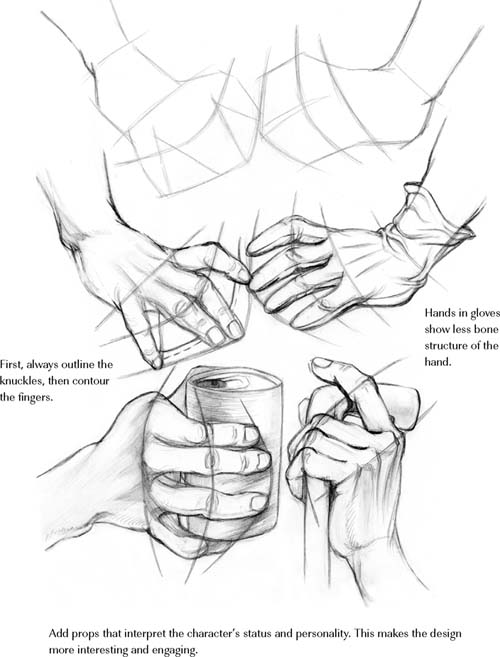
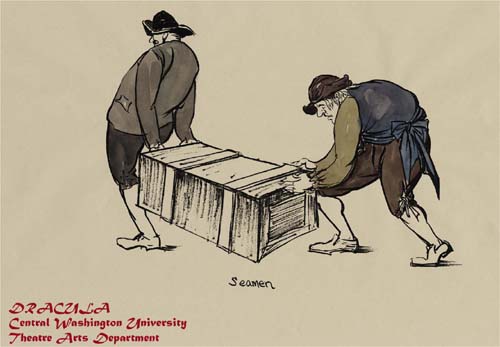
Adding accessories or props to hands portrays the personality of the character. They become part of my costume design, and accent the body's expression for a more dramatic and characteristic appearance. Accessories and props can be put on the body or held in the hands of the figure. Choosing an accessory or prop is based on the dialogue, actions, and characteristics of a particular role in a play. Pick the prop that interprets the character's status and personality. This makes the design more interesting and engaging, adds flavor and definition, and makes a clear statement about the character.
When drawing a gloved hand, the angular shapes of the knuckles diminish and look fatter than a bare hand. Wrinkles form on the glove when the finger knuckles and wrist areas bend or move. If long gloves are worn, wrinkles will form around the bent elbow area as well.
There are three things to consider before drawing a hand:
![]() Note the proportions of the hand in relation to the body.
Note the proportions of the hand in relation to the body.
![]() Pay attention to the knuckles to notice how the hand is formed.
Pay attention to the knuckles to notice how the hand is formed.
![]() Capture the angle between the hand and wrist.
Capture the angle between the hand and wrist.
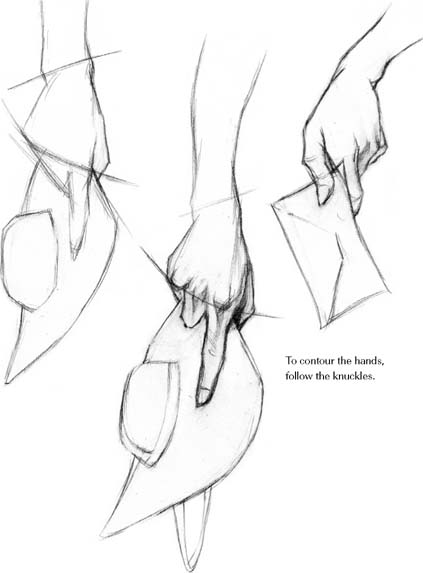
Correct proportioning of the hand facilitates proper hand size. If the knuckles line up correctly, they create a logical, graceful look to the hand. Inscribing an angle between the hand and wrist enhances the gesture action of the hand.
Hand Proportions
Hand size can be measured in relation to a person's face, as the hands and face are the most exposed parts of the body. For that reason, using the face as a measurement is more proper than using other body parts. The length of the hand, which runs from the tip of the middle finger to the bottom of the palm (at the wrist), approximately equals the distance from the bottom of the chin to the middle of the forehead. Naturally, of course, some people have smaller or bigger hands than this calculation.
The hand can be divided into two major sections: the palm mass and the finger mass, which are separated at the base of the fingers (see Figure 4-13). The middle finger is the longest finger. The length of the thumb is closest to the length of the pinkie finger. The first knuckle of the thumb is located at the midpoint of the palm mass.
There are two knuckles on the thumb, three on all fingers, and a wrist knob on the outer side of
4-13 Proportions of the Hand
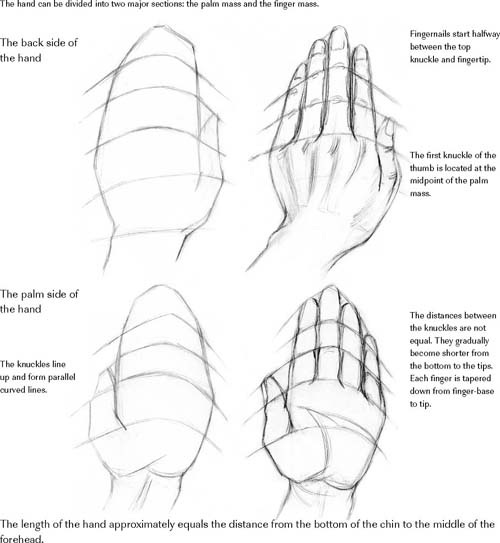
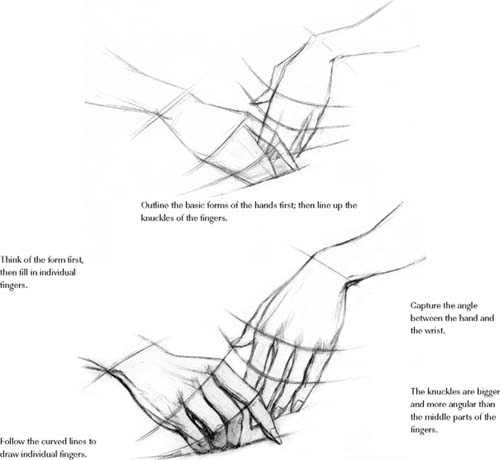
the wrist. The distances between the knuckles are not equal. From the bottom to the tip of each finger, the distance between the knuckles gradually becomes shorter. Each finger is tapered down from finger base to tip. Knuckles are bigger and more angular than the middle parts of fingers. Male knuckles are more massive and angular compared to female ones. Fingernails start halfway between the top knuckle and fingertip. Knuckles do not line up in a horizontal line but form parallel curved lines. Line up the knuckles before drawing individual fingers. Think of the form first, then fill in individual fingers. First define the bone structure of the hand rather than the soft flesh. The living hand has flesh, blood, and bone. Avoid hands that are too small.
Relationship Angle between Hand and Wrist
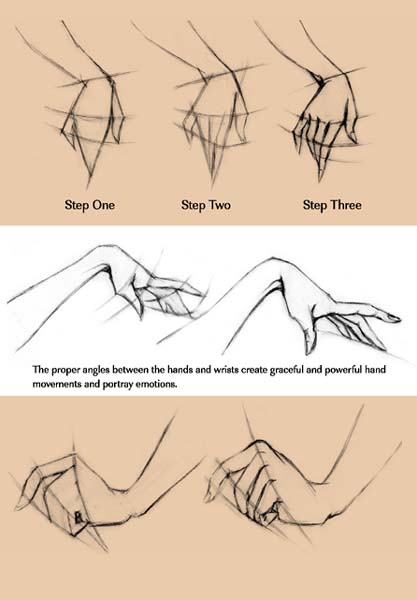
Most of the joints in the body can bend, twist, and rotate in different directions—within their limitations. The joint between the hand and wrist is one of them. It is capable of side-to-side and up-and-down movement. When movements take place, angles between the wrist and hand naturally occur. When drawing hands, bear in mind that hands are not isolated but are connected to the wrist, and each movement affects the wrist's movement. Thus, hands and wrists work as a unit. The proper angle creates graceful and powerful hand movements and poses. Focus attention to emphasizing the hand-to-wrist angle because achieving the precise action will effectively and favorably portray emotions. (See Figures 4-14 through 4-19.)
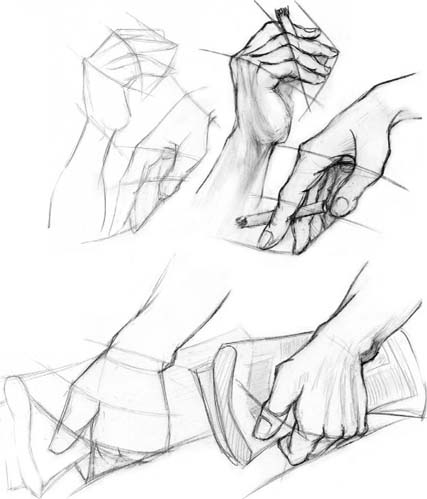
Figures 4-20 through 4-23 show design samples of hands and props.
4-14 Hand-Drawing Steps

4-16 Variation between Angles of Hands and Wrists
4-18 Male Hands with Props
FEET AND SHOES
Feet are another difficult body part to draw, but are still a bit easier to draw than hands. As with hands, studying foot proportions before drawing is the most effective and efficient way to learn (see Figure 4-24). In other drawing books, they say the length of the foot equals the length of the forearm when the arm is bent, which I have found to be true. Foot size relates to a person's height. Taller people have proportionally longer arms in comparison to their feet, compared to shorter people; this ratio adjusts accordingly.
When drawing feet, keep in mind the following:
![]() The inner side of the bottom of the foot forms an arch line in order to support body weight.
The inner side of the bottom of the foot forms an arch line in order to support body weight.
![]() The top of the foot also forms an arch line parallel to the bottom inner arch.
The top of the foot also forms an arch line parallel to the bottom inner arch.
![]() The inner side of the bottom of the foot is much thicker than the outer side of the foot.
The inner side of the bottom of the foot is much thicker than the outer side of the foot.
![]() The outer side of the foot is relatively flat as it touches the ground.
The outer side of the foot is relatively flat as it touches the ground.
![]() The heel of the foot is ball-shaped.
The heel of the foot is ball-shaped.
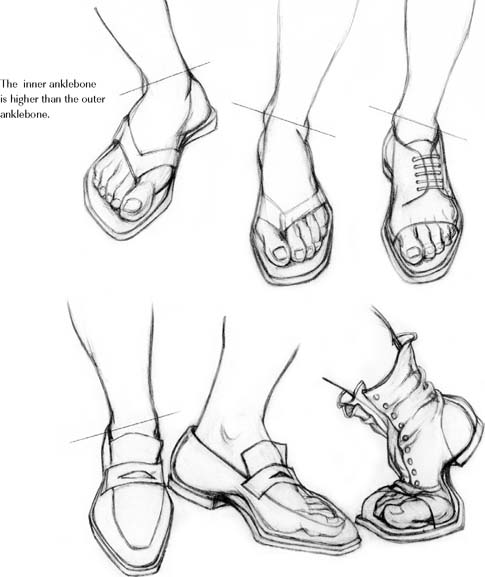
Ankle bones are the key in placing feet in proper position. The inner ankle bone is higher than the outer ankle bone in both females and males. Female ankle bones have smooth curves and male ankle bones are angular and big. When drawing feet as in drawing hands, the angle is very important.
Capturing the correct and proper angle of the ankle bone between the legs and feet makes the feet appear strong and lifelike. When drawing high-heeled shoes, the angle between the leg and foot diminishes to some degree depending on the height of the heel (see Figure 4-25). The taller the heel, the smaller the angle.
4-24 Proportions of the Feet
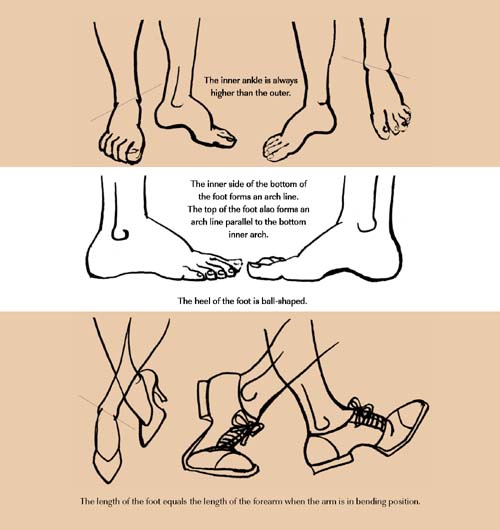

When checking feet for size and shape, keep in mind:
![]() Use the correct length/proportion/size of the feet in relation to the body.
Use the correct length/proportion/size of the feet in relation to the body.
![]() There are arch lines at both the top and bottom of the foot.
There are arch lines at both the top and bottom of the foot.
![]() Make ball-shaped heels.
Make ball-shaped heels.
![]() Use correct angles at the anklebones.
Use correct angles at the anklebones.
![]() The inner ankle is always higher than the outer.
The inner ankle is always higher than the outer.
Shoes are made to fit the feet. Once you know how to draw feet, the shoes will simply be drawn over the feet. Figure 4-26 contains a few sketches showing the feet and shoes overlapping each other. You are able to see the foot beneath the shoe, and hopefully this helps you to understand how the shoe fits the foot. Be aware that the soles of shoes are like feet: inner soles of shoes have deeper curves, and outer soles of shoes are relatively straighter with shallower curves. The deep and shallow curves show which shoes are right or left. Figures 4-27 through Figure 4-314-31 are design samples of feet and shoes.