Chapter 1. Installing Linux
This chapter covers the following topics:
Installing Linux
Using virtualization
While installation of Linux is not a stated topic in the current version of the Linux+ exam, in order to learn Linux, you must install it. You often need to reinstall it as you make mistakes and learn lessons.
In addition, the Linux+ exam isn’t concerned with the exact procedure to install Linux because it varies between Linux distributions and is constantly changing. The exam is more focused on what happens to your Linux systems after they are installed.
Because of this focus, this chapter lacks “‘Do I Know This Already?’ Quiz” and “Review Questions” sections that begin and end the other chapters in this book.
This chapter is concerned primarily with setting you up for your success studying Linux as an operating system by showing you how to
Pick a virtualization option
Use ISO files as an installation source
Use snapshots
Install a Linux distribution into a virtual machine
Foundation Topics
Hardware and Linux Installation
Becoming proficient with Linux starts with understanding the hardware that runs the operating system. Linux has had a bumpy history of hardware support because it was originally written with no help from the manufacturers. Over time hardware support has become better, and compatibility information has become easier to find. At one time, it was common to have to spend long nights poring over message boards to find someone else running the same video card. Thankfully, such problems have become increasingly rare.
In general, you can expect excellent compatibility on most server hardware and on recent generations of desktop hardware. If you buy only the newest, most cutting-edge (that is, the most expensive) equipment, you might find that you need to do a bit of extra reading and troubleshooting to get things to work.
We recommend using a virtualization tool such as VMware Workstation, VMware Fusion, VirtualBox, or KVM. If you do, you will have much less to learn about troubleshooting hardware issues because you will be using mainly software on top of the physical laptop or desktop you use as a virtualization system.
Typically, a chapter on Linux installation would discuss a system’s hardware and how that hardware is treated and recognized by Linux; it would cover the motherboard’s various components and how they are connected via internal buses as well as how peripherals are connected to the system via external buses such as USB, SCSI, and others. We don’t need to do that in this chapter, though, as Linux makes a fantastic virtualization client, and when you install a Linux distribution into a virtualization environment, you can choose from a set of preconfigured options the components you want Linux to discover and use. For example, most virtualization environments include options for disk drives that include the SCSI interface as well as the IDE interface.
Oracle’s VirtualBox environment gives you seven different possible disk controller options, the most common being IDE, SCSI, and SATA. The choices for storage controllers in Oracle’s VirtualBox virtualization application are as follows:
Add IDE Controller
Add SATA Controller
Add SCSI Controller
Add SAS Controller
Add Floppy Controller
Add USB Controller
Add NVMe Controller
Installing Linux as a Study Tool
Many years ago, learning an operating system was an exercise in physical devices, and a big part of it was operating system installation and reinstallation. It typically included a lot of waiting for files to be copied and troubleshooting of errors or misconfigurations. This frustrating process was mainly due to the need to install directly onto a physical system; virtualization environments had not yet become widely available.
The process is much easier today. Now you can download a virtualization environment or helper application, download an ISO file of your selected distribution, and have Linux installed and ready for use in as little as a few minutes.
Ideally, you want an environment that doesn’t require a lot of long wait times or troubleshooting issues. This chapter looks at some recommendations for getting started.
Setting Up a Virtualized Environment
The following sections detail the items you need to build a virtualized study environment. Keep in mind that these are simply recommendations, and you can stay with them or go as far in your own direction as you prefer. Most of all, remember that the goal is to get Linux installed and enable snapshots so you will be able to go back when needed. The suggestions in this chapter help you make this process easier on yourself.
Virtualization Host System
You need a computer—either a desktop or a laptop—with sufficient specifications to be a reasonable virtualization environment host. We recommend the following specifications as a minimum:
Processor: Use a recent AMD- or Intel-based desktop or laptop (not a Chromebook).
Host operating system: The host OS is typically Windows, Mac OS X, or Linux, though VirtualBox supports Solaris and OpenSolaris as well.
Memory: You need at least 2GB to 4GB of RAM for the main operating system, plus 1GB or more for each of the virtualized instances of Linux.
Hard disk: Virtualization environments are pretty small compared to an entire operating system, so plan to allocate about 10GB to 20GB per virtualized instance of Linux.
Network device: It used to be very important what network card or device you chose, but today, as long as you have a network device that can be assigned an IP address in your virtualized environment, that should be enough.
Guest operating systems: Because this is a book about learning Linux, we don’t discuss any virtualization environments that would not host a guest running Linux.
Installation Media Options
While you can likely still find physical installation CDs or DVDs, it’s recommended that you download ISO files (an image of a CD or DVD) either from a Linux distribution vendor’s site or from various trusted sources.
Note
You should download and install at the very least two Linux distributions: one of the RPM package style and one of the DEB package style. This is critical, because the Linux+ exam requires you to know installation/configuration/removal methods for both package formats, and you need to know how to update packages and installations on both package styles.
One of the most trusted sources of Linux distros is the amazing and very active Distrowatch.com (www.distrowatch.com), which has been in business for almost 18 years at the time of this writing, serving countless pages of Linux distribution news, tutorials, and links to the many distributions, large and small, popular and obscure.
Of course, you can go to the website of a commercial Linux vendor and get a copy of the latest offering of its community (no subscription fees) edition. The following are a few examples:
In addition, there are literally hundreds and maybe even thousands of possible Linux distributions that you can download, install, and use to study for the Linux+ exam.
Installing Linux is important, but it’s become less and less of the total Linux experience these days, and it doesn’t tend to take an inordinate amount of time. As mentioned earlier, Linux installation isn’t really covered on the Linux+ exam. Therefore, this chapter shows how to do a couple sample installations so you can decide whether you want to go further with other distributions.
Downloading ISO Files
To download an ISO file of your favorite distribution, go to the download page, click on the latest version, choose 64-bit if there’s a choice between 32-bit and 64-bit, and then save the ISO file to your local system’s drive.
This section walks through downloading an RPM package (openSUSE) and a DEB package (Ubuntu).
Downloading an openSUSE ISO for Installation
To download the RPM distribution, navigate in your browser to www.opensuse.org and hover over the Leap green text on the right side of the page, and then click on the Install Leap link that shows up.
Figure 1-1 shows the download page for openSUSE’s Leap distribution.

FIGURE 1-1 Download page for the openSUSE Leap distribution
The main Leap download page then shows up. Notice that you can use the default Installation x86_64 source at 3.6GB, and you can leave the Network Image setting alone for now (unless you already know what you are doing with a network install).
The Live x86_64 link in the middle right of Figure 1-1 is for when you want to use a Live distribution, which is a distro that will only use your system’s memory and will not be installed to the hard disk.
Choose one of the green links under the DVD Image (3.6GB) header to start downloading the ISO file. The Direct Link option is the most straightforward, so use that one if you are not familiar with mirrors or torrents.
When the Save or Open dialog opens, choose to save the file—and remember where you put it. It is a good idea to put all your ISOs in a common /home/iso folder or, if on Windows, somewhere in your file structure that makes sense to you.
Figure 1-2 shows the dialog that pops up for saving the ISO file to disk on a Mac.
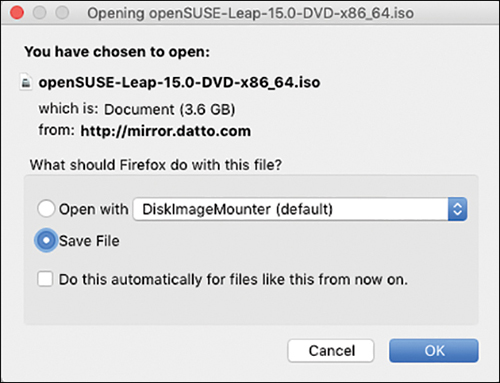
FIGURE 1-2 Saving an openSUSE ISO file to disk
Downloading an Ubuntu ISO for Installation
Selecting and downloading an openSUSE distro is easy, but getting an Ubuntu distribution is even easier: Navigate to www.ubuntu.com and click on the Download menu, and choose the Ubuntu Desktop LTS (Long Term Support) version listed there. When a dialog pops up, you should choose to save the ISO file to your preferred location on your local disk.
Installing an Ubuntu Virtual Machine
This section shows how to install Ubuntu inside VirtualBox. You need to either download and install VirtualBox or use the virtual machine environment of your choice.
Note
The VirtualBox documentation is comprehensive and excellent, and you should open the online version of the manual before beginning to work with the software (see https://www.virtualbox.org/manual/UserManual.html).
Creating the Virtual Machine
Follow these simple steps to create the virtual machine:
Note
To keep this section brief, we show screenshots only when really needed.
Step 1. Start the VirtualBox application and click the New icon at the top left of the VirtualBox interface.
Step 2. On the Name and Operating System screen, enter
a. ubuntustudy
b. Type: Linux
c. Version: Ubuntu (64-bit)
Step 3. Click Continue.
Step 4. On the Memory Size screen enter 2048 in the textbox and click Continue.
Step 5. On the Hard Disk screen, choose the Create a Virtual Hard Disk Now selection and click the Create button.
Step 6. On the Hard Disk File Type screen, make sure VDI (VirtualBox Disk Image) is selected, and click Continue.
Step 7. On the Storage on Physical Hard Disk screen, select the Dynamically Allocated item and click Continue.
Step 8. On the File Location and Size screen, ensure that ubuntustudy is entered in the textbox, ensure that the size is set to 10.00GB, and click Create.
The main Oracle VM VirtualBox Manager window reappears, and you should see the ubuntustudy virtual machine in the left panel. At this point, the virtual machine should be powered off.
Attaching the Distribution ISO
Ensure that the VirtualBox application is running and that you can see the ubuntustudy virtual machine in the list on the left. The ubuntustudy VM should not be powered on for this stage. Follow these steps:
Step 1. Right-click the ubuntustudy virtual machine and select Settings.
Step 2. When the Settings screen appears, click on the Storage icon, and then click the small CD-ROM icon with the green + on it that is slightly to the right of the Controller: IDE Storage Device to add an optical drive.
Step 3. When prompted about adding a new optical drive to the IDE controller, click the Choose Disk item to open a file chooser dialog.
Step 4. Navigate to the location of your ISO file for Ubuntu 18.x, click on the ISO file, and click the Open button.
Step 5. When the system returns to the Storage dialog, confirm that the ubuntu-xxxxx.iso file appears as an item under the Controller: IDE tree, and click OK.
Installing Ubuntu on a Virtual Machine
To install Ubuntu on a VM, follow these steps:
Step 1. When the main application appears, right-click on the ubuntustudy virtual machine, select Start, and click on the Normal Start item to start the virtual machine normally.
Note
As the virtual machine boots, you may see one or more messages, such as “You have the Auto capture keyboard option turned on,” at the top of the interface. You can read each message and then click on the blue circle with the white x in it to dismiss the messages one time, or you can click the Next icon to dismiss a message and prevent it from showing again.
Step 2. When the virtual machine boots and you have a choice of selecting either Try Ubuntu or Install Ubuntu, choose Install Ubuntu.
Step 3. On the Keyboard Layout screen, choose the appropriate settings and click Continue.
Step 4. On the Updates and Other Software screen, leave the Normal Installation radio button selected and deselect the Download Updates While Installing Ubuntu checkbox. Then click Continue.
Step 5. On the Installation Type screen, be sure the Erase Disk and Install Ubuntu radio button is selected, and click Install Now.
Step 6. On the Write the Changes to Disk? screen, click Continue.
Step 7. On the Where Are You? screen, choose the appropriate time zone and click Continue.
Step 8. On the Who Are You? screen, fill in the following details:
a. Your Name: Tux
b. Your Computer’s Name: ubuntustudy
c. Pick a Username: tux
d. Choose a Password: linux
e. Confirm Your Password: linux
Ensure that the Require My Password to Log In box is checked.
Step 9. Click Continue to begin the installation of the system.
Note
This process takes a few minutes, during which you see the “Beaver” screen and the software is installed to the system.
Step 10. When the Installation Complete dialog appears, click the Restart Now button.
Step 11. When presented with the final installation screen, you see the request “Please remove the installation medium, then press Enter” because the system doesn’t know it’s a disc image. The system should boot normally without your doing anything to disconnect the image, so simply press Enter. The system restarts and presents you with the login window.
Step 12. Click the orange Tux User box.
Step 13. Type the password you entered earlier and click Sign In.
Step 14. When signed in and presented with the What’s New in Ubuntu screen, click the green Next button.
Step 15. On the LivePatch screen, click the green Next button.
Step 16. On the Help Improve Ubuntu screen, click No, Don’t Send System Info and click the green Next button.
Note
Steps 16 and 17 might not appear in the order presented here; simply answer them as they occur.
Step 17. On the You’re Ready to Go! screen, click the green Done button.
Step 18. If presented with Software Updater popups, click Remind Me Later (rather than doing the installation right away).
Getting to the Command Line
To open a terminal/command line prompt on Ubuntu:
Step 1. Click on the Activities menu at the top left of the interface.
Step 2. In the dialog box, type terminal.
Step 3. When the Terminal icon appears, click on it to open the Terminal app.
You can also find the Terminal icon toward the bottom of the left-hand margin, under the Favorites menu.
Note
Depending on your screen size, you may or may not have to scroll down the Favorites menu to see the Terminal icon.
You’ll be opening the terminal approximately 300 times as you read this book. To make opening it easier, you can arrange the Favorites menu to keep the Terminal icon in view or move the icon further up in the Favorites menu.
When you have the command line/shell/terminal open, rearrange it so that you get the maximum amount of space to type your commands. You can easily do this by clicking on the square Maximize button to the left of the x Close button on the terminal application window.
The Importance of Snapshots
It is very important to take an initial snapshot of your study machine. Doing so will prevent you from having to reinstall the virtual machine if you make mistakes or misconfigurations.
Taking a Snapshot
To take a snapshot of a running virtual machine, you must be working with the menu items in the virtual machine instance—not Ubuntu’s File and other menus but the VirtualBox menus for that virtual machine. Follow these steps to take a snapshot:
Step 1. With the virtual machine running, and not in full screen, click on the VirtualBox main menu’s Machine item.
Step 2. Click the Take Snapshot menu item.
Step 3. When the Snapshot dialog appears, replace the Snapshot 1 text with After Installation. Optionally, add a description in the Snapshot Description textbox. Click OK.
Step 4. When the snapshot progress bar finishes and you have access to the main window again, you can make changes to the installed system and, if necessary, restore the After Installation snapshot.
Restoring a Snapshot
Restoring a snapshot effectively takes you back to the system state that existed when the snapshot was taken. Follow these steps:
Step 1. Navigate to the main VirtualBox Manager screen.
Step 2. Select the ubuntustudy virtual machine on the left column.
Step 3. Click on the Snapshots button at the top right of the interface. (Click the Machine Tools button, if needed, to make the Snapshots button visible.) The snapshots that exist for the ubuntustudy virtual machine are displayed.
Step 4. If any changes have occurred since the snapshot was made and you want your restore to include them, select the Current State (changed) item in the subordinate hierarchy.
Step 5. To restore the After Installation snapshot, right-click the Snapshot and choose the Restore option from the menu.
Step 6. When you are prompted about restoring from the snapshot, uncheck the Create a Snapshot of the Current Machine State checkbox, and click the Restore button to restore the snapshot.
By using snapshots properly and often, you can recover from almost any problem. As you work through this book, you might want to take a snapshot before working through each exercise. Then, if anything goes amiss, you can easily recover your system.
Summary
In this chapter you learned how to create a proper study environment for your certification preparation by installing a virtual machine manager such as Oracle Virtual-Box, creating a virtual machine, getting the necessary ISO files, and installing Linux inside that virtual machine. You also learned about snapshots, including how to make and restore them.
This study environment will serve you well, allowing you to make as many mistakes as you need to and still be able to undo those mistakes.
By shortening the time between the occurrence of an error and getting your system back to being operational, you can most rapidly study for the exam and gain the Linux knowledge you need.
Please don’t forget to install a second virtual machine of an RPM package style, such as openSUSE, CentOS, or Arch.