
Another feature of Corona that we need to understand before diving into our code is the widget. Corona provides common interface widgets such as buttons, sliders, a picker wheel, and a tab bar.
In our Frank's Fitness app, we are going to use the tab bar to provide an intuitive navigation for our users. The tab bar creates a customizable bar with tab buttons at the bottom of the screen.
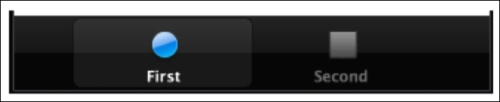
With our starter app, we have two buttons titled First and Second. To create a tab bar, we have to let our app know we want to start using widgets by requiring the widget library.
local widget = require "widget"
Now that our app knows we want to use the widget library, we create a table that holds our tab information.
local tabButtons = {
{
  label="First",
  defaultFile="icon1.png",
  overFile="icon1-down.png",
  width = 32,
  height = 32,
  onPress=onFirstView,
  selected=true
},
{
  label="Second",
  defaultFile="icon2.png",
  overFile="icon2-down.png",
  width = 32,
  height = 32,
  onPress=onSecondView
},
}
Here's a breakdown of what we are using in our table:
label(optional): This is the display name below the icon on our app.defaultFileandoverFile(required): These define the images that we want to use for when the tab is active or inactive.widthandheight(optional): This defines the width and height of our tabs in pixels.onPress(optional): This function is called when the tab is touched by the user.selected(optional): This determines which tab is active when the tab bar is created.
Next, we create the actual tab bar widget by creating a new variable and assigning it to widget.newTabBar.
local tabBar = widget.newTabBar{
top = display.contentHeight - 50,
buttons = tabButtons
}
Here's a breakdown of how we are using widget.newTabBar:
top(required): This defines the location of the tab bar on our app. By usingdisplay.contentHeight – 50, we are telling Corona to place the tab bar 50 pixels above the bottom of the screen.buttons(required): We use the tabletabButtonsthat was created for us withbuttons. This letsnewTabBarknow how we want our buttons to look.
Once you create the table and variable for the widget, you will see the tab bar on your app. To learn about the other widgets that Corona offers, visit http://docs.coronalabs.com/api/library/widget/index.html. On the documents page, you will learn about Corona's widgets for buttons, a picker wheel, a spinner, and more.