
1
Letting Go, Manifesting & Celebrating
WE BEGIN OUR CREATE YOUR LIFE BOOK JOURNEY by taking time to create awareness around how we live our lives. Becoming aware of our behaviors, responses, and thought patterns can help bring us to a place of “choicefulness.” Having choices means having more freedom to be, grow, and heal.
For the first few projects in this book, we look at what is and isn’t working in our lives. To figure out what isn’t working, we try to identify what’s holding us back. These might include habits, limiting beliefs, fears, or relationships that might be stifling us or hindering our progress. We focus on letting go of those, and we also look at the behaviors, thought patterns, and relationships that are serving us and enriching our lives and spend time honoring and celebrating them.
Finally we consider what we want more of in our lives and how to enrich and enhance their quality. When we work on this topic, the manifestation of hopes and dreams is the focus.
Using the creative process, we work through these aspects of personal development and bring them to a point of transformation and loving resolution.
PROJECT 1
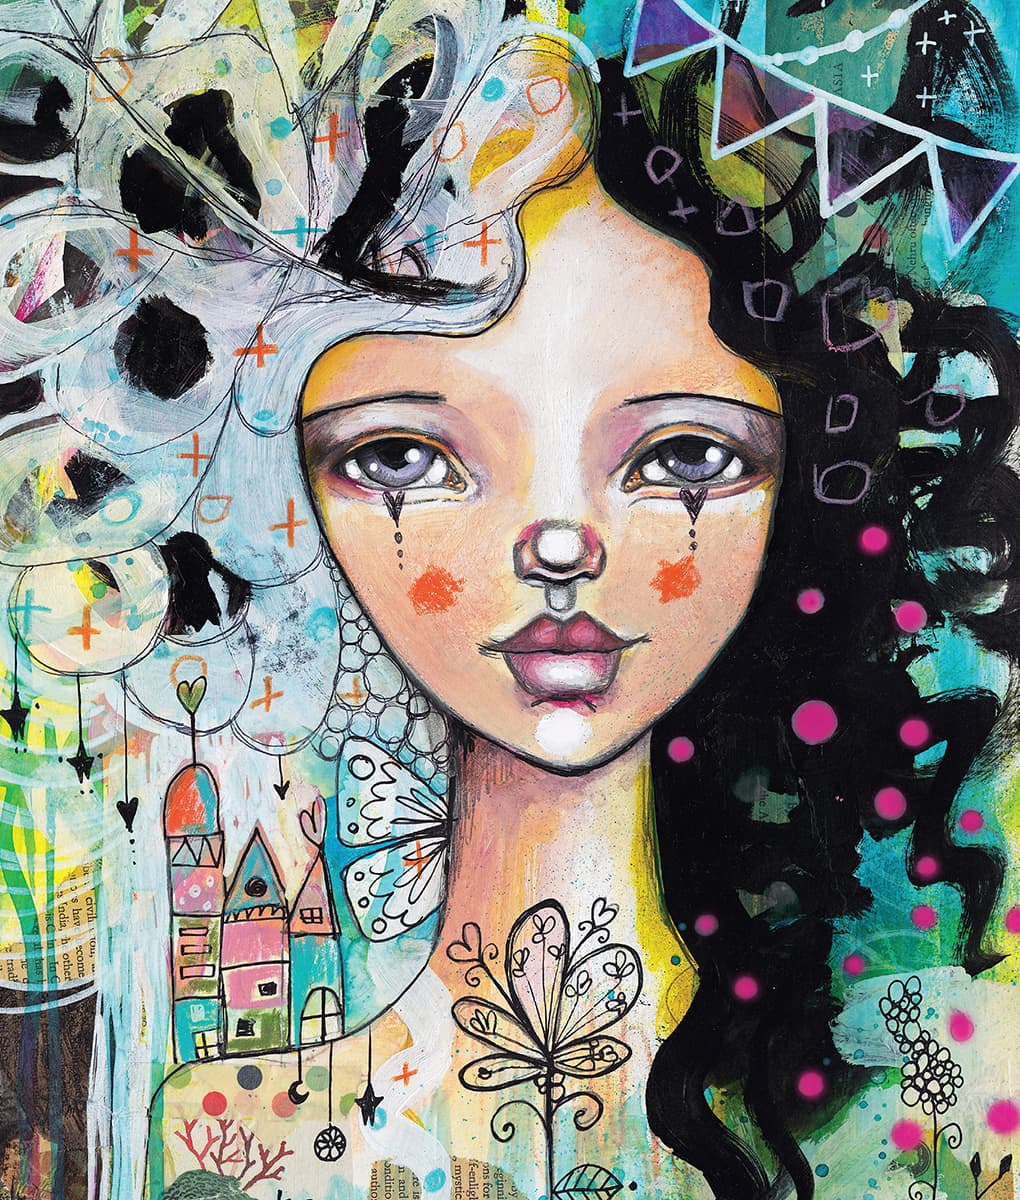
The Zen Butterfly
Let Go of What No Longer Serves You
AT THE BEGINNING OF A NEW YEAR, a new project, or a new phase of my life, I enjoy setting positive intentions. I like to look at things that help me navigate new beginnings with as much success as possible.
Exploration: Taking Stock of What’s Holding You Back
As part of that process, I take the time to look at anything in my life that is holding me back and might be preventing me from succeeding in my next phase. I like to mindfully consider elements in my life that I am holding onto but are no longer serving me or that are stopping me from moving forward in positive and easy ways.
Once I’ve identified the things holding me back, I perform symbolic little rituals that help me let go of them. Stepping into this process mindfully and lovingly helps me honor and then release each item with love, giving me more freedom to focus positively, without anything holding me back, on my goals and intentions.
One of the rituals that helps me with this process is the creation of a Zen Butterfly, which I want to share with you in this chapter.
Before starting, think back to the previous year, phase in your life, or project and reflect on the following questions in your Life Book Notebook:
1. What did not go well?
2. What do you want to let go of?
3. What went well? What did you enjoy?
4. How and in what ways did you grow?
5. What do you want to take with you into the new year/phase/project?
6. What positive experiences or qualities do you want to call in more of?
7. What are your positive intentions about this year/phase/project?

Art Page: Zentangle Butterfly
For this project, you’ll create a butterfly in a Zentangle style and incorporate a flight trail with writing on it that symbolizes you flying away from the things you want to let go of. The Zentangle style of drawing is meditative and can help you become more aware of and really focus on your positive intentions.
The butterfly is also flying toward the sun, which you’ll fill with your positive intentions or things you want to call into your life.

Create the Background
1. Using spray inks and your favorite stencils, create your first layer. Spray inks are wonderful to play with; they can be dripped, splattered, sprayed, and mixed. Let colors flower into each other and layer them over each other (A).

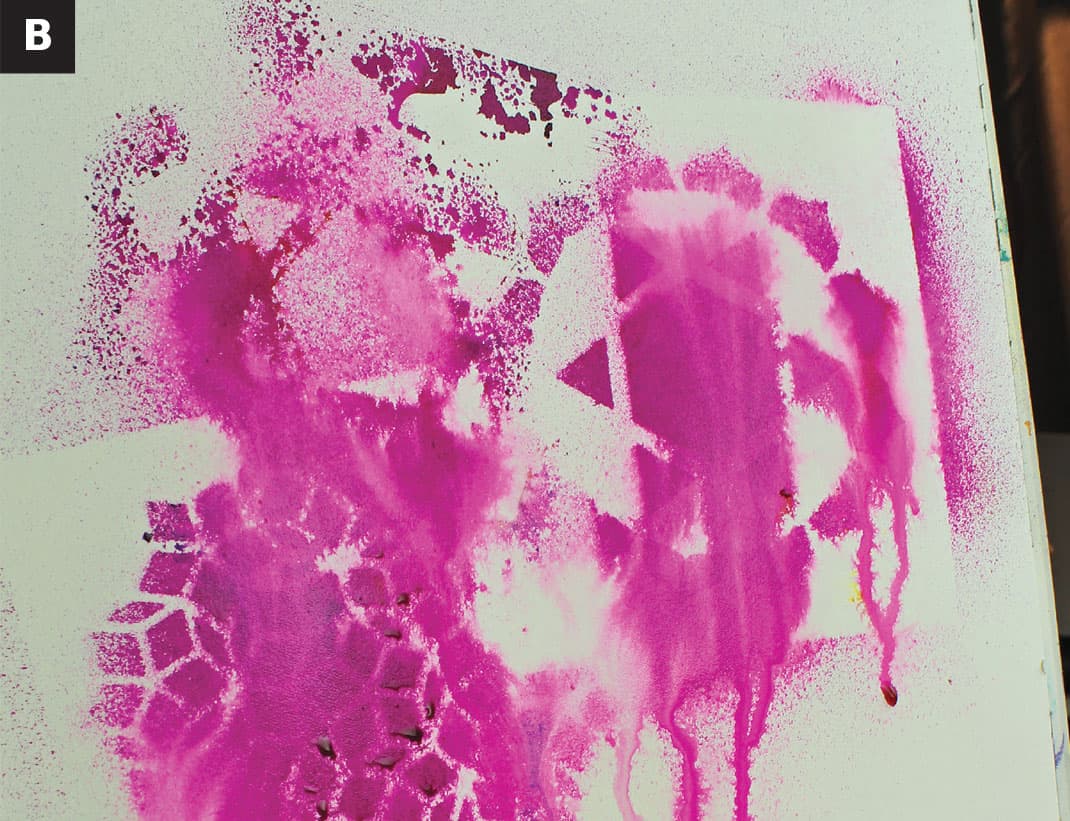
2. Add water to your inks so you can drip them, splash them, and splatter them around a bit. I like using small spray bottles with fine mist nozzles. Hold your page up to let the inks drip (B)!
3. Wipe away excess with a paper towel. The inks are very vibrant, so you won’t lose much color, making your background too dark. Continue adding layers of inks with stencils, splashes, and/or drips (C).

4. I love adding acrylics inks for extra pop. In this case, I chose a bright orange that went well with my color scheme. Continue to drip and layer until you have a colorful background you love (D).

Draw & Tangle the Butterfly
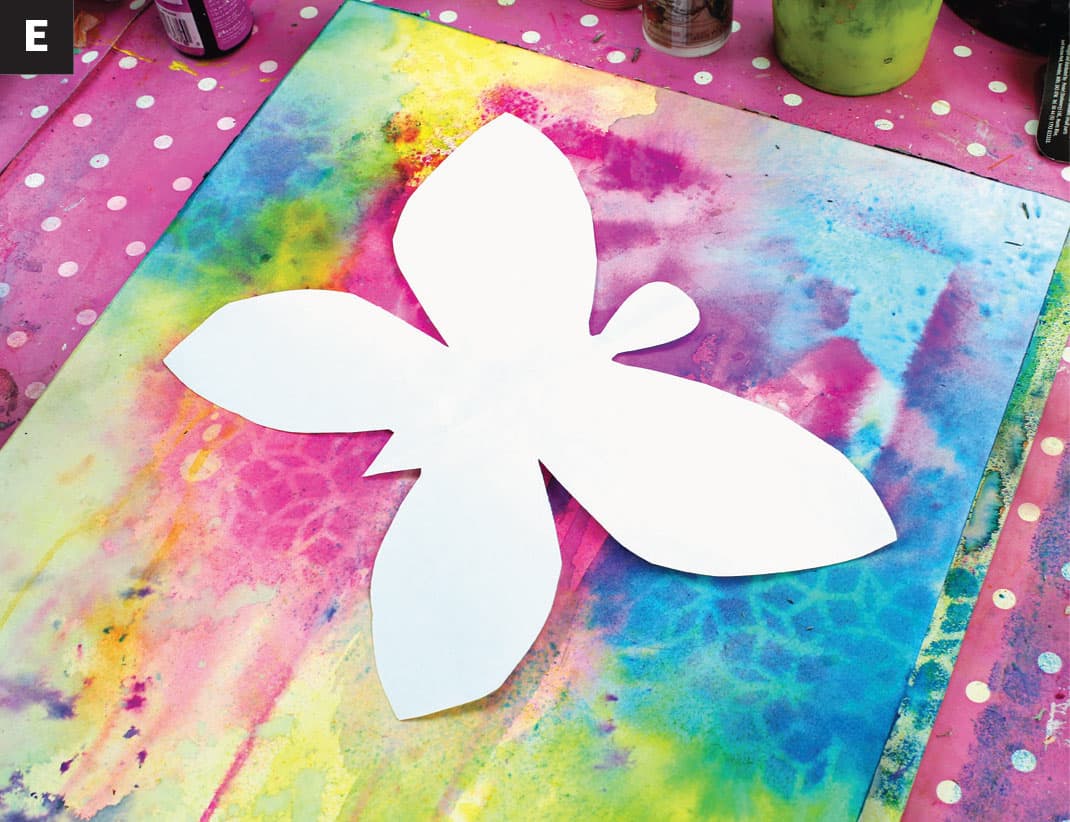
1. Draw a simple butterfly shape onto your background. If you want symmetry, you could first draw it on a piece of paper, fold it through the middle of the butterfly, cut it out, and trace around it on the background. But if you don’t care about symmetry, you can draw the butterfly straight onto the background by hand (E).
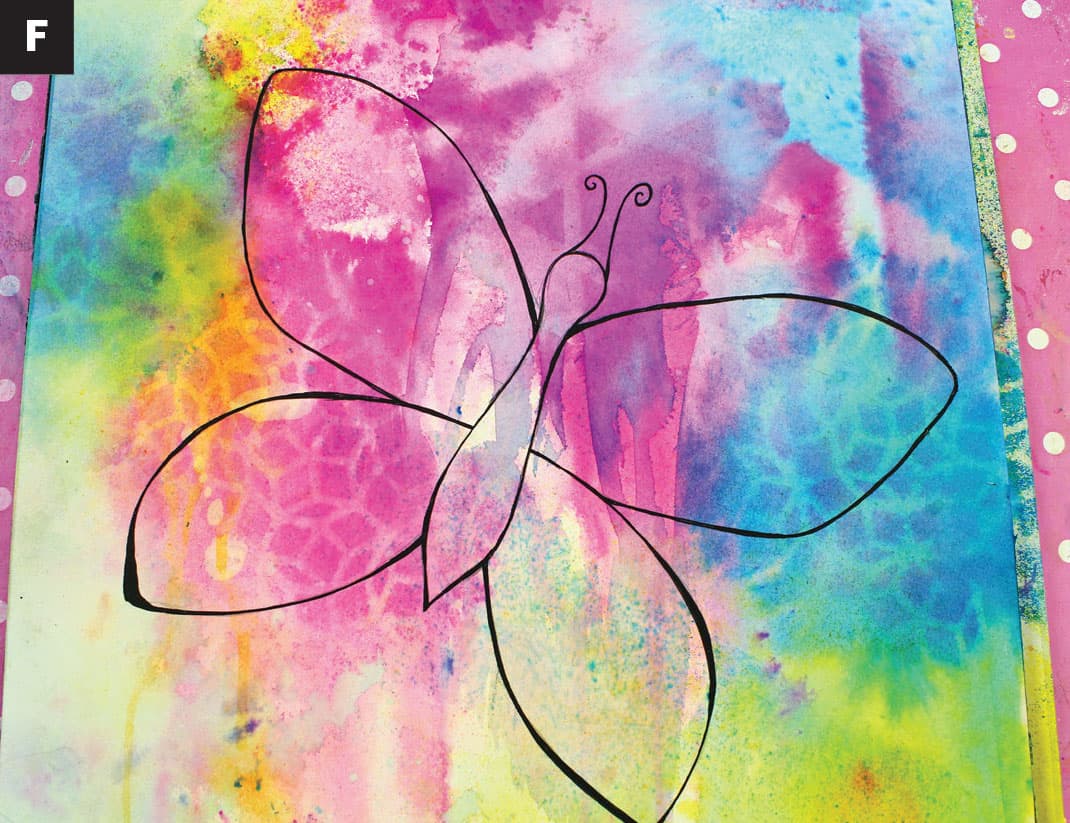
2. With a black pen, outline your butterfly (F).
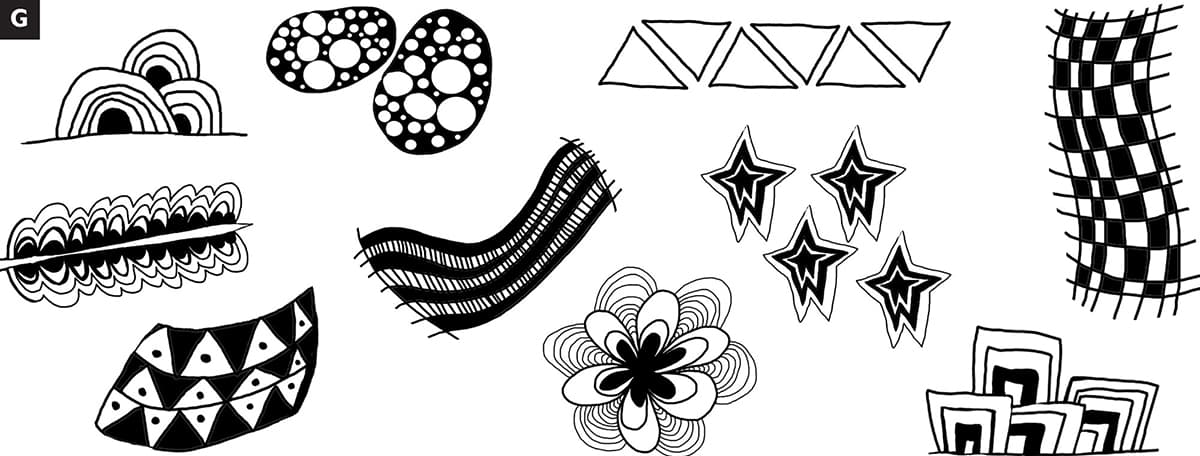
3. Next you’ll start adding Zentangle shapes to your butterfly. This process can be meditative and relaxing. While you do this, focus your attention and/or meditate on the things you want to call into your life more and on your positive intentions. You can include the things you want to achieve and manifest in your life this year or during the new project you’re working on. See G for some Zentangle shape ideas. Anything goes, really, so use your imagination to create new doodles and drawings. Repeat patterns and have fun!
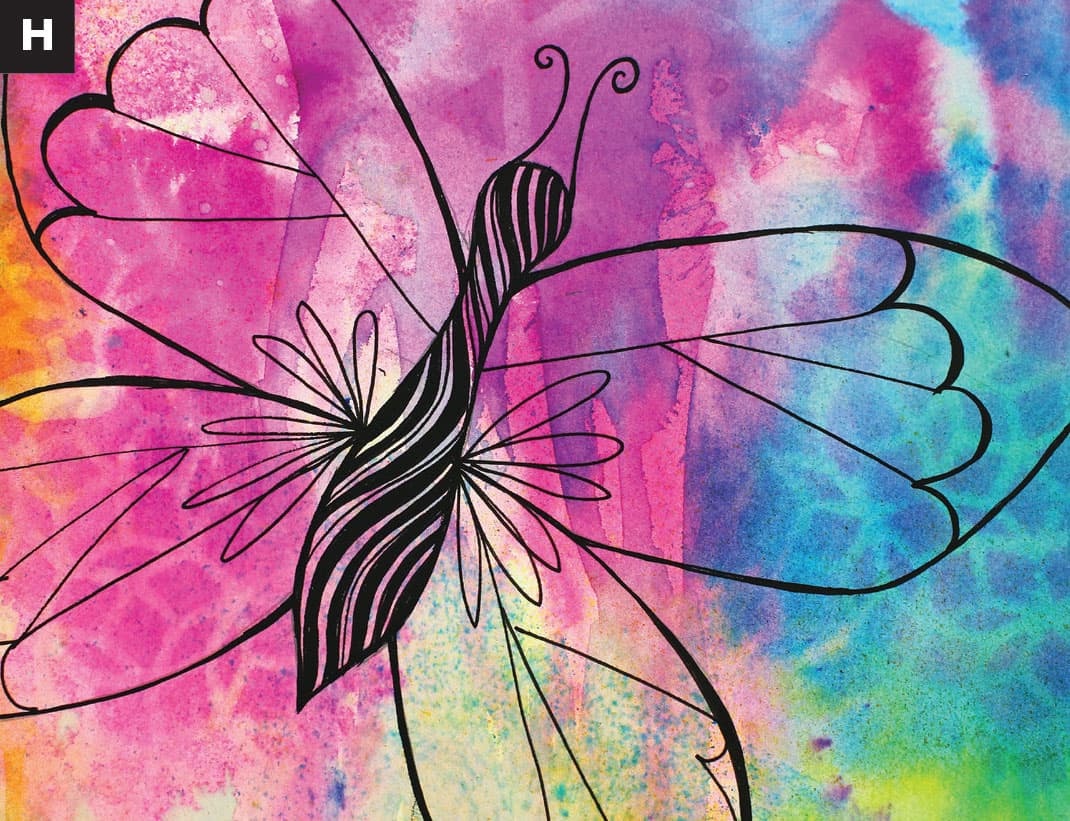
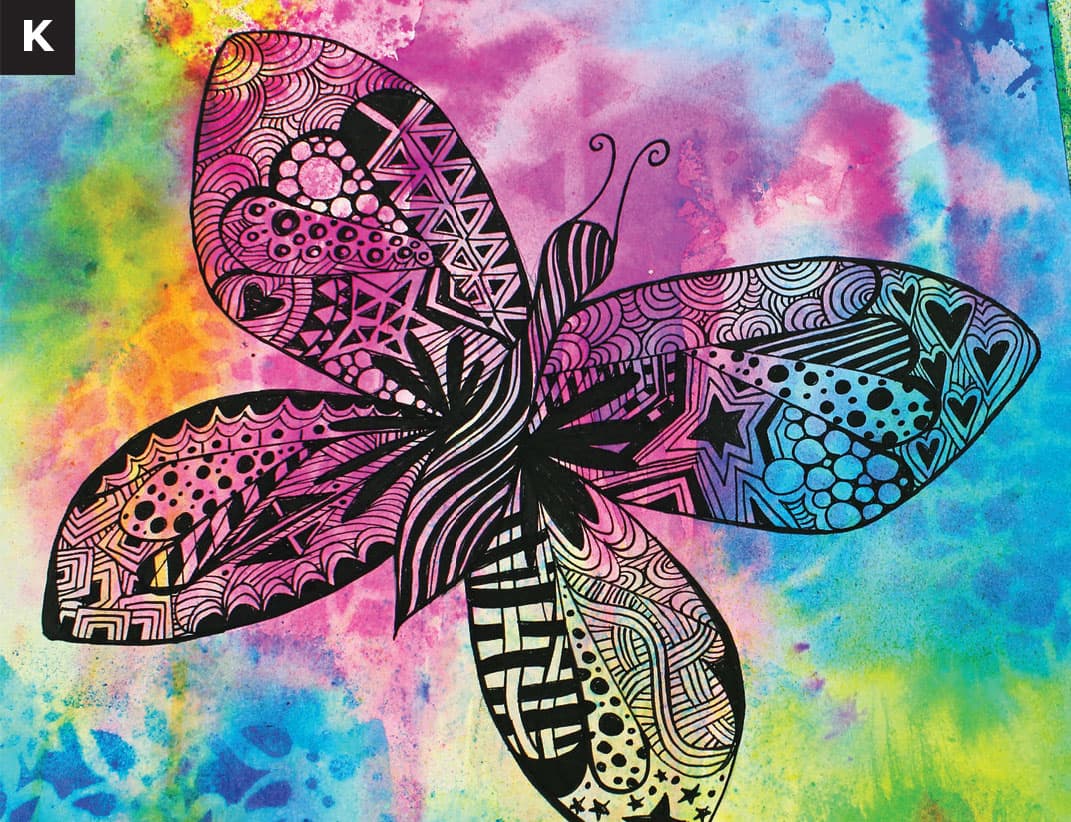
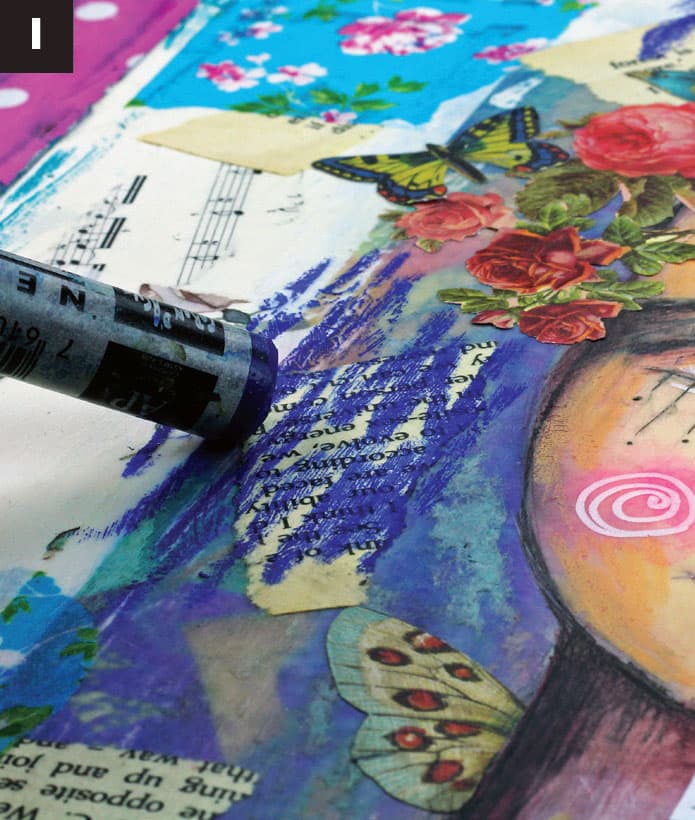
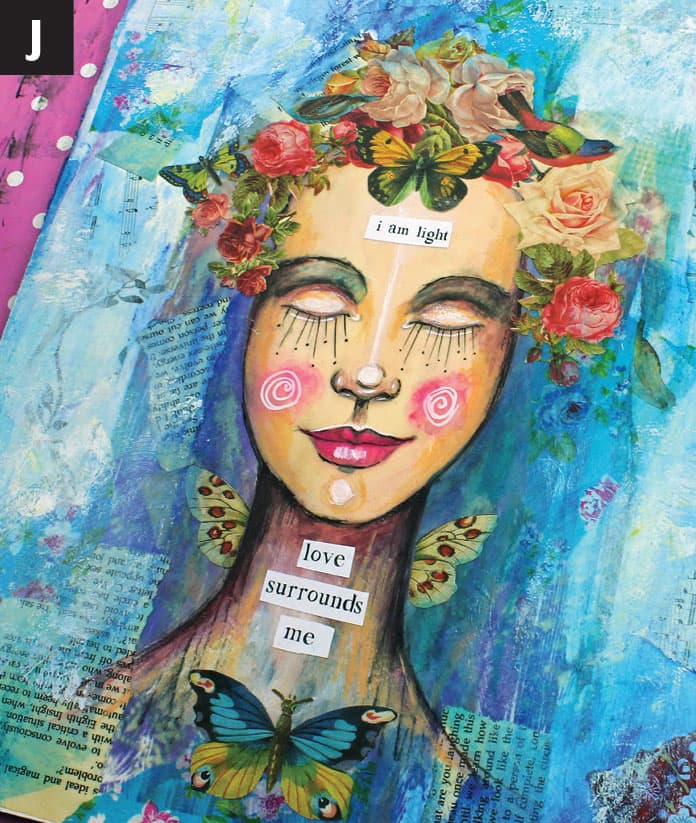
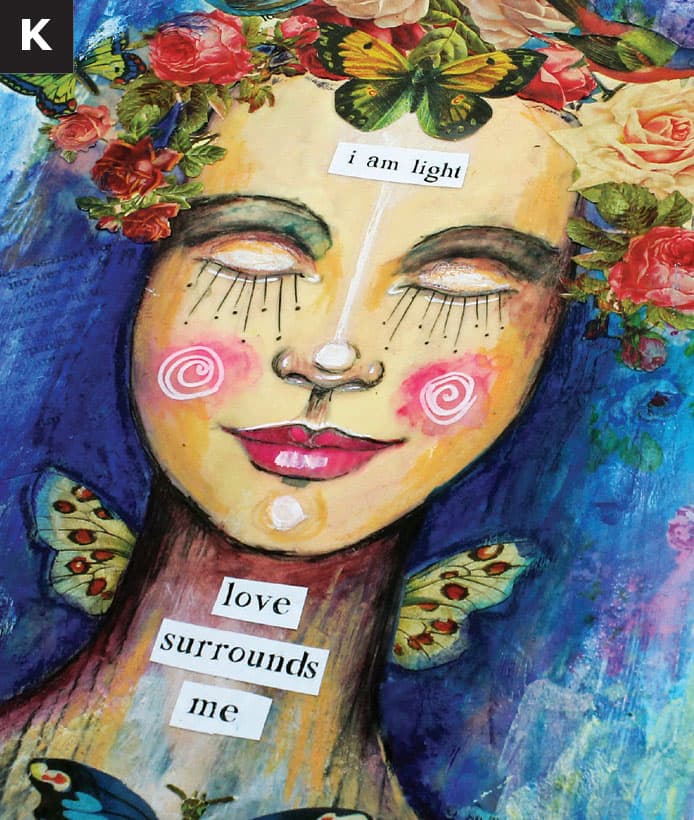
4. Continue to add Zentangles to all parts of the butterfly until it’s filled up and you’re happy with it, all the while meditating on the goals and intentions you want to fly toward (H, I, J & K).


Add Details for Letting Go
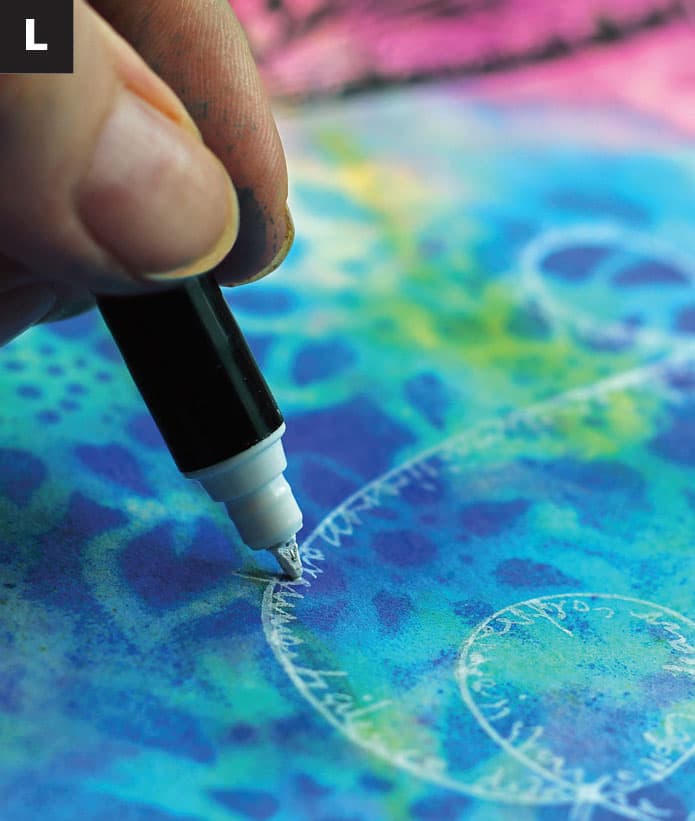
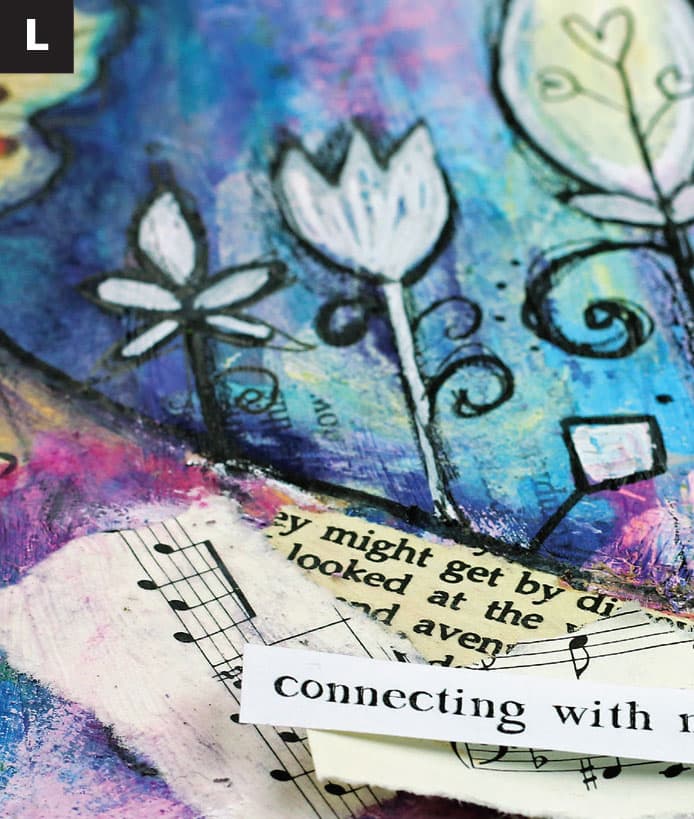
1. With a white or light-colored pen, draw a flight trail behind and underneath the butterfly. Write everything you want to leave behind you on that flight trail. The writing need not be legible; it’s just for expressing all the things you’re now ready to let go of (e.g., “I am letting go of fear, anger, sadness, resentment, etc.”). You’re using a light-colored pen because we want the trail and the things you let go of to fade away on the wind, symbolically speaking (L).
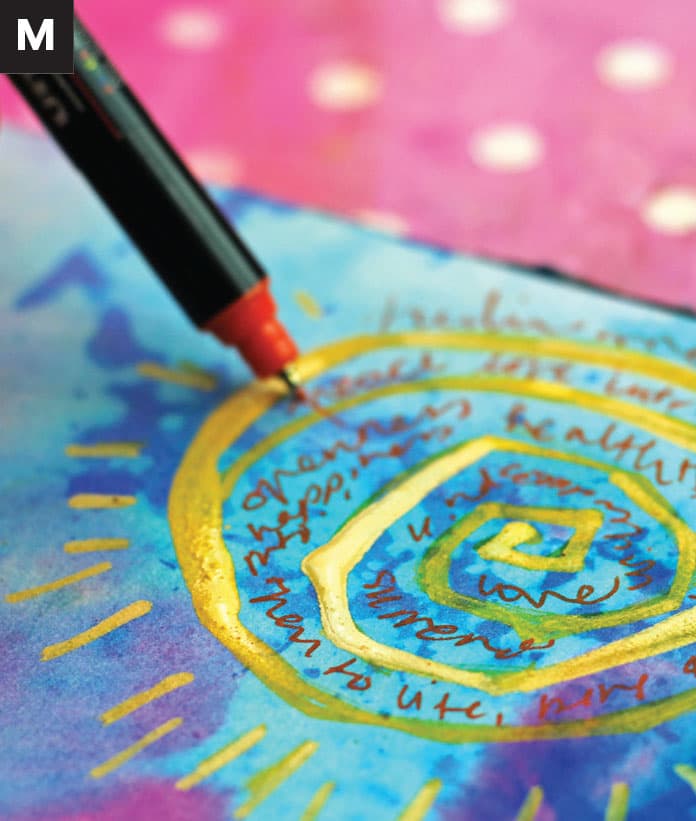
2. With a brighter color, draw a simple sun in the corner the butterfly is flying toward. I drew a spiral inside the sun so I could write my goals, intentions, wishes, hopes, and dreams in it. The butterfly is flying toward it, leaving a trail of all we want to let go of behind it (M).
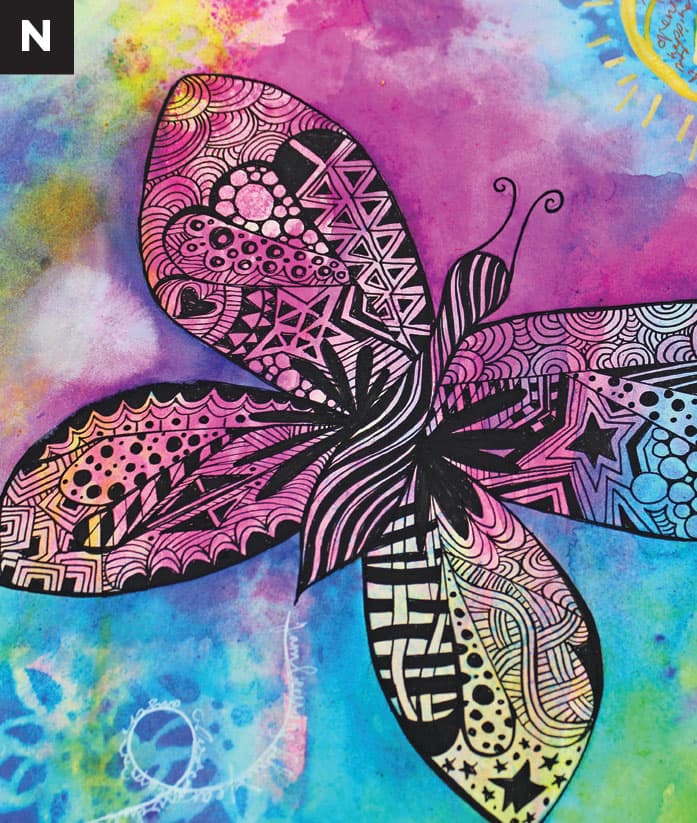
3. For my final steps, I added ink around the butterfly to make it come off the background a bit more. This is an optional step; it depends on how immersed your butterfly feels in the background. If you want it to come forward somewhat, add some inky colors around it (N).
4. As a finishing touch, I added white dots to the background to liven up the page and to give the impression of spring pollen flying on the breeze (O).

PROJECT 2
Envision Your World
Manifest Wishes & Hopes through a Dream Board
A DREAM BOARD—also called a vision board, a manifestation board, or an affirmation board—can help clarify and maintain focus to achieve a specific life goal, project, or dream. It’s a tool that can serve as a visual representation of your hopes, needs, and ideal life.
You may be familiar with a traditional dream board that consists of words, images, and other elements cut out from magazines or newspapers and collaged on one surface. The idea is that if you display your board, see it daily, and dream about it, your goals and hopes for the future will be more easily and quickly manifested.
Exploration: Thinking into the Future
Though the intention of my dream board is like that of a traditional one, I take the concept a bit further. In addition to images of what I want (either collage images or my own drawings), I include a photo of myself as well as positive affirmations of my wishes and hopes. You can make a dream board at any time, but I love creating them at the beginning of a year or at the start of a new project to help manifest what I want for that year or for that particular project.
Because affirmations are most powerful and effective when they’re in the present tense, they must be stated as if they’re already true—for example, “I am loved” as opposed to “I will find love.” They also need to be personal, specific, and positive—“I am loved,” rather than “I don’t want to be unloved.”
Before you begin, close your eyes, focus on the year or project ahead, and think about what you would like to manifest in your life. These could be physical things, such as a new car or house, or a new relationship or trip. You may also want to improve your health, become more self-loving, or find more community.
Write down your ideas for your dream board in your Life Book Notebook or on a separate piece of paper. You can also include little doodles, words, and notes. When you’ve written them all down, start your art page.
Art Page: Dream Board
This art page features acrylic transfers, which are great for creating distressed, vintage-looking images. Acrylic transfers can be done on paper as well as on surfaces such as wood or plastic. Because this technique creates mirror images of the print that’s being transferred, start by using Photoshop or another photo-editing program to reverse/mirror your image before printing it out if you want it to look the same as the original.
For collage elements, you can use old book pages, musical scores, tissue, or origami or scrapbook papers—anything that inspires you. You can use either symbolic or literal images to represent your wishes and dreams. For example, if you want more time to travel, you may opt for a butterfly or bird, or you can include images of the places you want to visit. Add other beautiful images to infuse your dream board with whatever will support and enhance the manifestation of your dreams and wishes. Also prepare printouts of your goal words, words of hope, and positive affirmations.

Transfer & Embellish the Main Image
1. Apply a thick layer of gel medium where you want to place your photo (or an image that represents you). Lay the image facedown on the medium. Use an old plastic card or other hard implement to smooth out any air bubbles (A).

2. Let it sit for 5 to 10 minutes and then brush water on the back. You’ll start to see the image shine through (B).

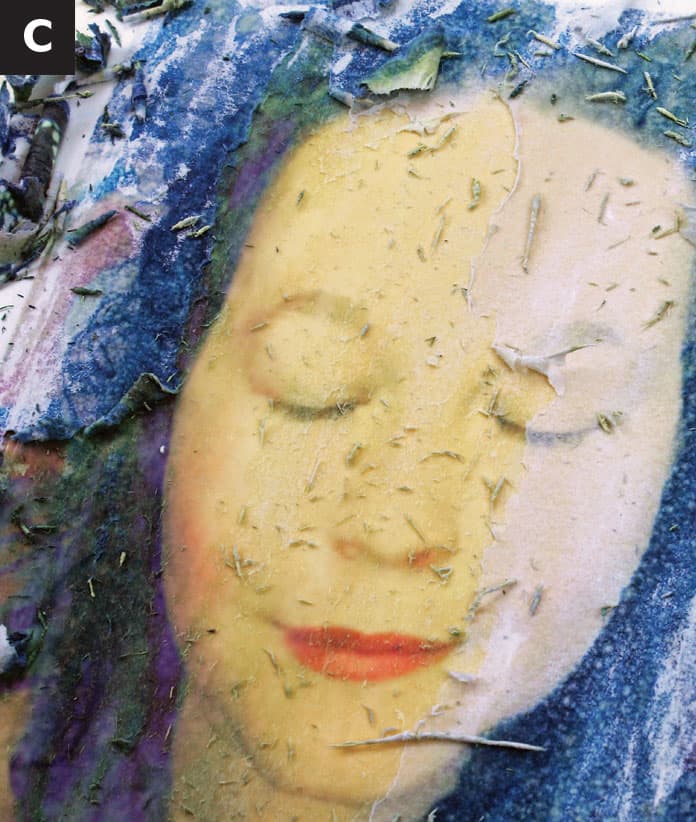
3. Once the water has been absorbed by the paper, gently rub the paper off with your fingers to reveal the image absorbed by the gel medium (C).
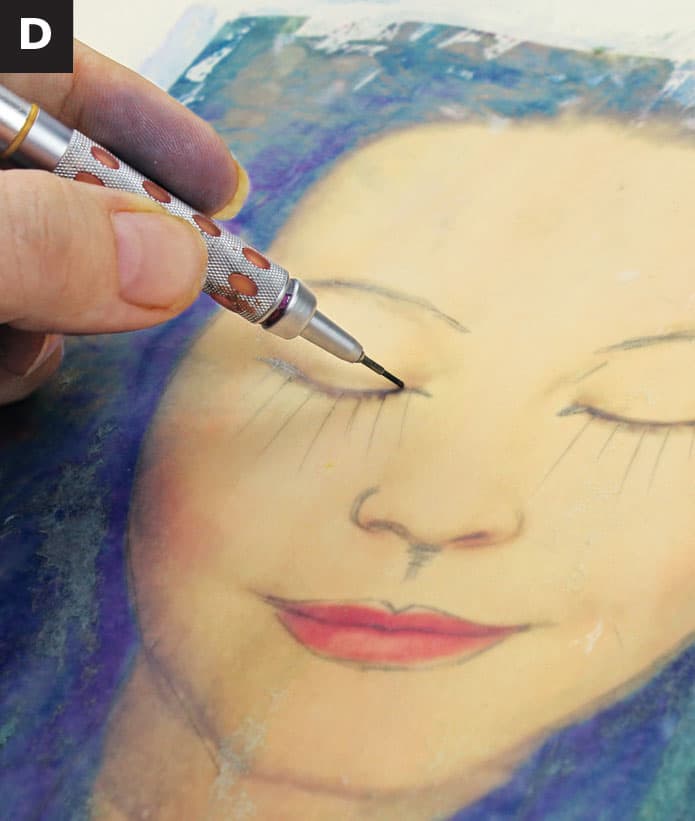
4. Leave the image as is or draw and paint over it, enhancing and deepening lines. Add loving, affirming words and doodles that support what you want to manifest to the surrounding area (D).
5. Add shading and highlights if desired. I used crayons and markers to add subtle color to the cheeks and shaded areas. Follow the patterns of shading and highlights within your image or create completely new ones (E).

6. Add highlights with a white paint marker and dark accents or outlines with a black fine-point marker or paint marker (F).

7. Deepen the shading with colored pencils. To get a rich, smooth effect, sharpen your pencils and then lay the leads flat against the paper as you shade (G).

Collage the Background
1. Tear your collage papers and arrange the pieces in a pleasing way. Repeat and overlap them to create visual unity and relationships. Glue them down with gel medium (H). Use an old plastic card to smooth out any air bubbles.

2. Add meaningful images and your printed-out words to the face as a second collage layer. Use pens and markers to enhance the face with additional details. Once the collage is dry, use water-soluble crayons to add a wash of color that lets the previous layers shine through (I).
3. If your background looks chaotic and messy, mute and unify it by applying a layer of white gesso with a brayer (J).
4. To create balance, harmony, and contrast, use markers, fluid acrylics, or water-soluble crayons to add concentrated patches of color (K).
5. Add simple drawings that represent your hopes and wishes. If desired, add collage images and affirming words wherever it feels right (L).
PROJECT 3
Layers of Your Heart
Celebrate & Honor the Loves in Your Life
GRATITUDE, HONORING, and celebration play big roles in my work, and I believe they contribute greatly to healing.
Just as we explore the things that don’t work in our lives (see Project 1), I believe it’s incredibly important to look at the things, people, and elements in our lives that are working well. Which elements are having a positive impact on your life?
Exploration: The Happiness Triad
By celebrating and mindfully focusing on all the positive goodness and happiness in your life, you will attract more of the same. This exercise therefore supports the previous two projects. Celebrating and honoring what is going well in your life will help manifest more of the same and help you let go of what no longer works for you.
I call it the happiness triad:
1. Letting go of what no longer serves you.
2. Setting intentions and goals serving manifestation.
3. Celebrating and honoring what’s working to cement and further deepen positive physical and emotional prosperity.
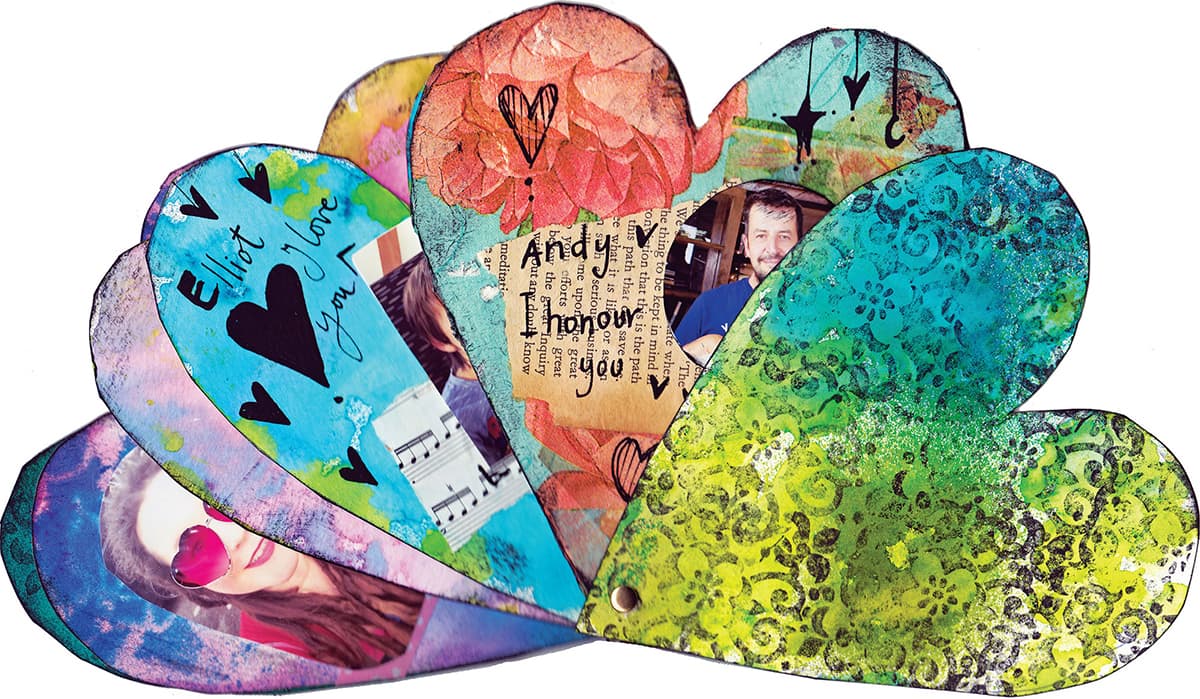
Art Page: Layers of Your Heart
In this project, we will create a heart deck or heart flower (showing the layers of your heart) on a page that contains a concertina envelope to house it. We’ll use different mixed-media techniques to decorate each heart to celebrate a positive element in your life. You can celebrate people, animals, achievements, positive experiences, inanimate objects, or other more abstract concepts. They can be big things (e.g., “I graduated”) or little things (e.g., “I saw a beautiful butterfly today”). Make a list of whatever you feel is working well in your life or is making a positive contribution to your happiness in your Life Book Notebook or on a piece of paper. Let’s get started!
"the more you praise and celebrate your life, the more there is in life to celebrate."
—oprah winfrey
Create Your Hearts
Draw six or seven hearts on 140 lb (300 g/m2) watercolor paper and cut them out. I worked on 9 × 12 inch (23 × 30.5 cm) paper, and my hearts were approximately 51/2 inches (14 cm) tall. You can choose to have different sized hearts or make them all the same. In my heart deck, all the hearts are the same size; I simply traced around the ones I had done previously. You can draw one by hand first, cut it out, and trace it (A).

Decorate Your Hearts
When I make these heart decks, I like to decorate the hearts in very different ways so they contrast but still complement each other. Each heart will represent a positive element you’ll celebrate in your life. Here are some decorating ideas I used:
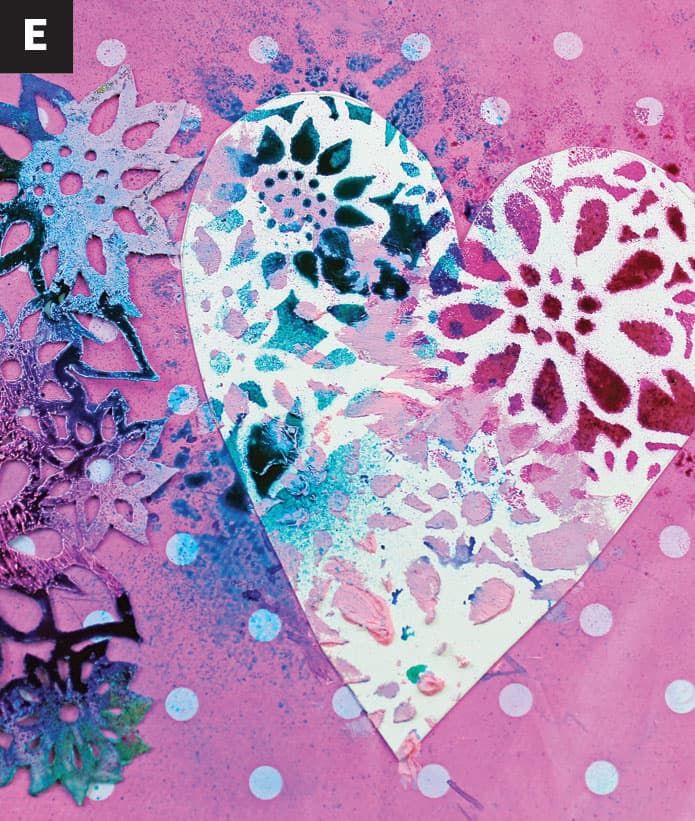
1. Using ink sprays, apply light washes to some of your hearts and/or combine washes with stencils. As the inks are very reactive to water, it’s best to use colors that mix well together. Avoid complementary colors (B & C).


2. If you don’t have ink sprays, you could dab some heavy body acrylic paints or gesso through stencils. The imagery won’t be as crisp, but you can create a nice texture with it and your stencil will show up differently from spray inks (D). Here you can see spray inks next to acrylics both applied through a stencil. Mix it up if you like; nothing is too wild. Follow your joy! Be playful and experimental (E). Be sure to include the back of your hearts when you decorate, as they will also be visible.

3. Using a waterproof ink pad and a pattern stamp, apply a layer of stamping to one of your hearts. Then spray or paint two colors over the stamped layer (F).

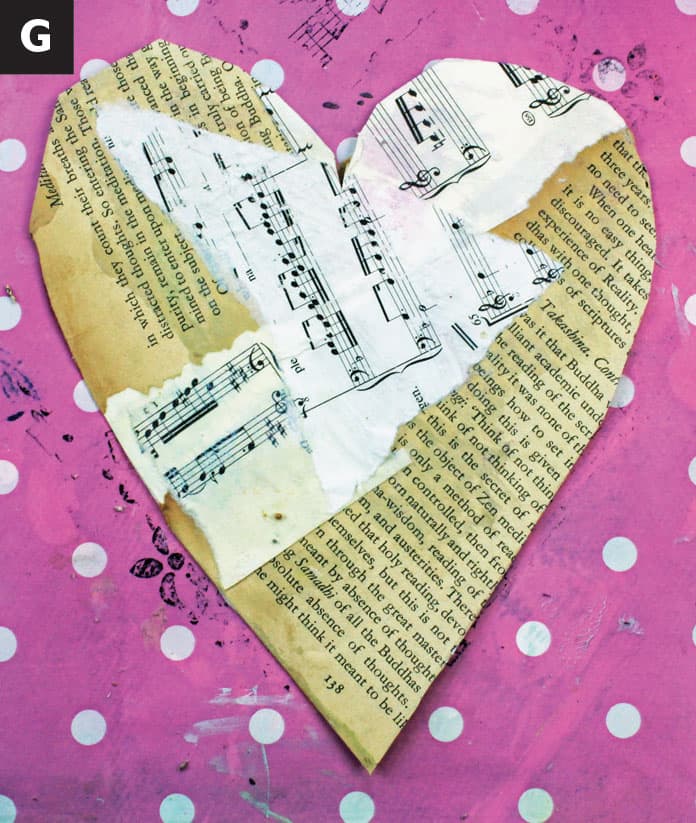
4. Add vintage collage or book pages to your heart (G).
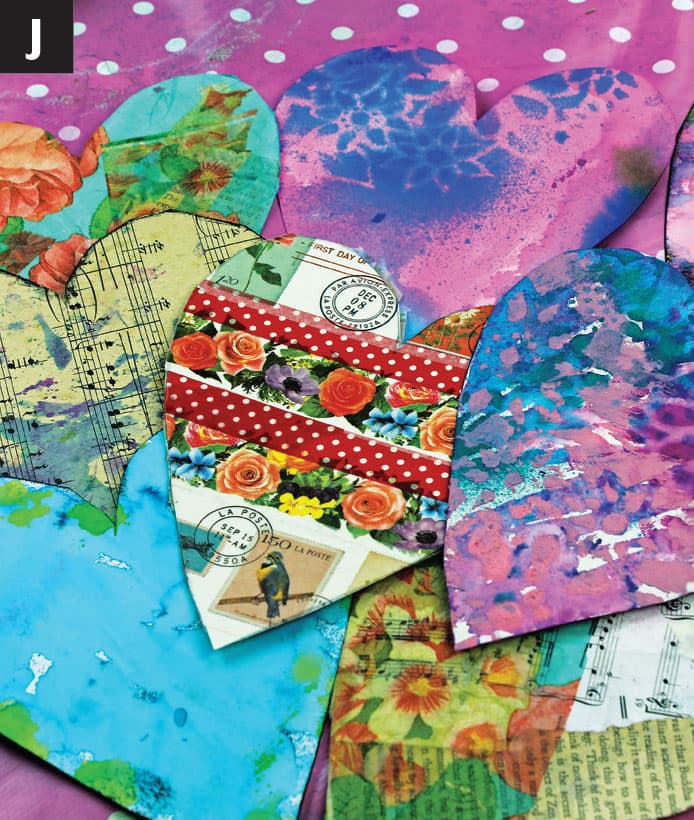
5. Use a variety of washi tapes to decorate your heart (H).

6. Patterned napkins are a great addition to any background or layer. The first layer of napkin (be sure to peel off the other two layers) will dry transparent if applied with matte medium (I).

7. The possibilities are endless when it comes to decorating your hearts. I’m sharing some decorating ideas with you, but please do not limit yourself only to my suggestions. Go wild, think outside the box, and do whatever calls you! Here is a group of decorated hearts together (J).
Add a Dark Ink Edge
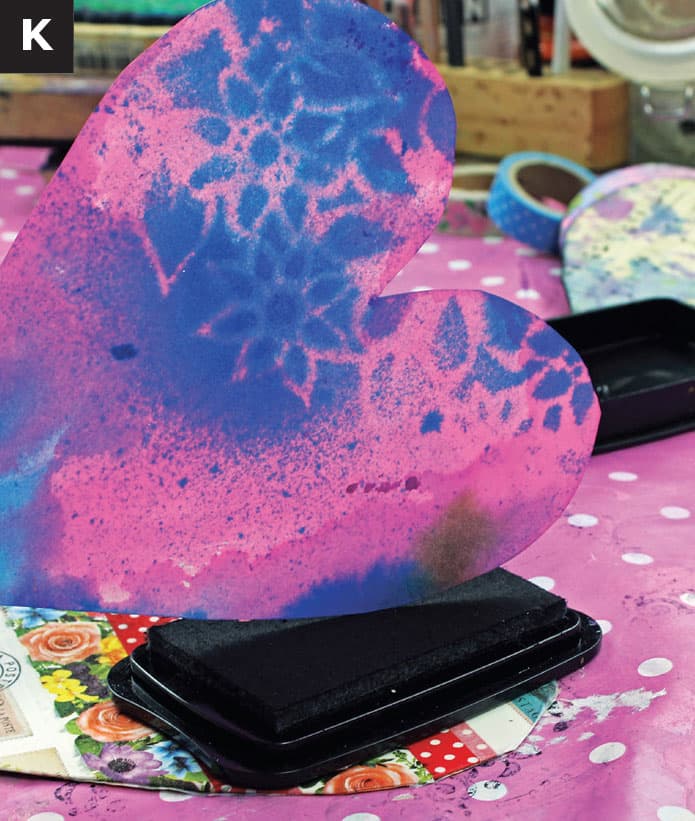
1. Before adding your celebration elements to your heart, use an ink pad to add shadow to the borders (K). It gives them a little more dimension.
2. Once all your hearts are finished, take a moment to refer to the list of things you are grateful for and that you want to celebrate.
Add Celebration Elements
The options are equally endless when it comes to adding your gratitude elements to your hearts. Feel free to experiment and explore how you want to add your celebrations to your hearts. Here are some celebration ideas I used (L).

1. Print out photos of your loved ones and add them to the hearts. You can doodle and draw on and around the photos too. I like adding crowns, hats, hearts, stars, and the like.
2. Add messages of gratitude, love, and/or celebration around the photos.
3. Add lists of gratitude to your hearts.
4. Go for simplicity and emphasis by just writing one name, thing, element, animal, or pet on a heart.
5. Write your gratitude along the edge of the heart.
6. Add quotes, lyrics, or inspiring prose about celebration from poets, authors, or singer-songwriters you love.
Put Your Booklet Together
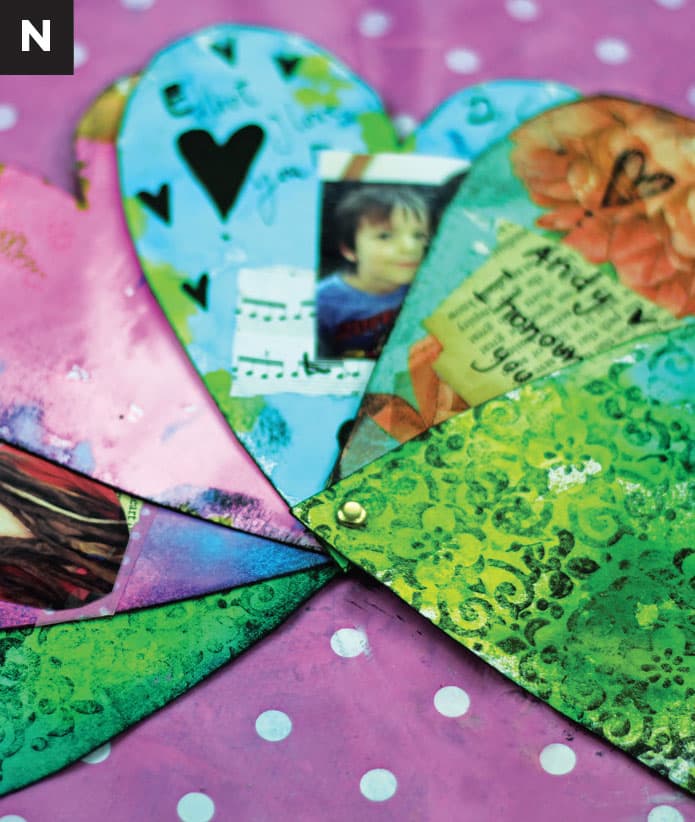
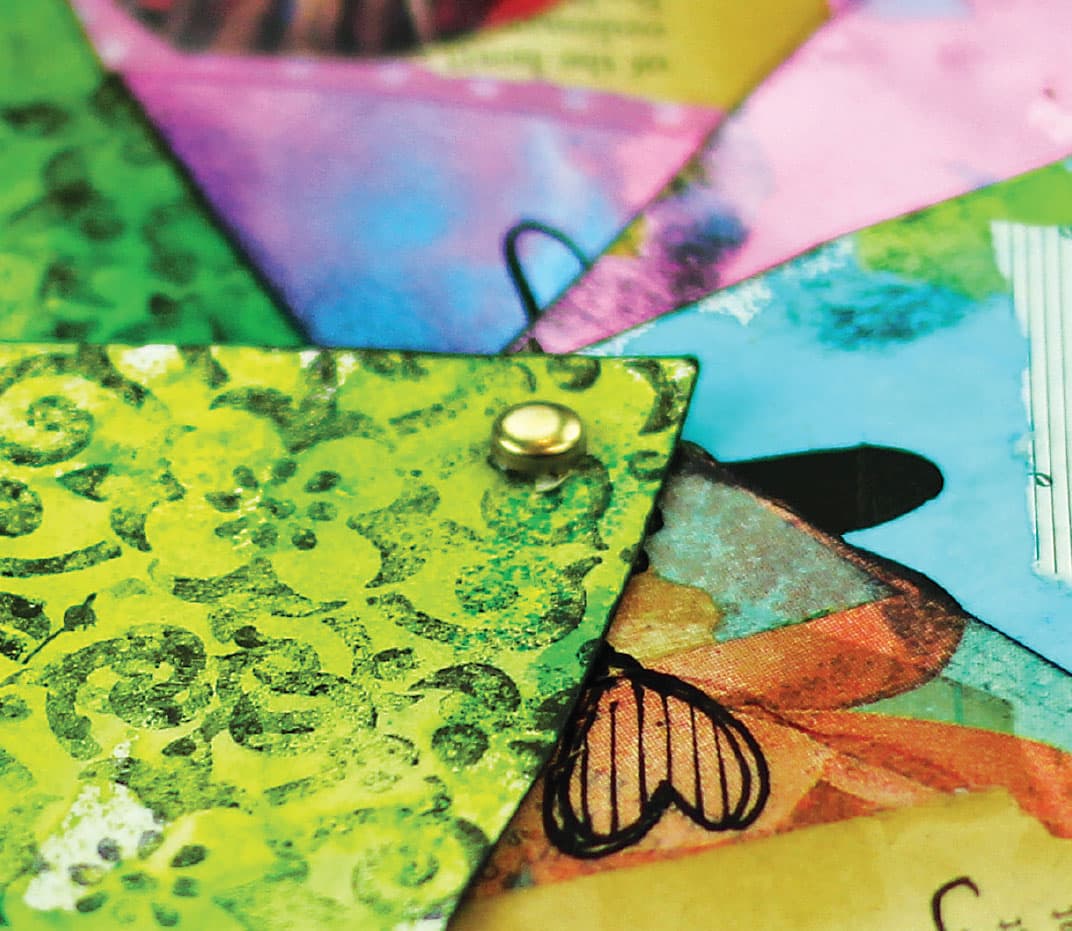
1. Once you’ve finished all your hearts, you’re ready to put your deck together. Using an awl or pin, prick holes in the bottoms of the hearts and push all the hearts onto a brass fastener. Once all your hearts are on, pry the two stalks apart and push them down (M & N).

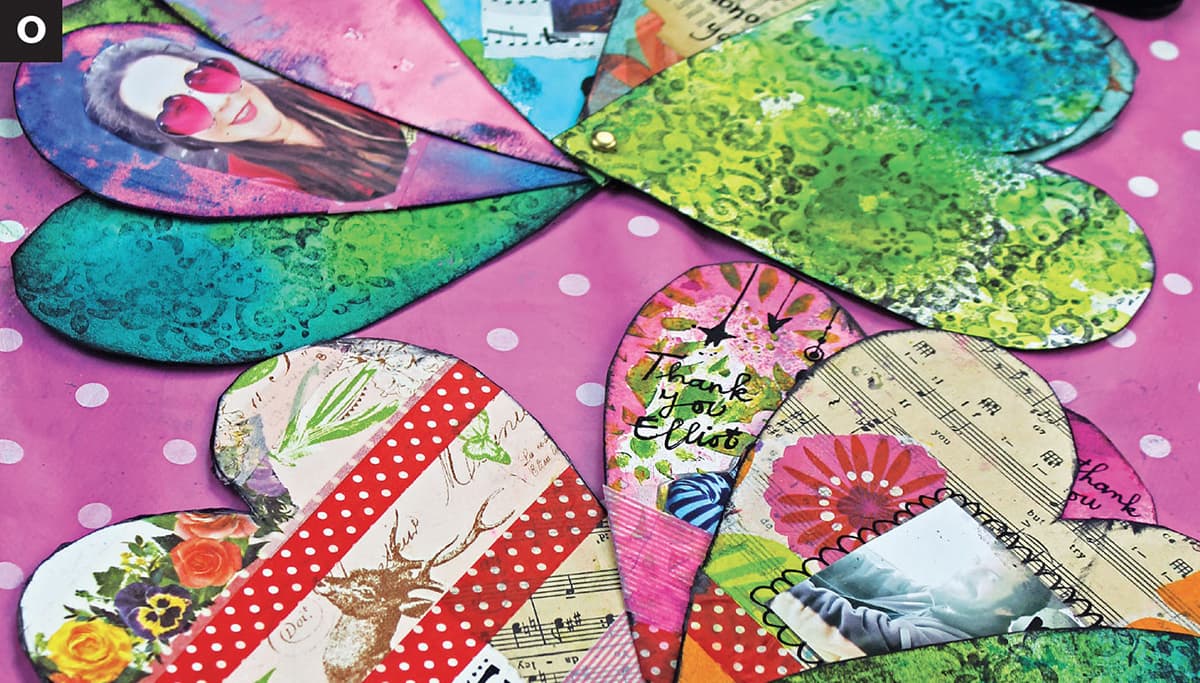
2. You can make more than one deck (O).
Put Your Page & Envelope Together
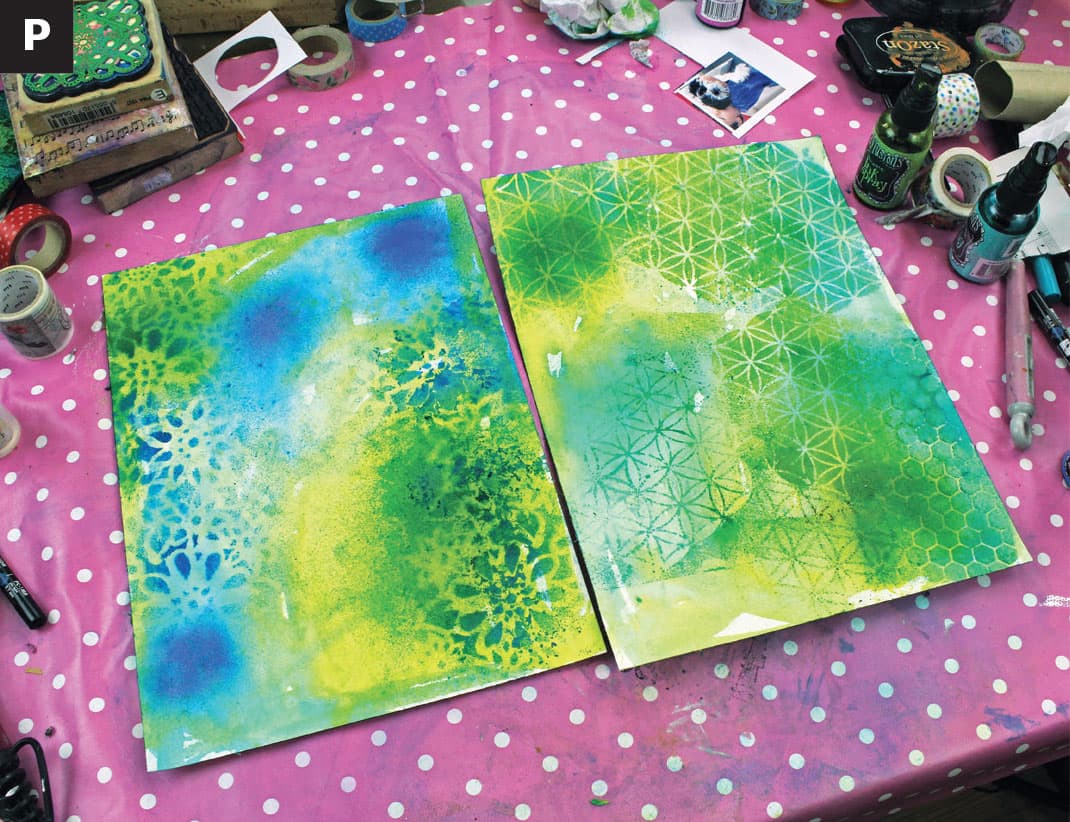
1. You’ll need two pieces of watercolor paper to create your page and envelope. For the main page, I used a simple background technique like the one done on one of the hearts. I applied a wash with ink sprays (two colors), added water with a brush, and then added some stencils for fun effects (P).
2. If you want the hearts to peek out of the envelope when they’re slotted into it, be sure to create the envelope at about one third of the original page size. Make the height approximately one third of your original page plus approximately 1/2 inch (1 cm). Then add 2 inches (5 cm) on each side lengthwise. Cut it out (Q).

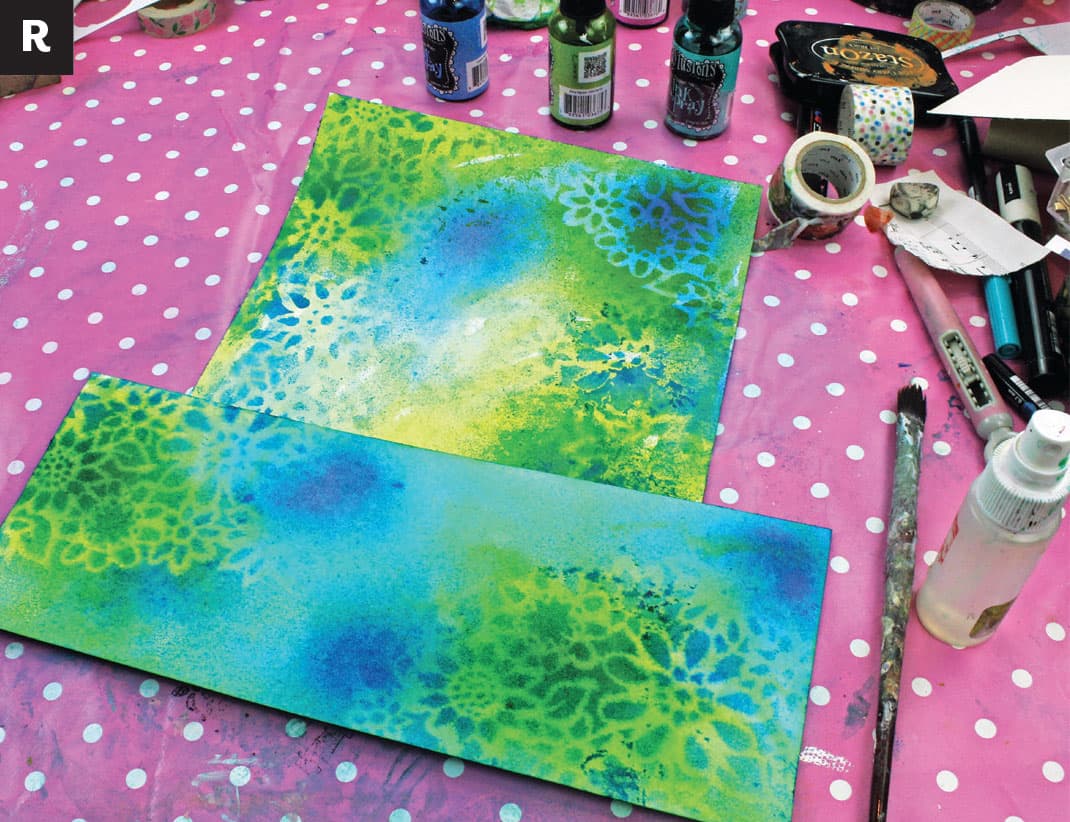
3. Before folding your envelope, decorate it the way you want. I wanted it to match the main page, but you could choose to decorate yours differently (R).
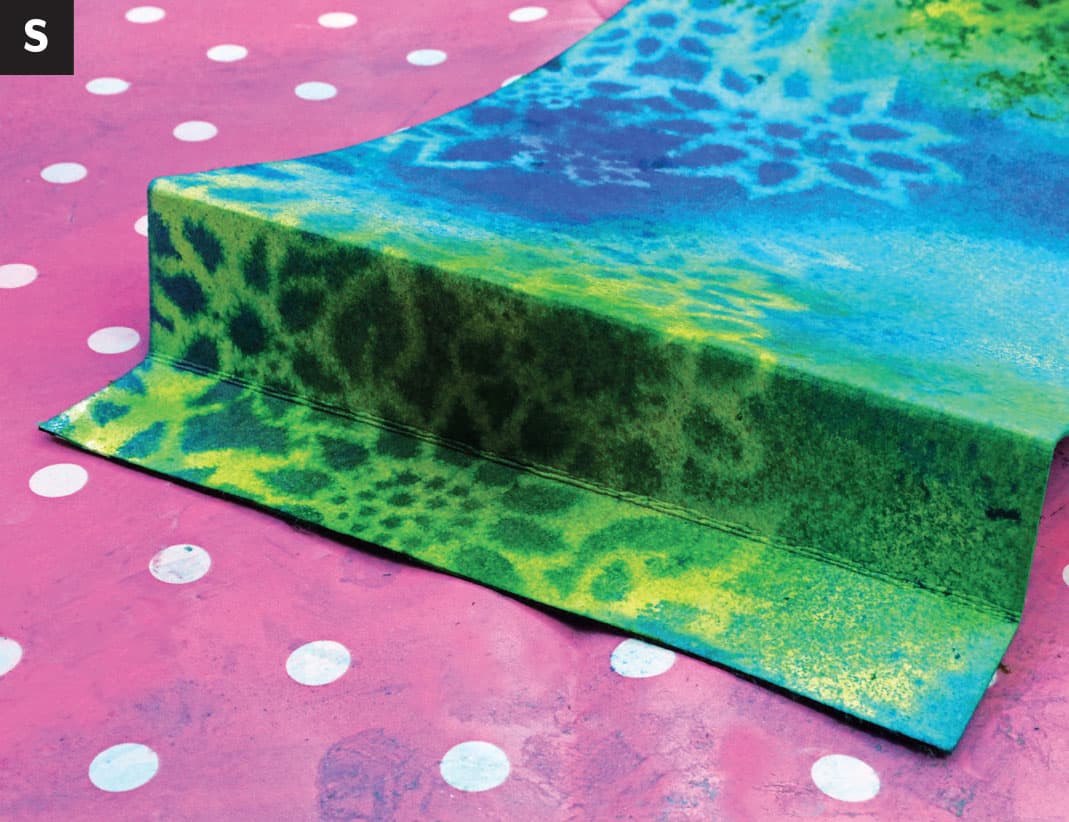
4. For ease, wet the back of your envelope; it will make the paper more pliable. Now fold the bottom of the envelope in at the 1/2-inch (1 cm) mark. I added lines so I knew where to fold. Use a bone folder or a hard implement to sharpen your fold. Now on both side edges, fold in on the 2-inch (5 cm) mark. Fold the edges back in on themselves (midway) as if to create a fan shape (S).
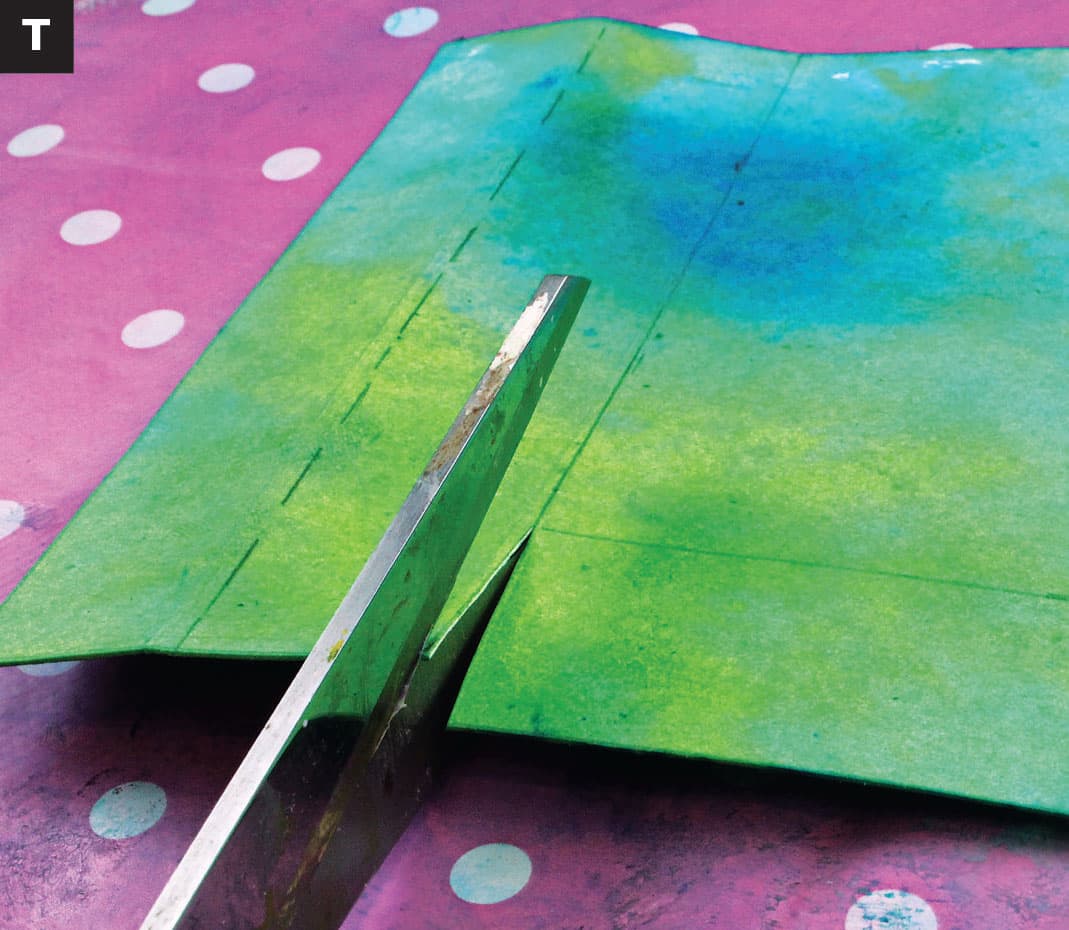
5. Cut off the bottom part of both folded sides that overlap with the bottom fold (T).
6. You’ll need to end up with this shape (U).

7. Once you fold everything in, place the sides in first. Glue the bottom onto the outside of the two outer sides.
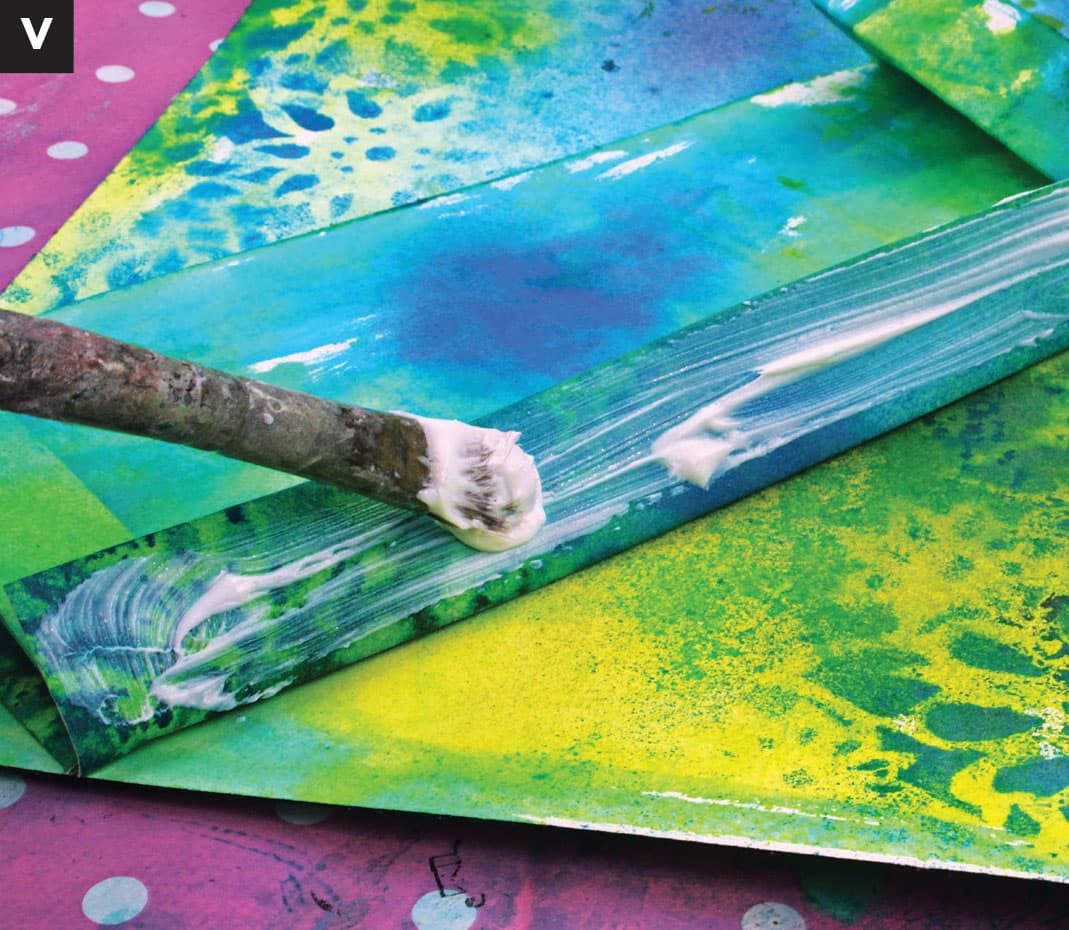
8. When your envelope is folded, glue it in place with a strong (heavy body) gel medium (V).
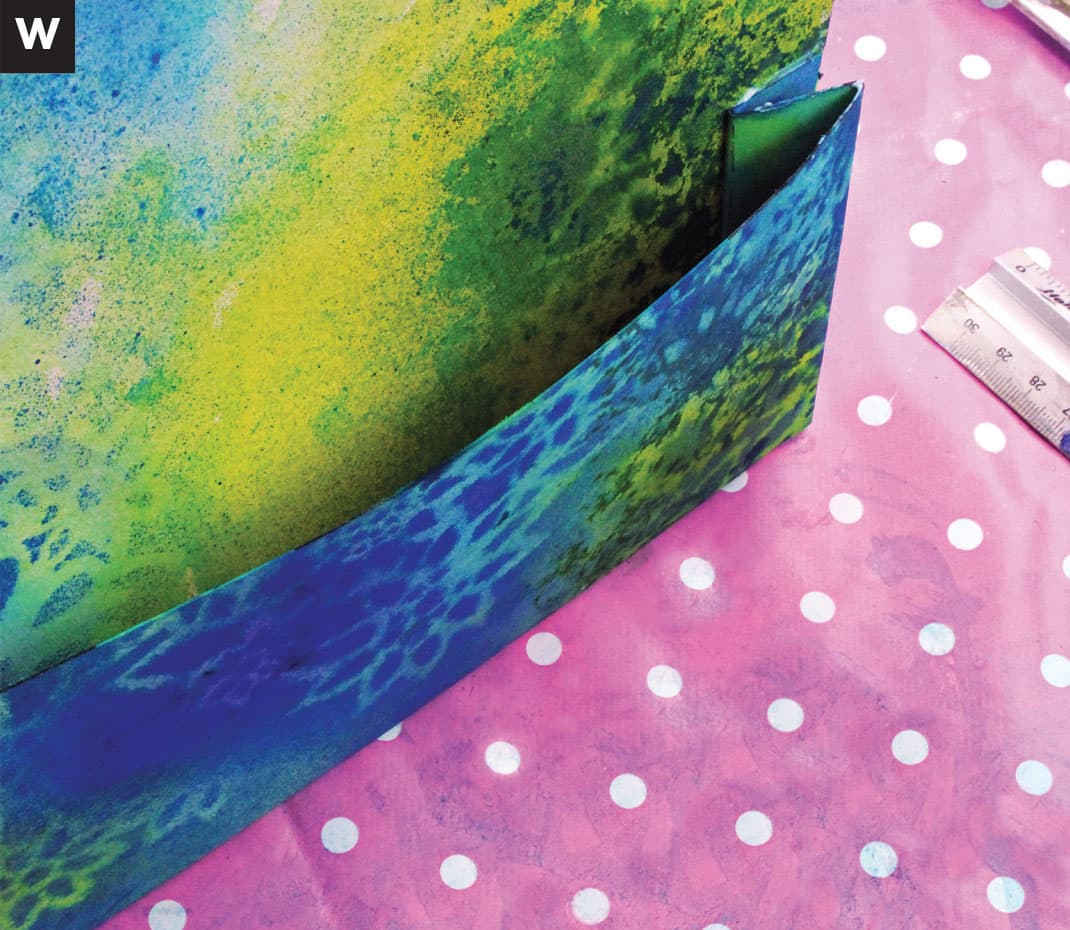
9. To fortify it, I also added washi tape to make sure it wouldn’t come undone (W).
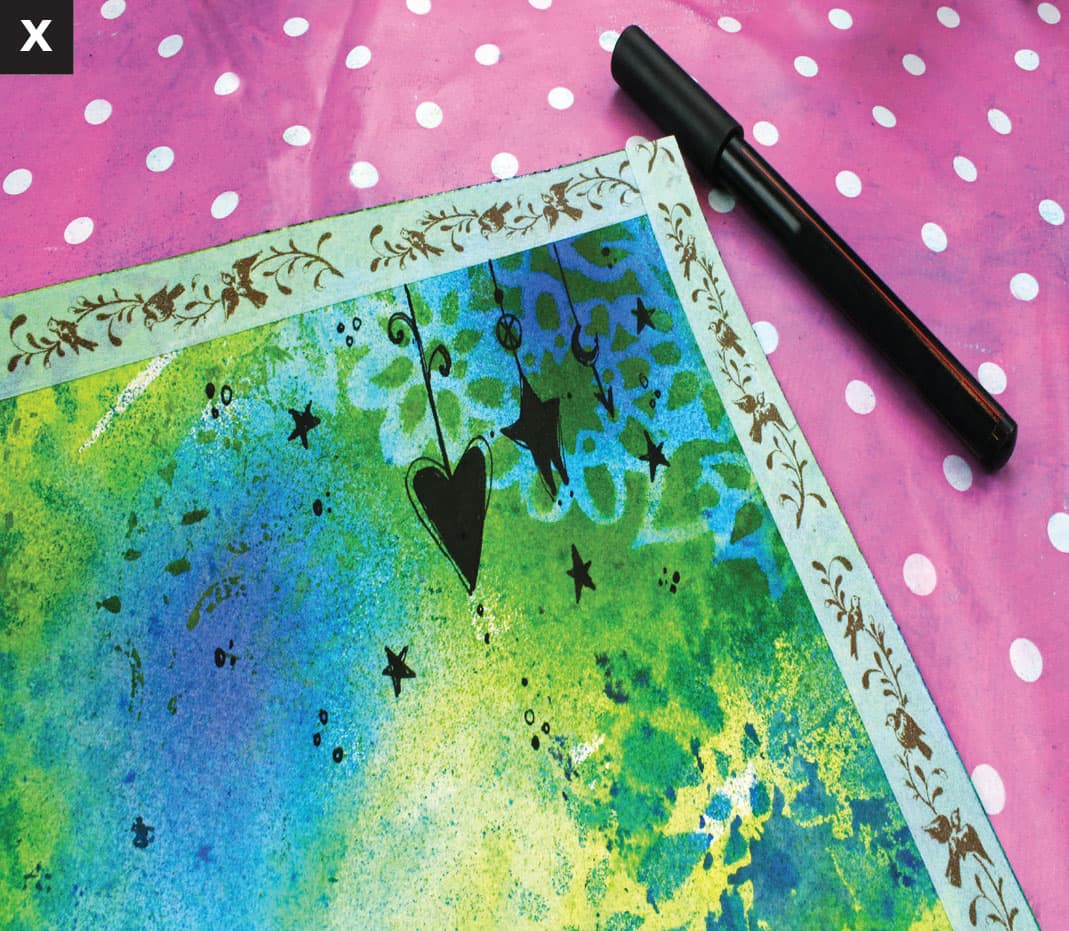
10. As a final touch, I drew doodles in the top right corner. I liked the background pretty much as it was, but it needed something there (X).

PROJECT 4
Following the Light
Engage in Meditative Painting
CONTRIBUTING ARTIST ALENA HENNESSY
IN THE PAINTING SHOWN opposite, I explored expressing light in abstract and symbolic ways. Not only did I create layers of paint to show the elusive and ever-changing qualities of light, but I also added actual gold leaf, which adds a highly reflective quality to the works. I was also interested in creating works with the intentional energy of “I am.” In other words, what lies at our true essence? Invoking a feeling of the mystery and the depth of our existence is of much interest to me, as is the perpetual changing nature of reality. The delicate leaf forms in the square painting are representative of the fragility of existence. To me, in the end, they create a feeling of celebration and gratitude that every day is indeed a gift.
Exploration: Finding Your Center
1. Meditation. To begin painting in this fashion, allow yourself to take 15 minutes to close your eyes and breathe deep into your belly. Allow your breath to move up and down your torso, even sending breath and energy all the way down into your toes and up to the crown of your head. Feel the stillness within yourself and listen to your heart. What does it have to share with you now? Alternatively, you can take a quiet walk in your neighborhood or park, simply noticing, or stare out a window and begin to take in all that you see in an objective fashion. Giving yourself time to feel where you are and what your body, heart, and mind are communicating to you is a valuable step in intuitive and intentional art-making. When you close your eyes, what shades of light and shadow do you see? How does light illuminate your world in your daily life? What does the gift of light give?
2. Reflection. After taking time to center or meditate, reflect on the feeling of “I am.” How would you answer the question? Begin to write in a free-flowing fashion or stream of consciousness without censoring yourself. What is at the core of your essence? Write for 10 to 15 minutes in this way. At the end of your entry, write out the words “I am _________ ” five or so times. Fill in the blanks with what comes to you first. Some examples could be:
• I am light (and shadow).
• I am unbridled joy.
• I am a spectrum of colors.
• I am infinite.
• I am breath, spirit, emotion, and thought.
Art Page: Following the Light
I paint in an instinctual style, a process in which I “feel my way” by responding to each mark made. Working with India and acrylic inks, along with acrylic paint and water-based paint pens, gives the works layers of depth. Water is an important element in my work, as I wish to have the free-form expression of fluidity shown, so I add a lot of water to the ink and layers of acrylic. Adding the sheets of gold leaf to these paintings gave them an extra layer to invoke actual reflective life. The piece above is an alternate outcome using the same process used in this project.

“beauty is not in the face; beauty is a light in the heart."
-Kahlil Gibran
1. Choose a substrate to work on (I like wood panel or Aquabord, but watercolor paper is also nice) and wet the surface with water. Spread India or acrylic inks, just a few colors, around in fluid, circular motions. Choose colors that reflect your current mood. Warm colors (reds, oranges, and yellows) are vibrant, give energy, and are passionate and active. Cool colors (blues, greens, and purples) are calming, recede, are at times melancholy, and give space (A).

2. Keep the layering process going with inks until it feels satisfying to you. Allow the water to work its magic and create feathering, drips, and fluid organic movements. Once the background is dry, you can add and blend a few acrylic colors. Keep layering and creating movements in different directions (B).

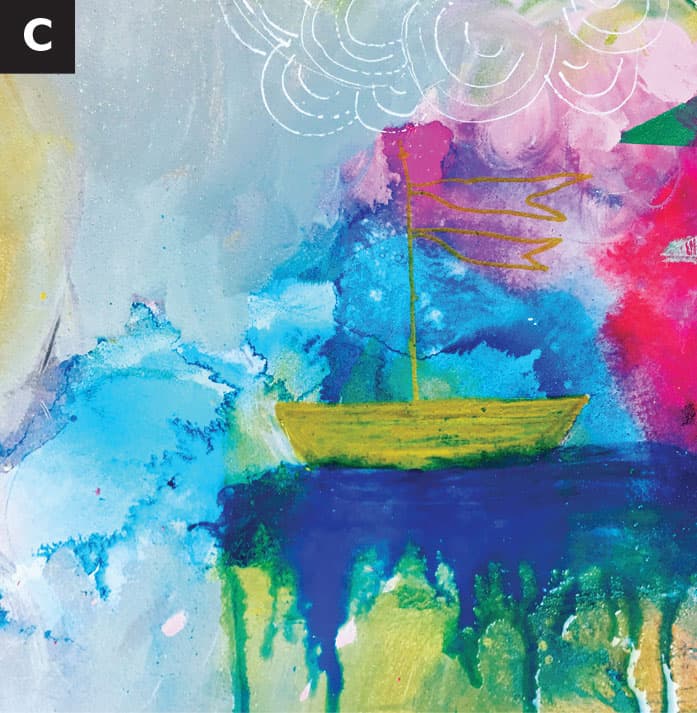
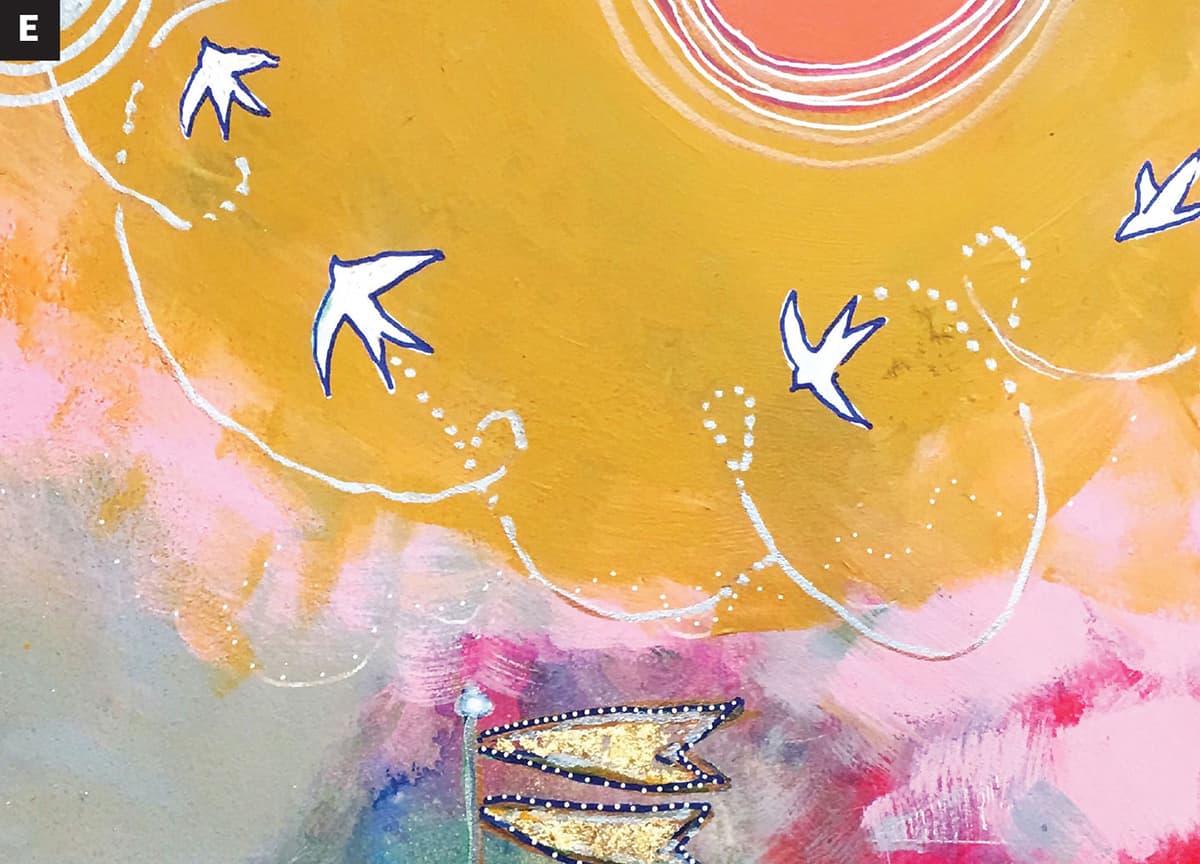
3. Let the surface dry. Use colored pencils to add drawings if desired. I drew a small boat with little pennants and swirling clouds above it (C).
4. If you wish to add gold leaf, read the package directions on how to apply it. It is pretty self-explanatory; you usually need to add the adhesive and let it sit for 25 minutes until it becomes tacky and then add the gold leaf sheet, pressing it down with your fingers and removing excess. I decorated my boat and its flags with gold leaf (D).

5. Once everything is totally dry, add details and imagery that speak to you with water-based paint pens. I like to feel my way through the paint, and this practice takes time (E). After adding details with the pens, you can also go back and add more ink or paint: layer, layer, layer!

With practice, you’ll begin to find your voice with painting. Try creating these paintings with at least five layers!
Remember that acceptance of where you are as an artist and what comes through you in the moment is the most important thing. Keep allowing your creativity to unfold unhindered, and you’ll receive immense benefit from it.