
Posing refers to the arrangement or positioning of a model—or other subject of a photographic portrait.
To say that somebody is "positioned" suggests that they are passive, and completely being directed by the photographer. This is, in fact, sometimes the case. But usually when a photographer and model work together, the best poses are created through a collaborative process.
The photographer-subject relationship gets even more emotionally complex when the portrait is being taken of a subject who is not a professional model. Non-professionals are inexperienced and may be awkward in front of the camera. It may take considerable effort to help an amateur feel comfortable posing. A successful session depends upon the interaction of both players in the drama.
The more casual the photography, the less control over posing the photographer can expect. For example, in street photography, you very rarely get to tell your subjects how to pose. The best you can expect is to watch the movements your subjects make, and pick good moments to make your photographs. And as you might expect, making an unwilling kid hold a pose is nearly impossible!
The impact of posing made by the photographer and subject varies according to the many different kinds of portrait photography. But it's true overall from the photographer's viewpoint that posing involves both the visual skills of an art director and the inter-personal skills of a psychologist.
Taking the visual side of things, it's important to be able to look at bodies and faces abstractly, and as part of a composition. If the person in front of your camera were a landscape, how would you feel about the way things seem to fit together? There should be an apparent, organic wholeness to any portrait—the parts of the body should seem to relate to each other in a proportional way, and nothing should seem to be extraneous or out of place.
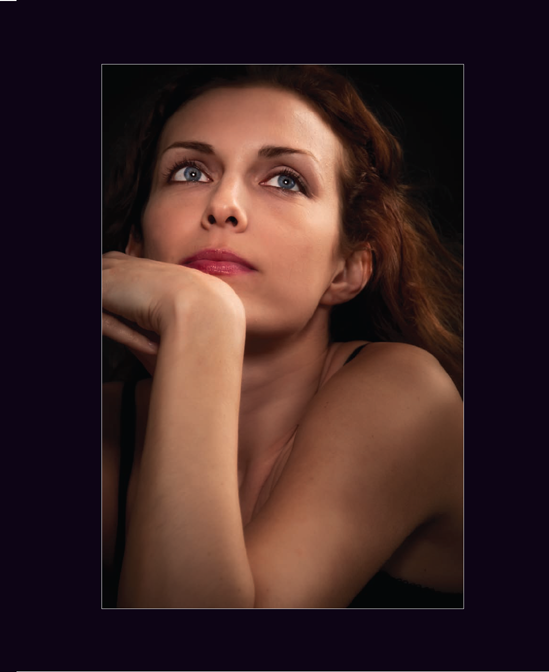
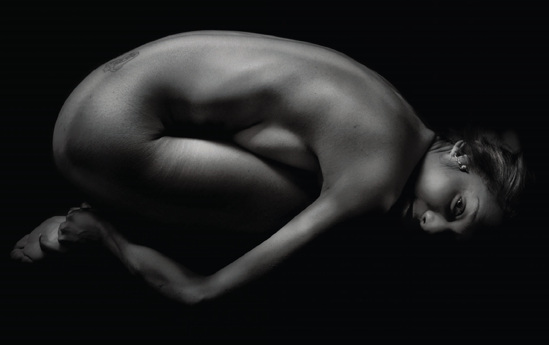
Quite rightly, a great many portraits emphasize faces. Faces do not exist in a vacuum, they are attached to bodies. Therefore, most portraits that are primarily about the face have to be posed to show the connection between the face and body. To highlight the interconnectivity of mind and body in this portrait, I asked the model to position her chin almost, but not quite, resting on her clasped arms.
150mm, 1/100 of a second at f/5.6 and ISO 100, hand held
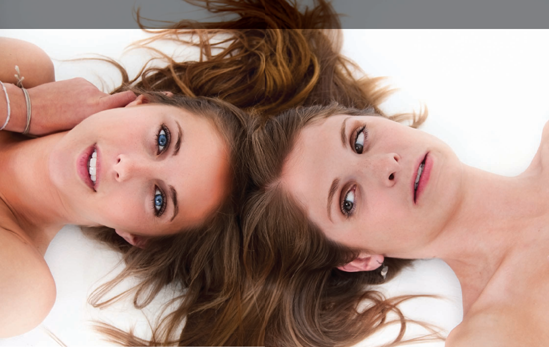
Pages 108–109: I photographed this pair looking straight down from above, using a white background.
The more people you add to a portrait, the more that can go wrong—or at least not quite right. It's difficult to catch a perfect expression on a single subject, and orders of magnitude more difficult when there are more than one. In this case, the woman on the left has an attractive and striking facial expression, and is looking right at the camera. I had just told a joke and the woman on the right started laughing, and then tried to restrain herself. This comes across as a quirky, rather than glamorous, look—but still makes for an interesting joint portrait.
56mm, 1/160 of a second at f/6.3 and ISO 100, hand held
A particular area of concern when poses involve the full figure (rather than just the head) is the hands. Unless you are very careful, hands can seem awkward and not really part of the person they are attached to—almost as if the hands are separate animals with a life of their own. Since misplaced hands can ruin even the best poses, you should keep your eye on how hands are positioned and try to get your subjects to place their hands in a way that makes visual sense in relationship to the rest of their body.
In portraits where faces loom large, be careful about the nose. An ugly view of the nose or nostrils can distract from even the most carefully planned head shot.
As I've mentioned before, the eyes are the most important visual element in many portraits. Therefore, you need to pay attention to the expression in and around the eyes—this is make or break for many portraits. A posing technique I often use is to ask my subjects to "smile with their eyes."
Tension doesn't look good. When someone is tense, lines appear on the face that are not normally present. It's a fact of life that many people get tense when they are photographed. Therefore, you should practice putting your subjects at ease by talking with them, and telling jokes. Music can help some subjects relax. Also, moving around or even jumping can help some models feel comfortable (see pages 116–119).
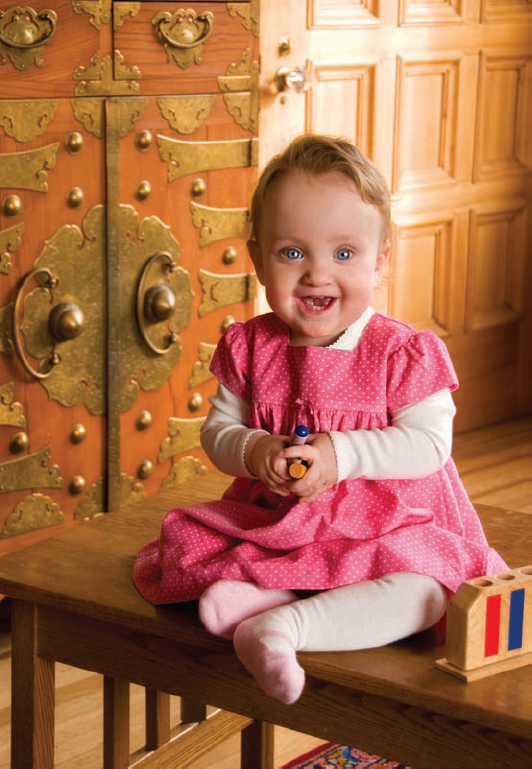
In this environmental portrait of my daughter Katie Rose, the rich background of paneled wood and the Oriental chest adds to the viewer's appreciation of the context of the portrait. Children will not hold a pose for long, so it's important to snap these shots quickly when you see them.
48mm, 1/100 of a second at f/4.8 and ISO 500, hand held
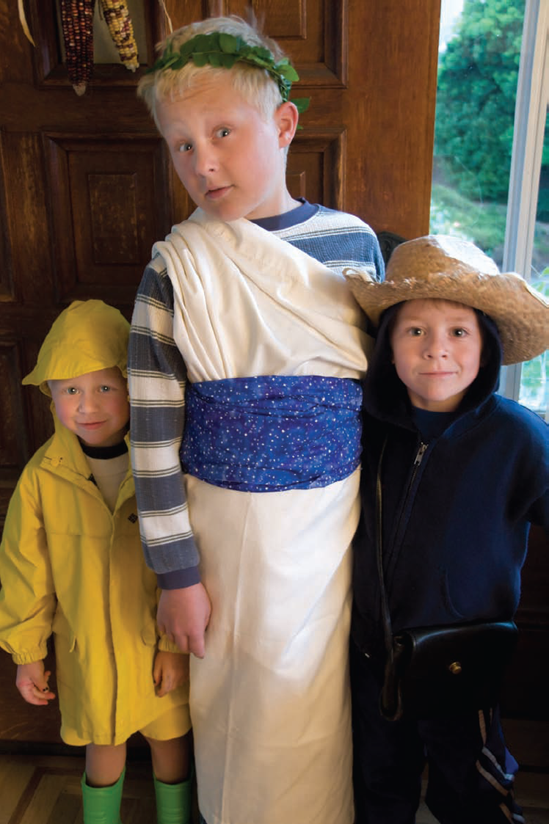
Dress-up occasions—such as Halloween—make for great natural posing of kids and family groups. Your subjects will be naturally proud of their costumes, and quite willing to "go the extra mile"—which for kids can simply mean following simple posing directions and holding relatively still when they look at the camera.
29mm, 1/13 of a second at f/4 and ISO 1000, hand held
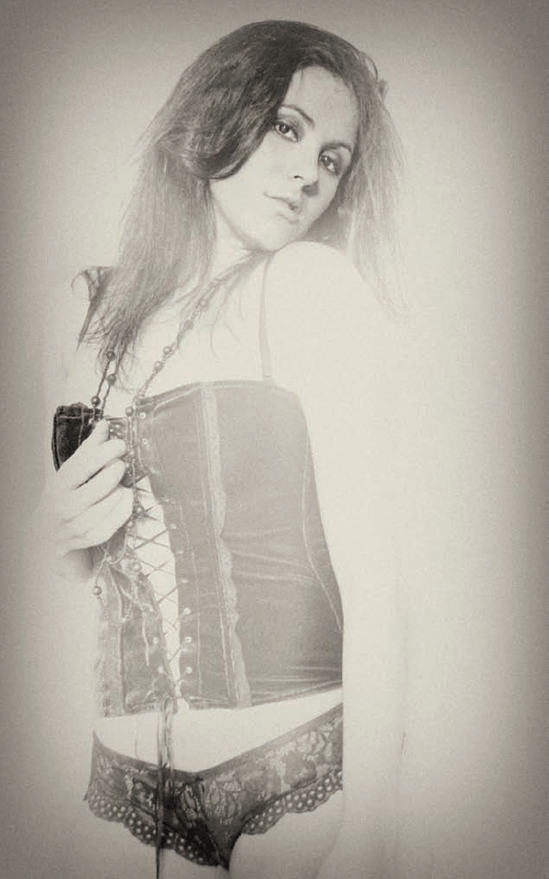
You can see in this model shot that arms are often a significant issue in posing. This model wasn't entirely sure what to do with her right arm and hand. We worked out a pose where she was using her hand to hold on to her necklace. Touching or grabbing an item of clothing is a common solution to the issue of where hands should be placed.
Photoshop tintype simulation, 1/50 of a second at f/6.3 and ISO 1600, hand held
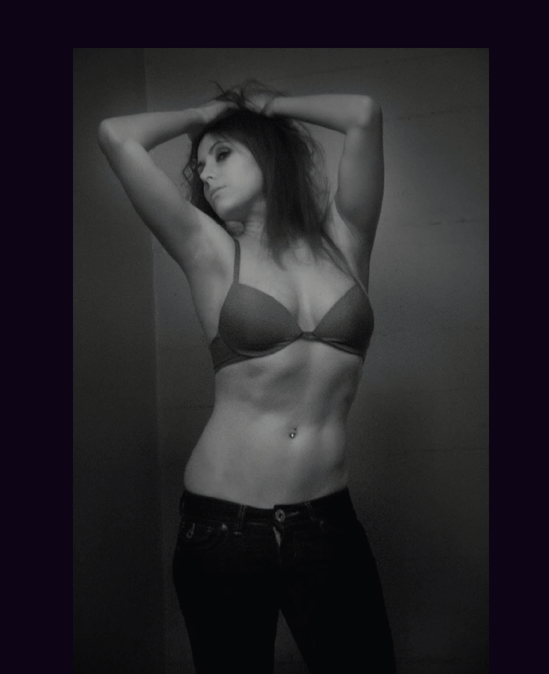
What do you do with the arms? Most experienced models understand this problem, and have developed routines for positioning their arms and hands in ways that work well with their bodies. The danger is that you will end up with a pose that seems stale because the model has done it often before.
This classic model pose is one answer to arm placement, and in the context of this particular shot gives the model an unusual and dreamy look.
Infrared capture, 1/50 of a second at f/6.3 and ISO 1600, handheld
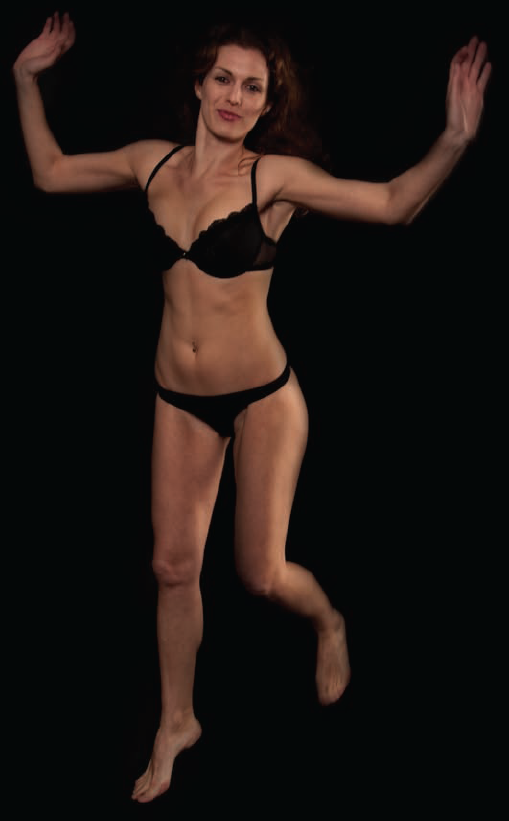
Photographer Philippe Halsman said, "When you ask a person to jump, his attention is mostly directed toward the act of jumping, and the mask falls, so the real person appears." Halsman made a practice of photographing his portrait subjects, many of them famous celebrities, when they jump.
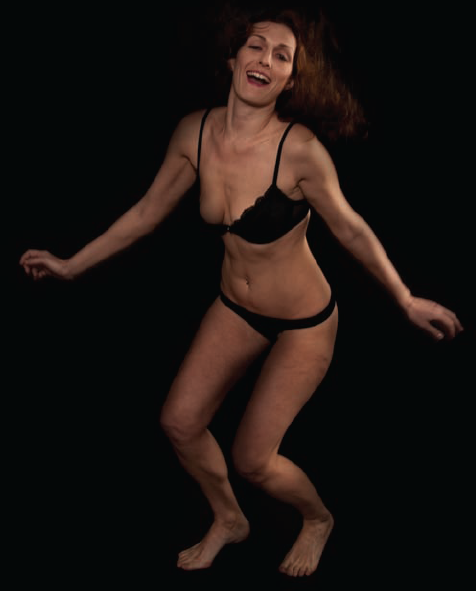
I've borrowed a leaf from Halsman's book, and when I encounter a subject who seems stiff, I often ask them to start jumping. I mostly use this as a warm-up, not for the photos that will get used. It's the rare portrait subject or model that doesn't find jumping amusing—and subsequent shots mostly show a more relaxed person.


Don't underestimate the importance of backgrounds in your portraits. You may think that a background does not matter in a photo dominated by a person, but it does.
It's very important to make sure that your background is chosen to work well with your portrait subject in the studio. It's hard to go wrong with a black background (for low-key, dark portraits) or a white background (for high-key, bright portraits), but do make sure your choice works well for both the skin tones of your subjects and for the image you have previsualized. It's worth bearing in mind that dark skin tones may not show up well on a black background.
If you do shoot with a colored background in the studio, you should keep the tone and attitude of the photograph in mind. For example, a light blue background can look good with a dark skinned subject (see page 93 for an example), and a red background can be used to present a blond subject as brassy and bold.
Don't neglect the possibility of improvising backgrounds. There's more to life in the studio than seamless paper on a roll. You might be amazed at what can be done with ordinary materials such as crumpled paper, corrugated cardboard, and bits of fabric.
Oil-painted backgrounds specifically designed for portraiture can work very well, especially when they are spot-lit. But I tend to be cautious with sets and painted backgrounds that are intended to appear to convert the studio into some other kind of environment, such as a countryside with fence, a bedroom, or an oak-paneled office. If you are not very careful, these kinds of backgrounds can look extremely "hokey."
When shooting outside, remember to keep in mind both the background and the portrait subject in the foreground. One classic amateur composition goof is to create an otherwise acceptable portrait with a tree coming out of the top of the person's head. This simply will not do.
Before, during, and after you make a casual portrait outdoors, or an environmental portrait in conditions that you don't entirely control, check your composition. If there's a visual flaw in the background, try to fix it—for example, by moving your camera position, or by asking your subject to move.
Another possibility with portraits, even those taken outdoors, is to bring your own background. It's easy to pop a black cloth into position, and all of a sudden have an uncluttered background that presents your subject with clarity.
While I often like to present my portrait subjects against relatively neutral backgrounds, it's also fun to use the magic of low depth-of-field. By focusing on your subject's eyes with the aperture of your camera wide open, you can make most backgrounds become soft and out-of-focus. See pages 132–135 for some tips related to this technique.
A crumpled sheet of used seamless paper worked as an improvised background with a surprisingly exotic look.
75mm, 1/160 of a second at f/8 and ISO 100, hand held
Pages 122–123: I chose to photograph this model in a yoga pose against a black background to emphasize the lines and tonality in this low-key image.
31mm, 1/125 of a second at f/6.3 and ISO 100, hand held

When considering the position of your camera in relationship to a portrait subject, the major factors to think about are:
Are you looking up or down at the subject?
Is the subject shown head-on, in profile, or at some angle in-between?
How close are you to the subject?
Subliminally, a camera angle that points up conveys respect and that the subject is larger than life. This is an effect that should be used with moderation, and care needs to be taken not to show an unattractive view of the insides of the nostrils. But it is striking that we often tend to follow people we literally look up to. Case in point: studies have shown that the vast majority of Fortune 500 CEOs are much taller than the average person. It's quite rare to be a short CEO. So pointing the camera up at your subject is a way of visually indicating that the subject is worthy of respect—and this effect holds true even when the angle is quite slight.
Conversely, looking down on a subject is a covert indication that the viewer does not need to be in awe of the subject. You will not find Winston Churchill or Barack Obama often photographed from above! But children often are photographed from above—in part because we are simply used to seeing kids from that angle. Also, models are sometimes photographed from above using a ladder to convey a sense of intimacy because of the downward camera angle.
A variety of camera angles are important to consider because they can communicate important information about your subject. A straight-on camera angle can create portraits that seem to be an honest rendition of character—but it can also be predictable and boring. A profile view can convey the idea that the subject of the portrait is an interesting character, and unusual angles of view can be used to communicate quirkiness.
Being close to your subject can give you the opportunity to bond and create intimacy. If close means that the face dominates the portrait, then the image is likely to be more about character and less about shape and form. However, a telephoto lens from farther back can create the same relationship of the face to the size of the portrait frame—and usually creates a more flattering rendition of facial structure.
There's really nothing wrong with any camera position and angle you choose to experiment with in relationship to your subjects—but you should be aware of the possible visual impact of your choices that I've just described.
When we interact with another adult, our expectation of whether we are looking up or down depends on our own height, as well as the height of the other person. But mostly, there isn't huge variation between adult heights—so it makes sense to position the camera so that it's almost straight-on towards adult subjects, or perhaps slightly looking up, as in this portrait of a Cuban farmer.
200mm, 1/160 of a second at f/6.3 and ISO 100, hand held

The eyes have it. When looking at a portrait, the viewer expects to gaze into the eyes of the subject. If you break this expectation, have a good reason for doing so.
On the other hand, if the eyes are included in a portrait, they are integral. Viewers will look first to the eyes, and then survey the rest of the scene. Plan to positioneyes as an important element in your composition. If your depth-of-field is shallow and only one thing can be in focus, the eyes should be sharp. Selectively focusing on the eyes is crucial for many portraits.
It's important to capture a significant expression in the eyes. The portrait subject should usually be directed to look at the camera, not at you. At the same time, you should attempt to engage the subject so they look interested. As I've mentioned, jokes work well, as does the instruction to "smile with your eyes."
Pay attention to the direction of light hitting your subject's eyes, and also the reflections in the eyes. While these elements make up only a small area of a portrait, they can have a disproportionately large impact on the "feeling" of your portrait overall. Eyes are beautiful, without exception. If the light falling on the eyes does not emphasize this beauty, modify the light, or move your subject until you are satisfied.
For outdoor portraits, soft and indirect light often works best. I look for bright shade or overcast but bright days and try not to position my subjects in strong sunlight.
Outside a cigar factory in Havana, Cuba, this man stopped me to talk. I used a wide-angle lens to increase the intimacy of the scene, at the same time taking care to center his eyes in the upper third of the composition.
24mm, 1/60 of a second at f/3.8 and ISO 100, hand held
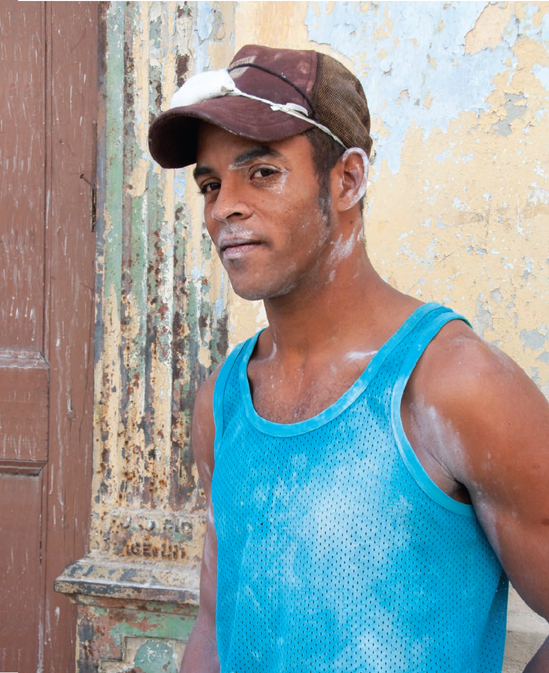
I shot a sequence of exposures of this plasterer. This one works best because his shy gaze is facing the camera, rather then averted as in the other captures. While he is not gazing 100% directly at the camera, there is something about his glance that is intriguing.
32mm, 1/320 of a second at f/9 and ISO 800, hand held
The shutter speed on your camera is set to a length of time, for example, 1/60 of a second. This duration controls how long the shutter is open to let light in to hit the sensor. Unless you are using a flash — for example, in the studio (see sidebar)—the shutter speed setting controls how motion is rendered.
Very fast shutter speeds (1/250 of a second and faster) freeze motion and render it crisply. Exposures of intermediate length (between 1/125 of a second and 1/15 of a second) mostly stop motion so people seem distinct, but there may be some blurring. Exposures that are longer than 1/15 of a second will usually show very distinctive (and sometimes creative) motion effects.
Portraiture is one area in photography in which stopping subject motion is usually one of the goals. To achieve this goal, you can ask your subjects to stay still (or glue them to the background!). More realistically, you can use a flash or plan to increase the shutter speed you use by some combination of adding light, opening the aperture of your camera to let more light in, or raising the ISO.
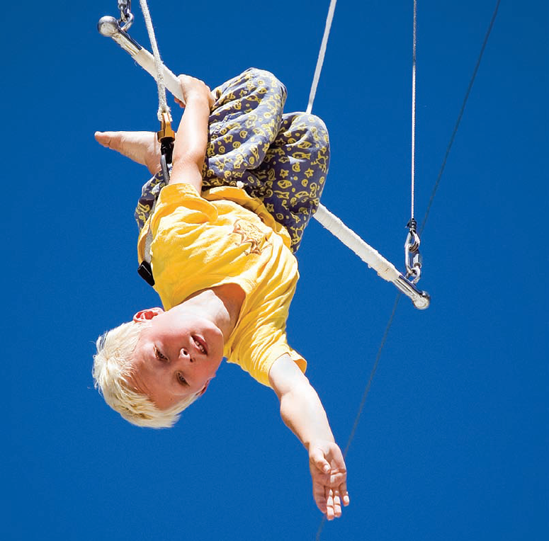
The high trapeze was rigged outside on a bright, sunny day near Lake Tahoe, California. To crisply capture my son Julian as he flew through the air, I knew I needed to use as fast a shutter speed as possible. The 1/1250 of a second shutter speed used in this exposure stops the motion nicely.
70mm, 1/1250 of a second at f/4.5 and ISO 200, hand held
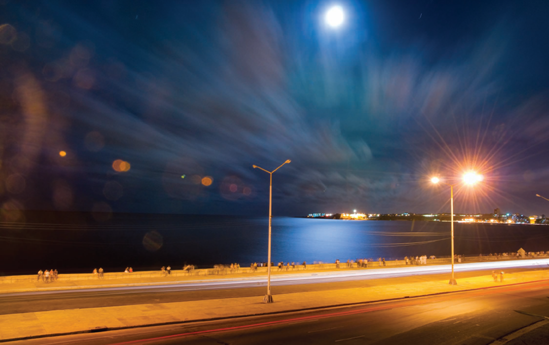
Pages 130—131: In this two-minute exposure by moonlight, the motion of the clouds blown towards the camera gets rendered as lines in motion. The clouds that are further away from the camera look more like "normal" clouds. At the same time, the people in the foreground (exposed at 20 seconds) are only slightly blurred—and look almost like part of the landscape.
Two exposures combined in Photoshop, one exposure at 20 seconds (foreground) and one at two minutes (sky); both exposures 22mm at f/16 and ISO 100, tripod mounted
I confess: in much of my photography, I'm a tripod kind of guy. Furthermore, in my flower, water drop, and nature photography I tend to stop my lens down to as small an aperture as I can to get the most depth-of-field (or range in front and behind the subject that is in focus). Give me f/64 and I'll ask for more.
For the most part, this kind of approach does not work well with portraiture. You can leave your tripod at home when you are taking photos of people. Other than as a prop, you probably won't miss it.
As I've mentioned, in the studio the duration of the exposure is controlled by the length of the flash put out by the strobe units. This means that it doesn't matter what shutter speed setting you use on your camera (as long as you can synch with the flash units). It also means that you don't effectively make changes to the exposure with your shutter speed when you are using flash as your exposure. To change your depth-of-field, you need to make sure you have the appropriate amount of light coming from the flash. You can also change your ISO which can potentially allow you to change your f-stop and thus depth-of-field.
Both these approaches have their limits. Usually, it is not possible to endlessly crank the power on strobe units—and if you could do so you might get high-light blowouts. Although cameras can shoot at much higher ISOs than they used to, you don't want to shoot portraits at ISOs that are too high, unless you are trying for an intentionally noisy effect.
All this implies a fairly large lens opening and wide open aperture. F-stops from f/5.6 to f/11 are the norm in studio portraiture (bearing in mind that the smaller the f-number the bigger the opening in the lens). In turn, a large aperture means shallower depth-of-field?—which is usually just fine for portraits.
A shallow depth-of-field portrait has the face, or even just the eyes, in focus with a blurred background and foreground. The viewer's eyes will go first to the sharper portion of an image, in this case the face.
The situation with location portraiture in terms of aperture and depth-of-field is pretty much the same as in the studio. Most likely, you'll want to freeze subject motion. This means that you can't go with too slow a shutter speed. Increasing the light is even less of an option in the field than in the studio. So increasing the ISO is your best bet to gain the leverage to close down your lens and get more depth-of-field, but who needs it?
In portraiture, moderate apertures are your friends. Just make sure the eyes are in focus. The name of the game is "f/8 and be there."
A moderate aperture (f/8) ensured enough depth-of-field so that the entire plane of this model's face was in focus in this studio shot.
200mm, 1/160 of a second at f/8 and ISO 100, hand held


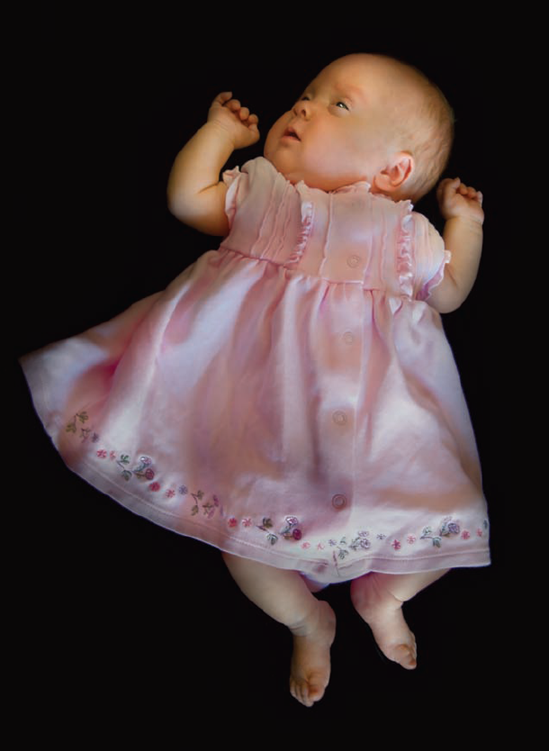
We often look literally down on babies and small children—for example, in a crib. So this camera position, straight down in relationship to the child, seems much more natural than it would with an adult subject. From this elevated position, the baby appears close to flat, so you don't need any depth-of-field.
46mm, 1/50 of a second at f/5.6 and ISO 640, hand held
In this photo, the wedding veil is the most important element (besides the bride) from a photographic standpoint. I shot the image with the aperture fairly wide open (f/4.8) to keep the focus on the veil while allowing the dark tunnel in the background to go out of focus.
55mm, 1/640 of a second at f/4.8 and ISO 200, hand held
For the most part, portrait photography means using a lens in the 50—150mm range—in other words, normal angle of view to moderate telephoto. This is good news from one viewpoint: unlike many other kinds of photography, good portrait photography does not usually involve fancy specialized optics or expensive, unusual lenses. Most likely, the "kit" lens that shipped with your DSLR will do just fine for portraiture—as will the zoom lens that comes with a fixed-lens compact camera.
In many portrait situations, you don't want to use a lens that is much wider than normal because using a wide-angle lens makes facial features look distorted in a way that is not flattering.
On the other hand, using a moderate telephoto tends to compress the lines of perspective in the areas of the cheekbones and face in a flattering way. That's why a 85mm to 100mm lens is often considered ideal for close-in portraiture—particularly if the lens has a fast maximum aperture, and blurs the background attractively when it is used wide open.
For much of my portraiture, particularly in the studio, I like to use my 18-200mm zoom lens. All photographic hardware choices involve trade-offs, and this is not a perfect lens. But it does cover in one convenient and fairly lightweight package all the focal lengths I am likely to need in portraiture.
There are a few situations in which it makes sense to use untraditional focal lengths or lenses to make portraits. For example:
If you want to bring a distant subject in closer for an intimate portrait, it makes sense to use a longer telephoto lens, perhaps around 200mm. I wouldn't suggest lenses longer than about 300mm for portraiture. Even if they are steady on a tripod—and these longer lenses cannot realistically be handheld—your subject will probably move at least slightly, creating unsharp looking images because of motion.
Special soft-focus optics, such as the Lensbaby with its configurable "sweet spot"—area that is in focus—can be used to create memorable, unusual, and romantic soft-focus portraits.
Extreme wide-angle portraits are almost never flattering, but they are certainly unusual and attention-getting. I've found that kids enjoy seeing themselves as captured using a fisheye lens, so in portrait sessions with kids I will often start by making a fisheye exposure. This loosens my subjects up so that they have fun with more conventional photos.
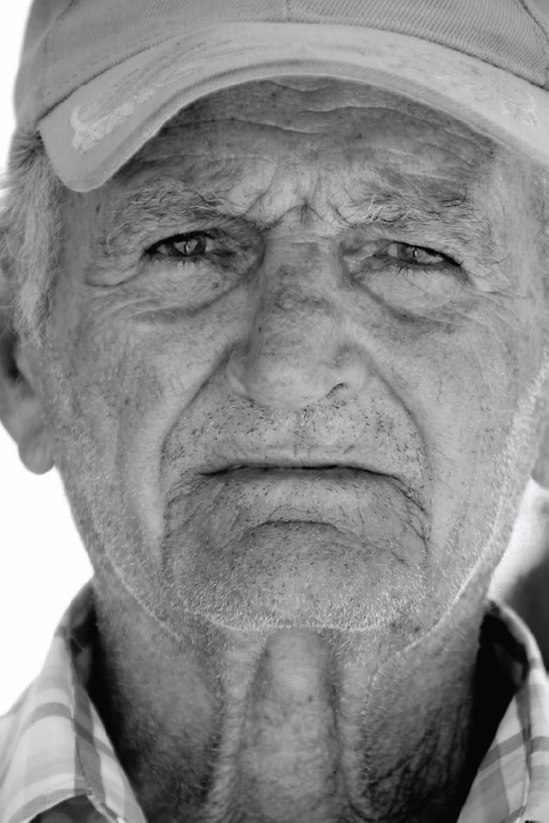
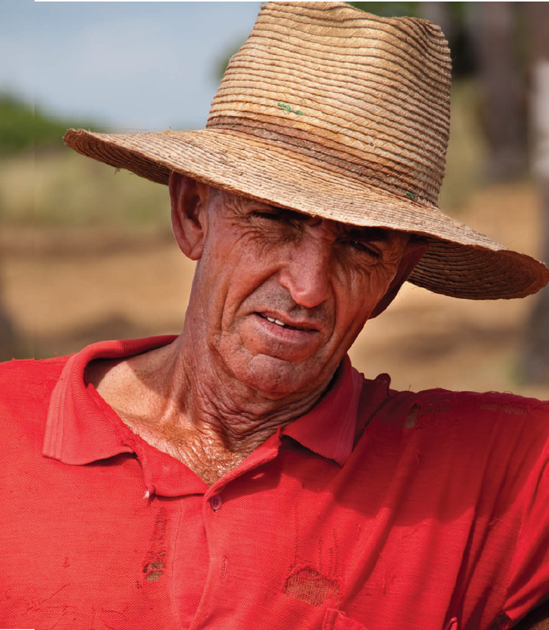
Using a telephoto lens (200mm) brought this tobacco farmer closer, optically helped to "separate" him from his background, and emphasized the leathery lines on his face and neck.
200mm, 1/250 of a second at f/8 and ISO 100, hand held
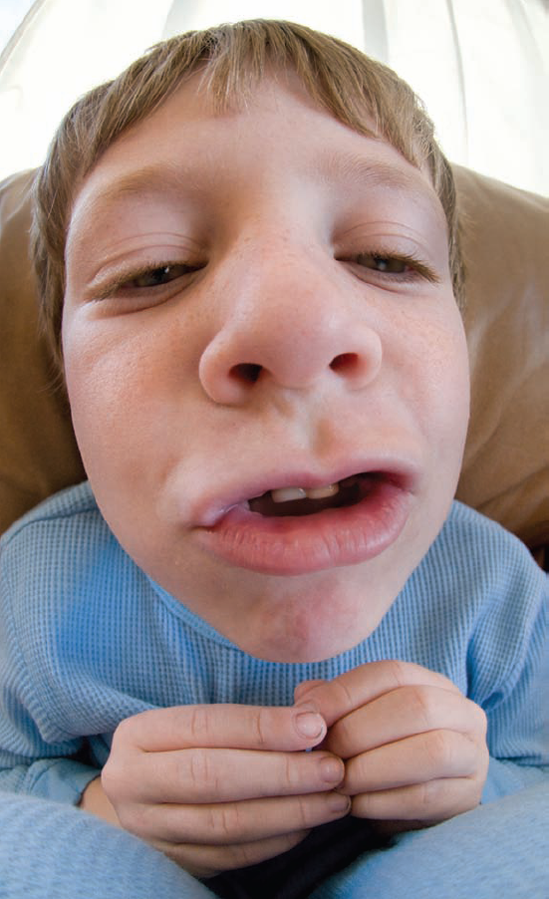
A fisheye lens held a couple of inches from my son Nicky's nose helps to create an unusual and humorous portrait.
10.5mm digital fisheye, 1/200 of a second at f/7.1 and ISO 400, hand held
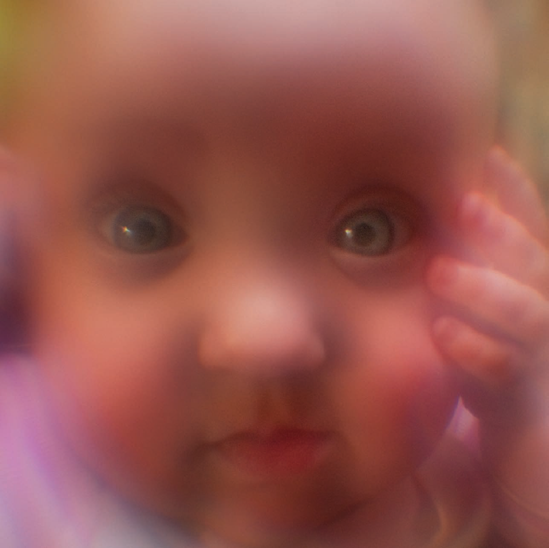
Using a special purpose lens—the Lensbaby Composer with a plastic optic—I was able to create an intentionally out-of-focus image, with only the eyes relatively sharp. The Lensbaby allows you to move the lens around on a flexible base to position the "sweet spot"—the portion of the image that is in focus—where you'd like it. Normally, in Lensbaby portraits, the sweet spot should be positioned so the subject's eyes are in focus, relatively speaking.
Lensbaby Composer, plastic optic, 1/60 of a second using an f/4aperture ring and ISO 320, hand held