
CHAPTER 7
Make Your Plane Look Good for Day Flying
Our approach at the Brooklyn Aerodrome to building with flat board makes it easy to decorate as well. This chapter lays out all we know about decorating for day flying, and most of that was figured out by Karen, who drives the artistic side of the Brooklyn Aerodrome. Do not decorate your first airframe because it will likely be destroyed in the learning process. If there are kids involved, then some simple decorating on the first plane is a great way to keep it fun while saving the fancy stuff for the second airframe.
This chapter is organized around example airplanes that use various techniques and materials, with a bit of a historic tour of things we have tried. Not all techniques worked out, so read the pluses and minuses of what we have done. Figure 7-1 shows some variations.
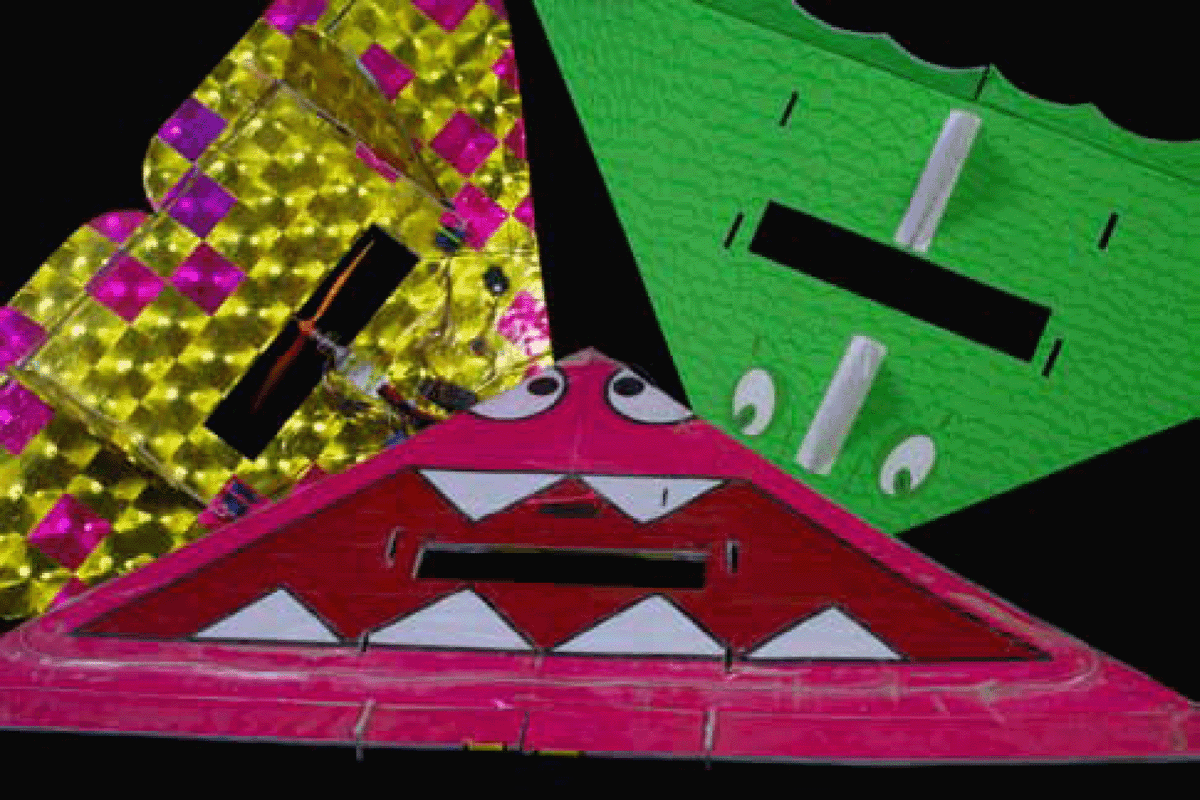
FIGURE 7-1 Assorted decorated Flacks.
General Considerations to Keep in Mind
Decorating can have both positive and negative effects on the performance of an airplane. The plane can be made tougher, more fragile, faster, or more sluggish by choice of technique and material. Some principles to keep in mind include the following:
1. Decorations add weight. A bare-bones Flack weighs 15 ounces. It can fly comfortably carrying another 8 ounces depending on prop/motor and flying conditions. A better decoration budget would be 5 ounces.
2. The center of gravity (CG) has to be maintained, but 75 percent of the airplane’s surface area is aft of the CG, so decoration will tend to move the CG back. The correct CG can be achieved by moving the battery forward, moving the motor forward, or adding nose weight.
3. Decorate with an eye to how the airplane will look in the sky, not on the ground. Things to consider include
a. The underside of the airplane will be in shadow most of the time.
b. Details will not be seen.
c. Contrast is your friend.
4. Don’t worry about clearly indicating left versus right or top versus bottom with color for day flying as long as you are not straying from core Flack design. Night flyers (Crystal Towel) can cause problems, but that is covered in Chapter 8.
5. A flying plane is always prettier than a plane on the bench. Don’t obsess on making it perfect.
Examples
We have tried a lot of decoration strategies at the Brooklyn Aerodrome. Learn from our successes and failures. With a somewhat timeline-sensitive presentation, this is what we have done for the daytime.
Mouse: Avery Stick-on Labels and Sharpies
Figure 7-2 is the first example of a “decorated” day flyer and shows the genesis of a long series of “face in the sky” approaches that look great in the air. The airplane never flew, but it was the parent of many that did. Our simple technique was sheets of white stick-on Avery label paper on blue foam and various Magic Marker colors.
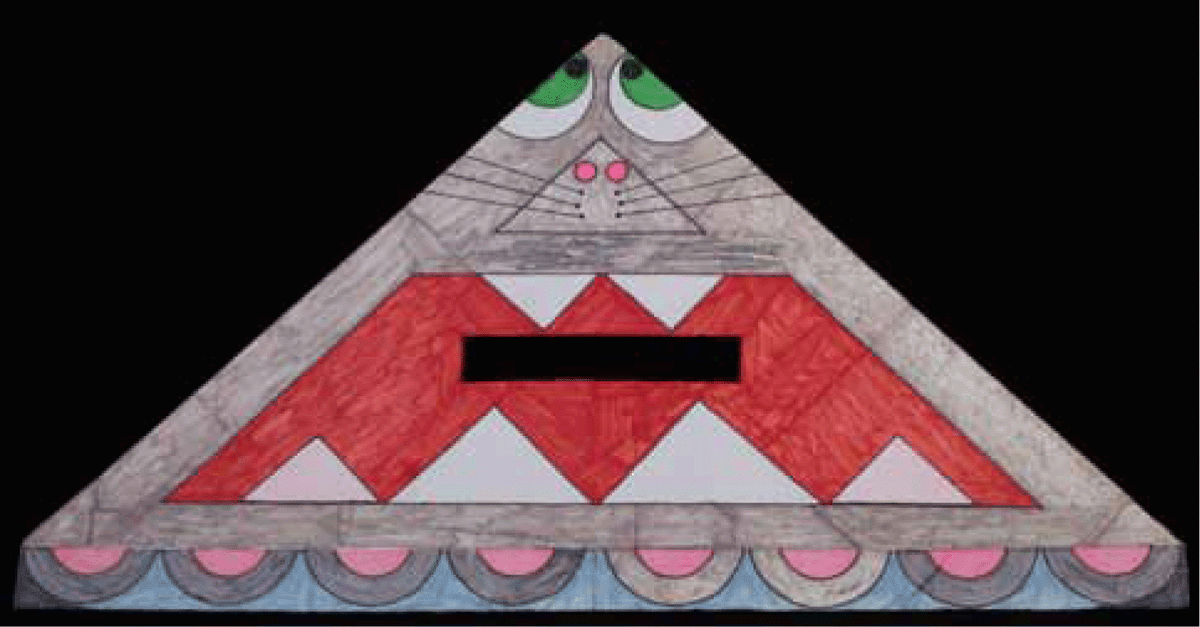
FIGURE 7-2 Avery stick-on paper and Magic Marker colors for the Mouse.
• Technique: Avery stick-on labels and Magic Markers.
• Pluses: Maximum control of shapes/lines.
• Minuses: Time-consuming; subject to wear and moisture; colors not saturated.
Purple Monster: Wrapping Paper
The Purple Monster in Figures 7-3 and 7-4 represented a breakthrough not only in design but also in performance. Not only did it look better, but it also flew better in that the wing was made considerably stiffer by the wrapping paper that we used to decorate the airplane. The wing was decorated by the following method, which we still use on all of our sheet-decorated planes.
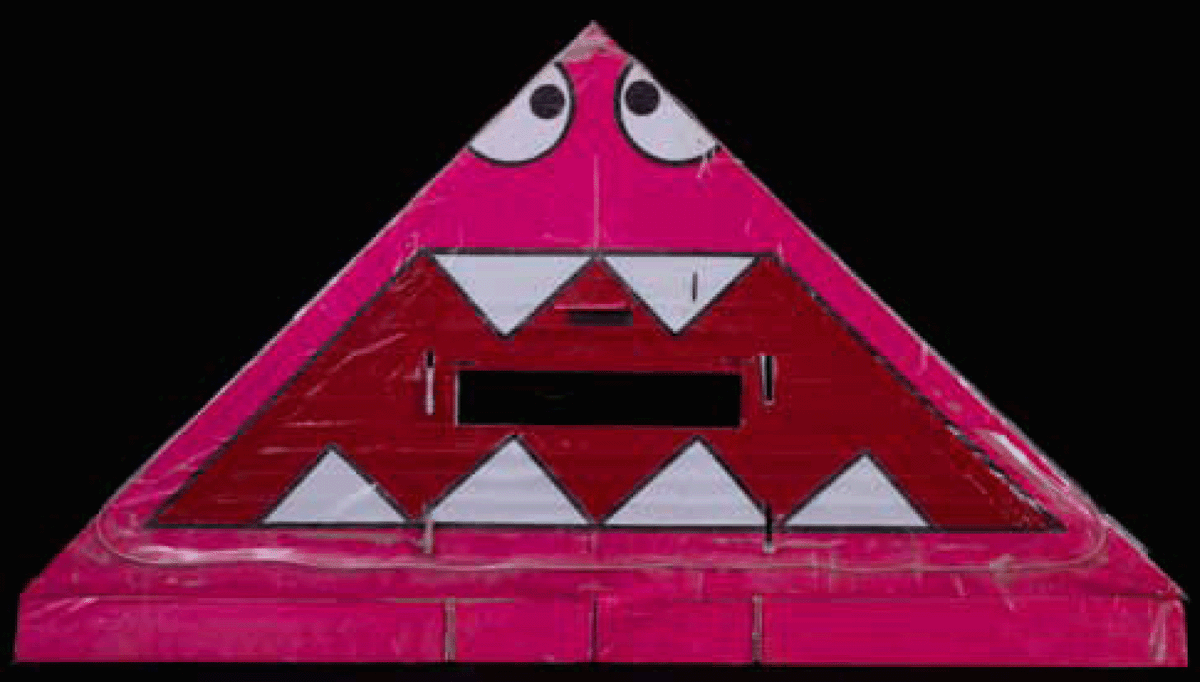
FIGURE 7-3 Bottom of the Purple Monster.
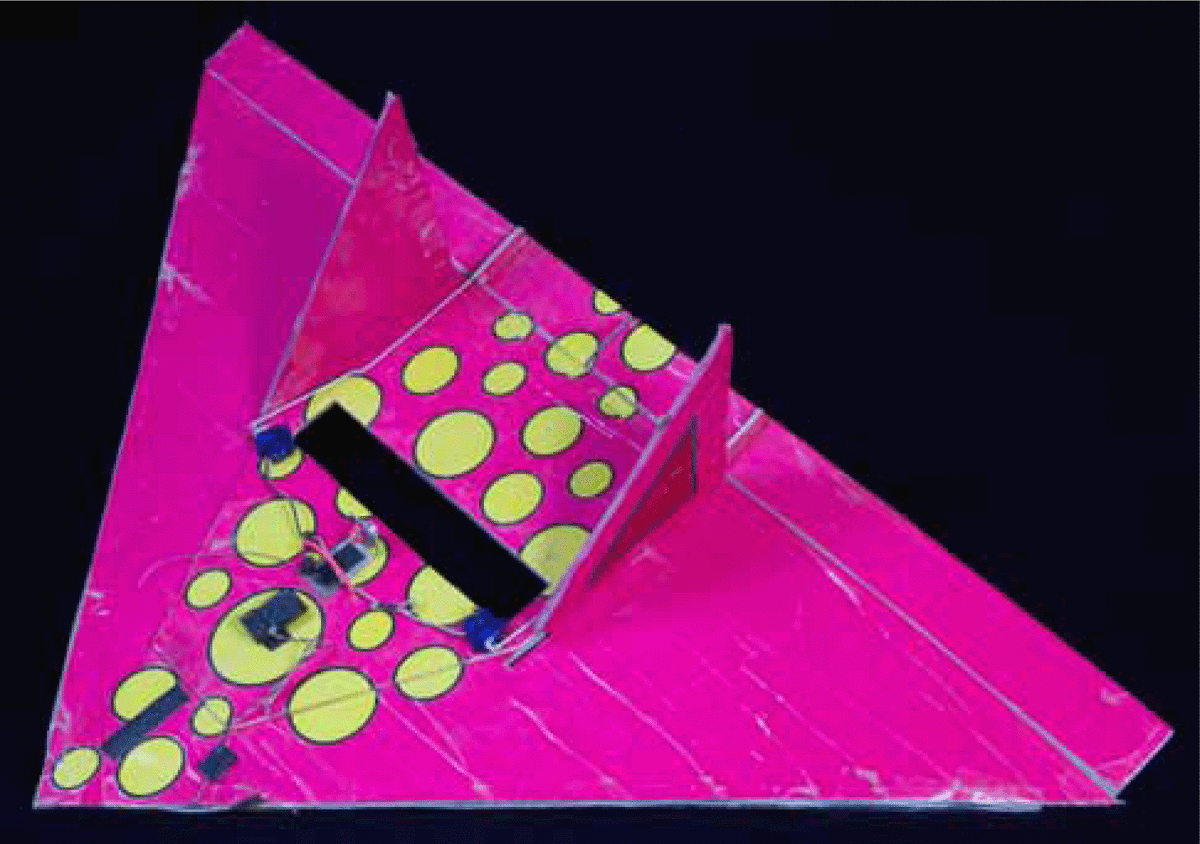
FIGURE 7-4 Top of the Purple Monster.
Covering an Airplane with Wrapping Paper
1. Cut the deck from Coroplast—later planes stopped using a deck.
2. Cut the wing and stabilizers from blue foam.
3. Cut and hinge the elevons with packing tape. It is important to do this before applying any covering.
4. Cover a large, well-ventilated spray area with newspapers.
5. Cut gift-wrap paper slightly oversize for attachment to the bottom of the wing.
6. Spray 3M 77 or other spray-mount adhesive onto the gift wrap. If other adhesive is used, test it on a bit of foam to be sure that it doesn’t melt the foam.
7. Wait for the spray mount to get a little tacky, and press the wing onto the gift wrap.
8. Trim the paper flush with the edge of the blue foam.
9. Put down fresh newspaper that is not sticky.
10. Generally, there are two large triangles of material left for the top surface. Apply spray-mount to each. Overlap the center by 1 inch, and apply the paper to the topside of the wing. Trim it flush with the edge of the foam. No effort is made to wrap the edge of the foam.
11. Cut the gap for the elevon. Unless the paper is very lightweight, the stiffness of the paper will resist going into the hinge and interfering with the functioning of the elevon. Trim the paper to the limits of the bevel. The blue foam that is showing can be colored with a Magic Marker.
You now have a wrapping paper-covered wing ready for detailed decoration. Notice that the wing is considerably stiffer than one made of foam alone. Not all wrapping papers will do this. For example, neither tissue, very thin plastic, or vinyl adds much stiffness.
The stabilizers and deck are covered in a similar fashion, but the deck need only be covered on one side. Detailed decorations are added with bits of other colored paper or plastic that are attached with spray-mount. If paper gift wrap is used, then it is well worth considering application of a layer of clear packing tape to waterproof the design. Dew on the grass can ruin a paper-decorated plane. Once decorated, the plane is built as described in Chapters 3 and 4. Note that it is much easier to decorate a plane without the electronics attached. Finish the design, and then add the gear.
Dealing with Blue Foam Cut Edges
The edges of the blue foam revealed on the sides of the cut and the elevon is often a source of visual incoherence. We have approached it in many ways.
1. Just ignore it.
2. Wrap the edge in black or other-colored tape before applying the top/bottom surfaces with overlap to the adjoining surfaces to lock the tape in. This can require slitting the tape to go around the corners, etc.
3. Wrap the first surface around about V2 inch before applying the second surface. This takes a long time to do and, like tape, requires slitting the wrap.
4. Color the edge with a Magic Marker.
Dealing with the Elevon Hinge Bevel in Blue Foam
The elevon hinge bevel can be annoyingly prominent in the design. It would be nice to hide that blue streak, but it is surprisingly difficult to do. Things we have tried and what happened include
1. Before applying the topside layer of material, apply a strip of decorative material on the hinge with it doubled back. This can work with very thin material, but it tends to make the hinge really stiff, and the material will pop out anyway.
2. Cut the top material in the middle of the hinge, and push it down into the hinge, making the blue less noticeable. Unless the material is very flimsy, it will become unstuck and, if stiff enough, interfere with up-elevon movement.
3. Paint or color the foam. This can work fine.
4. Just ignore it, and keep the bevel area free of material. This is what we do most of the time.
Assessment of the Purple Monster
• Weight: The decorations added 7 ounces to a 15-ounce airplane for a total weight of 1 pound, 6 ounces.
• Technique: Spray-mount-attached colored wrapping paper, black tape, and clear tape.
• Pluses: The design is visually strong; wrapping paper made the airframe stiffer, which meant a crisper performance; it was fairly quick to decorate; and the extra weight did not affect performance negatively, although the airplane did fly faster.
• Minuses: Wrapping with clear tape is a hassle to protect against moisture; the airplane was not as noticeable in the sky as we would have liked because of color choices; the spray-mount was smelly and messy; and most of the visually interesting bits are in shadow most of the time on the bottom.
Big Pink Angst: Fresnel-Lens Plastic
This plane represents the angst of creating new designs. As seen in Figure 7-5, it shows more tooth and claw with a shiny holographic skin that popped out much more than the wrapping-paper skin of the Purple Monster. It is probably our most flown airplane in the Brooklyn Aerodrome fleet, having been multiple years at Burning Man, Maker Faires, and summer camps.
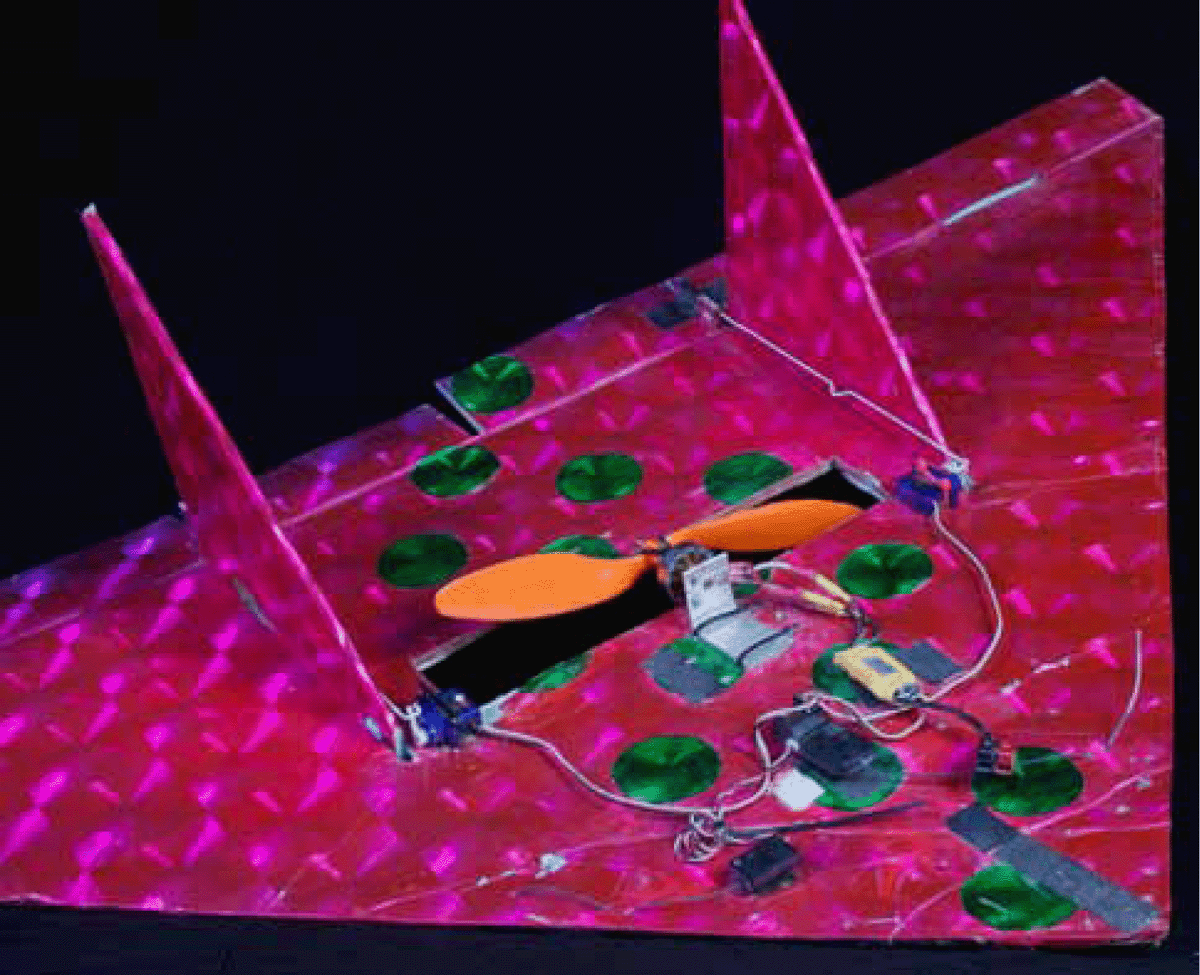
FIGURE 7-5 Top view of the Big Pink Angst. Note the absence of a deck. Bottom is similar to the Mouse and the Purple Monster.
No Deck for the Big Pink
The prime innovation of the Big Pink is that it is deck-free. The covering stiffened the airframe sufficiently to allow the components to be attached directly to the wing once it was covered and completely decorated. Servos are attached with both double-stick tape and zip ties directly onto the skin of the Big Pink.
The decision to eliminate the deck was motivated by seeking weight savings (2.5 ounces) and the benefit of simplifying the build/decorating process. The function of the deck is to allow for rapid airframe replacement, and it provides essential stiffening of the raw blue foam. I did not expect to crash this airplane as a beginner would, and I did not need the stiffening effect because of the adhesive film’s properties.
Pink Holographic Adhesive Film (and Other Colors)
This material is one my favorite skins. Go to the Brooklyn Aerodrome website to see the range of color this material offers. It weighs about ½ ounce a square foot and stiffens foam airframes like no other material we have. Given that the sides of a Flack are about 8 square feet and the stabilizers add nearly an additional 2 square feet, the covering adds 5 ounces to the total weight of the airframe. The plane can be covered in about 1½ yards of the 2-foot-wide material. The Flack is 23 inches from nose to elevon and 41 inches wide, so budget 45 inches to cover the top and bottom of the wing, with the remaining 9 inches for the stabilizers. We apply the material in the same fashion as done with the Purple Monster, except without all the smelly/sticky spray-mount adhesive. One frustrating bit is that bubbles tend to get caught under the plastic. This can be fixed by pricking the bubble with a pin and smoothing the plastic with a credit card. We tend to wrap external edges because it looks much better, but this takes a long time.
The plane handles much more crisply than a regular Flack, but it also flies faster and is more fragile on hard landings or crashes. Whereas the foam by itself may bend or crush, with the plastic skin, it tends to tear. It is also going to be much less forgiving if it hits a person or property. Figure 7-6 shows a yellow and pink version with rounded edges that may be less dangerous.
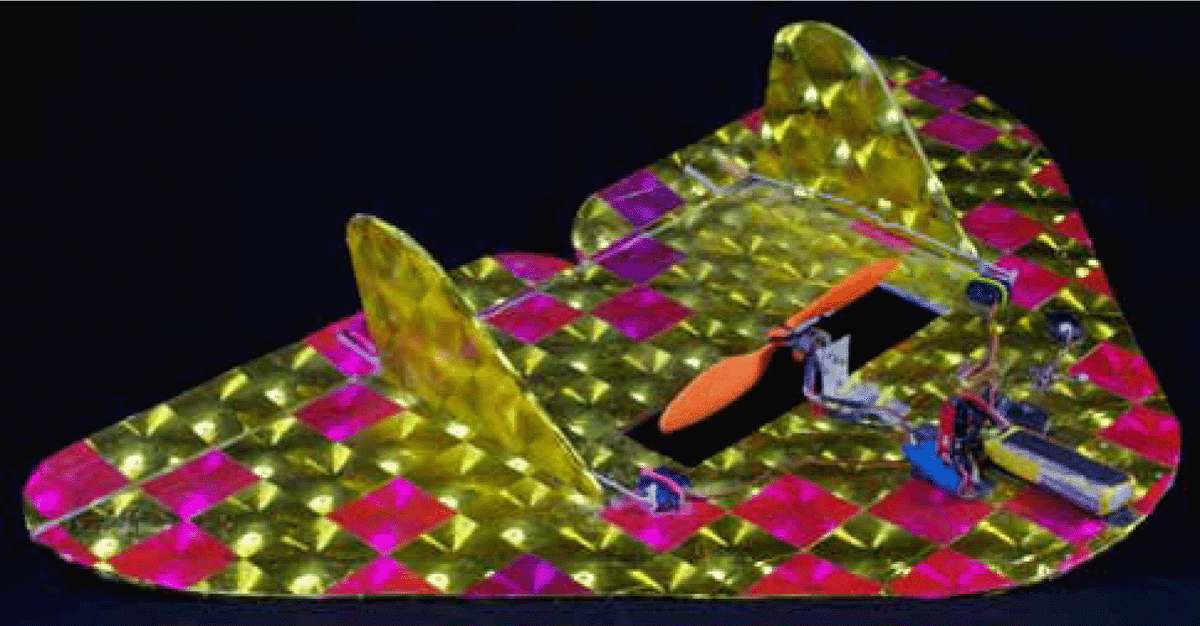
FIGURE 7–6 The Bumble Bee, a Fresnel lens–covered rounded airplane.
Assessment of Big Pink Angst
• Weight: The decorations added 5 ounces to a 15-ounce airplane for a total weight of 1 pound, 4 ounces.
• Technique: Stiff reflective adhesive film; various tapes; no deck used.
• Pluses: Increased stiffness results in the best-flying plane in our aerodrome; visually strong.
• Minuses: Crashes tend to tear the film and foam; colors can fade in intense sunlight; and increased stiffness makes the plane less safe for creatures or property.
Silver Shark: Plastic Film 2
The Silver Shark continued the big, toothy mouth theme but with a very different skin (Figure 7-7). The goal was to make an airplane that really caught your attention, and we thought that a reflective surface would be best if we could catch the sunlight in a mirror-like way and flash the plane while doing loops and rolls. Also notice that it has only a single fin—it flies fine with half the usual stabilizer complement. It debuted at the Figment Festival in 2010 on Governor’s Island in New York City to great effect.
FIGURE 7-7 The Silver Shark with its single terrifying fin. The other side is similar to other mouth planes.
Details
The skin is an adhesive plastic that has a little stretch to it and has reflective flecks embedded into it. It cost around $10 a yard at 24-inch width, and it took 1.5 yards to cover the entire airframe. The material weighs about 1 ounce per square foot. The total covering weight is 9 ounces since the the Flack has 8 square feet of wing and 1 square foot for a single stabilizer. Note that all external blue foam edges were wrapped bottom to top with a ½-inch overlap because we didn’t want to lose any opportunity to create a light flash, and the leading edges are an excellent place for that to happen. The adhesive also was a little goopy, so we also wrapped the external edges with clear packing tape for extrastrong bonding.
One downside of this was that with the stabilizer in the center to represent a single shark fin, there was a substantial stress riser in the middle of the airframe that was evident after 30 or so flights. The result was that the Shark got a little soft in the middle and could be seen flexing in loops. The situation could be rectified with a spar the width of the prop hole about 1 inch wide made of Coroplast added behind the prop hole.
Assessment of the Silver Shark
• Weight: 1 pound, 4 ounces.
• Technique: Plastic adhesive sparkly covering; various tapes; no deck used.
• Pluses: Nice sparkly airplane that got a lot of attention; it flew well, but not quite as well as the Purple Monster or the Big Pink Angst.
• Minuses: Center-mounted fin and absence of a deck caused the plane to be soft in the center, which was noticeable in turns and loops.
Brooklyn Aerodrome Orange Plane (BAOP) Paint on Foam
The BAOP was created to fly at the opening party for the Iridescent Science Center in the Bronx. We wanted a good-looking plane with Brooklyn Aerodrome written on both sides. Figure 7-8 shows how it came out. The colors are safety orange with white lettering. The plane flew great but tended to shed chunks of wing on landing.
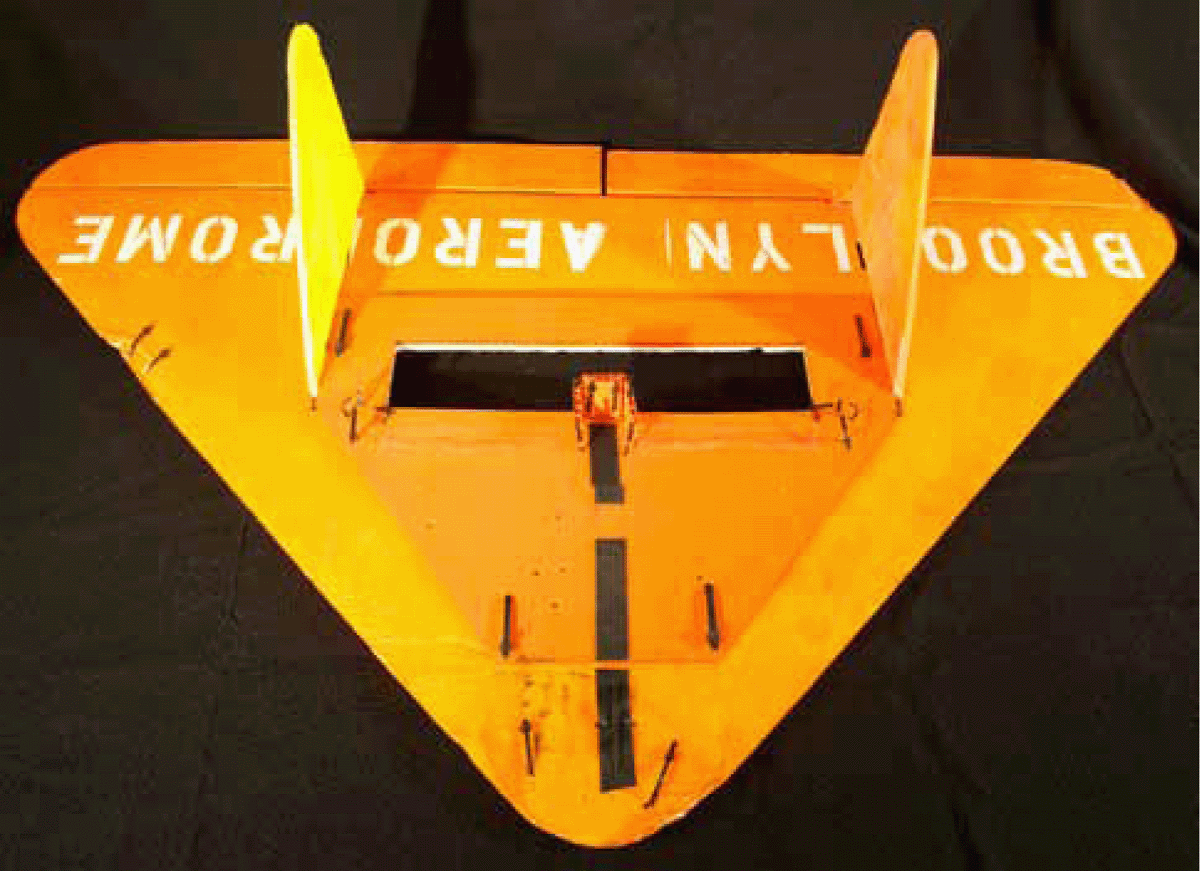
FIGURE 7-8 BAOP covered in orange paint with white lettering.
Painting Foam
The foam board we prefer calls out for painting. It is flat, takes paint well, and painting gives it artistic flexibility like nothing else. Unfortunately, the paint removes all flexibility from the surface, which flies great, but is a complete disaster on landing because the airframe breaks into bits on contact with any firm surface. Formulations we have tried include
1. Gesso foundation with colored artists acrylic. Result: The airplane broke like porcelain on a stone floor on first landing. Gesso is made of plaster, so no surprise there really.
2. Artist acrylic applied directly to blue foam. Result: Slightly less explosively fragile but still too fragile for robust use.
3. Foam-friendly spray paint. Result: Applied sparingly, it appeared to work better than any other paint-based alternatives.
Another issue with paint is that it tends to not allow packing tape to adhere well, making field repairs very difficult. Figure 7-9 shows zip ties being used to stitch on a chunk of wing and nose that would not take tape.
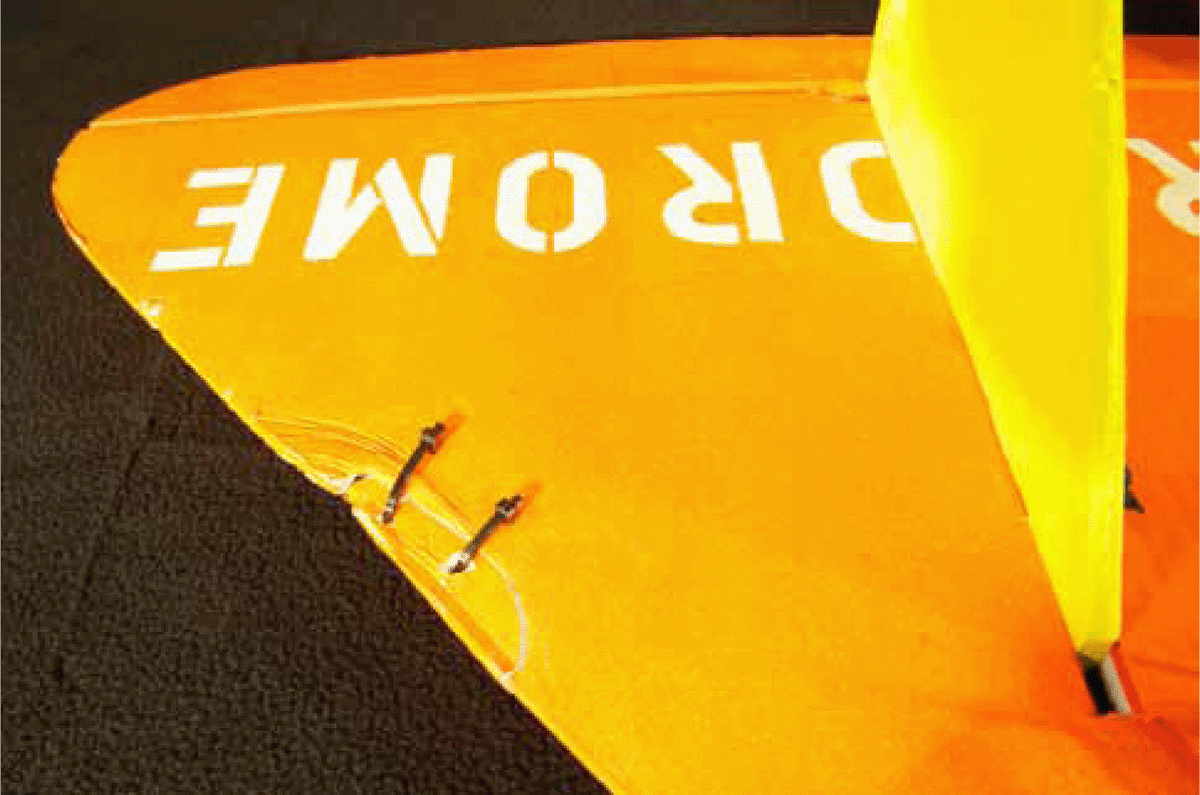
FIGURE 7-9 Crash damage had to be repaired with zip ties because the paint would not take packing tape.
Assessment of the BAOP
• Weight: 18 ounces.
• Technique: Deck with orange acrylic artist’s paint and stenciled letters.
• Pluses: Great-looking plane that flew as well as plastic film–covered planes.
• Minuses: Landings had to be perfect or the plane would break into chunks; not a recommended approach.
Blue Angel and Others in Printed Tyvek
We have a long-standing relationship with a fine-arts printer (Skink Ink) that can produce custom skins. The airframes in Figure 7-10 are all printed first and then attached. It is an excellent way to get high-quality images onto foam.
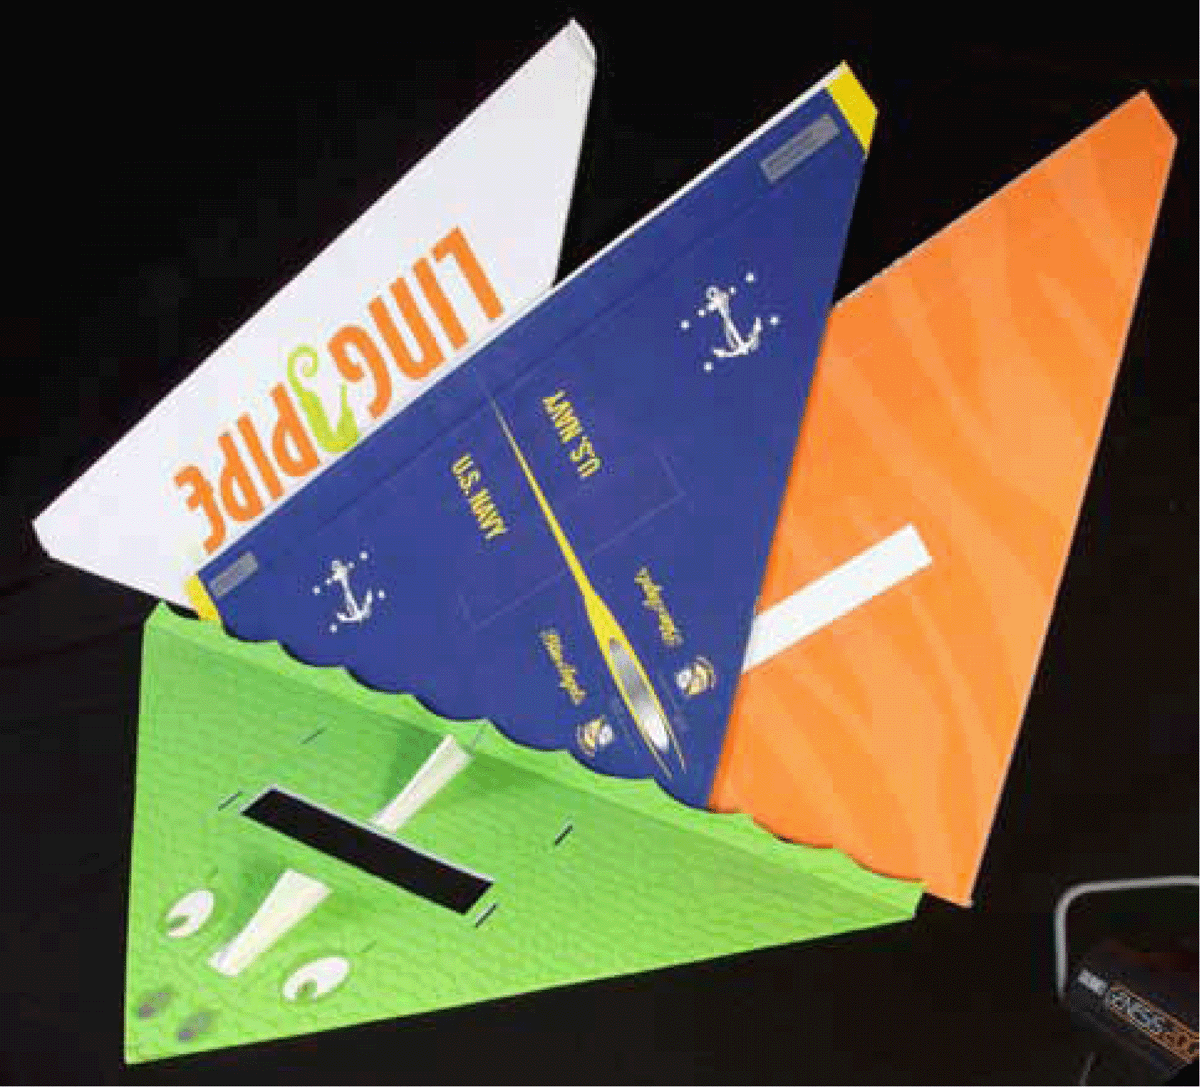
FIGURE 7-10 Printed Tyvek-covered airframes. (Left to right) Custom corporate logo print, Navy Blue Angel–styled plane, and camouflage pattern in orange. (Bottom) A dragon design.
Perhaps the finest example of this method of decoration was a presentation plane created for the Secretary of the Navy shown in Figure 7-10. The level of detail possible with this approach is limited only by the designer’s imagination. Figure 7-11 shows the cockpit details.
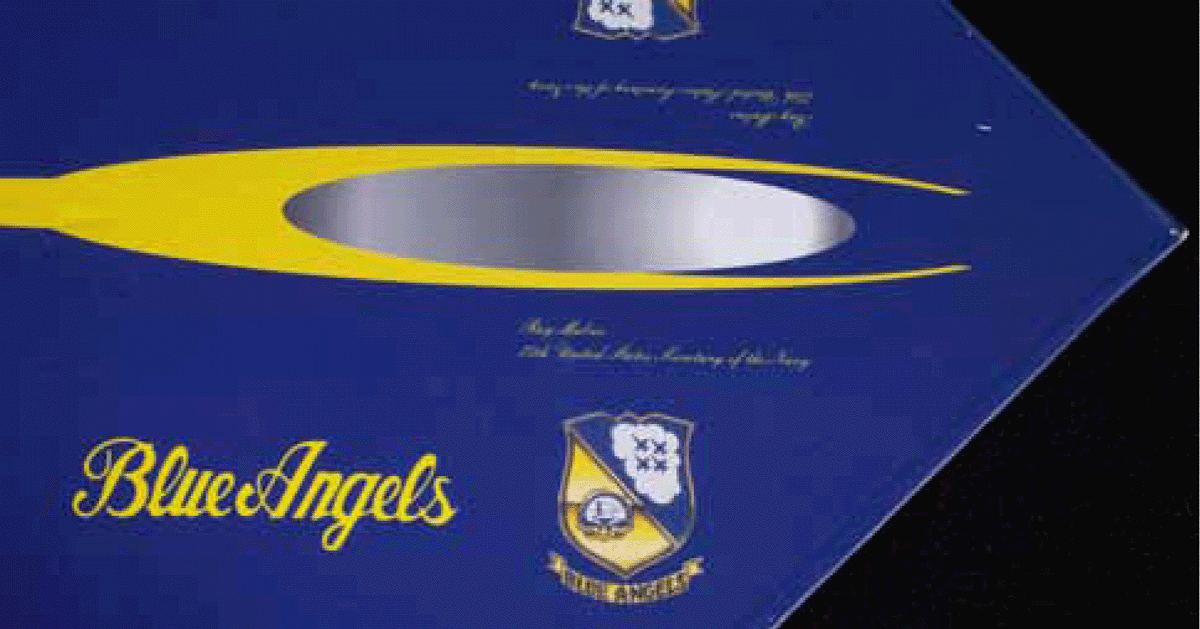
FIGURE 7-11 Cockpit details of the presentation plane for the Secretary of the Navy.
The material is Tyvek, which is a very tough plastic skin that is ideal for covering foam. Unfortunately, we have not been able to find Tyvek with an adhesive backing, so the covering method is either manually applied adhesive film or spray-mount adhesive, as done with the Purple Monster. Printing costs are around $150 per airframe (it comes already attached to foam) for standard designs. But the results speak for themselves. Custom printing costs more. The printing can be glossy or flat. For presentation planes, this approach cannot be beat.
Assessment of Printed Tyvek
• Weight: 22 ounces.
• Technique: Deckless build with contact paper attached custom-printed Tyvek.
• Pluses: Complete design freedom that results in a plane that looks as good up close as it does far away; ideal for presentation planes; the Tyvek is a very strong and appropriate covering that is nearly as stiff as adhesive plastic films.
• Minuses: Custom printing is expensive.
Flying Heart: Sign Vinyl
Figure 7-12 shows the Flying Heart in red and white stripes. It is the only example we have of a sign vinyl–covered aircraft, which is why it is included here despite its departure from the classic Flack shape. The details of its construction are covered in Chapter 8. Perhaps the greatest advantage of sign vinyl is that it can be had for free as a by-product of sign making. When you are getting your recycled Coroplast from the sign shop, ask the sign makers if they have any scrap vinyl, and you may find yourself with a garbage bag full of varied scraps. The material comes with adhesive and a removable backing and is very easy to work with.
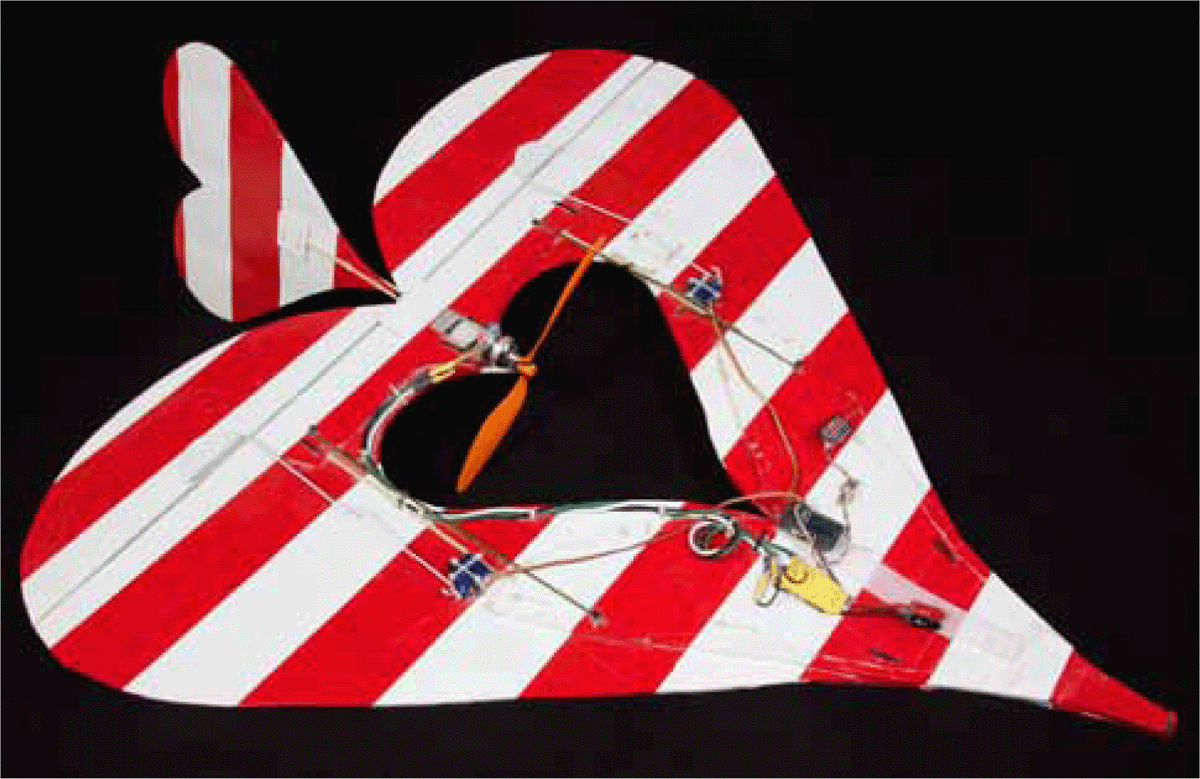
FIGURE 7-12 Flying Heart covered in sign vinyl.
Bought new, it comes in rolls that can be cut into varying-width tapes, which is what we did for the Flying Heart. It cuts easily with scissors, which makes it an ideal material for working with kids. The adhesive is less aggressive than that of the other plastic films, so pieces can be repositioned without tearing up the foam. Another benefit is that it resists scrapes and does not pick up grass stains. It is an ideal material for a tough and long-lasting aircraft. The only downside to sign vinyl is that does not stiffen the airframe very much, which means that a deck will be required. It weighs 0.6 ounce per square foot.
Assessment of Sign Vinyl
• Weight: 22 ounces.
• Technique: Decked-based build with sign vinyl covering all surfaces.
• Pluses: Excellent color saturation, reasonable prices, and easy to work with; extremely tough; takes damage well and is easy to repair.
• Minuses: Does not stiffen airframe sufficiently for deckless builds.
Firefly: Balloon Film
Figure 7-13 actually shows a night flyer with a reflective skin. It was designed to fly indoors at a warehouse party that had a camping theme, so there would be lots of light to reflect in addition to its own electroluminescent wire (el-wire) illumination. From a daytime decorating point of view, the interesting part is the reflective silver plastic, which is a nylon film used to create balloons. It is very light at 0.10 ounce per square foot and can be gotten from http://balloonkits.com. We attach it with spray adhesive, and it is very difficult to get a smooth surface. Over time, the material gets even more wrinkly, leading to an interesting stippled effect. It tears but is easy to repair with tape.
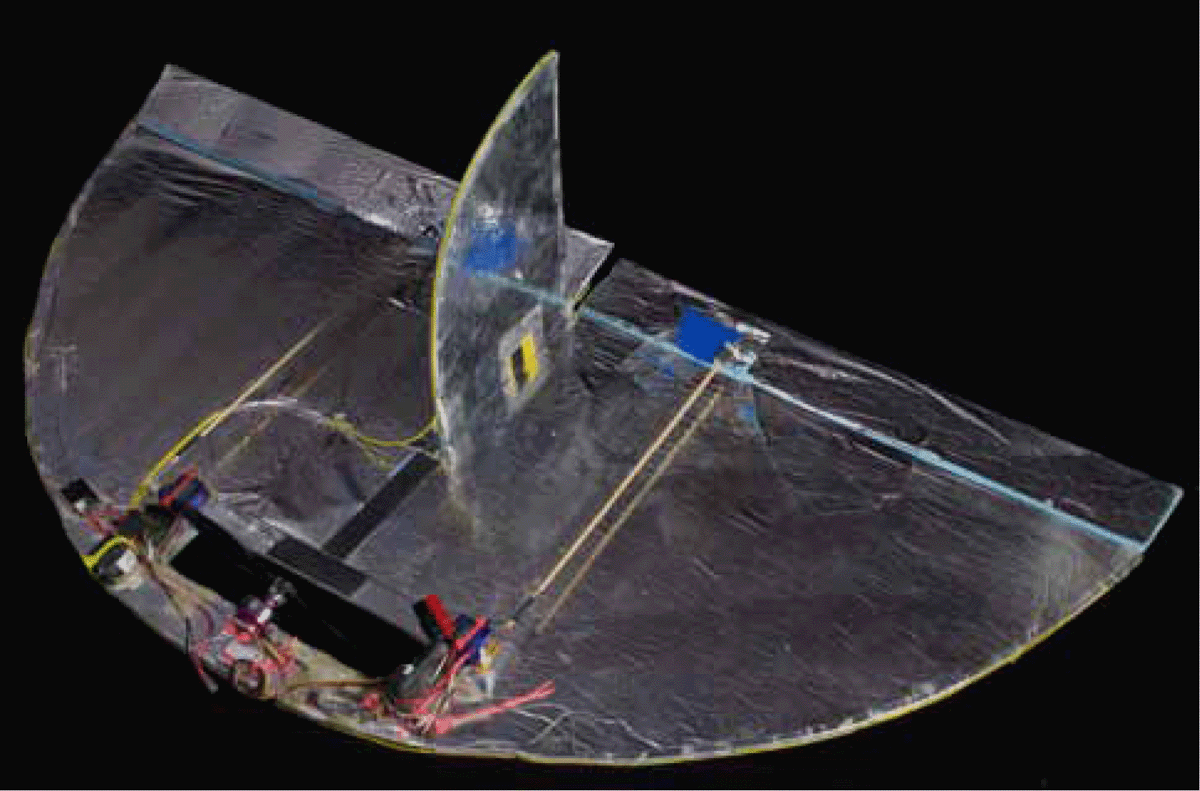
FIGURE 7-13 Firefly night flyer with balloon-film covering.
The film is conductive, which may raise issues with radio reception—we always use dual-antenna receivers with this covering. Put the antennas on the top and bottom of the wing to minimize the chance of the material blocking reception. Curiously, the film eventually will wear clear in spots that are handled frequently. It provides no additional stiffness to the foam.
Assessment of Balloon Film
• Weight: 0.10 ounce per square foot, not including adhesive.
• Technique: Balloon film applied with spray adhesive.
• Pluses: Very lightweight and very reflective covering.
• Minuses: Does not stiffen airframe; cannot be made smooth; and may cause radio problems.
Decorating with Tape
Any sort of colored tape is an excellent decorating material. While the designs tend not to be as enveloping as the earlier designs in this chapter, tape is where most folks find their comfort zone for individualizing their planes. Tape is easy to add to a plane once it is finished. Figure 7-14 shows some of the possibilities based on duct tape, scraps of sign vinyl, and safety tape.
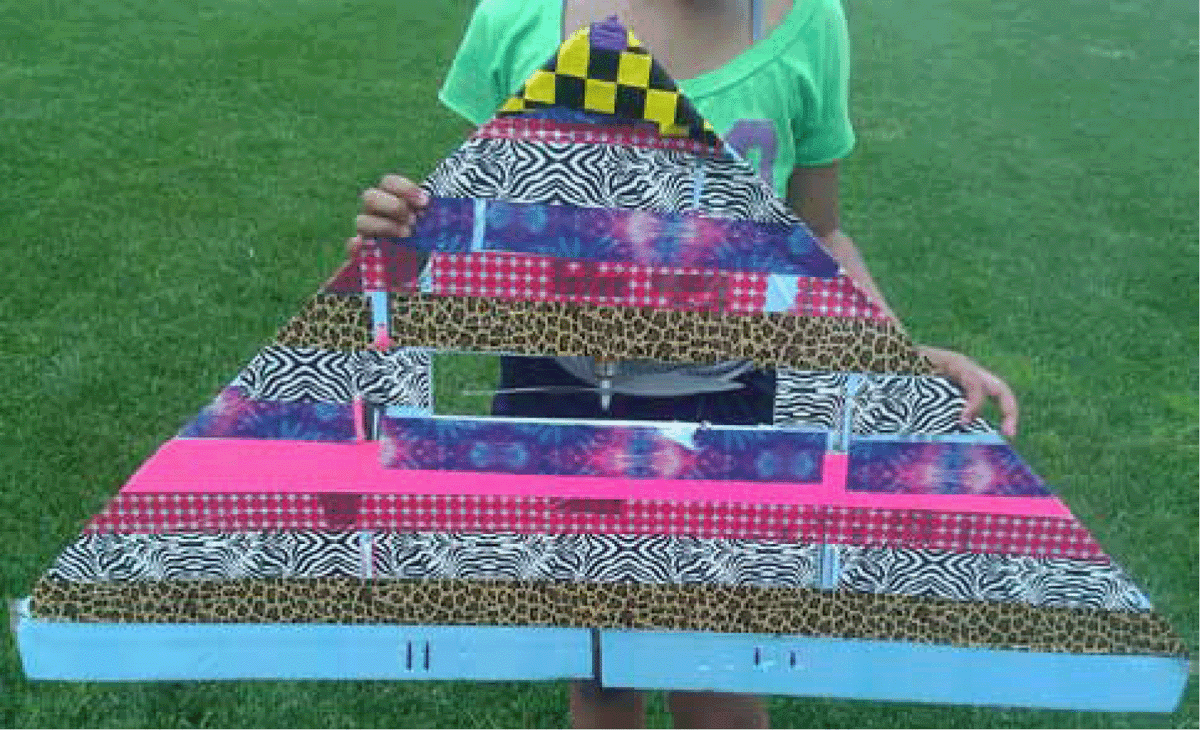
FIGURE 7-14 A plane that has almost all known types of decorative tape applied. Kids like to decorate their planes.
Some considerations on types of tape include
1. Duct tape. Heavy, widely available, and often in good colors and interesting patterns from your local hardware store. Be careful of putting too much aft of the CG.
2. Packing tape. Excellent material but tends to not be very opaque and can be hard to find in interesting colors.
3. Masking tape. Great for accents. Green and blue tape are readily available, but because they are low-stick tapes, they may need clear packing tape on top to keep them in place.
Conclusion
Decorating planes is very satisfying and well worth doing, but remember that all model airplanes come with an expiration date—especially ours. Always have a flying plane ready to go if you are going to do a big decorating job. It takes longer to decorate than to build usually, so don’t let decorating keep you off the field. Chapter 8 addresses decorating for night skies—really fun.