
Office Online Server, previously named Office Web Apps, is a server that allows users to view and edit Office documents such as Word, Excel, PowerPoint, and OneNote directly from the browser. Office Online Server also allows users to view PDF documents in the browser and convert Office documents to PDF.
It’s important not to get confused in Microsoft’s choice of name for the product. Even if it’s called Office Online Server, the product is fully On-Premises and does not require a connection to Office 365 or any Office 365 licenses.
Furthermore, Office Online Server isn’t only for SharePoint! Office Online Server can add features to Exchange Server 2016 / 2019 as well as Skype for Business Server 2015 / 2019. We will not cover those features, or how to enable them in this book; however, it is important to know that the investments you make in Office Online Server aren’t only for SharePoint, but for Exchange and Skype for Business as well.
There are multiple reasons to deploy Office Online Server other than the ability to view and edit Office documents from the browser. With Excel Services gone since SharePoint Server 2016, you need Office Online Server in order to view Excel Dashboards. Furthermore, Office Online Server enables additional features such as Durable Links. Office Online Server is an evergreen product, so we do not have an Office Online Server 2016 and Office Online Server 2019; it’s simply Office Online Server with an update becoming available every three to four months. The minimum version of Office Online Server for SharePoint Server 2019 is November 2018; however, it’s always recommended to install the latest version available.
Office Online Server Architecture Overview
Before we get start configuring Office Online Server, it’s important to understand the Office Online Server architecture in order to understand what we will install and configure in this chapter.

High-Level Overview of Office Online Server Architecture
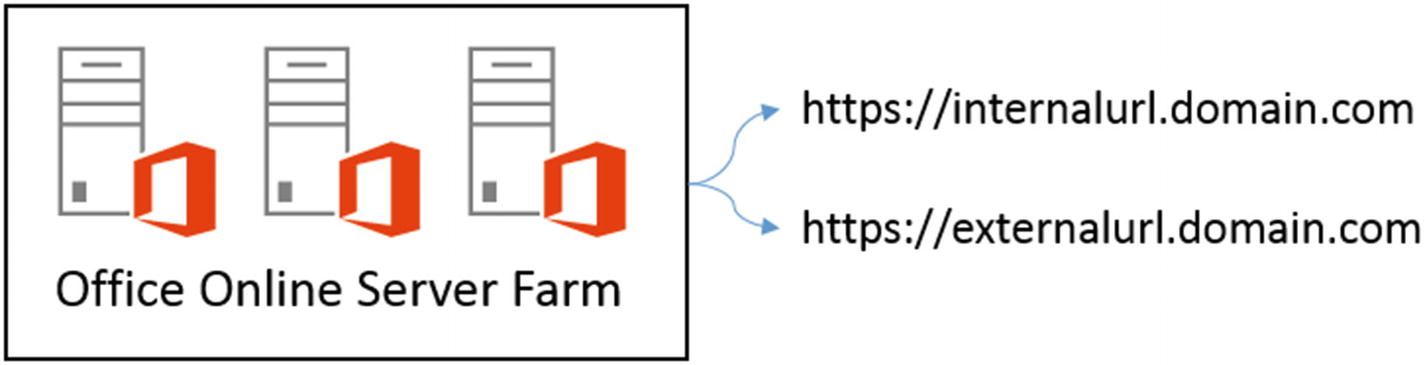
Office Online Server Internal and External URL
Office Online Server Ports
Port | Function |
|---|---|
80 | HTTP traffic |
443 | HTTPS traffic |
809 | Traffic between Office Online Servers |
To enhance security, you can block the ports that you do not use. For example, if your Office Online Server farm will be only made of one server and be accessible via SSL, you only need port 443.
Office Online Server Minimum Requirements
CPU | RAM | Disk |
|---|---|---|
64-bit, 4 cores | 12 GB | 80 GB for system drive |
Office Online Server supports the 64-bit versions of Windows Server 2012 R2 and Windows Server 2016. The Server with Desktop Experience feature needs to be enabled as Office Online Server cannot run on Windows Server core.
Note
At the time of writing this book, Office Online Server running on Windows Server 2019 was not supported. Always check the latest supported operating systems at https://docs.microsoft.com/en-us/officeonlineserver/plan-office-online-server .
From a networking perspective, all the servers in an Office Online Server Farm must be in the same forest, and in order to use Business Intelligence Features, they must be in the same forest as the users who will use them.
Office Online Server must be installed on its own dedicated server. It can run on both Physical as well as in a Virtual Machine running on Hyper-V or VMware. Office Online Server cannot be installed on the same machine as Exchange, SharePoint, and Skype for Business, SQL, Domain Controller, or any server that has Office installed.
Note
At the time of writing this book, the Office Online Server license prohibits enterprises installing Office Online Server on physical hardware they do not own, therefore making it impossible to use Office Online Server in Azure, AWS, or any other provider. Check with your Microsoft Licensing Expert before deploying Office Online Server on any machines you do not own.
SSL Offloading or SSL Bridging
Enabling client affinity or front-end affinity
Layer 7 routing
Furthermore, if you plan to open Office Online Server to the Internet for SharePoint or Exchange, you will also need a reverse proxy in order to securely make it available to external users.

Office Online Server Certificate
Installing Office Online Server
NET Framework 4.5.2
Visual C++ Redistributable for Visual Studio 2015
Afterward, we need to activate the required Windows Server Features and Roles. This can be achieved with the following PowerShell script, which will require a reboot.
Microsoft.IdentityModel.Extention.dll
After all prerequisites are successfully installed, you can open the Office Online Server Setup.exe from the binaries you got either from MSDN or the Volume Licensing Center.
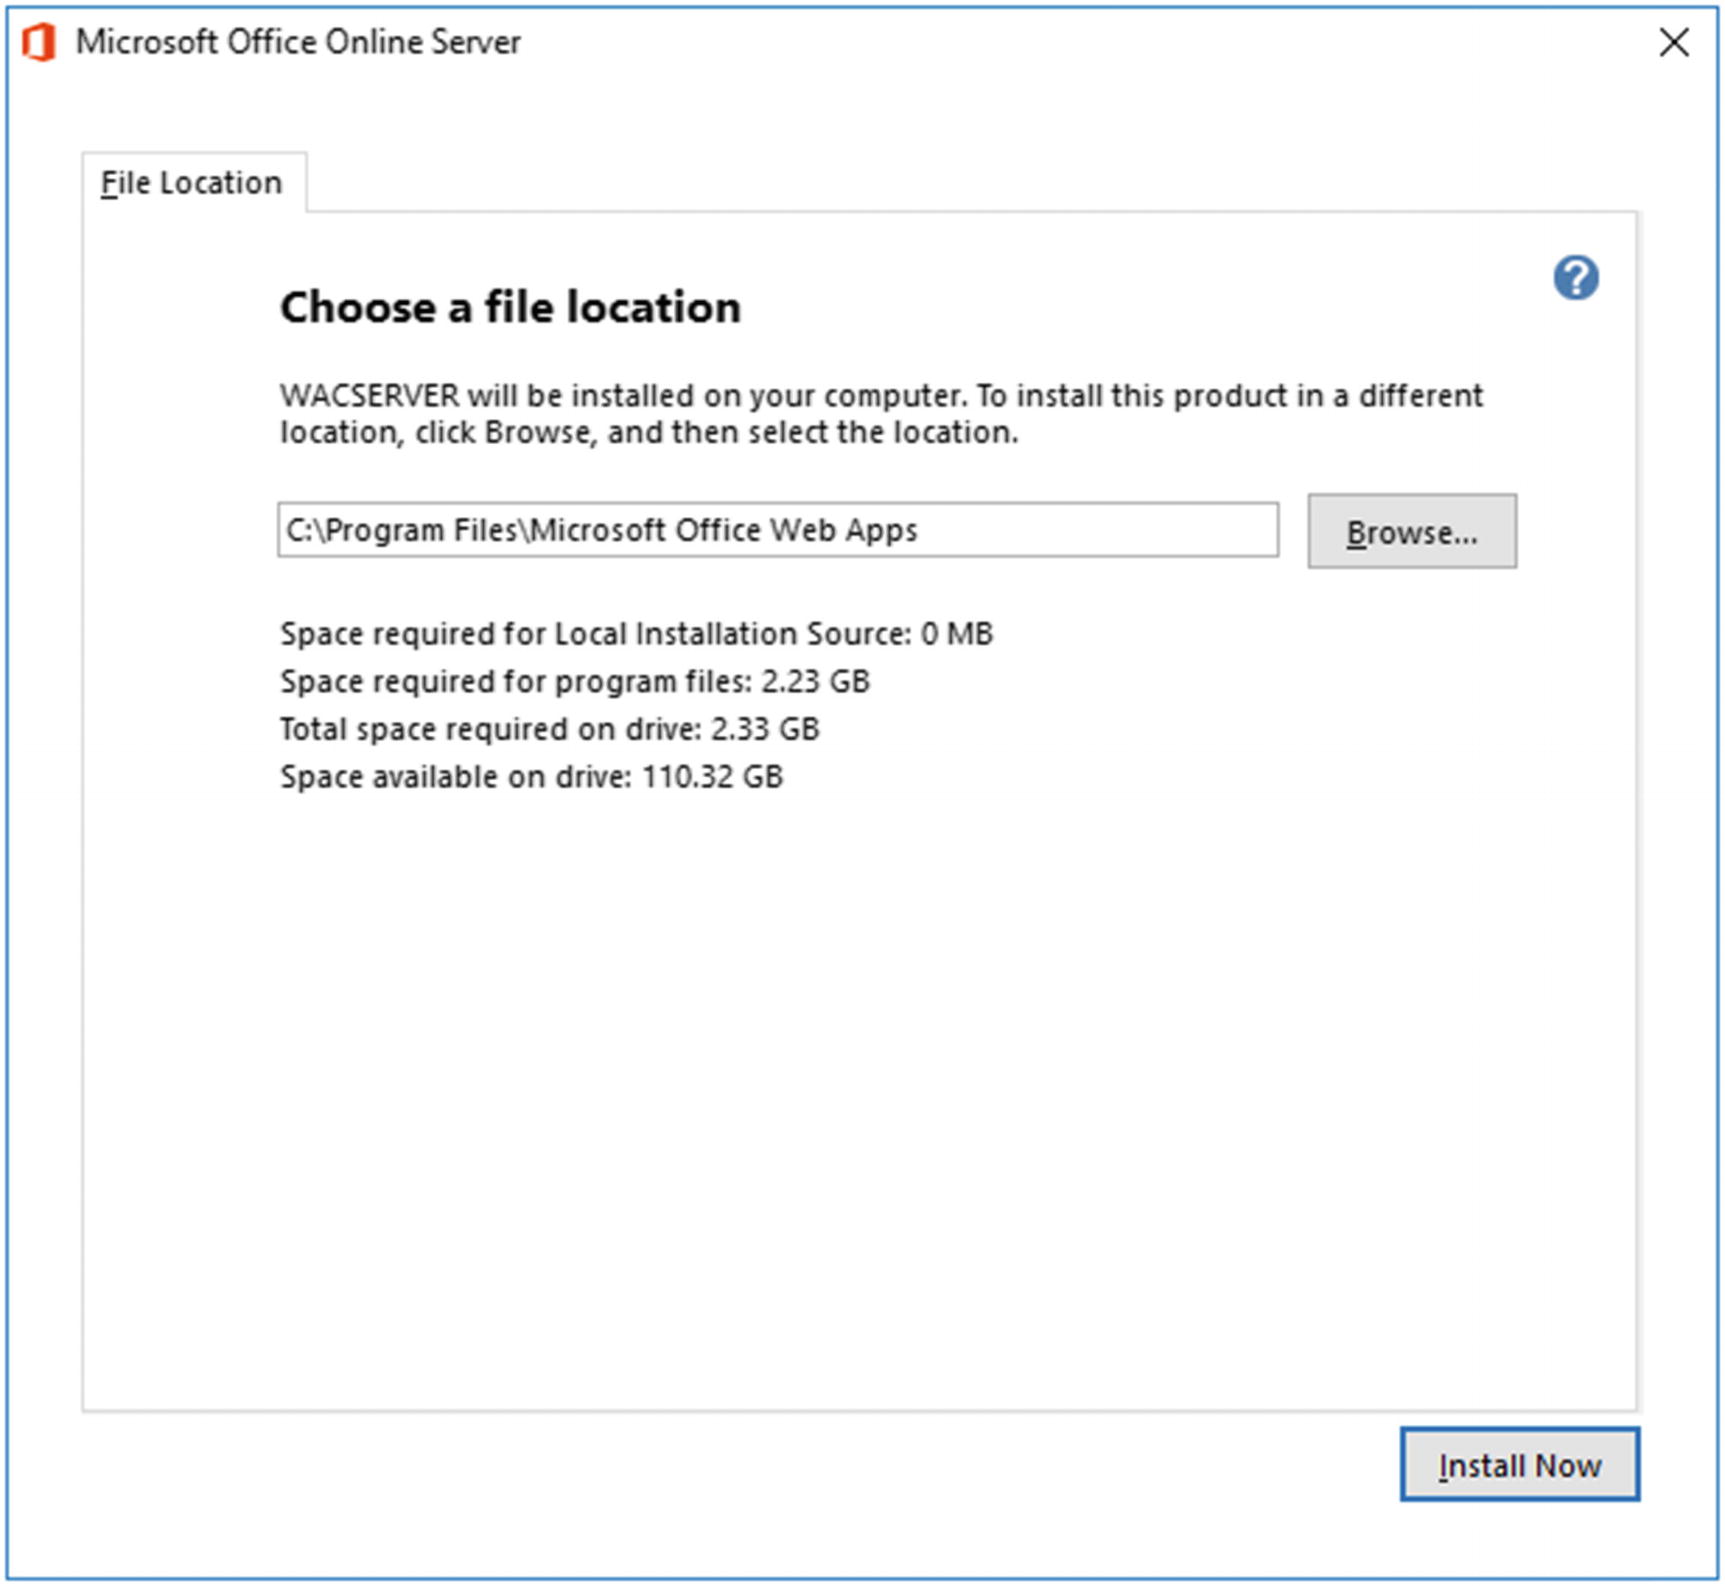
Office Online Server Installation
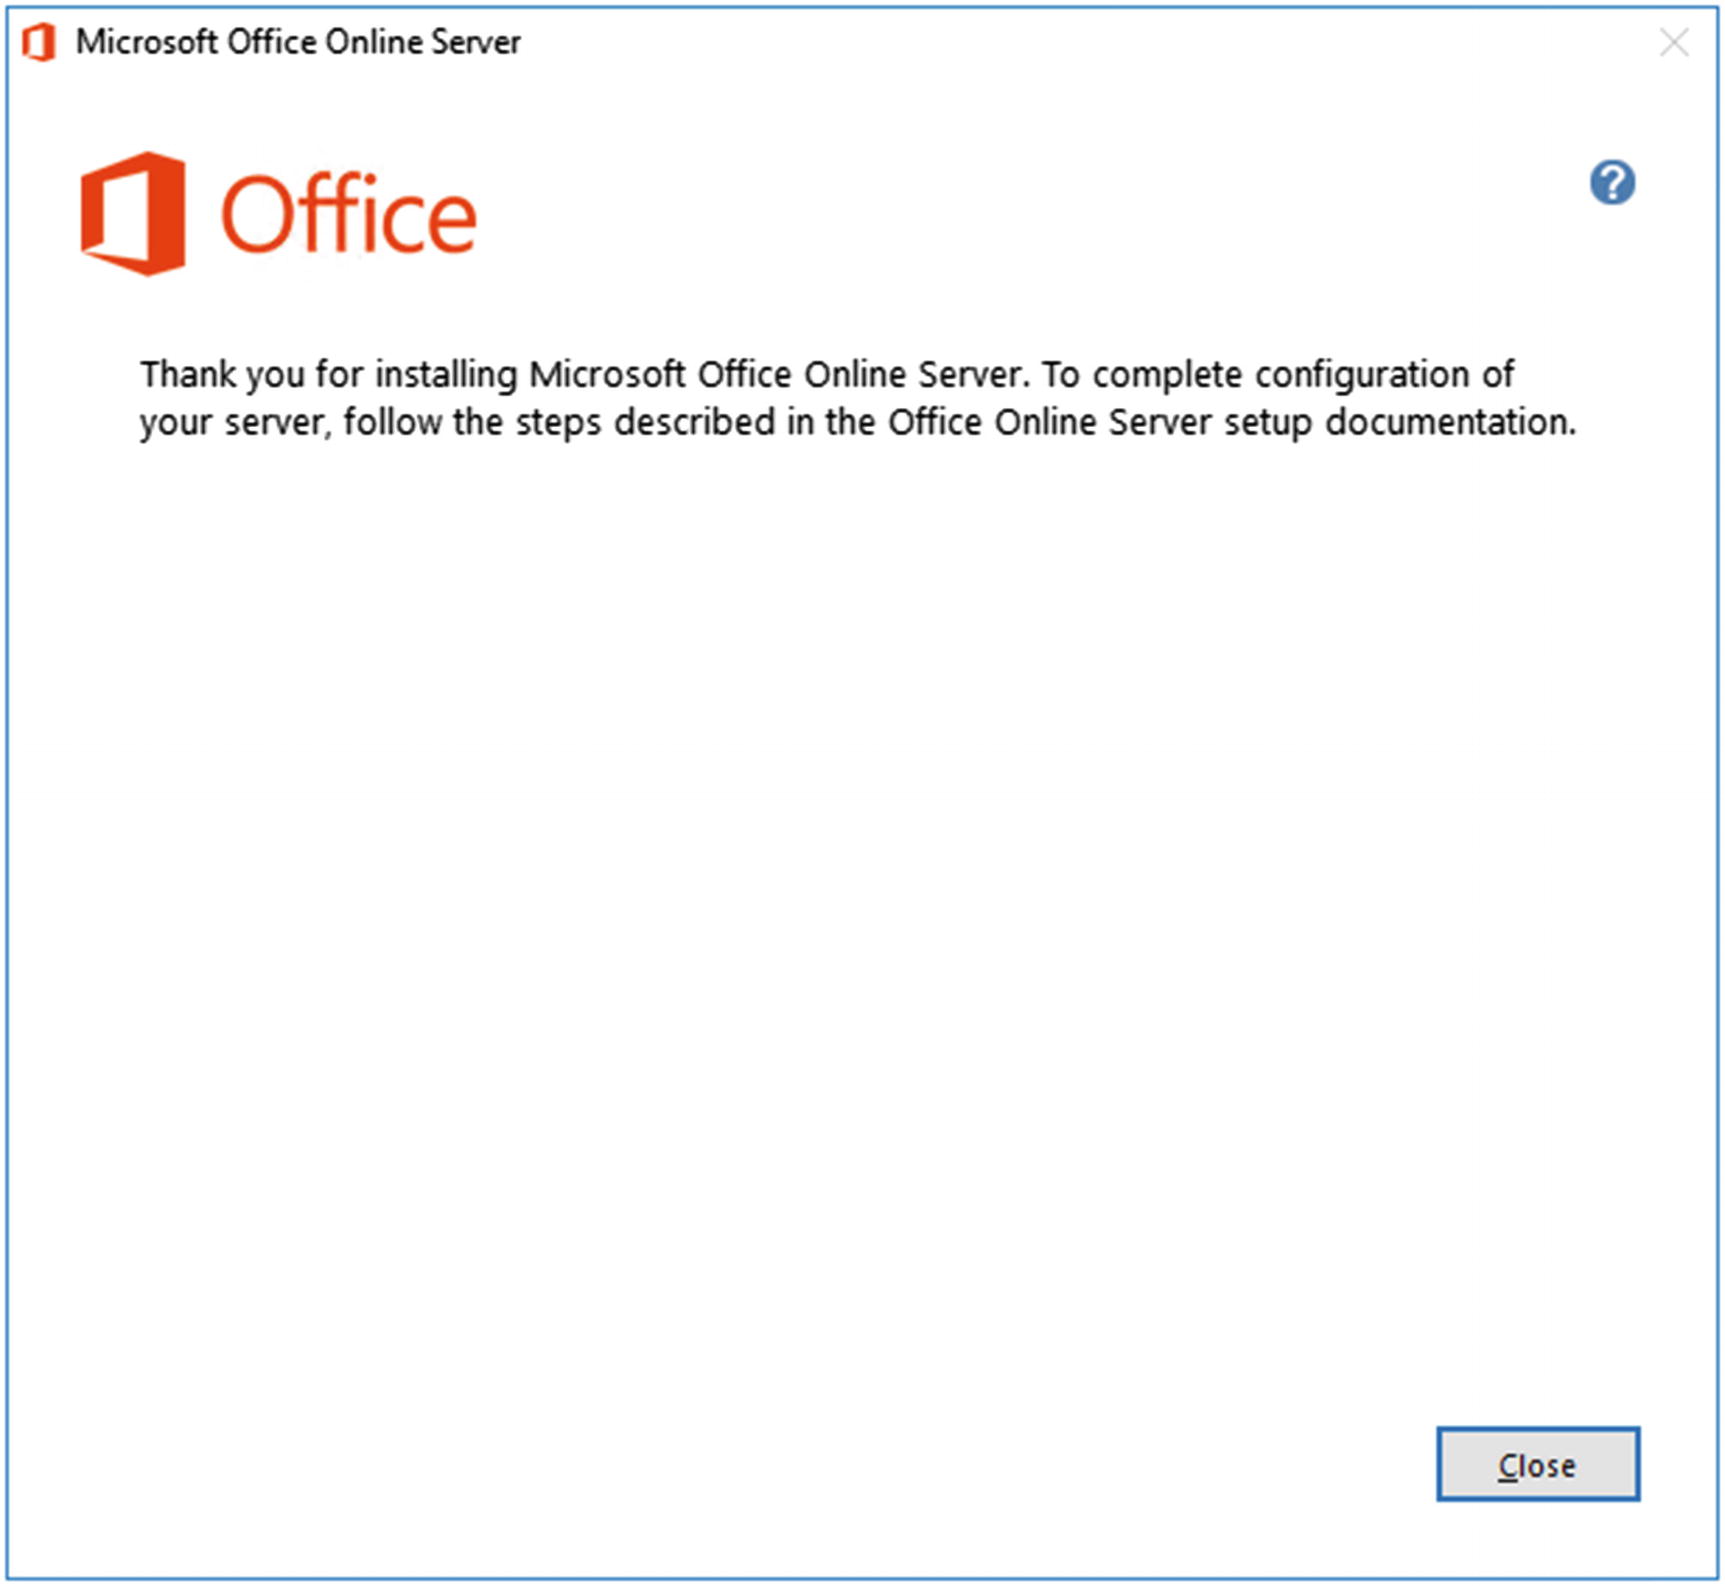
Office Online Server Installation Confirmation
With the installation of the Office Online Server binaries complete, it’s now time to install any Language Packs that you might want to offer to you users. For the Multilanguage UI to work, the language pack must be installed both on the Office Online Server, as well as on your host (SharePoint, Exchange, or Skype for Business).
Since our farm is not created at this point, installing Public Updates or Language Packs is as simple as starting the installer and clicking Next until it’s done. As Public Updates also include updates for the Language Packs, make sure to install the base Language Packs before installing Public Updates. By installing the base Language Packs before the Public Updates, all the language related updates in the Public Updates will be applied.
After your Office Online Server(s) are on the update level you want and have the required Language Packs for your business, it’s now time to create the Office Online Server farm.
Creating the Office Online Server Farm
Unlike most Microsoft products, Office Online Server does not have a user interface at all and the only way to manage it is by Windows PowerShell. Furthermore, unlike other Office Server products such as SharePoint, there is no “Office Online Management Shell” that you will find on your computer; the required module manage Office Online Server will be loaded by default every time you open PowerShell.
To create the farm, we need to run the New-OfficeWebAppsFarm PowerShell cmdlet. Office Web Apps is the old name of Office Online Server in the 2013 suite of Office Servers. You will see that most of the PowerShell cmdlets to manage Office Online Server still refer to Office Web Apps.
Note
Make sure to always run PowerShell as an administrator when changing Office Online Server configurations.
Before running the PowerShell to create our farm, there are a few things we need to plan. The first item to plan is what the URL will be that the consuming services (SharePoint, Exchange, or Skype for Business) will use to connect to the Office Online Server farm. From a SharePoint-only point of view, you could only have one URL if you want, since SharePoint can only use one of them, but not both. If you also plan to connect Skype for Business and Exchange to your Office Online Server Farm, they will sometimes need the External URL. A good example is when doing a Skype for Business meeting and sharing a PowerPoint presentation. Skype for Business will connect external users to the external URL of your office Online Server Farm. Something to consider is that to enable full functionality, the External URL must be accessible from the Internet. Some of the features are Document Previews from Outlook on the Web (formerly known as Outlook Web App), Skype for Business PowerPoint Presentations with external users, and document previews in Office 365 Search Results when using Cloud Hybrid Search.
- 1.
You have at least one SharePoint site that will be using HTTPS. If your SharePoint sites are using HTTPS, you will need it for your Office Online Server as well.
- 2.
You plan to connect Office Online Server to Skype for Business. Skype for Business only connects to Office Online Server if the latter is using https.
While in this book we recommend SSL Bridging for security, Office Online Server also supports SSL Offloading. SSL Offloading is not recommended because the traffic between the Load Balancer and your Office Online Server will not be encrypted, and you can be subject to a man-in-the-middle attack. If you plan to use SSL up to the Office Online Server, either by using pass through or SSL bridging on your Network Load Balancer, make sure to import the certificate into IIS on every server of your Office Online Server Farm. Make sure the certificate has a Friendly Name in IIS, as that’s what we will need to use in our PowerShell cmdlet.
Note
It is mandatory that the certificate have a Friendly Name, and this Friendly Name cannot contain an asterisk.
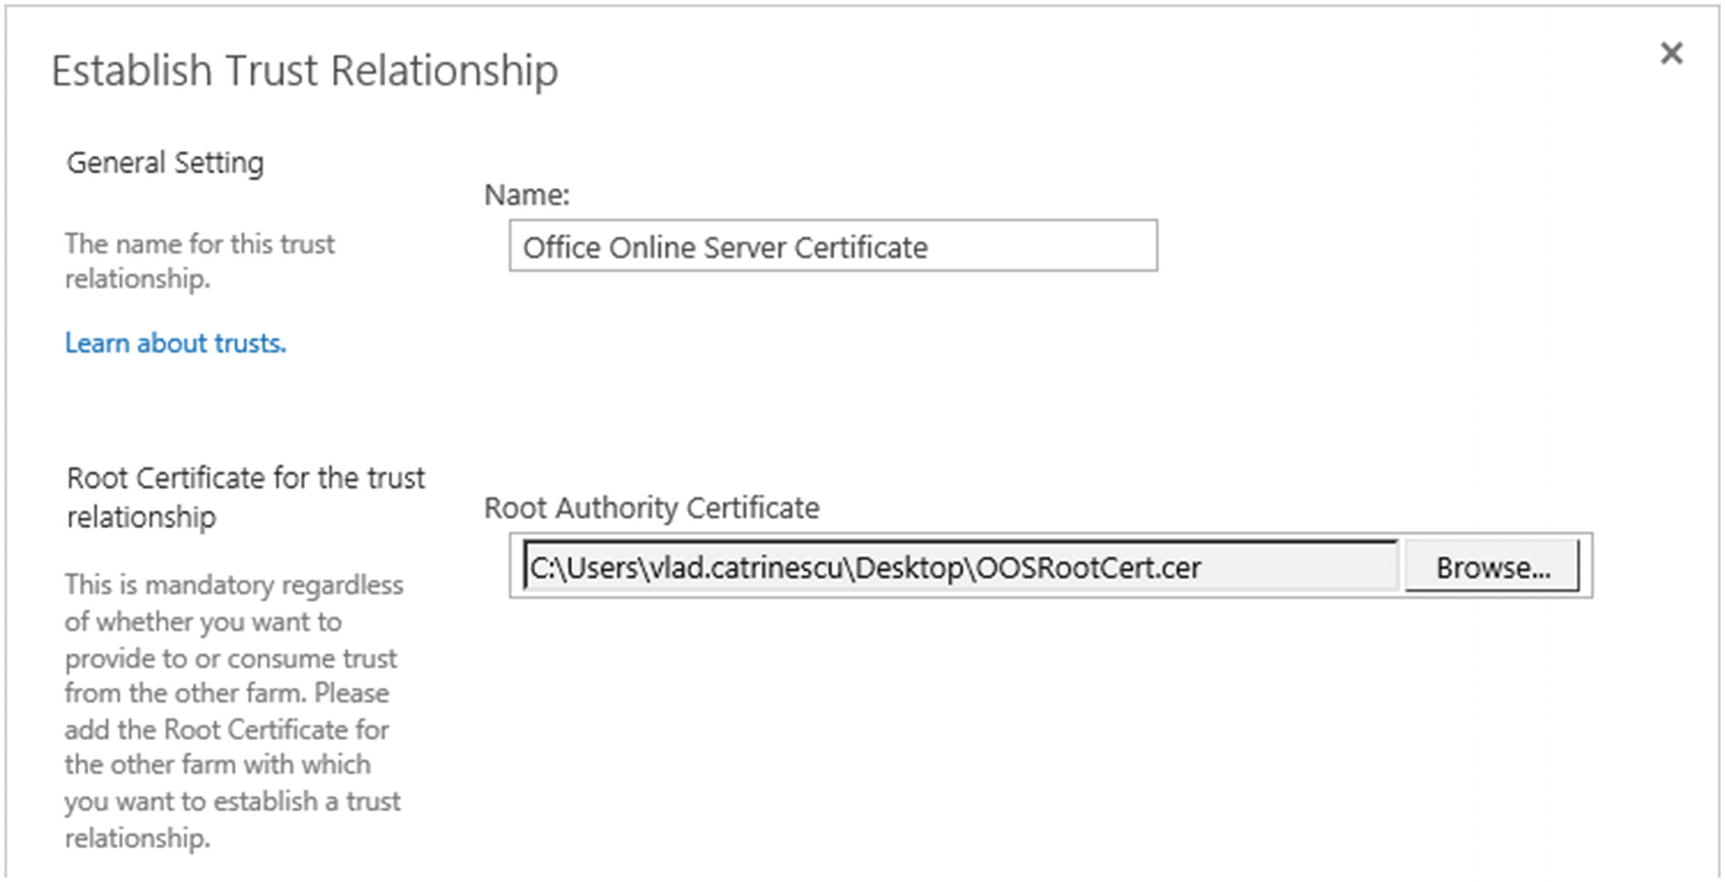
Establish Trust Relation in the SharePoint 2019 Central Administration
InternalURL is the Internal URL of the Office Online Server farm.
ExternalURL is the External URL of the Office Online Server farm, and as you see, you can select the same URL for both Internal and External URLs. This is what we did in our lab.
CertificateName is the Friendly Name of my Certificate in IIS.
EditingEnabled is a switch that tells Office Online Server that users are allowed not only to view documents with it, but also to create and modify documents in SharePoint directly in the browser. As soon as you choose this switch, you will be prompted to approve that you have the right licenses.
Note
If you plan to use Office Online Server on HTTP you need to add the –AllowHttp switch. If you plan to use SSL Offloading, you need to pass the –SSLOffloaded switch.

Discovery XML File
Where in the MachineToJoin Parameter, you give it the FQDN of the first Office Online Server in the farm. In our case, that FQDN is CALOS01.Lab.cobaltatom.com.
The output should be all the servers in your Office Online Server farm, with a health status of healthy.
SSL Configuration
Connecting Office Online Server with SharePoint 2019
Internal-http
Internal-https (default)
External-http
External-https
To test that the connection was successfully configured, navigate to any SharePoint Site and open an Office document. That document should open in the browser and you should be able to go through the entire document. Test Office Online Server with all of the supported Office document types, including editing functionality, if enabled.
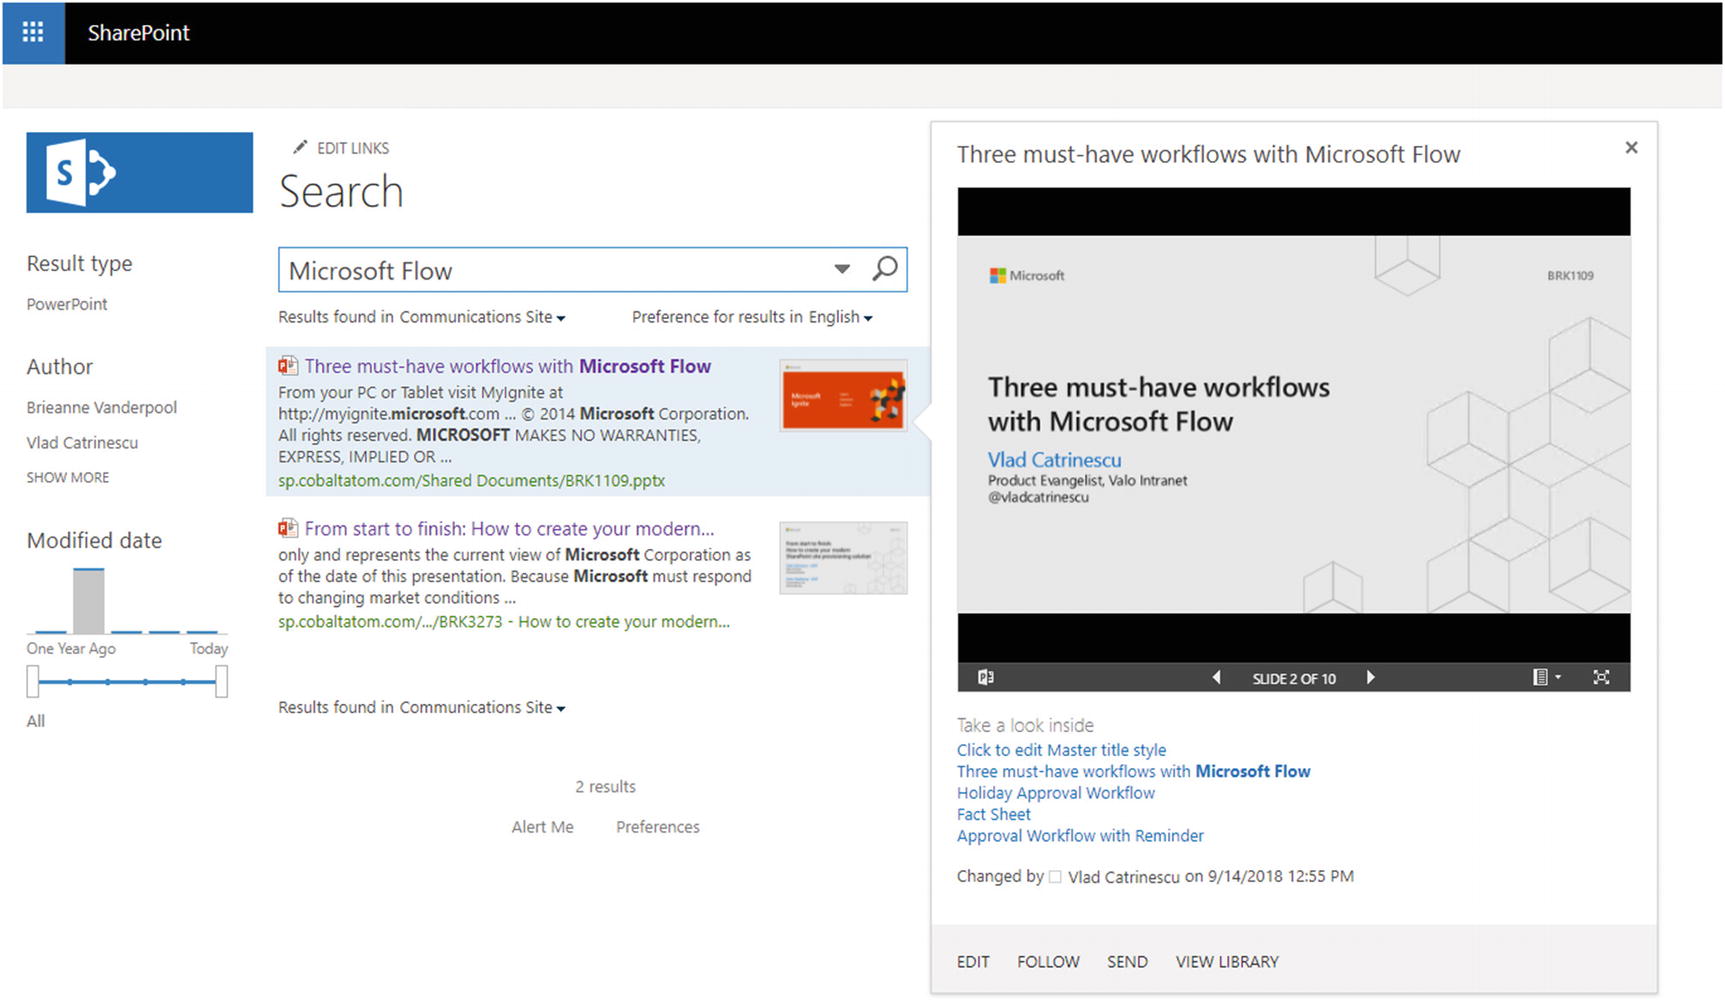
Office Documents Preview in Office Online Server
In order to enable this functionality, you will need to do a Full Crawl on your Content Sources and the previews will work afterward. With everything setup, let’s learn how to maintain Office Online server, and how to debug it in case something goes wrong.
Office Online Server Maintenance
Note
By default, the Office Online Server log location is at C:ProgramDataMicrosoftOfficeWebAppsDataLogsULS.
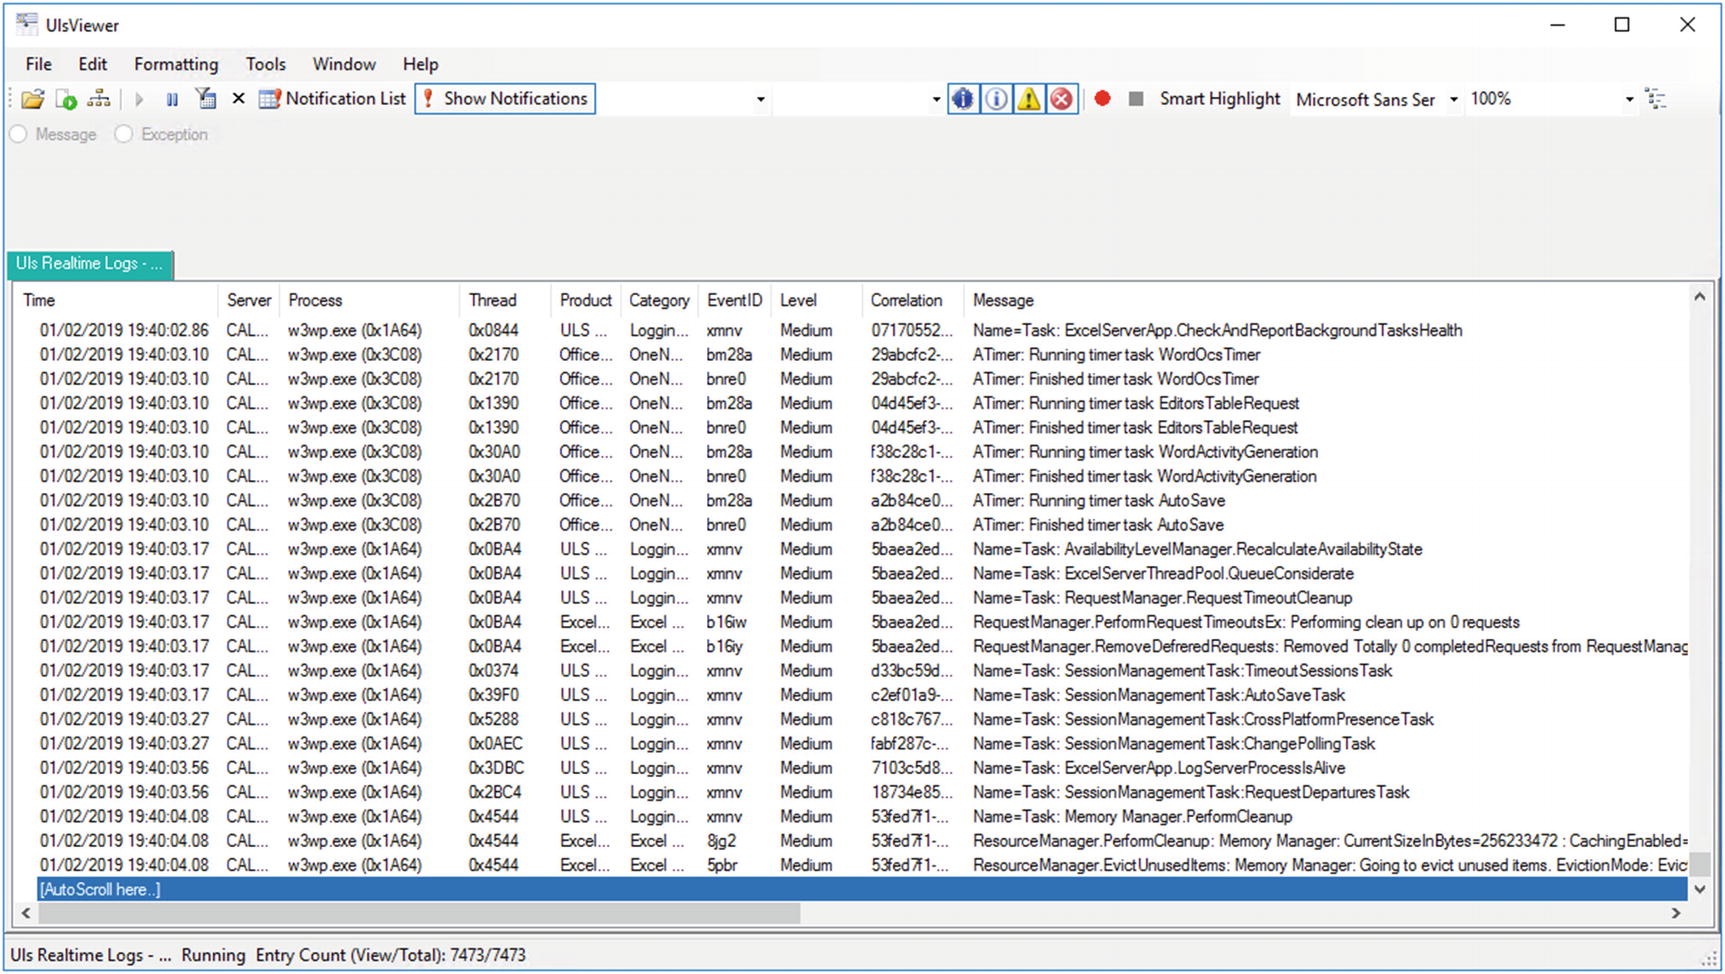
Viewing ULS logs with UlsViewer
Note
A reboot of every machine in the Office Online Server farm is required for the Log Verbosity to be changed.
Patching Office Online Server
After the machine is removed, you can apply the patch, and then recreate the Office Online Server farm by using the New-OfficeWebAppsFarm and the same parameters that you initially used to create this Office Online Server Farm.
Patching a Multi-Server Office Online Server Farm adds an extra layer of complexity. In order to keep Office Online Server availability, you must first remove one of the servers from the load balancer pool, and afterward remove it from the Office Online server farm by using the Remove-OfficeWebAppsMachine cmdlet.
Note
You cannot start by removing the Office Online Server Master Machine as this can only be removed when there are no other machines left in the farm. To find out what server is your Master Machine, simply run the Get-OfficeWebAppsMachine | Select MasterMachineName cmdlet on any server in your Office Online Server farm.
Once you remove a server from the farm, apply the patches on it, and then recreate the farm by using the New-OfficeWebAppsFarm cmdlet and the same parameters that you initially used to create this Office Online Server Farm. Point the Load Balancer only to this server, so users will use the server with the patched version of Office Online Server.
Remove the other Office Online Servers from the old farm, apply the patches, and then join them to this server by running the New-OfficeWebAppsMachine cmdlet.
Finally, add the remaining servers in the load balancer to load balance the charge.
Next Steps
With Office Online Server successfully configured, in the next chapter we will learn how to configure Workflow Manager in order to provide modern workflows in SharePoint 2019.