
Each image consists of a series of layers that are stacked on one another. By using the union filesystem, Docker combines all these layers into a single image entity. The union filesystem allows transparent overlaying of files and directories of separate filesystems, giving a single, consistent filesystem as a result, as you can see in the following diagram:
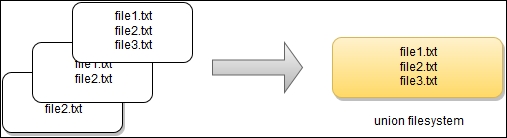
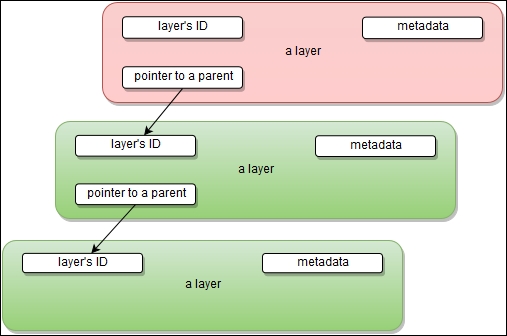
The contents and structure of directories that have the same path within these separate filesystems will be seen together in a single merged directory, within the new, virtual-like filesystem. In other words, the filesystem structure of the top layer will merge with the structure of the layer beneath. Files and directories that have the same path as in the previous layer will cover those beneath. Removing the upper layer will again reveal and expose the previous directory content. As we have mentioned earlier, layers are placed in a stack on top of one another. To maintain the order of layers, Docker utilizes the concept of layer IDs and pointers. Each layer contains the ID and a pointer to its parent layer. A layer without a pointer referencing the parent is the first layer in the stack, a base. You can see the relation in the following diagram:
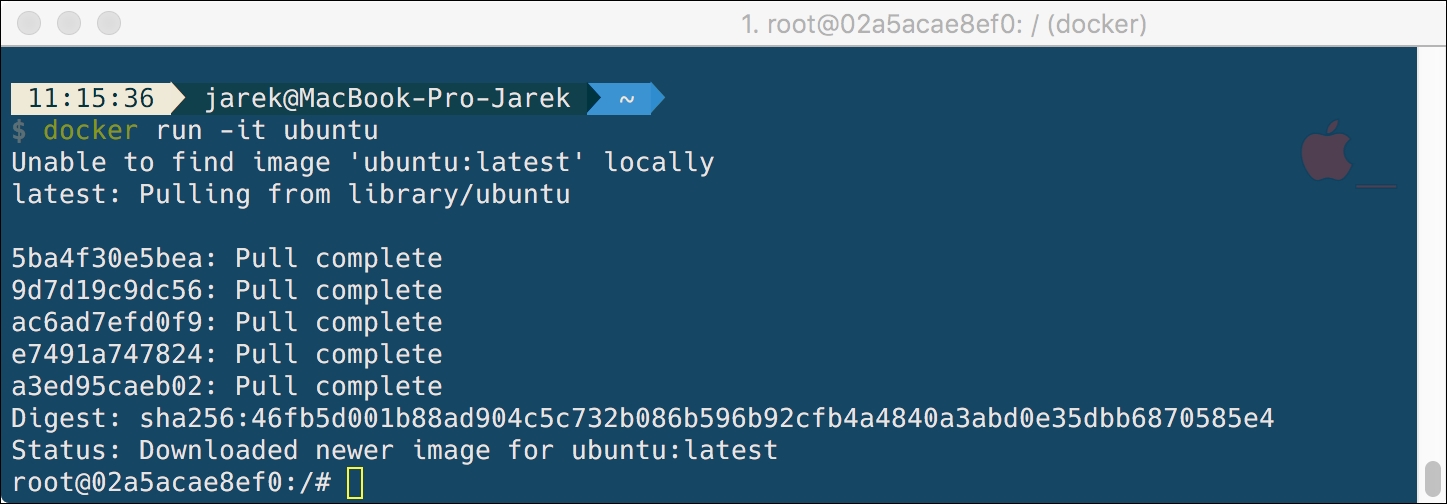
As you pull the image from Docker Hub, you actually can see the progress of each dependent layer being downloaded. Here's an example for the latest Ubuntu Linux:
Another advantage of using layers is the persistence of history. Layers can provide a history of how a specific image was built. Once all the layers are finished downloading, you can list the layers in the specific image using the history command:
   $
docker history ubuntu
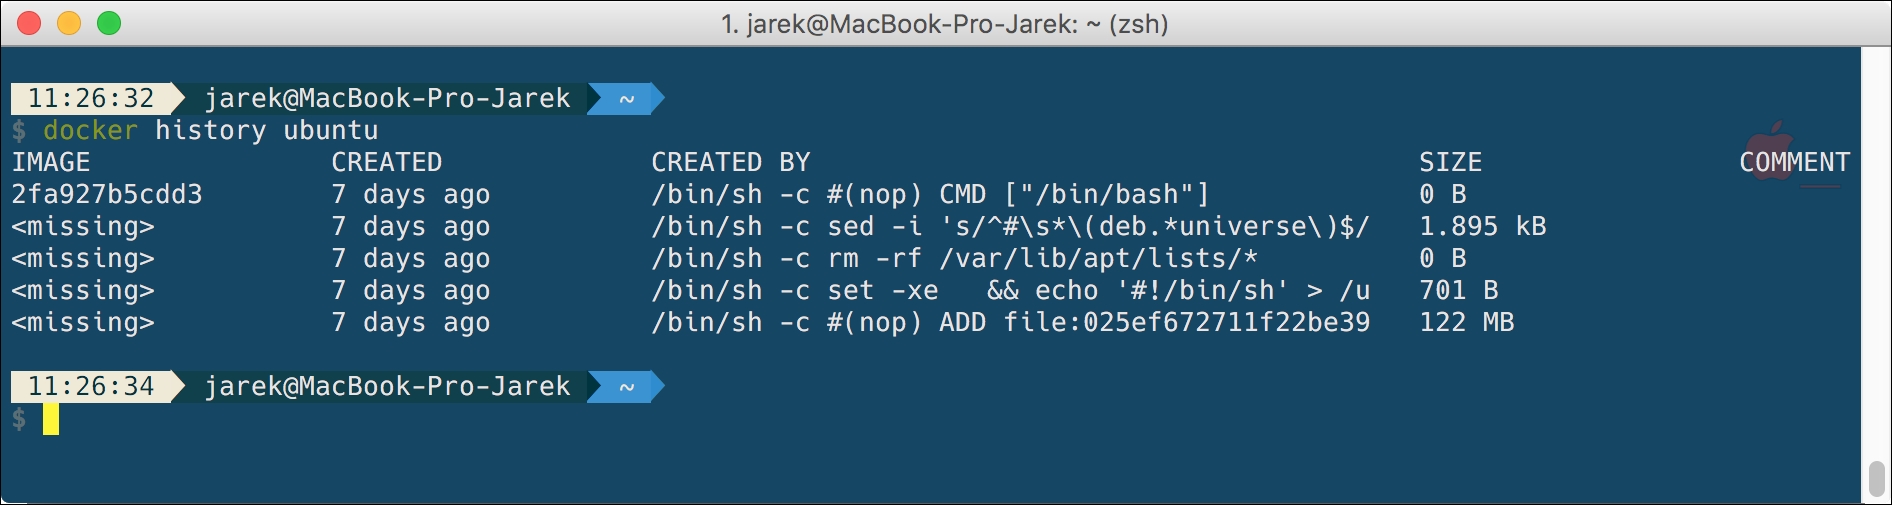
Each line in the history command's output corresponds to a commit to a filesystem. The values in the SIZE column add up to the corresponding SIZE column for the image in docker image.
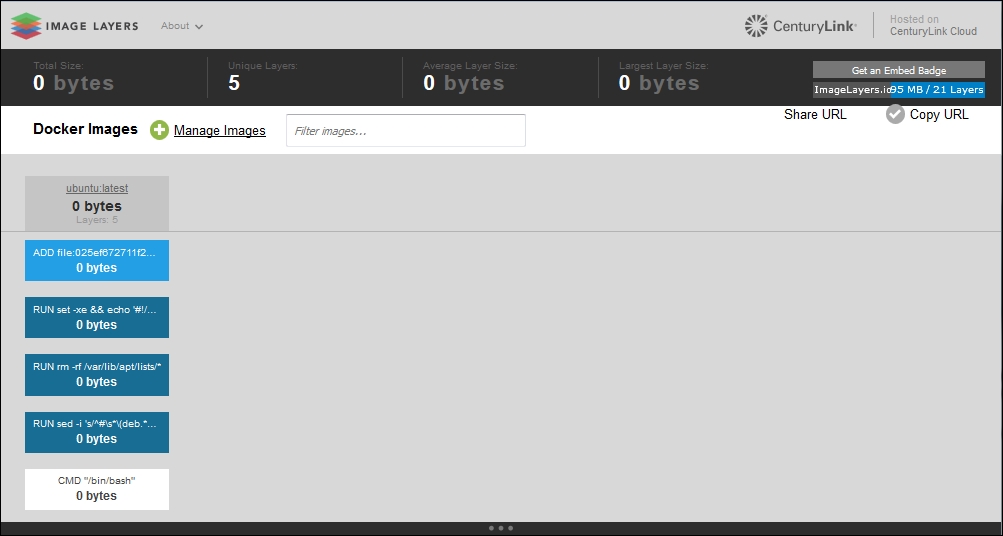
You can also see the graphical representation of the image using the ImageLayers web application available at https://imagelayers.iron.io:
Layers have some interesting features. First, they are reusable. If two different images have a common part, let's say a Linux shell, for example, Docker tracks all of the pulled layers and will reuse the shell layer in both of the images. It's a safe operation; as you remember, layers are read-only. When downloading the second image, the layer will be reused and only the difference will be pulled from the Docker Hub. This saves time, bandwidth, and disk space of course, but it has another great advantage. If you modify your Docker image, for example, by bumping the version of your application, only the single layer gets modified. Instead of distributing the whole image, you push just the update, making the process simpler and faster. This is especially useful if you use Docker in your continuous deployment flow: pushing a Git branch will trigger building an image and then publishing the application for users. Due to the layers reuse feature, the whole process is a lot faster. Because of layers, Docker is lightweight in comparison to full virtual machines, which doesn't share anything. Because of the layer caching that Docker uses, when you pull an image (https://docs.docker.com/reference/commandline/pull/), you eventually don't have to download all of its filesystem. If you already have another image that has some of the layers of the image you pull, only the missing layers are actually downloaded. There is a word of warning, though, related to another feature of layers: apart from being reusable, layers are also additive.
For example, if you create a large file in the container, make a commit (we will get to that in a while), then delete the file, and do another commit, this file will still be present in the layer history. Imagine this scenario: you pull the base Ubuntu image and install the Wildfly application server. Then you change your mind, uninstall Wildfly and install Tomcat instead. All those removed files from the Wildfly installation will still be present in the image - although they have been deleted. The image size will grow in no time. Understanding Docker's layered filesystem can make a big difference to the size of your images. The growing size can become a problem when you publish your images to a registry - it takes more requests and takes longer to transfer. Large images become an issue when thousands of containers need to be deployed across a cluster, for example.
To flatten the image, you can export it to a TAR file, using the export command:
   $
docker export <CONTAINER ID> >

   /home/docker/myImage.tar
The exported file can then be imported back, using the import command:
   $
cat /home/docker/myImage.tar | docker

   import - some-name:latest
If the free disk space is really an issue, you can pipe the output stream of export into the input stream of import:
   $
docker export <CONTAINER ID> | docker
   import - exampleimagelocal:new
Alternatively, you can use the docker-squash utility, available at GitHub https://github.com/jwilder/docker-squash, to make your images smaller. It will squash multiple Docker layers into one in order to create an image with fewer and smaller layers. Squashed images work the same as they were originally built, because this utility retains Dockerfile commands such as PORT or ENV. In addition, deleted files in later layers are actually removed from the image when squashed.
If necessary, you can also extract data files from the finished container with the cp (from copy) command:
   $
docker cp <CONTAINER ID>:
   /path/to/find/files /path/to/put/copy
Layers and images are closely related to each other. Docker deals with images and their layers with a few commands, and we have been using most of them already. Let's summarize them now:
|
Image-related command |
Description |
|
|
This lists the images |
|
|
This builds an image from a Dockerfile |
|
|
This shows the history of an image |
|
|
This creates a new filesystem image from the contents of a TAR archive |
|
|
This loads an image from a TAR archive |
|
|
This removes one or more images |
|
|
This saves an image's contents to a TAR archive |
|
|
This returns low-level information on an image |
Layers are a great feature in the container world. When used wisely, can be a great help when creating images. But, they also have a limitation. At present, the AUFS limit of 42 layers https://github.com/dotcloud/docker/issues/1171. This means that you should group similar commands where it is possible, which will result with just one single layer.
As we have said before, Docker images are stored as series of read-only layers. This means that once the container image has been created, it does not change. But having all the filesystem read-only would not have a lot of sense. What about modifying an image? Adding your software to a base web server image? Well, when we start a container, Docker actually takes the read-only image (with all its read-only layers) and adds a read/write layer on top of the layer's stack. Let's focus on containers now.