Even though taking pictures with a digital camera makes it easy to share digital photos electronically — on a Web page, as an e-mail attachment, or on a computer or TV screen — a photographic print on paper is still what photography is all about to many people. You can make photo-quality prints from digital photo files in many ways, including printing them on a desktop photo printer, ordering prints from an online photo-printing service, or using a local photo-processing lab.
Before you are ready to make prints, however, you may need to perform some basic image editing to get the best results. To make prints that look like the images on your computer screen, you need to take the time to calibrate your monitor with Adobe Gamma or a monitor-calibration device.
Besides making basic photo corrections to your digital photos, you also need to make sure that the aspect ratio is correct for the print size you want, that the image size is large enough for the print size, and that the photo has been sharpened for the target printer. If you are using your own desktop photo printer, you may also want to use Adobe Photoshop Elements or another image editor to precisely position photos on a page, create multiple photo page layouts, or crop photos that will be printed in a book using an online printing service.
Your digital camera, computer screen, and printer all reproduce color differently. Color management is a system of hardware and software products that have been configured to ensure accurate color across all devices.
A couple important steps in color managing your hardware are calibrating your computer display and using the right color profiles for the specific combination of printer, ink, and paper that you are using. Taking, editing, and printing digital photos can be a joy and easy to do when you have accurate color across your hardware and software. Without color management, the same process of taking, editing, and printing digital photos can become frustrating.
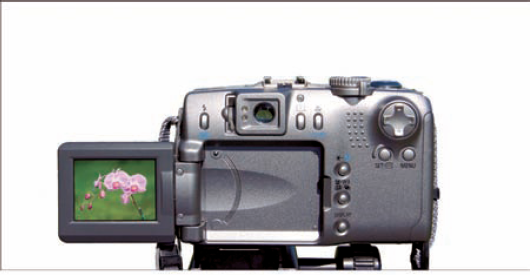
The LCD screen on the Canon PowerShot G3 displays a thumbnail image of a photo of a few orchids.
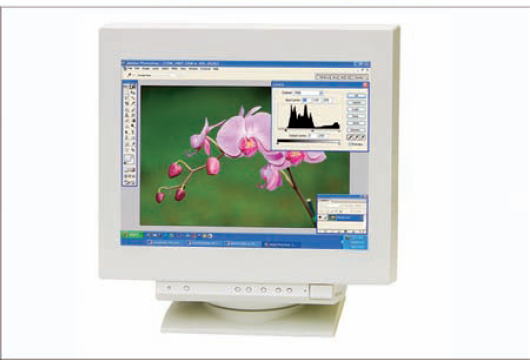
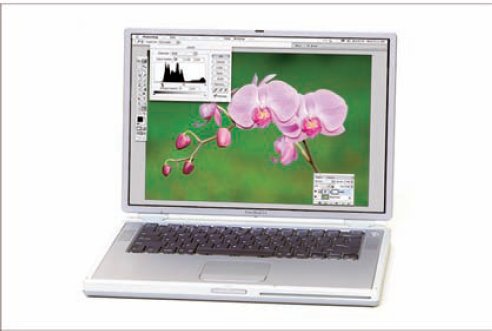
This computer monitor displays the orchids as they looked when the photo was taken.
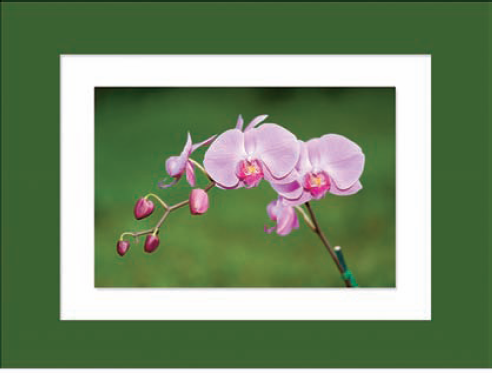
This print of the orchids looks the same as it did on the monitor and as it looked when the photo was taken.
The orchids on this Mac PowerBook G4 LCD look the same as they did on the print, on the PC monitor, and when the photo was taken.
Tip
Did You Know?
You can calibrate your Windows PC monitor using Adobe Gamma, which is a software utility added to the Control Panel when you install Adobe Photoshop Elements. To access the Control Panel, click the Start button and select Control Panel from the menu. If you are using a Mac, you can use Apple's ColorSync utility, which can be found in System Preferences. Be sure to adjust your monitor in the lighting conditions that you normally work in.
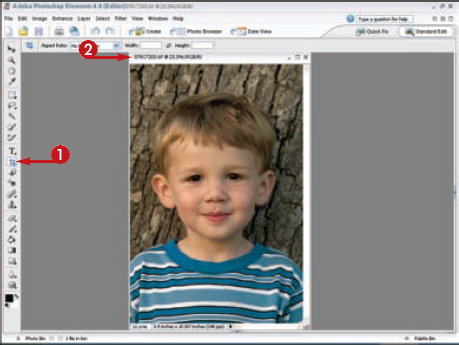
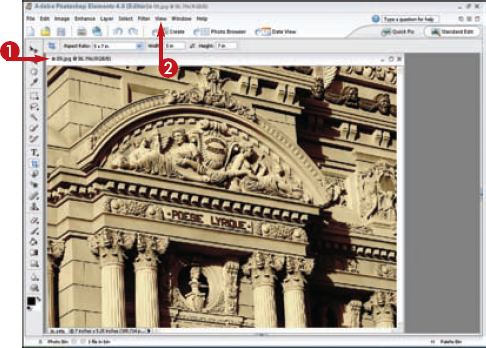
Photoshop Elements offers two useful tools for cropping images — the Rectangular Marquee and Crop tools. First, you can select the part of the image that you want to keep using the Rectangular Marquee tool and then select Image
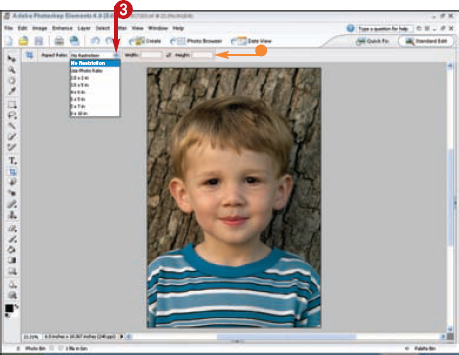
• Alternatively, you cantype in the width andheight that you want.
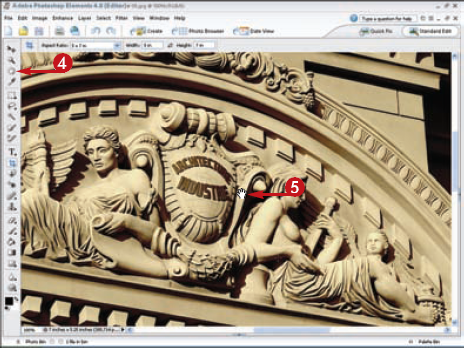
The cursor changes to indicate that you can rotate the image.
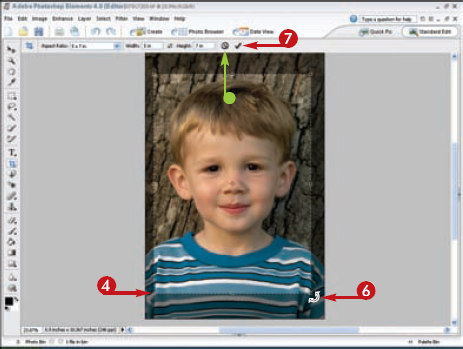
• To cancel the crop, click here.
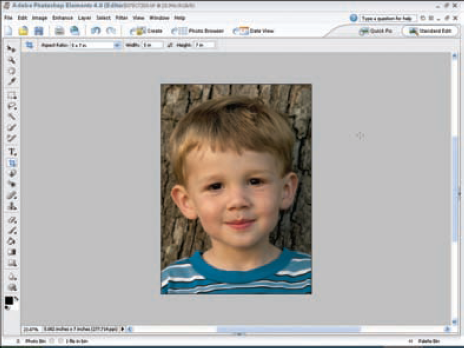
The image is cropped, resized, and rotated as chosen.
Tip
Did You Know?
You can increase or decrease the size of the selection by clicking one of the corners of the selection marquee and dragging it. If you entered values in the Width and Height box, the Crop tool automatically maintains the aspect ratio.
The largest size print you can make with your digital camera is limited by the pixel size of your camera, the quality of the photo you want to enlarge, and your tolerance for image degradation due to image upsampling.
To determine how large a print you can make with any given image, you need to experiment. To determine the optimal print size, you divide the pixel dimensions by the optimal print PPI for the printer or print service you intend to use. Most Epson printers make excellent prints at 240PPI. Hence, an image that provides a 1,536 × 2,480 pixel image would make an optimal print size of 6.4" × 10.3" — enough for an excellent 5"x 7" print.
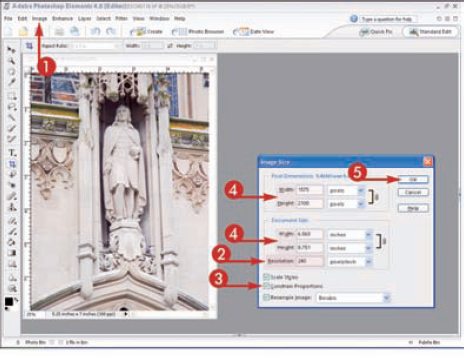
The Image Size dialog box appears.
The image size is changed.
The optimal print size is 1,575 × 2,100 pixels at 240PPI.
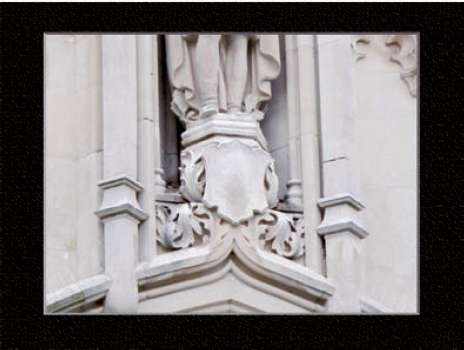
This 9.46MB image is the optimal print size, and it shows no loss in image quality.
This photo has been upsampled to be 1,920 × 2,560 pixels, which makes an 8" × 10" print at 240PPI.
A noticeable but acceptable amount of image degradation is visible in this 26.5MB image.
This photo has been upsampled to be 3,840 × 5,120 pixels, which makes a 16" × 20" print at 240PPI.
Substantial and unacceptable image degradation, caused by overincreasing the image size, appears in this 56.3MB image.
Tip
Did You Know?
When resizing images using the Image Size feature, you need to be careful to choose the most appropriate resampling algorithm. Use Bicubic Smoother when enlarging an image and Bicubic Sharper when reducing the size of an image.
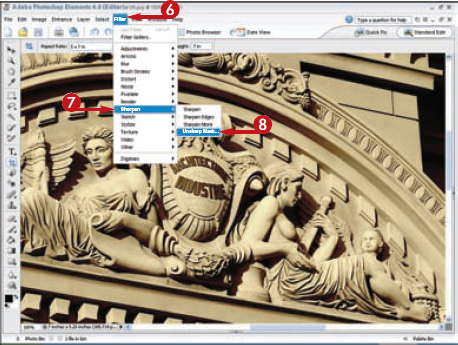
Most photos taken with digital cameras look soft; that is, they do not look as sharply focused as they could. Using an image editor, you can make an image look as sharp as any photo taken with a film camera. One easy way to increase the sharpness of a photo is to use the Unsharp Mask filter found in most image-editing applications.
You need to use different Unsharp Mask settings for the same photo when using it in different sizes for different purposes. The best settings for an 800 × 640–pixel image that you want to use on a Web page are entirely different than the settings you need to make a high-resolution print on an inkjet printer.
The image is shown at full size.
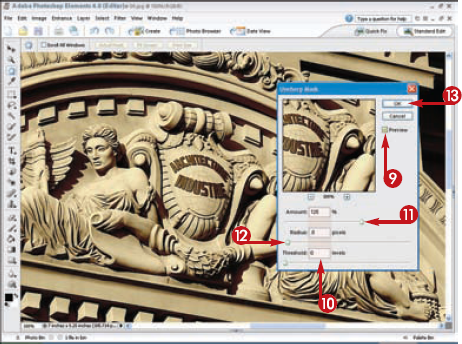
The Unsharp Mask dialog box appears.
The image is sharpened as you have specified.
Tip
Did You Know?
You cannot use Photoshop Elements to sharpen a poorly focused digital photo. The Unsharp Mask filter only increases the perceived sharpness of an already well-focused photo. If you want a good photo that appears "tack sharp," you must first shoot it in focus and then apply the Unsharp Mask filter to get the best results.
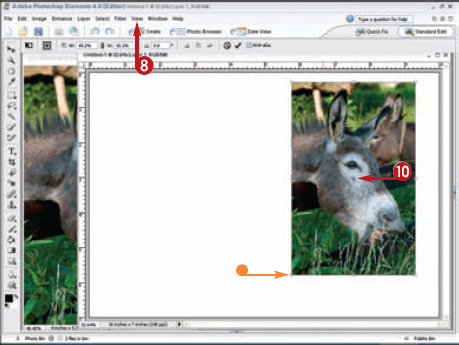
You may have many reasons to precisely position one or more photos on a page. If you are printing a page with only one photo, using your printer software may be the best approach.
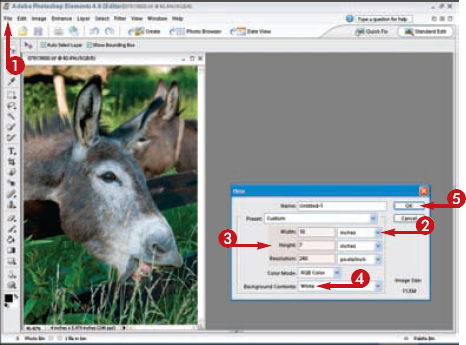
You can use the Photoshop Elements Image
The New dialog box appears.
Elements creates a new document to your specifications.
The photo appears in the new document.
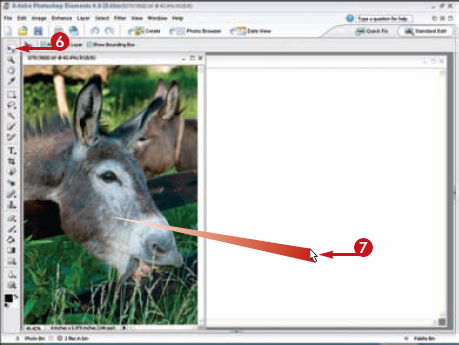
The rulers appear in the new document window.
• If you click and drag the handles around the photo, you can change the size of the image. Press Shift while dragging to maintain the aspect ratio.
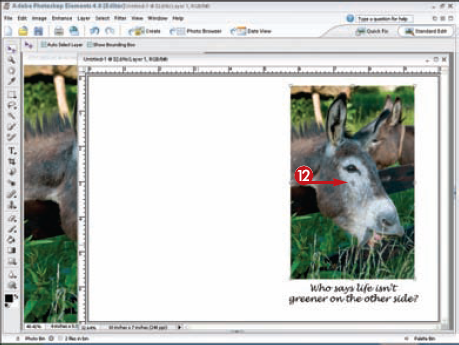
You can move the image up, down, and sideways by pressing the arrow keys. Each press moves the image one pixel.
Tip
Did You Know?
When you drag and drop, or when you cut and paste, multiple images onto a blank page, the images are all placed on their own layers. To view and select these layers, open the Layers palette. You can easily add any one of many varieties of drop shadows or other effects by opening the Layer Styles palette and double-clicking the style of your choice.
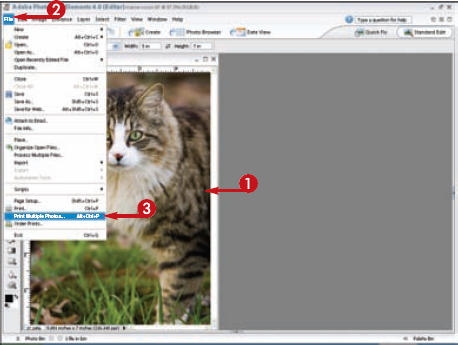
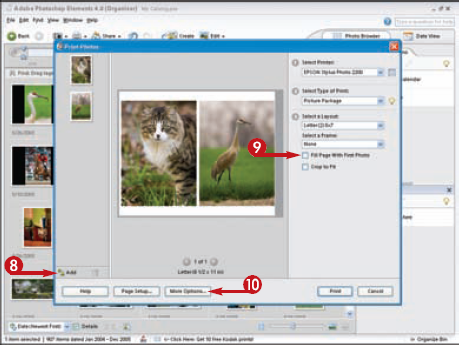
You can save photo paper, printer ink, and money by creating a multiphoto layout and printing more than one photo per page. The Print Multiple Photos command lets you quickly and easily make multiphoto prints.
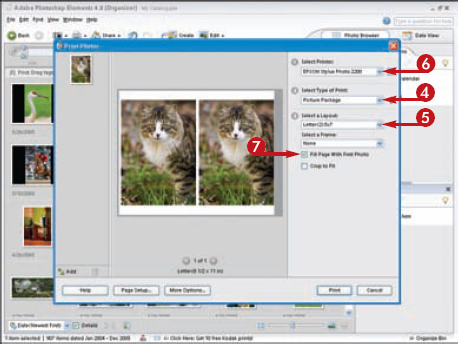
Besides using one of the 20 preformatted pages, you can also customize your own layout. You can learn more about making customized layouts by consulting the Adobe Photoshop Elements Help system. You can also automatically make a multiphoto print of every photo in a selected folder. The Picture Package's default layout is for multiple copies of a single photo. After you have selected a layout, however, you can click each photo and pick another photo to fill that space.
The Adobe Organizer is launched, and the Print Photos dialog box appears.
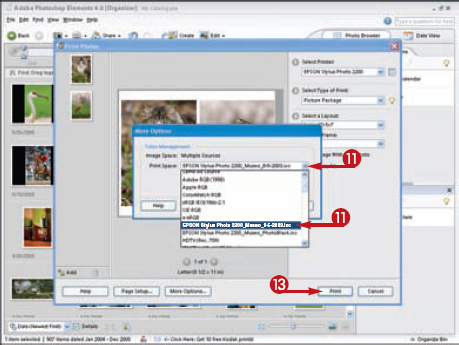
The More Options dialog box appears.
The printing process begins.
Tip
Time-Saver!
When you use the Photoshop Elements Print Photos dialog box, you will need to cut each photo from the page. If your photo-quality printer has a borderless print feature, make sure to check Borderless in the Print Photos dialog box. This will save you time in cutting the photos.
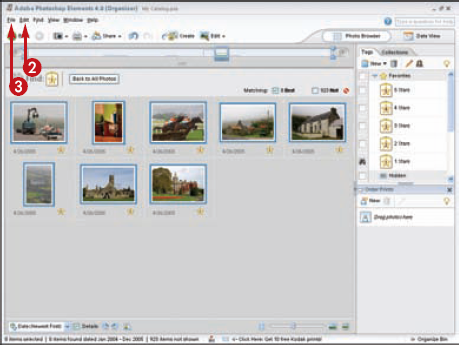
If you enjoy using a one-hour photo-finishing service at a local photo lab, you may enjoy using one of the online printing services. Although it is not possible to get your photo prints back in an hour, you can select, edit, upload, and order photo prints from your computer any time you like. After uploading your photos to an online printing service, your photos are delivered to your mailbox within a few days. Besides being able to order prints for yourself after you have uploaded them, you can also send a link via e-mail to anyone else with whom you want to share the photos. They can view the photos online and order prints if they like.
A blue border appears around all the images.
If you have not yet signed up for the Kodak EasyShare service, follow the instructions to do so.
The Adobe Photoshop Services dialog box appears.
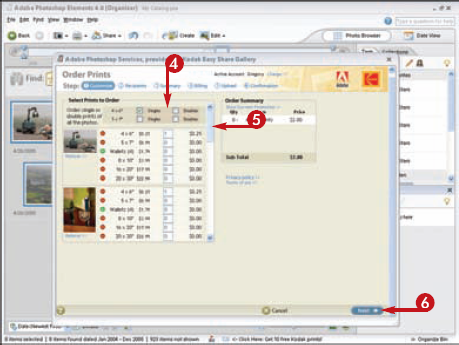

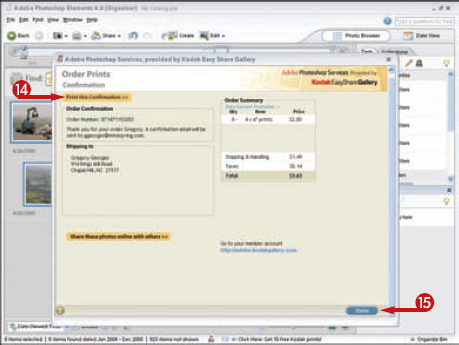
After the photos have been uploaded, the Confirmation page appears.
Within a few minutes, you will receive an e-mail confirming the order details.
Tip
Did You Know?
The best way to use an online photo-printing service is to crop, edit, and place all the photos that you want into a single folder before uploading them to the service. Crop each of the photos to the aspect ratio of the print size that you will want to order and save them in an appropriate file format.
Making a printed photo book is one of the most exciting ways to share photographs. The next time that you have a family get-together, you can create printed photo books and make them available to your family members. Or you may want to make your own 12" × 16" hardcover coffee table book featuring your top 40 photos.
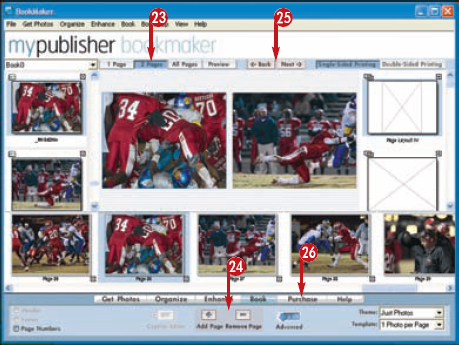
One of the leading online photo book companies is MyPublisher. A significant part of the MyPublisher service is the free software that you use to create your books. To download the MyPublisher BookMaker software, visit www.mypublisher.com.
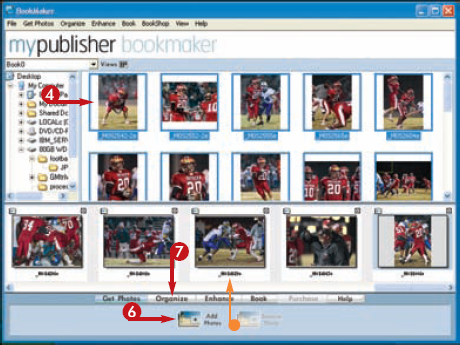
Thumbnail images are created and displayed.

All the thumbnail images now show a blue border.
• Thumbnail images appear here.
The pages are automatically created using the selected settings.
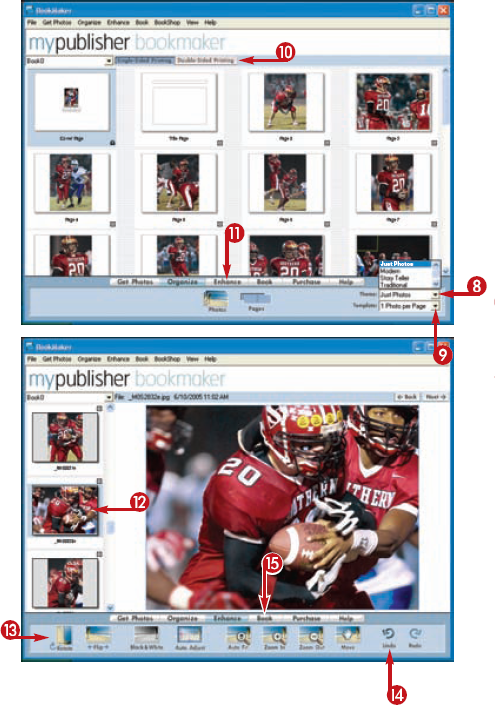
The Enhance page appears.
The edited image is displayed.
Tip
Did You Know?
If you want to make your own photo books using the paper of your choice and a desktop inkjet printer, you can do so by purchasing a photo book cover made for this purpose. In particular, ArtZ's (www.artzproducts.com) coffee table books and Red River Paper's (www.redriverpaper.com) custom book kits make excellent photo books that can feature your photos printed on your favorite inkjet paper, using a color profile — and printed to perfection.
If you do not want to order a photo book online, you can purchase StoryTeller from Epson (www.epson.com) and make your own photo book using your inkjet printer. Epson's StoryTeller is a kit that comes with album software, paper, a book, and a glossy cover. StoryTeller enables you to choose from 18 book covers and 60 page layouts.
After you have printed all the photos on the pages, you can add your favorite photos to the glossy book cover to make a fine-looking book. Extra sheets and one extra cover are included to ensure that you successfully complete your book.
The Book page appears.
The text box closes, and the text is applied to the page.
The Organize page appears again.
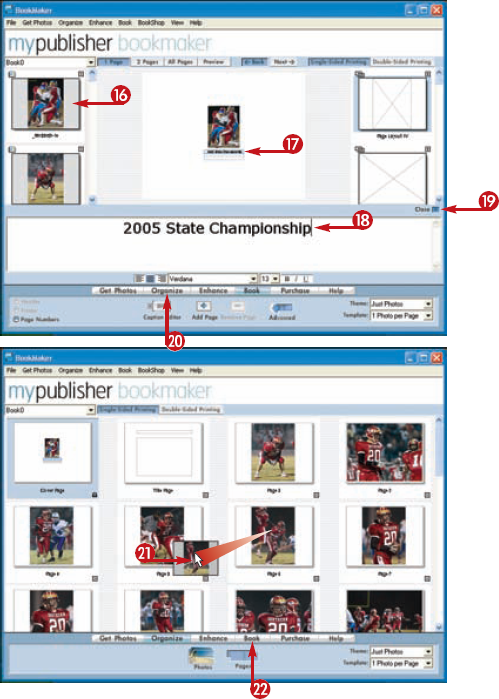
The Book page appears again.
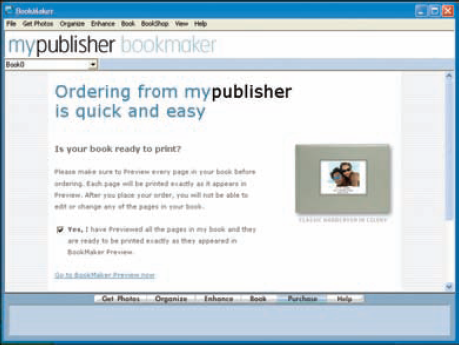
The first Purchase page appears.
Within a few days, your printed book will be delivered to you.
Tip
Apply It!
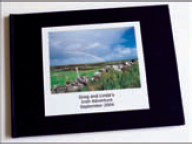
Choose a cover image and cover text to make a perfect book like this one when using MyPublisher's online printing service.