Although your natural inclination may be to focus your attention on your subject and compose carefully to get the shots you want, you can greatly improve your photography if you put an equal amount of time into evaluating and controlling light. What often distinguishes really good photographs from all the rest is how light is used to capture the photograph. Depending on the kinds of subjects you shoot, you may need to work exclusively with natural light, or you may be able to use a combination of natural and artificial light.
After you have decided what you want to shoot and you have a vision of the kind of shots you want, carefully consider the characteristics of the available light if you are shooting with natural light. Do you have backlighting or front lighting, or does the light come in from the side? Does the light come in from a low angle, or is the sun high in the sky? Is the light soft and diffused, or is it bright and intense? Does the light have a nice, warm golden glow or maybe an unwanted color cast?
When you do not have good light, consider ways in which you may improve it, or find another time to try again. Can you use one or more flashes? Are you shooting close-ups when a macro ring light may be the most effective kind of supplemental light? Would one or more handheld light reflectors be useful? The more you take advantage of quality light, the better your photos will be.
Digital photography is all about capturing light on an image sensor; the better the light, the more potential you have for getting great photographs. The quality of light can vary greatly from when the sun comes up in the morning to when it sets in the evening. Sometimes it varies on a second-by-second basis, such as when there are fast-moving clouds. A good way to learn what light is best for the subjects that you enjoy shooting is to shoot frequently and carefully study your photographs. Learn to judge light on direction, intensity, and color, and use that information to decide when and where to shoot.
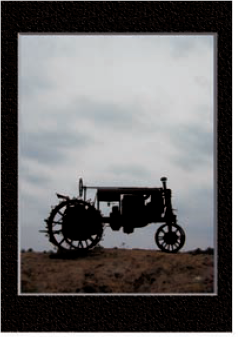
Heavy cloud cover and late evening sunlight help silhouette the tractor in this photo.
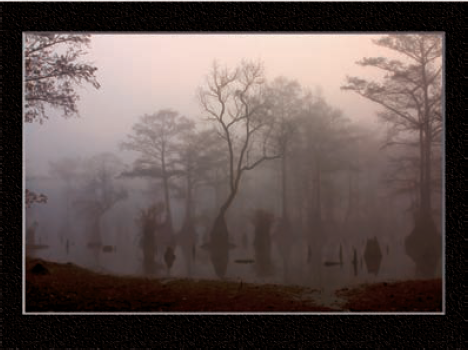
Fog reduces the dynamic range of light, which results in soft smooth gradations like this photo of a swamp.
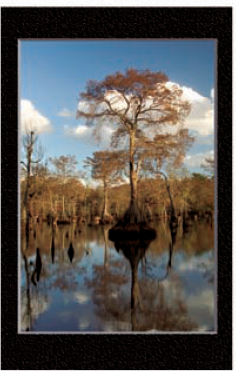
The low light of evening helps to give this swamp photo a golden glow against the rich blue sky with well-defined white clouds.
Rich fall colors plus the right light can make spectacular color in a photo.

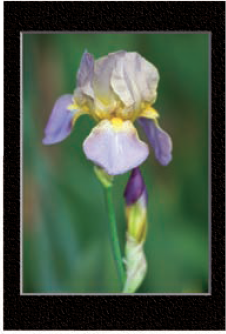
The soft, early morning light on this iris makes it easy to capture detail in the shadows and highlights.
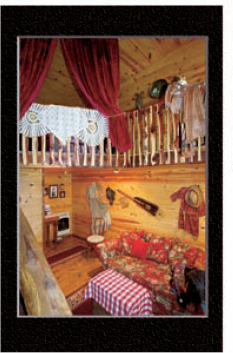
Even the golden glow of incandescent light against rich wood colors can create wonderful light in an interior like this one.
Tip
Photo Tip!
Clouds can be very helpful to photographers because they can diffuse bright sun and reduce the overall light intensity and contrast. Clouds can make an otherwise clear sky a little more interesting. Use clouds to your advantage and have patience for them to move to where they will help you get better photographs.
Do not avoid taking photos just because there is haze or fog. Haze or fog can act as an excellent light diffuser. Haze or fog can also create an atmosphere that may transform what would otherwise be an uninteresting scene into a beautiful photograph.
When properly exposing haze or fog, you can get stunning silhouettes and smooth monotone gradations that can make a photograph both simple and powerful. Whenever you have a chance to shoot in haze or fog, take it. Make sure, however, that you understand how to use exposure compensation because your camera's built-in light meter will likely give you an exposure that is not what you want.
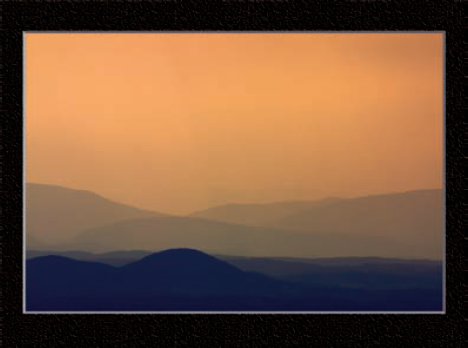
The haze seen from the Smoky Mountains makes photographs like this one rich in soft subtle gradations that diminish with distance.
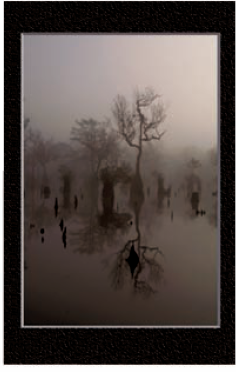
The fog in this swamp combines with the late evening sun to help create wonderful, monotone silhouettes of trees in the water.
Backlighting occurs when your subject has a bright light behind it, often resulting in dark shadows on the subject. Shooting in this kind of lighting can be both challenging and rewarding. The often extreme contrast between the bright background and an unlit subject makes it possible to get a silhouette.
Getting a good exposure in a backlit situation can be difficult. Shoot a couple of photos with different settings and compare the results on your camera's LCD screen. If your camera offers a histogram, you can use it to see if you have a dark or nearly black silhouetted subject or if you have blown-out highlights in the bright areas of the composition.
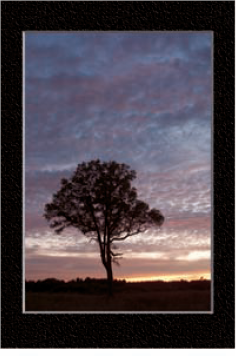
The fading sunlight behind the trees produced this silhouette.
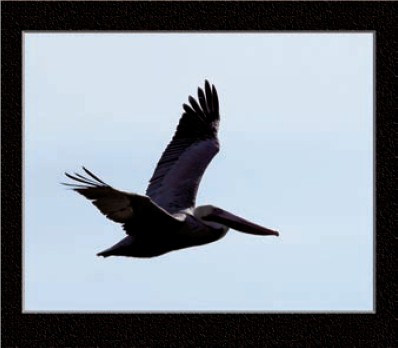
Underexposure caused this silhouette of a flying pelican, but it makes a nice photo anyway.
A camera with a built-in flash is very useful when you take snapshots or when there is not enough light and you cannot add light in any other way. Otherwise, you should carefully consider ways to avoid using a built-in flash most of the time. A built-in flash lights your subject with unnatural light that comes straight from the camera. The resulting effect is that important shadows, which add dimension to your subject, are removed by the flash.
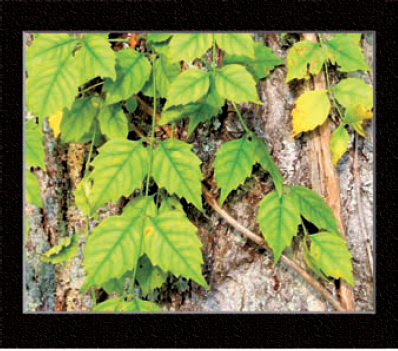
This photo taken without a flash shows good dimension and natural colors.
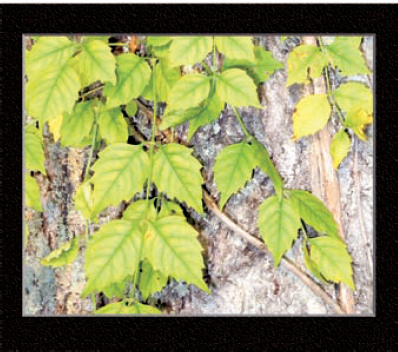
The use of a built-in flash for this photo has diminished the shadows, resulting in a flat-looking image with less natural colors.
A fill flash is light from a built-in or external flash that is used to illuminate dark shadows to reveal detail and to reduce overall image contrast in bright sun. When you are shooting compositions with strong shadows or backlighting, consider using a fill flash.
When you shoot a backlit subject and the primary light source is behind your subject and in front of you, the result can be an extremely high contrast. A fill flash can reduce the image contrast while lighting your subject to reveal important details.
If your camera has exposure compensation, you can use that feature to get the best balance between existing light and light from the flash.
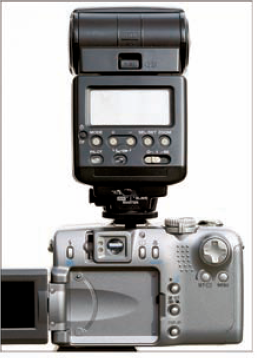
This is a Canon 550EX Speedlite mounted on a Canon PowerShot G2.
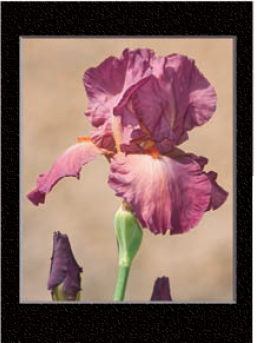
Bright sun creates extreme contrast on this iris with well-lit areas and dark flat shadow areas.
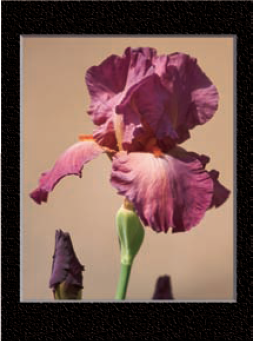
A fill flash reduces the overall contrast and lights the shadowy areas to reveal detail in the iris.
Generally, you should try to keep a subject's eyes in focus and capture a sparkle or catch light in them. Often lighting conditions enable you to shoot with existing light and get a catch light. If you are shooting without the benefit of light that enables you to get a catch light, use a flash or other light source.
To avoid adding too much artificial light from a flash, use flash compensation if it is available or an external flash. The distance to the subject and the power of the flash are important variables to consider. Be careful not to ruin your intended natural lighting. Just add a catch light to the eyes.
This child's portrait was greatly enhanced with a flash to add a catch light to the eyes.
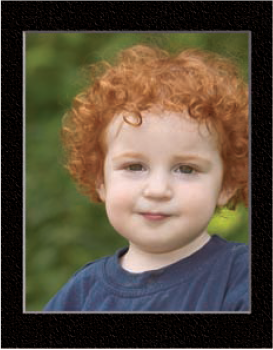
This close-up photo shows the important catch light, or sparkle light, in the child's eyes.

Unnatural red eyes almost always ruin a photograph. To avoid red eyes, many camera vendors have added features that are known as red-eye reduction features. Although these features can reduce or eliminate red eye, they often create other problems.
To avoid getting red eye, you simply need to shoot so that the angle between the flash and lens to the subject's eyes is more than five degrees. Using an off-camera flash is one option. You can also have your subjects look away from the camera slightly, or find an environment or use camera settings that don't require a flash. You are more likely to get red eye when shooting in a dark environment.
In this photograph, you can see the dreaded red eye caused by a flash.

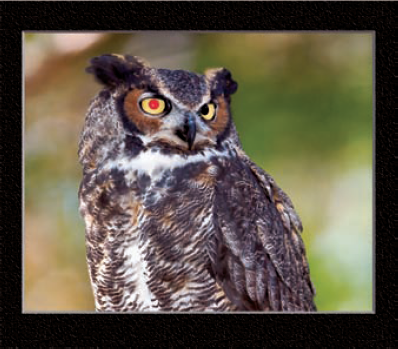
Red eye can even occur in the eyes of pets and wildlife subjects, such as this great horned owl.
One useful and inexpensive photographic accessory is a light reflector, such as the 32" Stroboframe Pops portable light modifier, which costs under $35. You can use it to reflect soft natural light toward your subject and as a shade cover to reduce overly bright direct sunlight.
A handheld light reflector is especially useful for adding light to a subject's face.
Besides filling shadows with natural light, you can add a warm color tone by using the bronze- or gold-colored side of the reflector. When shooting a backlit subject, a reflective light modifier, such as the Stroboframe light modifier, is an excellent tool to use to add natural fill light to the subject to reveal greater detail.
This portrait was taken in bright direct sun with a Stroboframe light modifier to reduce contrast and to evenly light the face. Notice the absence of harsh shadows.
Here, the Stroboframe light modifier is held to reflect light up toward the face of the model.

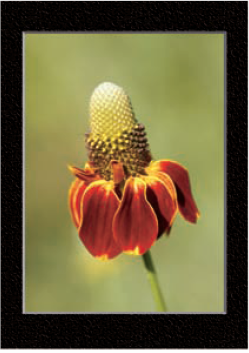
This wildflower photograph was taken on a bright sunny day under the shade created by a Stroboframe light modifier.
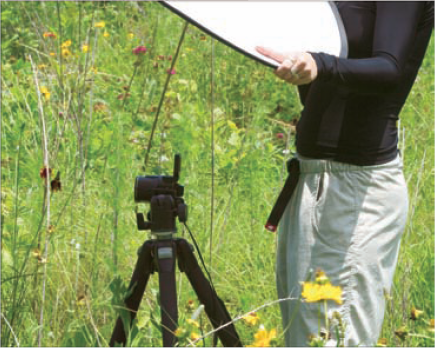
The photographer is using a self-timer and a Stroboframe light modifier to shade and photograph a wildflower.
Tip
Did You Know?
Large white mat boards, which can be purchased at most art stores, make excellent inexpensive light reflectors. Although they are not as convenient to store and carry as collapsible light modifiers, such as the Stroboframe Pops light modifier, they can be used to reflect light where it is needed. One advantage to using a white reflector over an additional light source is that it will not alter the color temperature of the ambient lighting, which can occur when using an artificial light source.
A macro ring light is a flash that attaches to a macro lens. Although a macro ring light can light up shadows in such a way that the subject loses some definition, a skilled photographer can alter the ratio of the light to maintain realistic shadows.
A macro ring light is also valuable when you want to increase depth of field. Whenever you shoot close to a subject, you have a limited depth of field. To maximize depth of field, you need to choose a small aperture, which results in a longer exposure. Using a flash, you can freeze the subject movement while benefiting from the increased depth of field, resulting in perfectly focused and exposed subjects.
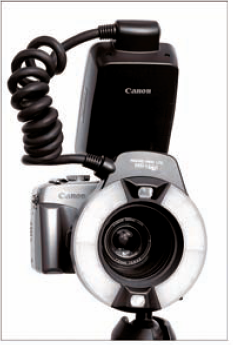
A Canon MR-14EX TTL Macro Ring Lite flash is mounted on the front of a Canon PowerShot G2.
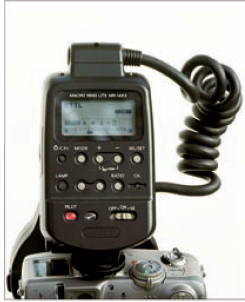
The Canon MR-14EX TTL Macro Ring Lite flash offers many features and controls for taking well-lit photos.
The interior details of this blue and yellow iris are well lit by a macro ring light.

A macro ring light provides excellent light for this spider with a catch light in the eyes.

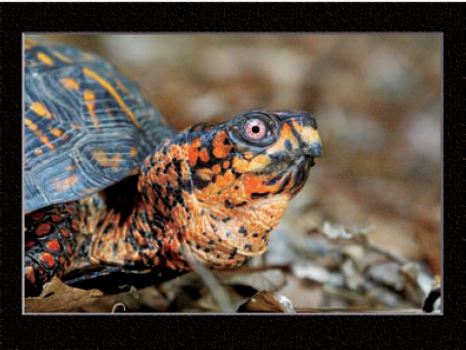
This close-up shot even shows detail in the cornea of the turtle's eye. This shot would have been difficult to light without a macro ring light.
Getting a good portrait is dependent on the quality and quantity of light available, which is why so many portrait photographers prefer to shoot inside a studio. One of the most useful lighting accessories in a portrait studio is a soft box, which is a large light box that diffuses the light from a flash to make soft, even, natural-looking light.
You can get the same soft, evenly diffused light in your own home without the expense of having a studio with the subject standing in front of a window. Depending on the light, you can either shoot with the light coming in directly, or you can use the diffused light that comes through a sheer drape.
You can create an excellent portrait by positioning your subjects in front of a window while they hold a mat board behind them as a background.
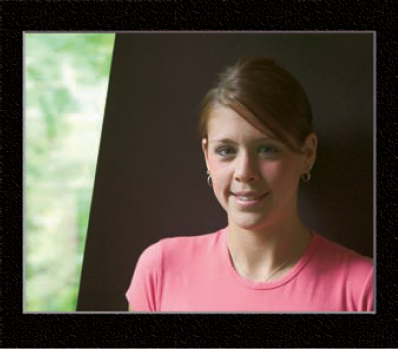
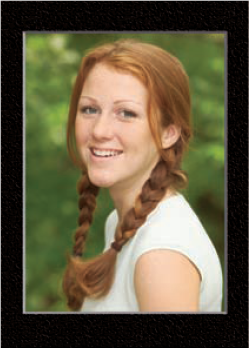
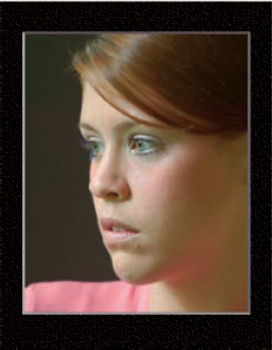
This portrait was taken using natural light shining in through a window.
The best sunlight is often found an hour or less before sunset until 20 or so minutes past sunset. This time is often referred to as the golden hour for photographers. When light is low in the sky, it gives you a very directional light that adds wonderful depth to your photographs.
When you plan on taking advantage of the sun in the golden hour, be well prepared to shoot because the best of that time may come and go quickly. Make sure that you have all your equipment out, and ready to shoot. You should also wait 20 minutes past sunset for any possible afterglow, which occasionally makes for a spectacular landscape photograph.
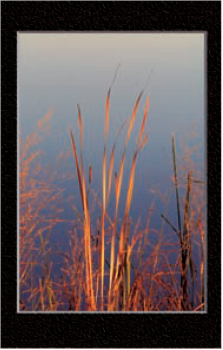
The golden hour of sunset casts a wonderful color on these reeds near the edge of the water.
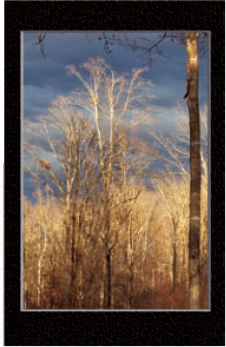
Near-sunset light provides the rich warm color and black shadows shown in this forest.
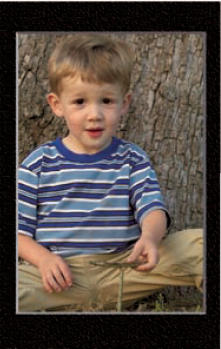
The golden light from the evening sun makes a wonderful color for this child playing with sticks.