
Although many factors contribute to making a good photograph, one of the most important factors is exposure. Even though your camera's light meter can help you choose the right combination of shutter speed and aperture, and in some cases even the ISO speed, it can still misread the amount of light and give you a photo unlike what you have in mind. To improve your chances of getting the exposure you want, most digital cameras offer a wide range of features that can help considerably. Understanding features such as exposure metering modes, histograms, and exposure compensation and understanding how to use manual mode can help you get the exposure that you want.
Even the challenge of capturing the full range of brightness, from the darkest darks to the brightest highlights, is easier if you understand what you can do later with an image editor on your computer and you plan for combining two or more images. When it comes to getting the right exposure, the digital camera wins hands down over the film camera. Not only do you have all the incredibly useful features to help you get the right exposure, but you can instantly see the image on an LCD panel. If you are not happy with the picture that you took, you can shoot until you get what you want — and it does not cost a thing!
Exposure is the correct combination of shutter speed, aperture, and ISO speed to get the photograph that you want. Exposure can be determined solely by the camera, by you and the camera together, or solely by you. Whenever the camera helps you choose exposure settings, the camera's built-in light meter takes a reading of the reflected light in the scene and then selects the appropriate camera settings.
When taking photos, remember that thereis no such thing as a perfect exposure —only one that is how you want it to be.
Overexposed photographs are overly light, and detail is lost in the highlights.
Underexposed photos are overly dark, anddetail is lost in the shadows.
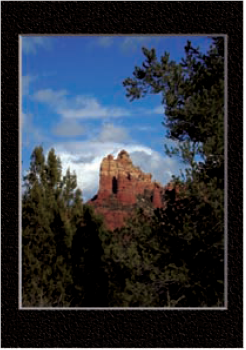
UNDEREXPOSED
Underexposing this photograph led to a loss of detail in the shadow area.
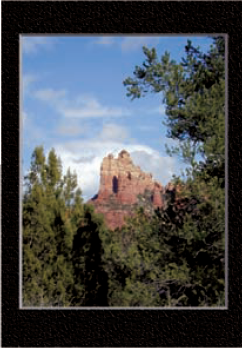
PROPERLY EXPOSED
This well-exposed photograph reveals details in the highlight areas and in the shadow areas.
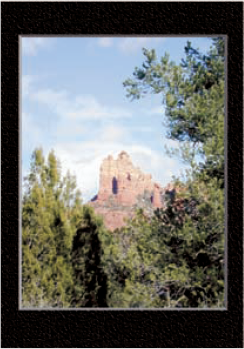
OVEREXPOSED
Overexposing, or "washing out," this photograph lost detail in the cloud area.
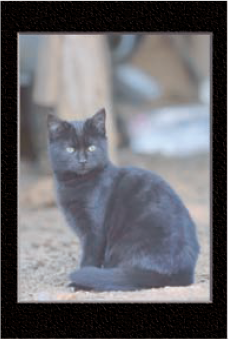
This photo was not metered correctly, and as a result, the dark black cat appears gray.
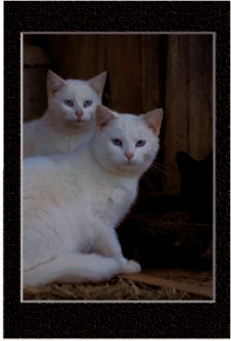
This photo of two white cats shown against a black background was metered incorrectly, and the white cats appear gray.
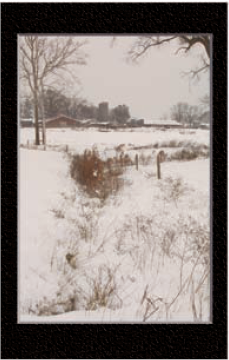
Photographers often incorrectly meter scenes with a lot of white sand or snow, as is the case with this underexposed photo of a snow-covered dairy farm.
Tip
Did You Know?
One of the significant advantages of using the RAW format, if it is available on your digital camera, is that RAW conversion tools enable you to vary the exposure by +/− two f-stops. If you plan on using this feature, make sure that you do not overexpose the image and "blow out" the highlights because you will not be able to retrieve picture information in that area with a RAW conversion tool.
Most digital cameras offer a variety of exposure modes. The camera automatically chooses both shutter speed and aperture settings when you select the program or automatic mode. When using these modes on some cameras, you can sometimes modify these initial settings.
When you select the shutter priority mode, the camera automatically chooses the aperture setting to get a good exposure. Likewise, when you choose the aperture setting that you want, the camera will select the shutter speed. Remember to choose the shutter speed setting when using shutter priority mode and to choose the aperture setting when you use the aperture priority mode; otherwise, you will simply be using the last setting that was used.
GENERAL EXPOSURE MODES
You usually select an exposure mode by turning a dial like this one found on the Canon PowerShot G2.
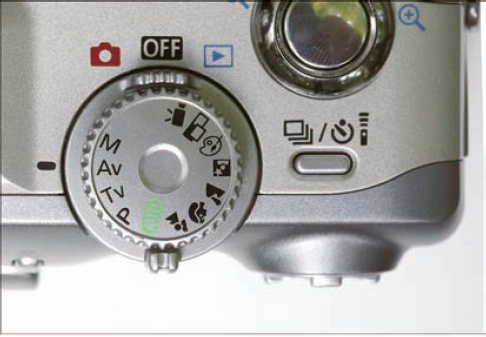
For snapshot photos and general use, select program or automatic exposure mode.
Choose the aperture priority mode when you want to control depth of field; in this mode, the camera automatically sets its shutter speed.
Choose shutter priority mode when you want to control shutter speed; the camera then automatically sets the aperture.
Use manual mode when you want complete control over both shutter speed and aperture.
Tip
Did You Know?
Automatic shooting modes such as landscape, macro, and portrait modes often result in a good photograph. However, they are not likely to produce photos as good as you can get if you understand and correctly use the shutter priority or aperture priority mode settings.
Today's digital cameras have a built-in exposure meter that measures the amount of reflected light to determine the appropriate settings. Although built-in exposure meters are getting increasingly sophisticated, they're not perfect. In many cases, these "bad" readings are caused by reading either too much or too little light. To give you more control over what light is metered, most digital cameras offer more than one exposure meter mode.
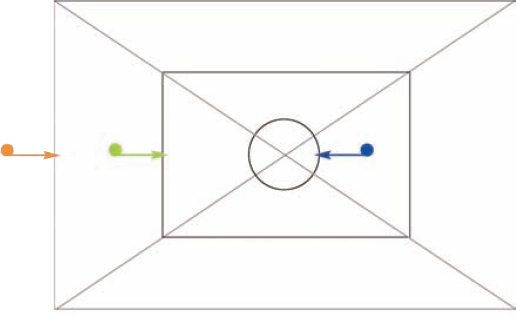
Some of the more common exposure meter modes are averaging or multisegment, center-weighted, and spot. Multisegment mode takes a reading from the entire picture. The center-weighted mode places emphasis on the center of the image, and spot metering reads only a tiny part of the image.
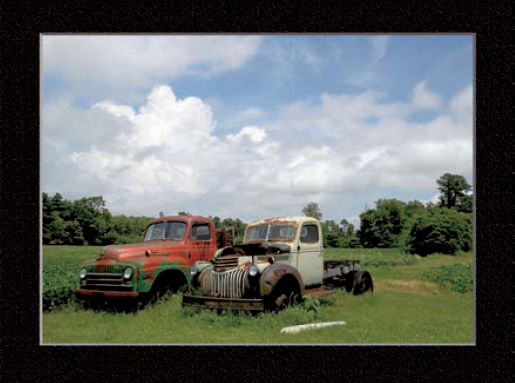
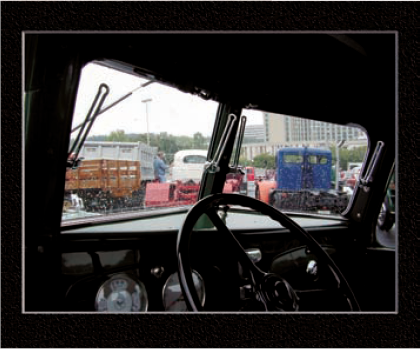
The averaging, or multisegment, metering mode is well suited for most images like this scene showing farm trucks.
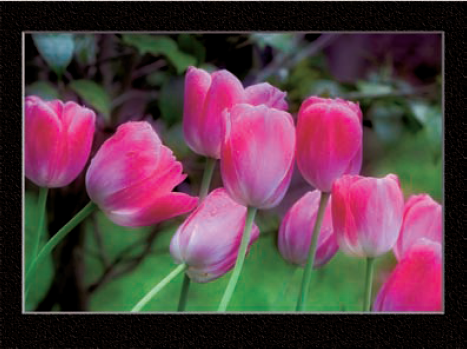
The center-weighted metering mode is useful for reading light on images like this one in which you want the priority given to the center of the image.
This scene was correctly metered using the manual metering mode to capture detail in the truck.
Tip
Did You Know?
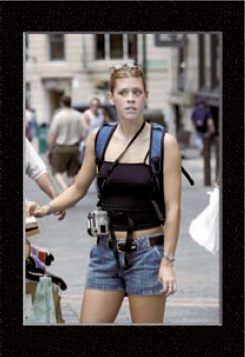
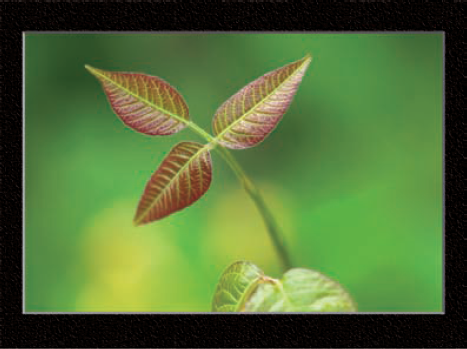
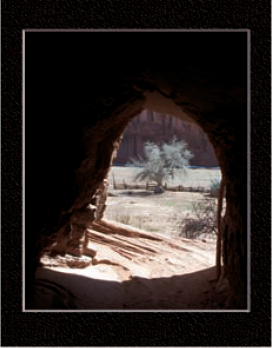
Many digital cameras have selectable auto-focus points that enable you to focus on off-center subjects. If your camera has this feature, check to see if one of your metering modes is linked to the selectable auto-focus points. This feature makes it easy to focus on an off-center subject, such as the tree photo that was shot from inside a cave shown in this task, and to meter the light from that same point.
One of the most useful features found on some digital cameras is the histogram. The histogram is a graph that shows the brightness levels of an image ranging from pure black to pure white. The vertical scale shows how many pixels are in the image at each brightness level.
Using the histogram, you can read the exposure of a photo. The more pixels there are to the right, the brighter the image. Although it's tempting to shoot to get a perfect histogram — one centered and dispersed across the brightness range — such a histogram does not mean that it's a good exposure. The sample photos and histograms shown illustrate the importance of getting the right histogram for the subject.
The Canon PowerShot G2 digital camera shows a histogram along with a small thumbnail image and important camera settings on an LCD screen.

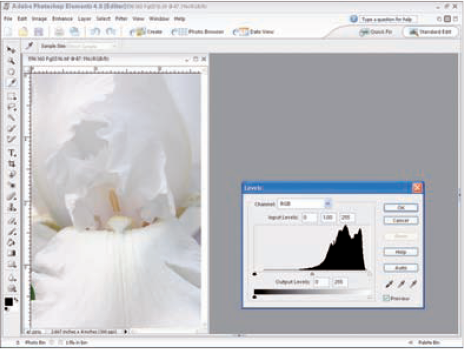
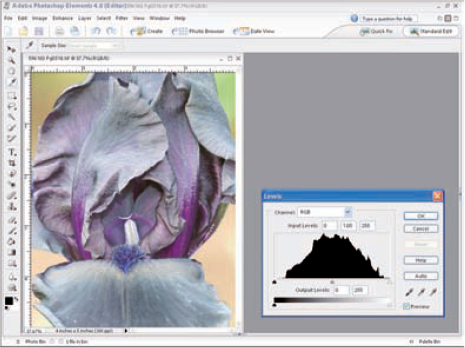
This pure white iris was correctly exposed using a built-in metering mode, a histogram, and exposure compensation.

This histogram of the white iris indicates a correctly exposed image, as the image is skewed to the bright side of the tonal range to keep the white iris white.
This nearly pure black Black Beauty iris was incorrectly exposed as a medium tone, which makes it appear purple rather than black.
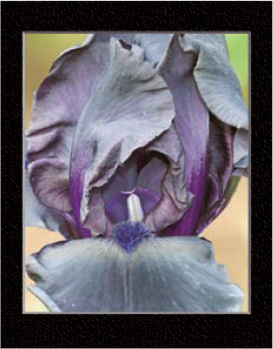
This histogram shows no black or near black tones in the very black Black Beauty iris. The exposure needs to be reduced.
Tip
Caution!
Many digital cameras enable you to change the brightness of the LCD screen used to view images that you are about to take or have taken. Changing the brightness level or viewing the screen in bright light can cause you to misread the exposure. If your camera offers a histogram, you can use its graphical chart to give you an accurate view of the exposure, regardless of the LCD screen brightness setting or bright light.
Exposure compensation enables you to modify the exposure up or down from the metered reading by a specified amount. By doing this, you can continue shooting using the modified meter reading settings and get good exposures. For example, if the meter reading indicates the need for a shutter speed of 1/60 of a second at f/5.6, a +1 exposure compensation would modify the aperture setting to f/4.0 if the shutter priority mode was selected, or to 1/30 of a second if the aperture priority mode was selected.
Using exposure compensation can be particularly useful when shooting in bright areas or when shooting in a backlit situation in which light comes from behind the subject.
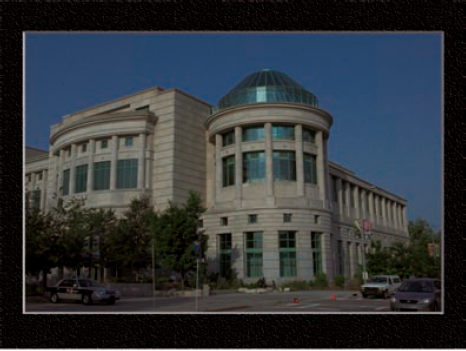
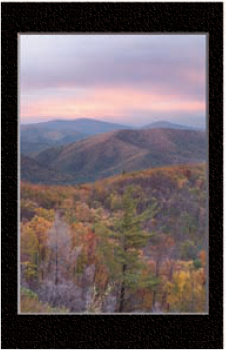
METERED SETTINGS
This photo was shot using the metered settings.
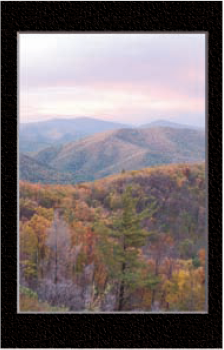
+1
This photo was shot with a +1 exposure compensation setting.
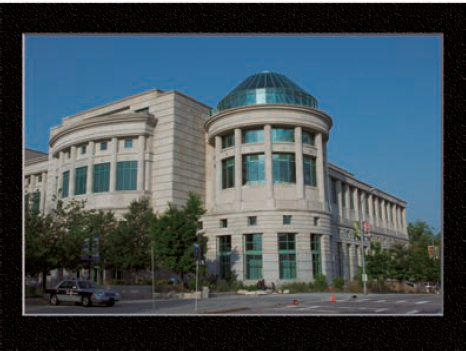
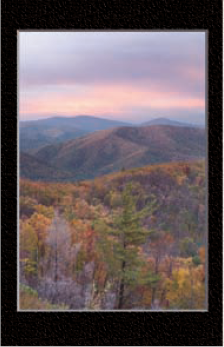
+1⅓
This photo was shot with a +1⅓ exposure compensation setting.
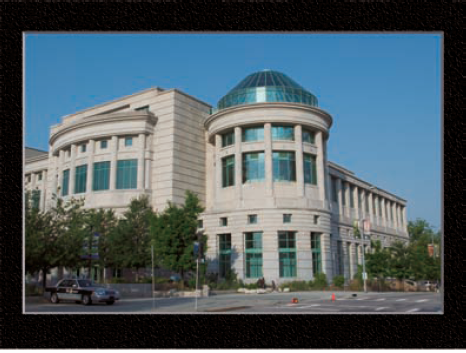
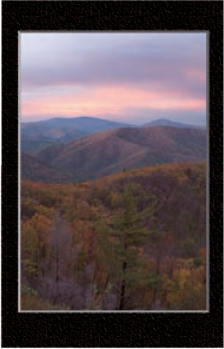
+2
This photo was shot with a +2 exposure compensation setting and is a good exposure.
Tip
Did You Know?
Using an exposure-compensation feature is the easy way to modify the built-in metering system to get the exposures that you want. If, for example, you are shooting a scene that is covered in snow, you can dial in the exposure compensation setting to adjust the built-in meter so that you get perfect photographs each time you press the shutter release.
If any photography rule should not be broken, it's that you should avoid blown-out highlights, unless you want them for creative reasons. A blown-out highlight occurs when you use exposure settings that make part of the image pure white where there should be details. Although you can usually bring out some detail in nearly black or shadow areas, you cannot bring out detail in areas that are pure white using a digital image editor.
If your camera LCD has a histogram, it likely also has a highlight alert, which shows blinking bright white pixels. These blinking white pixels mean that you need to decrease the exposure until there are no more blown-out highlights.
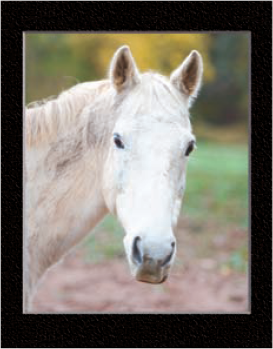
This horse portrait has been overexposed. The pure white area on the face has no detail and cannot be brought back into the photo with an image editor.
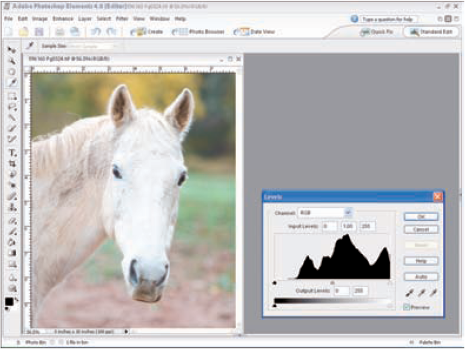
This histogram shows how much of the detail in the horse's face has been pushed into the no-detail highlight area.
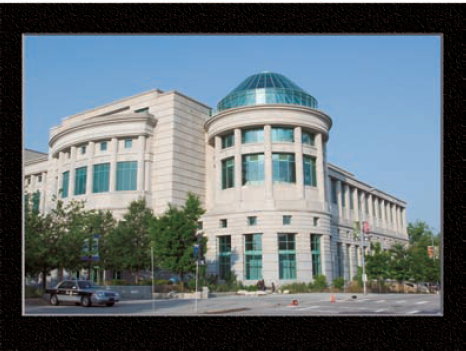
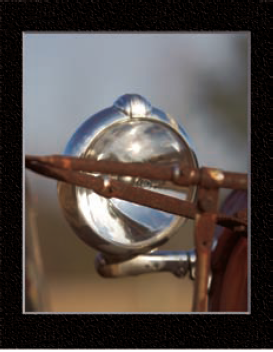
The pure white spectral highlights or reflections on this well-exposed photo of the shiny steel headlight are correct.
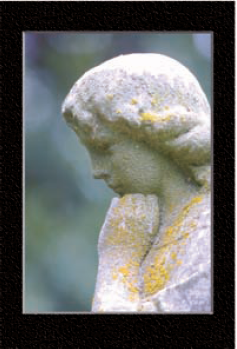
The smooth white marble on the top of the head and on the arm of this statue should be nearly pure white because there is little detail to show.
Tip
Did You Know?
When shooting with a digital camera, you should usually use exposure settings to properly expose for the highlight area of a scene. Using an image editor such as Adobe Photoshop Elements, you can often bring details back into an underexposed area; you cannot, however, bring detail back from an overexposed highlight area where all the details are blown out because there are few or no details in the near white or pure white areas.
Photographers refer to the range between the darkest parts of an image and the lightest parts as the dynamic range, or tonal range. A composition that has very bright parts and very dark parts is said to have a wide dynamic range or high contrast. Unfortunately, film or digital cameras are not able to capture detail in many wide dynamic range scenes.
The challenge that you face when shooting a high contrast scene is to capture details in the shadow areas and in the highlight areas. One option is to shoot once to expose for the highlights and once to expose for the shadows and merge the two images together using an image editor.
This photo reveals detail in the white sign but not in the bird's dark feathers because the dynamic range is too wide.
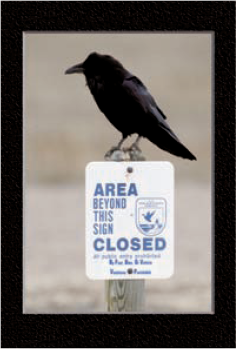
This histogram represents the tonal range of the preceding photo.

This is a classic example of the difficulty of getting details in a bright sky while showing details in a dark foreground.
Here detail is shown in the shadow areas, which causes a loss of detail in the sky.
Tip
Did You Know?
Many film photographers use a graduated neutral density filter to enable them to capture a wide dynamic range. Although this filter, which gradually changes from dark to light in a vertical direction, helps to capture a wide dynamic range, it does so in a less realistic manner than you can do when combining two images with a digital photo editor.
When you shoot a composition that has a wide dynamic range, you can make an image that shows the full dynamic range in one of two ways.
You can shoot two separate photos — one exposed for the shadows and one for the highlights — and then combine them with an image editor. Alternatively, you can take one photo using the RAW format and use a RAW converter such as Adobe Photoshop Camera RAW to convert the photo twice. First, convert it using an exposure setting to expose for the highlights and then convert it to expose for the shadows. Finally, use an image editor to combine them.
This photo was exposed to capture detail in the shadow area, or the foreground.

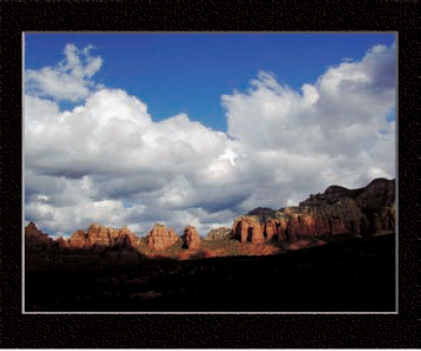
This photo was exposed to capture detail in the highlight area so that there is good detail in the clouds in the sky.
Combining the first two photos using an image editor shows the full dynamic range.

This photo was saved in the RAW format and later converted to expose detail in the shadow area, or the foreground.
This photo was saved in the RAW format and later converted to show good detail in the clouds in the sky.
The preceding two images were combined using an image editor to show the full dynamic range.
Tip
Did You Know?
You may have a more visible dynamic range in your digital photos than you can see. A good-quality computer monitor that has been carefully calibrated to show a wide dynamic range is essential to seeing and properly editing digital photos.