
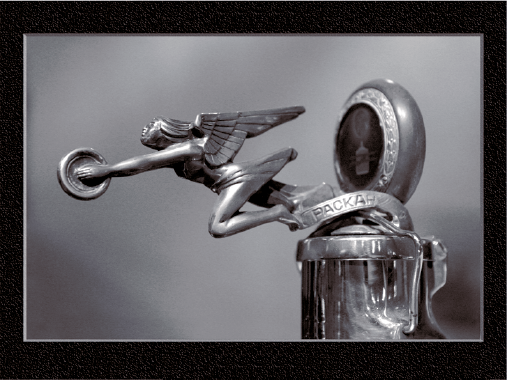
Whether you are a snapshot photographer who takes several photos to record people, places, and events that are meaningful to you, or you are a passionate photographer who gets immense joy from making fine art photographs, you can always improve your photography if you do the right things before shooting.
Choosing what and where to shoot is the first step that you must take before shooting. Learn to find good events, places, and subjects to shoot by reading newspapers, books, or online resources. Look for good photo opportunities at local fairs, botanical gardens, nature preserves, national parks, or even zoos. Consider shooting still life or setting up a studio inside where you can control lighting.
When you know what you will be shooting, make sure that you know all that you can know about your digital camera. The more you know about your equipment, the more you can concentrate on getting the photographs that you want and not on learning how to use your camera. It can be very disappointing spending valuable time and money to take a trip only to find that you did not take good photos due to improper camera settings or usage.
When you go to shoot, be realistic; a day of shooting will not always result in one or more good photos. All photographers have bad days that end with only mediocre photos — especially when the shooting conditions work against you!
Often, the best photo opportunities for you are those things that you enjoy. When planning a trip, give yourself plenty of time to stay and take photographs. Allow yourself some time for bad weather or other shooting conditions that prevent you from photographing. You can spend an entire day or more at a site and not have good light to shoot. Do not fall into the trap of trying to see too much too quickly. You may miss the kinds of shots that you had hoped to capture because you saw everything and shot little. Photography takes time, and time is often the most important factor in getting truly great photographs.
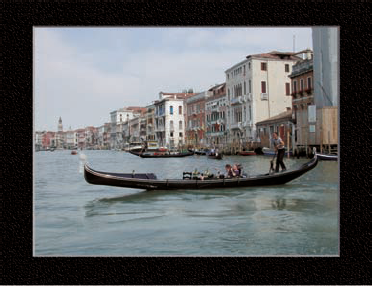
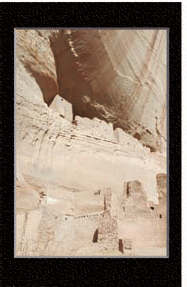
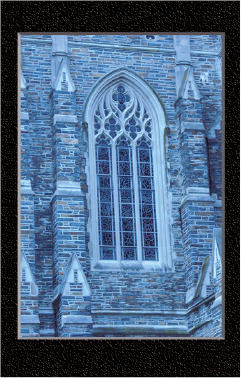
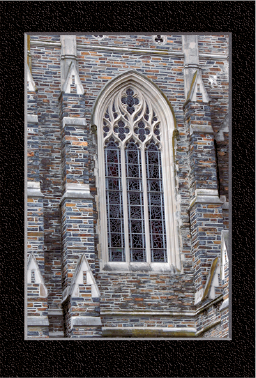
When shooting well-known places such as the Grand Canal in Venice or Canyon de Chelly in Arizona, take classic photos and then shoot creatively, too.
It took several hours of waiting to get a shadow on this otherwise overly bright photograph of the White House ruins in Canyon de Chelly in Arizona.
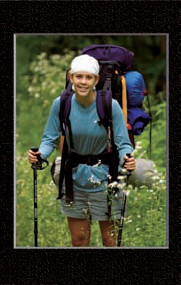
If you are willing to hike, you may be rewarded with photos that are well worth the effort that it took to get there.
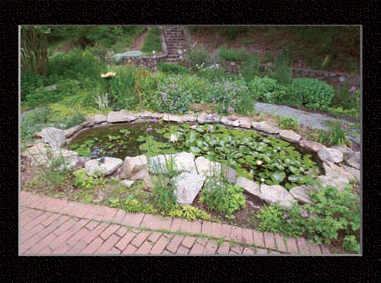
This small backyard pond offers many subjects to photograph. Being close to home, it is easy to pick the best light to shoot in.
This frog was sunning on a rock on the edge of the pond shown in the preceding photo.

Tip
Photo Tip!
When you find a good place to take photographs, visit it again and again. Your photographs will improve each time that you return to the location because you will learn when to visit and what to shoot.
Knowing why you are taking photos before you take them can help you get the photos that you want. For example, suppose you make a once-in-a-lifetime trip and get excellent pictures. You then decide to make a calendar but cannot find enough photos to fit the horizontal format that you have chosen. Thinking about why you are taking the photographs and how they are likely to be viewed can help you to better plan your photographs.
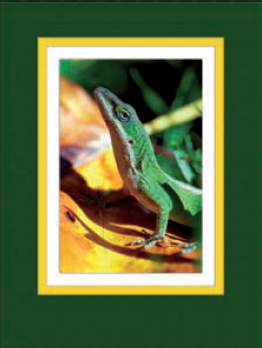
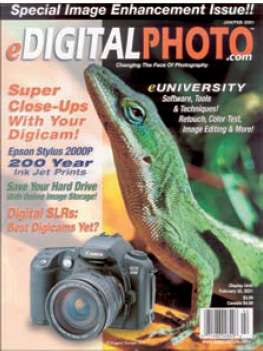
This photo of a green anole was taken so that it could be used in a variety of media.
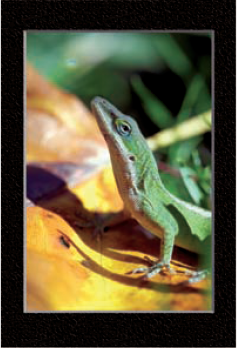
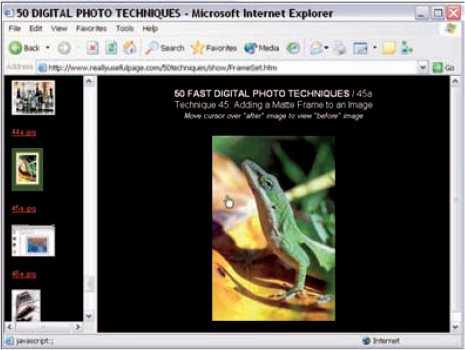
Minor cropping enables the photo to be displayed in a Web browser-based photo gallery.
Vertical orientation and composition makes it possible to frame this photo in standard-sized photo frames and mat boards.
Good cover design allowed the leaf on the left side of the photo to be used for the magazine's cover text.
Tip
Photo Tip!
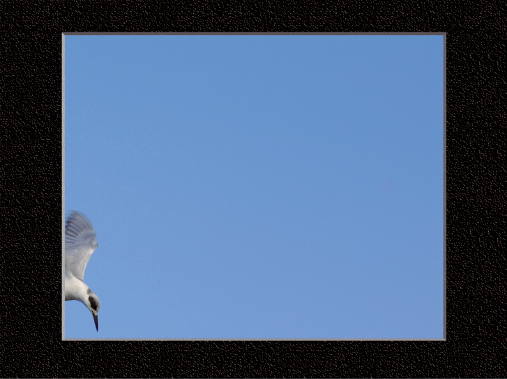
When you know that you will share a photo online, you can take advantage of the "multiplication factor" that you get when you crop an image from a large image. A small bird in a mostly blue sky print can become a large bird that fills the frame when it is cropped for the Web.
Today's sophisticated digital cameras enable anyone to take good photographs by simply using one of the automatic shooting modes and pressing the shutter release. However, most digital cameras offer many additional features that give serious photographers considerable creative control over how photos are taken.
One major advantage of most digital cameras is that you can review the image and camera settings on an LCD screen immediately. This enables you to check that the camera settings were set as you expected. Some digital cameras even provide a histogram to give you a graphical view of the exposure. To get the best photos, learn all that you can about your digital camera.
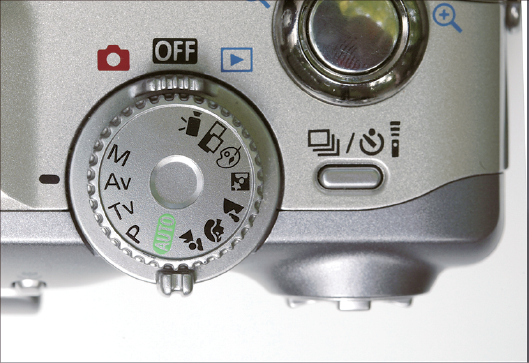
This dial on a Canon PowerShot G2 controls the shooting modes.
The Canon PowerShot G2 LCD screen shows important camera settings at a glance.

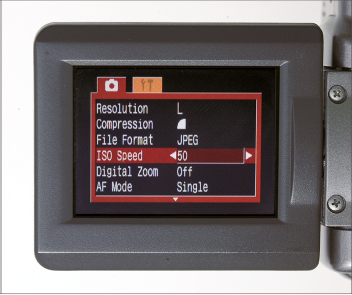
Important camera settings are controlled on the Canon PowerShot G2 via multiple menus.
The LCD screen on the Canon PowerShot G2 shows a screen with camera settings, a histogram, and a thumbnail image.

Tip
Caution!
Many digital cameras have shooting modes that automatically choose a faster ISO setting if there is not sufficient light. Make sure that you know which shooting modes allow this to avoid taking photos that have too much digital noise.
When you press the shutter release, you capture an image on the image sensor. The image is written to a file in a user-selected format. Most digital cameras offer three formats: JPEG (.jpg), TIFF (.tif), and RAW format.
The most commonly used format is the JPEG format. It offers a nice balance between file size and image quality. The JPEG format uses a mathematical algorithm to reduce the file size while losing minimal image quality. The TIFF format loses no image quality, but files are also considerably larger. For greater flexibility, you can use a RAW image converter, such as Adobe Camera RAW, and apply camera settings to the files after the photos have been taken.
RAW format images are digital "negatives" that need to be converted to be viewed and edited.
Table 1.1. Approximate Image File Sizes
Image Size | TIFF | JPEG | RAW |
|---|---|---|---|
5-Megapixel Image | 14.5MB | 1.5MB | 7.8MB |
Compression Ratio | 1:1 | 10:1 | 2:1 |
These file sizes are from a Nikon CoolPix 5700. File sizes from other digital cameras will vary.
Table 1.2. JPEG versus RAW File Format
RAW | |
|---|---|
All camera settings are applied to the file | Image stored as captured by sensor, allowing post-shoot changes |
Smaller file size | Larger file size |
Easily viewable images | Required RAW conversion software |
Quick to view | Slower to view |
8-bit image (less picture information) | Wider bit range (12 or 14 bits yield more picture information) |
In addition to choosing a format, most digital cameras enable you to choose the resolution. In the JPEG file format, many cameras enable you to specify the compression level. More pixels in a picture enable you to print a larger print, which is the primary reason to buy a camera with a higher megapixel rating.
There is a tradeoff — the more pixels, the larger the file. To fit more photos on digital storage media, the JPEG file format enables you to select the level of compression, which reduces file size. Unfortunately, the more an image is compressed, the lower the image quality.
This photo was taken with a 3.1-megapixel camera with an image size of 2,160 × 1,440 pixels.
This 800 × 600 pixel image was taken from the center of the preceding image. It makes an excellent "full-size" Web page photo.
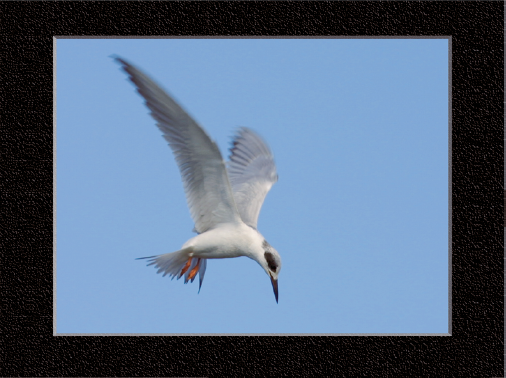
Table 1.3. Print Size
Megapixel Size[a] | Image Resolution | |
|---|---|---|
2 | 1,200 × 1,600 | 5" × 6.7" |
3 | 1,512 × 2,016 | 6.3" × 8.4" |
4 | 1,704 × 2,272 | 7.1" × 9.5" |
5 | 1,944 × 2,592 | 8.1" × 10.8" |
6 | 2,048 × 3,072 | 8.5" × 12.8" |
[a] This assumes that the optimal printing is 240PPI. Good images and proper image editing techniques may allow considerably larger prints to be made. | ||
Tip
Did You Know?
By reducing the image resolution to store more photos, you lose the benefits of image cropping and the ability to get a larger print later. As digital photo storage media prices continue to drop, you can buy one or more extra cards so that you can store your images at the maximum image resolution and with the least image compression. This decision enables you to avoid getting a prized shot that is too small or has too much compression to make a good print.
In film photography, you choose film based upon an ISO rating depending on how much light you expect. Film with a low ISO rating is considered to be a slower film because it takes a longer shutter speed to expose the film than with a higher ISO rating.
Digital cameras also enable you to change the ISO setting. Although a faster ISO setting, such as ISO 800, enables you to shoot in lower-light settings without blur due to long exposure times, you will end up with considerably more digital noise. Digital noise is similar to grain in traditional photography and is generally an undesirable tradeoff when using higher ISO settings.
This photo was shot at ISO 800 to enable a faster shutter speed, avoiding image blur in the low light.
Digital noise is easily visible in most of this photo.
No digital noise appears in this photo, which was shot at ISO 100.
ISO 800 was used to achieve a traditional film grain effect in this black-and-white photo.
Tip
Did You Know?
You generally get the best picture quality by using the lowest ISO setting your camera offers, such as ISO 50 or 100. A higher setting such as ISO 400 or 800 will have considerably more digital noise.
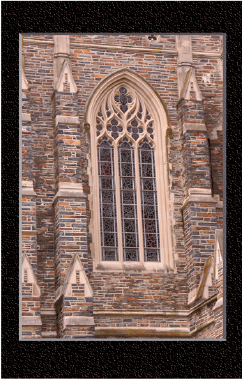
One challenge facing digital photographers is to take photographs with accurate color. An in-camera white balance setting enables you to record correct colors when shooting under a variety of lighting conditions. Many digital cameras have a custom white balance setting that can record very accurate colors after you first take a photo of a white card. One of the more consistent ways to get accurate color is to shoot in RAW mode, which enables you to change the white balance setting long after you take the photo. Most RAW converters, such as Adobe Camera RAW, have controls that can be used to fine-tune the white balance.
This photo was taken outdoors on a cloudy day with the white balance set incorrectly to tungsten.
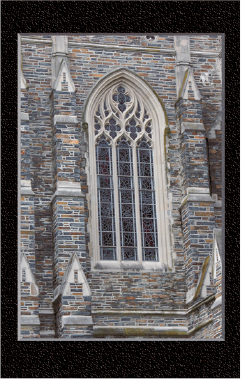
This photo was taken outdoors on a cloudy day with the white balance set correctly to cloudy.
This photo was taken outdoors on a cloudy day with the camera's white balance set to auto white balance.
This photo was taken outdoors on a cloudy day using the RAW format, which enabled the photographer to select accurate color after the shot was taken.
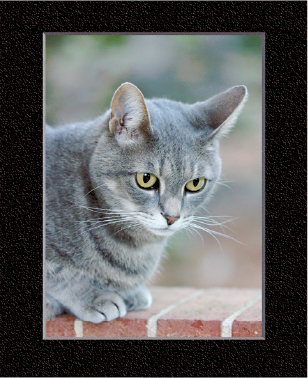
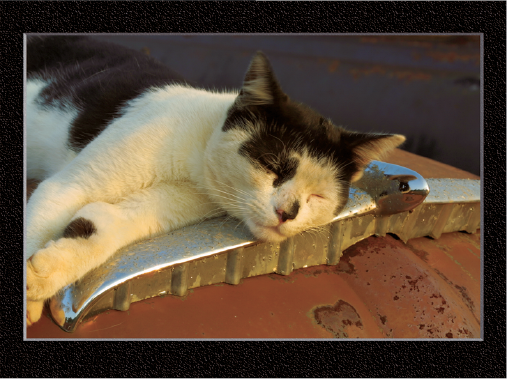
Although accurate color means that white is pure white, sometimes you want a color cast such as the golden glow of sunset found in this cat photo.
Tip
Photo Tip!
Sometimes you can add a preset white balance setting to add a favorable color tone to a photo. For example, using a cloudy white balance setting can add warmth to an otherwise cold or blue-toned scene.
To take advantage of the new world of digital photography, you should become as familiar with an image editor as you are with your camera. Learn how your image editor enables you to combine, fix, distort, correct, or otherwise change your photos. Digitally stitching multiple images together into a single panoramic photograph, increasing tonal range and image contrast, and creating photographs with a full dynamic range are just a few of the wonders you can achieve when you become proficient with an image editor.
Although a digital image editor provides you with tremendous image-manipulation power, don't forget that you can always do more with well-taken photos than with marginally acceptable ones.
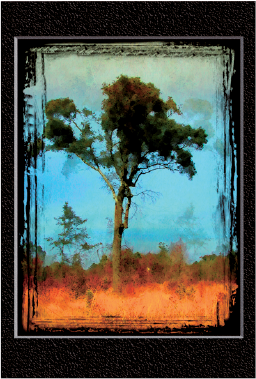
This photo of tree bark was taken to use as a background for another photo.

This simple photo of a tree was taken to combine with a background photo.
This image was made by combining the two preceding photos.
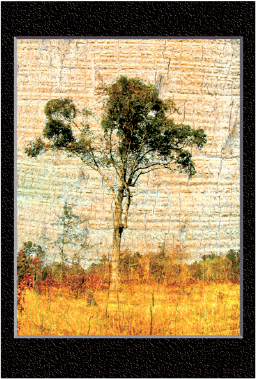
Adobe Photoshop Elements filters and plug-ins were used to create this painting-like image of the tree.
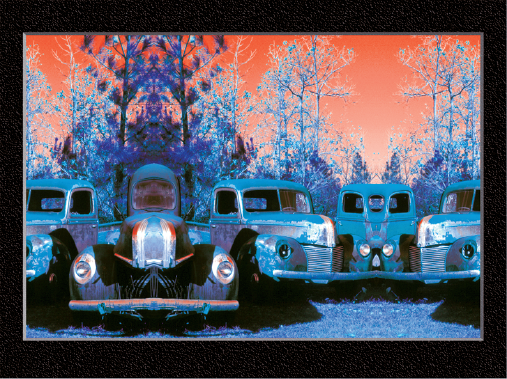
A row of old trucks was transformed into this image with Adobe Photoshop.
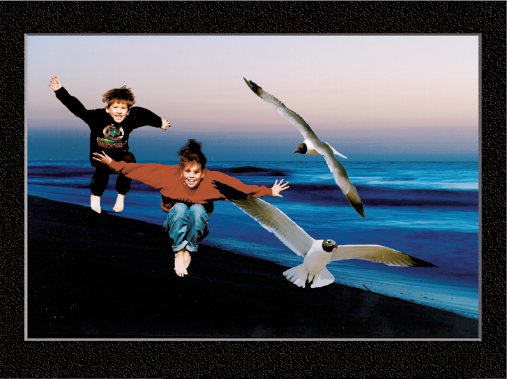
Five separate photos were combined to create this image of kids and seagulls flying over the coast.
Tip
Photo Tip!
After you have purchased a digital camera and some digital photo storage media, taking photos does not cost anything, so shoot often — and then shoot again. Learn to try different exposure settings and compositions, and shoot plenty of shots so that you have a choice between several good ones.
Depending on your shooting conditions, you may have to wait for better light, less rain, a subject to appear, or even the sun to rise or set. In any event, patience can be the most important personality trait in a photographer. The best way to strengthen that trait is to bring along items that will make your outing more enjoyable, productive, and safe.
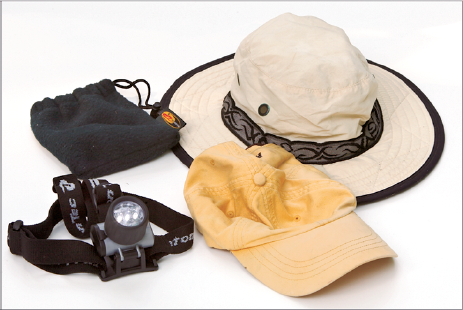
If you are too hot, cold, or hungry, you are likely to take fewer good photos. Before a shoot, carefully consider what you should take with you. A few nutrition bars, water, a lightweight folding chair, sunscreen, and a hat can unquestionably contribute to your taking better photographs.
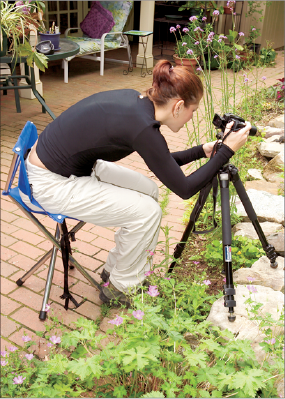
A lightweight folding tripod chair makes it easy for this photographer to quietly wait for a bullfrog to pop his head above water.
Water, sunscreen, insect repellent and bite medication, and snacks are just a few things that will make your picture-taking time more enjoyable.

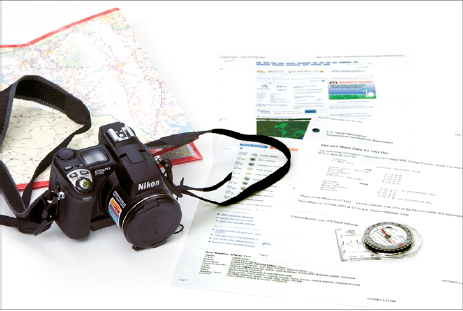
A compass and a schedule of sunrise and sunset and the moon's path will make it easier for you to be in the right place at the right time to get great photographs.
Take a hat to protect yourself from the sun and use a headlamp, such as the Princeton-Tec headlamp, to make your walks safe when walking in the dark.
Tip
Did You Know?
Some of the most useful information for photographers is found on the Internet.
Sunrise/Sunset/Twilight/Moonrise/Moonset/Phase information:
http://aa.usno.navy.mil/data/docs/RS_OneDay.htmlWeather:
www.weather.comorwww.weatherbug.comHiking equipment:
www.rei.comOnline mapping service:
www.mapquest.comBest state parks:
http://usparks.about.com/cs/stateparks/a/bestparks.htmAll-encompassing outdoor page:
http://gorp.com