
Chapter 12
Sending and Receiving Email
In This Chapter
![]() Using Outlook to send emails
Using Outlook to send emails
![]() Dictating email messages
Dictating email messages
![]() Making appointments with the Outlook calendar
Making appointments with the Outlook calendar
![]() Creating notes in Outlook
Creating notes in Outlook
![]() Emailing with Thunderbird
Emailing with Thunderbird
![]() Interacting with Gmail
Interacting with Gmail
Using Dragon Professional Individual to command your email application is an effective way to be more productive. Nuance has made email sending a priority. Several voice commands help you get things done faster. Programs like Outlook work with some Natural Language Commands. They’re easy to learn and well supported.
This chapter delves into four email programs: Outlook, Outlook.com, Thunderbird, and Gmail. If your preferred email program isn’t on my list, it may work with some common commands. Try them. Now, just dive right in and start e-communicating, the Dragon Professional Individual way!
 For more on web browsers, see Chapter 13 to learn about installing and enabling the Dragon Web Extension when you are using Internet Explorer, Firefox, and Chrome.
Creating and Managing Emails
As you contemplate using Dragon Professional Individual to send your emails, keep in mind these general recommendations that apply to most email programs:
- Check your previous emails. Make sure you let Dragon Professional Individual look at your previously sent emails before you send your next new email. You want to give your Dragon Professional Individual assistant a proper orientation, don’t you? Your Dragon Professional Individual assistant looks at your email files to familiarize itself with email addresses. To run this process, choose Vocabulary ⇒ Learn from Sent Emails on the DragonBar to enable Dragon Professional Individual to look at them. See Chapter 17 for more information.
- Use the Dictation Box. If you have trouble dictating into your email program, use the Dictation Box and then transfer the dictation back into the email window. With your email program open, access the Dictation Box by choosing Tools ⇒ Dictation Box on the DragonBar or by saying, “Show Dictation Box.” See Chapter 8 for more information on the Dictation Box.
- Know common email commands. Several commands work with most email programs. Familiarize yourself with them before you start. Check the Command Browser to see what other commands you can use. To do this, go to Tools ⇒ Command Browser and use the Context drop-down menu to access specific program commands. Many commands are specific to Microsoft Outlook.
- Use the Help files. You can always get immediate help while you dictate your emails. Say, “What can I say?” to bring up hints on the spot. You can also say, “Give me help.” There is no need to become frustrated trying to think of the right commands when help is almost literally on the tip of your tongue.
- Format email addresses. You can make choices about how your email and web addresses are formatted. Go to Tools ⇒ Auto-Formatting Options on the DragonBar and choose your preferences. Read more information about this in Chapter 17.
- Add email addresses. If you frequently use a particular email or web address, you can add it to your vocabulary like you do other “non-words.” Otherwise, you can say an address, such as
[email protected],much like you would in conversation. Make sure everything is lowercase by saying, “No Caps On,” and then say the email address. Then say, “No Caps Off.” For the address itself ([email protected],for instance), say, “<person’s name> at company dot com.” Say web addresses. Speak a web address in the form, “w w w dot company dot com.” For a full address (such as
http://www.company.com) say, “h t t p w w w dot company dot com.” Don’t mention the colon or slashes. Dragon Professional Individual adds the colon and slashes and recognizes the terms com, gov, mil, net, org, and sys just as you normally say them. If you prefer, you can verbally spell those terms letter by letter. Table 12-1 shows the Dragon Professional Individual commands that are generally used for email applications.Dragon Professional Individual works with Internet Explorer, Google Chrome, and Mozilla Firefox when you use a browser with your email application.
If Dragon Professional Individual insists on capitalizing the www portion of a web address, correct the capitalization by using the Correction dialog box. (Dragon Professional Individual has an obsession about capitalizing initials.) Or say, “No Caps,” then, without pausing, speak the address. To absolutely, completely suppress all capitals within the address, say, “No Caps On No Caps w w w dot whatever dot com No Caps Off.”
Table 12-1 Dragon Professional Individual Commands for Email Applications
To Do This |
Say This |
Launch <program name>. |
“Start Microsoft Outlook.” |
Open your inbox. |
“Go To Inbox.” |
Look at new mail. |
“Check For New Mail.” |
Move to next email. |
“View Next Unread Message.” |
Send email. |
“Send Message.” |
Close email. |
“Close All Items.” |
Mark message to follow up. |
“Flag This (or That or It) For Follow-Up.” |
Open with email address. |
“Send Email To <person’s name>.” |
Add a file(s) to email. |
“Attach A File.” |
Launch spell check. |
“Check Spelling.” |
Print email. |
“Print Mail.” |
Reply to everyone in message list. |
“Reply To All.” |
You can substitute “Message” or “Email” for the word “Mail.”
Interacting with Microsoft Outlook
Microsoft Outlook is the most widely used business email client. When used in combination with Dragon Professional Individual, it is a Full Text Control application that also provides some Natural Language Commands. Outlook keeps track of your personal information — at least appointments, addresses, and the like. Because of its extensive use in business organizations, I focus on several specifics that make using Outlook easier.
Outlook has a good collection of hotkeys that enable you to access features with the “Press <hotkey>” voice command. To see a list of Outlook’s hotkeys, look in Outlook’s Help Index under keyboard shortcuts for your version of Outlook.
Using the three-panel email application window
Outlook uses the basic three-panel window arrangement:
- The folder list: A vertical pane on the left displaying message folders or mailboxes.
- The message list: A horizontal pane in the upper-right corner that lists the messages contained in the selected message folder.
- The reading pane: A horizontal pane in the lower-left corner displaying the contents of the selected message.
Move from one pane to another by pressing the Tab key or saying, “Press Tab.” Move in the opposite direction with Shift+Tab.
 Like Microsoft Windows 7 and 8 and 10, Outlook 2010 and 2013 displays the Ribbon and the Office button. Use the cursor to mouse over the menu items to see what they are called. Then you can select them by saying, “Click <name of menu>.” (See Chapter 15 for more about controlling and navigating in Windows 7.)
The folder list
The folder list in an email application behaves like the folder list in Windows Explorer. (See Chapter 15.) When the cursor is in this pane, use the “Move Up/Down” commands to select a folder or mailbox. For example, “Move Down Five” selects the folder or mailbox five places below the currently selected folder or mailbox. Folders that contain subfolders or mailboxes have a +/– check box next to their folder icons. To display the subfolders or mailboxes, select the containing folder and say, “Press Right Arrow.” To hide the subfolders or mailboxes, say, “Press Left Arrow.”
The message list
The message list is, first and foremost, a list. When the cursor is in the message list pane of the email application window, select messages in the list by using the “Move Up/Down” commands. To select the message three places above the currently selected message, say, “Move Up Three.”
Reading messages
You can read a message in the reading pane of the application window, or you can get a little more reading room by opening a message window. Open a message window in Messenger by selecting a message in the message list and choosing File ⇒ Open from the menu. (Alternatively, you can say, “Open Mail Message” or “Open Message.”)
Whether the cursor is in the reading window or in a message window, the “Move” and “Go” commands move the cursor through the message. However, the most useful command when you’re reading a message is “Press Page Down.” It displays the next window of text.
Switching between open mailboxes and messages
Say, “Press Alt Tab” to cycle through the items on the taskbar. Switch to a new mailbox by selecting it in the folder list. You can also say, “List All Windows” or “List Applications” to see what’s open and select it from there.
Dictating messages
You can use some Natural Language Commands with Outlook just like when you dictate text into a word processor (see Chapter 9). In Outlook, a message composition window consists of a number of textboxes: several one-line boxes corresponding to the various parts of a message header, and one large textbox for the body of the message.
Move the cursor from one textbox to another by using the Tab key or saying, “Press Tab.” Move in the opposite direction with Shift+Tab. You can also use the name of the field you want to access. To send your first email, launch Dragon Professional Individual and do the following:
Say, “Send Email to George Foster.”
Outlook (if it’s your default email program) opens a new email form and inserts the name George Foster into the ‘To’ field. When you send the email, Outlook will automatically check that name against your contacts and associate the right email address to the name. If you want to check and make sure before you send the email, just say, “Check names.”
Say, “Go to Subject.”
The cursor moves to the Subject field.
- Dictate your email subject.
Say, “Body Field.”
The cursor is now in the body of the email and ready for you to dictate your complete message.
- Dictate your email.
Proofread your email.
If you find mistakes, select and correct them as you would in any other dictation process. (See Chapter 5 for more on quick correction of dictation.)
After you correct all mistakes, say, “Send Message” or “Click Send.”
Your message is sent. You can now move on to reading or sending other emails.
Getting your mail read to you
Your Dragon Professional Individual assistant can read your email to you. Isn’t that what you’d expect from a first-rate assistant? Use the text-to-speech feature to do this. Select the text you wish read to you and say, “Read That.” The text will be read back to you in the voice you have chosen from the options available to you. If you want to modify the voice of your assistant, go to Tools ⇒ Options ⇒ Playback/Text-to-Speech and look at the Text-to-Speech attributes. Where you see Voice, use the drop-down list to choose either American English Samantha or British English Serena.
If for any reason your application doesn’t work that way, just copy the text of the message from the reading pane of your email application into the Dragon Professional Individual Dictation Box and say, “Read Document.” The Dragon Professional Individual voice and diction won’t compete with James Earl Jones’s voice, but you will understand what it is saying.
Keeping track of appointments
After you send an email, you don’t need to stop using voice commands in Outlook. You can schedule appointments through Outlook’s Calendar window. Bring up the Calendar window (shown in Figure 12-1) by saying, “Create a New Appointment.” Opening the Calendar window adds the Calendar menu to the menu bar. Use this menu for all of your calendar-related activities. To create a new appointment in Outlook, do the following:
Make sure Dragon Professional Individual is running and say, “Create a New Appointment.”
The Outlook Appointment Form opens and the cursor is positioned in the Subject field.
- Dictate your subject.
- Say, “Move to Location” to go to the location field and dictate your location.
- Say, “Go to Start Time” and dictate the date.
- Move to time fields by saying, “Press Tab” and add the times.
Say, “Move to Body Field” and dictate details.
Complete your message.
- Say, “Save and Close.”
- To check if the appointment is there, say, “Switch to the Calendar Folder” to view it.

Figure 12-1: Outlook’s Calendar utility helps you keep track of your appointments.
Six additional common commands you can use with Outlook appointments are as follows:
- “Show Date”
- “View Month”
- “Invite Attendees”
- “Cancel Invitation”
- “Create a Meeting About <xyz>”
- “Create an Appointment on <date>, <time> <am/pm>”
Outlook Tasks are visible in the Calendar window, but they are most easily added and deleted using the Task window. To open the Task window, say, “Open, Tasks.” Opening the Task window adds the Task menu to the menu bar. To add a new task, say, “New Task.”
Whether you add an appointment or a task, a dialog box with a number of fields to be filled in confronts you. When the cursor is in a textbox, you can dictate just as you would dictate into a word processor. Don’t be afraid to use those Full Text Control capabilities (see Chapter 8) to edit or correct your entries.
Move from one field of a dialog box to the next by saying, “Press Tab,” or jump to any field you want by using the field’s name. For example, in order to select the All Day Event check box in the New Appointment dialog box, say, “Click All Day Event.”
Listing new contacts
Outlook keeps track of much more than email addresses. As marketers like to say, “The money is in the list.” They usually mean your customer mailing list — but for many people, their contacts list is their customer mailing list.
In this context, a contact is not one of those clear round things that falls out of your eye during a basketball game. It’s a person you have contacted at some point in your life and created and stored his email address (plus any other optional info you add).
Outlook handles contacts via the Contacts window. Open it by saying, “View Address Book.” As an added bonus, the Contacts menu is appended to the menu bar. Anything you want to do with your contacts list is handled by this menu. For example, to add a new contact, say, “Create New Contact.” Outlook responds by displaying the New Contact dialog box, shown in Figure 12-2.
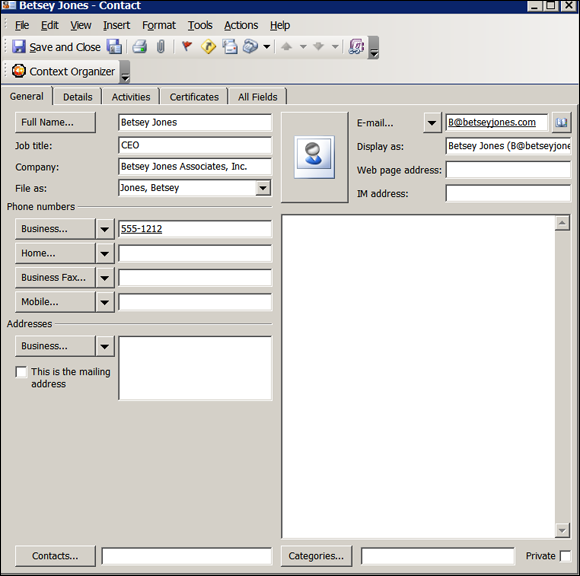
Figure 12-2: The New Contact dialog box.
The New Contact window looks intimidating because it contains spaces for everything you may know about a person other than hat size. Nevertheless, the only field you have to fill out is Name. Other than that, you can skip around, using the hotkeys to pick other fields to fill. For example, to skip to the Web Page textbox, say, “Press Alt W.” The New Contact window begins with the General tab on top. To switch to another tab, say, “Press Control Tab.”
Making notes
Outlook Notes is a great place to jot down important things you don’t want to forget. It works well with Dragon Professional Individual because its main purpose is dictation, just like any word processor. If you want to dictate notes in Outlook, make sure that Dragon Professional Individual is running and then do the following:
Say, “Start Microsoft Outlook.”
The Outlook application opens.
- Say, “Open Notes.”
Say, “New Note.”
A note opens for you to dictate into.
Dictate your note.
After you dictate the note, proofread it for mistakes and make corrections as you would with any other type of dictation.
- Say, “Save The Note.”
Say, “Close The Note.”
If you want to view your note, say, “Click Notes List” to select the radio button and view your missive.
Easy, huh? If you like to create sticky-note reminders, this is much quicker (and neater and environmentally friendly and cheaper, but I digress!). Instead of sticking notes on your screen, use this.
Enhancing Email
Dragon Professional Individual plays nicely with Outlook. You also get some additional commands for Outlook.com, Thunderbird, and Gmail. If you use these email applications, you’ll be happy to know that voice commands are an option for them, too.
Aggregating email accounts with Thunderbird
If you use Thunderbird, Mozilla Foundation’s free email client, you know that it’s an open source application and works cross-platform. This means that it is created by developers who donate their time and share code. It can be used with Windows, Mac, or Linux.
If you haven’t used Thunderbird, consider it if you want to aggregate emails across several email accounts. Thunderbird doesn’t send email on its own. It lets you combine your accounts and work from one main source. It has several add-ons and lets you configure your email account in a way that makes sense for you.
After you set up and open Thunderbird, you notice that it looks like most other email clients. It uses the three-panel window configuration: the folder list, a message list, and a reading pane.
You will find that using Thunderbird is like using the DragonPad. If you can navigate that, you already know how to navigate Thunderbird. Thunderbird acts like a Full Text Control application. You can navigate by saying the menu and submenu names. You can use voice commands for each one by saying “Click” and then the menu name. For example you can say the following as you follow along the top menu:
- “Click Get Mail”
- “Click Write”
- “Click Chat”
When writing emails, you say, “Go to the Address Book and Pick a Name.” Then you say, “Go to Subject,” and dictate the subject. Then you dictate the body of the message by saying, “Move to Message Field.”
Choosing Gmail
In Dragon Professional Individual, Gmail can be used with the following browsers:
- Internet Explorer version 9, 10, 11 (32-bit or 64 bit)
- Mozilla Firefox, latest version
- Google Chrome, latest version
Gmail, like Thunderbird, is another Full Text Control application that doesn’t work with Natural Language Commands. But it gets the job done, and if Gmail is your application of choice, fear not. It can work for you.
One secret to using Gmail with Dragon Professional Individual is to use the “Click” command. Doing so enables you to manage email tasks quickly. For example, you can say, “Click Reply,” “Click Delete,” or “Click Report Spam.”
The Gmail program doesn’t have a reading pane, but closely follows the other structures of other email programs. To send mail in Gmail after launching Dragon Professional Individual and your Gmail window, follow these steps:
Say, “Click Compose Mail.”
The email window opens with the cursor in the address box.
Dictate the address and then say, “Move to Next Field.”
Move through the subject field the same way.
- Dictate your email.
- Say, “Click Send.”