
19. Working with Other Applications
When you’re building a website, no single application can stand alone; to get the best results, you must orchestrate elements from a variety of programs. For example, you might get your text from Microsoft Word, data for a table from Microsoft Excel, and the site’s images from Adobe Photoshop, Adobe Fireworks, or any other image editing program.
Dreamweaver can help you expertly tie together these disparate elements into a unified website. It has special features that allow it to work with other programs, making it easy to incorporate files from those other programs into your pages.
In Chapter 5, we covered how Dreamweaver integrates with Photoshop to work with images. In this chapter, you’ll learn how you can use other programs to edit elements on a page you’re working on in Dreamweaver; use Dreamweaver’s integration with Fireworks to edit and optimize images; and import and modify Microsoft Office documents. You’ll also learn how Dreamweaver and Adobe Contribute work together to make editing your website easy, even for people who aren’t web savvy.
Assigning External Editing Programs
When you are working on your webpages, you can launch another program to edit files that Dreamweaver can’t edit itself, such as graphics and media files. For example, if you want to edit a JPEG file, you can have Dreamweaver use Fireworks or Photoshop or even something like Windows Paint. You specify an external editor for a particular file type.
Dreamweaver can use any programs that you have on your machine to edit files, but you’ll need to tell Dreamweaver about these programs first. You do that in Dreamweaver’s Preferences dialog.
To assign an external editor
1. Choose Edit > Preferences (Dreamweaver > Preferences) or press Ctrl-U (Cmd-U).
The Preferences dialog appears.
2. Click the File Types/Editors category.
The File Types/Editors pane appears ![]() .
.
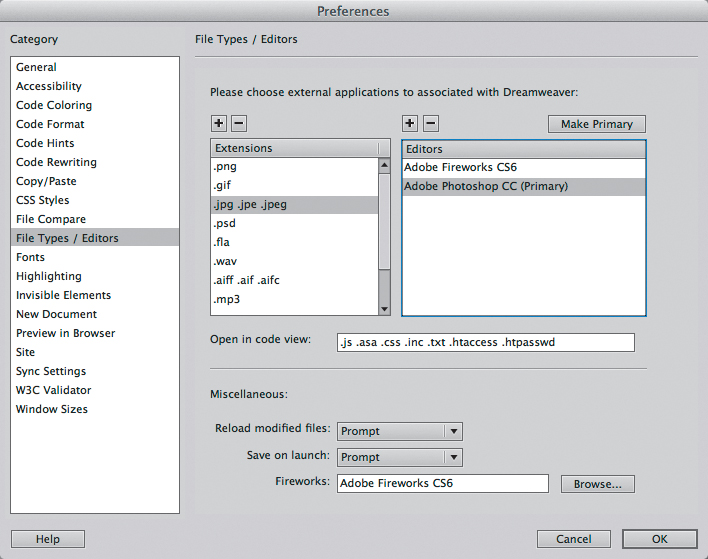
![]() Use the File Types/Editors category of the Preferences dialog to set which programs you want to use to edit particular kinds of files.
Use the File Types/Editors category of the Preferences dialog to set which programs you want to use to edit particular kinds of files.
3. On Windows, you can associate some file types with Dreamweaver (this feature is missing from Dreamweaver on OS X; on the Mac, you set file associations with the Get Info window in the Finder). At the top of the File Types/Editors pane are check boxes for the four file types: Cascading Style Sheets (.css), JavaScript (.js), PHP (.php), and Extensible Markup Language (.xml) ![]() .
.

![]() On Windows, you can specify in Dreamweaver’s Preferences the file associations Windows should use for four file types.
On Windows, you can specify in Dreamweaver’s Preferences the file associations Windows should use for four file types.
4. The field in the middle of the pane, Open in Code View, has extensions of all kinds of files that Dreamweaver automatically opens in Code view. If you will be working on code files of a type not listed, enter one or more extensions in the field, separated by a single space.
5. From the Reload Modified Files pop-up menu, choose what you want Dreamweaver to do when it detects that changes have been made in another program to a file that is open in Dreamweaver. Your choices are Prompt (Dreamweaver will ask you whether it should reload the page), Always, and Never.
6. From the Save on Launch pop-up menu, choose whether Dreamweaver should always save the current document before starting the external editor, never save the document, or ask you if it should save the document.
7. If you have Adobe Fireworks on your system, tell Dreamweaver its location: click the Browse button, navigate to Fireworks in the resulting Select External Editor dialog, and click Open.
Dreamweaver uses Fireworks by default to edit most graphics files, and Fireworks has special features that allow it to update images directly on Dreamweaver pages.
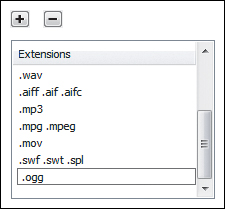
8. The Extensions column has a list of graphic and media types. Click to select the media type for which you want to assign an external editor.
If the media type has an editor already assigned, that editor appears in the Editors column.
or
To add a media type, click the plus (+) button above the Extensions column. A new entry appears at the bottom of the Extensions column. Type a new extension for the new media type ![]() .
.
![]() When you add a new file extension, you enter it at the bottom of the Extensions column.
When you add a new file extension, you enter it at the bottom of the Extensions column.
9. To add an editor, click the plus (+) button above the Editors column.
The Select External Editor dialog appears. Navigate to the program you want to use and click Open.
10. Repeat steps 8 and 9 for the rest of the media types in the Extensions column.
11. Click OK to dismiss the Preferences dialog.
Tip
If you prefer to use Adobe Photoshop as your image editor, set it to be the external image editor for JPEG, GIF, and PNG files.
Tip
Dreamweaver can make some edits to graphics files itself, including resizing, adjusting brightness and contrast, cropping, and more. See Chapter 5 for more information.
Editing Images with Fireworks
You can use Adobe Fireworks to edit images on your Dreamweaver pages, and the two programs work together to make it easier. When you start editing an image in Dreamweaver, Dreamweaver hands the image off to Fireworks. It’s in Fireworks that you’ll make the changes you want. Then you tell Fireworks that you’re done editing the image and you want to go back to Dreamweaver. Fireworks saves the image and sends it back to Dreamweaver, which then updates the webpage with the modified image.
You can also have Fireworks objects on your webpages, and Dreamweaver opens Fireworks when you need to make any changes to those objects. For example, in Fireworks you can create navigation bars complete with links and rollover effects. Fireworks saves these navigation bars as HTML and CSS, with associated images. Fireworks makes it easy to export its navigation bars to Dreamweaver, and Dreamweaver recognizes that the navigation bar was created in Fireworks, so that when you attempt to edit the navigation bar in Dreamweaver, Fireworks automatically launches.
In order to edit images in Fireworks, it must be selected as the external editor in Dreamweaver’s Preferences dialog for the particular image file type you want to edit. See “Assigning External Editing Programs,” earlier in this chapter, for more information.
2. Click the Edit button in the Property Inspector ![]() .
.
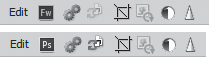
![]() Click the Edit button in the Property Inspector to begin modifying an image with Fireworks (top). If Photoshop is set as the external file editor for the kind of image file you have selected, the Photoshop icon appears in the Property inspector instead (bottom).
Click the Edit button in the Property Inspector to begin modifying an image with Fireworks (top). If Photoshop is set as the external file editor for the kind of image file you have selected, the Photoshop icon appears in the Property inspector instead (bottom).
Fireworks launches and displays the Find Source dialog. This gives you the choice to edit a PNG file that could be the original Fireworks file ![]() . That’s because PNG is Fireworks’ native format, and files that you create in Fireworks are saved as PNGs and then, if necessary, exported to JPEG or GIF for use on your website. Fireworks provides more editing options for PNG files than it does for other formats. So if you create images in Fireworks, you can often have two copies of the image: the PNG source and the exported JPEG or GIF.
. That’s because PNG is Fireworks’ native format, and files that you create in Fireworks are saved as PNGs and then, if necessary, exported to JPEG or GIF for use on your website. Fireworks provides more editing options for PNG files than it does for other formats. So if you create images in Fireworks, you can often have two copies of the image: the PNG source and the exported JPEG or GIF.
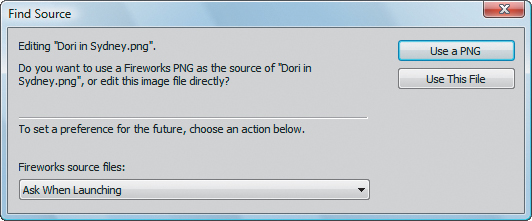
![]() Fireworks gives you the choice to edit the file in the Dreamweaver page or to edit a Fireworks PNG source file.
Fireworks gives you the choice to edit the file in the Dreamweaver page or to edit a Fireworks PNG source file.
3. If you originally created the image in Fireworks and want to edit the PNG, click the Use a PNG button.
The Open dialog appears. Navigate to the PNG file, select it, and click OK (Choose).
or
If you want to edit the file itself, click Use This File.
The image opens in Fireworks ![]() .
.
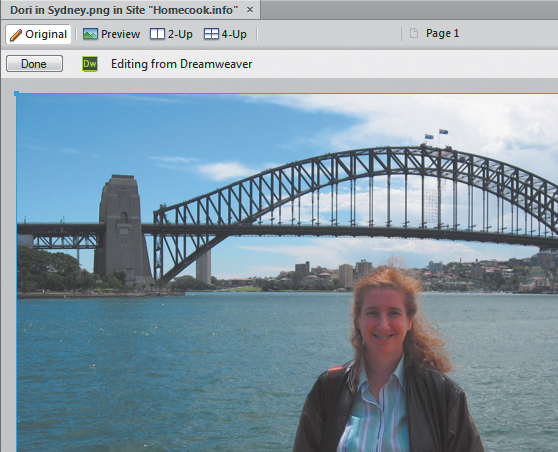
![]() When you are editing an image from Dreamweaver, Fireworks lets you know in a status bar at the top of the Fireworks document window and includes a Done button.
When you are editing an image from Dreamweaver, Fireworks lets you know in a status bar at the top of the Fireworks document window and includes a Done button.
Note that a status bar appears in the Fireworks document window and includes a Done button and the notation “Editing from Dreamweaver.”
4. Make your changes in Fireworks.
5. Click Done in the Fireworks window.
Fireworks saves and closes the image. Behind the scenes, it has told Dreamweaver to update the image on the Dreamweaver document page.
6. Switch back to Dreamweaver to continue your work.
The updated image will be on the page.
To export Fireworks HTML to Dreamweaver
1. In Fireworks, prepare and save the document (such as a navigation bar) that you want to export to Dreamweaver ![]() .
.

![]() This navigation bar in Fireworks is destined for Dreamweaver.
This navigation bar in Fireworks is destined for Dreamweaver.
2. Choose File > Export.
The Export dialog appears ![]() .
.
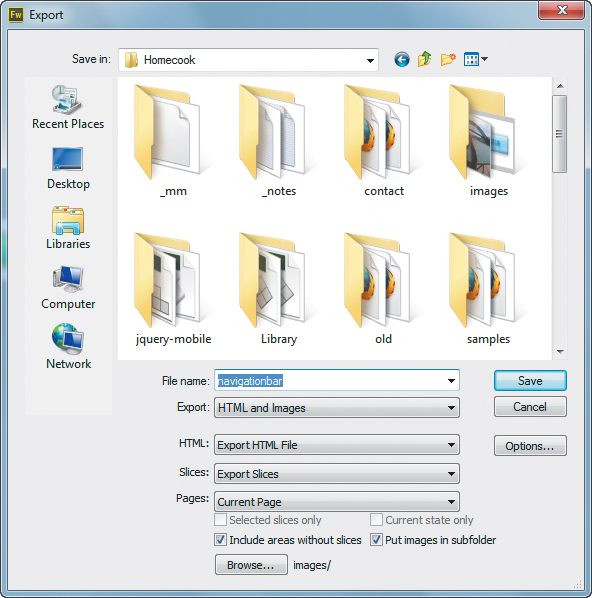
![]() Use the Export feature to begin sending the navigation bar to Dreamweaver.
Use the Export feature to begin sending the navigation bar to Dreamweaver.
3. Navigate to the place in your local site folder where you want to save the Fireworks HTML file.
4. (Optional, but recommended) Select the “Put images in subfolder” check box, then click Browse and select the images directory, so that the different images that make up the Fireworks table don’t clutter up the root directory of your site.
5. Click Save.
Fireworks saves the HTML and associated images in your site folder.
To edit a Fireworks image or table
1. In Dreamweaver, select the image or table that was originally created in Fireworks.
Dreamweaver shows you in the Property inspector that the object came from Fireworks, and it shows you in the Src field the name of the original Fireworks PNG file ![]() .
.
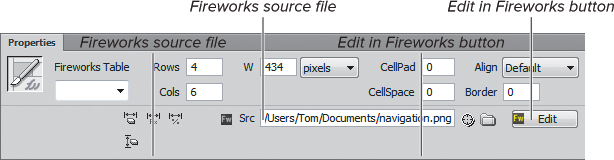
![]() The Dreamweaver Property inspector recognizes objects from Fireworks, and it shows you the name of the original Fireworks source file in the Src field.
The Dreamweaver Property inspector recognizes objects from Fireworks, and it shows you the name of the original Fireworks source file in the Src field.
2. Click the Edit button in the Property inspector.
or
Right-click, and choose Edit in Fireworks from the resulting context menu.
Fireworks launches and displays the PNG file for the object you wish to edit ![]() . A status bar appears in the Fireworks document window, with a Done button and the notation “Editing from Dreamweaver.”
. A status bar appears in the Fireworks document window, with a Done button and the notation “Editing from Dreamweaver.”
![]() When you click the Edit in Fireworks button, the original PNG file opens for editing in Fireworks.
When you click the Edit in Fireworks button, the original PNG file opens for editing in Fireworks.
3. Make the changes you want in Fireworks.
4. Click Done in the Fireworks window.
Fireworks saves and closes the object or table. Behind the scenes, it has told Dreamweaver to update the object on the Dreamweaver document page.
5. Switch back to Dreamweaver to continue your work.
The updated object will be on the page.
Tip
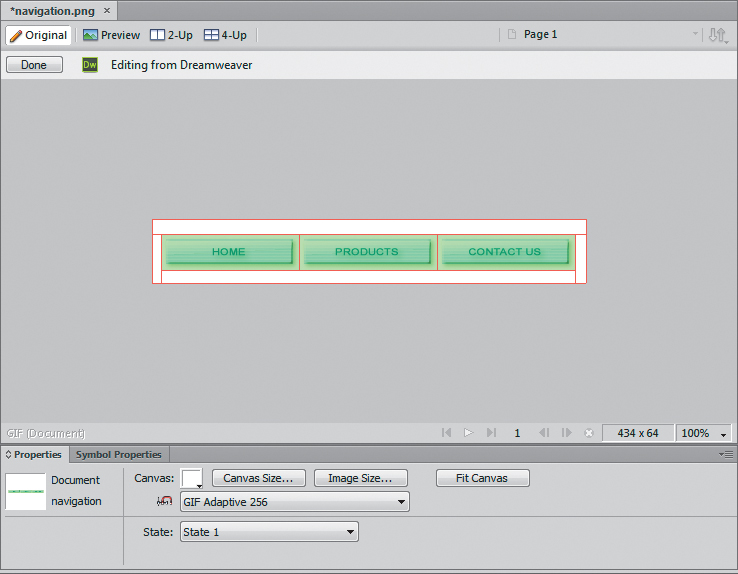
When Fireworks creates a navigation bar (or any complex image that uses scripts), it slices the PNG file into many different pieces, some of which are buttons and some of which are spacers. Some of these pieces also have JavaScript associated with them, for functionality such as rollovers. When Fireworks exports the navigation bar to Dreamweaver, Fireworks converts the format of the slices to many different JPEG files and creates a borderless table to contain all the slices ![]() .
.
![]() We’ve selected the borderless table that contains the navigation bar’s components to show the slices that Fireworks creates.
We’ve selected the borderless table that contains the navigation bar’s components to show the slices that Fireworks creates.
Tip
Fireworks exports its images to JPEG or GIF formats, which are less flexible to edit than PNG files. For example, once you have exported an image from Fireworks’ native PNG format, you can’t easily go back and edit text, effects settings, or paths in the artwork. That is why it’s important to keep the original PNG files, so that you can easily go back and edit your work. We recommend that you save your original Fireworks PNG files in the same folder with the exported files, which usually means your site’s images folder. If you don’t want to upload the PNG files to your server (there’s usually no reason to do so), cloak them, as discussed in Chapter 2.
Cleaning Up Word HTML
Back in Chapter 4, you learned how to bring content from Microsoft Word into Dreamweaver with the Paste Special command, which allows you to preserve varying amounts of the formatting from the Word document. By using the Paste Special command, you will get very good results.
There’s another way to get content from Word into Dreamweaver, though we don’t recommend it. We are only telling you because you might have to deal with it anyway. Word can export its files as HTML documents, which can then be opened in Dreamweaver. The problem is that when Word (and other Microsoft Office applications) saves a document as a webpage, the HTML code created includes lots of excess or Microsoft-specific code that is designed to enable these webpages to be brought back into Word or Excel more easily, but that most browsers don’t need. This excess code can easily bloat the size of a webpage to two or three times the size of a webpage created entirely in Dreamweaver.
Happily, Dreamweaver has the ability to import a Word HTML document and clean up its code. It does this by eliminating Word-specific styles, removing nonstandard CSS, getting rid of empty paragraphs, deleting Microsoft-specific XML tags, and more. In short, if you have been given Word documents that were exported to HTML, Dreamweaver has the means to clean them up.
The document appears on the screen.
2. Choose Commands > Clean Up Word HTML.
The Clean Up Word HTML dialog appears ![]() . Dreamweaver automatically detects whether the HTML was produced by Word 97/98 or Word 2000 or later.
. Dreamweaver automatically detects whether the HTML was produced by Word 97/98 or Word 2000 or later.
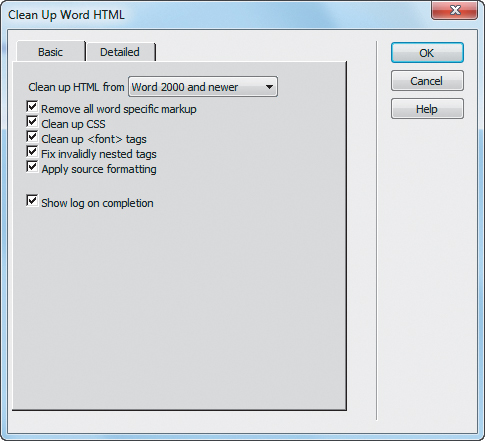
![]() Use the Clean Up Word HTML command to optimize the HTML from Word documents that were exported as webpages.
Use the Clean Up Word HTML command to optimize the HTML from Word documents that were exported as webpages.
3. Choose to turn on or off any of the options on the Basic or Detailed tabs of the dialog.
By default, all of the options are turned on. We recommend that you leave things this way, unless you know that there are specific options you don’t need.
4. Click OK.
Dreamweaver processes the Word HTML document, then displays a dialog summarizing the results of the process ![]() .
.
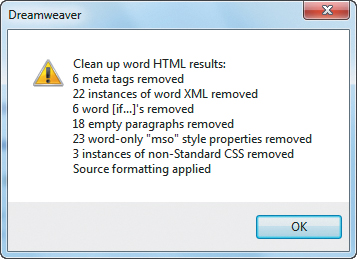
![]() Dreamweaver lets you know the changes it made to the Word document.
Dreamweaver lets you know the changes it made to the Word document.
5. Click OK.
The converted document appears in the Dreamweaver document window.
Tip
The Paste Special command does a better job of preserving the original formatting and styling of the Word document than the Clean Up Word HTML command.
Tip
Long Word documents may take more than a minute to complete processing, depending on the size of the document and the speed of your computer.
Tip
There is a third way to bring Word or Excel documents into Dreamweaver for Windows, but again, we don’t recommend it. You can choose File > Import > Word Document or File > Import > Excel Document. After choosing the document you want from an Open dialog, Dreamweaver converts the document and inserts its contents into the current page. Unfortunately, you get approximately the same quality results as you would get if you exported the Word or Excel document to HTML, imported it into Dreamweaver, then used the Clean Up Word HTML command—which is to say, not as good as if you had used Paste Special.
Using Content from Excel
There are two kinds of information that you might want to use from Microsoft Excel on your webpages. First, you may want the information in the worksheet—the data and calculations that make up all or part of the worksheet. Second, you may wish to place a graph taken from an Excel worksheet on a webpage.
In both cases, you’ll copy and paste the information from Excel into your Dreamweaver document.
To import Excel worksheet data
1. In the Excel worksheet, select the information you want to bring into Dreamweaver ![]() .
.

![]() Begin importing Excel worksheet data into Dreamweaver by selecting and copying the information in Excel.
Begin importing Excel worksheet data into Dreamweaver by selecting and copying the information in Excel.
2. Choose Edit > Copy, or press Ctrl-C (Cmd-C).
3. Switch to Dreamweaver.
4. Click in the document at the insertion point where you want the Excel information to appear.
5. Choose Edit > Paste Special.
The Paste Special dialog appears ![]() . This dialog has four choices. The first choice, “Text only,” pastes all the information from the worksheet into a single line. This jumbles all the information together, so don’t use it. The next three choices paste the worksheet information as a table, retaining increasing amounts of formatting information from the original worksheet. In most cases, you’ll find that the best choice is “Text with structure plus full formatting.”
. This dialog has four choices. The first choice, “Text only,” pastes all the information from the worksheet into a single line. This jumbles all the information together, so don’t use it. The next three choices paste the worksheet information as a table, retaining increasing amounts of formatting information from the original worksheet. In most cases, you’ll find that the best choice is “Text with structure plus full formatting.”
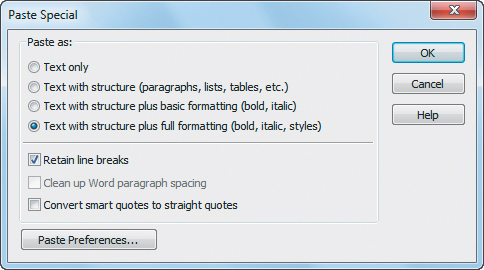
![]() Use the Paste Special dialog to control how much formatting you want to maintain from the Excel worksheet.
Use the Paste Special dialog to control how much formatting you want to maintain from the Excel worksheet.
6. Choose the formatting option you want.
7. Click OK.
Dreamweaver pastes the Excel information into the document as a table ![]() . In the figure, note that Dreamweaver preserved all the original formatting, including the bold text.
. In the figure, note that Dreamweaver preserved all the original formatting, including the bold text.

![]() The Excel worksheet data appears in Dreamweaver as a table.
The Excel worksheet data appears in Dreamweaver as a table.
Tip
If you want to style the worksheet in Dreamweaver after import, you should use the “Text with structure plus basic formatting” choice in the Paste Special dialog. The reason is that the “Text with structure plus full formatting” choice creates CSS styles in your Dreamweaver document that make it more difficult to restyle the table.
To import an Excel chart
1. In the Excel worksheet, select the chart you want to bring into Dreamweaver ![]() .
.
![]() Begin bringing an Excel chart into Dreamweaver by selecting and copying the chart in Excel.
Begin bringing an Excel chart into Dreamweaver by selecting and copying the chart in Excel.
2. Choose Edit > Copy, or press Ctrl-C (Cmd-C).
3. Switch to Dreamweaver.
4. Click in the Dreamweaver document to set the insertion point where you want the Excel chart to appear.
5. Choose Edit > Paste, or press Ctrl-V (Cmd-V).
The Image Optimization dialog appears ![]() .
.
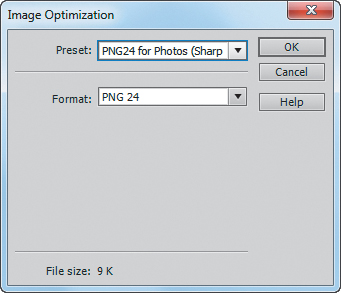
![]() You can make adjustments to the chart image in the Image Optimization dialog.
You can make adjustments to the chart image in the Image Optimization dialog.
6. Make any format adjustments you want in the Image Optimization dialog.
7. Click OK.
The Save Web Image dialog appears.
8. Give the image a name, and navigate to where you want to save it (usually inside your site’s images folder).
9. Click Save.
The Image Description (Alt Text) dialog appears. Alternate text is used by screen reading programs utilized by the visually impaired.
10. Enter the description for the image, then click OK.
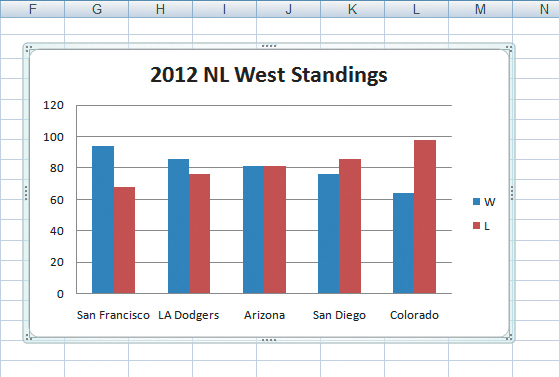
11. The chart appears in the Dreamweaver document ![]() .
.
![]() The Excel chart ends up on the Dreamweaver page as a graphic.
The Excel chart ends up on the Dreamweaver page as a graphic.
Working with Contribute
One of the difficulties faced by web designers is the problem of maintaining a website in good order after you launch the site. Because websites need constant changing to remain vital, there is a need to update content throughout the site on a regular basis. But as a designer, you are probably reluctant to let everyday users make changes and updates to your websites for fear that minor mistakes will cause major problems.
That’s where Adobe Contribute comes in. With a combination of Dreamweaver templates and Contribute, you can allow virtually anyone who can use a word processor to make changes to your websites, without the possibility of accidentally breaking the site. Contribute users can change page content only within the template’s editable areas, and the Contribute site administrator can restrict the Contribute user’s editing abilities. Contribute allows designers to get back to the job of designing sites (rather than maintaining pages) and allows clients to maintain sites themselves (rather than trying to track down the designers to make small changes).
In Dreamweaver, besides designing your pages using Dreamweaver templates (see Chapter 16 for more information about templates), you need to set some Dreamweaver preferences so that your site is ready for the Contribute user. You can also launch Contribute to perform site administration from Dreamweaver.
The Manage Sites dialog appears ![]() .
.

![]() In the Manage Sites dialog, choose the site for which you want to enable Contribute compatibility.
In the Manage Sites dialog, choose the site for which you want to enable Contribute compatibility.
2. From the list of sites, select the site that you want to enable for Contribute.
3. Click the Edit button (it looks like a pencil).
The familiar Site Setup dialog appears. Click the Advanced Settings category ![]() .
.
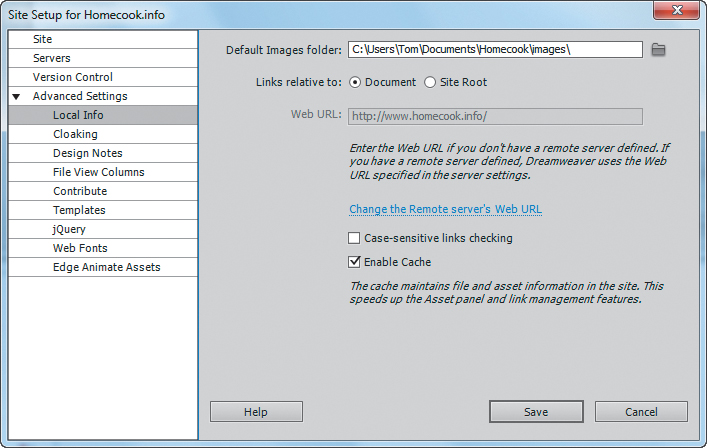
![]() The Site Setup dialog allows you to adjust many settings that are associated with the particular site you chose in the Manage Sites dialog.
The Site Setup dialog allows you to adjust many settings that are associated with the particular site you chose in the Manage Sites dialog.
4. In the list on the left side of the dialog, click the Contribute category.
The Contribute pane appears ![]() .
.
![]() You enable Contribute compatibility in the Contribute pane of the Site Setup dialog.
You enable Contribute compatibility in the Contribute pane of the Site Setup dialog.
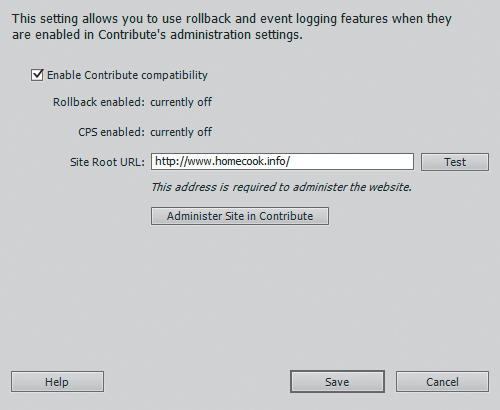
5. Select the “Enable Contribute compatibility” check box.
6. In the Site Root URL text box, the URL of your site should appear. If it does not, enter it now.
7. Click the Test button.
Dreamweaver connects to the website and confirms that the connection is working. Dreamweaver puts up an alert box letting you know the connection was successful.
8. Click OK to dismiss the confirmation alert.
9. Click Save to dismiss the Site Setup dialog.
To administer a site in Contribute
1. Choose Site > Manage Sites.
The Manage Sites dialog appears.
2. From the list of sites, select the site that you want to enable for Contribute.
3. Click Edit.
The Site Definition dialog appears.
4. In the list on the left side of the dialog, click the Contribute category.
The Contribute pane appears ![]() .
.
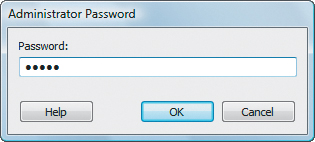
5. Click the Administer Site in Contribute button.
You must also have a copy of Contribute on your hard disk. The Administrator Password dialog appears ![]() .
.
![]() Begin administering the Contribute site by entering your administrator password.
Begin administering the Contribute site by entering your administrator password.
6. Enter your Contribute administrator password, and click OK.
The Contribute Administer Website dialog appears ![]() .
.
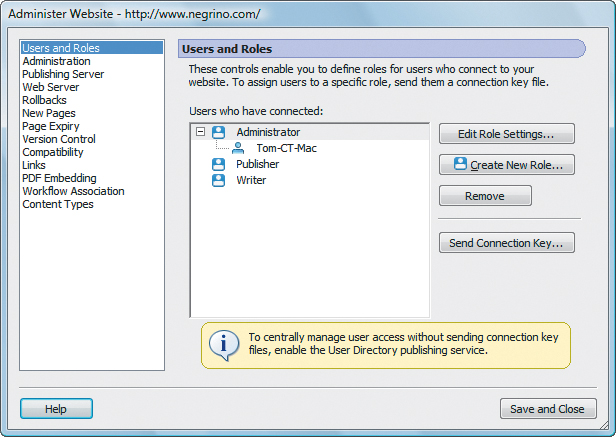
![]() Use the Administer Website dialog to adjust user roles and permissions.
Use the Administer Website dialog to adjust user roles and permissions.
7. Make any administrative changes you desire, then click Save and Close to dismiss the Administer Website dialog.