Chapter 10. Email, Gmail, Facebook, and the Universal Inbox
You want email? You’ve got email. The Droid 2 does a great job of handling whatever email task you throw at it. Want to send and receive attachments like pictures; Word, Excel, and PowerPoint files; and PDFs? The Droid 2 can do that. How about working with just about any email service out there? It can do that, too. You can also manage your mail, sync your mail, and plenty more right on your phone. It’s a great way to have your email always in your pocket.
This chapter shows you how to get the most out of email on the Droid 2. And since more and more people use Facebook in addition to email, or even instead of email, as a way to communicate with friends, business associates, and family, it covers the Droid 2’s built-in Facebook app as well.
Understanding Email on the Droid 2
The Droid 2 runs on Google’s Android operating system, so it comes as no surprise that its main built-in email app is for Gmail. You don’t have to use Gmail if you don’t want to, though; you can use your current email service instead. Or you can use both.
Gmail on the Droid 2 works a bit differently from other email services, so this chapter covers both methods. The Droid 2 also has a unified inbox, which shows all your email in one place. You can read, respond to, create, and manage all your email from one single location—no need to keep switching among apps.
Setting Up Gmail
Android is built from the ground up to integrate with Google services—search, Google Maps, and Gmail. If you already have a Gmail account, then when you set up your Droid 2, you tie into that account. If you don’t have a Gmail account, you first need to set one up.
Note
When you first bring your Droid 2 home, you may already be set up to use Gmail. Often, Verizon sales staff set up your Gmail account right in the store for you.
When you use the Gmail app on your Droid 2, it synchronizes with your web-based Gmail. So when you delete an email on the Droid 2, for example, it deletes it on the web-based Gmail; when you create and send an email on your Droid 2, it shows up in your Sent folder on the Web; and so on.
Signing up for a Gmail account is free and takes only a few minutes. You can create it on the Web or on the Droid 2. To do it on the Web, head to www.gmail.com. Fill in the usual information, such as first and last name, login name, and password. The login name you choose becomes your email address. If you use the login name petey.bigtoes, then your email address will be [email protected]. So make your login name something pleasant and easy to remember.
Note
When you create a Gmail account, you’re actually setting up an account for all of Google’s services, not just Gmail. You use the same account to access Google Calendar and other services. In other words, if you have a Google Calendar account, then you already have a Gmail account. Use that information when setting up Gmail on your Droid 2.
Now that you have a Gmail account, you’re ready to set up Gmail on your Droid 2. When you set up your Gmail account, you’ll also be setting up your Calendar account and importing your Gmail contacts into your Droid 2. From the Application Tray, tap the Gmail icon. After a brief welcome screen, Gmail asks if you have a Google account. If you haven’t already set one up, tap Create, and fill in the information required.
Note
When creating a Gmail account, make sure to leave the box next to “Automatically configure account” turned on. That way, the Droid 2 will do all the heavy lifting of properly configuring your new account.
If you already have a Gmail account, tap Sign In. Enter your Gmail address and the other basic information. If you have a Google Contact list, the Droid 2 automatically starts downloading it in the background, and also syncs your mail.
Note
What if you have multiple Gmail accounts? You can have the Droid 2 handle more than one. To set up a second account, tap My Accounts from the Application Tray. Then tap “Add account”→Google, and set up your second account. If you prefer, you can also use the Droid 2’s browser to visit Gmail, and access your other accounts that way.
Reading Mail in Gmail
Once you’ve got your Gmail account set up, it’s time to start reading mail. Launch the Gmail app by tapping it in the Application Tray. You see a list of emails, but the list you see depends on what you were doing the last time you were using Gmail. For example, if the last time you used Gmail you were in your Inbox, you see all the mail in your Inbox. If you were viewing mail in a different label (the term Gmail uses for a folder), you see just the mail in that label.

Note
While most email programs use folders to let you organize your email, Google uses labels in its web-based email, and that’s what you use on the Droid 2.
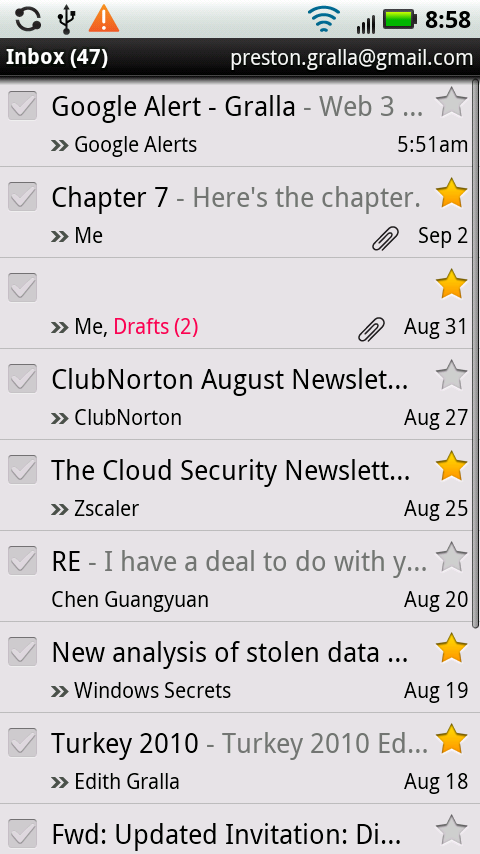
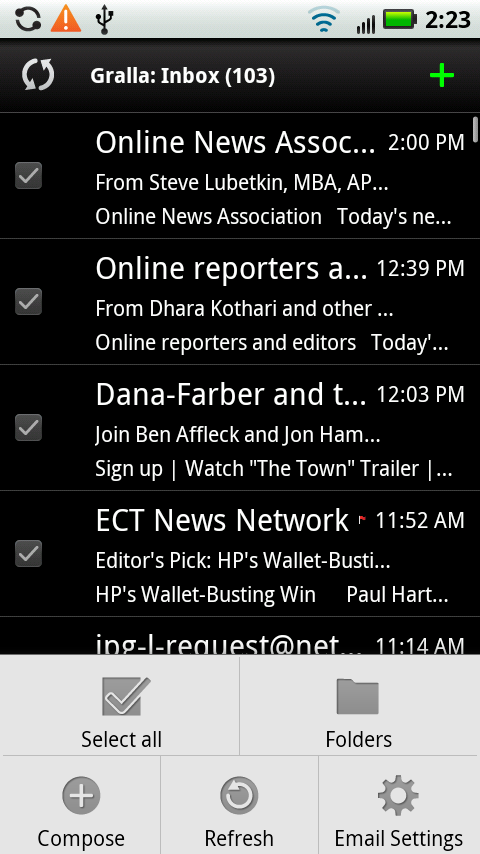
Most of the time, of course, you’ll land in your inbox, which lists all your mail. Mail you haven’t read is boldfaced and has a white background; the rest of your mail is in a normal font and has a gray background. The top of your screen displays the total number of messages in your inbox, and also your email address.
Note
The Droid 2 regularly checks your Gmail account for new mail, and if it finds any, it displays an email icon in the Notification bar. Pull down the Notification bar, and then tap the Gmail notification to launch Gmail.
When you’re viewing mail in a list like this, each piece of mail shows the following:
The sender
The subject line
The date it was sent, or if it was sent today, the time it was sent
To open a message, tap it. Scroll up, down, and sideways in the message using the normal Droid 2 gestures of dragging and flicking.
All the links you see in the email message are live—tap them, and you go to the web page to which they’re linked, using the Droid 2’s web browser. Tap an email address, and a new email message opens to that address. Tap a YouTube video, and the video plays, and so on.
In fact, in many instances, the text in the email message doesn’t even need to be a link for the Droid 2 to take some kind of action on it. If there’s a phone number in an email, tap it to call that number. Just tap the phone button to dial. If you tap a street address, the Droid 2 shows you that location in Google Maps.
Note
Gmail, Google Calendar, and your Gmail contacts are all set up to sync between your Droid 2 and your various Google accounts on the Web. All this happens automatically, in the background, without you having to take any action. You can turn syncing off, or choose to sync manually, though. For details, see Gmail and Google.
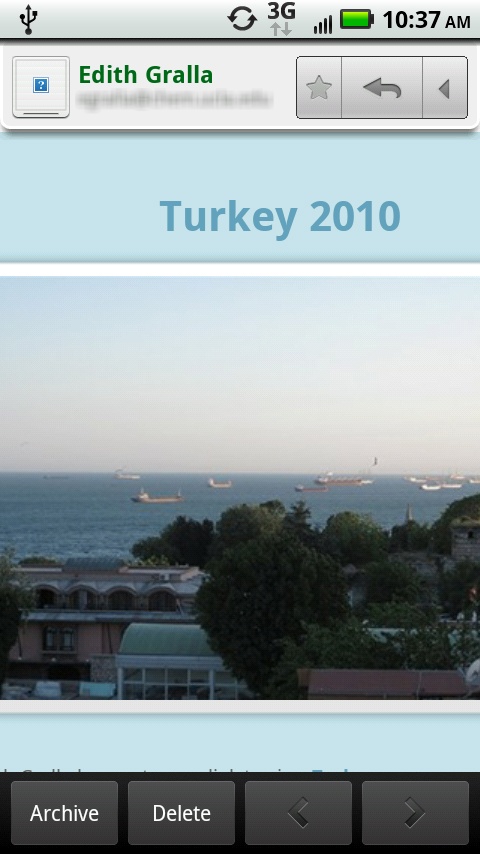
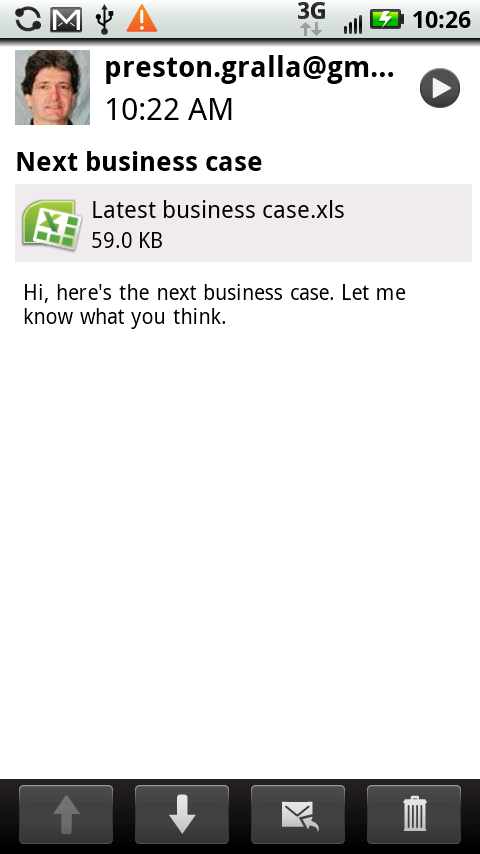
Handling Graphics in Gmail
There are two basic kinds of graphics you may get in Gmail. Some are embedded in the content of the message itself—for example, a company logo. Other times, the sender attaches the image to the messages, like a family member sending you Thanksgiving photos.
If the graphics are embedded in the content of the message, you see a button titled Show pictures. In some cases you don’t really need to see the graphics (who cares what a company’s logo looks like, really?). In that case, do nothing, However, in other cases, the graphic is an integral part of the message, like a graph or a map. If that happens, tap Show pictures. You see all the graphics on full display, right in the message.

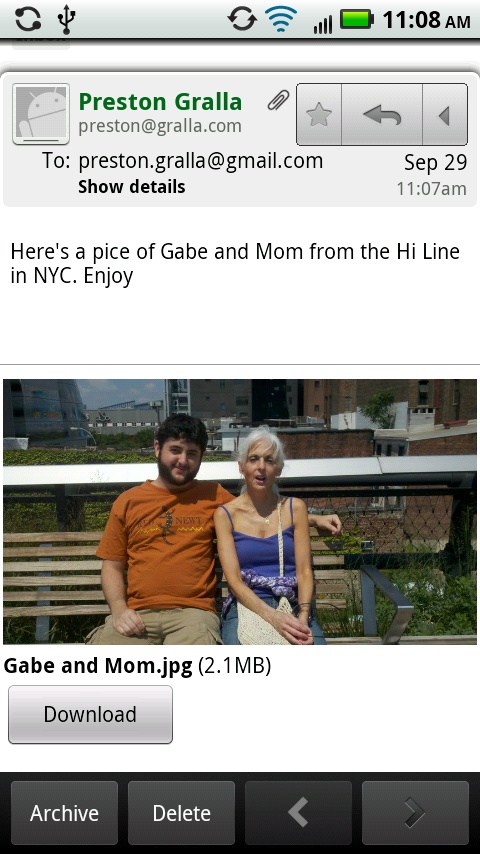
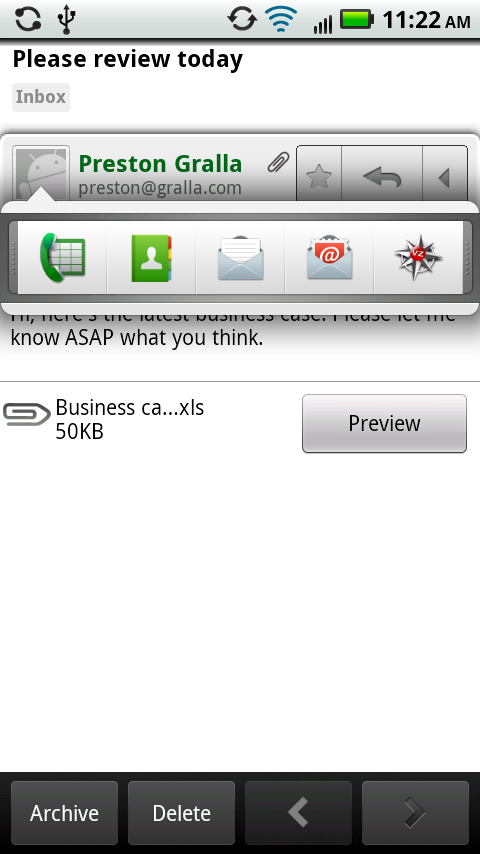
If someone has attached a graphic, you see the graphic displayed in the email message. You also see a small paper clip icon near the top of the message, which indicates that the email has an attachment.
To save the picture to your Droid 2, tap Download, and it gets downloaded to the Gallery on your SD card. For details about the Gallery, turn to Opening the Gallery.
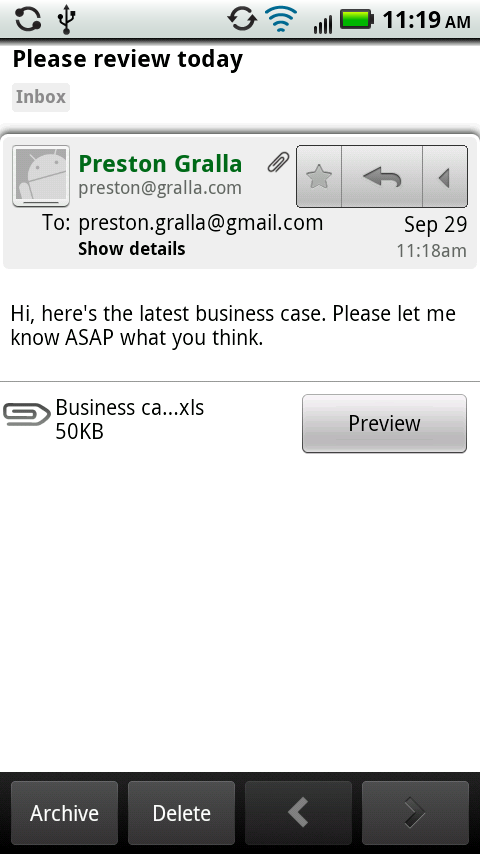
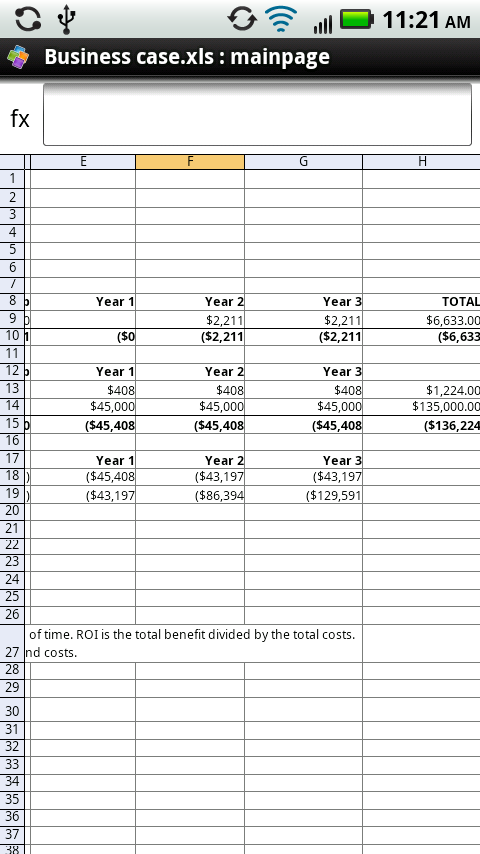
Attachments in Gmail
Gmail lets you download graphics attachments, including those in the .jpg, .png, and .gif formats. But it doesn’t let you download other kinds of attachments. You can preview Word, Excel, and PowerPoint files, among others, but you can’t download them onto your Droid 2. And some file types, you can’t even preview.
If you get an attachment that you can preview, you see a paper clip icon near the top of the mail, as well as a more prominent one at the bottom of the message. The attachment’s name and a Preview button also appear next to the paper clip icon.
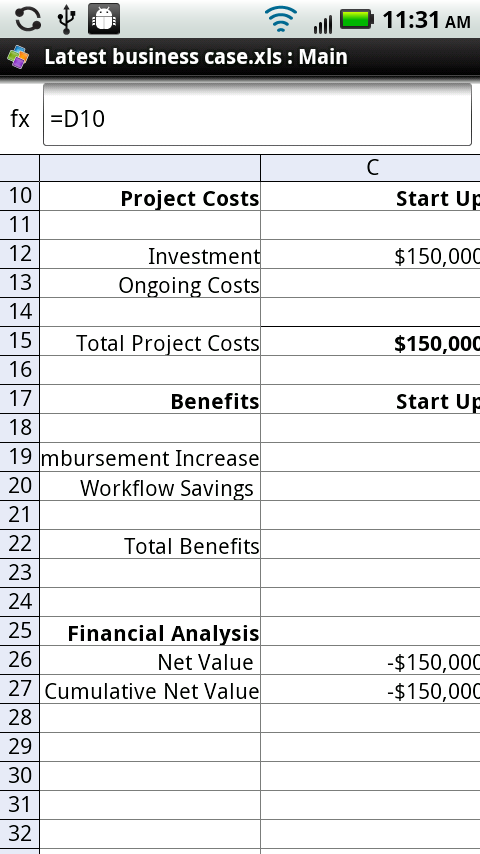
Tap the Preview button, and the attachment opens. If it’s a Word, Excel, or PowerPoint file, it opens in an app called QuickOffice that’s built into the Droid 2.
Add the Sender to Your Contacts
If you’re reading an email message from someone and want to add her to your Contact list, tap the small button to the left of her name. A screen appears that lets you create a new contact with the sender’s name and email address, or add the information to an existing contact.
If the person is already in your Contacts list, when you tap the name, a list of icons appears that lets you respond to her in a number of ways, including by email, phone, and so on, based on the contact information you have.
Replying and Forwarding in Gmail
Near the top of the screen in Gmail, next to the sender’s name, you’ll find a small toolbar of icons for replying to and forwarding mail:
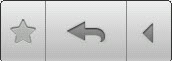
 Stars the message. If the message already displays a star, tap it to remove it.
Note
For more information about starred messages, see Managing Incoming Mail in Gmail.
 Replies to the message’s sender only. A new email window opens, addressed to the sender, with the original email text quoted in it. If there’s an attachment in the original email, it won’t be included.
 Expands the toolbar to give you more options for replying and forwarding.

The expanded toolbar gives you two more options:
 If the email was sent to multiple people, this replies to the sender of the message, and to all the recipients in a new email window, with the original message quoted in it. You can always add new recipients or delete existing ones. If there’s an attachment in the original email, it won’t be included.
 This opens a new email window with a blank To: field so that you can fill it in. The message includes the entire email that you had opened, including any attachments.
Understanding Gmail’s Organization
Gmail has its own terminology and worldview when it comes to handling email, so you have some new terms and ideas to get used to. Here are the most common Gmail concepts:
Labels. Think of these as email folders. Your regular email program has a folder called Inbox, for example, and lets you create other folders, such as Family, Work, and so on. Gmail calls these email containers labels.
That said, there is a slight underlying difference between the way you work with Gmail’s labels and how you work with your email program’s folders. In your typical email program, you might move mail between folders by dragging them. Not so in Gmail. In Gmail, you affix a label to an email message. When you do that, that email automatically appears when you sort for that label.
Labels actually give you more flexibility than folders, since you can attach multiple labels to a single email message to have it show up in multiple labels. For example, if you get an email from your brother about advice for your upcoming trip to France, you can add the labels Family and France to the email. That email then shows up in both your Family label, and your France label.
Tip
The Droid 2 Gmail app is designed to work in concert with Gmail on the Web. So you can’t do everything in the Gmail app that you can do on the Web. The Droid 2 Gmail app can’t create labels, for example, so to create new ones, you must visit your Gmail account on the Web, either using the Droid 2 browser or a computer.
Overall mail organization. Because Gmail uses labels rather than folders, you may find mail in more than one location. Also, unlike some email software, Gmail gives you the option of viewing all mail in one single area titled All Mail, including both mail that you’ve sent and that you’ve received.
Chats appear in Gmail on both the web client and on the Droid 2.
Archive. In some instances, you’ll get mail that you want to keep around but don’t want showing up in your inbox, because your inbox would otherwise get too cluttered. So Gmail lets you archive messages. Archiving a message doesn’t delete it, but it removes it from your inbox. You can still find the message listed in your All Mail folder. You can also find it by searching.
Managing Incoming Mail in Gmail
Once you’ve read a Gmail message, it’s time to decide what to do with it. At the bottom of your screen when you’re reading email, you’ll find four buttons that can help:

Archive. This button appears if you haven’t given a label to the email. (See Adding a Signature for details on adding labels.) Tap the button to archive the message. It vanishes from your inbox, but still appears in All Mail.
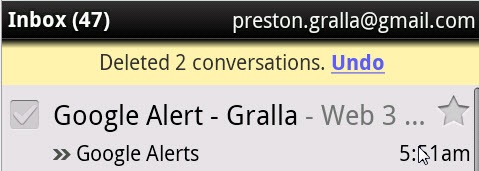
Delete. Sends your email to the Gmail Trash. The mail will be available in the Trash for 30 days, so you can view it there if needed—but after 30 days it gets deleted forever. When you delete mail, you see a notification at the top of your inbox, telling you how much mail you’ve deleted, and allowing you to undo the deletion—in other words, take the message out of the Trash.
That’s just the beginning, though. Tap the Menu key, and you’ll have these options:
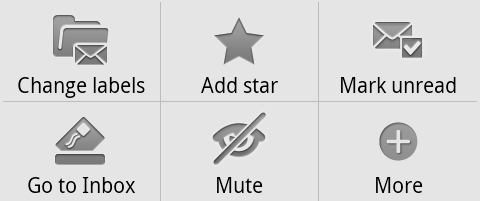
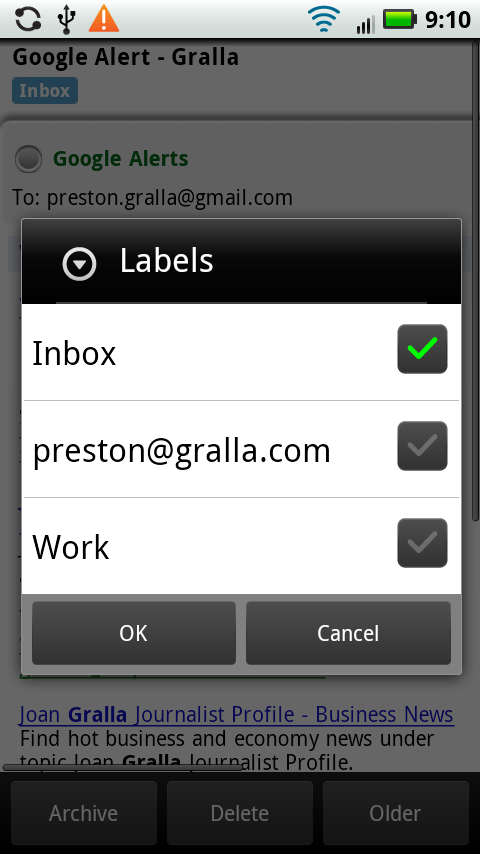
Change labels. Even if you haven’t applied a label to a piece of mail in your inbox, it already has a label pre-applied to it—Inbox. Tap this button to change the label by adding more labels to the message, or taking away existing labels, such as the Inbox label. If you take away the Inbox label, the message appears in All Mail, but not your Inbox. When you tap the button, a screen appears with all your labels on it. The labels for the mail you’re reading have green checkmarks next to them. Add checkmarks for all the labels you want to add, and remove checks for labels you want to remove.
Add star. If you get a very important message, add a star to it. From now on, a gold star appears next to the message in the Inbox or any other label you view it in. You can also go to the Star label, and see only starred email.
Report spam. Tap the Report Spam button, and a note goes to Google saying you believe the email is spam. Google uses that information to determine which mail should be considered spam and be automatically rerouted into people’s Spam label.
Mark unread. When new mail comes into your inbox, its background is highlighted in white, and its text is bold. After you read it, the background turns gray, which marks it as being read. This makes it easy for you to see what messages you haven’t yet read. If you want to keep the current email message looking like a new one (because you want to make sure you read it again later, for example), tap this button.
Go to Inbox. Returns you to your inbox. The mail you’re reading will be shown as read, unless you’ve chosen the “Mark unread” option.
Mute. Tap, and the email and all conversations related to it will bypass your inbox and be automatically archived. When you mute a piece of mail, you’re not just archiving that one piece of mail, but the entire “conversation” of which it’s a part. Let’s say, for example, you subscribe to a mailing list, and there is a long, ongoing series of back-and-forth emails about a topic in which you have no interest. (Justin Bieber, anyone?) You’re tired of seeing mails in that conversation pop up in your inbox. Tap the Mute button, and you won’t see it in your inbox anymore. It will, however, still appear in All Mail.
More. Tap this button for a grab bag of options. A menu appears from which you can choose to get help with Gmail, change Gmail settings, select text in your current message, or report the current message as spam.
Note
When you get a message that Gmail considers spam, it isn’t automatically deleted. Instead, it shows up in your Spam label. It doesn’t appear in All Mail, or anywhere else in Gmail. It also doesn’t appear when you search through your email.
Managing Multiple Email Messages
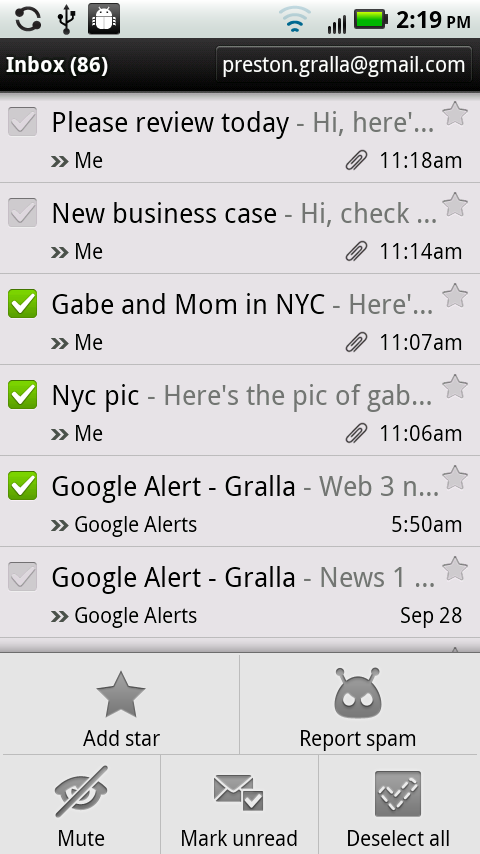
You can also handle groups of messages rather than individual ones. In your inbox, each piece of incoming mail has a box to its left. Tap that box to select the message; a green checkmark appears next to it, and the bottom of your screen displays three options: Archive, Delete, and Labels. To select multiple messages, just turn on their checkboxes. After you select all the mail you want to handle, choose which option you want to apply to the selected mail.
Press the Menu key to call up five additional options: “Add star”, “Report spam”, “Mute”, “Mark unread”, and “Deselect all”. See Managing Incoming Mail in Gmail to find out what they do. The only one different here is the Deselect all, which deselects all the mail that you’ve chosen.
Writing Messages in Gmail
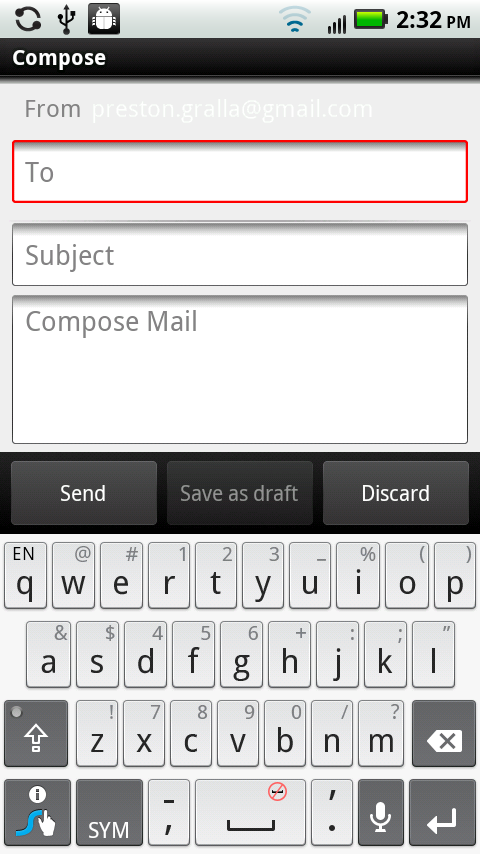
When you want to create a new Gmail message, start from the inbox, press the Menu key, and then tap Compose ![]() on the menu that appears. A new, blank message form opens, and the keyboard appears so you can start typing.
on the menu that appears. A new, blank message form opens, and the keyboard appears so you can start typing.
Tip
If you want a larger keyboard, turn your Droid 2 90 degrees. And, of course, you can always use the slideout keyboard as well.
Write your message this way:
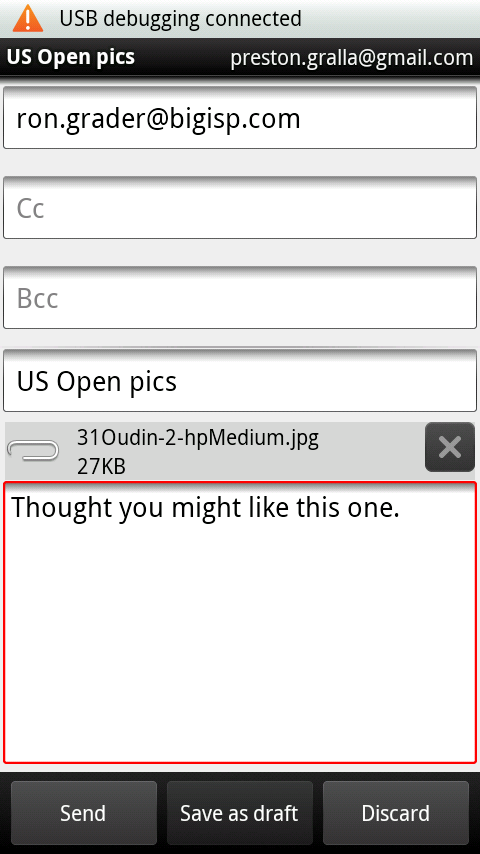
Type the recipient’s address in the To field. As you type, Gmail looks through your Contacts list, as well as people you’ve sent email to in the past, and displays any matches. (Gmail matches the first few letters of first names as well as last names as you type.) If you find a match, tap it instead of typing the rest of the address. You can add as many addresses as you want.
Tip
Gmail lists only the first four matches from your Contacts list. To see if there are more potential matches, look to the right of the displayed names. If you see a scroll bar, there are more matches from which you can choose. Drag the scroll bar to see all matching names. The scroll bar is visible only for a second or two, but even after it goes away, if you tap and drag in that area, you can scroll through the list.
Send copies to other recipients. Press the Menu key, and tap Add Cc/Bcc
 from the menu that appears. Two new lines appear beneath the To field—Cc and Bcc.
Anyone whose email address you put in the Cc and Bcc boxes gets a copy of the email message. The difference is that while everyone can see all of the Cc recipients, the Bcc copy is sent in private. None of the other recipients can see the email addresses you enter in the Bcc field.
Note
The term carbon copy comes from those long-gone days in the last century when people typed mail, documents, and memos on an ancient device called a typewriter, and to make multiple copies, added a sheet of carbon paper and another sheet of typing paper. The force of the keys striking the paper would imprint ink on the second sheet using the ink in the carbon paper.
Type the topic of the message into the Subject field. A clear, concise subject line is a good thing for both you and your recipient, so you can immediately see what the message is about when you scan your inbox.
Type your message into the Compose Mail box. Type as you would in any other text field. You can also use copy and paste (Create and Edit Keyboard Shortcuts).
Add an attachment. To add an attachment, press the Menu key and then tap Attach
 from the screen that appears. You have the choice of attaching photos, videos, or other types of files.
To attach a photo or video, select Gallery. Navigate through the Gallery until you find the file you want to attach. Tap it to attach it to the message.
To attach a file, select Files, and you’re sent to a file manager from which you can browse the phone for files to attach.
No matter what type of file you send, a paper clip icon appears beneath the subject line, and you see the file name and size. Tap the X button if you want to remove the attachment. You can keep adding attachments, if you want.
Tap Send, Save as draft, or Discard. Tap Send, and the message gets sent immediately. “Save as draft” saves the message to your Draft label, where you can later review it, edit it, and send it. Discard gets rid of the message for good.
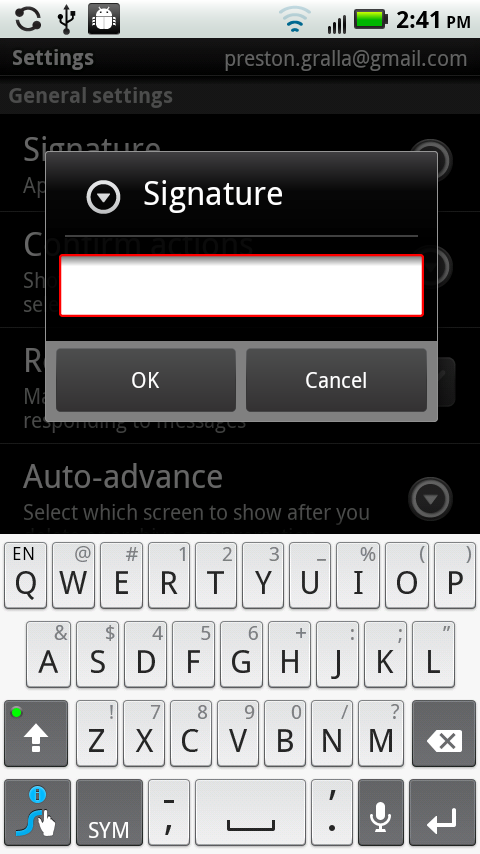
Adding a Signature
The Gmail app can automatically add a signature—your contact information, for example—at the bottom of every outgoing message. To create a signature of your own, press the Menu key and then select Settings (if you’re in your inbox), or More→Settings (if you’re in any other label). From the screen that appears, tap the down arrow next to Signature. Tap OK, and the signature will be appended to the bottom of all messages you send.
Working with Labels and Search
Labels are an excellent way to organize your email in Gmail, because they’re far more flexible than folders. A single message can appear in as many or as few labels as you want.
To go to a different label or to create a new label, press the Menu key when you’re in your inbox or any other label. Then tap “Go to labels” ![]() .
.
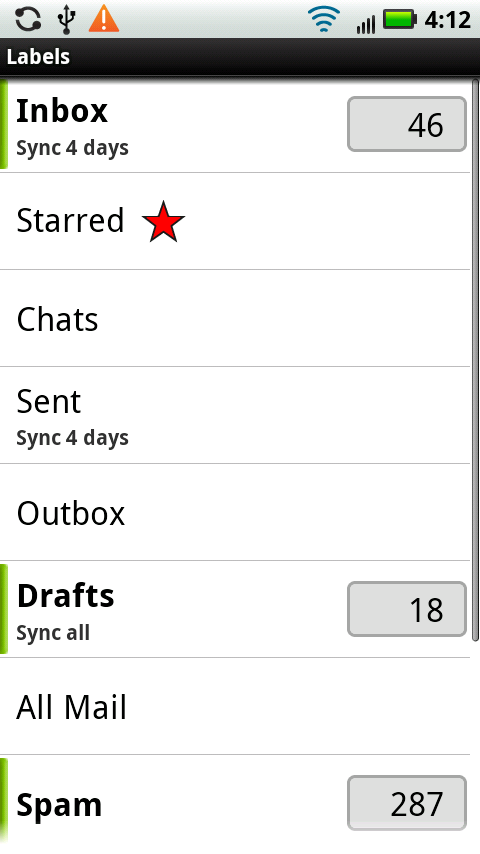
You see a scrollable listing of all your labels. Gmail automatically creates these labels for you:
Inbox contains all your incoming messages.
Starred shows all the messages you’ve starred (Managing Incoming Mail in Gmail).
Chats contains the contents of all chats done via Google Talk.
Outbox shows mail you’ve created and asked Gmail to send, but that has not yet been sent.
All Mail contains all mail and chats, except for Spam and Trash. It also includes mail that you’ve archived (Understanding Gmail’s Organization).
Spam contains all mail marked as spam, either by you or by Google.
Trash contains mail you’ve deleted but that hasn’t been removed from the trash yet because it’s not more than 30 days old.
Note
If you use Gmail’s Priority Inbox on the Web, you’ll also see a label here called Important that shows all the messages that Gmail has flagged as being important to you. For details about how Priority Inbox works, and to set it up on the Web, go to http://mail.google.com/mail/help/priority-inbox.html.
If you’ve created any labels other than these using Gmail on the Web, then you see them here as well. You can’t create new labels in Gmail on the Droid 2. To create a new label, visit Gmail on the Web using your Droid 2 browser or on a computer.
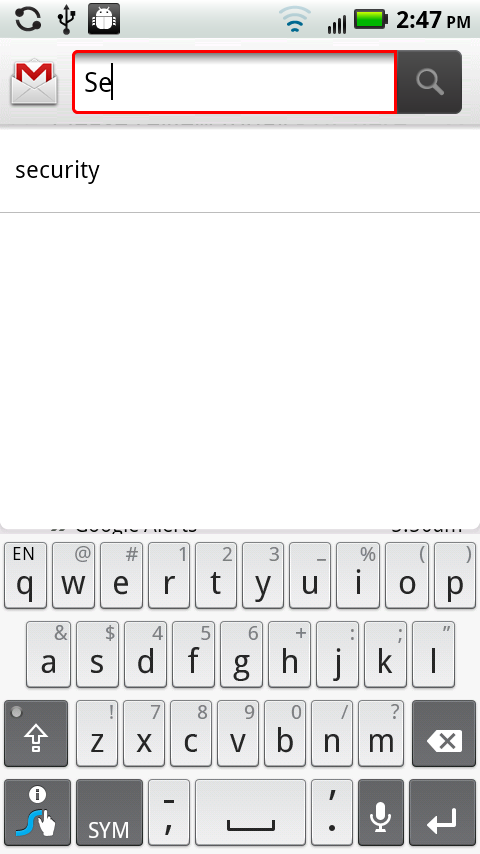
Searching Gmail
Google makes what many consider the best search engine on the planet, so it’s no surprise that it builds Google Search into Gmail on the Droid 2. Searching is straightforward, as long as you understand one very important point: When you launch a search, you search only through the current label. So if you have some messages in your Work label, and you search in your Family folder, the search won’t find those Work messages.
What if you don’t remember what label you’ve stored a message in? Then go to All Mail and do a search from there. That way, you’ll find mail from all your labels (except Spam and Trash), as well as your archived mail.
To search, press the Menu key, and then tap the Search button. As you type, Gmail displays previous searches you’ve done that match those letters and narrows the search as you type. If you see a search term you want to use, tap it. If not, type the entire search term, and then tap Search.
After you enter your search terms, you see a display of all matching email. Gmail searches through the To, From, and Subject fields, as well as the messages’ text. In the upper-left corner, you see the search term you entered.

Advanced Gmail searching
Advanced Gmail searching
Gmail lets you do some pretty fancy searching—after all, Google is the search king. So you can search by To, From, Subject, specific labels, and a lot more. Say you want to search for all email with the word “Halloween” in the subject line. Type the following in the search box:
Subject:Halloween
You can search other Gmail fields, as shown on the following list (head to http://tinyurl.com/gmail-search for a more complete list):
You can combine these search terms with one another, and with a search of the text of the message. So to search for all email in your Work label with the word “budget” in it, you’d do this search:
In:Work Budget
Setting Up Email Accounts
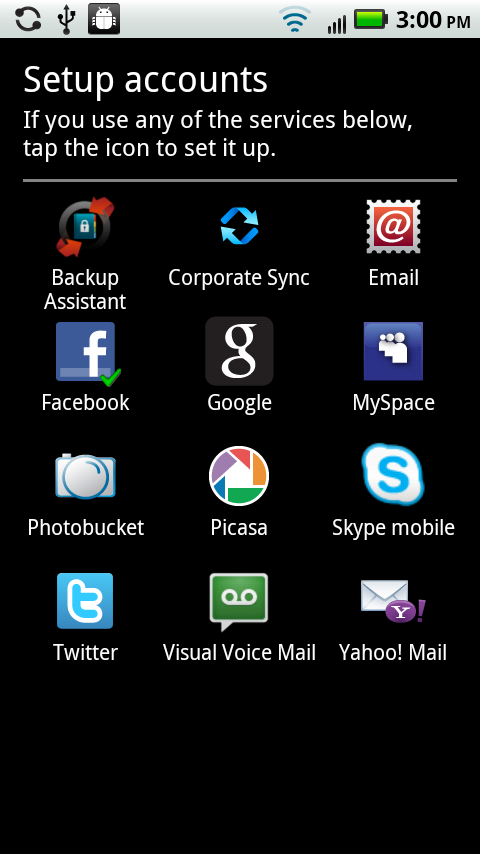
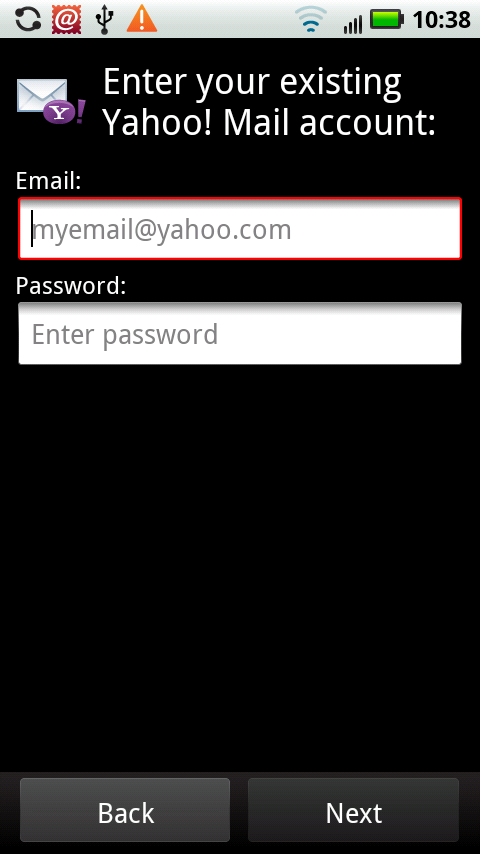
You’re not confined to using Gmail on the Droid 2—you can use your other email accounts as well. To set one up, tap My Accounts from the Application Tray. You see a list of you existing accounts, not just including email, but others as well, such as Facebook, and even your Visual Voice Mail account if you have one (Setting Up Visual Voicemail). Tap “Add account”. You see a list of the various kinds of accounts you can add, including a general email account, or a Yahoo Mail account.
To add a Yahoo Mail account, tap it, fill in your Yahoo user name and password, and you’re ready to go. There’s nothing else you need to do.
POP3 and IMAP Accounts
Not everyone has a Gmail account or a Yahoo account. Your primary email account may come from work or your Internet service provider (ISP). As a general rule, these kinds of accounts use one of two technologies:
With a POP (Post Office Protocol) account, the POP server delivers email to your inbox. From then on, the messages live on your Droid 2—or your home computer, or whichever machine you used to check email. You can’t download another copy of that email, because POP servers only let you download a message once. So if you use your account on both a computer and your Droid 2, you must be careful to set up the account properly, as described in the box on Keeping Your POP Mailboxes in Sync, so you won’t accidentally delete email. Despite this caveat, POP accounts remain the most popular type of email accounts, and are generally the easiest to set up and use.
With an IMAP (Internet Message Access Protocol) account, the server doesn’t send you the mail and force you to store it on your computer or Droid 2. Instead, it keeps all your mail on the server, so you can access the exact same mail from your Droid 2 and your computer—or even from multiple devices. The IMAP server always remembers what you’ve done with your mail—what messages you’ve read and sent, your folder organization, and so on. So if you read mail, send mail, and reorganize your folders on your Droid 2, when you then check your mail on a computer, you’ll see all those changes, and vice versa.
That’s the good news. The bad news is that if you don’t remember to regularly clean out your mail, your mailbox can overflow if your account doesn’t have enough storage to hold it all. If your IMAP account gets full, then when people send you email, their messages bounce back to them.
Note
With the exception of a Gmail account, you can add only email accounts that you’ve previously set up to your Droid 2. If you get a new email account at work or home, get it all set up before you try to add it to your phone.
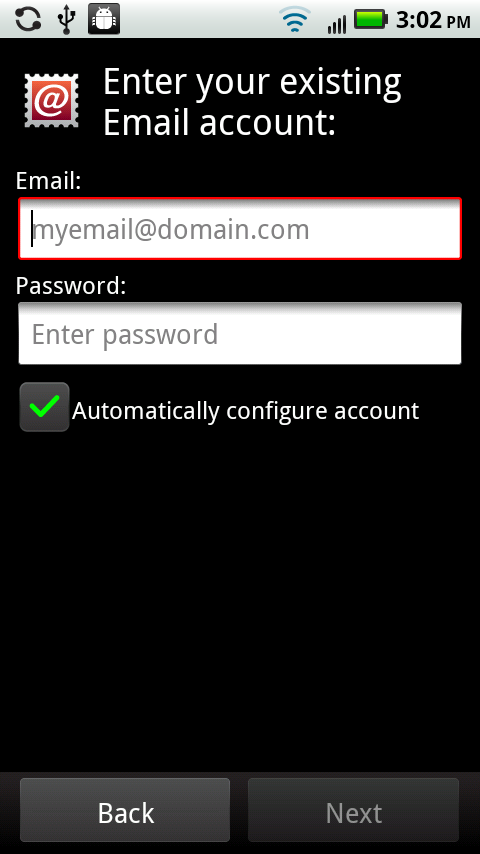
The Droid 2 works with both types of accounts, and setting them up is the same as well. From the Application Tray, tap My Accounts→“Add account”→Email, and from the screen that appears, fill in your user name and password. Make sure that the “Automatically configure account” checkbox is turned on. The Droid 2 now attempts to automatically configure your email account for you. Most of the time it will be able to figure out your settings, but sometimes it fails. In that case, it shows you a screen where you need to fill in techie details, such as server names for the outgoing mail server (SMTP), whether you use POP3 or IMAP, the incoming mail server name, and so. If you don’t have the information at hand (and face it, who does?) check with your ISP or your corporate tech support staff.
You can set up as many email accounts as you want on your Droid 2. (As you’ll see later in this chapter, you can view mail from all of them in a single inbox.)
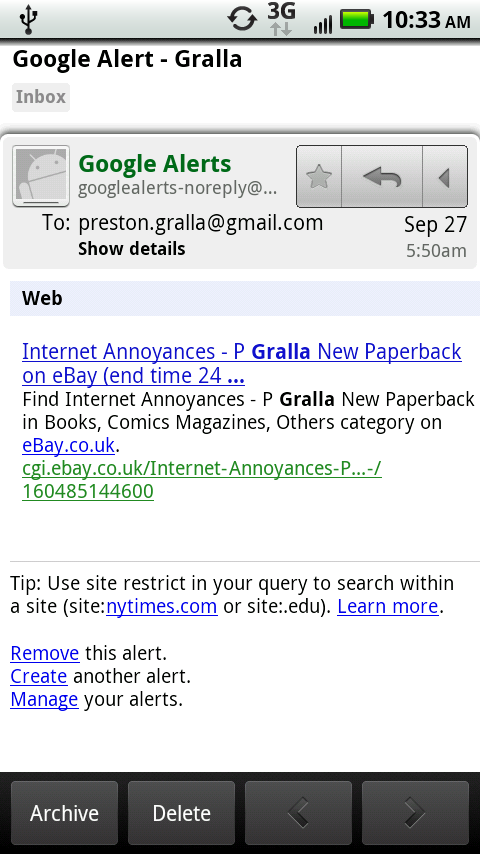
Reading Mail
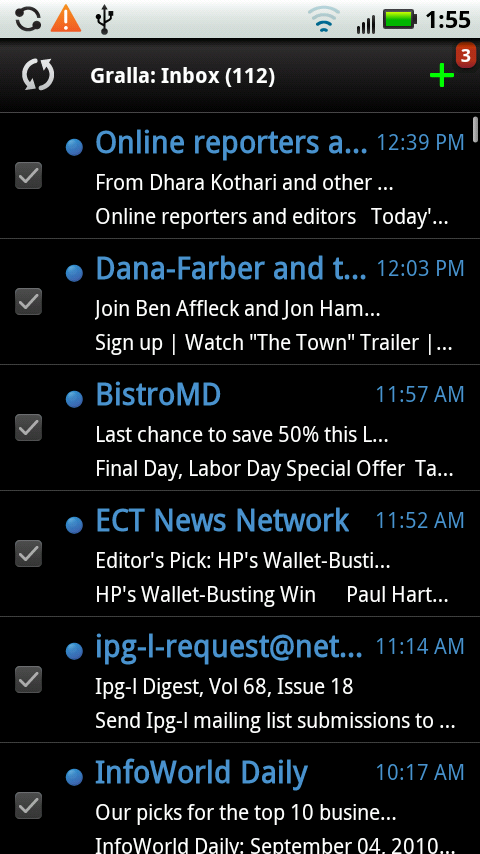
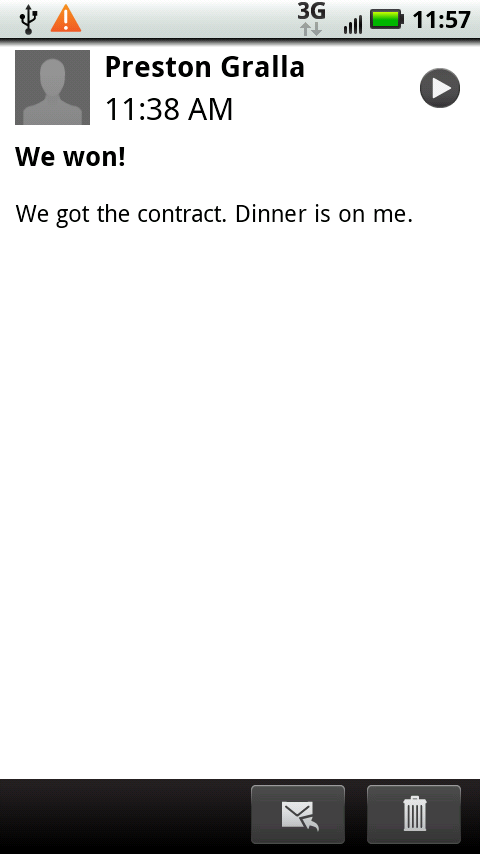
On the Droid 2, reading email on a non-Gmail account is much like reading Gmail. In the Application Tray, tap Email to launch the Email app, and it immediately downloads any waiting mail. As with Gmail, the Email app displays the subject line, time and date of delivery, and the sender of each message. It also displays the first line or so of the message.
Note
If you’ve organized your mail into folders on your computer, that organization won’t be reflected on the Droid 2. You won’t be able to see or use the folders from your computer’s email software.
To read a message, tap it. If there are images in the message, they aren’t displayed off the bat; to see them tap Display Images. At the bottom of the screen are icons that take you to the next ![]() and previous
and previous ![]() messages, for deleting mail
messages, for deleting mail ![]() , and for replying to or forwarding mail
, and for replying to or forwarding mail ![]() . To forward or reply to mail, tap the icon and select whether you want to forward or reply.
. To forward or reply to mail, tap the icon and select whether you want to forward or reply.
Note
If the sender is a contact for whom you have a picture, the contact’s picture will show up next to his name in the From area.
The Droid 2 gives you a few more ways to handle mail. Tap the Menu key, and you have these options:
Move. Lets you move the mail to another folder. If it’s an IMAP account, you see the folders created on the server. However, with a POP3 account, you won’t see other folders here aside from Trash.
Tip
If you’ve set up multiple email accounts, when you go to your inbox, you see email only from the first one you set up, which is your default account. To change your default email inbox, press the Menu key, tap Email Settings→“Default email account”, and then choose which you want to be the default.
Mark unread. Email you haven’t yet read shows up as blue in your inbox, with a blue button. If you want the mail you’ve read to again appear unread (showing up as blue with a blue button), tap this option.
Tip
To read email from another account instead of your default, you can use the Droid 2’s Universal Inbox, or use the Messaging applet to check inboxes individually. For details, see The Universal Inbox.
Flag. If you have mail that you want to mark as important, tap this button to flag it. When you do this, a flag icon
 shows up next to it in the inbox.
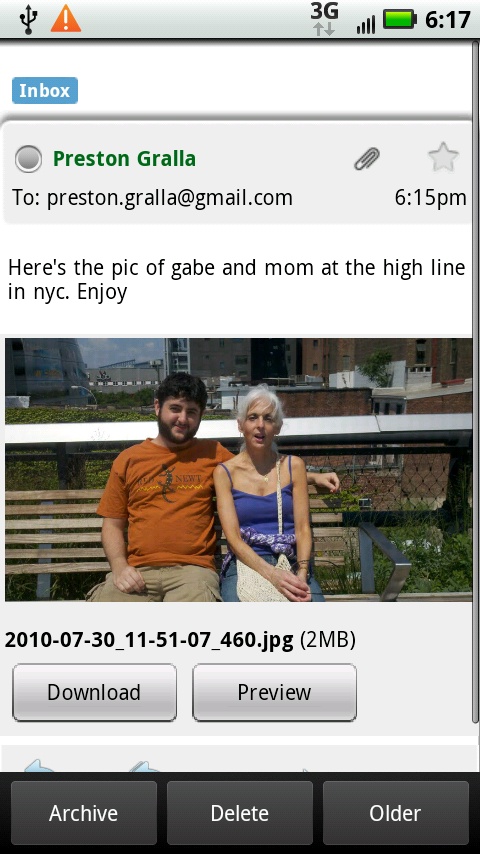
Handling Attachments and Pictures in Email
More and more email messages contain pictures. Sometimes, the picture is in the content of the message itself, such as a company logo. Other times, the picture is an attachment, like a family photo. Email handles the two types of graphics differently.
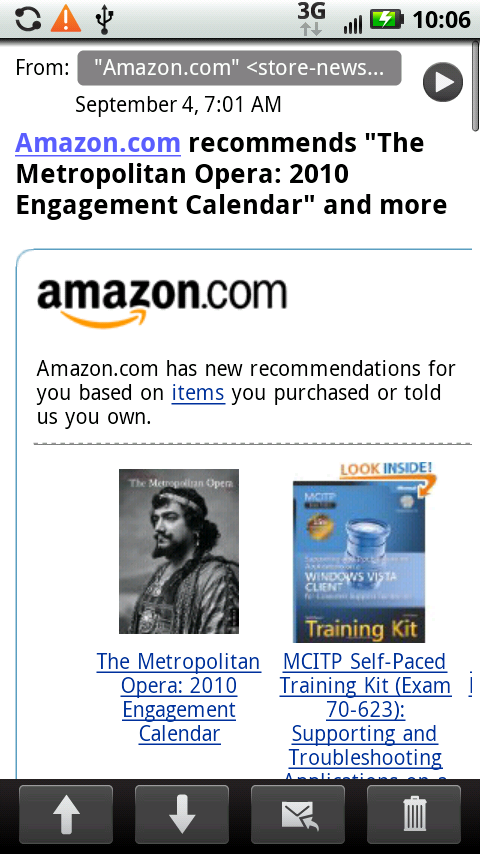
If the graphics are embedded in the content of the message, you’ll see a button labeled “Display Images”. If you’re not curious to see the graphics—most of the time they’re logos and ads, anyway—do nothing. However, if the graphic is an important part of the message, tap “Show pictures”. You see all the graphics on full display, right in the message.
If someone has sent an email and attached a picture, you’ll see a small thumbnail of the graphic in the body of the message. To view the image, tap it; it opens in its own window. Rotate the phone 90 degrees, and you’ll see the full picture as the phone switches to its wider orientation. Tap the ![]() to see details like the photo’s size and resolution. To save the picture, press it, and from the screen that appears, tap Save. It will be saved to your SD card.
to see details like the photo’s size and resolution. To save the picture, press it, and from the screen that appears, tap Save. It will be saved to your SD card.

Attachments in Email
When you receive an email attachment in Word, Excel, PowerPoint, or some other file types, you can preview them but not download them. And some file types you can’t even preview.
If you get an attachment that you can preview, you’ll know when you open the email, because you’ll see an icon representing the file type—a spreadsheet icon, for example. You’ll see the file name and size as well. Tap it, and the attachment opens. If it’s a Word, Excel, or PowerPoint file, the preview opens in an app called QuickOffice that’s built into the Droid 2.
Adding the Sender to Your Contacts
If you get a message from someone and would like to add him to your Contacts list, open the email and then tap the small button to the left of the sender’s name. A screen appears that lets you create a new contact with the sender’s name and email address, or add the information to an existing contact.
Managing Mail
When you’re in your inbox, you’ve got more options for managing your mail. Press the Menu key, and a menu appears with these options:
Select all. Puts a checkmark next to every piece of mail in your inbox, so you can move or delete them en masse.
Folders. This lets you navigate among your folders. In POP3 accounts, you’ll see Inbox, Trash, Outbox, and Sent.
Compose. Tap this to write a new message.
Refresh. This tells the Droid 2 to check for new mail.
Email Settings. This leads you to all your email options. See Accounts for details.
Creating and Sending Mail
To create a new email message, press the Menu key and then tap Compose. If you’re in your inbox, you can instead tap the green + key at the top of the screen.
You create a new email message in nearly the identical way in the Email app as you do in the Gmail app, so go to Writing Messages in Gmail for details about filling in the To, Subject, and other fields.

There are some differences between composing and sending mail in Gmail and in your Email app, however:
To add a recipient without typing, tap the small Add Recipient icon
 in the To: field. Your Contacts list opens. Select a contact to add as a recipient. You can select multiple recipients. When you’re finished, click Done.
Format text using boldface, italics, and so on by using the toolbar
 just beneath the Subject field. You can also add emoticons—little smileys and other symbols—by tapping the smiley face icon. Be sparing, please; not everyone is an emoticon lover.
If you have multiple email accounts, you can select from which account you want to send. Press the Menu key, tap From, and from the menu that appears, select the account.
You can set the importance level of an email. You can mark mail with three levels of importance: Low, Normal, or High. Press the Menu key, tap Importance, and then select which level you want to use. The recipient of the message must use an email program that understands those levels in order to display them.
Adding a Signature
When you send an email, the Droid 2 appends text to the bottom of it: “Sent via DROID on Verizon Wireless.” That text is visible as you type, and you can delete it if you want. In fact, you may want to delete it from every message and to use some text of your own there instead—your email signature.
To add a signature to all your outgoing mail or to delete the Droid 2’s text at the bottom of the screen, when you’re in the inbox, press the Menu key and then tap Email Settings→“Compose options”.
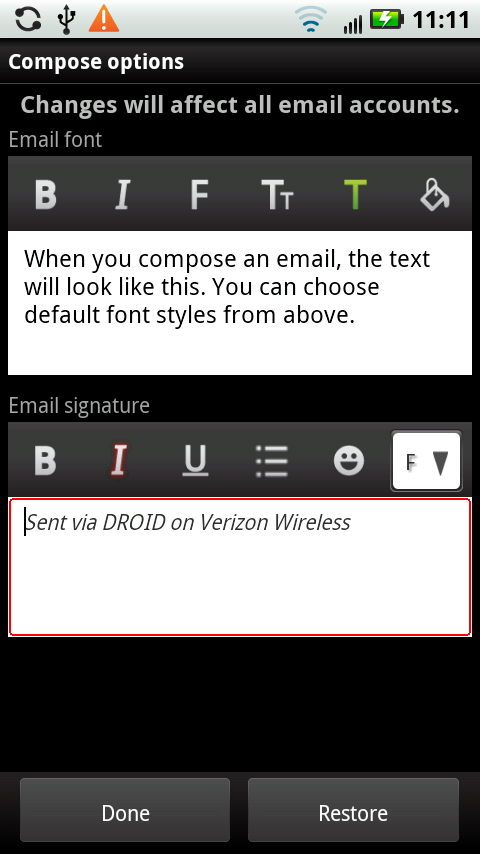
The screen that appears lets you delete the “Sent via DROID on Verizon Wireless.” You can choose to leave it blank, so no text is appended, or else add text of your own. You can also change the format and color of the text that appears in the body of your message. Use the “Email font” toolbar to select your options. You see the changes as you make them. Tap Done when you’ve got your signature and text exactly the way you want them. Tap Restore if you want to undo your changes.
The changes will affect all the email message you send with the Email app. (The signature you make in Email doesn’t apply to your Gmail account. For details about handling signatures in Gmail, see Adding a Signature.)
The Universal Inbox
The Droid 2 has a kind of universal email inbox that lets you check all your email accounts in one fell swoop—no need to check your home, work, and other email separately. To get to it, from the Application Tray, tap Messaging. You see, at a glance, all your email and social networking accounts, as well as your text messaging records. Next to each account icon, you see the number of unread messages or conversations.
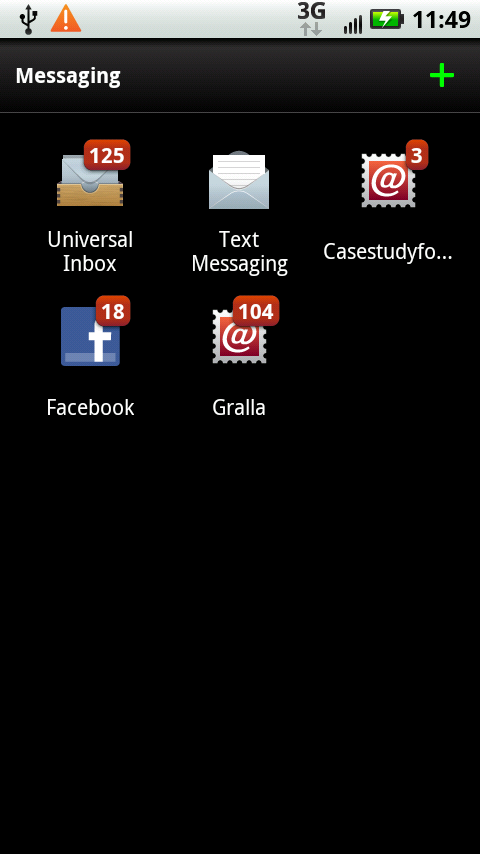
If you want to see messages from any individual account, tap that account’s icon. But the Universal Inbox icon is a better bet. Tap the icon, and you see all the email from all your email accounts in one place. You can then read your mail, and reply to those you want, without having to think which account they came from. The Universal Inbox is smart enough to know that if you received mail to your personal email account and respond to the email, it should send from that account.
Note
You won’t see incoming mail sent to your Gmail account in your Universal Inbox. You’ll have to check that separately.
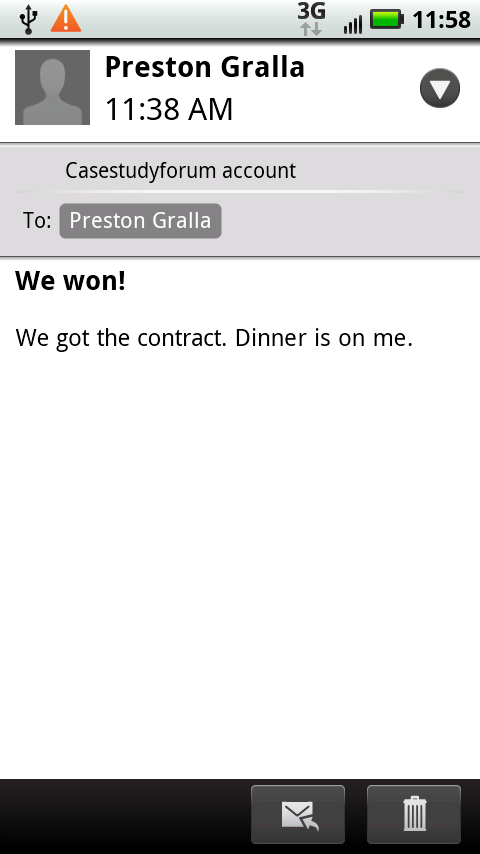
If you want to know from which account you’ve received a particular email, when you’re reading the email, tap the small right-facing arrow ![]() at the top-right of the screen. You see the name of the account to which the email was sent, and more header information. To see less information, tap the arrow, which has now turned into a down arrow
at the top-right of the screen. You see the name of the account to which the email was sent, and more header information. To see less information, tap the arrow, which has now turned into a down arrow ![]() .
.
Using Web-Based Mail Programs
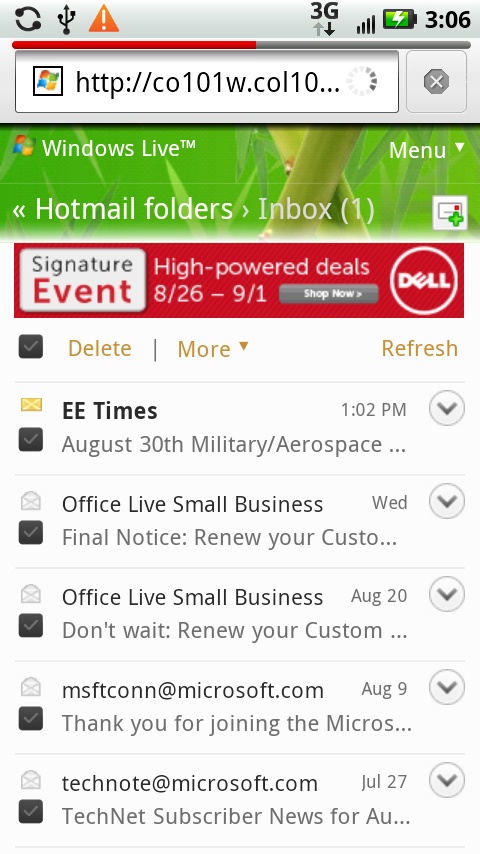
Gmail and Yahoo Mail are both web-based mail programs, but the Droid 2 includes special software that lets you use them without having to visit the Web—just use the specific app on your Droid 2. But there are other web-based mail programs out there, including the very popular Hotmail. You can use just about any email service on the Droid 2, and most likely very easily. Visit the site with your web browser, and you should be able to use the email site just as if you were using it on a computer. In some cases, when you visit the site, you’ll be automatically routed to a site specifically built for smartphones, so that all the features are formatted nicely for your phone.
In some instances, there might even be an app you can download from the Android Marketplace, or from the Web, that you can use instead of a web browser. Search the Android Marketplace (Using Market) to see.
Facebook on the Droid 2
Folks are shifting the way they communicate with one another electronically, using social networking sites (notably Facebook) more, and using email less. If you’re a Facebook fan, you’ll be pleased to know that the Droid 2 lets you use Facebook without having to visit the Web—just use the Droid 2’s built-in Facebook app.
To set up your Facebook account, from the Application Tray, tap My Accounts→“Add account”→Facebook. Enter your Facebook user name and password, and you connect to your account. It’s that simple.
Note
When you set up a Facebook account, your Contacts list will check Facebook to see if it has pictures for any of your contacts. If so, it displays those friends’ Facebook pictures in your Contacts.
Once you’ve set up your account, there are two ways to use Facebook—using the Droid 2’s Facebook widget, or using the Facebook app in the Messaging area. The widget is far more comprehensive and gives you access to a full range of Facebook features. The app in the Messaging area only shows you Facebook messages sent to you.
Using the Facebook Widget
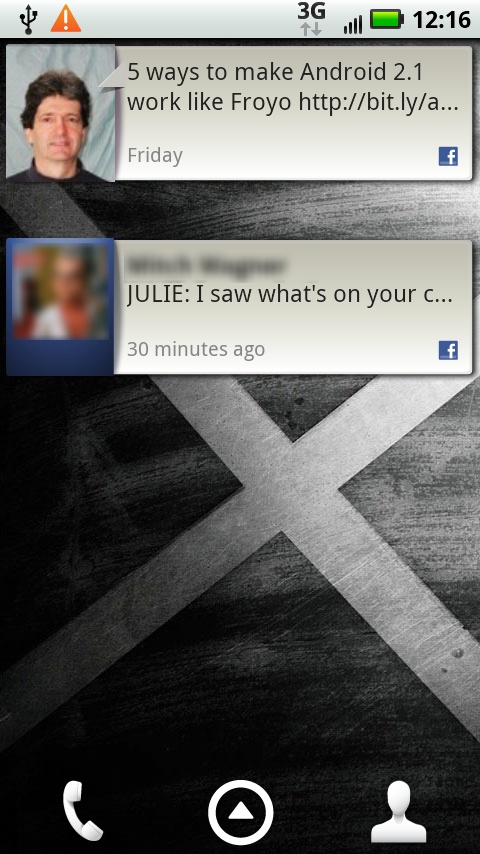
To use the Facebook widget, go to the Social Networking pane by going to the Home screen and swiping to the third pane to the left. (For details, see Customizing the Home Screen and Panes.)
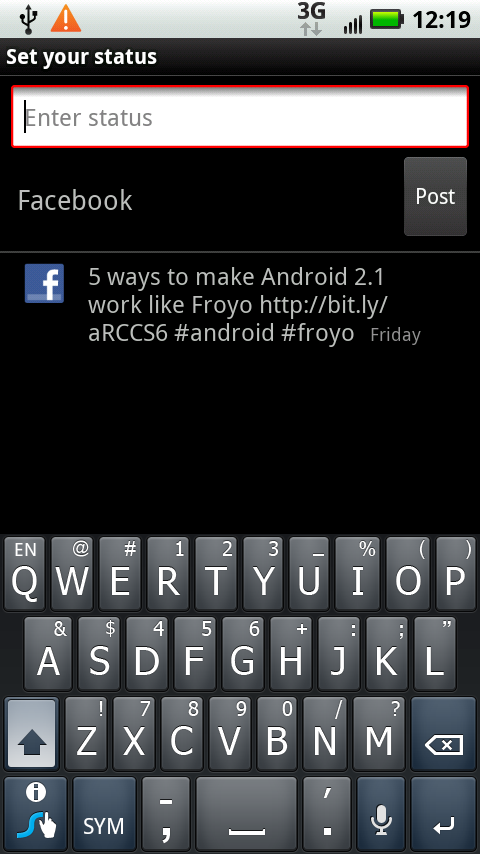
The widget displays the most recent status update you’ve posted to Facebook, and your friends’ most recent updates, too. To post a new update, tap your most recent status update, type your text, and then tap Post.
Note
The Droid 2 includes built-in apps for other social networking services, including Twitter and MySpace. Tap the My Accounts icon in the Application Tray, and select which service you want to set up an account for.
To read a status update from a friend, tap it in the widget. You see the full update, not just a shortened version. You can add a comment, or add a “Like” by tapping the appropriate button. You’re able to see comments to the update as well, and who has added a “Like” to the post. You can also tap any links to follow them to the web page or Facebook page.
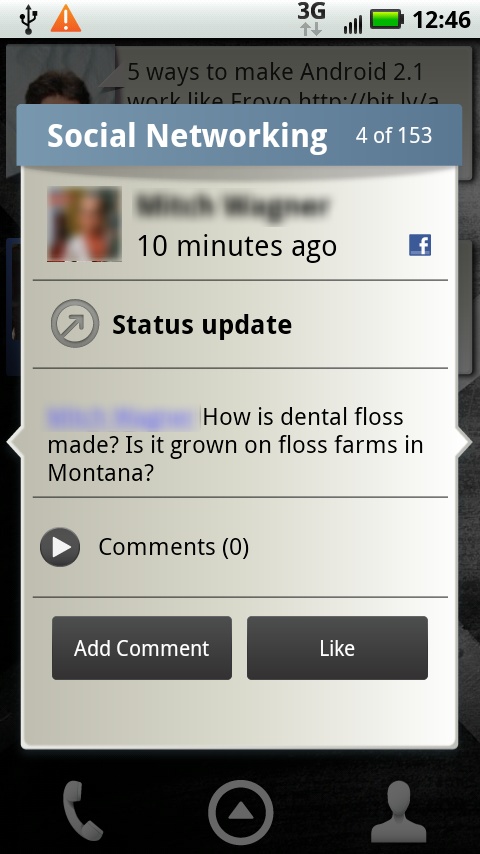
But wait—there’s more! Tap the “Status update” button in the middle of the update, and you come to yet a more complete screen that lets you also write a message on the person’s wall.
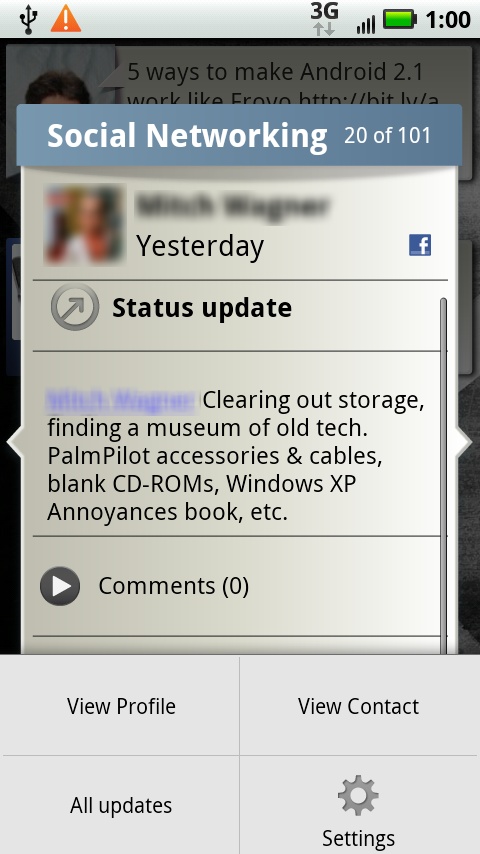
Press the Menu key while you’re reading an update, and you’ll find options for viewing the friend’s profile on Facebook, viewing the friend’s contact information on your Droid 2, seeing a scrollable list of all updates from all your friends, and for setting Facebook widget settings, such as for how long to show updates from friends. On the scrollable list of updates, tap any to see full details.
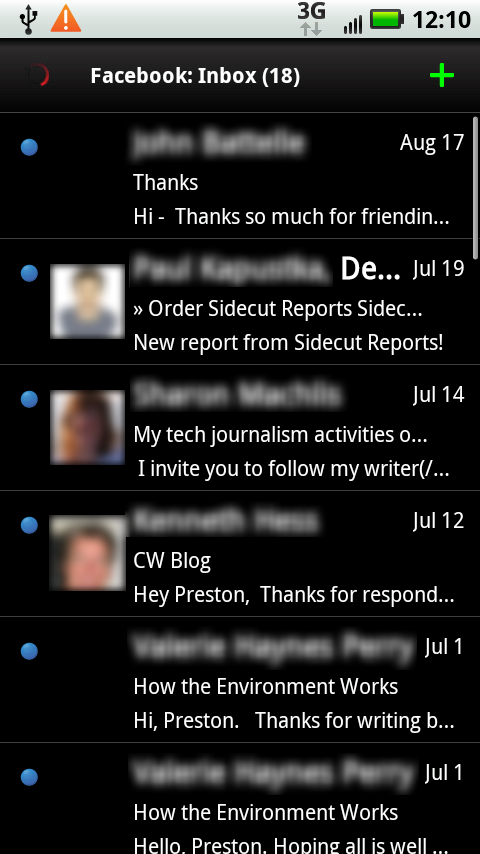
Using the Facebook App
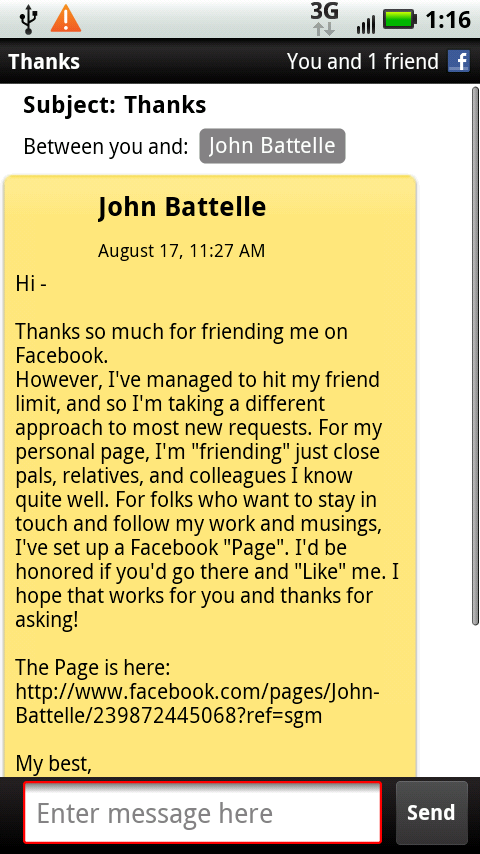
To use the limited Facebook app, in the Application Tray, tap Messaging→Facebook. You see a scrollable list of all the Facebook messages sent to you. Any you haven’t read have a blue button next to them. Tap any message to read it.
When you read a message, a text box appears at the bottom of the screen. Type a message and tap Send to reply to the message. You can also compose a new message from inside the app. Press the Menu key, select Compose, and tap away.