
Chapter 12. Syncing and Transferring Music, Videos, Pictures, and Other Files
Your Droid 2 is not an island—it’s built to work with your computer as well. If you’ve got a music collection on your PC, for example, you can sync that collection to your Droid 2 and listen to music there. You can also transfer pictures and videos between your Droid 2 and your PC or Mac. In fact, you can transfer any file between your Droid 2 and your computer.
Specifically, when you transfer and sync files between your Droid 2 and your computer, they go on the phone’s SD card. The Droid 2’s main memory is used for storing system files and applications, rather than music, videos, and pictures.
Connecting Your Droid 2 to Your Computer
To transfer files between your Droid 2 and your computer, first connect your Droid 2 to either your Mac or PC using the Droid 2’s data cable. Connect the micro USB plug into your Droid 2 and the normal-sized USB plug into your computer’s USB port.
A USB icon appears in the Notification bar ![]() . Pull down the Notification area and then tap the USB connection notification.
. Pull down the Notification area and then tap the USB connection notification.

Note
When you connect your Droid 2 to your Windows PC for the first time, the PC may not recognize it. It may need a special driver—a small piece of helper software—in order to see the Droid 2 and communicate with it. Your PC should look for and install the drivers automatically, assuming it’s connected to the Internet. If not, go to http://bit.ly/brh0YH and click the “Motorola 4.7.1 Driver with MotoConnect” link.
A screen appears with these options:
PC mode. In PC mode, both your computer and your Droid 2 can store files, change files, and use files on your phone’s SD card. If you instead choose USB Mass Storage, described below, your phone won’t be able to access the SD card while it’s connected to your computer.
Windows Media Sync. Select this option if you want to sync music files using Windows Media Player.
USB Mass Storage. Select this option if you want to transfer and manage files on your Droid 2 using your computer’s file manager, such as Windows Explorer on the PC or Finder on the Mac. When you select this mode, only your computer will be able to make changes in the Droid 2 storage, unlike PC mode, in which the Droid 2 can make changes as well.
USB Mass Storage mode can let other devices access your Droid 2’s storage, too. So, for example, car stereos that can access USB flash drives and play music from them can also connect to your Droid 2 and play music from it.
Charge only. Select this option if you only want to charge your Droid 2 using your computer, and don’t want to transfer files.
Tip
If you want to use software other than Windows Media Player or Windows Explorer to transfer files between your Droid 2 and your PC, try the free Motorola Media Link found at www.motorola.com/medialink. (It works only for PCs, not for Macs.)
Transferring Files Using Your PC
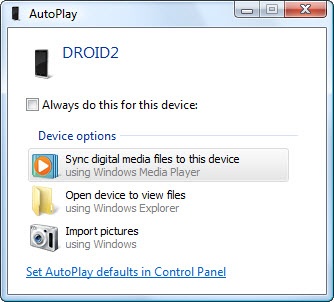
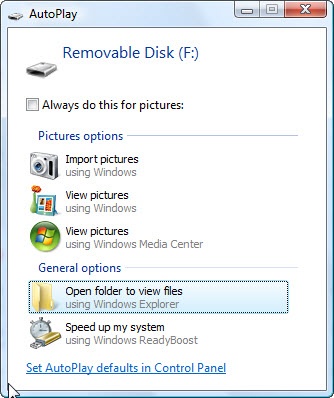
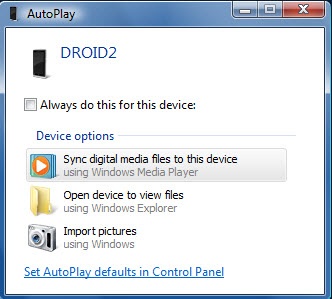
When you connect your Droid 2, the AutoPlay screen appears on the PC (as it always does when you connect a USB device to your PC). What appears on this screen varies slightly depending on whether you’ve connected using PC mode or USB Mass Storage. If you’ve chosen USB Mass Storage, the screen tells you what drive letter the Droid 2 will use in Windows. It also offers a few more options versus connecting in PC mode, including being able to import photos. If you select PC mode, the AutoPlay screen will identify the device as a Droid 2, rather than as a generic lettered drive in Windows Explorer.
Note
If you have a Mac, flip to Transferring Files Using Your Mac.
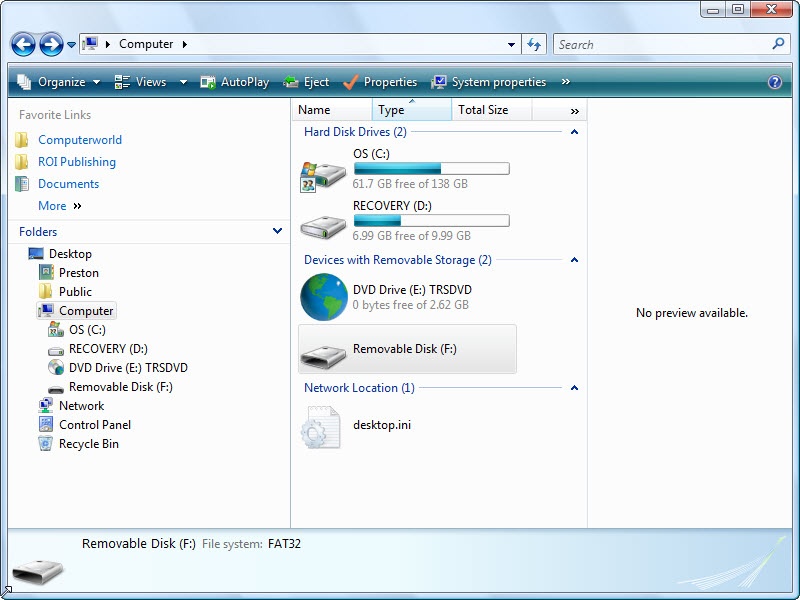
After you’ve done that, launch Windows Explorer. Your Droid 2 now shows up as a removable disk, just like any USB drive.
Tip
Before unplugging your Droid 2 from your PC, right-click the Safely Remove Hardware icon in your Windows notification area and select Safely Remove Hardware. Then unplug the Droid 2.
You can now use your Droid 2 as if it were any USB flash device—copying files to and from it, creating folders, and so on. That’s fine in theory, but in practice what can you actually do? You’ll find many folders on the Droid 2, most of which have names that make no sense, such as “.Trash”, or “dcim”.
Note
When you browse the Droid 2 using Windows Explorer and transfer files between your PC and the Droid 2, you can browse and transfer files only to and from the SD card, not the Droid 2’s built-in storage. Changing or adding files to your Droid 2’s built-in storage rather than the SD card could damage the phone.
There are several important folders that contain information you might want to transfer from your Droid 2 to your PC, or vice versa. You’ll see a lot more folders, but these are the important ones:
Downloads. If you’ve downloaded content to your Droid 2 from the Internet, such as pictures or web pages, you see them in here.
DCIM/camera. Here’s where the Droid 2 stores all the photos you’ve taken. Drag photos from this folder to your PC to copy them, or drag photos here from your PC to put them into the Droid 2 Gallery. See Opening the Gallery for more information about the Gallery.
Music. The Droid 2 stores music here, although it might also store music in other places as well. If you download music files using the Amazon music app built into the Droid 2, for example, there will be an Amazonmp3 folder where your music is stored.
Video. If you’ve transferred files to your Droid 2 using Windows Media Player, they’re in here.
Videos. If you use the Droid 2’s built-in Video Editor Lite app, then after you save edited videos, you’ll find them in this folder.
Note
There’s some tech-talk you need to know before transferring videos from your Droid 2 to your PC. When you record videos on your Droid 2, they’re recorded in a format called .3pg. Depending on the versions of Windows and Windows Media Player you have, your PC might not be able to play those videos. If you have Windows 7 and Windows Media Player 12 or above, you’re set. But if you have Windows Vista, Windows XP, or any version of Windows other than Windows 7, you’re out of luck, since Windows Media Player 12 or above won’t run on those operating systems.
However, if you’re willing to try being a geek for a while, you can transfer the .3pg files to your PC, and then try using a file conversion program to convert the .3pg files to a format that older versions of Windows Media Player can handle, such as .wmv. Go to www.download.com or www.pcworld.com/downloads/downloads.html, and search for 3pg or media converter.
Playlists. Here’s where the Droid 2 stores playlists, so you can transfer them between your PC and your phone.
Transferring Files Using Your Mac
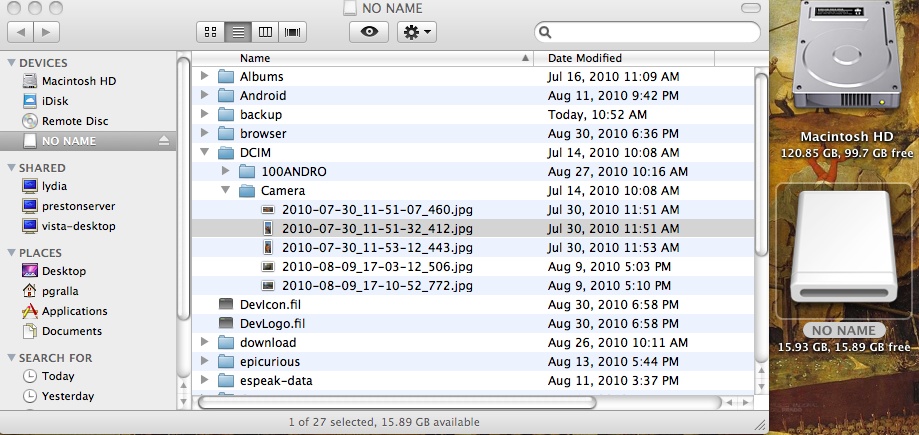
Connect your Mac to your Droid 2 using USB Mass Storage Mode, and an icon for the Droid 2 appears on your desktop. Browse it using the Finder as you would any other USB storage device. You can copy, move files, and so on between your Droid 2 and your Mac.
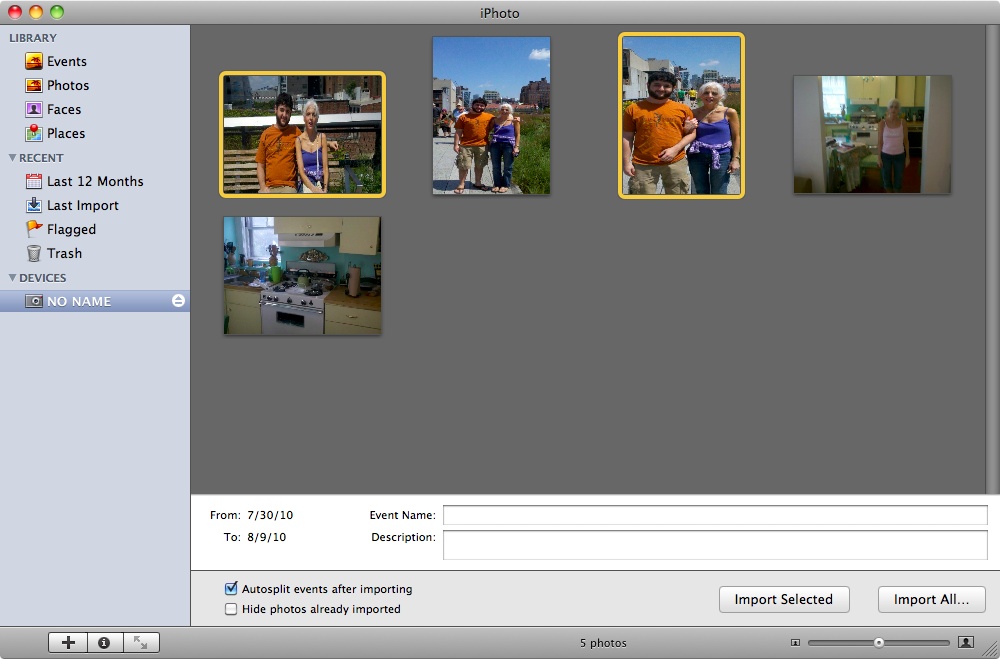
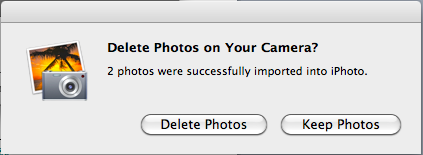
When you connect your Droid 2 to your Mac in USB Mass Storage mode, iPhoto immediately launches, and opens to the folder on your Droid 2 that contains your photos (DCIM/camera). To import photos and use them in iPhoto, select individual photos or all of them, and then select either Import Selected or Import All, and you’ll be able to use the photos from your Droid on your Mac. After you’ve imported the photos, the Mac asks if you want to delete the pictures you’ve imported. If you want to keep them on your Droid 2, make sure to click Keep Photos.
You can also use Finder to copy photos and any other files back and forth between your Mac and your Droid 2. The Droid 2 appears like any other removable UsB drive in Finder.
Transferring Music, Videos, and Pictures from a PC Using Windows Media Player
There’s a much better way to transfer media files from your PC to your Droid 2 than using Windows Explorer: Windows Media Player. Not only is Windows Media Player more automated, but it also lets you preview and play the files before syncing them over.
Note
Even though there’s a version of Windows Media Player for the Mac, you can’t use it to transfer and sync files to your Droid 2. To move files between your Droid 2 and Mac, you’ll have to use Finder.
After you’ve connected your Droid 2 to your computer, you can transfer music, video, and pictures to it using Windows Media Player:
When you connect your Droid 2, select USB Mass Storage, Windows Media Sync, or PC mode from the USB notification.
Note
If you have DRM-protected music or media on your PC, when you transfer that music to your Droid 2, the Droid 2 won’t be able to play it. DRM stands for digital rights management, and it limits the distribution of music files that have been paid for, making it difficult for them to be played on devices other than the one the music was purchased on.
If you’ve chosen USB Mass Storage or PC mode, when the AutoPlay notification screen appears on your PC, select “Open folder to view files”. On your PC, run Windows Media Player.
If you’ve chosen Windows Media Sync, select “Sync digital media files to this device using Windows Media Player”.
Windows Media Player starts.
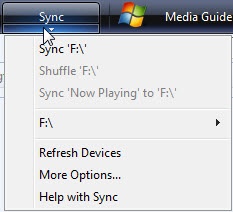
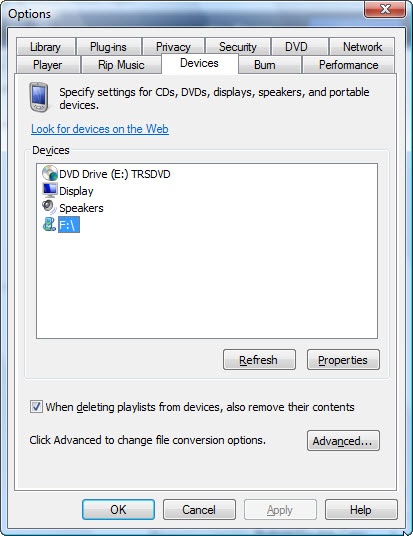
Hover your mouse over the Sync button at the top of Windows Media Player until a small down arrow appears just underneath the button. Click the arrow, and then select More Options→Devices.
Among the devices you see listed is a new drive that wasn’t on your PC previously—that’s your Droid 2. Highlight it and click Properties.
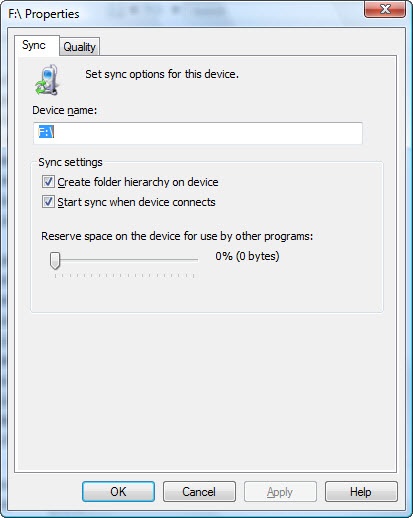
The Properties screen appears. You’ll set three important options here:
Create folder hierarchy on device. This means that when you sync your music files to your Droid 2, it creates folders on the Droid 2’s SD card that are the same as on your PC. Make sure you leave this turned on.
Start Sync when device connects. If you select this option, it means that as soon as you connect your Droid 2 to your PC, the sync starts, without you having to take any action. Select this only if you’re absolutely sure that you want all music on your PC to be transferred to your Droid 2, and vice versa. If you don’t want all your music transferred, make sure this box is unchecked. To be on the safe side, turn off this option, at least the first several times you sync your Droid 2 and PC. You can always turn it back on later.
Reserve space on the device for use by other programs. If you’re worried that the music library from your PC will take up all the space on your Droid 2, choose the amount of space you want to keep for other files on your Droid 2’s SD card. If you ever come up against the limit of the amount of music you can transfer from your PC to your Droid 2, you can delete music on your Droid 2 to make room for new tunes—or come back to this screen and decrease the amount of space given to other files and applications.
When you’re done making your choices, click OK and then click OK again when you get back to the Devices tab.
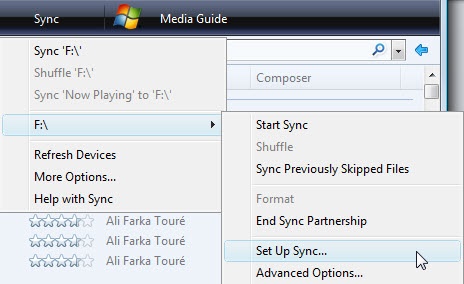
Click the down arrow underneath the Sync button, and hover your mouse over the drive assigned to your Droid 2. From the menu that appears, select Set Up Sync.
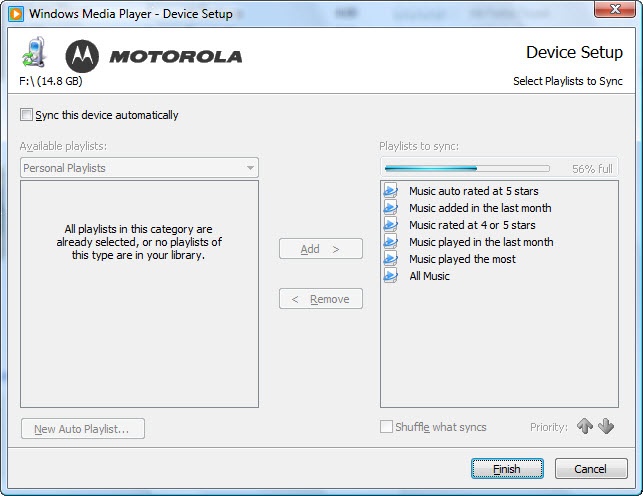
The Device Setup screen appears. Make sure that the box next to “Sync this device automatically” is turned off if you don’t want the Droid 2 to always automatically sync whenever you connect it to your PC and run Windows Media Player. If you want to customize the general types of music to sync—such as only five stars, only music played in the past month, and so on, make your selection here. You can also have your playlists synced to your Droid 2, if you have any.
When you finish making your choices, click Finish to go back to the main screen of Windows Media Player.
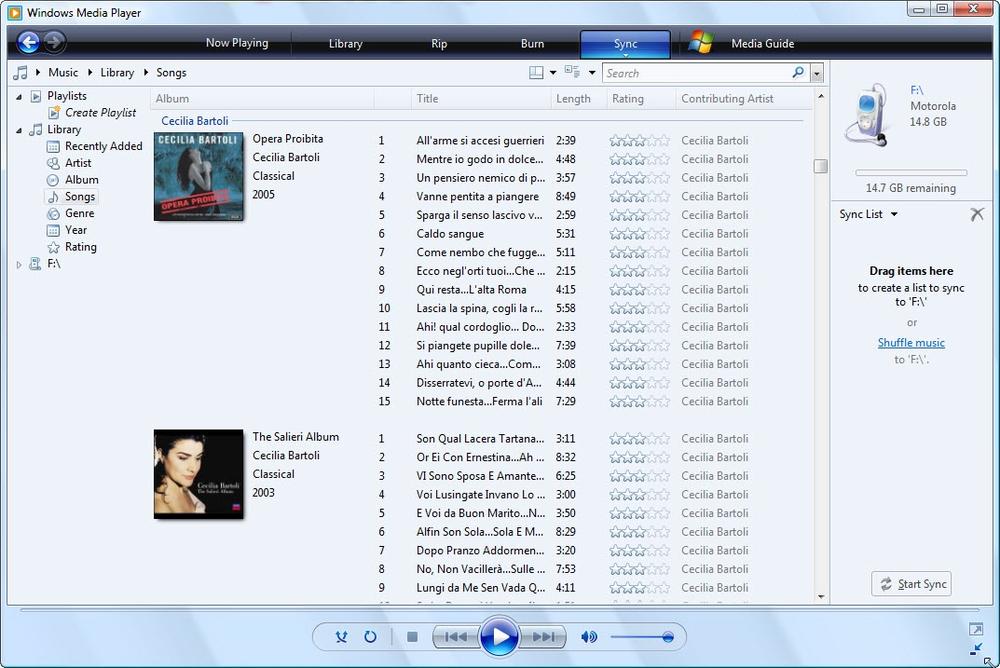
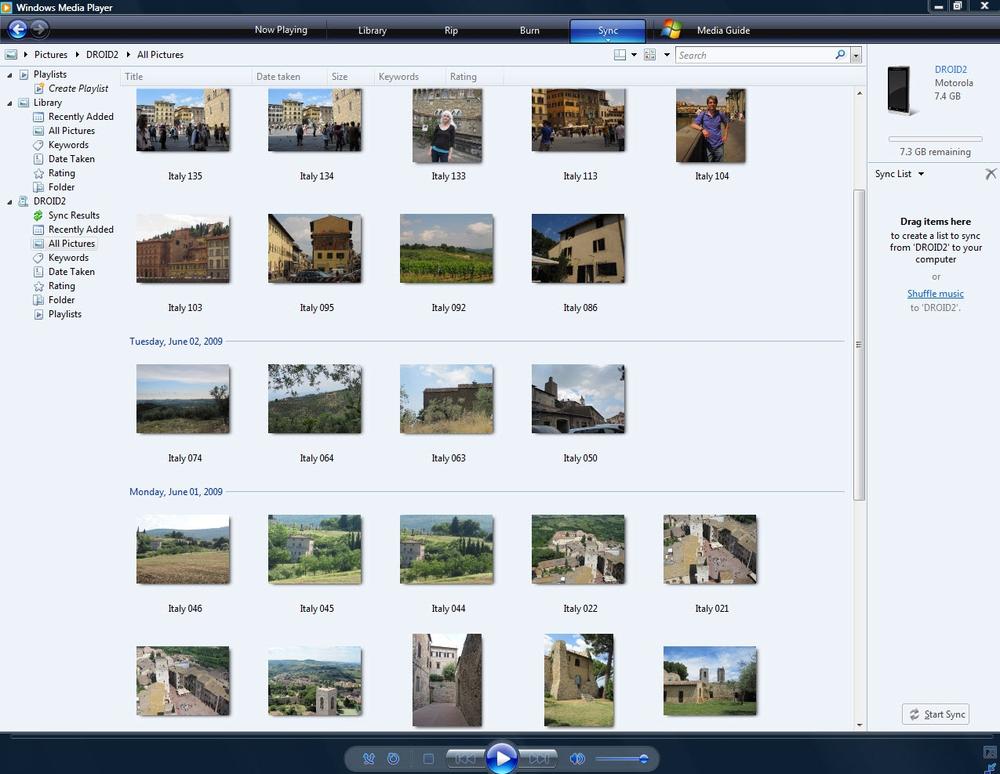
At top right, there’s an icon representing your Droid 2, listing it as a removable drive, showing its drive letter, and showing you how much storage space is available on its SD card.
Drag all the albums and tracks you want to synchronize to your Droid 2 from the list of music on your PC on the left side to the Sync List area just beneath the icon representing the Droid 2.
After you drag each album or track, it appears on the Sync List. Review the list, and remove any files you don’t want to sync.
If you have other media, such as pictures, video, or recorded TV shows that you want to sync to your Droid 2, go to those areas in the Windows Media Player.
Drag the files you want to sync to the Sync List area, just as you did for music.
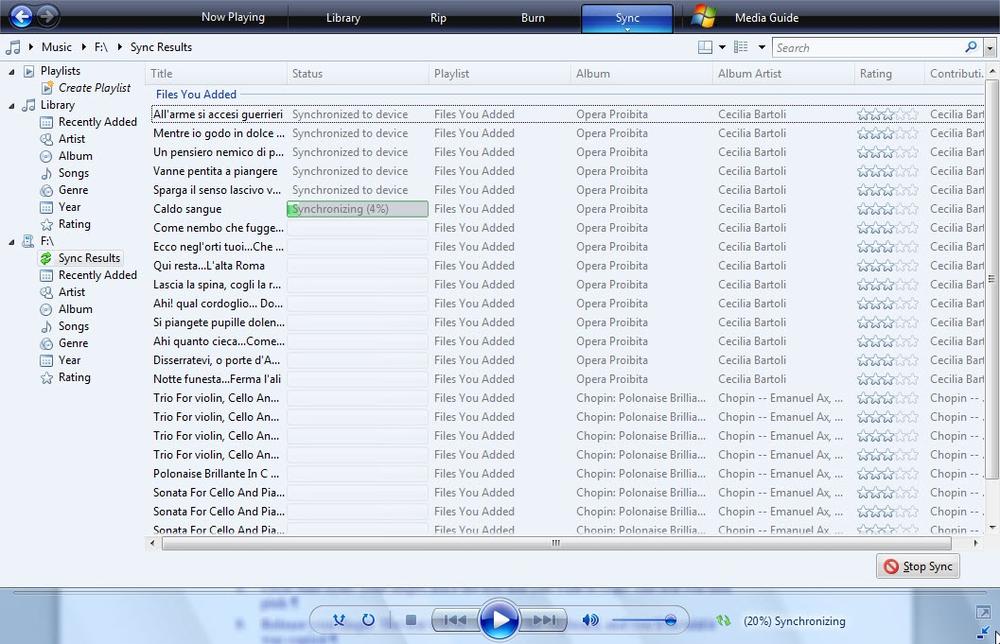
Click Start Sync.
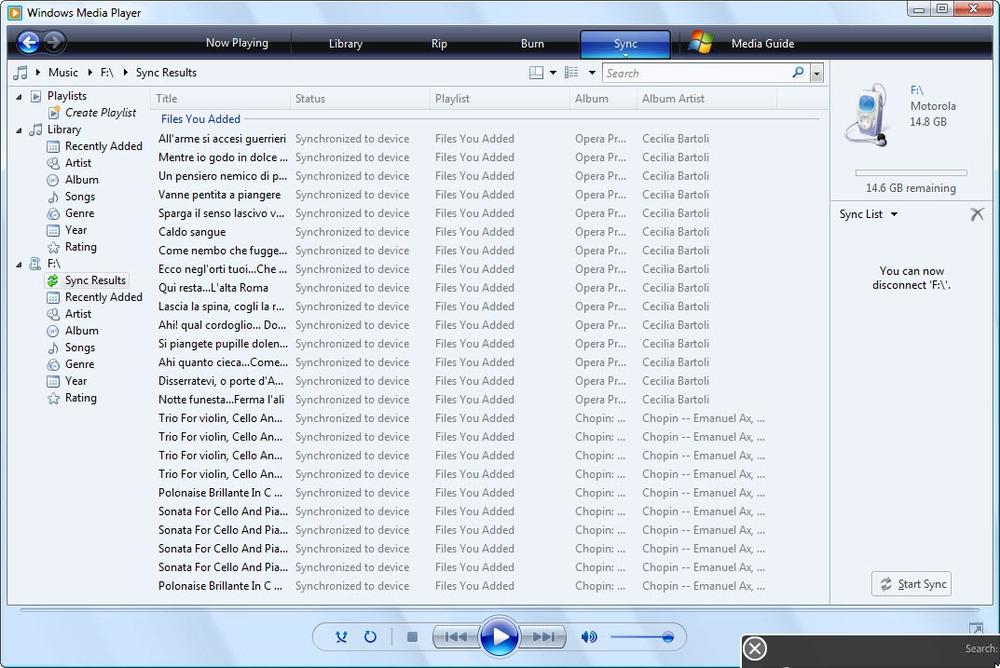
A screen appears showing you the full list of files that are syncing. You see the progress of each file as it syncs. After each file syncs, the file turns gray, and the status line next to it reads “Synchronized to device”. When all the files have synced, on the right side of the screen you see a notification saying that you can now disconnect your Droid 2.
Note
If you want all your files to be synced every time automatically, and you made the “Start sync when device connects” choice, you won’t have to drag files to the Sync List area, or click Start Sync. Synchronization begins automatically.
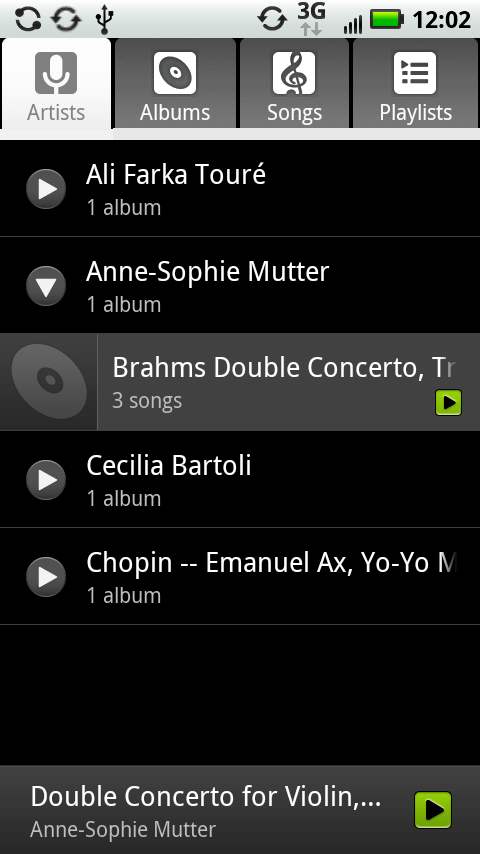
Your music, video, and pictures will now be available on your Droid 2. Tap the Music app in the Application Tray, and you’ll be able to play and manage your music. (For more information about playing music, see Chapter 4.)
Transferring Music, Videos, and Pictures to Your PC
Windows Media Player does double-duty and works in both directions—you can use it to transfer music, videos, and pictures from your Droid 2 to your PC as well. First, follow the instructions starting on Transferring Music, Videos, and Pictures from a PC Using Windows Media Player to connect your Droid 2 to your PC, and set up sync options. Then:
At the top of the screen, click the Sync button.
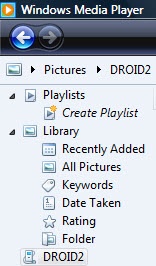
On the left-side navigation panel of Windows Media Player, you see the Droid 2 listed.
At the left top of Windows Media Player, choose the type of files you want to transfer to the Droid 2—Music, Pictures, Video, Recorded TV, or “Other media”.
The Droid 2 may not be able to play every type of video, recorded TV, or other media file, because it has different capabilities than Windows Media Player. For the tech-inclined, here are some details: It plays MP3, WMA, and other types of music files; it can display photos and graphics in JPEG, GIF, PNG, and BMP; and it plays video in WMV, MPEG-4, H.263, and H.264 AVC, as well as its own 3PG format.
Note
Motorola has free software you can download and use to transfer and sync photos, video, and music between your Droid 2 and PC. It’s called Motorola Media Link. To get more details and download it, go here: www.motorola.com/medialink.
Drag the photos or other files you want to transfer to your PC from the listing in the library area to the Sync List.
The button at the bottom right of your screen changes from Start Sync to “Copy from Device”.

Transferring Pictures to Your PC in Bulk
If dragging files one by one in Windows Media Player seems like too much work, there’s a simpler solution, as long as you want to copy all your Droid 2 pictures to your PC.
Note
When you select this method, all your pictures will be transferred from your Droid 2 to your PC; you won’t be able to select individual pictures. To select individual pictures, see the previous section.
Here’s how to do it:
Connect your Droid 2 to your PC, and select USB Mass Storage or PC mode (Transferring Music, Videos, and Pictures from a PC Using Windows Media Player).
The AutoPlay screen appears on your PC.
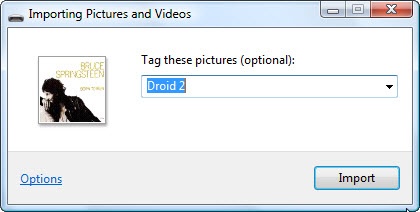
A screen appears asking if you want to add tags to your pictures. When you tag a picture, you add text information that isn’t visible, but that can be used to find, sort, and display your pictures. For more details about tags, see Photo Settings. Add a tag if you want.
To customize the way Windows imports your pictures, click the Options link.
You arrive on the Import Settings page, where you can change the folder where the pictures are imported—if you don’t change the folder, they go into a subfolder in your PC’s Pictures folder. You can also change other options, including the subfolder that will hold the folders, the file names each picture is given, whether to erase photos from the Droid 2 after the photos are imported, and so on.
When you make changes to the Import Settings screen, those settings will be applied whenever you attach your Droid 2, or any camera, in the future. You can always change the options by going back to this screen.
When you’re done making any changes to the settings for importing pictures, click OK. Click Import when the Import screen appears.
Windows imports all the pictures, and shows you the progress of the files as they’re imported. When it’s done importing the pictures, it opens the Windows Picture Gallery to the folder where you’ve imported the photos.

Using the Droid 2 Files Application
If you want to browse through the files of your Droid 2, you don’t need to rely on your PC or Mac—you can use the Droid 2’s Files app. From the Application Tray, tap Files to launch it.
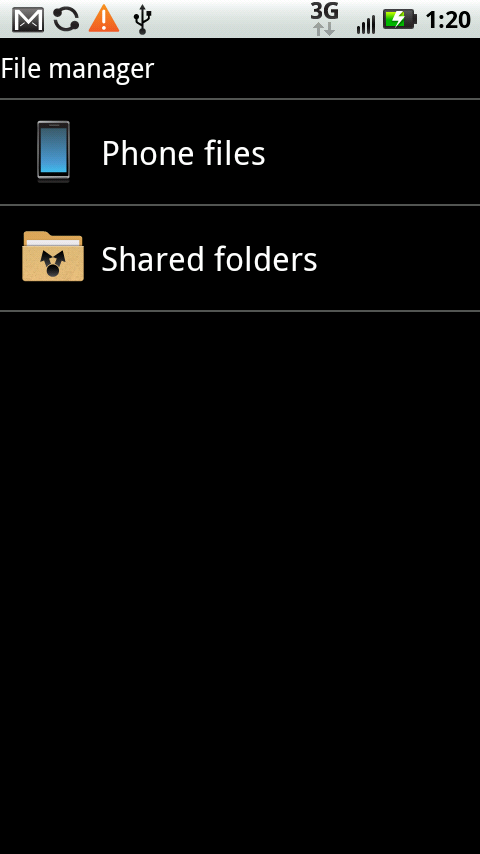
To browse your SD card, tap the Phone files icon, and a file manager opens. Tap “Phone files” to browse the files on your SD card, in much the same way that you can browse remotely using Windows Explorer or the Mac Finder.
Note
When you run the Files app, you also see a “Shared folders” choice. To use the shared folders feature you need to connect to a media server via Wi-Fi. Check your media server’s documentation for setting up a server, including passwords and user names. Once you know the server’s name, password, and user name, you can connect to the media server from the Files app’s shared folders feature.
You see the name and date of creation of each folder, as well as the number of items in it. Tap any folder to open it, and then tap any file to open it—view a photo, play a piece of music, and so on, using the Droid 2’s various built-in apps.
Hold your finger on a folder, and you get a menu of options for file and folder management:
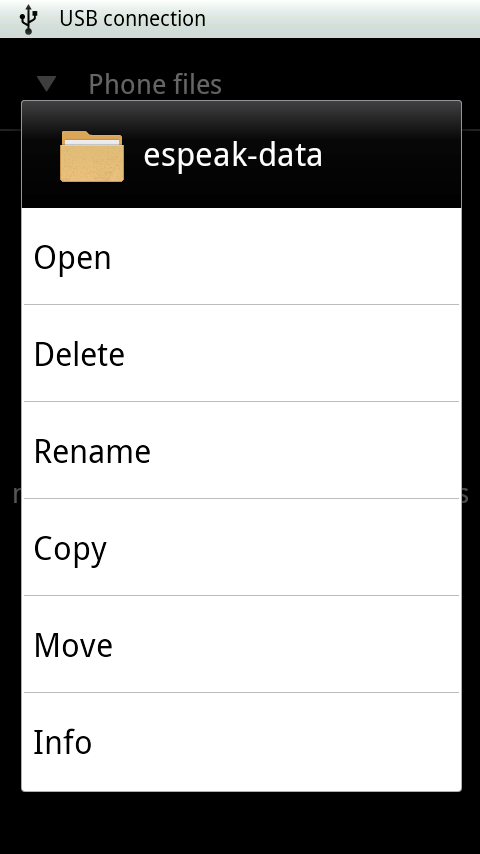

To create a new folder, when you’re viewing a list of folders, tap the Menu key, select “New folder”, type its name, and then tap OK. To select multiple folders and move or delete them all, tap the Menu key; checkboxes appear next to all folders. Tap any folders you want to select for moving or deleting, and then tap Move or Delete from the menu.
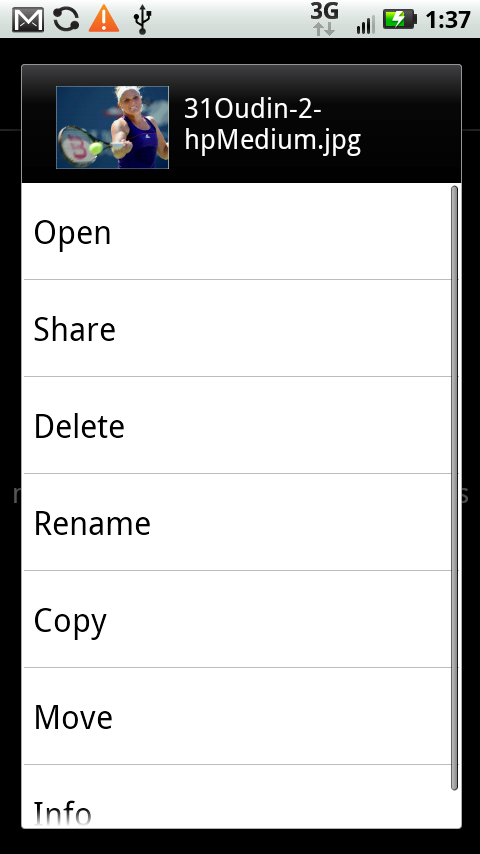
When you hold your finger on a file, you get the same Open, Delete, Rename, Copy, Move, and Info options, plus Share, which lets you send the file to a friend via email or text message.
To select multiple files to move or delete, when you’re in a folder viewing a file list, press the Menu key. Empty checkboxes appear next to all files in the list. Tap any files you want to select for moving or deleting, and then tap Move or Delete on the menu.
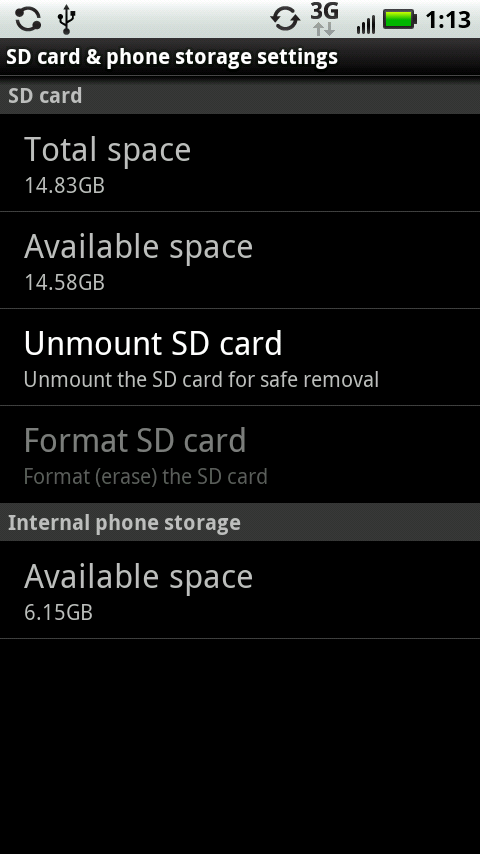
Checking Space on Your SD Card
If you transfer lots of music and files from your PC or Mac to your Droid 2, you may eventually run out of storage space. It’s a good idea to regularly check how much space you’ve got left on it. To do so, from the Home screen press the Menu key and tap Settings→“SD card & phone storage”. You see the total amount of capacity on your SD card and how much storage you have free.
If you’re running out of space on your SD card, delete files from it. If you’re deleting music, use the Music app rather than the Files app, because if you delete the files using the Files app, the Music app will still show the music as being present, even after the files are gone.