Generators are a class of effects that create (or generate) new video information rather than modify existing video. After you have generated it by rendering, a generated clip can be used just like any other clip. Text is a high-profile member of the generator class of effects; using the text generator to produce titles is covered later in this chapter.
Final Cut Express’s generators include the following:
Bars and Tone, which generates NTSC or PAL color bars and includes a 1-kHz audio tone with an adjustable level.
More Bars & Signals, a suite of specialized color bar patterns and gradients.
Matte, which generates solid, single-color clips.
Render, which generates color gradients and different types of “noise.”
Shape, which generates an opaque geometric shape on a black background. You can scale or color the shape.
Slug, which generates solid black frames and silent audio. (There are no controls for this effect.)
Text, which generates simple titles using TrueType fonts loaded in your system.
Title 3D and Title Crawl, two text generators from third-party developer Boris. These offer much more precise control over title text, such as individual letter control over kerning. See “Creating titles with Boris Calligraphy” later in this chapter.
To add a generator to a sequence:
In the Viewer, choose an item from the Generator pop-up menu in the lower-right corner (Figure 17.1).
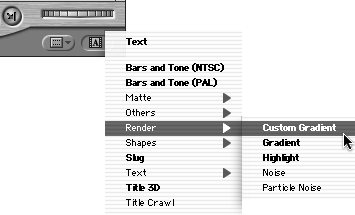
Figure 17.1. Choose a generator from the Generator pop-up menu in the lower-right corner of the Viewer window.
The generator effect is loaded into the Viewer as an unrendered clip.
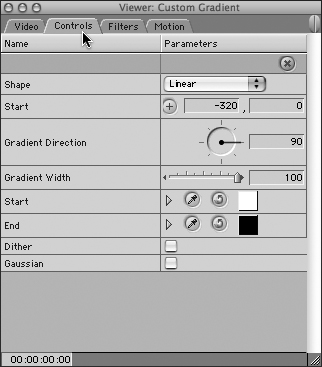
Click the Controls tab to access the generator controls (Figure 17.2).
Adjust the generator’s controls; then click the Video tab to view the generator clip in the Viewer.
Edit the generator into your sequence just as you would a clip.
Render your generated clip. You must render it before you can play it back. Select the clip; then choose Sequence > Render Selection.
Tip
When you are configuring settings for a generator clip, it’s much easier to see what you’re doing if you drag the generator clip’s Controls tab out of the Viewer window first. Now you can view the generator image on the Viewer’s Video tab as you configure the settings on the Controls tab.
To edit a generator in a sequence:
Double-click the generator clip in the Timeline to open it in the Viewer.
Click the Controls tab; then make your adjustments.
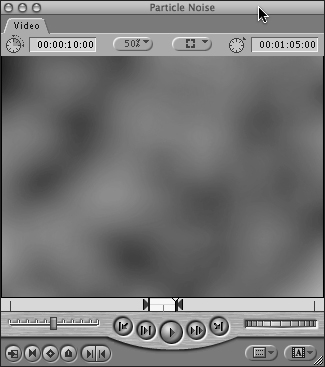
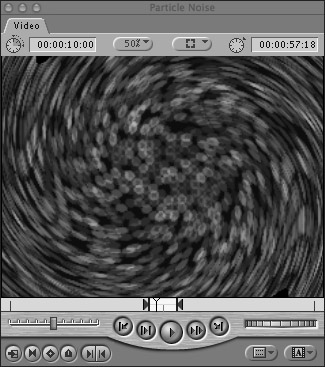
Particle Noise = Generator Fun
When you’re stuck for a way to add a little flash and color to a title sequence, load up Particle Noise. This generator is a ready source of animated textured backgrounds that range from serene (Figure 17.3) to trippy (Figure 17.4). Remember: you can stack multiple copies in layers, apply filters, and animate generators with motion keyframes. Now your only problem is how to stop fooling with Particle Noise and finish your title sequence.
Use text generators to create text elements and title screens in Final Cut Express. A text generator can create titles using any TrueType font currently loaded in your System Folder. You can specify text size, style, color, tracking, and kerning.
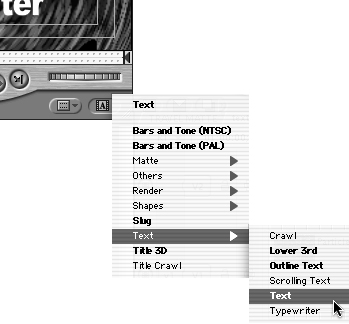
Final Cut Express offers six built-in text generators, which appear in the Text submenu of the Viewer’s Generator pop-up menu (Figure 17.5):
Text: Generates static text in a single size and style. This option allows carriage returns.
Lower 3rd: Generates two lines of static text. Each line has separate controls for font, style, and size. The Lower 3rd generator is designed to create the standard titles used to identify interview subjects in news and documentary programs.
Outline Text: Generates static text with an adjustable outline stroke and background matte. You can also matte graphics into the text, outline, or background elements.
Scrolling Text: Generates animated text that scrolls up or down the screen vertically. A longer clip duration results in a slower scrolling speed. Scrolling text allows carriage returns.
Crawl: Generates a single line of animated text that scrolls across the screen horizontally. Crawl speed is determined by the duration of the clip: a longer clip duration results in a slower crawl speed.
Typewriter: Generates animated text that appears on the screen one letter at a time, as if typed.
These built-in generators are the simplest means of adding text to your sequences, but there are some limitations: although text generators offer extensive control over the font, size, style, and positioning of text, except when you use the Lower 3rd generator, you’re limited to a single font per text generator.
Final Cut Express also comes with two optional, third-party plugin text generators: Boris Title 3D and Title Crawl. These generators allow you to use as many fonts as you want (and probably more than you should); fancy text fanciers should read “Creating titles with Boris Calligraphy” later in this chapter for more details.
You can edit a text generator clip into a sequence in the Timeline and apply effects, just as with other clips. You can also animate static text by using keyframes to make dynamic adjustments to a text generator clip’s motion properties.
Your animation applies to all text in the generator—you cannot control individual letters, words, or sentences.
Tips
A simple way to fade titles in and out is to keyframe opacity at the head and tail of the text generator clip. If you’re building a title sequence, you can copy and paste just the opacity attribute to ensure a consistent look.
An even simpler way to fade regular text titles in and out is to use the shortcut menu to place a single-ended Cross Dissolve on each end of the generator clip and then drag the transition ends inward to change the fade length.
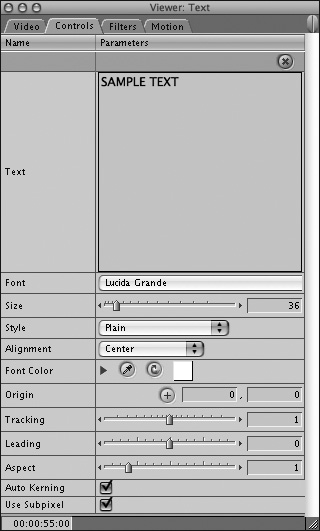
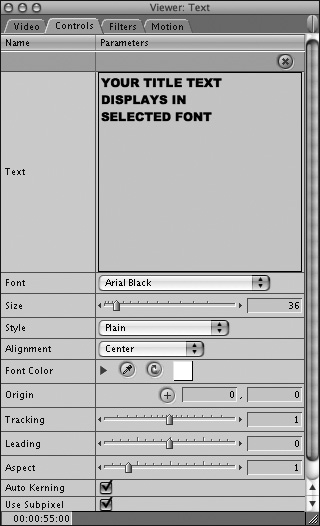
On the Controls tab, you can specify the following text control settings (Figure 17.6):
Text: Enter your text in this field or cut and paste from a word processing program.
Font: Choose a font from this pop-up menu.
Size: Use the slider or enter a point size for your type.
Style: Choose a font style (Plain, Bold, Italic, and so on) from this pop-up menu.
Alignment: Choose Center, Left, or Right alignment from this pop-up menu.
Font Color: Click the expansion triangle to reveal the full set of color controls; then do one of the following:
Origin: Click the Point Select (+) button (located to the left of the Origin value fields) and then specify new coordinates for your text’s origin point relative to the frame by clicking the new origin location in the Canvas or on the Video tab of the Viewer. Animating the origin point (rather than the center point) of your text allows you to position your text at a starting point outside your frame.
Tracking: Use the slider or enter a value to specify the spacing between letters.
Leading: Use the slider or enter a value to specify the spacing between lines of text.
Aspect: Use the slider or enter a value to specify the height:width proportion of your selected font.
Auto Kerning: Check the box to enable automatic adjustment of the spacing between individual letters.
Use Subpixel: Check the box to enable subpixel accuracy in your rendered text generator. Subpixel rendering takes longer.
To generate a basic title screen:
To generate a title screen, do one of the following:
From the Generator pop-up menu in the lower right of the Viewer window, choose Text > Text.
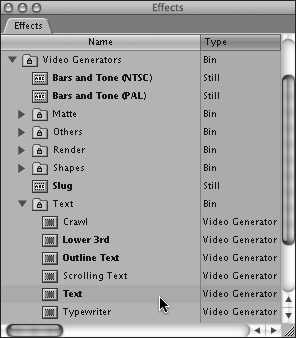
On the Browser’s Effects tab, choose Text from the Video Generator folder (Figure 17.7).
The Text generator appears in the Viewer.
In the Viewer, click the Controls tab to access the generator’s controls; then specify your text control settings as outlined in the previous section, “Text generator options checklist” (Figure 17.8).
You can specify only one font per text generator.
Click back to the Viewer’s Video tab and edit the text clip into your sequence in the Timeline. If you want to superimpose your text over video, choose the Superimpose edit type when you perform your edit (Figure 17.9).
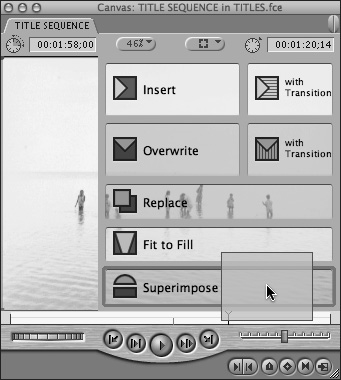
Figure 17.9. Drop the text clip on the Superimpose area of the edit overlay. A Superimpose edit automatically places your text clip on a new Timeline track above the target track, starting at the sequence In point.
You can edit, filter, and animate text clips as you would any other video element.
The Outline Text generator offers three customizable elements in one text generator: text, an outline stroke, and a rectangular background matte (Figure 17.10)—perfect for punching titles over hard-to-read backgrounds or creating subtitles that maintain their legibility. You can insert a clip into any of the three elements by dropping the clip on the element’s clip well on the Controls tab; the clip’s image will be matted into the outline text element you specify (Figure 17.11).
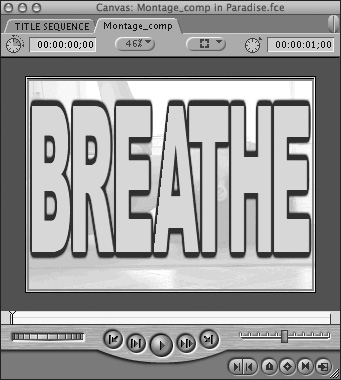
Figure 17.10. The Outline Text generator is composed of three customizable elements: text, an outline stroke, and a rectangular background matte.
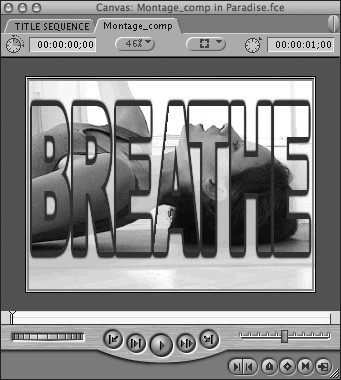
Figure 17.11. You can matte graphics into any of the generator’s three elements. This composition has a clip matted into the text element.
To create outline text:
To generate an outline text title, do one of the following:
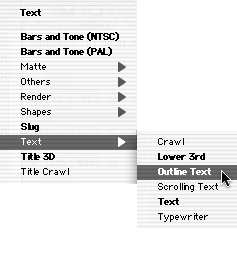
From the Generator pop-up menu in the lower right of the Viewer window, choose Outline Text (Figure 17.12).
On the Browser’s Effects tab, choose Outline Text from the Video Generator folder.
The new Outline Text generator appears in the Viewer.
In the Viewer, click the Controls tab to access the generator’s controls; then specify your text control settings as outlined earlier in this chapter, in the section “Text generator options checklist” (Figure 17.13).
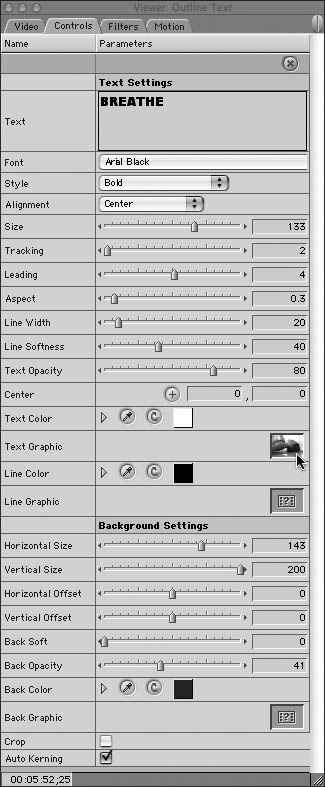
Figure 17.13. Specify your text control settings as outlined in the section “Text generator options checklist.”
You can also specify any of the following outline text parameters:
Line Width: Specify the width of the text’s outline.
Line Softness: Specify the amount of edge feathering applied to the text’s outline.
Center: Specify x,y coordinates for the text’s center point.
Text Color: Select a color for the text.
Text Graphic: Drag and drop a graphics clip to be matted into the text element.
Line Color: Select a color for the text’s outline.
Line Graphic: Drag and drop a graphics clip to be matted into the outline element.
Use the sliders in the Background Settings section to specify the size, edge feathering, opacity, color, and graphics for an optional rectangular matte that sits behind the text and outline. The default Size values are set to zero, so you must increase the size settings to see the background matte.
Click back to the Viewer’s Video tab and edit the text clip into your sequence in the Timeline. If you want to superimpose your text over video, choose the Superimpose edit type when you perform your edit.
Final Cut Express offers three animated text generators: Scrolling Text, Crawl, and Typewriter. These generators offer the font styling and positioning controls of the static text generators, plus simple animation routines built into the generator. You set up the animation on the text generator’s Controls tab.
Because these animated titles typically start offscreen, you will not see any text onscreen if your playhead is parked at the beginning or end of the clip. You have to scrub the playhead through the clip to see how your animated title is shaping up.
Scrolls are most often found as credit sequences at the end of a show (or at the beginning of Star Wars parodies). Scrolling text displays a lot of information in a little time, but take care not to roll your text too quickly. If you set your scroll speed too high, the titles will stutter (they won’t appear to scroll smoothly), and no one will be able to read them.
There are several ways to create the scrolling graphic elements. The easiest is to use the Scrolling Text generator found in the Video Generator list, but if you plan to use multiple fonts or specialized tracking, sizing, and kerning, then your best bet is to use the free Boris Calligraphy Title Crawl text generator plugin found on your Final Cut Express CD. See “Creating titles with Boris Calligraphy” later in this chapter.
To generate a scrolling text title:
Do one of the following:
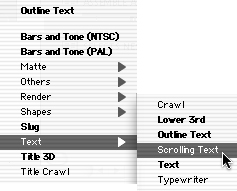
From the Generators pop-up menu in the lower right of the Viewer window, choose Scrolling Text (Figure 17.14).
On the Browser’s Effects tab, choose Scrolling Text from the Video Generator folder.
The Scrolling Text generator appears in the Viewer.
In the Viewer, click the Controls tab to access the generator’s controls; then specify your text control settings as outlined earlier in this chapter, in the section “Text generator options checklist” (Figure 17.15).
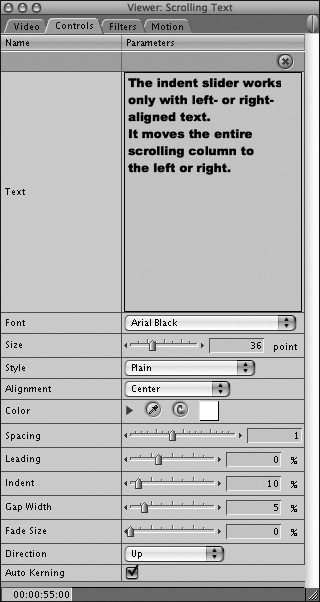
Figure 17.15. Specify your text control settings as outlined in the section “Text generator options checklist.”
You can also specify any of the following scrolling text parameters:
Spacing: Use the slider or enter a value to specify the spacing between letters (as with Tracking).
Leading: Use the slider or enter a value to specify the spacing between lines of text.
Indent: Use the slider or enter a value to set the x-axis (left-right) positioning of the scroll’s aligned edge, expressed as a percentage of the screen. Indent is enabled only for left- or right-aligned scrolls. The title-safe area begins inside 10% of the screen.
Gap Width: Use the slider or enter a value to specify the width of the gap between any two text entries separated by an asterisk (*).
Fade Size: Use the slider or enter a value to set the vertical display area of your scrolling text, expressed as a percentage of the screen. The scrolling text will fade in as it enters (and fade out as it exits) the vertical display area you specify.
Direction: Choose Up or Down from this pop-up menu to specify the direction in which the generated text will scroll.
Click back to the Viewer’s Video tab and edit the text clip into your sequence in the Timeline. If you want to superimpose your text over video, choose the Superimpose edit type when you perform your edit.
Tip
Use the Gap Width setting to create a double-column credit scroll with a center gutter. Here’s how: Set the Gap Width parameter to specify the width of the gap between any two text entries separated by an asterisk (*). When you assemble the text for your credit scroll, type Production Credit*Name—for example,
Visual Effects*Xochi Studios—and the gutter in your credit scroll will be set to the Gap Width value. How*about*that?
Like the stock market ticker tape creeping along the bottom of your TV screen, a text crawl is an animated title that scrolls horizontally. Text crawls can be useful for displaying short phrases—but keep them short, unless you are trying to annoy your audience.
Stuttering is more pronounced during a text crawl than during any other type of text effect. Take care to test your crawl on an NTSC monitor, and watch for optical jumpiness. Possible remedies include using a wider-stroked font, a larger font size, a slower crawl speed, or a motion blur.
To generate a crawl text title:
Do one of the following:
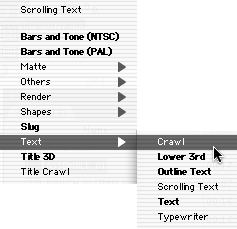
From the Generator pop-up menu in the lower right of the Viewer window, choose Crawl (Figure 17.16).
On the Browser’s Effects tab, choose Crawl from the Video Generator folder.
The Crawl text generator appears in the Viewer.
In the Viewer, click the Controls tab to access the generator’s controls; then specify your text control settings as outlined earlier in this chapter, in the section “Text generator options checklist” (Figure 17.17).
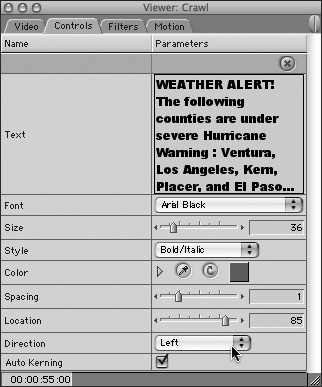
Figure 17.17. On the generator’s Controls tab, specify your text control settings as outlined in the section “Text generator options checklist.”
You can also specify any of the following crawl text parameters:
Spacing: Use the slider or enter a value to specify the spacing between letters (as with Tracking).
Location: Use the slider or enter a value to specify the y-axis (top-bottom) positioning of your crawl.
Direction: Choose Left or Right from this pop-up menu to specify the direction in which the generated text will scroll.
Click back to the Viewer’s Video tab and edit the text clip into your sequence in the Timeline. If you want to superimpose your text over video, choose the Superimpose edit type when you perform your edit.
The cute little Typewriter text generator automates the animation of single letters popping onto the screen; that’s why it’s called Typewriter. It’s a real time-saver, as anybody who has manually animated simulated typing will tell you.
To generate a typewriter text title:
Do one of the following:
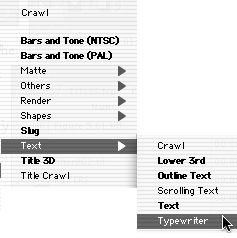
From the Generator pop-up menu in the lower right of the Viewer window, choose Typewriter (Figure 17.18).
On the Browser’s Effects tab, choose Typewriter from the Video Generator folder.
The Typewriter text generator appears in the Viewer.
In the Viewer, click the Controls tab to access the generator’s controls; then specify your text control settings as outlined earlier in this chapter, in the section “Text generator options checklist” (Figure 17.19).
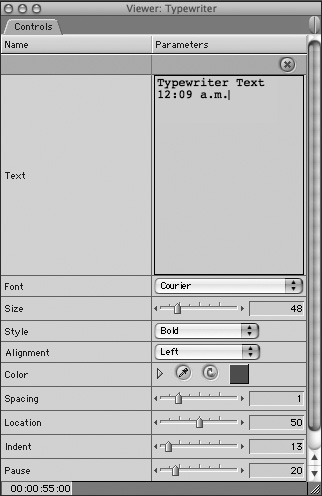
Figure 17.19. On the generator’s Controls tab, specify your text control settings as outlined in the section “Text generator options checklist.”
You can also specify any of the following typewriter text parameters:
Spacing: Use the slider or enter a value to specify the spacing between letters (as with Tracking).
Location: Use the slider or enter a value to specify the y-axis (top-bottom) positioning of your text element.
Indent: Use the slider or enter a value to specify the x-axis (left-right) positioning of your text element, expressed as a percentage of the screen.
Pause: Use the slider or enter a value to specify the timing of your typewriter animation. A larger Pause value results in a longer hold at the end of the clip. The speed of the type-on effect is calculated based on the overall duration of the generator clip minus the pause value you set here.
Click back to the Viewer’s Video tab and edit the text clip into your sequence in the Timeline. If you want to superimpose your text over video, choose the Superimpose edit type when you perform your edit.
Two Boris Calligraphy text generators, Title 3D and Title Crawl, are available as an installation option in the Final Cut Express installer. Once you install them, these third-party generators show up in the Viewer’s Generator pop-up menu along with the standard FCE generators (Figure 17.20).
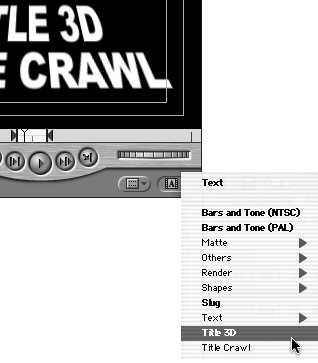
Figure 17.20. If you choose to install them, the Boris Text generators appear in the Generator pop-up menu along with the standard FCE generators.
Title 3D features vector-based text you can manipulate in 3D space with pivot control, animated tracking, and a host of text transformations.
Title Crawl is an automated roll and crawl title generator.
In both generators, you can:
Enter text in a larger text-entry field (Figure 17.21).
Create static titles.
Set font, size, style, and color properties for individual characters.
Apply drop shadows and borders.
Choose from other 2D title animation options.
Copy and paste text from a word processor.
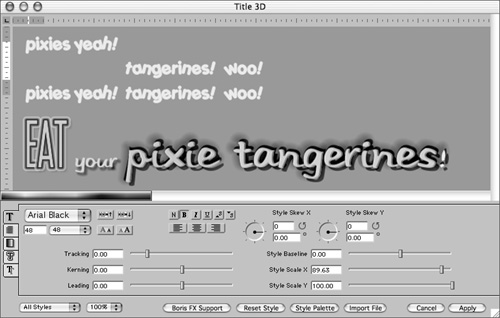
Note that you can set individual parameters such as font, size, color, and tracking for every character, but you cannot animate individual character properties over time. For more information about Boris Calligraphy, see the Boris Calligraphy user manual, a 44-page, illustrated PDF file, located in the Extras folder on the Final Cut Express application disk.
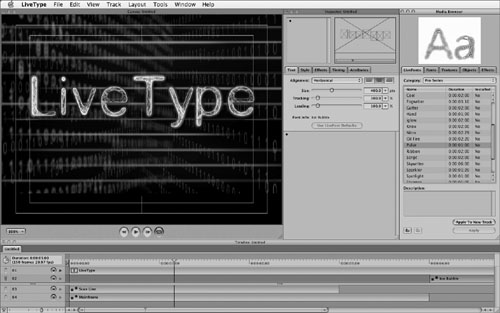
Who says you can’t get a free lunch? LiveType (Figure 17.22) is an amazing animated title generator that’s bundled into the FCE suite of applications. You can create customized animated fonts, objects, and textures for importing into your FCE project. LiveType offers a library of animated LiveFonts, along with hundreds of pre-set combinations of fonts and backgrounds. It would take another Visual QuickStart Guide to explore all of LiveType’s possibilities, so instead, head for the file called LiveType Help.pdf found in the Documentation folder on your Final Cut Express application DVD.