
A Final Cut Express project is more than a collection of media files. The real power of Final Cut Express lies in the way the media is controlled by the intelligence of the program’s data structuring. To take advantage of that power, you must take control of the data.
This chapter introduces Final Cut Express’s system of organizing your video projects. You’ll get an overview of Final Cut Express’s organizing frameworks: projects, sequences, and clips. You’ll also learn how to manipulate that organizational framework so that your projects, sequences, and clips stay sound and organized.
Longer, more complex projects sometimes require a little extra care and feeding, so you’ll find project management strategies and techniques for building a project that contains multiple sequences. You’ll also find tips on how to delete media files—and how to resurrect deleted files.
Final Cut Express is a nondestructive, nonlinear editing system, and that design has an impact on the way it handles file management. You’ll be much more effective as a media manager if you understand how Final Cut Express tracks media files and project data before you use the project management techniques described in this chapter.
“FCE Protocol: Clips and Sequences,” found later in this chapter, explains the rules you really need to know to understand how this program constructs edits.
A Final Cut Express project breaks down into the following key components.
Project file: The top level of the FCE organizing framework, a project file stores references (file location information) to all the media files you use to complete a particular program, along with the sequencing information (your cut) and all settings for special effects you apply to any clip in the project. The project file contains no media—it’s strictly the “brains” of your project—but this one file is your project’s most valuable asset. All your editing genius is stored in this modest data file.
Sequence: The middle level of the Final Cut Express organizing framework, a sequence is an edited assembly of audio and video clips. A sequence is always part of a project, and you can have multiple sequences in a project, but you can’t save a sequence separately from a project. However, you can copy a sequence from one project and paste it into another project.
Clip: The ground level of the FCE organizing framework, the clip represents an individual unit of media in Final Cut Express. A clip can stand for a movie, a still image, a nested sequence, a generator, or an audio file. Clip types appear in the Browser’s Type column, and each type of clip displays an identifying icon.
Figure 4.1 diagrams the FCE organizing framework.

Figure 4.1. The project file is at the top level of FCE’s organizing framework. You organize multiple clips and sequences inside a project file.
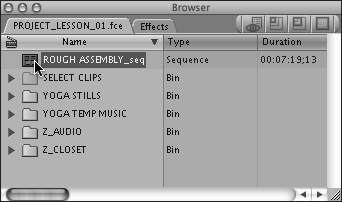
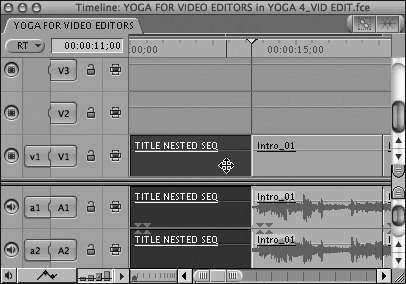
Figure 4.2 shows how the FCE project structure plays out in the Browser and Timeline windows.
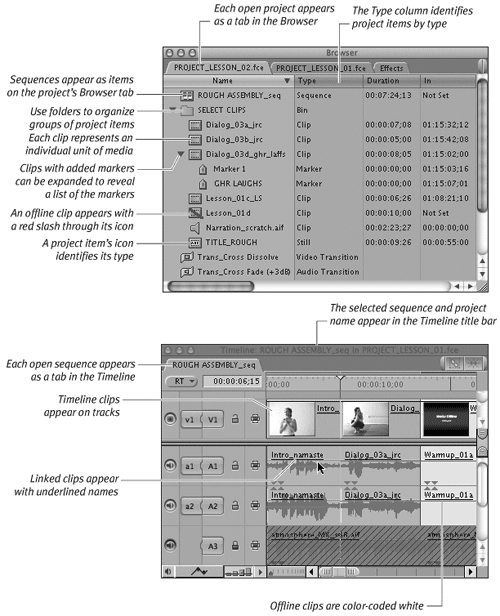
Figure 4.2. The Browser (top) and Timeline (bottom) interfaces provide a variety of information about your project.
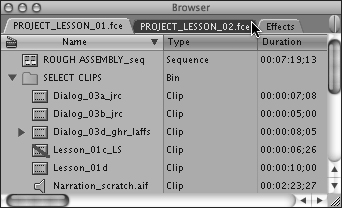
On a project’s Browser tab, you’ll find quite a few different clip types, but you’ll also find containers for holding clips: sequences and folders. The Browser’s Effects tab contains other types of nonclip project items, audio and video filters and transitions, and generators. See “Browser Window Icons” in Chapter 7 for descriptions of each type of item you’ll encounter in a project.
Project files store disk location information for all the media files used in a program, along with the sequencing information for your edited program plus the settings for special effects applied to any clip in the project. The data stored in a project file is used to re-create the timing, sequencing, and transitions and effects you specify for a particular cut, without altering or changing the storage location of your original source files. (Note: If you haven’t read the sidebar “What Is Nonlinear, Nondestructive Editing?” in Chapter 1, please do so now. It’s key to understanding how Final Cut Express works.)
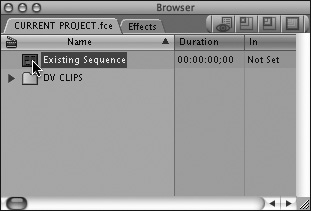
To get started in Final Cut Express, you create a new project and then start adding clips and sequences to the Browser window as you shape your project. Sequences can be exported independently as movies or clips, but they can’t be saved separately from a project.
To create a new project:
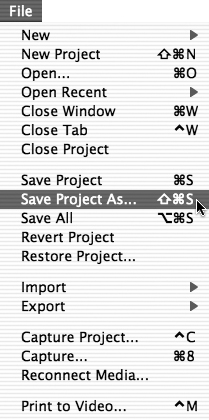
Choose File > New Project (Figure 4.3). or press Command-Shift-N.
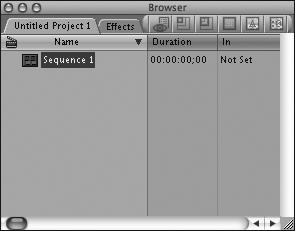
A new project tab appears in the Browser window (Figure 4.4).

To open a project:
Choose File > Open; or press Command-O.
Locate and select the project file you want to open (Figure 4.5).
Click Choose.
Choose File > Save Project; or press Command-S.
To save a project with a different name:
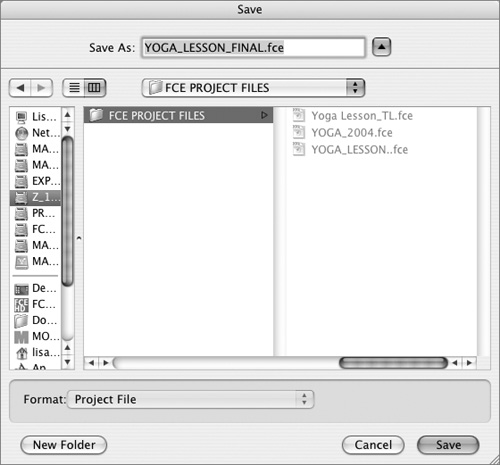
Choose File > Save Project As (Figure 4.6); or press Command-Shift-S.
In the dialog box, type a name for the project in the Save As field.
Choose a destination folder.
Click Save (Figure 4.7).
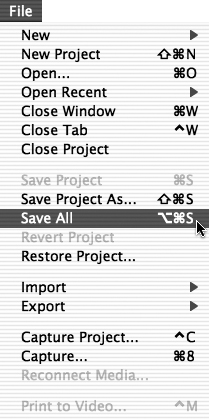
To save all open projects:
Choose File > Save All (Figure 4.8); or press Command-Option-S.
If you created one or more new projects that haven’t yet been saved, type a name for the first one in the dialog box.
Choose a destination folder.
Click Save.
Repeat steps 2 through 4 for each new project that you want to save. Previously saved open projects are saved automatically.
Using Save As to Protect Your Work
Opening, modifying, and then saving the same project file day after day increases the chance that your precious project file will become corrupt and unusable.
Use the Save As command to back up your project file every day or so. Save As makes a fresh copy of the current version of your project file.
Give the original project file a version number, revert the name of your fresh duplicate to the base name of your project, and then continue working in the new duplicate version.
FCE automatically creates a new, separate capture folder every time you change the name of your project. For this reason, to avoid the complications that arise from changing the name of your project file (multiple capture folders), you’ll need to add an identifying version number to your older project file and then be sure that your active project file always has the same original name (Figure 4.9).
Figure 4.9. Rename your older project file with an identifying version number and use the original project filename for your fresh copy.
FCE’s vault system, which automatically saves and then archives multiple versions of your project, provides you with a fail-safe backup, but some editors still prefer to retain control over the process. Good habits are hard to break.
Do one of the following:
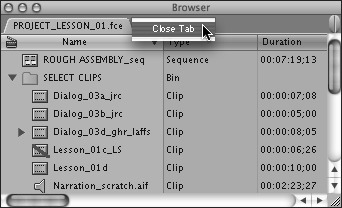
In the Browser, Control-click the project’s tab (Figure 4.10); then choose Close Tab from the shortcut menu (Figure 4.11).
In the Browser, click the project’s tab to bring it to the front (Figure 4.12). Then choose File > Close Project.
In the Browser, press Command-W. For all projects you’ve modified, Final Cut Express will ask which projects you want to close.
Each project has a set of properties that are saved with it. The project’s properties apply to all sequences in a project and are independent of the project’s Sequence presets.
To view or change the properties of a project:
In the Browser, click the Project tab.
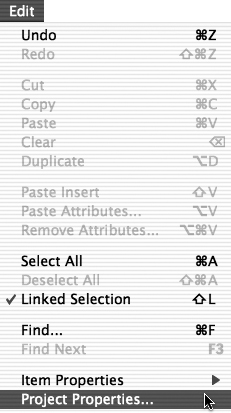
Choose Edit > Project Properties (Figure 4.13).
In the Project Properties window (Figure 4.14), do any of the following:
Display project durations as timecode or as frames. Choosing Frames displays the total number of frames for clips and sequences in the Browser’s Duration column, as well as in the Timeline, Canvas, and Viewer.
Set the time mode of all project clips to Source Time (which matches the timecode rate of the clip’s source media file) or Clip Time (which starts with the timecode value of the first frame in the clip, then calculates and displays timecode based on the current frame rate assigned to the clip). Source Time and Clip Time are identical in most cases; a speed-modified clip is an example of a clip whose Source Time and Clip Time do not match.
Edit the heading labels for the Comment columns that appear in the Browser window.
After you make your changes, click OK.

Choose File > Revert Project.
In the warning dialog box, click OK (Figure 4.15).

Figure 4.15. After you choose File > Revert Project, you’ll see a dialog box warning you that your unsaved changes will be lost.
Final Cut Express reverts the current project file to its condition at the last time you saved the file.
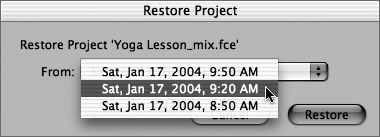
To restore a project:
Choose File > Restore Project (Figure 4.16).
In the Restore Project dialog box’s pop-up menu, select the archived project file you want to restore (Figure 4.17).
Click Restore.
Final Cut Express opens the selected archived project from the Autosave Vault.

Final Cut Express’s Autosave Vault automatically saves all open projects as you work, at a time interval that you select. The vault stores multiple, dated backup copies of your project. This archive can come in handy. For example, maybe you’re at the point in a project where you are trying new approaches to refine your cut, and you want to discard your last experiment. Or maybe you and your collaborator just don’t agree, and she’s completely recut your program while you were away for the weekend.
Each autosaved version is a backup copy that includes all changes you’ve made (up to the last autosave time) in the project file that you’re currently working on. (That project file is modified only when you invoke the Save or Save All command.) If you haven’t made any changes in an open project file since the last backup copy was autosaved, FCE won’t archive another backup in the Autosave Vault until you do.
You can set Autosave preferences on the General tab of the User Preferences window. See “Specifying User Preferences and System Settings” in Chapter 3 for details on your settings options.
The backup copies of your project files are archived in a folder located inside your Final Cut Express Documents folder (Figure 4.18). If you want to store your archive of backups elsewhere, specify another location on the Scratch Disks tab of the System Settings window (Figure 4.19).

Figure 4.18. In the Autosave Vault, dated backup copies of your project files are archived in a folder.
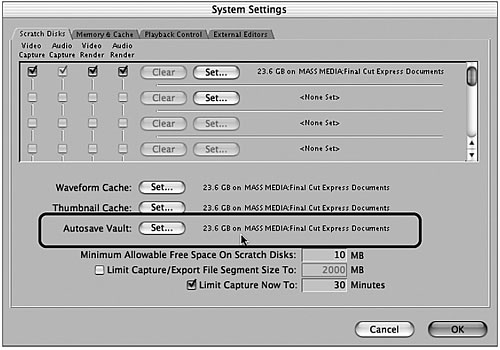
Figure 4.19. Set the Autosave Vault location on the Scratch Disks tab of the System Settings window.
When the number of backup copies in the Autosave Vault reaches the limit you set in User Preferences, FCE deletes the oldest Autosave file (or project folder) to make room for the newest Autosave file, unless the oldest project archived in the vault is currently open. FCE overrides the maximum projects limit you set if the number of open projects exceeds your specified limit when a scheduled autosave occurs.
If your computer powers off or crashes while you’re working, the last saved version of your project file will open when you relaunch Final Cut Express. The choice is yours—continue to work in your original file, or use the Restore Project command to open your most recent autosaved backup copy. Here’s the drill.
To use Autosave to recover from a crash:
After you restart, go to the folder where you archived your current original project file (that’s the file you just crashed out of) and rename that file so it won’t be overwritten and you can return to it, if need be.
Launch FCE; then use the Restore Project command to go to the Autosave Vault and open the most recent Autosave backup version of your project file in FCE.
After you’ve checked the integrity of the autosaved file in FCE, save the autosaved project file with your original project name.
You can undo every type of action you perform in your projects, sequences, and clips, as well as redo actions that you have undone. FCE can store up to 32 actions across multiple projects—you set the number of undos on the General tab of the User Preferences window.
To undo the last action:
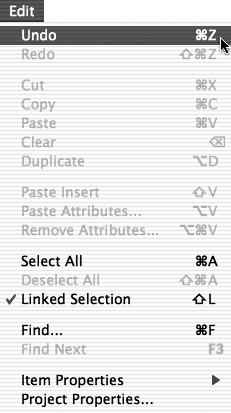
Choose Edit > Undo (Figure 4.20); or press Command-Z.
To redo the last undone action:
Choose Edit > Redo; or press Command-Shift-Z.
To specify the number of actions that can be undone:
Choose Final Cut Express > User Preferences.
On the General tab of the User Preferences window, set the levels of undo actions to a number between 1 and 32 (Figure 4.21).

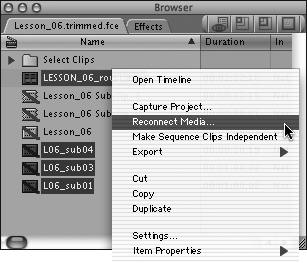
In Final Cut Express, the links between your clips and sequences in the Browser and the underlying media source files on disk are based on the media file’s name and location. If you rename the source media files used in a project or sequence, you’ll be greeted with the Offline Files window full of clips marked “missing” the next time you open your project. Don’t panic. You can reconnect clips to media on your disk using the Reconnect Media command.
It’s important to understand how Final Cut Express’s protocols governing clip versions affect the reconnection process. Starting in FCE 2, sequence clips by default are affiliated with a master clip in the Browser. The offline/online status of the master clip and all affiliated clips is linked; make any one affiliated clip offline, and all its affiliated clips are taken offline automatically. Fortunately, the same principle applies to relinking. Remember, however, that any independent clips in your sequence are considered separate copies of the clips in the Browser. If an independent clip is used in a sequence, the sequence copy and the Browser copy must be reconnected separately. This is a little tricky, because the sequence icon in the Browser doesn’t display the red diagonal offline indicator to warn you that it contains offline clips. Selecting the sequence when you are reconnecting allows you to locate files for all offline clips in the sequence.
Tip
You can use Final Cut Express’s Find function to search for all the offline clips and sequences in a project (search the Offline Yes/No column for Yes) and then select and reconnect the offline clips and sequences right in the Find Results window.
Select the file or files to be reconnected (Figure 4.22). You can select a clip or sequence in the Browser or clips in an open sequence in the Timeline.
Do one of the following:
Choose File > Reconnect Media.
Control-click the clip or sequence; then choose Reconnect Media from the shortcut menu (Figure 4.23).
In the Reconnect Options dialog box, Offline, Online, or Render file options may be available, depending on your current file selection. Check the box for each type of file you want to reconnect; then click OK (Figure 4.24).
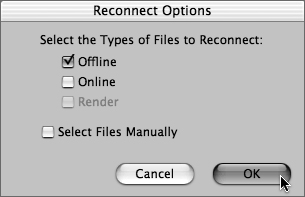
Figure 4.24. In the Reconnect Options window, check the box for each type of file you want to reconnect; then click OK.
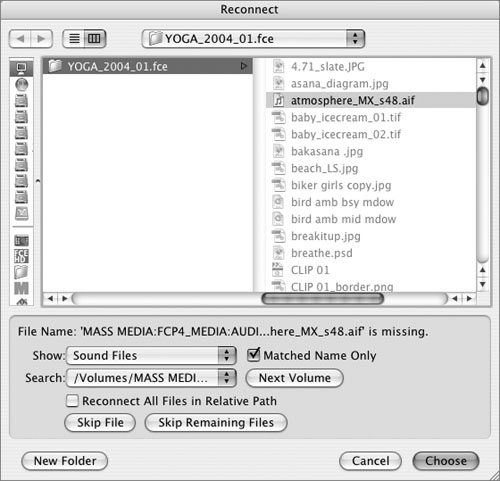
Final Cut Express searches your media drives for the first file in your selection. If FCE successfully locates the source media file for your first offline clip, the Reconnect dialog box appears with that source file listed in the file window (Figure 4.25). If FCE cannot locate the first source media file, a prompt at the top of the window displays the name of the clip and the first file you should locate.
Do any of the following:
Select a file type from the Show pop-up menu to limit the file list display to the selected file type.
Check Matched Name Only to highlight only an exactly matching name in the file list display and dim all nonmatching names. Disable this feature to have access to a complete list of the folder’s contents.
Select a drive or folder to search from the Search pop-up menu. Click the Next Volume button to move to the next media drive.
Check Reconnect All Files in Relative Path to automatically reconnect any other clips in the sequence that are associated with files in the same folder. You must reconnect the first file manually by clicking Choose.
Click Skip File to bypass the clip currently displayed in the File Name prompt.
Click Skip Remaining Files to bypass all remaining clips that can’t be located automatically.
Click Choose to reconnect the clip and its source media (Figure 4.26).
The dialog box closes and then reopens, and the File Name prompt indicates the next file to locate. Continue until the dialog box closes.
Tip
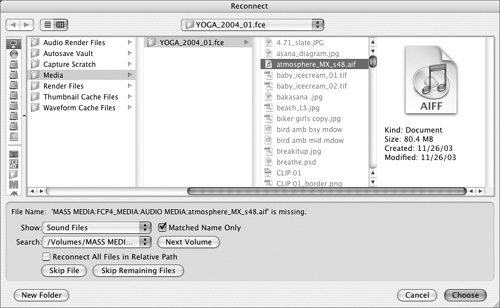
The File Name prompt area in the Reconnect dialog box is often too small to display the full directory path for the clip you’re searching for. When you search for many clips with similar names, the partial display is pretty useless. You can see the full directory path name for your stray clip by stretching the Reconnect dialog box horizontally (Figure 4.27). Stretching the dialog box doesn’t widen the columns in this window, but if you pause the pointer over a name, FCE will display a tooltip with the full name of the file.
Final Cut Express displays the Offline Files window to alert you that media files have gone missing since the last time you saved a project. Any time you open a project or switch back to FCE from the Finder, Final Cut Express rechecks the status of your media files. If FCE detects missing files, the Offline Files window appears automatically to alert you and offer you options for restoring order to your FCE project.
To reconnect using the Offline Files window:
Final Cut Express displays the Offline Files window (Figure 4.28), which lists all media files missing from the current project and their most recent hard disk location. This list could include:
Missing source media files
Render files lost because they reference a missing media file
QuickTime reference movies made invalid by a missing media file
A segment of a spanned media file
Use the Forget Files buttons (Figure 4.29) if you want to change the status of all the files listed from “missing” to “offline” and remove them from this list of missing files. If you don’t use the Forget Files option, Final Cut Express will continue to post alerts about missing media each time you launch the project, until you reconnect the media and clips or make the clips offline.
Click the Movie button to change the status of all the source media files in the list from “missing” to “offline.” All clips referencing these files will be marked as offline clips in your project, but you can still relink the files later.
Click the Render button to remove all of the render files from this list. If you choose to forget render files, you won’t have the opportunity to reconnect them later.
To finish the process, choose one of the following options:
Click the Reconnect button (Figure 4.30) to access the Reconnect Media feature, and then try to locate and reconnect the missing files. The Reconnect Media operation is described earlier in this chapter.
Click OK to exit the Offline Files window and leave all the files remaining in the list classified as missing or invalid. The next time you launch this project, FCE will display the Offline Files window again, and you can choose to reconnect or to take files offline at that time.


To delete media files, you have to go outside Final Cut Express, locate the files in the project’s Capture Scratch folder, and move them to the Trash.
You delete unused render files from disk in the same way. You’ll find render files in folders labeled Audio Render Files and Video Render Files. If you render frequently, you would be surprised how much storage space your old render files can hog.
To delete a source media file from disk:
Save your project and quit Final Cut Express.
In the Finder, navigate to the project’s Capture Scratch folder and select the media file you want to delete.
Control-click the selected media file; then choose Move to Trash from the shortcut menu (Figure 4.31).
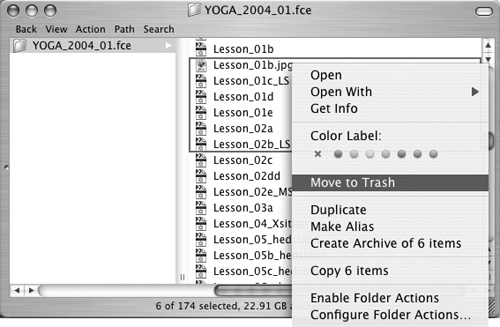
Figure 4.31. In the project’s Capture Scratch folder, Control-click the media file you want to delete; then choose Move to Trash from the shortcut menu.
The source media file is moved to the Trash.
Relaunch FCE and open the project.
If you have not previously deleted the clips that reference the source media file, you’ll see the Offline Files window listing the media file you moved to the Trash.
Click the Forget Files Movie button to update your FCE project’s item tracking (Figure 4.32).
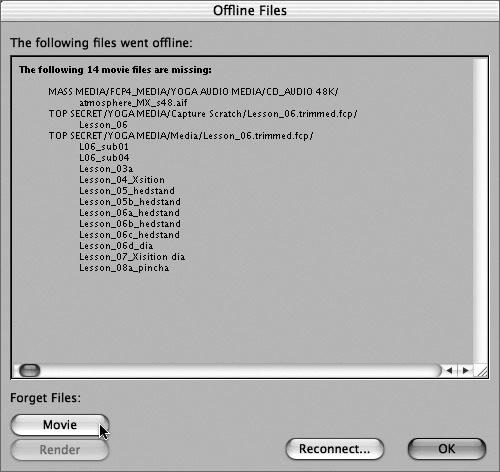
Figure 4.32. Clicking the Forget Files Movie button updates your FCE project’s item tracking, removing the deleted file from the project’s database.
To finally delete the files, you’ll need to empty the Trash manually. If you change your mind later, before you empty the Trash, and want to retrieve the files, drag them out of the Trash and reconnect them to your project by using the Reconnect Media command. If you empty the Trash, your files are finally deleted.
Tip
You can delete render files in the same way. With your Finder window in Column view, you can preview each media file in the QuickTime preview utility built right into the file window. Select the clip you want to preview, and the QuickTime preview appears automatically. This trick works only in the Finder, though—not within the Reconnect dialog box in FCE.
Even if you are not forced to reorganize your project’s media elements because you have run out of disk space, it’s a good idea to streamline a project as you go, especially if you’re working on a long, complex project. As your project accumulates clips, sequences, edits, render files, multiple tracks of audio, and effects, more and more of your available RAM is needed just to open the project. At some point, you could experience a drop in Final Cut Express’s speed or video playback performance.
Tip
Do you really need to preserve every scrap of media and every old duped sequence in your project? Redundant copies of project items may seem valuable now, but will you remember why you saved them when you return to this project in a year? Consider some project streamlining before you pack up and move. Check out the “Deleting media” section earlier in this chapter for ideas.
To streamline a project in progress:
With the project open in the Browser, choose File > Save All.
The current version of the project is saved.
Choose File > Save Project As.
The Save dialog box appears.
Navigate to the folder where you want to store your project file, enter a name for the new project version in the Save As field (Figure 4.33), and then click Save.

Figure 4.33. Enter a name for the new project version in the Save As field. This version of the project is the one you’re going to clean up.
The new version of your project replaces the older one on the front tab of the Browser window (Figure 4.34).
Remove all but the most current versions of your sequences and delete any excess clips (Figure 4.35). If you are short of disk space, you could choose to delete the clips’ source media files as well, but you don’t need to delete the source media files to get the benefits of a streamlined project.
In the Finder, navigate to the Render Files and Audio Render Files folders. They’re located inside the Final Cut Express Documents folder where your media files are stored. Delete any obsolete render files.
With the new, streamlined project open in the Browser, choose File > Save.
If you streamlined your project to improve Final Cut Express’s performance, you’ll need to close and then reopen the project to recapture the available RAM and start enjoying improved performance.

Tip
Remember that the Render Files folder contains render files for all our projects, so be careful as you select the files you want to delete. Check each file’s creation date and view any candidates for the Trash bin on the Finder’s built-in QuickTime preview player (Figure 4.36).
If you are trying to assemble a long project in Final Cut Express on a modest system, you may find that you have much more media than hard drive space to store it on.
The simplest approach to a staged editing process is to edit one sequence at a time, print the sequence to video, clear off the media, and then edit the next sequence.
Here’s a checklist for taking a completed sequence offline and preparing your drives for the next sequence:
After you have completed a sequence and printed it to tape, make sure you save the project file that contains the final version of your sequence.
You should also save a backup copy of the project file on a Zip disk, CD, or some other form of removable media.
Back up any media elements in your sequence, such as graphics files or digital audio from a CD, that won’t be restored in a batch recapturing process.
In the Browser, select all the clips and sequences that reference media files you no longer need. Use the method for deleting media files described earlier in this chapter to delete all the media source files you no longer need.
The clips and sequences referring to the deleted media files will be marked offline, but the clip data will remain in your completed project file. This clip and sequence data takes up very little room, so you don’t need to delete it; you can store it in a single Browser folder.
Capture the next batch of media files and start work on your next sequence.
If you find that you need to go back and modify a sequence after you have deleted its underlying media files, you can use the sequence data you saved in the project file to batch recapture your footage and re-create the sequence.
All filters, motion paths, keyframes, transitions, nested sequences, and audio mixing are reconstituted when you batch recapture the media files for a sequence. Your render files will be gone, however, and you’ll need to re-render any sequence material that requires them.
To restore a sequence:
Control-click the sequence in the Browser and choose File > Capture Project (Figure 4.37).
Follow the steps in “To batch capture selected clips” in Chapter 5 and batch recapture your footage from tape.
Restore to your hard disk any non-DV media elements in your sequence, such as graphics files or digital audio from CD, that won’t be restored in the batch-recapturing process.
Follow the steps described in “To reconnect offline files” earlier in this chapter (Figure 4.38) and reconnect any non-DV media elements you restored.
To restore the render files, re-render any sequence material that requires rendering (Figure 4.39).


If you just want to do a little housecleaning in your project’s media file folder, it’s handy to have an inventory of every clip that’s currently being used in a sequence in your project and another list of every element in your project that remains unused. How can you create complete lists of used and unused elements in your project? It’s simple. You can use the Find feature to assemble these lists—you can even inventory multiple projects in a single Find operation. Powerful stuff.
To get a complete list of unused clips in a group of sequences:
Open all the projects you want to search.
On each project’s tab in the Browser, Command-click to select the sequences you want to include in your search (Figure 4.40).
Choose Edit > Find; or press Command-F.
In the Find dialog box, configure the options as follows:
Choose All Open Projects from the Search pop-up menu.
Choose Unused Media from the For pop-up menu and check the box next to In Selected Sequences.
Choose Replace Find Results from the Results pop-up menu.
Click Find All (Figure 4.41).
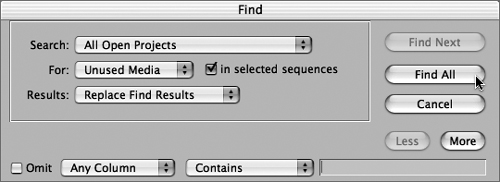
Figure 4.41. The Find dialog box, configured to find unused clips in selected sequences. Click Find All to perform the search.
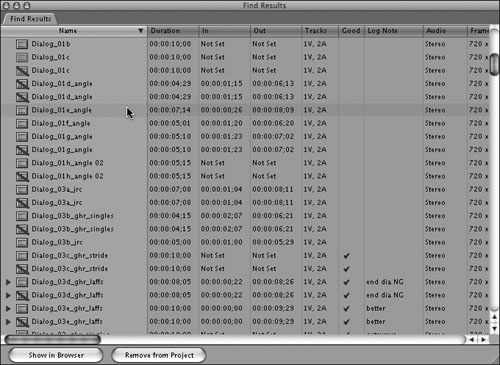
A list of all the clips that remain unused in the sequences you selected is displayed in the Find Results window (Figure 4.42).

Tips
Final Cut Express does not support text export; the best you can do is to take a screen shot of the Find Results window and print it.
If your clip’s name is different from the name of the underlying media file, you can find the underlying media file (and its location) in the clip’s Item Properties window or the Browser’s Source column.
Final Cut Express doesn’t generate separate preview or temporary files when you use the Print to Video function. The only files you need to clean up after a project are the project file, media files, render files, and thumbnail and waveform cache files (Figure 4.43).

Mac OS X was designed as a multiuser environment. The operating system’s hierarchy of users and file access privileges is built on the assumption that multiple people are sharing the data and applications stored on your computer. For Final Cut Express users, this has a few specific effects.
How you choose to set up your file access depends on your individual circumstances.
If you are a solo user running Final Cut Express on a computer that you own, you should already be set up as the computer’s Owner-User. This gives you access to any file in the system that you created.
If you are collaborating on a project with a small group of trusted colleagues sharing Final Cut Express, you’ll need to decide how you want to handle access to Final Cut Express’s project and media files. You can choose to administer the project in OS X’s multiuser domain and allow multiple users access to the project files, or you might find it simpler to create a single user ID for the entire group (Figure 4.44). In the latter case, everyone in the group logs in as that Project User and has the same read/write privileges to the project and media files.
If you are sharing a Final Cut Express system with many users working on different projects, you’ll want to configure your file access for maximum privacy.

Solo users can save their project files in a public or private Documents folder (save in your private Documents folder if you have any security concerns); groups collaborating on an FCE project should save common project files in the Shared folder (Figure 4.45), located inside the Users folder, so that all users can access the shared documents.

Figure 4.45. Groups collaborating on a Final Cut Express project should save common project files in the Shared folder so all group members have access to them.
In FCE, any time you create a new file—by saving a project file, capturing media, or creating graphics—that file’s access privileges are set to the system default: Read & Write for the file’s owner, and Read Only for all other users (Figure 4.46). You may occasionally need to modify file access privileges to allow other users access to your project and its media.
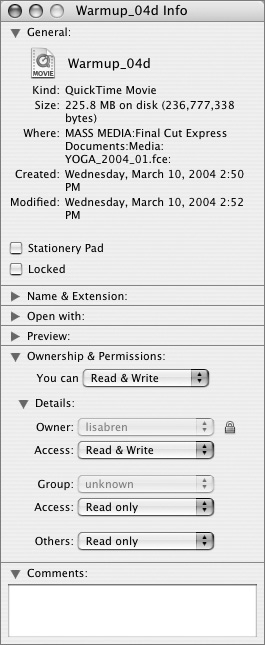
Figure 4.46. The Mac OS X default file access for new files is Read & Write for the file’s owner and Read Only for all other users.
Tips
A non-bootable hard disk may offer Read & Write privileges to all users by default, but that doesn’t mean individual files and folders on that drive are accessible to all. To set open access for all files on a disk volume, check Ignore Ownership on This Volume in the drive’s Info window (Figure 4.47).
Mac OS X considers FireWire drives to be removable media (because they’re hot-swappable) and offers Read & Write privileges to all users for the entire contents of the drive by default.

A sequence is an edited assembly of audio and video clips. Sequences are the middle level of the Final Cut Express organizing framework. A sequence is always part of a project, and you can have multiple sequences in a project. Sequences can be exported independently as movies or clips, but they can’t be saved separately from a project.
Once you’ve assembled a sequence, that sequence can be manipulated as if it were a single clip. You can open a sequence and play it in the Viewer, mark In and Out points, and insert all or part of that sequence into another sequence, just as if it were a clip. Inserting a sequence into another sequence creates what’s known as a nested sequence. (See “Working with Multiple Sequences” later in this chapter.)
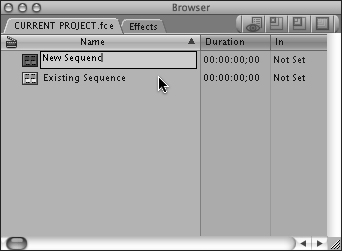
A new project created in FCE automatically generates a new, untitled sequence in your default sequence format.
Note that you probably won’t need to change Sequence presets unless you change your audio or video input device. Final Cut Express selects an Easy Setup with your default preset based on setup information you supplied when you installed the program. See “How to Choose an Easy Setup” in Chapter 3.
To add a new sequence to the current project:
Choose File > New > Sequence; or press Command-N.
A new sequence with a default, highlighted name appears at the top level of the current folder (Figure 4.48).
Type a new name for the sequence to rename it (Figure 4.49).

To open a sequence for editing:
Do one of the following:
Double-click the sequence in the Browser (Figure 4.50).
Control-click the sequence’s icon; then choose Open Timeline from the shortcut menu.
Select the sequence; then choose View > Sequence in Editor.
The sequence opens in both the Canvas and the Timeline (Figure 4.51).

Select the sequence in the Browser (Figure 4.52).
Choose Edit > Duplicate (Figure 4.53); or press Option-D.
In the Browser, rename the sequence copy with a unique name (Figure 4.54).


Tip
The copy procedure described here is a convenient way to “safety copy” a version of a sequence and associated media files after a long rendering process. With a safety copy of the rendered sequence, you can feel free to experiment with changes that could cause a re-render, because any changes you make to the duplicate sequence will not affect the original sequence or its render files.
To copy a sequence from one project to another:
Select the sequence in the Browser.
Choose File > Copy; or press Command-C.
Open the second project and select its tab in the Browser.
Choose File > Paste; or press Command-V.
The sequence now appears in both projects. The two copies of the sequence reference the same source media files on disk, but you’ll need to re-render any previously rendered sequence material in the new project location.
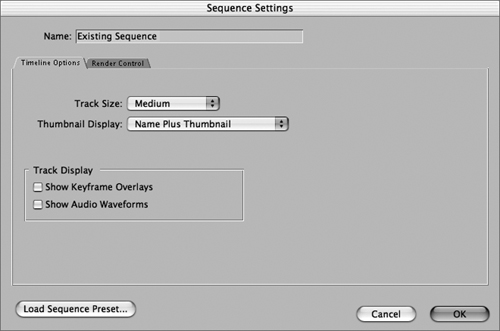
You can open and review or modify settings for an existing individual sequence in the Sequence Settings window. The Sequence Settings window contains the same main display options as the Timeline Options and Render Control tabs in the User Preferences window. When you modify any settings for an individual sequence, you are changing the settings for that sequence only.
You can use this window’s Load Sequence Preset button to switch to a different Sequence preset, but unless you’re sure that’s what you need to do, it’s not advisable.
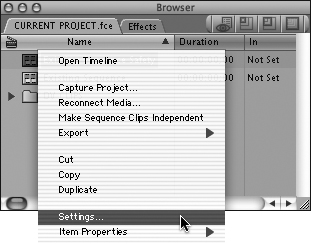
To change the settings for an individual sequence:
Control-click the sequence’s icon in the Browser.
Choose Settings from the shortcut menu (Figure 4.55).
Modify your Sequence settings (Figure 4.56). then click OK. (For more information about the Sequence Settings window, see “Customizing the Timeline Display” and “Specifying Render Control Settings” in Chapter 3.)
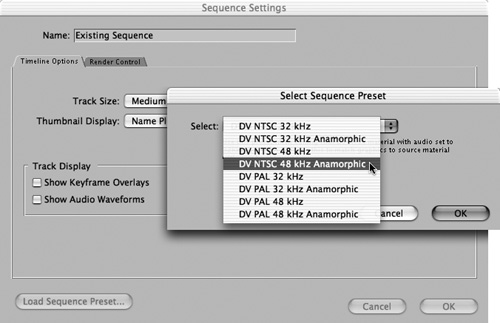
To switch a sequence’s settings to a different Sequence preset:
Make the sequence active by selecting it in the Browser or Timeline.
Choose Sequence > Settings.
The Sequence Settings window appears.
Click the Load Sequence Preset button at the bottom of the General tab.
Choose a different preset from the Select pop-up menu in the Select Sequence Preset dialog box (Figure 4.57); then click OK.
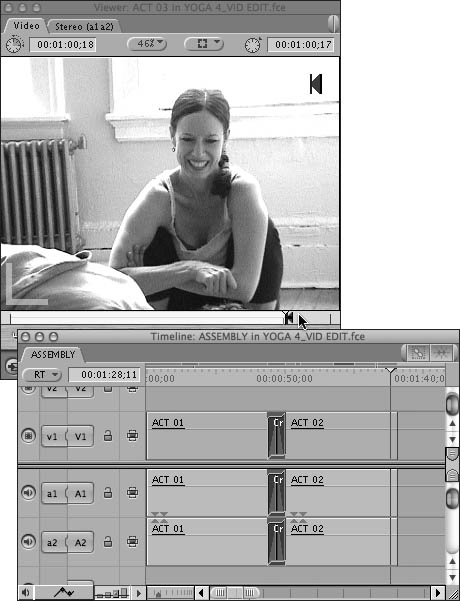
In Final Cut Express, you can edit a sequence into another sequence in the same way you would a clip: Drag the entire sequence from the Browser to another open sequence in the Timeline or Canvas. Alternatively, you can drag the sequence from the Browser and drop it on the Viewer’s image area and then edit it into your open sequence as you would a clip.
Unlike clips, nested sequences are actually pointers or references to the original sequence, not copies. You can nest a sequence in multiple projects; then, if you change the original sequence, all the projects in which that sequence is nested will be updated.
Assembling multiple sequences into a master sequence is useful for a number of purposes, from reusing a previously edited and rendered segment such as a logo or a credit sequence to assembling a final master sequence from shorter segments produced by multiple editors.
You can select a group of sequence clips or a portion of a Final Cut Express sequence and convert that selection to a self-contained sub-sequence. There’s no simple “Nest Items” command—that’s reserved for Final Cut Pro users—but you can achieve the same effect with a little more trouble by cutting and pasting your selected clips into a new, empty sequence that you place in the clips’ former location in the master sequence.
Converting a group of clips to a nested sequence has several advantages:
Nesting a group of clips can simplify the process of moving them around within a sequence or placing them in another sequence.
Converting a series of edited clips into a single nested sequence allows you to create a single motion path for the nested sequence rather than having to create a separate motion path for each clip.
Nesting a group of clips allows you to apply and adjust a single copy of a filter to a series of clips, rather than having to apply and adjust filters for each individual clip.
You can nest clips that are stacked on multiple tracks (such as layered title elements) and animate them as a single sub-sequence.
You can nest a clip containing an element you want to blur. By increasing the frame size when you nest, you can create a roomier bounding box that will accommodate the larger size of your blurred element.
Nested sequences can help preserve your render files—most render files associated with the nested sequence are preserved within the nested sequence, even if you move it around or change its duration. For more information on nested sequences and rendering protocol, see “Using nested sequences to preserve render files” in Chapter 18.
In a sequence with multiple effects applied, nesting a clip can force a change in the rendering order.
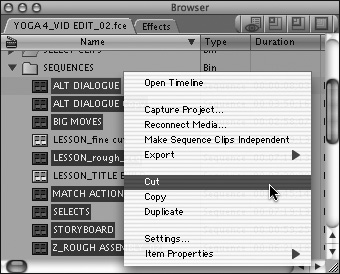
Moving selected clips into a new, separate sequence is the first step in nesting a selection of clips inside your master sequence. Moving material from sequence to sequence is easy; simply copy (or cut) material from one sequence and paste it into another sequence. You can copy and paste the entire contents of a sequence, or you can select a single clip.
Copying and pasting between sequences is governed by the same rules that govern copy and paste within the same sequence: When you paste, the clips paste themselves into the destination sequence on the same tracks you cut them from unless you make a change to the Auto Select controls of the destination sequence after you cut (or copy) but before you paste. If you do, then the Auto Select controls determine the track destination of pasted tracks. Clips will be pasted starting at the lowest-numbered Auto Select–enabled track.
To copy and paste clips between sequences:
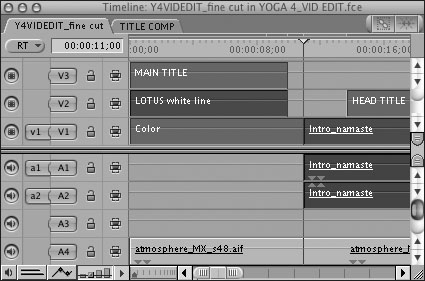
In the Timeline, select the clips you want to copy into the destination sequence (Figure 4.58) and then do one of the following:
To copy the selected clips, press Command-C.
To cut the selected clips, press Command-X.
In the destination sequence, position the playhead where you want to paste the clips; then press Command-V.
The clips are pasted into your destination sequence according to the protocols described above (Figure 4.59).
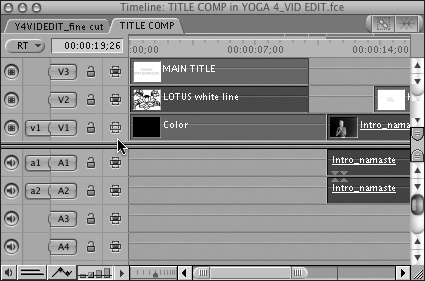
Figure 4.59. Press Command-V to paste the sequence tracks into your destination sequence. As long as you make no change to the Auto Select controls between cutting and pasting commands, the pasted clips are assigned to the same tracks they occupied in the source sequence. In this example, Auto Select control settings have been overridden and the clips are pasted into the destination sequence on Tracks V1, V2, and V3.
You can use sequences as source clips and edit them into another sequence. Your source clip sequence could be a preexisting sequence you drag into the Viewer or Timeline from the Browser, or it could be a nested sequence located inside a parent sequence in the Timeline. Opening a sequence in the Viewer is not quite as easy as opening a clip. Once you’ve loaded a sequence into the Viewer, however, you can edit it into a sequence just as you would a clip.
If you need more information on how to perform edits in Final Cut Express, see Chapter 9, “Basic Editing.”
To load a sequence into the Viewer:
In the Browser, select the sequence you want to edit into your main sequence; then do one of the following:
Choose View > Sequence.
Drag the sequence’s icon from the Browser and drop it on the image area in the Viewer window (Figure 4.60).
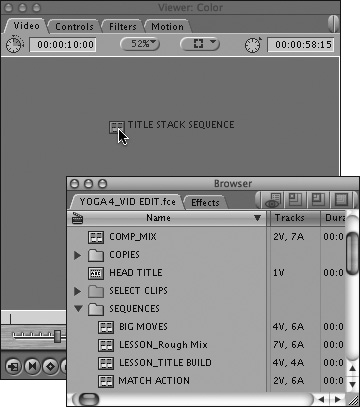
Your edited sequence opens in the Viewer, ready to be used as source media (Figure 4.61). If the sequence you select is open in the Timeline and the Canvas, it closes automatically when you load it into the Viewer.

Figure 4.61. Your edited sequence opens in the Viewer window. You can edit the sequence into an open sequence in the Timeline, just as you would a clip.
To load a nested sub-sequence into the Viewer:
In the Timeline, do one of the following:
Control-click the nested sequence and then choose Open in Viewer from the shortcut menu (Figure 4.62).
Double-click the nested sequence while holding down the Option key.

Your nested sequence opens in the Viewer window, ready to be used as a source clip.
Tips
When you load a nested sequence from the Timeline and edit it back into your main sequence, you are creating a duplicate of the nested sequence—an independent copy of the original sequence that will not reflect changes you make to the original. If you want all copies of your nested sequence to update when you make changes, use the Browser version of your nested sequence as your source clip instead.
All nested audio appears as stereo pairs on two tracks, even if the sub-sequence contains only a single channel of audio.
You can open a nested sequence and add, remove, or trim clips. When you return to your main sequence, you’ll see that the duration of the nested sequence has been adjusted to reflect your changes. Clips to the right of the nested sequence will be rippled to accommodate the change to your nested sequence duration. You’ll still need to open the nested sequence to make changes to the clips inside.
To make changes to a nested sequence:
Do one of the following:
In the main sequence in the Timeline, double-click the nested sequence (Figure 4.63).
In the Browser, double-click the icon for the nested sequence.
The nested sequence opens as the front tab of the Timeline (Figure 4.64). If you opened the nested sequence from inside the main sequence, the main sequence is still open on the rear tab (Figure 4.65).


To “un-nest” a sequence:
There’s no “Un-nest” command in Final Cut Express. If you want to replace a nested sequence that you have placed in your main sequence with the clips contained in that nest, you should first open the nest in the Timeline and then copy the clips from the open nest and paste them back over the nested sequence’s original location in the main sequence. For more information, see “Copying and pasting from sequence to sequence” earlier in this chapter.
Assembling Nested Sequences with Transitions
Building your program as a series of separate sequences and then assembling your sequence “scenes” into a final master sequence is a common post-production strategy. If you want to use transitions to join your scenes together, you’ll need to allow extra media handles at the start and end of your nested sequences. When you’re ready to assemble your master sequence, load each sub-sequence into the Viewer. Mark the frames you want to appear as the center point of your scene-to-scene transition as the sub-sequence’s In and Out points before you edit them into the final master sequence (Figure 4.66).
Final Cut Express has always used clip types—audio, video, graphic, and generated—to identify clips that reference different types of source media. FCE uses a different class of clip types—subclip, merged clip, and sequence—to identify clips that reference a portion of another clip (like a subclip) or multiple clips (like merged clips and sequences).
FCE 2 introduced three new clip types—master, affiliate, and independent—to identify clips that are linked by shared properties (like master and affiliate clips) or clips whose properties and behavior are independent of other clips (like independent clips). The new clip type classifications and behavior are designed to ease project management by automatically updating all affiliated clips when you make a change to a shared property on any of the individual affiliates anywhere in the project. The master/affiliate clips’ shared properties are all related to media management; clip properties that remain independent—In and Out points, markers, and applied effects—are all modified during the normal course of editing and must remain independent in each clip copy you use.
Here’s an example: You have a master clip in the Browser, and you edit it into your sequence. An affiliate copy of that master clip appears in the sequence. Rename the affiliate copy, and the name of its master clip is also renamed. Change the reel name of the master clip, and the reel name of the affiliate clip in the sequence reflects the same change.
The master/affiliate clip-handling scheme keeps your clip duplicates in sync, which can simplify your life when you’re media-managing certain types of projects. Projects best suited to master/affiliate clip handling are well logged, with discrete clips that you don’t plan on subdividing much.
If your preferred editing method is to capture large chunks of media and then subdivide and rename the clips post-capture, consider converting your master clips to independent-type clips before you start dicing them up. It could save you from the headache and confusion of converting (and tracking) each clip’s type separately. For more information on clip affiliation protocols, see “About Clip Affiliations” in Chapter 7 of Apple’s Final Cut Express Help PDF.
Here’s a rundown of FCE’s clip types.
Audio, Video, and Graphics clips: These clip types are determined by the type of source media the clip is referencing.
Generated clip: Create a generated clip by opening a generator from the Viewer’s Generators pop-up menu. Generated clips are created as master-type clips. For more information, see Chapter 17, “Titles and Generators.”
Master clip (Figure 4.67): Any clip that can generate affiliate clip copies is a master clip. See Table 4.1 for a complete list of ways to create one.
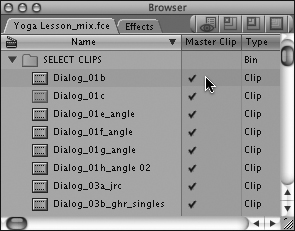
Figure 4.67. It’s not easy to identify master, affiliate, and independent clips in the FCE interface. Master clips are easiest to spot; a check mark in the Master Clip column identifies a master clip in the Browser. Master clips never appear in a sequence.
Table 4.1. FCE Clip Type Relationships
MASTER?
HOW TO CREATE
BEHAVIOR
Master clip
Yes
Capture new video or audio.
Import video or audio.
Create a subclip.
Create a freeze-frame.
Create a merged clip.
Drag a merged clip from the sequence back to the Browser.
Use the Duplicate as New Master clip command.
Use Modify > Make Master Clip on an affiliate or independent sequence clip.
Delete an affiliate’s master clip. Affiliate clips in the Browser are converted to master clips.
Synchronizes clip name, reel name, source timecode, subclip limits, and online/offline state with all affiliated clips and the master clip.
Does not synchronize markers, In and Out points, applied effects, or motion properties.
Master clips appear only in the Browser.
Affiliate clip
no
Edit a master clip into a sequence.
Duplicate a clip in the Browser or in a sequence.
Copy and paste a clip in the Browser or in a sequence.
Drag a sequence clip back into the Browser.
Synchronizes clip name, reel name, source timecode, subclip limits, and online/offline state with all affiliated clips and the master clip.
Does not synchronize markers, In and Out points, applied effects, or motion properties.
Affiliate clips can appear in the Browser or Timeline.
Independent clip
no
Delete an affiliate’s master clip.
Use the Make Independent Clip command on a sequence clip.
Copy a sequence from Project A to Project B; sequence clips become independent in Project B.
Edit a clip opened outside the project directly into a sequence.
Open an FCE 1 (or an FCP 1, 2, or 3) project in FCE 2; all project clips will be independent.
Maintains independent clip name, reel name, source timecode, remove subclip limits, online/offline state, markers, In and Out points, and applied effects or motion properties.
Independent clips appear only in the Timeline, except when a pre-FCE 2 project is opened.
Affiliate clip (Figure 4.68): An affiliate clip is a copy of a master clip that is created by inserting the master clip into a sequence or duplicating the master clip in the Browser. Copies of affiliate clips remain linked to their master clip originals; the linked relationship extends to the clip name, reel name, source timecode, labels, subclip limits, and online/offline state of all affiliate clips. Change one of these shared properties in any one of the affiliated clips, and the change will appear in all the affiliated clips. Markers, In and Out points, and applied effects or motion properties remain independent in master/affiliate clips. See Table 4.1 for a complete list of ways to create an affiliate clip.
Independent clip (Figure 4.69): Each copy of an independent clip refers directly back to its source media and does not synchronize clip naming or any other properties with any other independent clip copy. All clips in pre-FCE 2 projects are independent clips. See Table 4.1 for a complete list of ways to create an independent clip.
Subclip: Subclips are shorter clips you create from a section of a longer master clip. A subclip is always created as a new master-type clip, with no affiliate relationship to the clip it was created from. For information on subclips, see Chapter 8, “Working with Clips in the Viewer.”

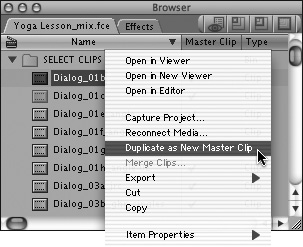
To duplicate a Browser clip as a new master clip:
Select the clip in the Browser and then do one of the following:
Control-click the clip and then choose Duplicate as New Master Clip from the shortcut menu (Figure 4.70).
Choose Modify > Duplicate as New Master Clip.
The duplicate of the clip appears as a new master clip in the Browser (Figure 4.71).

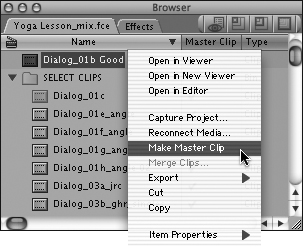
To convert an independent or affiliate clip into a master clip:
Select the clip in the Browser and then do one of the following:
Control-click the clip; then choose Make Master Clip from the shortcut menu (Figure 4.72).
Choose Modify > Make Master Clip.
Tips
After you’re done hacking, renaming, and subdividing, and the independent clips in your sequence finally settle down enough to get hitched, you can create master clips for every sequence clip simply by selecting the entire contents of the sequence and dragging it to the Browser. Your independent sequence clips become affiliates of the newly created master clips in the Browser.
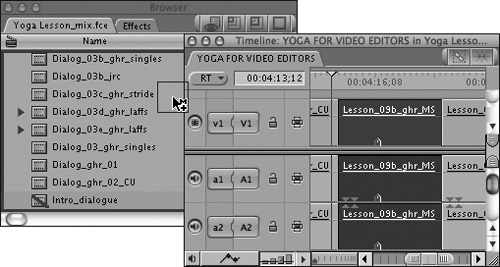
Create a duplicate master clip for a sequence clip by pressing Option as you drag the sequence clip out of the Timeline and then adding the Command key as you drop the clip in the Browser (Figure 4.73). “Voilà!” is so overused these days, but still...
To locate an affiliate clip’s master clip:
Select the affiliate clip in the Timeline or Browser; then choose View > Reveal Master Clip.
The master clip is revealed in the Browser.
To make a sequence clip independent:
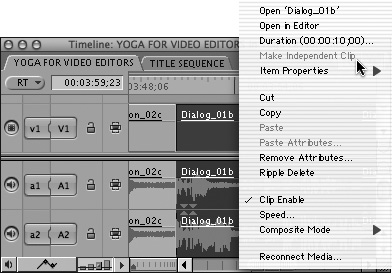
In the Timeline, Control-click the sequence clip; then choose Make Independent Clip from the shortcut menu (Figure 4.74).

Figure 4.74. Choosing Make Independent Clip from the sequence clip’s shortcut menu converts an affiliate-type clip to an independent-type clip.
The affiliate sequence clip is converted to an independent-type clip.
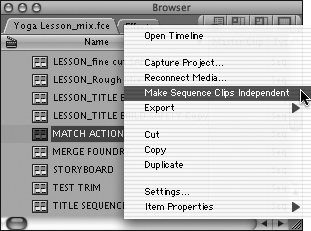
To make all clips in a sequence independent:
Select the sequence icon in the Browser; then choose Make Sequence Clips Independent from the shortcut menu (Figure 4.75).
To break an affiliate clip’s relationship with its master:
Do one of the following:
The Item Properties window is the central location for information about an individual clip. The settings on three tabs in the Item Properties window allow you to view or change the properties of a clip. Besides the general clip information column in the far left of the window, you’ll see a column for the clip’s video track and separate columns for each audio track in the clip. This expansion of the Item Properties window makes it possible to combine one video track with up to 24 tracks of audio from different sources and track each audio channel separately.
To open a clip’s Item Properties window:
Select the clip in the Browser or Timeline or open it in the Viewer.
Do one of the following:
Choose Edit > Item Properties.
Control-click the item; then choose Item Properties from the shortcut menu (Figure 4.76).
Press Command-9.

Tips
Want to view item properties for multiple clips in a single window? Just select the clips in the Browser or Timeline before you use the Edit > Item Properties command.
What if you have changed the name of a clip and removed all traces of the original source media file it references? You can consult the Item Properties window for the renamed clip to trace the underlying source media filename and location.
To get information about the format of a clip:
Open the clip’s Item Properties window using one of the methods described on the previous page.
The Item Properties window opens, displaying the Format tab. This tab displays data on the location of the source media file, file size, and format characteristics for each track of the clip (Figure 4.77).
Control-click the item’s setting in the Clip column to modify the following Format properties:
Name: Enter a new name for the clip.
Pixel Aspect Ratio: Select a pixel aspect ratio for the clip.
Anamorphic 16:9: If your clip’s source media is 16:9, enabling this option ensures that FCE will interpret and display the clip’s pixel aspect ratio properly.
Field Dominance: Specify the dominant field by making a selection from the shortcut menu.
Alpha Type: Select an alpha channel type for the video clip.
Reverse Alpha: Reverse the alpha channel of the video clip.
Composite Mode: Select the mode to be used when compositing the video clip.
