In this chapter you will learn how to create and work with loops. Loops are code blocks that repeat a series of programming statements over and over again. As such, they facilitate the development of applications that can process large amounts of data using a minimum number of programming statements. Loops can be used to process the contents of arrays and text files. Loops can also be used to control an application’s interaction with the user, repeatedly executing the same process until instructed not to. This chapter will teach you how to use a number of different types of loops and will explain the types of situations to which each type of loop is best applied. This chapter will also show you how to create your next computer game, the Guess My Number game.
Specifically, you will learn how to
Set up
do...while,do...until,for...next, andwhile...wendloopsAvoid creating endless loops
Prematurely exit out of loops
Terminate programs caught up in a loop
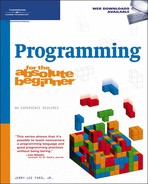
In this chapter you will learn how to create a new computer game called the Guess My Number game. This game challenges the player to guess a number between 1 and 100 in as few guesses as possible. The player submits guesses by typing a number into the designated textbox control and then clicking on a button control labeled Guess. When the game first starts, these two controls are disabled, preventing the player from entering a guess until the Start Game button is clicked, as shown in Figure 6.1.

A random number is generated when the player clicks on the Start Game button. In addition, the textbox input control and the Guess button are enabled, allowing the player to start making guesses. The Start Game button is then disabled and stays that way until the player manages to guess the game’s secret number, as shown in Figure 6.2.
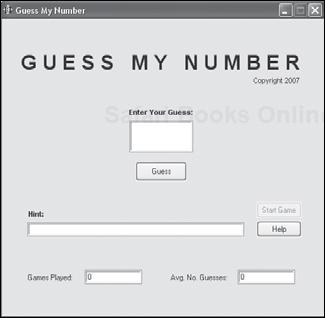
Figure 6.3 shows an example of what the game looks like as the player enters a guess.
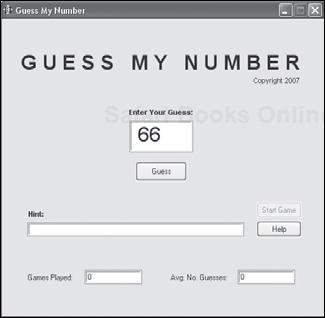
Figure 6.3. Aguess of 66 has been entered, but it will not be processed until the player clicks on the Guess button.
Each time a guess is made, the game responds by displaying a hint that the player can use to guide her next guess, as demonstrated in Figure 6.4.
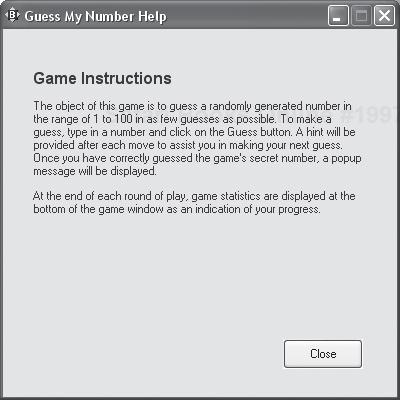
Help is available at any time. To access it, all the player has to do is click on the Help button. In response, the game displays the Help window shown in Figure 6.5.
Game play continues until the player guesses the secret number, at which time the popup dialog shown in Figure 6.6 is displayed.
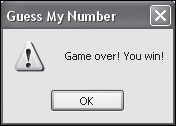
Figure 6.6. A popup dialog window notifies the playerwhen the game’s secret number has been guessed.
After clicking on OK to dismiss the popup dialog, the player can start a new game by clicking on the Start Game button again.
A loop is a set of programming statements that are repeatedly executed within a computer program. Without loops, programmers would have to write enormous programs in order to be able to process large amounts of data. Likewise, without loops, performing repetitive actions, such as processing a collection of records stored in a file, becomes a tedious chore. The power of loops can be easily demonstrated in even small programs. Take, for example, the following Just BASIC program.
print 1
print 2
print 3
print 4
print 5
print 6
print 7
print 8
print 9
print 10
As you can see in this example, things were done the hard way. In order to count to 10, 10 separate print statements were used. Supposeyou wanted to count to 100,1,000, or 1,000,000. The number of print statements required to count this many times is clearly prohibitive. However, using loops you can write a program that can count to any number you want using just a handful of statements. For example, consider the following:
i = 1

do


  print  i
  i = i + 1

loop while  i  <= 10
Here, a do...while loop has been set up to print out 10 numbers (see Figure 6.7), displaying the exact same output as the previous example.
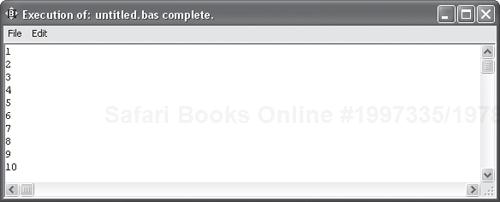
By changing the value of 10 to 1,000,000 in the last statement, you can modify the loop to count to a million without adding a single line of code.
Obviously, using fewer programming statements to get something done makes for more streamlined and easier to support applications. Without loops, the programmer’s job would be a lot harder. You can use loops to process the contents of arrays or to control an interactive application that repeatedly prompts the user to provide input. You can also use loops when processing files by extracting records a line at a time. As you have just witnessed, you can also use loops whenever you need to repeat a series of statements over and over again, like when displaying computer animation.
Like other programming languages, Just BASIC provides you with a number of different ways that you can construct loops, including:
do...while—. Creates a loop that executes at least once and repeats as long as a specified condition is true.do...until—. Creates a loop that executes at least once and repeats until a specified condition is true.for...next—. Creates a loop that repeats a set number of times.while...wend—. Creates a loop that repeats for as long as a specified condition is true.
This chapter will teach you how to formulate and work with each of these types of loops.
Hint

You will find examples of similar types of loops in most programming languages like C++ and Visual Basic. However, some programming languages, such as AppleScript, go a slightly different direction, using the repeat statement to create different types of loops. For example, in AppleScript the repeat while and repeat until loops are roughly the equivalent of the do...while and do...until loops and the repeat with loop is pretty similar to Just BASIC’s for...next loop.
The do...while loop is designed to repeat a code block as long as a specified condition remains true. In order to set up a do...while loop, you must know in advance what condition must occur in order for the loop to terminate (e.g., what will cause the condition to evaluate as false). You might, for example, set up a do...while loop that allows the user to enter an unlimited amount of input, terminating only when the user enters a command signaling the end of input. The syntax of the do...while loop is outlined here:
do
  statements
loop while condition
statements is a set of one or more program statements that are to be executed each time the loop repeats. condition is an expression that is evaluated at the end of each iteration of the loop and must resolve to a value of true or false. Because the condition being tested is defined at the end of the loop, do...while loops always execute at least one time, even if the value of condition is false.
Hint
As you can see from the syntax of the do...while loop, the expression being tested is located at the end of the loop, ensuring that the loop executes at least one time. In many other programming languages, including Visual Basic and REALbasic, the do...while loop supports a second format in which the condition is moved to the opening do statement, as shown here:
do while condition
  statements
loop
This form of the do...while loop only executes if the value of the tested condition is true. If it is not the case, the loop never executes.
You have already seen an example of a do...while loop that counted to 10 earlier in this chapter. To become more familiar with the do...while loop, take a look at the following example.
displayString$ = ""
name$ = ""
do
name$ = ""
prompt "Enter a name."; name$
name$ = upper$(name$)
if name$ <> "" and name$ <> "QUIT" then
displayString$ = displayString$ + name$ + chr$(13)
end if
loop while upper$(name$) <> "QUIT"
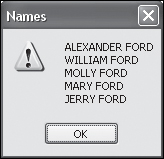
notice "Names" + chr$(13) + displayString$Here, a do...while loop has been set up to allow the user to input a series of names, each of which is appended to a string. As each new name is added, it is appended to the end of the displayString$ variable followed by a linefeed character. The user may input as many names as desired. The program stops accepting input only when the user enters the quit command. Note the use of the upper$() function, which converts any input presented by the user to all uppercase characters. This simplifies things by eliminating the requirement that the user enter the quit command in a particular format, allowing any use of case when keying in the command.
Figure 6.8 shows an example of the popup dialog that is repeatedly displayed prompting the user to enter another name.
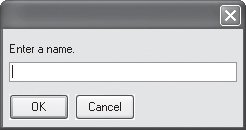
Figure 6.9 demonstrates how this example’s output might look if the user were to enter five names and then type quit.
Hint
Almost all programming languages have an equivalent set of statements that serve the same purpose as Just BASIC’s do...while loop. For example, in C++ and Perl, the do...while loop has the following syntax, using curly brackets to enclose the code block portion of the loop.
do {
  statements
} while (condition);
The do...until loop is very similar to the do...while loop, the only difference being that the do...until loop executes as long the tested condition is false instead of true. The syntax of the do...until loop is shown here:
do
  statements
loop until condition
Hint
As you can see from the syntax of the do...until loop, the condition being tested is located at the end of the loop, ensuring that the loop executes at least one time. In many other programming languages, including Visual Basic and REALbasic, the do...until loop supports a second format in which the condition is moved to the opening do statement, as shown here:
do unitl condition
  statements
loop
This form of the do...until loop only executes if the value of the tested condition is false. If this is not the case, the loop never executes.
statements is a set of one of more program statements that are executed each time the loop repeats. condition is the expression that is evaluated at the end of each iteration of the loop and must resolve to a value of true or false. Because the condition being tested is defined at the end of the loop, do...until loops always execute at least one time, even if the value of condition is true.
To get a better appreciation of the do...until loop, take a look at the following example.
i = 1

do

  print i
  i = i + 1

loop until i > 10
As you can see, this example is very similar to the do...while loop that was presented earlier. Both loops have been set up to count from 1 to 10. Instead of being set up to count from 1 to 10 while i is less than or equal to 10, this example has been set up to repeat until i is greater than 10. As this example demonstrates, the do...until and do...while loops are pretty much interchangeable.
The for...next loop is typically used in situations where you know in advance the number of times that a loop must repeat. The loop keeps track of the number of times that it has executed using a counter, which is just a numeric variable that is automatically incremented each time the loop repeats. The syntax of the for...next statement is outlined here:
for counter = begin to end [step StepValue]
   statements
next counter
statements is a set of one of more program statements that will be executed each time the loop repeats. counter is a numeric variable that keeps track of the number of times the loop executes. begin sets the counter variable’s initial value and end sets its ending value, which when reached terminates the loop’s execution. StepValue is an optional parameter that, when used, sets the incremental value to be used to increase the value of counter each time the loop repeats itself. If not specified, a value of 1 is assumed for StepValue
Hint
Note that in Just BASIC, you must add counter to the end of the next statement. Not all BASIC programming languages have this same requirement. For example, in REALbasic for...next loops do not allow you to add anything to the end of the next statement.
Hint
The for...next loop is very common among other programming languages. For example, in C++ and Perl, it has the following syntax.
for (initialization; condition; increment) {
  statements
}
To get a better feel of how the for...next loop works, take a look at the following example.
for i = 1 to 10
   print i
next I
Here, a for...next loop has been set up that counts from 1 to 10, just as was previously done with the do...until and do...while loops. As this example demonstrates, you can often use the for...next loop in place of the do...while or do...until loops. The for...next loop is often used in conjunction with arrays, as demonstrated here:
dim merchandise$(9)

merchandise$(0) = "Nails"
merchandise$(1) = "Screws"
merchandise$(2) = "Bolts"
merchandise$(3) = "Nuts"
merchandise$(4) = "Wire"
merchandise$(5) = "Hammers"
merchandise$(6) = "Paint"
merchandise$(7) = "Wood"
merchandise$(8) = "Washers"
merchandise$(9) = "Levels"

for i = 0 To 9
  notice "Inventory" + chr$(13) + merchandise$(i)
next i
Here, an array named merchandise$() has been created and populated with 10 items. Rather than process each item in the array a statement at a time, a for...next loop has been set up that processes the entire loop.
If necessary, you can include the StepValue parameter and specify a numeric value other than 1. For example, if you added it to the previous example and assigned it a value of 2, every other item in the merchandise$() array would be displayed. You can also assign a negative number as the StepValue, which in the case of the previous example could be modified to process the contents of the array in reverse order, as demonstrated here:
dim merchandise$(9)

merchandise$(0) = "Nails"
merchandise$(1) = "Screws"
merchandise$(2) = "Bolts"
merchandise$(3) = "Nuts"
merchandise$(4) = "Wire"
merchandise$(5) = "Hammers"
merchandise$(6) = "Paint"
merchandise$(7) = "Wood"
merchandise$(8) = "Washers"
merchandise$(9) = "Levels"

for i = 9 To 0 step -1
  notice "Inventory" + chr$(13) + merchandise$(i)
next i
Hint
You can use a negative number to step backward in any BASIC programming language. However, in REALbasic, you also have the option of specifying the DownTo command as demonstrated here:
For i As Integer = 10 DownTo 1
  MsgBox i
Next
Here, a for...next loop has been set up in REALbasic that counts from 10 down to 1 by 1, displaying the value of i in a popup dialog each time the loop repeats.
Just BASIC also supports the use of while...wend loops. A while...wend loop is one that repeats as long as a specified condition remains true. The syntax of the while...wend loop is outlined here:
while condition
  statements
wend
condition is an expression that is evaluated and must resolve to a value of true or false. statements is a set of one of more program statements that is to be executed each time the loop repeats.
Hint
Many other programming languages provide an equivalent functionality to BASIC’s while...wend loop. For example, an equivalent loop in C++ and Perl has the following syntax.
while (condition) {
  statements
}
To see an example of the while...wend loop in action, take a look at the following example.
i = 1

while i <= 10
  print i
  i = i + 1
wend
When executed, this example counts from 1 to 10.
Hint
REALbasic supports the while...wend loop. In Visual Basic the while loop is the equivalent of the while...wend loop and has the following syntax:
while expression
  statements
end while
However, in both programming languages the use of this type of loop is discouraged. Instead, the do...until and do...while loops are preferred, because these statements provide equivalent capabilities and the tested condition to be added to either the beginning of the loop or the end of it, making these statements far more flexible than the while...wend loop.
One situation that all programmers must constantly be on the look out for when working with loops is endless loops. An endless loop is a loop that never ends. Endless loops occur because of mistakes made when setting up loops. For example, you might want to create a loop that that counts from 1 to 10 as shown here:
i = 1

do

  print i
  i = i + 1
loop while i <= 10
However, suppose you accidentally typed a minus sign in place of the plus sign, like so:
i = 1

do

  print i
  i = i - 1
loop while i <= 10
In this example, the loop counts backwards starting at 1 and never stops because the value of i never reaches 10.
The point that you need to take from this example is to take extra care when working with loops in your applications. A loop is a very powerful programming technique. However, its power can be turned against you when a loop is miscoded. In addition to being careful when writing your program code, it is equally important that you test your applications thoroughly, ensuring that every line of code is tested, even code for parts of the application that may not be often used.
Trick
If, despite your best efforts, you realize when testing the execution of one of your Just BASIC programs within the Just BASIC code editor that your program has gotten stuck in an endless loop, all hope is not lost. In many situations you can terminate the program’s execution. To do so, click on the Run menu and select the Kill BASIC Programs menu item. In response, Just BASIC will display a context menu listing any of the Just BASIC programs currently executing, as demonstrated in Figure 6.10.

To force the termination of a particular Just BASIC program, select its name from the list and then click on Yes when prompted to terminate its execution. If this does not work or if you are running a stand-alone copy of your application outside of the Just BASIC editor, you can still stop your program by using the Task Manager window, which you can access by pressing the Ctrl + Alt + Del keys simultaneously. Once opened, you can select your application and then click on the End Task button. Windows will then display a popup dialog asking for confirmation before forcing the application’s termination.
There will be times when something happens in a loop that will require the loop to stop executing. For example, you might set up a loop that is designed to collect a series of names from the user. One way that you might handle this situation is to set up a do...while loop that executes until the user enters a command such as quit. When this occurs, you would then use the exit command to terminate the loop. Once the exit command has been executed, processing resumes with the program statement that follows the loop.
The exit command can be used to break out of do...until, do...while, while...wend, and for...next loops. The following list shows the syntax used by the exit command to break out of each of the aforementioned loops.
exit doexit whileexit for
Hint
The exit command can also be used to break out of subroutines and functions. When used to break out of a subroutine, the following syntax is used.
exit sub
When used to break out of a function, use the following syntax.
exit function
To get a better understanding of how to work with the exit command, take a look at this example.
nomainwin

dim names$(100)
i = 0

do while i <= 100

    prompt "Enter a new name. "; inputName$

  if inputName$ = "quit" then
    exit do
  else
    names$(i) = inputName$
    inputName$ = ""
    i = i + 1
  end if

loop
Here, a loop has been set up to collect and populate an array with up to 101 names. Each time the user enters a new name in the popup dialog and clicks on the OK button, a new name is added to the names$() array. In this example, the do...while loop has been set up to terminate only under two conditions. The first is when the value of i becomes equal to 100, at which time the array has been filled. The other condition occurs when the user enters quit into the popup dialog.
All right, now that you have learned all about loops and the steps involved in setting them up, let’s turn your attention back to the development of this chapter’s game project. As you work your way through this project, you will gain hands-on experience in controlling interface controls, including modifying their attributes and controlling their availability. You will also learn how to create and control a Help window and to programmatically terminate the application when one or both application windows are open.
The design of the Guess My Number game will follow the same pattern already established through the development of earlier programming projects. In total, you will create the development of the Guess My Number game in seven steps, as outlined here:
Create a new BASIC file and add initial comment statements.
Display the Guess My Number game window.
Analyze player guesses and determine whether the game has been won.
Start a new game.
Display a Help window.
Close the Help window.
Terminate the game’s execution.
Let’s begin the creation of the Guess My Number game by setting up a new BASIC file and adding the code statements shown here:
' *************************************************************************
'
' Script Name: GuessMyNumber.bas (The Guess My Number Game)
' Version:     1.0
' Author:      Jerry Lee Ford, Jr.
' Date:        March 1, 2007
'
' Description: This game is a Just BASIC number guessing game that
'              challenges players to guess a number between 1 and 100 in
'              as few guesses as possible.
'
' *************************************************************************

nomainwin 'Suppress the display of the default text window
As you can see, there is nothing new here, just a few opening comments followed by the nomainwin command, which suppresses the display of the application’s default mainwin text window.
The next step in the development of the Guess My Number game is to set up the game’s primary window from which the game is played. This is accomplished by adding the programming statements shown next to the end of the program file.
'Declare global variables used to keep track of game statistics
global secretNumber, avgNoGuesses, noOfGamesPlayed, guessCount, helpOpen$

'Assign default values to global variables
secretNumber = 0    'Keeps track of the game's randomly generated number
guessCount = 0      'Keeps track of the total number of guesses made
avgNoGuesses= 0     'Stores the calculated average number of moves per game
noOfGamesPlayed = 0 'Keeps track of the total number of games played
helpOpen$ = "False" 'Keeps track of when the #help window is open

WindowWidth = 510   'Set the width of the window to 500 pixels
WindowHeight = 500  'Set the height of the window to 500 pixels

ForegroundColor$ = "Darkblue" 'Set the window font color to dark blue

'Define the format of statictext controls displayed on the window
statictext #play.statictext1, "G U E S S  M Y  N U M B E R", _
  30, 50, 440, 40
statictext #play.statictext2, "Copyright 2007", 395, 90, 80, 20
statictext #play.statictext3, "Games Played:", 40, 400, 80, 20
statictext #play.statictext4, "Avg. No. Guesses:", 265, 400, 90, 20
statictext #play.statictext5, "Enter Your Guess:", 200, 140, 100, 20
statictext #play.statictext6, "Hint:", 42, 300, 30, 20

'Add button controls to the window
button #play.button1 "Guess", AnalyzeGuess, UL, 210, 225, 80, 30
button #play.button2 "Help", DisplayHelp, UL, 400, 318, 70, 25
button #play.button3 "Start Game", StartGame, UL, 400, 288, 70, 25

'Add three textbox controls and place them inside the groupbox control
textbox #play.textbox1, 200, 160, 100, 50
textbox #play.textbox2, 130, 395, 90, 22
textbox #play.textbox3, 370, 395, 90, 22
textbox #play.textbox4, 40, 320, 340, 22

'Open the window with no frame and a handle of #play
open "Guess My Number" for window_nf as #play

'Set up the trapclose event for the window
print #play, "trapclose ClosePlay"

'Display the appropriate variable values in the following textbox controls
print #play.textbox3, avgNoGuesses
print #play.textbox2, noOfGamesPlayed

'Set the font type, size, and properties for each of the static controls
print #play.statictext1, "!font Arial 24 bold"
print #play.statictext2, "!font Arial 8"
print #play.statictext5, "!font Arial 8 bold"
print #play.statictext6, "!font Arial 8 bold"
print #play.textbox1, "!font Arial 24";

print #play.button3, "!setfocus"; 'Set focus to the Start Game button
print #play.button1, "!disable"   'Disable the Guess button
print #play.textbox1, "!disable"  'Disable the input textbox

'Pause the application to wait for the player's instruction
wait
As you can see, the first thing that happens is the definition of five global variables that will be used to keep track of data used throughout the application. Each of these five variables is then assigned an initial value. Note that the purpose of each variable is documented in comments embedded within the program code. The last variable, helpOpen$, merits additional discussion. It will be used to keep track of the status of the game’s Help window. Since the Help window is not opened by default, an initial status of "False" is assigned to helpOpen$. Later, should the player open the Help window, its value will be changed to "True". If the player decides to stop playing the Guess My Number game, the value assigned to helpOpen$ will be checked to determine if the application needs to close the Help window before terminating its execution.
The next several statements set the height and width of the window and its foreground color to dark blue. Six statictext controls are then added to the window. These controls will be used to display the game’s name and copyright information and to provide labels for other controls.
Next, three button controls are added to the window and assigned labels of Guess, Help, and Start Game. When the player clicks on the Guess button, the AnalyzeGuess subroutine is called. This subroutine compares the player’s guess to the game’s randomly generated number to see if the player has won. If this is not the case, a hint is provided. Clicking on the Help button calls on the DisplayHelp subroutine, which displays the game’s Help window. Clicking on the Start Game button executes the StartGame subroutine, which allows the player to start up a new round of play.
Four textbox controls are then added to the window. The first textbox control will be used to allow the player to type in and submit guesses. The other three textbox controls will be used to display a hint that helps to guide the player’s next guess as well as display game statistics showing the number of games played and the average number of guesses made per game.
The next statement displays the window using the open command, assigning it a handle of #play. The window’s trapclose event handler is then set up, calling on the ClosePlay subroutine whenever the player attempts to close the #play window (requiring confirmation before closing any open windows and executing the end command).
The next seven statements use the print command to display the values assigned to the avgNoGuesses and noOfGamesPlayed variables (both are initially assigned a value of 0) and to set the font size, type, and attributes of various statictext and textbox controls. The last three print statements set focus to the Start Game button and disable access to the Guess button and its associated input textbox control. Finally, the wait command is executed, pausing application execution to await user interaction.
The AnalyzeGuess subroutine is responsible for analyzing player guesses. It provides hints based on player input and determines when the game has been won. The code statements that make up the AnalyzeGuess subroutine are shown next and should be added to the end of the program file.
'This subroutine analyzes player guesses and determines when the game
'has been won
sub AnalyzeGuess handle$

  'Retrieve the player's guess and assign it to a variable
  print #play.textbox1, "!contents? playerGuess"
  'Validate that an acceptable value has been entered
  if playerGuess < 1 or playerGuess > 100 then

    'Inform the user that an invalid guess has been made
    print #play.textbox4, "Your guess must be between 1 and 100. Try again."
    print #play.textbox1, "" 'Clear out the input textbox
    print #play.textbox1, "!setfocus"; 'set focus to the input textbox
    exit sub 'Exit the subroutine without processing any remaining
             'subroutine statements

  end if

  'Determine if the player's guess is too low
  if playerGuess < secretNumber then

    'Increment the variable that tracks the total number of guesses made
    guessCount = guessCount + 1

    'Inform the user that the guess was too low
    print #play.textbox4, "Your guess was too low. Try again."
    print #play.textbox1, "" 'Clear out the input textbox
    print #play.textbox1, "!setfocus"; 'set focus to the input textbox
    exit sub 'Exit the subroutine without processing any remaining
             'subroutine statements

  end if

  'Determine if the player's guess is too high
  if playerGuess > secretNumber then

    'Increment the variable that tracks the total number of guesses made
    guessCount = guessCount + 1

    'Inform the user that the guess was too high
    print #play.textbox4, "Your guess was too high. Try again."
    print #play.textbox1, "" 'Clear out the input textbox
    print #play.textbox1, "!setfocus"; 'set focus to the input textbox
    exit sub 'Exit the subroutine without processing any remaining
             'subroutine statements

  end if

  'Determine if the player's guess was correct
  if playerGuess = secretNumber then

    'Let the player know he has won the game
    notice "Guess My Number" + chr$(13) + "Game over! You win!"

    'Increment the variable that tracks the total number of guesses made
    guessCount = guessCount + 1

    'Increment the variable that tracks the total number of games played
    noOfGamesPlayed = noOfGamesPlayed + 1

    'Calculate the average number of guesses per game
    avgNoGuesses = guessCount / noOfGamesPlayed

    'Display the appropriate variable values in the following textbox
    'controls
    print #play.textbox3, avgNoGuesses
    print #play.textbox2, noOfGamesPlayed

    print #play.textbox1, ""          'Clear out the input textbox
    print #play.button3, "!enable"    'Enable the Start Game button
    print #play.button3, "!setfocus"; 'Set focus to the Start Game button
    print #play.textbox1, "!disable"  'Disable the input textbox
    print #play.button1, "!disable"   'Disable the Guess button
    print #play.textbox4, ""          'Clear out the Hint textbox control

    exit sub 'Exit the subroutine without processing any remaining
             'subroutine statements

  end if

end sub
This subroutine begins by storing the player’s guess in a variable named playerGuess. It then uses an if...then statement to determine if the player’s guess is valid (e.g., it is not less than 1 or greater than 100). Note the use of the or operator, which allows the if statement to perform two separate comparison operations. If the player’s guess is invalid, an error message is displayed and then the input textbox control is cleared and assigned focus, preparing it for the player’s next guess.
If the player’s guess is valid (e.g., it is greater than or equal to 1 and less than or equal to 100), three separate if...then statements are executed. The first if...then statement executes when the player’s guess is too low. The second if...then statement executes when the player’s guess is too high, and the last if...then statement executes when the player’s guess matches the game’s secret number. The first two if...then statements increment the value of guessCount by 1 and display an appropriate hint message. The last if...then statement also increments the value of guessCount as well as the value of noOfGamesPlayed by 1. It then divides the value of guessCount by noOfGamesPlayed to calculate the value assigned to avgNoGuesses. Next, a series of print statements is executed in order to enable the Start Game button and assign it focus as well as to disable the Guess button and the input textbox control.
The StartGame subroutine, shown next, is called when the player clicks on the Start Game button. It is responsible for generating the game’s random number (in the range of 1 to 100) and for enabling the Guess button and input textbox controls.
'This subroutine is called when the player clicks on the Start Game button
sub StartGame handle$

  'Generate a new random number for the game
  secretNumber = int(rnd(1)*100) + 1

  print #play.button1, "!enable"     'Enable the Guess button
  print #play.textbox1, "!enable"    'Enable the input textbox
  print #play.button3, "!disable"    'Disable the Start Game button
  print #play.textbox1, "!setfocus"; 'Set focus to the input textbox

end sub
The code statements responsible for generating and displaying the game’s Help window are shown next and should be added to the end of the program file.
'This subroutine is called when the player clicks on the Help button
sub DisplayHelp handle$

  helpOpen$ = "True" 'Identify the #help window as being open

  WindowWidth = 400  'Set the width of the window to 500 pixels
  WindowHeight = 400 'Set the height of the window to 500 pixels

  'Use variables to store text strings displayed in the window
  HelpHeader$ = "Game Instructions"
  helpText1$ = "The object of this game is to guess a randomly generated" _
    + " number in the range of 1 to 100 in as few guesses as possible. " _
    + "To make a guess, type in a number and click on the Guess button. " _
    + "A hint will be provided after each move to assist you in making " _
    + "your next guess. Once you have correctly guessed the game's secret" _
    + " number, a popup message will be displayed."
  helpText2$ = "At the end of each round of play, game statistics are " _
    + "displayed at the bottom of the game window as an indication of " _
    + "your progress."

  'Define the format of statictext controls displayed on the window
  statictext #help.helptext1, HelpHeader$, 30, 40, 140, 20
  statictext #help.helptext2, helpText1$, 30, 70, 330, 80
  statictext #help.helptext3, helpText2$, 30, 160, 330, 50

  'Add button controls to the window
  button #help.button "Close", CloseHelpWindow, UL, 280, 310, 80, 30

  'Open the window with no frame and a handle of #play
  open "Guess My Number Help" for window_nf as #help

  'Set the font type, size, and properties for specified statictext control
  print #help.helptext1, "!font Arial 12 bold"

end sub
As you can see, the code statements in this subroutine are pretty straightforward. However, there is one statement that you should pay particular attention to. It is the first statement in the subroutine. This statement assigns a value of "True" to the helpOpen$ string variable. This identifies the Help window as being open. Later, when the player tries to terminate the Guess My Number game, the game’s trapclose event handler will examine the value assigned to helpOpen$ in order to determine whether to close the Help window before executing the end command.
The CloseHelpWindow subroutine, shown next, is executed whenever the player closes the game’s Help window. As you can see, it executes two statements. The first statement sets the value of helpOpen$ to "False" and the second statement closes the window.
'This subroutine is called when the player closes the #help window
sub CloseHelpWindow handle$

helpOpen$ = "False" 'Identify the #help window as being closed

  close #help 'Close the #help window

end sub
The application’s last subroutine is the ClosePlay subroutine. Its job is to get confirmation from the player before terminating the game. If confirmation is provided, the subroutine closes the #play window and, if open, it also closes the game’s Help window (#help) and then executes the end command.
'This subroutine is called when the player closes the #play window
'and is responsible for ending the game
sub ClosePlay handle$

  'Get confirmation before terminating program execution
  confirm "Are you sure you want quit?"; answer$

  if answer$ = "yes" then 'The player clicked on Yes

    close #play 'Close the #play window
    'See if the #help window is open and close it if it is
    if helpOpen$ = "True" then

      call CloseHelpWindow "X" 'Close the #help window

    end if

    end 'Terminate the game

  end if

end subThat’s it. Assuming that you have followed along carefully without missing any steps, your copy of the Guess My Number game should be ready to test. As you put the game through its paces, try entering both valid and invalid data to ensure that the application handles it correctly. Keep an eye on the game statistics provided at the bottom of the game window and validate that they are being properly tabulated. Lastly, make sure that the Guess and Start Game button controls are appropriately enabled and disabled as the game progresses and that the hints that are provided are consistent with the number that the game generates.
In this chapter you learned how work with an assortment of different types of loops, including the do...while, do...until, for...next, and while...wend loops. This chapter also provided you with guidance regarding situations in which each of these types of loops is best applied. You learned how to use the exit command to break out of loops and terminate programs that have become hung up in loops. By learning how to work with loops, you have laid the foundation required to develop applications that can process huge amounts of data or repeat any set of program statements over and over again as required to perform a particular task.
Before moving on to Chapter 7, “Improving Program Organization with Functions and Subroutines,” why don’t you take a little extra time to work on the Guess My Number game by tackling the following list of challenges.