6. Working with Existing Web Pages
Animating HTML Pages
So far, you’ve created only standalone animations. But the product of your efforts isn’t usually the purpose. The goal of creating a banner ad or animation is to eventually deploy it to an existing site or web page. In this chapter, we’ll explore the steps needed to take an Edge animation and insert it into a web page on your current site. Then, although the program doesn’t offer this feature yet, I‘ll show you how easy it is to make Edge animations loop. Later, we’ll also take a look at how you can use Edge to animate the whole web page itself!
Inserting Edge Animations
OK, you’ve created a great banner ad, now what? You’re not going to deploy it as a standalone animation. In this exercise, you’ll learn how to insert an Edge animation into an existing web page.
1. Launch Edge Preview.
2. Open edgebanner.edge from the Lesson6 folder. Preview the animation.
The animation is a travel banner ad for Italy that combines text, native Edge objects, and four web-compatible images. When the animation ends, the first image is requeued, indicating that the animation is intended to loop. This version of Edge doesn’t include any looping behavior, but later I’ll show you how to add a simple JavaScript to make the animation play over and over.
3. Launch Adobe Dreamweaver or your favorite HTML editor.
Dreamweaver is not required for this exercise or operation; it’s just my preferred editor. Any HTML editor may be used. If you don’t have one, you can perform the following steps in any text editor like Notepad, TextEdit, BBEdit, and so on. Note: Both Windows and the Mac OS supply a built-in text editor, and several very good programs are available for free or at a nominal cost for download. However, for any professional web-development environment, Dreamweaver offers very powerful tools and productivity enhancements that I just can’t live without.
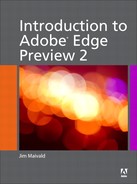
4. Dreamweaver users only (others may skip to Step 5): Define a new site based on the Lesson6 folder. Set the default images folder to: Lesson6/images/.
If you’re unfamiliar with Dreamweaver, refer to the Help file to describe the steps necessary to define a new site. For a complete course in Dreamweaver, see Dreamweaver CS5: Classroom in a Book (Adobe Press, 2011). Note: The following steps will focus on a Dreamweaver-based workflow, so some of the descriptions may not conform to your own screen if you’re using another program.
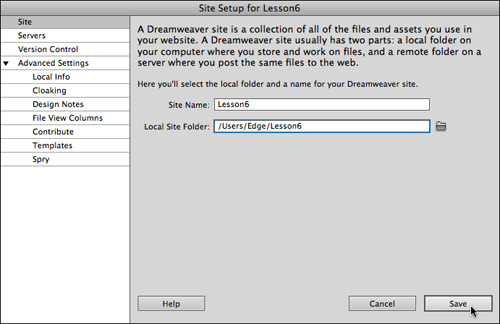
5. Open the file banner_page.html from the Lesson6 folder. Save the file as: mybanner_page.html.
6. Switch to Design view, if necessary.
The file contains a two-column web page with header and footer and a basic CSS-based navigation menu. As you can see, a spot has been reserved for the banner ad.
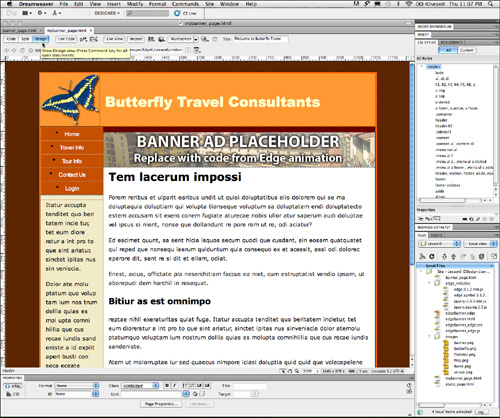
7. In Design view, select the banner ad placeholder. Observe the tag selectors at the bottom of the document window.
The placeholder is an <img> element contained in the element <div.symbol_stage#stage>. The <div> features both HTML class and ID attributes. You will insert the Edge HTML components into this page to replace the placeholder.
8. Open the file edgebanner.html.
This is the base file for the Edge animation. If you are still in Design view, the file looks as if it’s empty. And, it mostly is.
9. Switch to Code view. Observe the code.
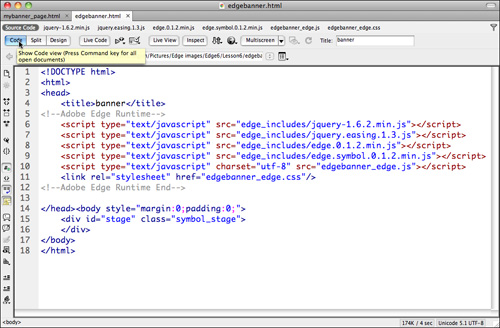
If you haven’t opened any Edge animations yet, you may be surprised to learn that the file contains only 18 lines of code. In fact, almost all of the code creating the animation is actually contained in the files referenced in the <head> section of this page. The files referenced include both CSS and JavaScript files. To move the Edge animation, you have to transfer all those references to the appropriate spots of the targeted HTML document.
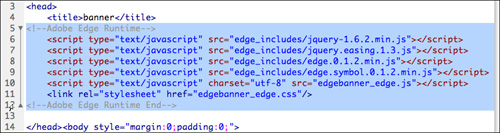
10. Select all the code starting from line 5 <!--Adobe Edge Runtime--> to the end of line 12 <!--Adobe Edge Runtime End-->.
11. Select Edit > Copy or press Ctrl/Cmd-C.
12. Switch to mybanner_page.html.
13. If necessary, switch to Code view. Locate the opening <head> tag. Insert the cursor directly after the tag.
14. Select Edit > Paste or press Ctrl/Cmd-V.
You have moved the file references to the appropriate spot of the HTML document. Note: It’s important to know that the files referenced here are all stored within the same folder as the targeted HTML document. If your Edge animations are saved in a different folder than your web pages, these references should be modified to point to the proper locations.
The last step is to replace the placeholder code with the real deal.
15. Switch to edgebanner.html. Locate the code:
<div id="stage" class="symbol_stage"></div>
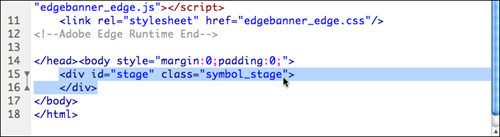
Note how the <div> element itself is empty! All the images and other animation elements are supplied by the referenced files. In the case of these two files, the placeholder <div> in the targeted HTML is identical to this element here, except that it contains a placeholder image. To finish the process of inserting the animation, you could copy the <div> element from this file and paste it in place of the one in the targeted page, or you could simply edit the code in the targeted page to remove the placeholder image. Note: The key aspects in all this are actually the class and ID attributes in the <div>.
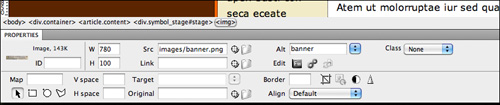
16. Switch to mybanner_page.html. Locate the code:
<img src="images/banner.png" width="780" height="100" alt="banner">

17. Select and delete the entire <img> element.
The <div> element should be empty. It is now identical to the one in edgebanner.html.
18. Save the file. Select Live view.
The banner ad should play one time and stop. If for some reason the animation doesn’t play properly in Live view, or you aren’t using Dreamweaver, you can preview the page in any current browser, loading the mybanner_page.html from your local hard drive. Note: Older browsers may not be compatible with Edge animations.
As you can see, incorporating Edge animations into an existing web page is pretty straightforward and simple. The only limitation seems to be in the fact that the animation only plays one time. At the moment, Edge doesn’t provide a built-in method for looping animations, but since it uses standards-based code, we can supply our own method with a bit of JavaScript.
Adding a Looping Behavior
In this exercise, you’ll learn how to add a simple JavaScript code snippet that accesses Edge’s own jQuery library to make the animation loop.
1. If necessary, launch Dreamweaver. Open mybanner_page.html.
Note: As I mentioned earlier, Dreamweaver is not required for this exercise. You can perform the following steps in any HTML or text editor.
2. Switch to Code view. Locate and insert the cursor before the ending </head> tag.
3. Enter the following code:
<script language="JavaScript">
$(window).ready(function()
{
$.Edge.symbol.get($("#stage"))
._getTimeline("Default Timeline")
.addObserver({ onComplete: function()
{
$.Edge.symbol.get($("#stage"))
.play("Default Timeline");
}
});
});
</script>
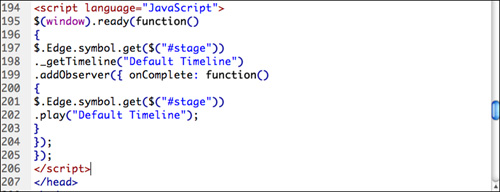
This script calls the timeline for animation’s stage element and causes it to loop endlessly. And best of all, this code should work for any Edge animation. Note: Be careful to enter all the code as it appears, even a small typo can cause it to fail. If you are working in Dreamweaver or another program that automatically debugs the code as you type, keep an eye out for any error messages. Also, it’s important to know that the code supplied here works for this version of Edge Preview, but it may not work in future releases.
4. Save the file and preview the page in Live view or your favorite browser.
The animation should continue to loop endlessly now. Although this animation isn’t designed to stop playing at the end, if you wanted your animations to loop a specific number of times and stop, it’s easy to adapt the above code to accomplish this goal.
5. Modify the code as you see below:
<script language="JavaScript">
$(window).ready(function()
{
var i=0;
$.Edge.symbol.get($("#stage"))
._getTimeline("Default Timeline")
.addObserver({ onComplete: function()
{
//Comment: enter below the number of times the animation should run, minus one.
if ( i < 1)
{
++i;
$.Edge.symbol.get($("#stage"))
.play("Default Timeline");
}
}});
});
</script>
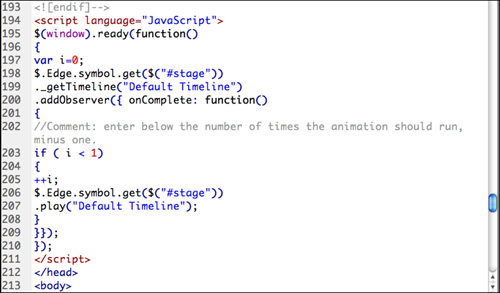
These changes should make the animation loop twice. To change the number of times it loops, modify the code < 1 to the number of times you want it to loop after the first run-through. Later in this chapter, we’ll explore the steps needed to deploy your Edge animations to your website. Next, we’ll take a look at how Edge can animate the entire web page itself!
Animating a Web Page
If you were a curious person, you probably would have already started to poke around in the files Edge created for your animation to see how all this magic is created. If you did, you’d find a whole bunch of CSS and JavaScript and you might miss altogether the fact that it’s all straightforward, standards-based code. Edge isn’t building proprietary elements or sprites; it’s simply using what’s available to knowledgeable coders and developers. In fact, I pointed out several times in the previous chapters that the animations you were creating were populated by typical HTML elements: div, p, h1-h6 and so on. So then the next question is: “What’s preventing you from using Edge to animate an entire web page?” And, the simple answer is: “Nothing.”
In this exercise, you’ll learn how to use Edge to animate a basic web page.
1. If necessary, Launch Edge Preview.
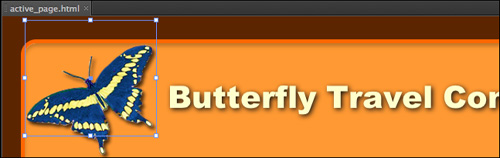
2. Open static_page.html from the Lesson6 folder. Save the file as active_page.html.
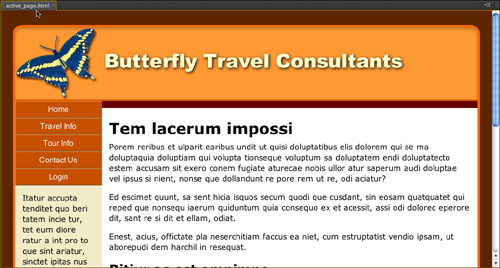
The page is nearly identical to the document with which you just worked, except that it doesn’t contain the banner ad. If you intend to animate the entire page, it may be asking a bit much to add Edge animation to a page containing an Edge animation. Feel free to try, but I like to make sure my web pages display correctly, so I err on the side of caution.
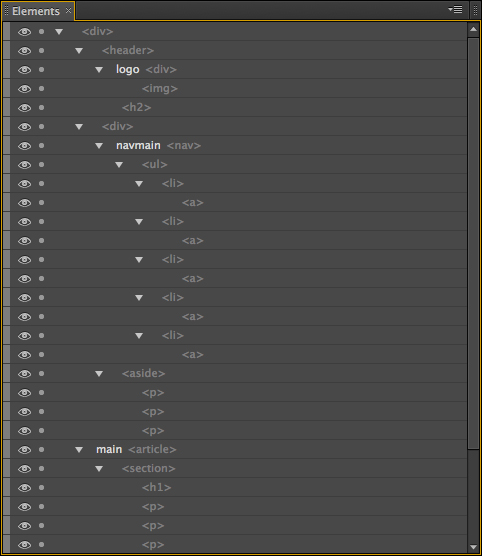
As you can see from the Elements panel, the HTML elements within the page are displayed in a long list in the order they appear in the code. Items with IDs are listed by that attribute. While you won’t see a class name displayed, it will appear if you hover the Selection tool over the element in the list. Otherwise, elements without IDs are simply listed by their tag name, like: <div>, <p> or <aside>.
If you want to identify elements quickly in Edge, I’d advise that you add unique IDs to any element you wish to animate. But it’s not necessary. Edge allows you to animate any element that appears within the list.
Let’s start off by hiding the entire page and then making it appear all at once.
3. In the Elements panel, select the <div> at the top of the list.
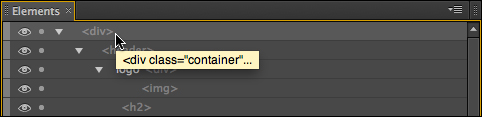
A tooltip will appear when you hover over it, indicating that the element is: <div class="container">.
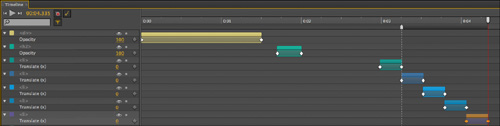
4. If necessary, set the Playhead at 0:00.00 seconds. Set Opacity to: 0%.
A keyframe will appear on the timeline.
5. Move the Playhead to 0:01.500 seconds. Set Opacity to: 100%.
A keyframe and transition will appear on the timeline for Opacity. The next item in the list is the butterfly logo. Let’s get it to fly across the screen.
6. Select the <div> labeled “logo” in the Element panel.
A blue frame should appear in the stage surrounding the butterfly indicating that it’s selected. Be careful when selecting elements. In many cases, you can simply click on the item itself if you want to select it. But the logo is made up of two elements: <div> and <img>. Clicking on the item on the stage could select either one. And it might be the wrong one. By using the Element list, you’ll always target the desired item.
7. In the Properties panel, enter 2000 px for Translate (x).
A keyframe appears for Translate (x) at 0:01.500 seconds.
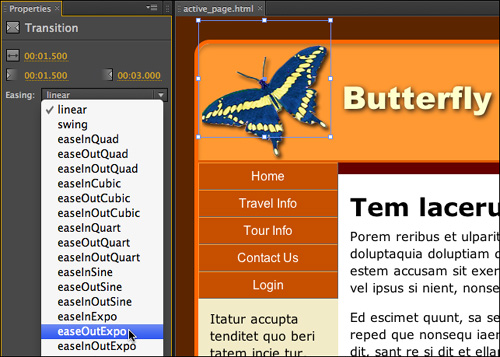
8. Move the Playhead to 0:03.00 seconds; enter 0 px for Translate (x).
A keyframe and transition appear for Translate (x).
9. Select the transition for Translate (x). From the Easing menu, choose: easeOutExpo.
Let’s make it look as if the butterfly’s wings were fluttering.
Creating Repetitive Actions
In this exercise, you will continue animating the web page by creating a flutter effect for the butterfly.
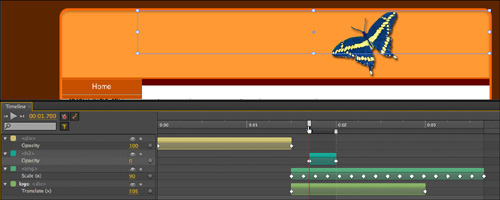
1. Move the Playhead to 0:01.500 seconds. Alt/Opt-Drag the Mark to 0:01.635 seconds.
2. Select the <img> inside <div> logo in the Elements list. Change Scale (x) to: 80%.
A set of keyframes and a transition appear on the timeline for Scale (x) for the <img> Element.
3. Select the transition for Scale (x) and copy it. Paste invert at 0:01:635 seconds.
The inverted transition appears on the timeline, moving the Playhead to 0:01.770 seconds. The first transition combined with the second creates the first flutter. To create more, simply copy both and paste them over and over until you have achieved the desired number of moves.
4. Select the two back-to-back Scale (x) transitions and copy them.
5. Paste new transitions at 0:01.770 seconds. Continue to paste copies until the Playhead shifts to 0:03.660 seconds.

Each time you paste the Playhead shifts to the end of the new transitions.
6. Save the file and preview the animation.
The screen starts out blank. The main content frame appears; the butterfly flies across the stage to its resting position; it flutters a few more times after it stops; then the butterfly flies across the title in the header.
Let’s make the title fade in as the butterfly passes.
7. Select the <h2> element in the header.
8. Move the Playhead to position the butterfly over the word “Butterfly” (approximately 0:02.00 seconds). Move the Mark to this position.
9. Move the Playhead to position the butterfly over the word “Consultants” (approximately 0:01.700).
This targets the timeline to create a transition using the back-to-front animation technique.
10. Change the Opacity to: 0%.
Keyframes and a transition appear on the timeline. The next element we’ll animate is the navigation menu. This element offers lot of possibilities: You could have the entire menu fade in or fly in, too, but I think it would look better as a build effect.
Building an HTML Menu
In this exercise, you will build the navigation menu by animating one button at a time.
1. In the Elements list, select the first <li> element in the navmain <nav> element.
A bounding box appears around the first button in the menu.
2. Move the Playhead to 0:03.00 seconds. Move the Mark to 0:03.255 seconds.
3. Change the Translate (x) attribute to: -190px.
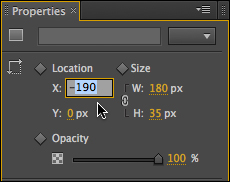
The first button of the menu moves off the stage and is invisible to the left of the page.
4. Select the Translate (x) transition for the <li> element. Apply easeOutQuad from the Easing menu. Press Ctrl/Cmd-C to copy the transition.
5. Move the Playhead to 0:03.255 seconds. Select the next <li> element and press Ctrl/Cmd-V to paste the transition.
The second menu button is now animated like the first.
6. Select each of the remaining menu buttons in turn and paste the transition until all have been animated consecutively.
You can use the same transition for the rest of the sidebar1 content, too.
7. Select the element: <aside>. Press Ctrl/Cmd-V to paste the transition again.
Let’s fly the main content in from the bottom of the stage.
8. Select main <article> in the Elements panel.
9. Move the Playhead to 0:04.530 seconds. Move the Mark to 0:05.500 seconds.
10. Change the Translate (y) attribute to: 1500px.
A transition and keyframes appear on the timeline for the element: main <article>. The last element we’re going to animate is the <footer>.
11. Select the Translate (y) transition. Apply easeOutQuart from the Easing menu.
12. Select the element: <footer>.
13. Move the Playhead to 0:05.500 seconds. Move the Mark to 0:06.00 seconds.
14. Change the Translate (y) to: 1200px.
15. Select the Translate (y) transition and apply easeOutBounce from the Easing menu.
16. Save the file and preview the animation.
The empty web page fades in as the butterfly flutters across the stage, and then each successive element appears on the screen until the whole page is complete. Feel free to experiment with different settings or timings.
You’ve learned how to create animations in Edge using both its native drawing tools as well as web-compatible images. You’ve inserted a standalone animation in a web page and learned how to use Edge to animate the elements that make up the page itself. The final step is to deploy your animations to your website.
Deploying Edge Animations to the Web
The hard part is over. Your animations are complete and they’ve been inserted in all your pages. But getting the animations to the web is a little more complicated than simply uploading the web pages to the Internet. In this exercise, you’ll learn how to deploy Edge animations properly.
1. Launch Dreamweaver.
As before, Dreamweaver is not essential to this exercise, but it offers tons of productivity enhancements that make deploying your animations quick and easy. In place of Dreamweaver, you can use any FTP application. Note: The following steps assume you will be using Dreamweaver.
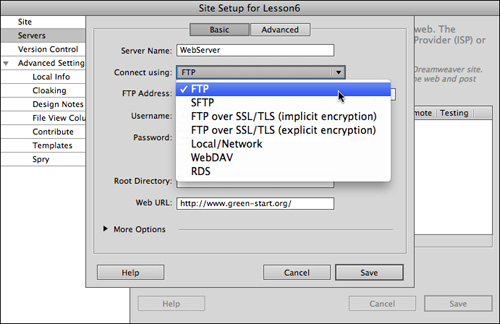
2. If necessary, define a site based on the Lesson6 folder. If a site is already defined, select it from the Site menu in the Files panel.
The site should be configured to connect to your remote server. See the instructions on how to do this in the Help file.
3. Open the Files panel. Select the Expand button.
4. Select the button: Connects to Remote Host.
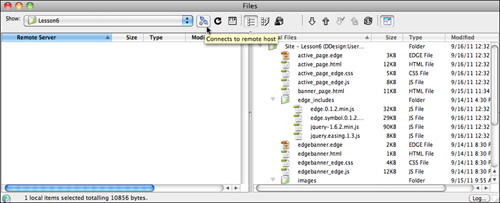
The Files panel is divided into Local and Remote windows. The left window should show you the files on your remote host, the right your local files and folders. Your Edge animations require several files and at least one folder to generate the appropriate action. Most of these files are external to the base HTML file that contains the stage element, and all of them must be uploaded to the remote host for the animations to play properly.
Do not change or alter the names of any of these files or folders or references to them in the HTML code. Most of the names are generated automatically and match the spelling and case of the target files. This is very important, because some web servers are case sensitive and simply changing the capitalization of a file name or reference can cause it not to load.
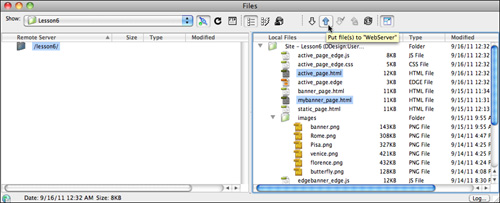
5. In the Local window (right) select mybanner_page.html and active_page.html.
To select two or more files you can hold the Shift key if they are consecutive, or the Ctrl/Cmd key if they are non-consecutive.
6. Click the Put button in the Files window.
Dreamweaver should prompt you to upload Dependent files. In normal web production you may ignore this option to save time or to avoid uploading support files that may already be on the server. In this instance, the dependent files have been newly created and are unlikely to be on the remote server.
7. Click yes to upload the dependent files.

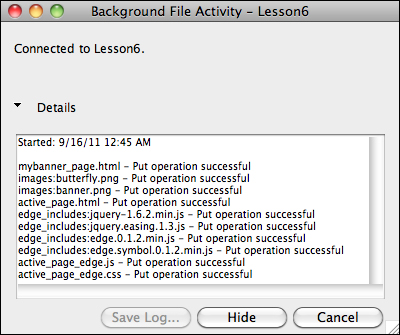
A report should appear detailing the files that were uploaded and whether the operation was successful. Check to make sure that all the necessary files were uploaded, including the ones in the edge_includes folder. You may notice that a file ending in .edge was not uploaded as a dependent file, although it exists in the Local folder. These files store some preference settings for your Edge animations but are not used or needed by the browser and you don’t need to upload them to the server.
8. Close the report dialog. Click the Collapse button in the Files panel.
9. Open your favorite browser and navigate to the pages you just uploaded to your site.
The animations should play as they did in Edge or in Live view. If you notice errors or inconsistencies, check to see that the most current versions of each HTML document and the support files have been uploaded. If the problem persists, check the animations in another browser. Remember, older browsers may not support all, or any, of the animation features in Edge. You should also check to make sure you are using the most up-to-date version of your browser.
What’s Next
The most important thing to remember as you review all the things you have learned and done in this book is that Edge is still evolving. More amazing features and capabilities are being developed and added to program even as you read this. Adobe has promised an aggressive development cycle with periodic updates that will be provided through Adobe Labs. In the same spirit, Peachpit has promised to stay on top of these versions and to provide detailed coverage as soon as possible with major releases. Stay tuned. This is just the beginning.
Edge has an advantage over other animation programs because it builds content using HTML, CSS, and JavaScript natively. There’s no need for a third-party browser plug-in or player application. The resulting code is also fully editable, allowing you to modify the elements or animation at any time, even without Edge itself. Of course, there are some caveats.
Edge capitalizes on many features developed for HTML5 and CSS3 that have been published but not formally adopted by the Internet yet. Although these specifications have been under development for the last decade and could be adopted at any time, they also could change and evolve. Until the rules are formalized, there’s no guarantee that what you build today will still work a year from now. Heck, it may not even work in some older browsers or devices now. But the same could be said about other types of animation and interactivity, too. There are very few guarantees on the web, or in life, but Edge makes the process so easy and even fun, it’s a simple task to rebuild any animation that becomes obsolete or incompatible.
So what are you waiting for?