10. Editing Basics
In this chapter, you learn how to edit your photographs using the tools available to you in the editing window. These tools include iPhoto’s quick fixes tools and its special effects buttons.
→ Straightening crooked images
→ Cropping photos to fit any size
→ Getting rid of blemishes and reducing red-eye
→ Adding filters to your pictures
iPhoto is about 60% photo organizer, 20% photo editor, and 20% photo sharer. If you want to be a professional photographer, you aren’t going to want to use iPhoto to edit your pics. However, if you are like me and 99% of the population, iPhoto’s editing capabilities are more than you’ll ever need. As a matter of fact, Apple has made many of iPhoto’s editing tools so easy to use that you can apply them with just a few clicks. iPhoto does have some advanced editing tools; however, this chapter looks at the basic tools you’ll find yourself using most often. But don’t worry; we’ll check out the advanced editing tools in Chapter 11, “Advanced Editing Tricks.”
The Editing Window
Before you get started with some editing, take a moment to look at the layout of iPhoto in Edit mode. To start, you need to be in Edit mode.
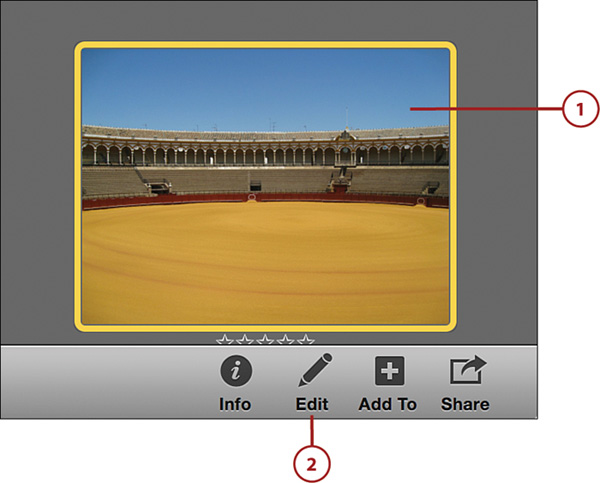
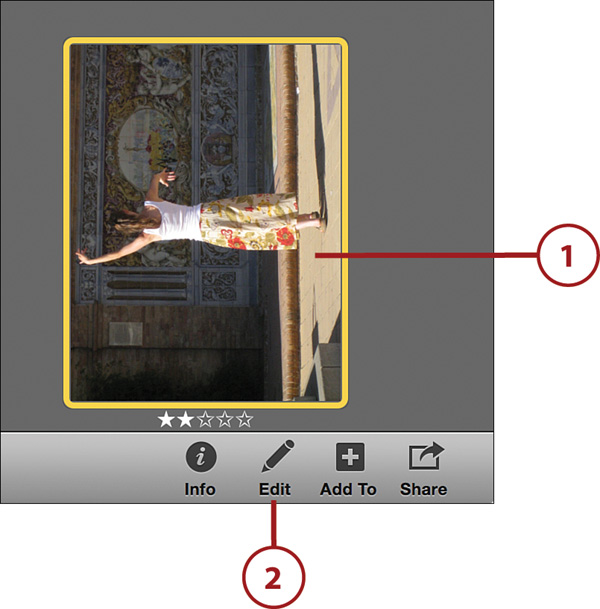
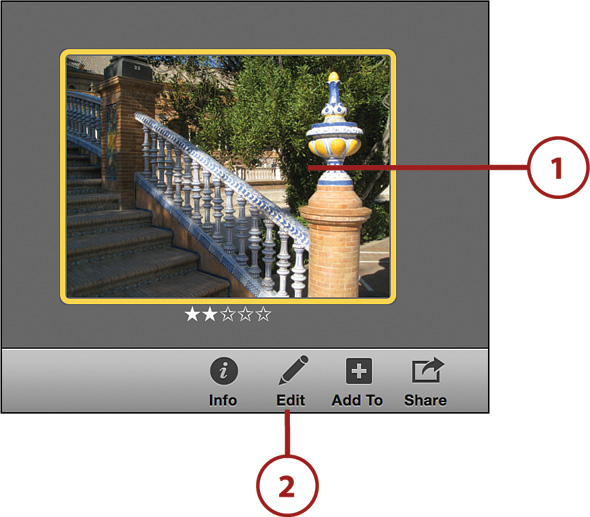
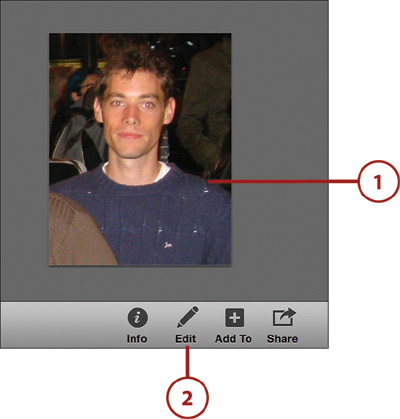
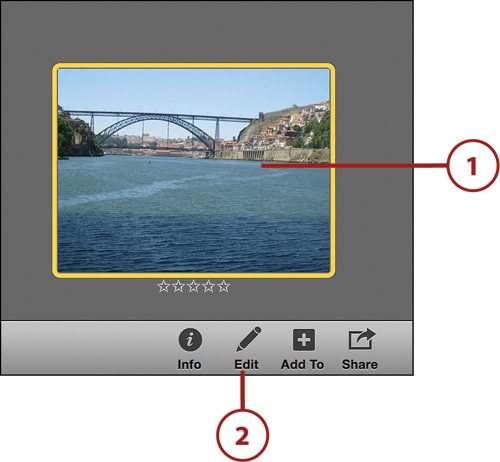
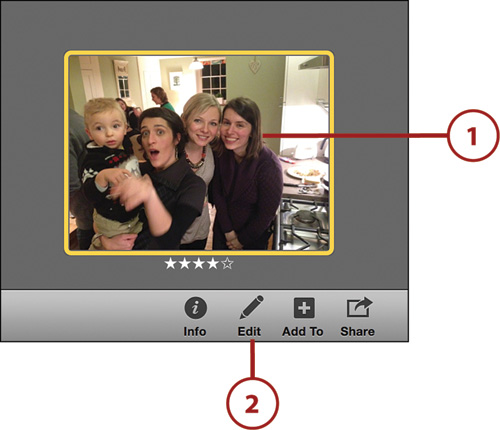
1. Select a photograph from your library that you want to edit.
2. Click the Edit button in the iPhoto toolbar. The Edit button resembles a pencil.
Navigate Edit Mode
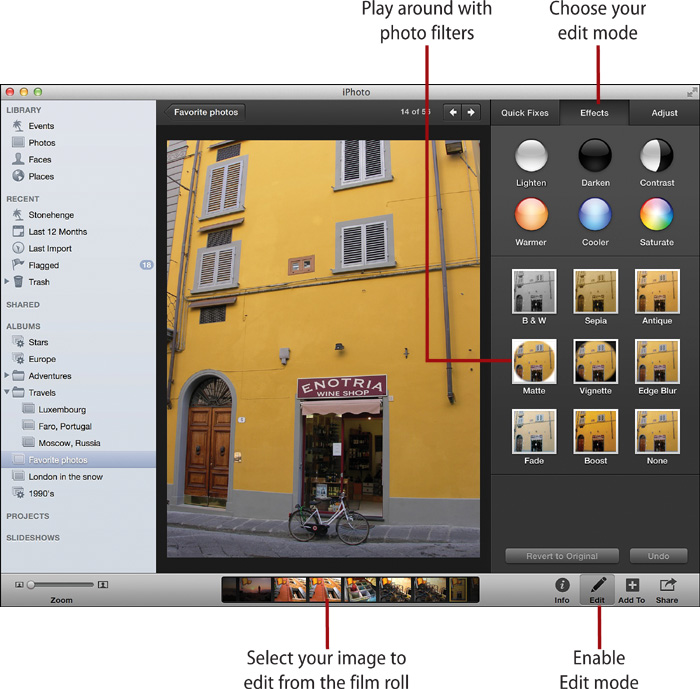
iPhoto retains its similar look and feel when you’re in Edit mode. On the left side, you have the source list with all its events, faces, places, and albums, and in the middle you have the selected photo you’ve chosen to display and edit. However, there are some important new features.
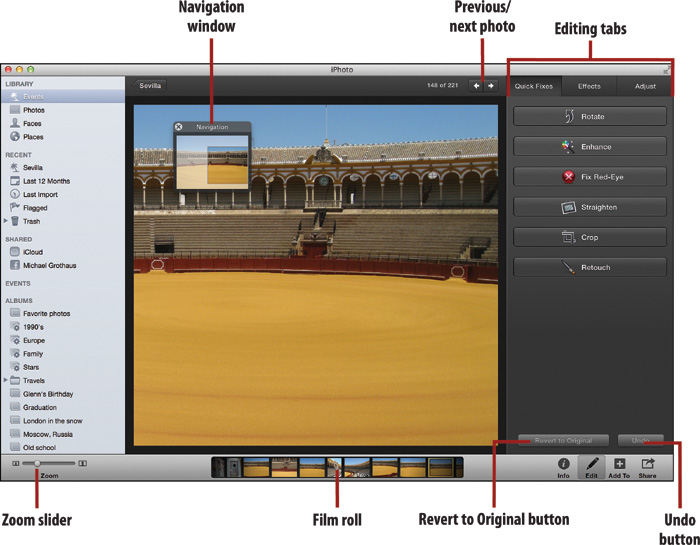
• Film roll: Use this to navigate the photos in your current album or event. Alternatively, you can use the left/right arrow buttons at the top of your screen to move to the next or previous photo.
• Editing tabs: The editing tabs are the meat of the editing window and appear at the upper right of iPhoto’s edit screen. The tabs are labeled Quick Fixes, Effects, and Adjust. Each tab, when selected, shows you a different range of editing options. In the figure, Quick Fixes is selected, and you can see its tools, such as the Rotate and Enhance buttons.
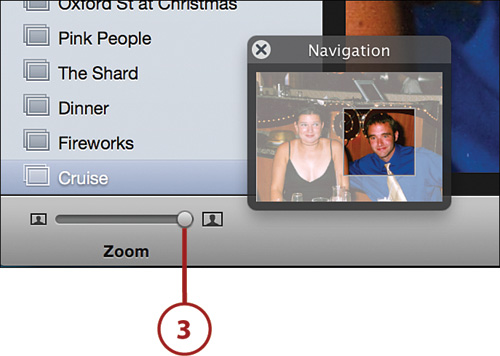
• Zoom slider: This isn’t new; you’ve seen it before. The Zoom slider simply lets you zoom in to a photograph to see a portion of it in more detail. However, when zooming in to a photograph in Edit mode, using the Zoom slider causes a small navigation window to appear.
• Navigation window: The navigation window pops up on your screen whenever you first zoom in to a photograph in Edit mode. The navigation window shows you a thumbnail of the full photograph you are zoomed in to. The zoomed-in portion is displayed in a clear square in the navigation window, and the rest of the photo that isn’t visible in iPhoto’s main editing window is grayed out.
Navigating with the Navigation Window
When you click and drag the square in the navigation window, the image in iPhoto’s editing window pans to match the location of the square. To close the navigation window, click the X in its upper-left corner.
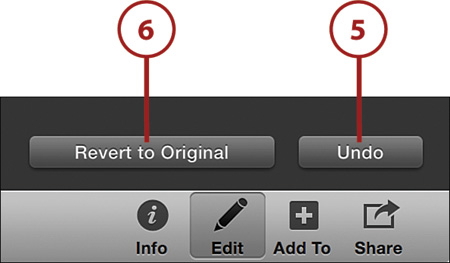
• Revert to Original button: iPhoto is a nondestructive editor, so no matter how many edits you make to your photo, iPhoto always keeps a copy of the original image you imported. You can click the Revert to Original button and quickly return your edited photo to its original state, no matter how many edits you have performed.
• Revert to Previous button: Note that the Revert to Original button might read Revert to Previous if you’ve edited the photo during multiple sessions of using iPhoto. Revert to Previous reverts the photo to its last edited state when you exited editing mode. You can keep clicking Revert to Previous until you see the button change to Revert to Original. Click this, and your photo reverts to its original imported state.
• Undo button: Unlike the Revert to Original button, which eliminates all your edits, the Undo button only removes the last edit you made in the current editing session. So, if you’ve fixed red-eye, rotated a photo, and then applied a crop, clicking the Undo button undoes only the crop, not the rotation or the red-eye fix. Click the Undo button again to remove the next edit in the reverse sequence you applied it.
• Redo button: Sometimes you might accidentally go a few steps more than you want to when undoing an edit. That’s where the Redo button comes in. If you undo too much, simply hold down the Option key on your keyboard, and the Undo button becomes a Redo button. Click it as many times as it takes to redo edits you’ve undone.
Quick Fixes
If you are using iPhoto to edit your photos, you are likely to be someone who is making simple, fast edits to your favorite pictures. Apple knows this, and that’s why it designed iPhoto with a simple three-tab editing layout. The first tab, Quick Fixes, is as simple as they come. This tab enables you to make the six most common edits quickly and efficiently: rotating, enhancing, reducing red-eye, straightening, cropping, and retouching.
Rotate a Photo
Rotating a photo is something almost everyone has done or will need to do. Usually when a photo needs to be rotated, it’s because you took it in portrait (vertical) orientation with your camera, but it was imported in the standard landscape (horizontal) orientation.
1. Select the photo you want to rotate.
2. Click the Edit button.
3. Click the Rotate button on the Quick Fixes tab. The selected photo is rotated counterclockwise. The photo rotates 90° each time you click the button.
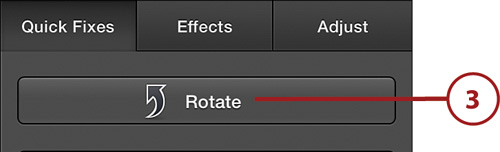
4. Alternatively, you can rotate a photo clockwise 90° at a time by holding down the Option key on your keyboard and clicking the Rotate button.
Other Ways to Rotate
You don’t need to go through these steps each time you want to rotate a photo. There are plenty of other ways to rotate a photo. You can select a photo and then use the keyboard shortcut Command+R. Or you can select a photo and then choose Photos, Rotate Clockwise or Photos, Rotate Counterclockwise from iPhoto’s menu bar. You can also rotate a photo via the contextual menu. Right-click a photo to see the menu.
Enhance a Photo
Sometimes you might take a beautifully composed photo in which the color is off or the photo appears too light or too dark. When this happens, there’s no need to panic. iPhoto has a one-click fix for most photos with ailments such as poor saturation or contrast; it’s called the Enhance button, and it works almost like magic.
1. Select the photo you want to enhance.
2. Click the Edit button.
3. Click the Enhance button on the Quick Fixes tab. The selected photo is automatically enhanced based on saturation levels, contrast, exposure, and more. The sample Before and After shots show how enhancing a photo can really bring out details that would normally have been hidden.

Reduce Red-Eye
Ah, red-eye. That red halo that makes us look like demons in photographs—it’s the scourge of photographers everywhere. Luckily, most of the cameras on the market today offer built-in red-eye reduction. However, if you still have photos where your friends look like they’re about to unleash heat vision on some unsuspecting victim, iPhoto makes it easy to remove the red-eye effect.
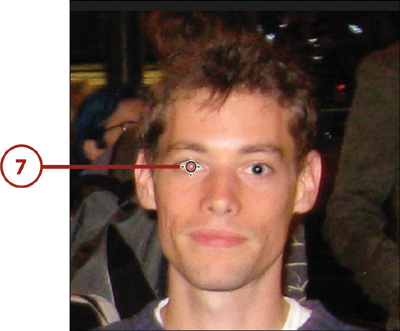
1. Select the photo of a person with red-eye.
2. Click the Edit button.
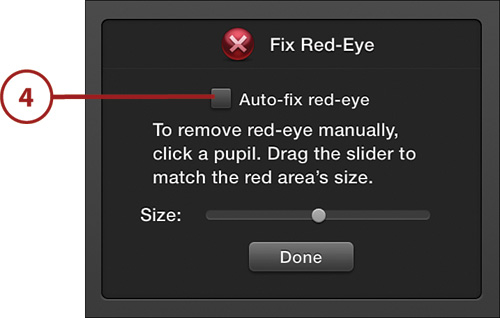
3. Click the Fix Red-Eye button on the Quick Fixes tab.

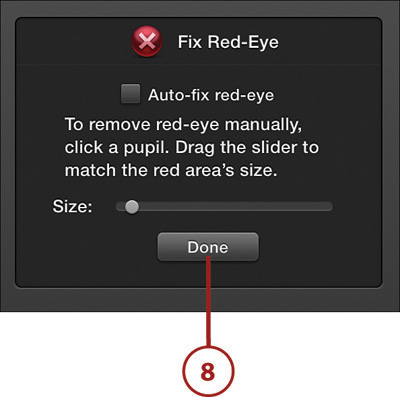
4. If iPhoto detects that there are people with red eyes in the photograph, it automatically tries to remove the red-eye. If this doesn’t work, uncheck the Auto-Fix Red-Eye check box.
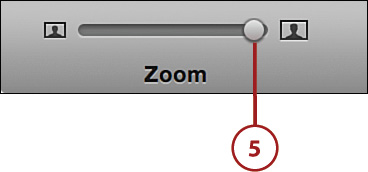
5. To remove the red-eye manually, zoom in to the face of the person with red-eye.
6. Drag the slider in the Fix Red-Eye tool until the size of the crosshairs that appear matches the diameter of the person’s eyes. Alternatively, you can also change the crosshair size by pressing the left bracket and right bracket ([ and ]) on your keyboard.
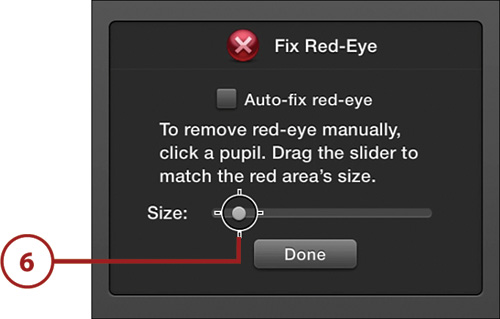
7. Move the red-eye selector over each eye and click. The red-eye is removed.
8. Click the Done button to exit the Fix Red-Eye menu.
Straighten Crooked Photos
Sometimes you might have a photograph that’s a little crooked. Perhaps you weren’t holding the camera perfectly steady, or maybe you put it on a ledge and set the timer so you and all your friends could be in the same photograph, but maybe the ledge wasn’t exactly level.
iPhoto lets you easily straighten or level photographs by rotating them slightly—up to 45° in either direction. It’s a great feature; just don’t use it on any photos of the Leaning Tower of Pisa.
1. Select the photo to be straightened.
2. Click the Edit button.
3. Click the Straighten button on the Quick Fixes tab.

4. A drop-down menu appears and yellow grid lines appear over your photograph.
5. Adjust the slider left or right to straighten the photo. Remember, you can straighten it up to 45° in either direction. Use the yellow lines that are overlaid on the photo as a guide to level ground.
6. When you are finished, click the Done button.

Crop a Photo
There are tons of reasons you might want to crop your photographs. Perhaps you want to just simply cut out something, such as a stray tree branch or a random stranger who walked into the edge of your photograph. Or you might want to crop a photo to bring attention to a certain part, perhaps making it more artistic. Whatever your reason, iPhoto makes cropping photos painless and easy.
1. Select the photo to be cropped.
2. Click the Edit button.
3. Click the Crop button on the Quick Fixes tab.

4. Drag the border of the white crop box in any direction you want. As you do, white grid lines appear in it, which breaks your photo into thirds. These thirds can help you make aesthetically pleasing crops for your photo.
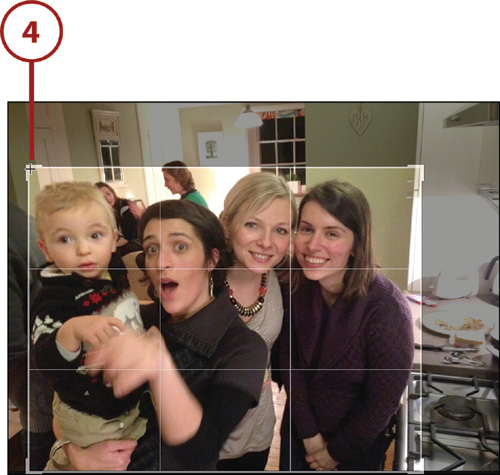
5. (Optional) Check the Constrain check box to constrain your crop to a specific aspect ratio (the size of your photo, such as 4×6 or 8×10) or shape (such as a square or a DVD cover). When you’ve checked the box, choose the constraint from the drop-down menu. For example, if you choose to constrain the crop to an 8×10, no matter where on the photo you choose to crop, it will be a perfect 8×10 when viewed or printed.
6. (Optional) Click and drag anywhere in the center of the crop box to adjust it to the right spot in the photograph without changing the crop’s dimensions. Clicking the Reset button expands the borders of the crop box to the boundaries of the original photograph.
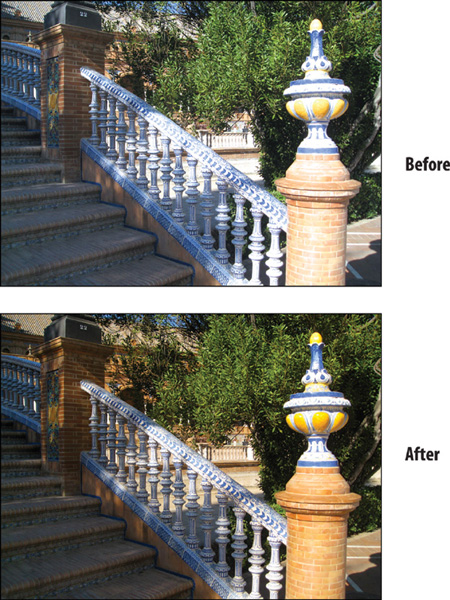
7. Click the Done button to complete the crop. As you can see in the Before and After shot, cropping really helps you tighten a photograph and draw the eye into what’s important in the picture.


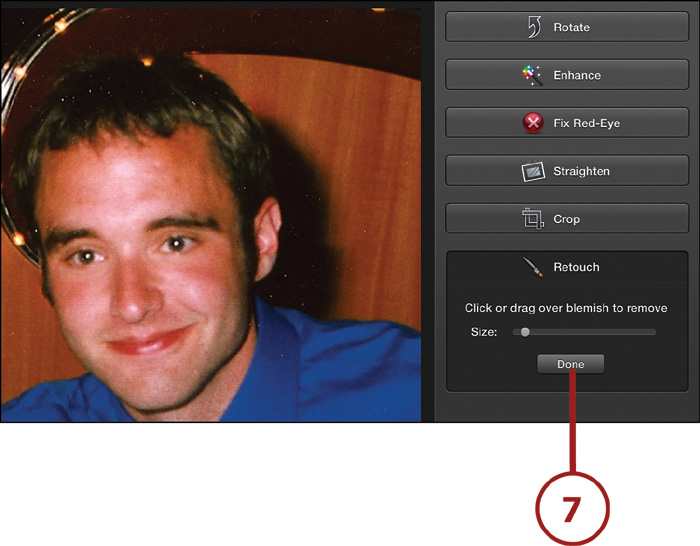
Retouch a Photo
We all wish we had a magic wand that could quickly remove our real-life blemishes, but until science comes up with such a device, at least take solace in knowing that iPhoto has a magic wand of sorts that easily enables you to remove blemishes from your photos. This magic wand is called the Retouch button.
1. Select the photo to be retouched.
2. Click the Edit button.

3. Zoom in on the photograph to the location with the blemish you want to remove. Maybe it’s a blemish on the skin or just dust on a photograph that you’ve scanned into your computer. This example focuses on touching up the mole on the man’s chin.
4. Click the Retouch button on the Quick Fixes tab.

5. Use the slider to adjust the brush size of the Retouch tool. Alternatively, you can change the brush size by pressing the left bracket and right bracket ([ and ]) on your keyboard. The size of the tool should be adjusted to best match the size of the blemish you want to retouch.
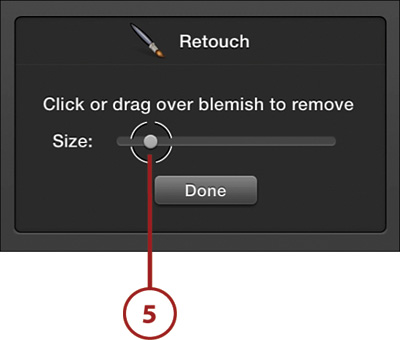
6. Move the brush over the mark or blemish you want to remove, and then click the mark with your mouse button or simply drag the cursor across it with the mouse button held down to remove it. If the mark or blemish is small, click it a few times. If that doesn’t remove it, drag the brush in short strokes to blend it with its surrounding colors.
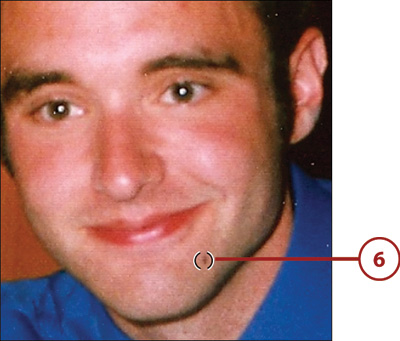
7. Click the Done button to save your changes and exit the Retouch menu.
Copying and Pasting Textures
You can get a little more advanced in your retouching abilities in iPhoto by copying pixels from another part of a photo and pasting them onto a mark or blemish. This effectively covers up the spot you want to eliminate. To do this, press the Option key while you click an area that has the texture you want, and then click the area you want to paste that texture on to. Blemish gone!
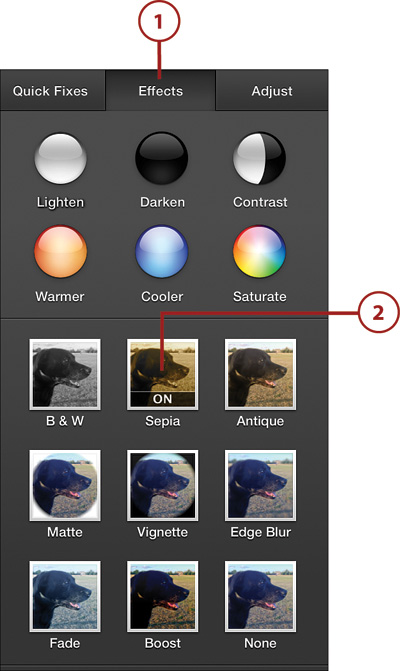
Applying Filters
Thanks to the likes of Instagram, filters are all the rage in photography. Filters (which Apple lamely calls “Special Effects”) are simply basic special effects that give your images a different look. They’re lots of fun to play around with and great for those of you who want to get a little artsy with your photographs, which is why Apple has included a selection of one-click filters in iPhoto.
1. Click the Edit button in the iPhoto toolbar.
2. Click the Effects tab at the top of the Edit window.
3. Choose the filters you want to add to your photo.
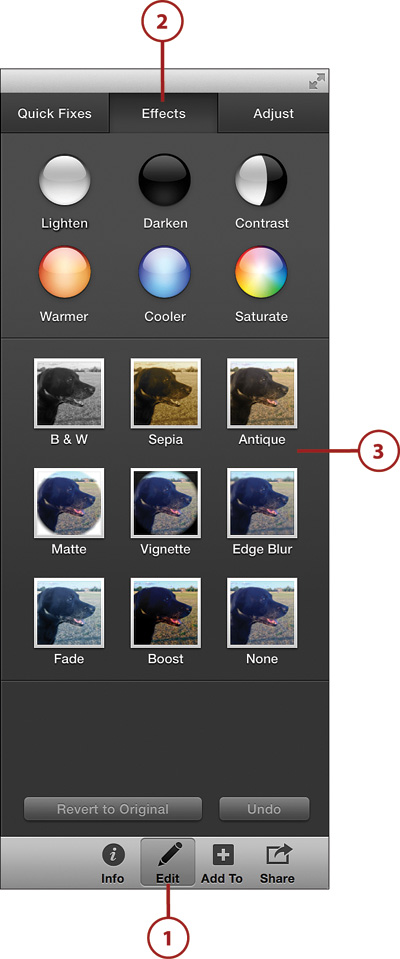
Use the Round Filter Buttons
There are six round filter buttons. The first row of these round filter buttons alters a photo’s highlights and shadows. Clicking the Lighten or Darken button adjusts the overall lightness or darkness of your photo one step at a time. Clicking the Contrast button adjusts the contrast, or the difference between light and dark tones, a single step at a time.
The second row of round filter buttons alters a photo’s color tint. Clicking the Warmer button deepens the warm colors, such as yellows, reds, and oranges, in your photo. Clicking the Cooler button deepens the cool colors, such as blues, greens, and purples. Clicking the Saturation button adjusts the color intensity of the photo one step at a time.
1. Click one of the round buttons on the Effects tab. You can click any of the round filter buttons as many times as you want. Each time you do, its respective effect is applied to the photo. When you click more than once, there is a cumulative effect. The more you click the Lighten button, for example, the lighter your photo gets.
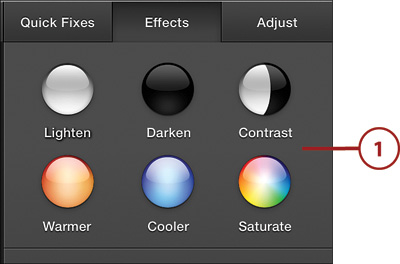
2. (Optional) To undo the most recently applied effect, you can click the Undo button at the bottom of the Effects tab.
3. (Optional) To completely revert to the original photo, thus removing all filters you have applied, click the Revert to Original button at the bottom of the Effects tab.

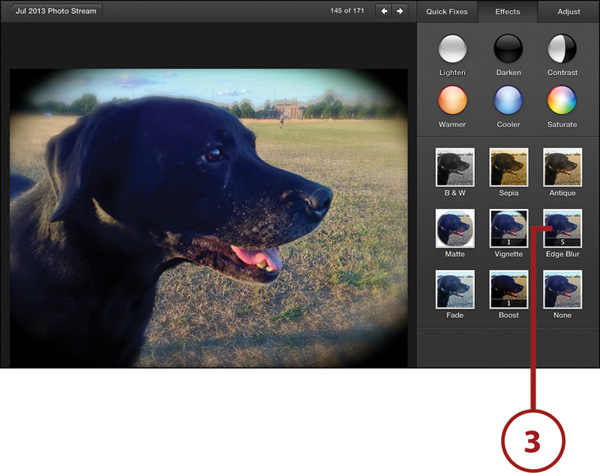
Use the Square Filter Buttons
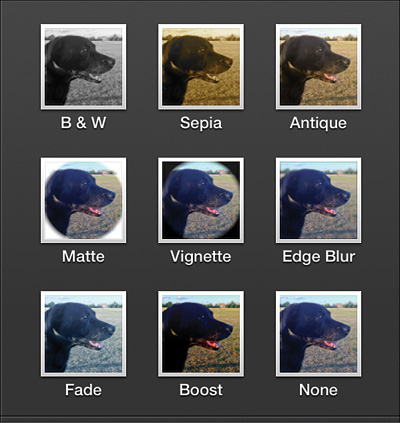
There are nine square filter (special effects) buttons. These buttons apply a specific filter in increasing cumulative grades—so if you click Sepia multiple times, the photo gets a greater and greater sepia look. You can tell the level of the filter you are on by the labels that appear along their bottoms when they are activated. Here’s what the different filters do:
• B&W: Changes photo to black and white. This can be only on or off. When B&W is on, you cannot also use Sepia or Antique.
• Sepia: Applies a reddish-brown hue to your photo. This can be only on or off. When Sepia is on, you cannot also use B&W or Antique.
• Antique: Gives photos an aged appearance, just like the ones you see at your grandparents’ house. There are nine levels of Antique. Click the up or down arrows on the labels to move through the levels. If Antique is in use, you cannot also use B&W or Sepia.
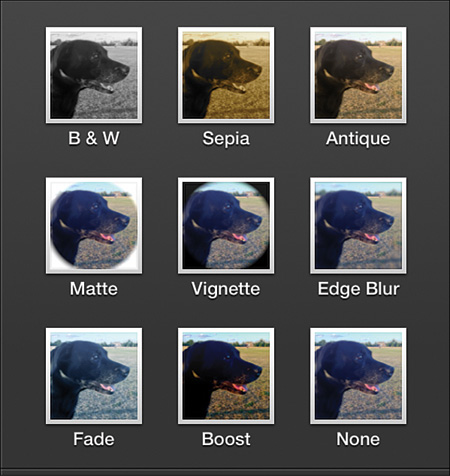
Square filter buttons
• Matte: Blurs the edges and corners of a photo in a white oval. There are 24 levels of Matte, each one increasing the diameter of the matte.
• Vignette: Darkens the edges and corners of a photo in a black oval. There are 24 levels of Vignette, each one increasing the diameter of the vignette.
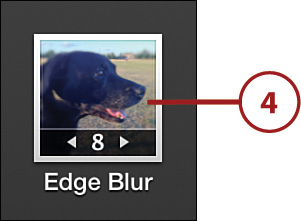
• Edge Blur: Blurs the edges of a photo like someone has smeared Vaseline on your camera’s lens. There are 11 levels of Edge Blur.
• Fade: Reduces the color intensity of the photograph as if you’ve left it outside in the sun for a number of years. There are nine levels of Fade.
• Boost: Increases the color intensity of the photograph as if you’ve printed the same photo directly on top of a copy of it. There are nine levels of Boost.
• None: Removes all effects applied to the photo.
Square filter buttons
Apply a Filter
1. From the Effects tab, click one of the square buttons. Some of the square filter buttons have only two modes: on or off. Others have an increasing level of that filter each time you click it.
2. To toggle a filter that only has an on or off mode, click it once to apply the filter (the label below it will say On), and then click it again to remove the filter (the label below changes to Off).
3. For filters with increasing levels of special effects, keep clicking them to increase the special effect. Each time you click, the label below the filter shows you what level it is on.
4. To reduce the level of a multistep filter, click the Back arrow in the label of the filter button.
5. (Optional) To undo the most recently applied filter, click the Undo button at the bottom of the Effects tab.
6. (Optional) To completely revert to the original photo, thus removing all filters you have applied, click the Revert to Original button at the bottom of the Effects tab.