
Chapter 13. Handling Input and Scrolling
In the previous chapter, “Developing Custom Views,” you worked through how to create a custom view that properly handles measurement, layout, drawing, and saving/restoring state. Now it’s time to round out that knowledge with a deep look at handling input and scrolling.
Touch Input
Touch input is the primary means of interacting with views in Android. In most cases, you can use the standard listeners, such as OnClickListener and OnLongClickListener, to handle the interactions. In some cases, you need to handle custom, more complex touches. If a view already meets your needs but you just need to handle custom touches, then consider using the OnTouchListener to avoid having to subclass the view.
Touch events are reported with the MotionEvent object (which can also be used for other input types such as a trackball). MotionEvents track pointers (such as a user’s fingers on the screen), and each pointer receives a unique ID; however, most interactions with pointers actually use the pointer index—that is, the position of the pointer within the array of pointers tracked by a given MotionEvent. A pointer index is not guaranteed to be the same, so you must get the index with findPointerIndex(int) (where the int argument is the unique pointer ID).
There are a lot of types of MotionEvents (you can see details at https://developer.android.com/reference/android/view/MotionEvent.html), but a few in particular you should know. ACTION_DOWN indicates that a new pointer is being tracked, such as when you first touch the screen. ACTION_MOVE indicates that the pointer has changed, usually location, such as when you drag your finger on the screen. ACTION_UP indicates that the pointer has finished, such as when you lift your finger from the screen. ACTION_POINTER_DOWN and ACTION_POINTER_UP indicate when a secondary pointer is starting to be tracked and is finishing, respectively, such as when you touch the screen with a second finger. ACTION_CANCEL indicates that the gesture has been aborted.
Android has several classes that simplify working with input. GestureDetector can be used to listen for common touch gestures. To use it, you simply pass the MotionEvent from your onTouchEvent(MotionEvent) method in the view to onTouchEvent(MotionEvent) on the GestureDetector. It specifies the OnGestureListener interface that defines various gesture-based methods such as onFling and onLongPress. You can use a GestureDetector to determine when any of these predefined gestures has taken place and then trigger your OnGestureListener. Because you often only need to handle a subset of the gestures available, there is a SimpleOnGestureListener that implements all the methods of OnGestureListener as empty methods or methods that simply return false. If you wanted to listen to just flings, you would override onDown(MotionEvent) to return true (returning false from this method will prevent the other methods from triggering because the touch event will be ignored) and override onFling(MotionEvent, MotionEvent, float, float) to handle the fling. Note that a compatibility version of GestureDetector appears in the support library called GestureDetectorCompat.
To simplify working with MotionEvents, there is a MotionEventCompat class in the support library. It provides static methods for working with MotionEvents so that you don’t have to deal with masks manually. For instance, you can call getActionMasked(MotionEvent) to get just the action portion of the int (such as ACTION_DOWN) that is returned by a MotionEvent’s getAction() method.
Android also provides two classes for working with scrolling. The original is called Scroller and has been available since the beginning of Android’s public release. The newer version is called OverScroller and was added in API level 9. Both of them allow you to do things such as animate a fling gesture. The main difference between the two is that OverScroller allows you to overshoot the bounds of the scrolling container. This is what happens when you fling a list quickly in Android, and then the list stops and the edge glows. The OverScroller determines how far beyond the list you have scrolled and converts that “energy” into the glow. You can also use ScrollerCompat if you need to support older versions of Android.
EdgeEffect was introduced in API level 14 (Ice Cream Sandwich) to standardize working with visual indicators of overscrolling. If you decide to create a custom view and want to have an EdgeEffect while still supporting older versions of Android, you can use the EdgeEffectCompat class from the support library. When running on pre-ICS versions of Android, it will simply have no effect.
Other Forms of Input
When Android was originally developed, it was designed to support a variety of form factors, and that meant it had to support multiple input types. Many of the original phones had touchscreens along with alternate input methods such as scroll wheels and directional pads. Although many Android devices today do not use these other input methods, it’s still worth considering how users can interact with your views without touch input. In most cases, supporting other forms of input requires very little effort. Plus, supporting a directional pad, for instance, allows your app to run on Android TV or to be better used by devices with keyboards.
In general, you simply need to override onKeyDown(int, KeyEvent) to handle alternate forms of input. The first parameter is an int identifying which key was pressed (the KeyEvent object has constants for all the keys; for example, KeyEvent.KEYCODE_ENTER is the int representing the Enter key). The second parameter is the actual KeyEvent object that contains details such as whether another key is being pressed (to let you do things like check if Alt is being pressed while this key is being pressed) and what device this event originated from (e.g., an external keyboard).
Trackball events aren’t common anymore but can be handled with your onKeyDown(int, KeyEvent) method, so you rarely need to consider them. For instance, if you do not specifically handle trackball events, a scroll to the right on a trackball will end up triggering onKeyDown(int, KeyEvent) with the “key” being KEYCODE_DPAD_RIGHT. In the case where you do want to handle trackball events differently (such as to handle flings), you will do so in onTrackballEvent(MotionEvent). Be sure to return true to consume the event.
Creating a Custom View
To better understand input and scrolling, we’re going to make a custom view. We’re going to make a view that takes an array of icons (Drawables) and draws them. It will assume they are all the same size and draw them from left to right. That doesn’t sound too exciting, but we will see how to handle positioning each of the Drawables to be drawn, how to keep things efficient, how to handle scrolling and overscrolling, and how to detect when a Drawable is touched. This view actually requires a fairly significant amount of code, so don’t be afraid to jump back to the beginning of this chapter or the previous chapter to remember the general concepts.
Creating the Initial Custom View Files
We’ll get started with a new project, creating a dimens.xml file in res/values that has two dimensions. The first dimension is icon_size and represents the width and height of the icons; set it to 48dp. The second dimension is icon_spacing and represents the space between icons; set it to 16dp. The file should look like Listing 13.1.
Listing 13.1 The Simple dimens.xml File
<resources>
<!-- Default screen margins, per the Android Design guidelines. -->
<dimen name="activity_horizontal_margin">16dp</dimen>
<dimen name="activity_vertical_margin">16dp</dimen>
<dimen name="icon_size">48dp</dimen>
<dimen name="icon_spacing">16dp</dimen>
</resources>
Next, we create the HorizontalIconView class that extends View. We implement all the constructors and each constructor should call through to init(Context), which we’ll be making shortly. There are also several class variables to create. See Listing 13.2 for how the class should initially look like with all the variables included. These are all the variables that will be used throughout the next few sections, so don’t worry about understanding all of them just yet; they’ll be explained as we build each method that requires them.
Listing 13.2 The Initial HorizontalIconView
public class HorizontalIconView extends View {
private static final String TAG = "HorizontalIconView";
private static final int INVALID_POINTER = MotionEvent.INVALID_POINTER_ID;
/**
* int to track the ID of the pointer that is being tracked
*/
private int mActivePointerId = INVALID_POINTER;
/**
* The List of Drawables that will be shown
*/
private List<Drawable> mDrawables;
/**
* EdgeEffect or "glow" when scrolled too far left
*/
private EdgeEffectCompat mEdgeEffectLeft;
/**
* EdgeEffect or "glow" when scrolled too far right
*/
private EdgeEffectCompat mEdgeEffectRight;
/**
* List of Rects for each visible icon to calculate touches
*/
private final List<Rect> mIconPositions = new ArrayList<>();
/**
* Width and height of icons in pixels
*/
private int mIconSize;
/**
* Space between each icon in pixels
*/
private int mIconSpacing;
/**
* Whether a pointer/finger is currently on screen that is being tracked
*/
private boolean mIsBeingDragged;
/**
* Maximum fling velocity in pixels per second
*/
private int mMaximumVelocity;
/**
* Minimum fling velocity in pixels per second
*/
private int mMinimumVelocity;
/**
* How far to fling beyond the bounds of the view
*/
private int mOverflingDistance;
/**
* How far to scroll beyond the bounds of the view
*/
private int mOverscrollDistance;
/**
* The X coordinate of the last down touch, used to determine when a drag starts
*/
private float mPreviousX = 0;
/**
* Number of pixels this view can scroll (basically width - visible width)
*/
private int mScrollRange;
/**
* Number of pixels of movement required before a touch is "moving"
*/
private int mTouchSlop;
/**
* VelocityTracker to simplify tracking MotionEvents
*/
private VelocityTracker mVelocityTracker;
/**
* Scroller to do the hard work of scrolling smoothly
*/
private OverScroller mScroller;
/**
* The number of icons that are left of the view and therefore not drawn
*/
private int mSkippedIconCount = 0;
public HorizontalIconView(Context context) {
super(context);
init(context);
}
public HorizontalIconView(Context context, AttributeSet attrs) {
super(context, attrs);
init(context);
}
public HorizontalIconView(Context context, AttributeSet attrs, int defStyleAttr) {
super(context, attrs, defStyleAttr);
init(context);
}
@TargetApi(Build.VERSION_CODES.LOLLIPOP)
public HorizontalIconView(Context context, AttributeSet attrs, int defStyleAttr, int defStyleRes) {
super(context, attrs, defStyleAttr, defStyleRes);
init(context);
}
}
Now it’s time to create the init(Context) method. It’s a private method that does not return anything and just sets up some values for the view. We need to get a reference to the Resources by calling context.getResources(). We’ll use getDimensionPixelSize(int) to set both the mIconSize and the mIconSpacing using the two dimensions we previously created (R.dimen.icon_size and R.dimen.icon_spacing). Next, we get a ViewConfiguration reference by calling its static get(Context) method. The ViewConfiguration class can give us values to use in views to make sure custom views behave in the same way as all other views. For instance, set mTouchSlop to the value returned by ViewConfiguration’s getScaledTouchSlop() method. This value is the number of pixels a pointer/finger must travel on the screen before being considered “moving” and is scaled to the device’s density. If we did not consider touch slop, it would be extremely hard to touch down on an exact pixel and lift your finger without moving to another pixel on accident. Once a pointer has moved the touch slop amount, it’s moving, so it can become a gesture such as a drag or a fling. We also set mMinimumVelocity via getScaledMinimumFlingVelocity() (which represents the minimum pixels per second a pointer has to move to initiate a fling gesture), mMaximumVelocity via getScaledMaximumFlingVelocity() (which represents the maximum pixels per second that a fling can travel at), mOverflingDistance via getScaledOverflingDistance() (which represents the maximum distance to fling beyond the edge of the view; we’ll convert that value into the glow at the edge of the view instead of scrolling beyond), and mOverscrollDistance via getScaledOverscrollDistance() (which represents the same thing as the overfling distance but when you are dragging or scrolling the view instead of flinging it).
To be explicit, we call setWillNotDraw(false) on our view to ensure that the onDraw(Canvas) method will be called. It’s good to get into the habit of calling this method in an initialization method for all your custom views that draw so that you don’t forget to do so when extending a view that will not draw unless you call this method; otherwise, you could be in for a few hours of frustrating troubleshooting.
We set up the mEdgeEffectLeft and mEdgeEffectRight by instantiating a new EdgeEffectCompat from the support library. This class is where you put all the extra “energy” when scrolling beyond the bounds of the view. The more that you scroll beyond the view, the brighter it glows. We also set mScroller as a new OverScroller. That will be used to do the hard work of animating flings.
When we’re done with the init(Context) method, it should look like Listing 13.3.
Listing 13.3 The Complete init Method
/**
* Perform one-time initialization
*
* @param context Context to load Resources and ViewConfiguration data
*/
private void init(Context context) {
final Resources res = context.getResources();
mIconSize = res.getDimensionPixelSize(R.dimen.icon_size);
mIconSpacing = res.getDimensionPixelSize(R.dimen.icon_spacing);
// Cache ViewConfiguration values
final ViewConfiguration config = ViewConfiguration.get(context);
mTouchSlop = config.getScaledTouchSlop();
mMinimumVelocity = config.getScaledMinimumFlingVelocity();
mMaximumVelocity = config.getScaledMaximumFlingVelocity();
mOverflingDistance = config.getScaledOverflingDistance();
mOverscrollDistance = config.getScaledOverscrollDistance();
// Verify this View will be drawn
setWillNotDraw(false);
// Other setup
mEdgeEffectLeft = new EdgeEffectCompat(context);
mEdgeEffectRight = new EdgeEffectCompat(context);
mScroller = new OverScroller(context);
setFocusable(true);
}
Now that our view sets up all the basic values it will need, there’s just one thing remaining before measuring and drawing the view: We need to be able to set the Drawables. For this, we create a public method called setDrawables(List<Drawable>). It’s not quite as straightforward as just updating mDrawables. First, we check if mDrawables is null; if it is, we check if the passed-in List is null. If both are null, we can just return because nothing needs to be updated. If mDrawables is null but the passed-in List is not, we call requestLayout() because there is a new List of Drawables to measure. If mDrawables is not null but the passed-in List is, we call requestLayout(), set mDrawables to null, and return. If mDrawables and the passed-in List of Drawables are the same size, the view simply needs to be redrawn (remember, all of the “icons” or Drawables are being drawn at the size specified in dimens.xml, so only the number of them has to be compared), so we call invalidate(). If the two Lists are a different size, we need to requestLayout(). Anything that didn’t return needs to update mDrawables, so we create a new List containing the Drawables. The reason for creating a new List is because the view should not have to handle the case of the List being modified by external code that adds or removes Drawables. See Listing 13.4 for the complete method.
Listing 13.4 The Complete setDrawables Method
/**
* Sets the List of Drawables to display
*
* @param drawables List of Drawables; can be null
*/
public void setDrawables(List<Drawable> drawables) {
if (mDrawables == null) {
if (drawables == null) {
return;
}
requestLayout();
} else if (drawables == null) {
requestLayout();
mDrawables = null;
return;
} else if (mDrawables.size() == drawables.size()) {
invalidate();
} else {
requestLayout();
}
mDrawables = new ArrayList<>(drawables);
mIconPositions.clear();
}
You could make this also check for empty Lists being passed in, if you believe that is a use case that will happen frequently. Without explicitly checking for empty lists, the view will just treat them like a nonempty List, but it will never draw anything.
Measuring
The first challenge of creating your custom view is to handle the measuring. Some custom views are extremely easy to measure; others take a bit of work. If your view is being used internally only (i.e., it’s not going to be in a library or repository that other developers can use), you can take some shortcuts to simply make it support the layouts you will use it in; otherwise, you need to make sure your view handles whatever the parent asks of it.
It’s very common to create private methods called measureHeight(int) and measureWidth(int) to split up measuring the two dimensions, so we’ll do that now. Both should return an int that represents the measured size. The height is the easier of the two to measure, so we’ll start there. We declare an int called result and set it to 0; it will be the measured size. We get the mode portion of the int that was passed in by using MeasureSpec.getMode(int) and get the size portion by calling MeasureSpec.getSize(int) just like we did in the previous chapter. If the mode is MeasureSpec.EXACTLY, we can set your result to the size and we’re done. In all other cases, we want to determine our size. We add the top padding size and the bottom padding size (you can use getPaddingTop() and getPaddingBottom(), respectively) plus the mIconSize to set result to the desired height. Next, we check if the mode is MeasureSpec.AT_MOST. If it is, the parent view is saying your view needs to be no bigger than the passed size. We use Math.min(int, int) to set result to the smaller of the passed-in size and your calculated size and then return the result. You might notice that this is extremely similar to what we did in the previous chapter; in fact, this pattern of handling measurement is very common, so getting used to it will help with any custom views you make. Your method should look like Listing 13.5.
Listing 13.5 The Simple measureHeight Method
/**
* Measures height according to the passed measure spec
*
* @param measureSpec
* int measure spec to use
* @return int pixel size
*/
private int measureHeight(int measureSpec) {
int specMode = MeasureSpec.getMode(measureSpec);
int specSize = MeasureSpec.getSize(measureSpec);
int result;
if (specMode == MeasureSpec.EXACTLY) {
result = specSize;
} else {
result = mIconSize + getPaddingTop() + getPaddingBottom();
if (specMode == MeasureSpec.AT_MOST) {
result = Math.min(result, specSize);
}
}
return result;
}
Now we can copy and paste the method we just made and rename it to measureWidth(int). We need to calculate the full size of the view with all drawables in place to know how much it needs to scroll regardless of the size of the visible portion of the view. Just after pulling the mode and size out of the passed int, we will calculate the maximum size. We retrieve the number of icons by getting the size of mDrawables (remember that it can be null) and multiply the icon count by the mIconSize to get the amount of space needed just for drawing the icons. Then we calculate the amount of space needed for the dividers (the space between the icons). If the icon count is one or less, there will be no divider space; otherwise, there will be mIconSpacing times one less than the icon count (e.g., if there are three icons, there are two spaces: one between the first and second item and one between the second and third). Now we add the divider space, the icon space, and the padding to get the maximum size needed for this view.
Down in the code we copied in, we need to adjust the else statement. If the spec mode is AT_MOST, we set the result to the smaller of the maximum size and the passed spec size. In all other cases, we set the result to the maximum size we calculated.
Finally, we need to determine how much scrolling should be possible. If the maximum size we calculated is greater than the result (i.e., there is more to draw than will fit in the allowed space), we set mScrollRange to the difference; otherwise, set it to 0. See Listing 13.6 for the complete method.
Listing 13.6 The Complete measureWidth Method
/**
* Measures width according to the passed measure spec
*
* @param measureSpec
* int measure spec to use
* @return int pixel size
*/
private int measureWidth(int measureSpec) {
int specMode = MeasureSpec.getMode(measureSpec);
int specSize = MeasureSpec.getSize(measureSpec);
// Calculate maximum size
final int icons = (mDrawables == null) ? 0 : mDrawables.size();
final int iconSpace = mIconSize * icons;
final int dividerSpace;
if (icons <= 1) {
dividerSpace = 0;
} else {
dividerSpace = (icons - 1) * mIconSpacing;
}
final int maxSize = dividerSpace + iconSpace + getPaddingLeft() + getPaddingRight();
// Calculate actual size
int result;
if (specMode == MeasureSpec.EXACTLY) {
result = specSize;
} else {
if (specMode == MeasureSpec.AT_MOST) {
result = Math.min(maxSize, specSize);
} else {
result = maxSize;
}
}
if (maxSize > result) {
mScrollRange = maxSize - result;
} else {
mScrollRange = 0;
}
return result;
}
We can now implement the actual onMeasure(int, int) method with ease. We simply override the method to call setMeasuredDimension(int, int), passing in the values from the two methods we created. It should look like Listing 13.7.
Listing 13.7 The Complete onMeasure Method
@Override
protected void onMeasure(int widthMeasureSpec, int heightMeasureSpec) {
setMeasuredDimension(measureWidth(widthMeasureSpec), measureHeight(heightMeasureSpec));
}
That’s all there is for measuring. If you’re making a view for a library, you should consider how you will handle undesirable sizes. For instance, obviously you only want to use this view where it fits the desired height (vertical padding plus the icon), but what if a user gives a different height? Should you adjust the measuring by seeing how much vertical room there actually is for the icon? Yes and no are both acceptable answers, as long as they are documented.
A ViewGroup would also implement onLayout at this point to position each of its children. The ViewGroup needs to simply call layout on each of the children, passing in the left, top, right, and bottom pixel positions. Because this custom view does not have any children, we do not need to implement that method and can move on to the drawing phase.
Drawing
Now that we have measured our view, we need to implement the drawing step. All of this will be done in the view’s onDraw(Canvas) call, so we can start implementing that now. First, we check if we have anything to draw. If mDrawables is null or mDrawables is an empty list, we can immediately return for efficiency.
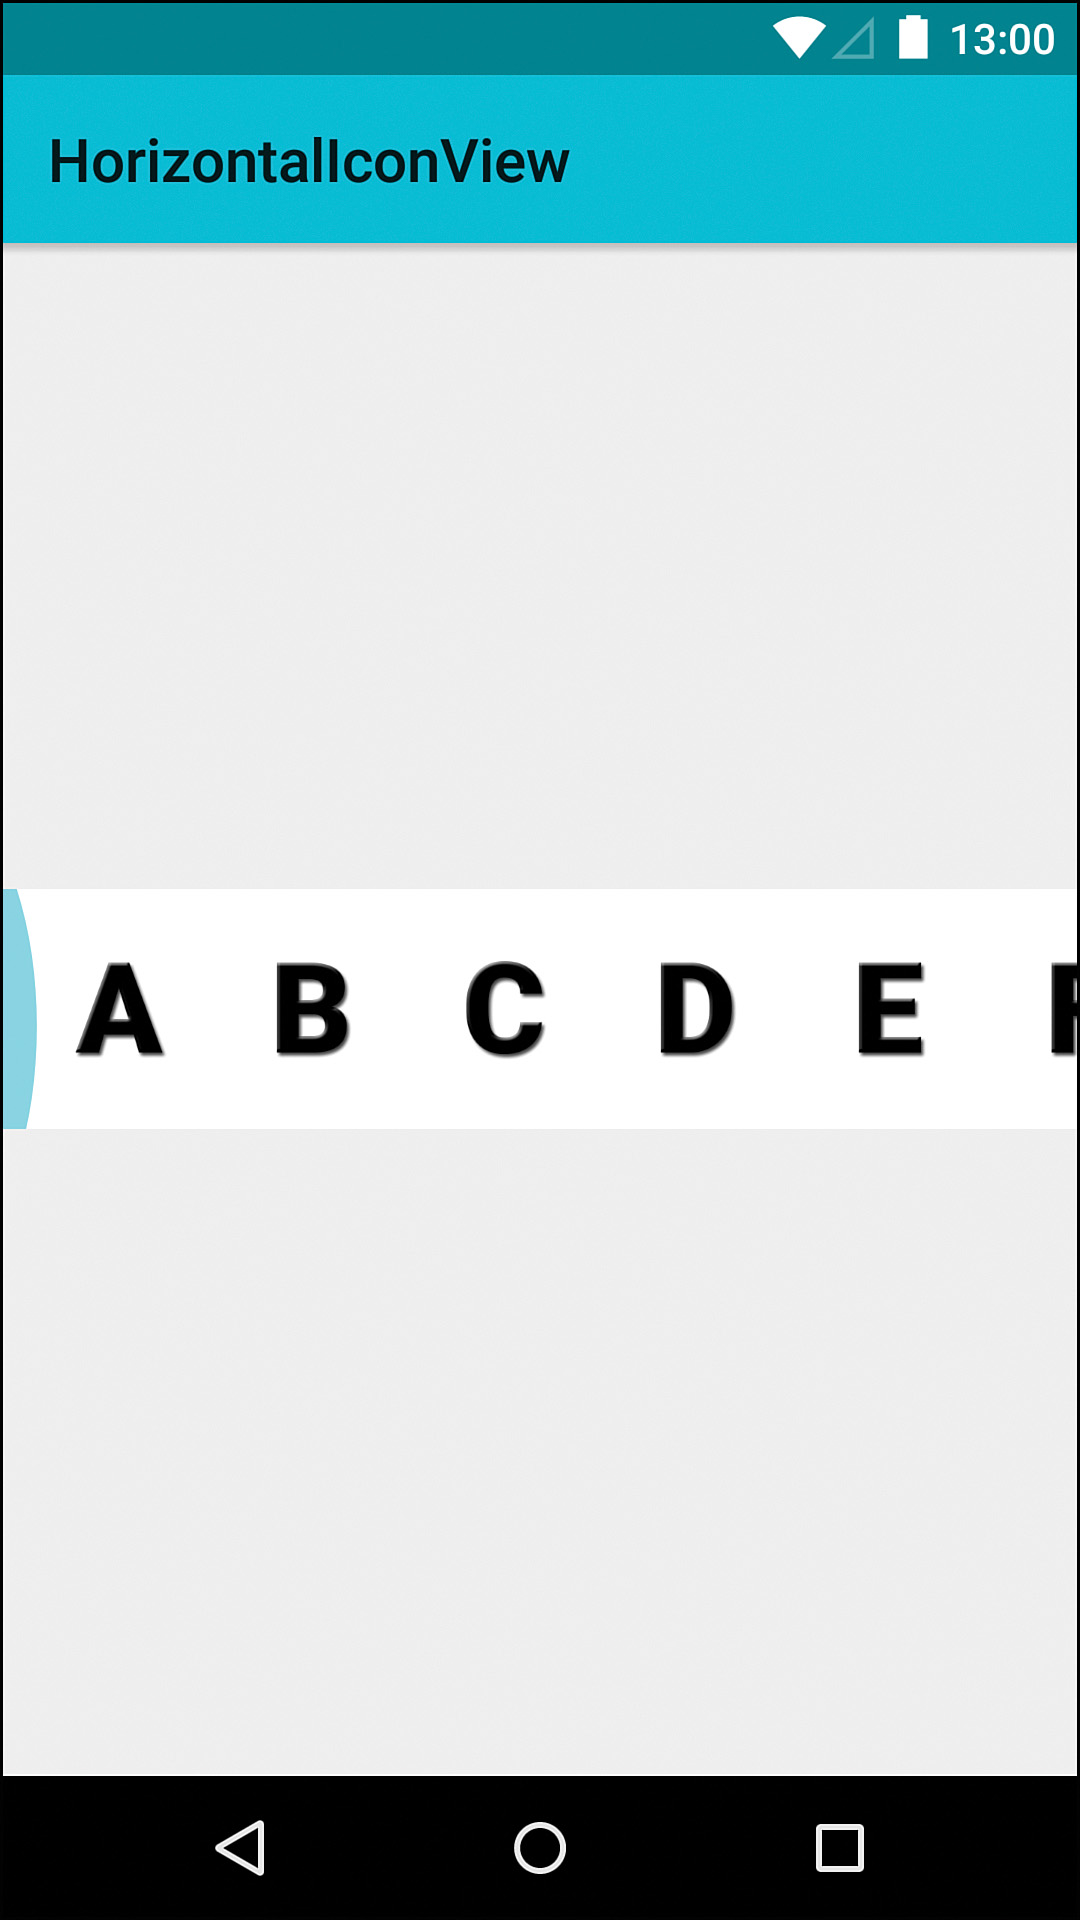
Next, we get the dimensions we need to work with. First, we get a local copy of the width by calling getWidth(). Then, we create a copy of the bottom, left, and top padding with the getPadding calls. We need to determine the portion of the overall view that is visible (this will be important once we handle scrolling). Although our view may be a few thousand pixels wide, it could just be showing 200 pixels, so we do not want to draw more than we need to (remember, it’s important to be efficient while drawing). See Figure 13.1 for a visual explanation (and note that this example uses several alphabetic drawables to make it easy to see the scroll position). This shows the full view width, but the onDraw(Canvas) method should only draw the portion displayed by the device.
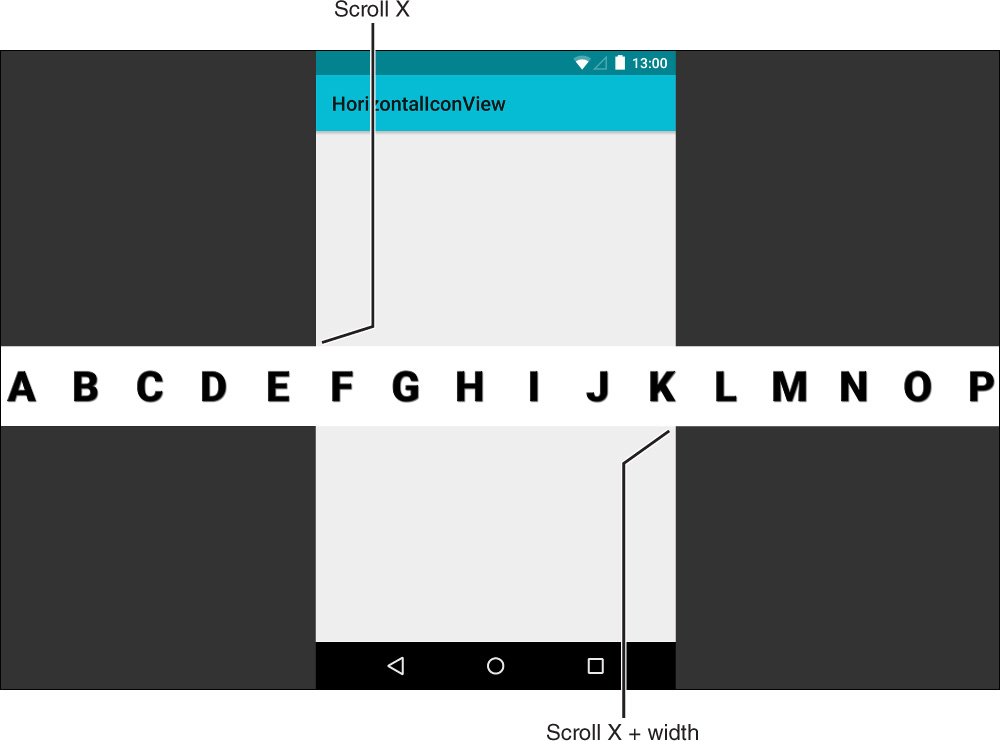
Figure 13.1 The full view is represented horizontally here, but the device is just a window into a portion of it
To get the left edge of the display, we call getScrollX(), which returns the horizontal offset caused by scrolling. For now, this will always be 0, but it will change once we’ve added in support for scrolling. To keep the code clear, we also determine the right edge of the display by adding the width to the left edge. Now we can easily check if our drawables are within these coordinates.
Now we create a left and a top nonfinal int. This is a common technique for tracking where you are drawing to next, so we set the left to paddingLeft and set the top to paddingTop. In this example, everything is drawn in a straight line, so top won’t change, but we will be increasing left. Keep in mind the left value is using the coordinate system for the view, not the currently shown portion of the view. In other words, it’s based on the full horizontal image from Figure 13.1 and not just the portion shown on the screen.
We update the mSkippedIconCount to 0. This keeps track of how many icons we skipped before starting to draw. The value of tracking this will be more apparent soon. We loop through the mDrawables list, checking if the icon is onscreen. If the current left position plus the width of the icon (in other words, the rightmost pixel of the drawable) is less than the leftEdge of the screen, then we add the icon size and spacing to left, increment the skipped icon count, and continue—there is no need to draw it. If the current value for left is greater than the right edge, we have drawn everything that will go on the screen and we can break out of the loop and skip all the icons to the right of the screen.
For all icons that are actually displayed on the screen, we will get the drawable, set the bounds, and draw it with the canvas. The bounds will have the left and top set to the left and top variables, respectively. The right and bottom will be set to left plus icon size and top plus icon size, respectively.
Before continuing on with the next drawable, we want to store the bounds of the drawable as a Rect in mIconPositions. This can later be used to see if the user taps within the bounds of a given drawable. Note that we want to keep as few objects as possible, so we don’t create a Rect for every single drawable; we create one for each drawable on the screen. Looking back at Figure 13.1, you can see that the F is the first drawable, so it would be the Rect at position 0. The K would be the Rect at position 5. If the mIconPositions list already contains a Rect for that position, the bounds can simply be copied from the drawable to that Rect; otherwise, a new Rect can be created by using the Drawable’s copyBounds() method without any arguments and added to the list.
Before continuing on with the next drawable, we don’t want to forget to increase left by the icon width plus the icon spacing. At this point, our onDraw(Canvas) method should look like Listing 13.8.
Listing 13.8 The onDraw Method So Far
@Override
protected void onDraw(Canvas canvas) {
if (mDrawables == null || mDrawables.isEmpty()) {
return;
}
final int width = getWidth();
final int height = getHeight();
final int paddingLeft = getPaddingLeft();
final int paddingTop = getPaddingTop();
// Determine edges of visible content
final int leftEdge = getScrollX();
final int rightEdge = leftEdge + width;
int left = paddingLeft;
final int top = paddingTop;
mSkippedIconCount = 0;
final int iconCount = mDrawables.size();
for (int i = 0; i < iconCount; i++) {
if (left + mIconSize < leftEdge) {
// Icon is too far left to be seen
left = left + mIconSize + mIconSpacing;
mSkippedIconCount++;
continue;
}
if (left > rightEdge) {
// All remaining icons are right of the view
break;
}
// Get a reference to the icon to be drawn
final Drawable icon = mDrawables.get(i);
icon.setBounds(left, top, left + mIconSize, top + mIconSize);
icon.draw(canvas);
// Icon was drawn, so track position
final int drawnPosition = i - mSkippedIconCount;
if (drawnPosition + 1 > mIconPositions.size()) {
final Rect rect = icon.copyBounds();
mIconPositions.add(rect);
} else {
final Rect rect = mIconPositions.get(drawnPosition);
icon.copyBounds(rect);
}
// Update left position
left = left + mIconSize + mIconSpacing;
}
}
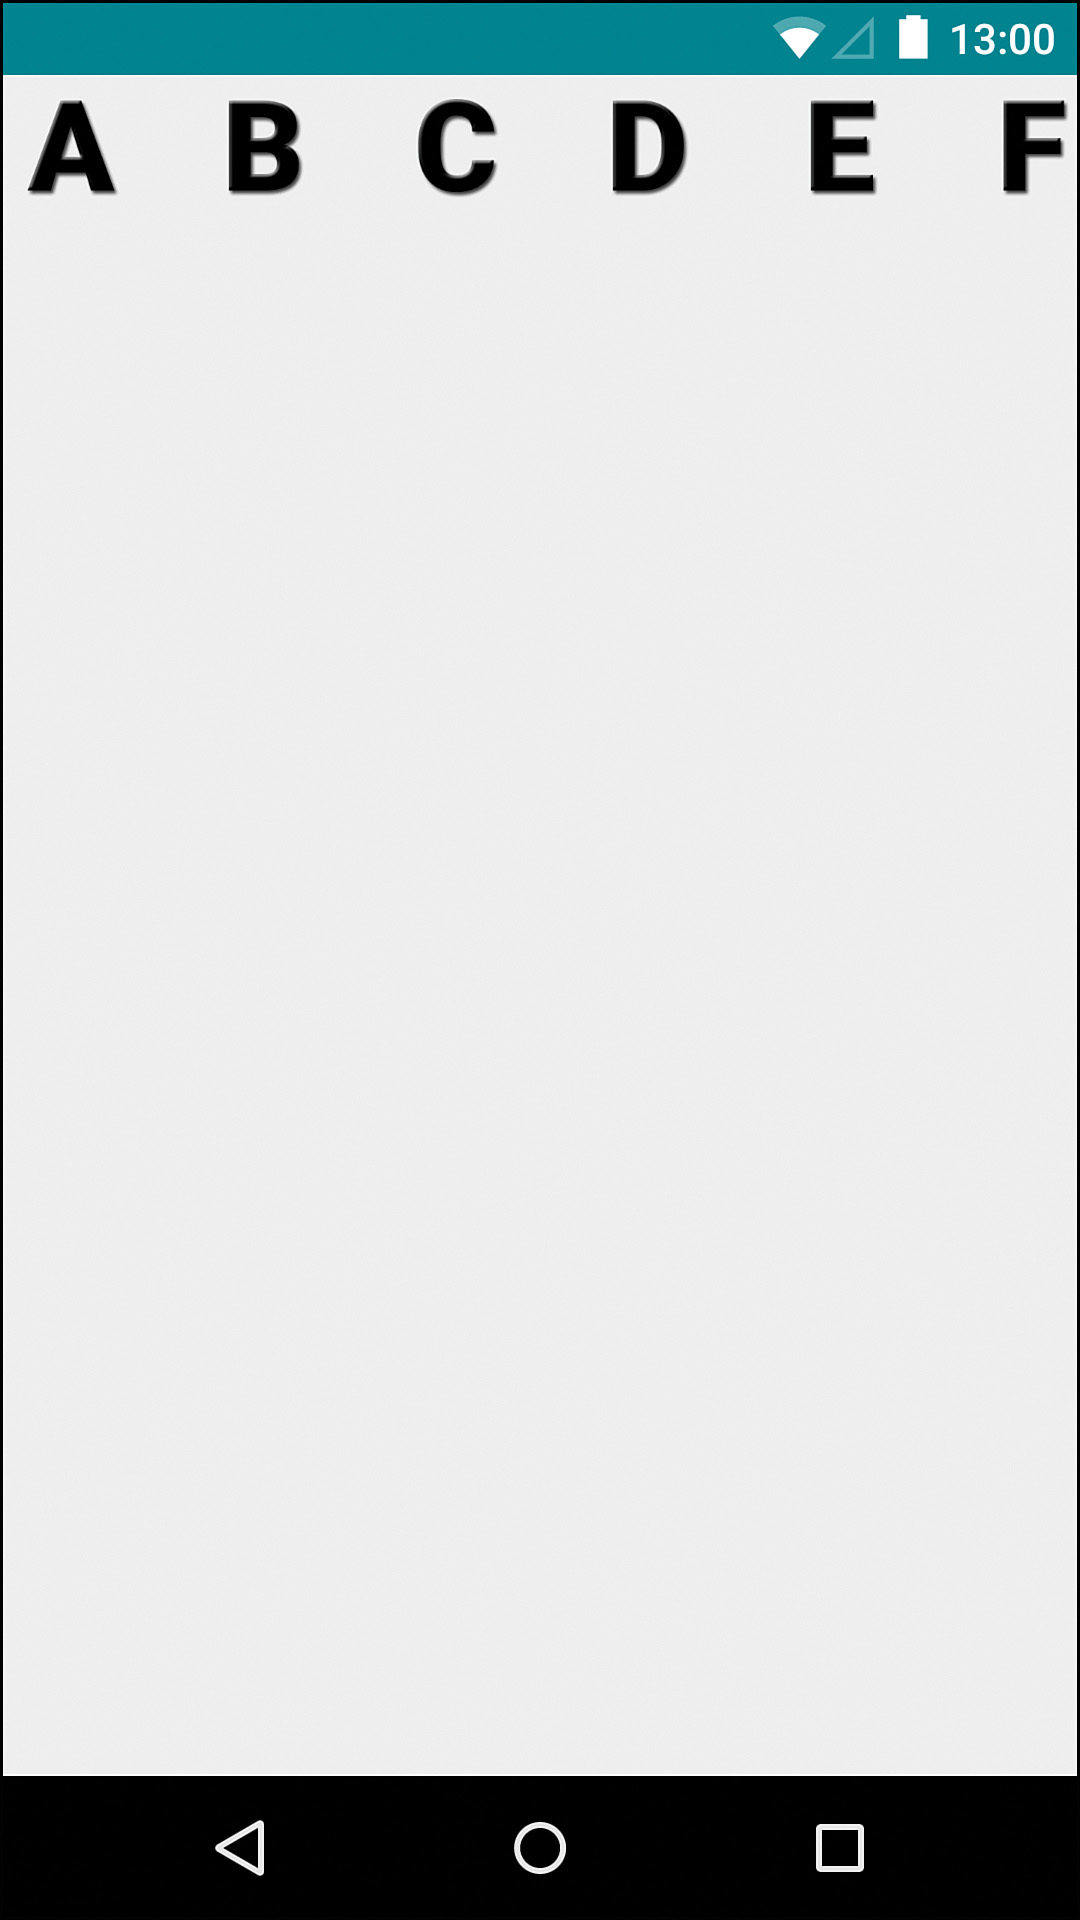
Now that we’ve managed to create all this drawing code, it’s a good idea to test it. For now, we just create a list of drawables in the activity, instantiate a new instance of our custom view, set the list of drawables, and then call setContentView(View) with our HorizontalIconView. See Listing 13.9 for a simple example of what our Activity’s onCreate(Bundle) method can look like at this point, and see Figure 13.2 for what the output might look like.
Listing 13.9 A Simple onCreate Method in an Activity
@Override
protected void onCreate(Bundle savedInstanceState) {
super.onCreate(savedInstanceState);
// Get a List of Drawables
final Resources res = getResources();
final List<Drawable> list = new ArrayList<>();
list.add(res.getDrawable(R.drawable.a));
list.add(res.getDrawable(R.drawable.b));
list.add(res.getDrawable(R.drawable.c));
list.add(res.getDrawable(R.drawable.d));
list.add(res.getDrawable(R.drawable.e));
list.add(res.getDrawable(R.drawable.f));
list.add(res.getDrawable(R.drawable.g));
list.add(res.getDrawable(R.drawable.h));
list.add(res.getDrawable(R.drawable.i));
list.add(res.getDrawable(R.drawable.j));
list.add(res.getDrawable(R.drawable.k));
list.add(res.getDrawable(R.drawable.l));
list.add(res.getDrawable(R.drawable.m));
list.add(res.getDrawable(R.drawable.n));
list.add(res.getDrawable(R.drawable.o));
list.add(res.getDrawable(R.drawable.p));
list.add(res.getDrawable(R.drawable.q));
list.add(res.getDrawable(R.drawable.r));
list.add(res.getDrawable(R.drawable.s));
list.add(res.getDrawable(R.drawable.t));
list.add(res.getDrawable(R.drawable.u));
list.add(res.getDrawable(R.drawable.v));
list.add(res.getDrawable(R.drawable.w));
list.add(res.getDrawable(R.drawable.x));
list.add(res.getDrawable(R.drawable.y));
list.add(res.getDrawable(R.drawable.z));
final HorizontalIconView view = new HorizontalIconView(this);
view.setDrawables(list);
setContentView(view);
}
Preparing for Touch Input
Touch input can be one of the most challenging aspects of creating a view due to the many places you can make mistakes that cause bizarre behavior, missed interactions, or sluggishness. Also, a lot of interactions and considerations go into making touch behavior feel right. This custom view will give you the opportunity to see how to handle touches, drags, flings, overscrolling, and edge effects.
First, we start with some of the easier methods to get prepared for the heavy work. We will start with overriding and implementing computeScroll(), which updates scrolling during flings. We check if mScroller’s computeScrollOffset returns true. If it does, the OverScroller hasn’t finished animating and we need to continue scrolling the view (if not, we don’t need to do anything else in this method). We get the X position by calling getScrollX(). It represents the current X position but not what it should be after the scroll is complete, so it’s commonly called oldX. We get what the X position should be by calling mScroller’s getCurrX() (just called x). If these are not the same, we call overScrollBy(int, int, int, int, int, int, int, int, boolean). Yes, that method takes a ridiculous amount of ints. They are in pairs, starting with the change in X (x minus oldX) and the change in Y (0) position, then the current scroll positions for X (oldX) and Y (0), followed by the X scroll range (mScrollRange) and Y scroll range (0), and the last ints are the maximum overscroll distance for X (mOverflingDistance) and Y (0). The last value is a boolean that indicates if this is a touch event (pass false because this is triggered when the view is still scrolling after a fling).
Now we call onScrollChanged(x, 0, oldX, 0) to notify the view that you scrolled it. If x is less than zero and oldX is not, then the fling has gone beyond the left end, so mEdgeEffectLeft should react. We call its onAbsorb(int) method, passing in the current velocity (get it from the mScroller’s getCurrVelocity() method). Similarly, if x is greater than mScrollRange and oldX is not, then the fling went beyond the right edge, so mEdgeEffectRight should react. See Listing 13.10 for the full method.
Listing 13.10 The Complete computeScroll Method
@Override
public void computeScroll() {
if (mScroller.computeScrollOffset()) {
int oldX = getScrollX();
int x = mScroller.getCurrX();
if (oldX != x) {
overScrollBy(x - oldX, 0, oldX, 0, mScrollRange, 0, mOverflingDistance, 0, false);
onScrollChanged(x, 0, oldX, 0);
if (x < 0 && oldX >= 0) {
mEdgeEffectLeft.onAbsorb((int) mScroller.getCurrVelocity());
} else if (x > mScrollRange && oldX <= mScrollRange) {
mEdgeEffectRight.onAbsorb((int) mScroller.getCurrVelocity());
}
}
}
}
Any time you create a view that calls the overScrollBy method, you should also override onOverScrolled(int, int, boolean, boolean), so we will do that next. This one is actually very easy. If mScroller’s isFinished() method returns true, we just call through to the super method. If not, we call setScrollX(scrollX) to update the scroll position. If clamped is true, we need to call the mScroller’s springBack(int, int, int, int, int, int) method. This method brings the OverScroller back to a valid position and, more specifically, allows the glow at the edge of the view when you fling it. Be careful with this method; the ints are not quite in X/Y pairs. The first two are the start for X (scrollX) and Y (0), the next two are the minimum (0) and maximum (mScrollRange) values for X (not the minimum for X and Y), and the last two are the minimum and maximum values for Y. You are probably starting to notice how easy it can be to mix up one of these ints and end up with bugs and strange behavior; there isn’t really a good solution to avoiding these bugs, so be extra careful any time you have to work with any of these crazy int-happy methods. See Listing 13.11 for the full method.
Listing 13.11 The Complete onOverScrolled Method
@Override
protected void onOverScrolled(int scrollX, int scrollY, boolean clampedX, boolean clampedY) {
if (mScroller.isFinished()) {
super.scrollTo(scrollX, scrollY);
} else {
setScrollX(scrollX);
if (clampedX) {
mScroller.springBack(scrollX, 0, 0, mScrollRange, 0, 0);
}
}
}
Another method to implement that’s relatively short is fling(int). We will use this internally to trigger a fling. If mScrollRange is 0, we just return because there is nowhere to fling. Otherwise, we calculate an int called halfWidth by subtracting the horizontal padding from the width of the view and dividing the result by 2. This value will be used for the “overfling” range. We call the mScroller’s fling(int, int, int, int, int, int, int, int) method. This is another one that’s easy to make a mistake on. The first two ints are for the starting position for X (getScrollX()) and Y (0). The second pair is the velocity for X (velocity) and Y (0). After that, you have the min X position (0) and max X position (mScrollRange), followed by the min Y position (0) and max Y position (0). The last pair is the overfling range for X (halfWidth) and Y (0). See Listing 13.12 for the full method.
Listing 13.12 The Complete fling Method
/**
* Flings the view horizontally with the specified velocity
*
* @param velocity int pixels per second along X axis
*/
private void fling(int velocity) {
if (mScrollRange == 0) {
return;
}
final int halfWidth = (getWidth() - getPaddingLeft() - getPaddingRight()) / 2;
mScroller.fling(getScrollX(), 0, velocity, 0, 0, mScrollRange, 0, 0, halfWidth, 0);
invalidate();
}
We need to update the onDraw(Canvas) method to draw the overscroll glow. At the end of the method, we check if mEdgeEffectLeft is not null (it shouldn’t be, but at some point you might want the view to support disabling the edge glow). If mEdgeEffectLeft.isFinished() returns false, we need to rotate the canvas 270 degrees and then translate (move) it back by the height of the view so that we can draw the effect. When we call the mEdgeEffectLeft's draw(Canvas) method, it returns true if the effect hasn’t yet faded out (meaning we need to invalidate the view). We then restore the canvas to its state prior to your rotation and translation. The work is similar for mEdgeEffectRight. See Listing 13.13 for the detailed code. This code is taken from the HorizontalScrollView with minor modification.
Listing 13.13 The Code for Drawing the Edge Effects in onDraw(Canvas)
if (mEdgeEffectLeft != null) {
if (!mEdgeEffectLeft.isFinished()) {
final int restoreCount = canvas.save();
canvas.rotate(270);
canvas.translate(-height, Math.min(0, leftEdge));
mEdgeEffectLeft.setSize(height, width);
if (mEdgeEffectLeft.draw(canvas)) {
postInvalidateOnAnimation();
}
canvas.restoreToCount(restoreCount);
}
if (!mEdgeEffectRight.isFinished()) {
final int restoreCount = canvas.save();
canvas.rotate(90);
canvas.translate(0, -(Math.max(mScrollRange, leftEdge) + width));
mEdgeEffectRight.setSize(height, width);
if (mEdgeEffectRight.draw(canvas)) {
postInvalidateOnAnimation();
}
canvas.restoreToCount(restoreCount);
}
}
One final helper method to create before we can start diving into the gritty touch code is onSecondaryPointerUp(MotionEvent). This is called when the user has two (or more) fingers down on the view and lifts one of them up. The MotionEvent passed into this method was triggered by the finger that lifted, so we need to check to see if its pointer ID matches the one we are tracking (well, the one we will be tracking soon when we do the heavy touch code). If it does, we need to get another pointer to track. Although there can be many different pointers, it is good enough (for this view at least) to simply switch to the second pointer if the first was lifted or the first pointer if the second was lifted. You also need to clear the velocity because we’re tracking a new pointer. See Listing 13.14 for the full method; this is another one that comes mostly from HorizontalScrollView.
Listing 13.14 The Complete onSecondaryPointerUp Method
private void onSecondaryPointerUp(MotionEvent ev) {
final int pointerIndex = MotionEventCompat.getActionIndex(ev);
final int pointerId = MotionEventCompat.getPointerId(ev, pointerIndex);
if (pointerId == mActivePointerId) {
final int newPointerIndex = pointerIndex == 0 ? 1 : 0;
mPreviousX = ev.getX(newPointerIndex);
mActivePointerId = ev.getPointerId(newPointerIndex);
if (mVelocityTracker != null) {
mVelocityTracker.clear();
}
}
}
Handling Touch Input
We’ve done all the preparatory work for handling touch events, so now it’s time to dive in and tackle the hard part. We need to override the onTouchEvent(MotionEvent) method. If mVelocityTracker is null, we get a new reference by calling VelocityTracker.obtain(). We add the movement represented in this MotionEvent to the tracker by calling addMovement(MotionEvent) on it. Then we get the action int, which tells us what this MotionEvent represents (was it a touch or a movement or something else), by calling MotionEventCompat.getActionMasked(MotionEvent). The MotionEventCompat class comes in the support library and has a few static methods to help work with MotionEvents. Now, we switch on the action.
The first case to tackle is MotionEvent.ACTION_DOWN. This is only ever triggered by the first pointer (the pointer with index 0) touching the view; it will never be triggered by a second pointer touching the view when a pointer is already touching it. This means that if the mScroller has not finished animating (check isFinished()), we need to stop it (mScroller.abortAnimation()). In other words, if the view is flinging and the user touches the view, it should stop flinging as if grabbed. We store the X coordinate of the motion event in mPreviousX by calling MotionEventCompat.getX(MotionEvent, 0). We also store the pointer ID in mActivePointerId. This is the identifier for the pointer we will be watching for movements. If another pointer touches the view and starts sliding around, we don’t care about it.
The next case is the hardest one, and that’s MotionEvent.ACTION_MOVE. First, we find the index of the pointer we care about (remember the difference between index and ID, as explained earlier in the chapter) and get its X coordinate. If mIsBeingDragged is not true, it means the user has touched the view but has not yet moved the finger enough to be considered a drag, so we need to check if the difference between this X coordinate and mPreviousX that you updated in the ACTION_DOWN case is greater than the touch slop. If it is, the user is now dragging the view, so we set mIsBeingDragged to true and remove the touch slop from the delta between the previous X position and the current one. This subtle change to the delta prevents the view from feeling like it suddenly skips the amount the pointer had moved. Think of sliding your finger across something slightly slick in real life, such as a magazine cover. Your finger might slide a little before there is enough friction to move that object, then the object continues to move from the point where there was enough friction as opposed to the object suddenly jumping as if your first point of contact had enough friction.
If the user is dragging the view, we need to call overScrollBy (and get all those ints just right). The return result indicates if it scrolls beyond the bounds, so we clear the velocity tracker if it does. If mEdgeEffectLeft is not null, we should check if the view is being scrolled beyond its bounds. For example, if the view is being scrolled beyond the left edge (0), we need to call the onPull(float, float) method of mEdgeEffectLeft. If that’s the case, we should also call abortAnimation() on mEdgeEffectRight if it’s not already finished because we’re done pulling on that edge. We do the same for if the view is being scrolled beyond the right edge (pulled past mScrollRange). The abortAnimation() call will tell us if the view is still animating, so we can check it to see if we need to invalidate the view, but we’re potentially dealing with two edge effects (one that might be starting to glow now and one that might have already been glowing), so it’s easier to just check if either edge is not finished after doing everything else.
The next case to handle is MotionEvent.ACTION_UP, and it signifies that there are no more pointers touching the view. This means that we need to check whether this results in a fling of the view or a touch that didn’t drag. If mIsBeingDragged is true, we need to calculate the velocity stored in mVelocityTracker by calling computeCurrentVelocity(1000, mMaximumVelocity), where the first value is the units (1000 means velocity in pixels per second) and the second is the maximum velocity you care about. This actually calls through to a native method to calculate the velocity because it can be a complex calculation. After triggering that method, we can get the result by calling getXVelocity(int). If the result is greater than mMinimumVelocity, we call fling with the inverse of our velocity. The reason we pass the inverse is because you’re actually moving the displayed portion of the view in the opposite direction of the fling. For example, if your finger slides to the right very fast, you have a fling with a positive velocity; however, the view is supposed to look like it is scrolling left. If the velocity was not enough to be a fling, we call the mScroller’s springBack method to make sure we stay within the bounds of the view. We now recycle the VelocityTracker and remove our reference to it. By recycling it, we return it to the pool that can be handed out to another view, so we must not interact with it after that. If mEdgeEffectLeft is not null, we should call onRelease() on both mEdgeEffectLeft and mEdgeEffectRight.
Still in ACTION_UP, if mIsBeingDragged is false, we should check if it was just a touch of a Drawable. We get the X and Y coordinates for the pointer and then loop through mIconPositions, checking each Rect’s contains(int, int) method to see if the pointer is within that view. If it is, we use a Toast to indicate which position was touched and indicate how many Rects are in the mIconPositions list (so we can see that it does not grow excessively). If we were really going to do something significant with the touch, we would want to check whether it was a regular touch or a long press and we would want to update the drawable states to let them know when they were being touched. We can determine the amount of time needed before a touch is a long press by comparing the time it has been touched with ViewConfiguration.getLongPressTimeout(), which will return the number of milliseconds (usually 500).
The case after that is MotionEvent.ACTION_CANCEL, and it’s relatively easy because this indicates that the gesture has been aborted (e.g., if a parent view started to intercept the touch events). The general goal of this method is to do what you do when it’s an ACTION_UP, but do not trigger any events (no flinging, no selecting, and so on). If the view wasn’t being dragged, we do nothing. If it was, we spring back to valid coordinates, recycle the VelocityTracker and remove our reference to it, and call onRelease() on both of our EdgeEffectCompats.
Finally, the last case to worry about: MotionEvent.ACTION_POINTER_UP. This indicates that a pointer other than the primary one went up. Now we can call that handy onSecondaryPointerUp(MotionEvent) method we created earlier. That’s it! See Listing 13.15 for the complete class, including the full onTouchEvent(MotionEvent) method.
Note
Listing 13.15 is quite lengthy because it contains the entire custom HorizontalIconView. You should spend time reviewing it to make sure that it makes sense and consider re-reading any sections of this chapter that are not quite clear to you.
Remember that the code examples for this book are all available at https://github.com/IanGClifton/auid2, so you can access all of the code from Chapter 13 to run it yourself and experiment. Sometimes changing existing code to see how it affects the resulting app is the best way to understand it.
Listing 13.15 The Complete HorizontalIconView Class
public class HorizontalIconView extends View {
private static final String TAG = "HorizontalIconView";
private static final int INVALID_POINTER = MotionEvent.INVALID_POINTER_ID;
/**
* int to track the ID of the pointer that is being tracked
*/
private int mActivePointerId = INVALID_POINTER;
/**
* The List of Drawables that will be shown
*/
private List<Drawable> mDrawables;
/**
* EdgeEffect or "glow" when scrolled too far left
*/
private EdgeEffectCompat mEdgeEffectLeft;
/**
* EdgeEffect or "glow" when scrolled too far right
*/
private EdgeEffectCompat mEdgeEffectRight;
/**
* List of Rects for each visible icon to calculate touches
*/
private final List<Rect> mIconPositions = new ArrayList<>();
/**
* Width and height of icons in pixels
*/
private int mIconSize;
/**
* Space between each icon in pixels
*/
private int mIconSpacing;
/**
* Whether a pointer/finger is currently on screen that is being tracked
*/
private boolean mIsBeingDragged;
/**
* Maximum fling velocity in pixels per second
*/
private int mMaximumVelocity;
/**
* Minimum fling velocity in pixels per second
*/
private int mMinimumVelocity;
/**
* How far to fling beyond the bounds of the view
*/
private int mOverflingDistance;
/**
* How far to scroll beyond the bounds of the view
*/
private int mOverscrollDistance;
/**
* The X coordinate of the last down touch, used to determine when a drag starts
*/
private float mPreviousX = 0;
/**
* Number of pixels this view can scroll (basically width - visible width)
*/
private int mScrollRange;
/**
* Number of pixels of movement required before a touch is "moving"
*/
private int mTouchSlop;
/**
* VelocityTracker to simplify tracking MotionEvents
*/
private VelocityTracker mVelocityTracker;
/**
* Scroller to do the hard work of scrolling smoothly
*/
private OverScroller mScroller;
/**
* The number of icons that are left of the view and therefore not drawn
*/
private int mSkippedIconCount = 0;
public HorizontalIconView(Context context) {
super(context);
init(context);
}
public HorizontalIconView(Context context, AttributeSet attrs) {
super(context, attrs);
init(context);
}
public HorizontalIconView(Context context, AttributeSet attrs, int defStyleAttr) {
super(context, attrs, defStyleAttr);
init(context);
}
@TargetApi(Build.VERSION_CODES.LOLLIPOP)
public HorizontalIconView(Context context, AttributeSet attrs, int defStyleAttr, int defStyleRes) {
super(context, attrs, defStyleAttr, defStyleRes);
init(context);
}
@Override
public void computeScroll() {
if (mScroller.computeScrollOffset()) {
int oldX = getScrollX();
int x = mScroller.getCurrX();
if (oldX != x) {
overScrollBy(x - oldX, 0, oldX, 0, mScrollRange, 0, mOverflingDistance, 0, false);
onScrollChanged(x, 0, oldX, 0);
if (x < 0 && oldX >= 0) {
mEdgeEffectLeft.onAbsorb((int) mScroller.getCurrVelocity());
} else if (x > mScrollRange && oldX <= mScrollRange) {
mEdgeEffectRight.onAbsorb((int) mScroller.getCurrVelocity());
}
}
}
}
@Override
public boolean onTouchEvent(@NonNull MotionEvent ev) {
if (mVelocityTracker == null) {
mVelocityTracker = VelocityTracker.obtain();
}
mVelocityTracker.addMovement(ev);
final int action = MotionEventCompat.getActionMasked(ev);
switch (action) {
case MotionEvent.ACTION_DOWN: {
if (!mScroller.isFinished()) {
mScroller.abortAnimation();
}
// Remember where the motion event started
mPreviousX = (int) MotionEventCompat.getX(ev, 0);
mActivePointerId = MotionEventCompat.getPointerId(ev, 0);
break;
}
case MotionEvent.ACTION_MOVE: {
final int activePointerIndex = MotionEventCompat.findPointerIndex(ev, mActivePointerId);
if (activePointerIndex == INVALID_POINTER) {
Log.e(TAG, "Invalid pointerId=" + mActivePointerId + " in onTouchEvent");
break;
}
final int x = (int) MotionEventCompat.getX(ev, 0);
int deltaX = (int) (mPreviousX - x);
if (!mIsBeingDragged && Math.abs(deltaX) > mTouchSlop) {
mIsBeingDragged = true;
if (deltaX > 0) {
deltaX -= mTouchSlop;
} else {
deltaX += mTouchSlop;
}
}
if (mIsBeingDragged) {
// Scroll to follow the motion event
mPreviousX = x;
final int oldX = getScrollX();
final int range = mScrollRange;
if (overScrollBy(deltaX, 0, oldX, 0, range, 0, mOverscrollDistance, 0, true)) {
// Break our velocity if we hit a scroll barrier.
mVelocityTracker.clear();
}
if (mEdgeEffectLeft != null) {
final int pulledToX = oldX + deltaX;
final int y = (int) MotionEventCompat.getY(ev, 0);
final float yDisplacement = 1 - ((float) y / getHeight());
if (pulledToX < 0) {
mEdgeEffectLeft.onPull((float) deltaX / getWidth(), yDisplacement);
if (!mEdgeEffectRight.isFinished()) {
mEdgeEffectRight.onRelease();
}
} else if (pulledToX > range) {
mEdgeEffectRight.onPull((float) deltaX / getWidth(), yDisplacement);
if (!mEdgeEffectLeft.isFinished()) {
mEdgeEffectLeft.onRelease();
}
}
if (!mEdgeEffectLeft.isFinished() || !mEdgeEffectRight.isFinished()) {
postInvalidateOnAnimation();
}
}
}
break;
}
case MotionEvent.ACTION_UP: {
if (mIsBeingDragged) {
mVelocityTracker.computeCurrentVelocity(1000, mMaximumVelocity);
int initialVelocity = (int) mVelocityTracker.getXVelocity(mActivePointerId);
if ((Math.abs(initialVelocity) > mMinimumVelocity)) {
fling(-initialVelocity);
} else {
if (mScroller.springBack(getScrollX(), 0, 0, mScrollRange, 0, 0)) {
postInvalidateOnAnimation();
}
}
mActivePointerId = INVALID_POINTER;
mIsBeingDragged = false;
mVelocityTracker.recycle();
mVelocityTracker = null;
if (mEdgeEffectLeft != null) {
mEdgeEffectLeft.onRelease();
mEdgeEffectRight.onRelease();
}
} else {
// Was not being dragged, was this a press on an icon?
final int activePointerIndex = ev.findPointerIndex(mActivePointerId);
if (activePointerIndex == INVALID_POINTER) {
return false;
}
final int x = (int) ev.getX(activePointerIndex) + getScrollX();
final int y = (int) ev.getY(activePointerIndex);
int i = 0;
for (Rect rect : mIconPositions) {
if (rect.contains(x, y)) {
final int position = i + mSkippedIconCount;
Toast.makeText(getContext(), "Pressed icon " + position + "; rect count: " + mIconPositions.size(), Toast.LENGTH_SHORT).show();
break;
}
i++;
}
}
break;
}
case MotionEvent.ACTION_CANCEL: {
if (mIsBeingDragged) {
if (mScroller.springBack(getScrollX(), 0, 0, mScrollRange, 0, 0)) {
postInvalidateOnAnimation();
}
mActivePointerId = INVALID_POINTER;
mIsBeingDragged = false;
if (mVelocityTracker != null) {
mVelocityTracker.recycle();
mVelocityTracker = null;
}
if (mEdgeEffectLeft != null) {
mEdgeEffectLeft.onRelease();
mEdgeEffectRight.onRelease();
}
}
break;
}
case MotionEvent.ACTION_POINTER_UP: {
onSecondaryPointerUp(ev);
break;
}
}
return true;
}
/**
* Sets the List of Drawables to display
*
* @param drawables List of Drawables; can be null
*/
public void setDrawables(List<Drawable> drawables) {
if (mDrawables == null) {
if (drawables == null) {
return;
}
requestLayout();
} else if (drawables == null) {
requestLayout();
mDrawables = null;
return;
} else if (mDrawables.size() == drawables.size()) {
invalidate();
} else {
requestLayout();
}
mDrawables = new ArrayList<>(drawables);
mIconPositions.clear();
}
@Override
protected void onDraw(Canvas canvas) {
if (mDrawables == null || mDrawables.isEmpty()) {
return;
}
final int width = getWidth();
final int height = getHeight();
final int paddingLeft = getPaddingLeft();
final int paddingTop = getPaddingTop();
// Determine edges of visible content
final int leftEdge = getScrollX();
final int rightEdge = leftEdge + width;
int left = paddingLeft;
final int top = paddingTop;
mSkippedIconCount = 0;
final int iconCount = mDrawables.size();
for (int i = 0; i < iconCount; i++) {
if (left + mIconSize < leftEdge) {
// Icon is too far left to be seen
left = left + mIconSize + mIconSpacing;
mSkippedIconCount++;
continue;
}
if (left > rightEdge) {
// All remaining icons are right of the view
break;
}
// Get a reference to the icon to be drawn
final Drawable icon = mDrawables.get(i);
icon.setBounds(left, top, left + mIconSize, top + mIconSize);
icon.draw(canvas);
// Icon was drawn, so track position
final int drawnPosition = i - mSkippedIconCount;
if (drawnPosition + 1 > mIconPositions.size()) {
final Rect rect = icon.copyBounds();
mIconPositions.add(rect);
} else {
final Rect rect = mIconPositions.get(drawnPosition);
icon.copyBounds(rect);
}
// Update left position
left = left + mIconSize + mIconSpacing;
}
if (mEdgeEffectLeft != null) {
if (!mEdgeEffectLeft.isFinished()) {
final int restoreCount = canvas.save();
canvas.rotate(270);
canvas.translate(-height, Math.min(0, leftEdge));
mEdgeEffectLeft.setSize(height, width);
if (mEdgeEffectLeft.draw(canvas)) {
postInvalidateOnAnimation();
}
canvas.restoreToCount(restoreCount);
}
if (!mEdgeEffectRight.isFinished()) {
final int restoreCount = canvas.save();
canvas.rotate(90);
canvas.translate(0, -(Math.max(mScrollRange, leftEdge) + width));
mEdgeEffectRight.setSize(height, width);
if (mEdgeEffectRight.draw(canvas)) {
postInvalidateOnAnimation();
}
canvas.restoreToCount(restoreCount);
}
}
}
@Override
protected void onMeasure(int widthMeasureSpec, int heightMeasureSpec) {
setMeasuredDimension(measureWidth(widthMeasureSpec), measureHeight(heightMeasureSpec));
}
@Override
protected void onOverScrolled(int scrollX, int scrollY, boolean clampedX, boolean clampedY) {
if (mScroller.isFinished()) {
super.scrollTo(scrollX, scrollY);
} else {
setScrollX(scrollX);
if (clampedX) {
mScroller.springBack(scrollX, 0, 0, mScrollRange, 0, 0);
}
}
}
/**
* Flings the view horizontally with the specified velocity
*
* @param velocity int pixels per second along X axis
*/
private void fling(int velocity) {
if (mScrollRange == 0) {
return;
}
final int halfWidth = (getWidth() - getPaddingLeft() - getPaddingRight()) / 2;
mScroller.fling(getScrollX(), 0, velocity, 0, 0, mScrollRange, 0, 0, halfWidth, 0);
invalidate();
}
/**
* Perform one-time initialization
*
* @param context Context to load Resources and ViewConfiguration data
*/
private void init(Context context) {
final Resources res = context.getResources();
mIconSize = res.getDimensionPixelSize(R.dimen.icon_size);
mIconSpacing = res.getDimensionPixelSize(R.dimen.icon_spacing);
// Cache ViewConfiguration values
final ViewConfiguration config = ViewConfiguration.get(context);
mTouchSlop = config.getScaledTouchSlop();
mMinimumVelocity = config.getScaledMinimumFlingVelocity();
mMaximumVelocity = config.getScaledMaximumFlingVelocity();
mOverflingDistance = config.getScaledOverflingDistance();
mOverscrollDistance = config.getScaledOverscrollDistance();
// Verify this View will be drawn
setWillNotDraw(false);
// Other setup
mEdgeEffectLeft = new EdgeEffectCompat(context);
mEdgeEffectRight = new EdgeEffectCompat(context);
mScroller = new OverScroller(context);
setFocusable(true);
}
/**
* Measures height according to the passed measure spec
*
* @param measureSpec
* int measure spec to use
* @return int pixel size
*/
private int measureHeight(int measureSpec) {
int specMode = MeasureSpec.getMode(measureSpec);
int specSize = MeasureSpec.getSize(measureSpec);
int result;
if (specMode == MeasureSpec.EXACTLY) {
result = specSize;
} else {
result = mIconSize + getPaddingTop() + getPaddingBottom();
if (specMode == MeasureSpec.AT_MOST) {
result = Math.min(result, specSize);
}
}
return result;
}
/**
* Measures width according to the passed measure spec
*
* @param measureSpec
* int measure spec to use
* @return int pixel size
*/
private int measureWidth(int measureSpec) {
int specMode = MeasureSpec.getMode(measureSpec);
int specSize = MeasureSpec.getSize(measureSpec);
// Calculate maximum size
final int icons = (mDrawables == null) ? 0 : mDrawables.size();
final int iconSpace = mIconSize * icons;
final int dividerSpace;
if (icons <= 1) {
dividerSpace = 0;
} else {
dividerSpace = (icons - 1) * mIconSpacing;
}
final int maxSize = dividerSpace + iconSpace + getPaddingLeft() + getPaddingRight();
// Calculate actual size
int result;
if (specMode == MeasureSpec.EXACTLY) {
result = specSize;
} else {
if (specMode == MeasureSpec.AT_MOST) {
result = Math.min(maxSize, specSize);
} else {
result = maxSize;
}
}
if (maxSize > result) {
mScrollRange = maxSize - result;
} else {
mScrollRange = 0;
}
return result;
}
private void onSecondaryPointerUp(MotionEvent ev) {
final int pointerIndex = MotionEventCompat.getActionIndex(ev);
final int pointerId = MotionEventCompat.getPointerId(ev, pointerIndex);
if (pointerId == mActivePointerId) {
final int newPointerIndex = pointerIndex == 0 ? 1 : 0;
mPreviousX = ev.getX(newPointerIndex);
mActivePointerId = ev.getPointerId(newPointerIndex);
if (mVelocityTracker != null) {
mVelocityTracker.clear();
}
}
}
}
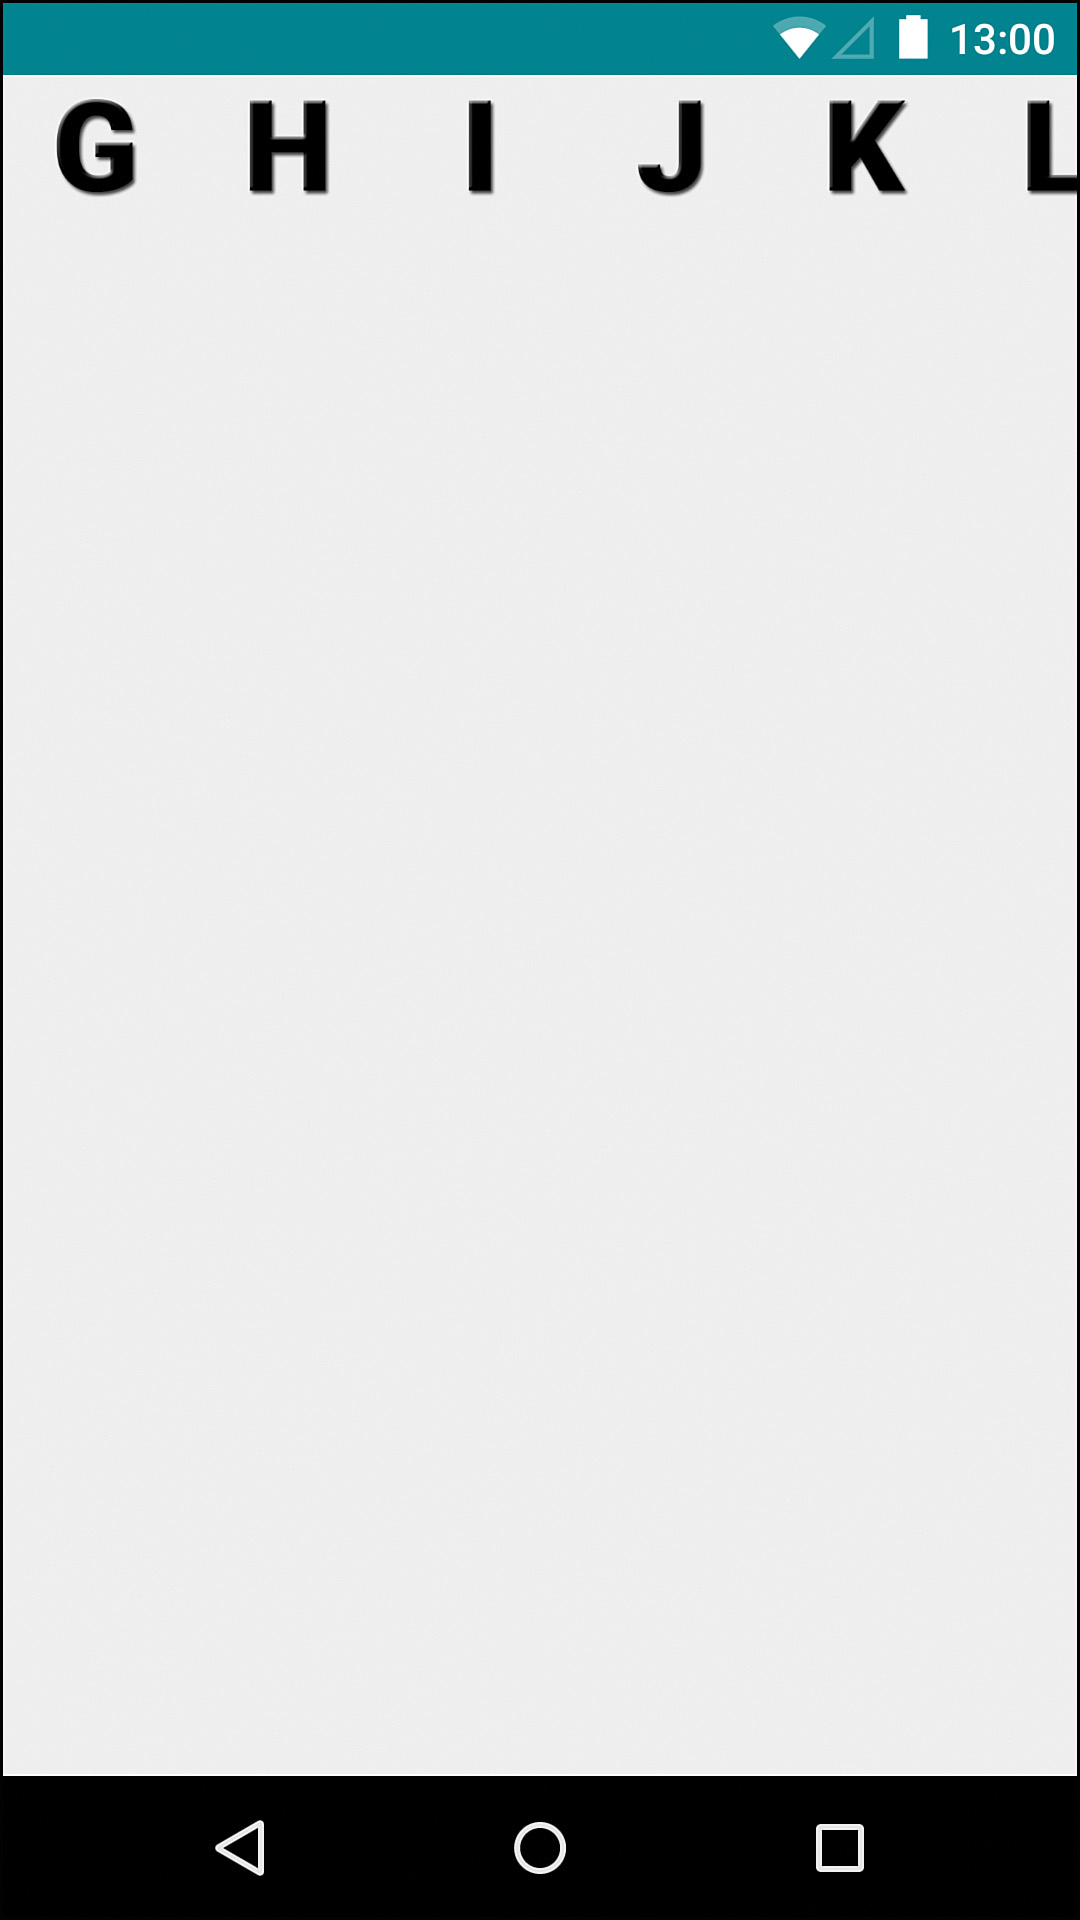
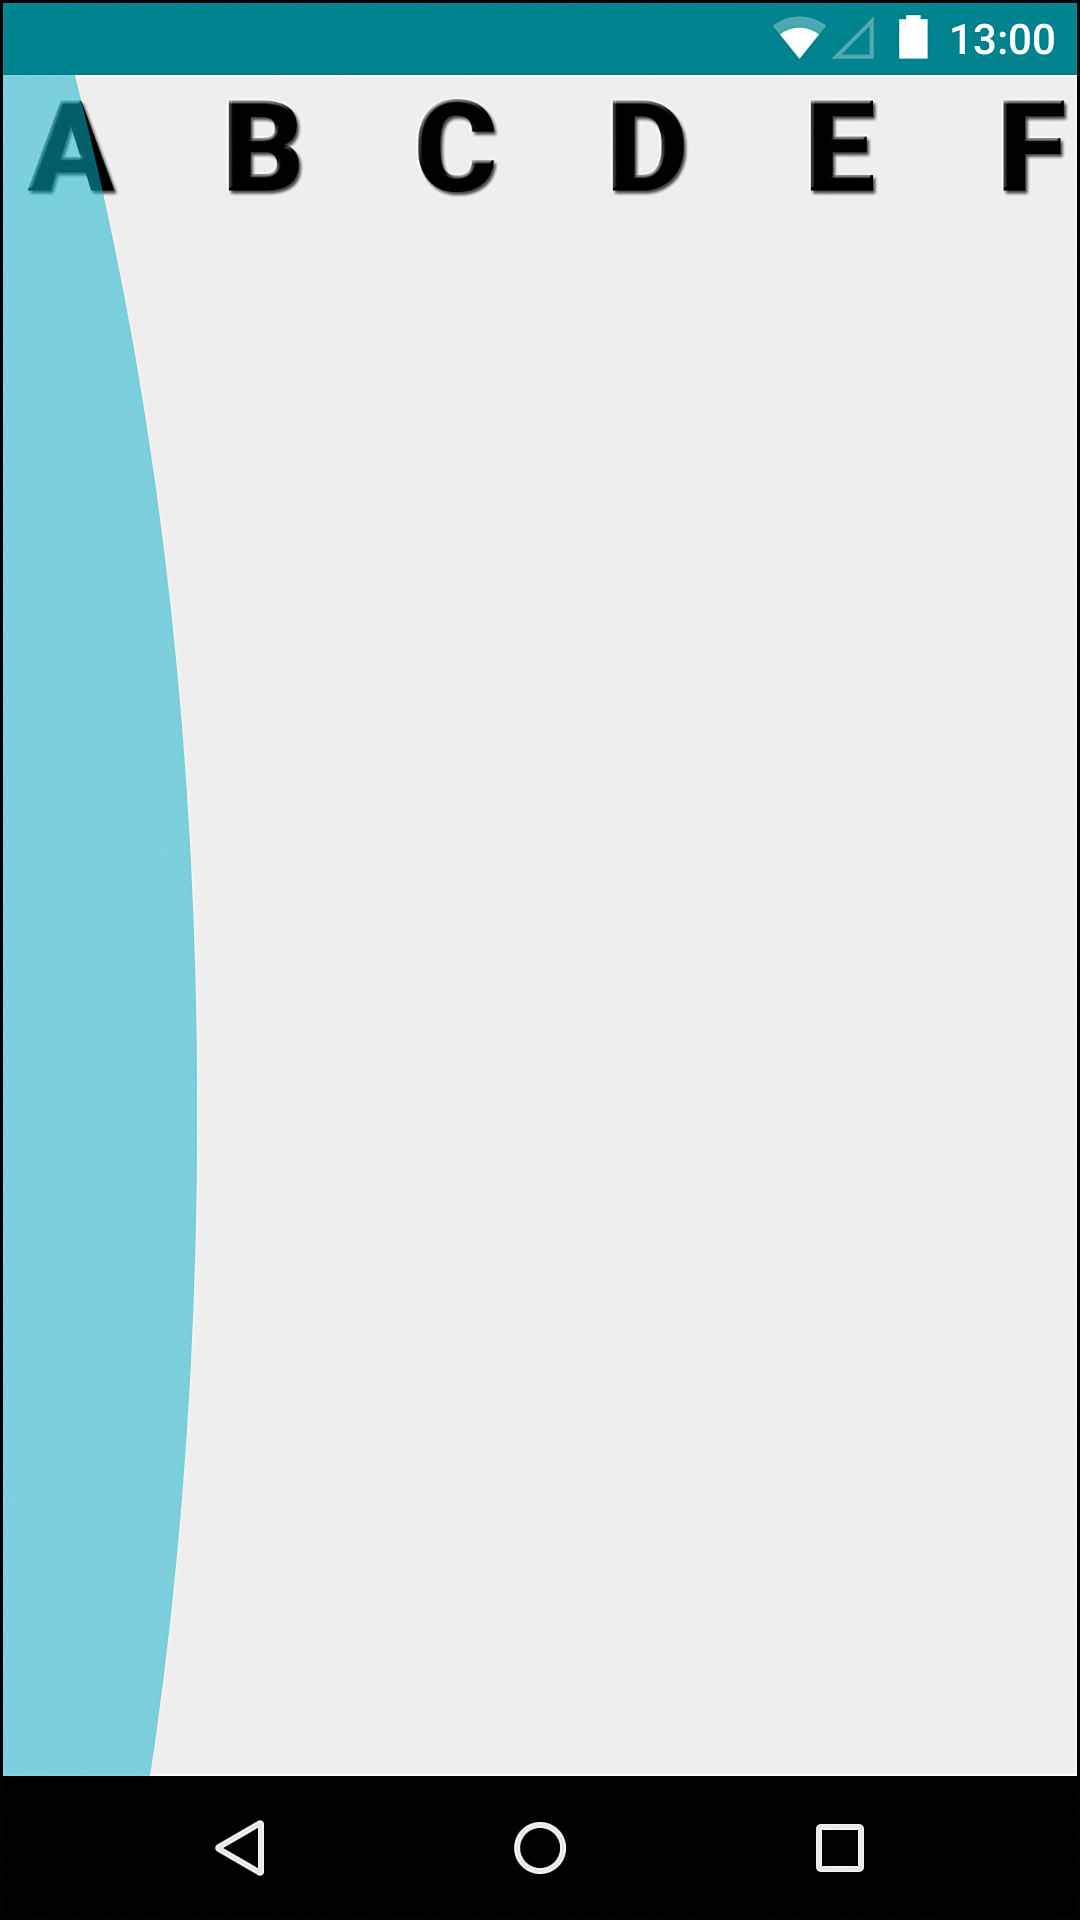
Now we can test out our new view. We should make sure it can scroll (see Figure 13.3) through the full range of drawables, left and right. Also, we should make sure the overscroll visuals on the left work (see Figure 13.4) and the overscroll visuals on the right work.
You might be wondering why the overscroll glow appears over the entire activity area. That’s because the custom view was passed in with setContentView(View). To verify it really works how it should, we should try putting it in a layout. You might also consider adding padding or other attributes that may affect the way it draws. See Listing 13.16 for a sample layout.
Listing 13.16 A Simple Layout for Testing the Custom View
<LinearLayout xmlns:android="http://schemas.android.com/apk/res/android"
xmlns:tools="http://schemas.android.com/tools"
android:layout_width="match_parent"
android:layout_height="match_parent"
android:orientation="vertical"
android:background="#FFEEEEEE"
tools:context=".MainActivity">
<android.support.v7.widget.Toolbar
android:id="@+id/toolbar"
android:layout_width="match_parent"
android:layout_height="?attr/actionBarSize"
android:elevation="4dp"
android:background="?attr/colorPrimary"/>
<Space
android:layout_width="match_parent"
android:layout_height="0dp"
android:layout_weight="1"/>
<com.auidbook.horizontaliconview.HorizontalIconView
android:id="@+id/horizontal_icon_view"
android:layout_width="match_parent"
android:layout_height="wrap_content"
android:background="@android:color/white"
android:padding="16dp" />
<Space
android:layout_width="match_parent"
android:layout_height="0dp"
android:layout_weight="1"/>
</LinearLayout>
Updating the activity to use that layout and running it on a device gives the result in Figure 13.5. Notice that the glow on the left side is contained within the view itself. The view is correctly centered and has the correct background.
Now is a great time to go back through the code and make sure you understand each method. Don’t be afraid to experiment. See what happens if you comment out certain lines or change the values. That’s one of the best ways to understand what is really happening with the code and why you pass certain values to methods. For example, if touch slop still seems like a weird concept, see what happens when you multiply it by 10.
Other Considerations
This view is far from perfect, but it does demonstrate the challenging parts of creating a custom view. It also has a potential bug in that the number of Rects that are kept for hit detection can actually be one greater than the number of views on the screen. It’s not a major problem, but it’s something that would be worth fixing before making this part of some library. Of course, if you were to make this part of a library, you would want to finish the hit handling for the icons and use a custom listener interface to report touches instead of directly handling them.
Another problem with this view is that it only works on Android 4.2 and above (API level 16) because of the use of postInvalidateOnAnimation(), which causes invalidate to happen on the next frame. To improve compatibility with older versions of Android, you can use reflection to see if this method exists. If not, the standard invalidate() method will work. The OverScroller’s getCurrVelocity() method is used, which was added in Android 4.0 (API level 14). You can instead use the velocity from your mVelocityTracker’s last report, calculate the velocity yourself, use reflection, use a fixed value, or even just comment out those lines (in which case a fling just won’t cause the glow).
Summary
This is definitely the most challenging and detailed chapter of the book. If you feel like you don’t quite understand all of it, that’s okay. The important part is understanding the concepts so that you can start to work on custom views yourself. The first few views you make on your own are likely to have bugs or cause some frustration. There are a lot of places to mix up an int or forget to call a method, so don’t be surprised if you have to spend effort troubleshooting. That’s a great way to learn. Hopefully by reading this book, you’ve learned to avoid some of the common pitfalls, such as not calling setWillNotDraw(false) and wondering for hours why your drawing code isn’t working.
When you’re ready to learn more about custom views, the Android developer site has some good documentation on additional ways to work with touch input at http://developer.android.com/training/gestures/index.html. Of course, there’s rarely a better place to learn than the code itself, so don’t be afraid to pull up the source for one of the built-in views. You’ll start to see many repeating patterns, and that’s when your understanding really starts to come together.