
8. Organizing and Managing Photos On Your Mobile Device
In this chapter, you’ll learn how to organize your digital photos while they’re stored on your smartphone or tablet, and keep them organized when they get transferred to a computer or online photo sharing service. Topics include
→ Ways to sort your images
→ How to create custom albums
→ Moving images between albums
As you take photos using the camera built in to your smartphone or tablet, they’re automatically assigned a generic filename (with a sequential number associated with it) and stored in a central album where they can easily be found using the Photos app, the Gallery app on Android-based devices, another third-party photo editing/enhancement app, a social media app, or your email app, for example.
At some point, especially as your personal photo collection expands to include hundreds or thousands of images, taken at different times and in different places, you’ll want to organize them on your mobile device. This organization process typically includes creating custom-named albums in which you store groups of photos.
Get Organized, Stay Organized
As your photo library grows, it’s much easier to organize your images as they’re taken, as opposed to after you’ve amassed hundreds or thousands of photos that get stored by default into a single folder.
Ultimately, you have the opportunity to add additional metadata to your images (see “Making Photos More Useful with Metadata” in Chapter 2, “Taking Amazing Pictures with Your Smartphone or Tablet”), give them each a custom filename, and be able to sort them in other ways, either on your mobile device, or after they’re transferred to a computer or online service.
Organizing Your Photos On an iPhone or iPad
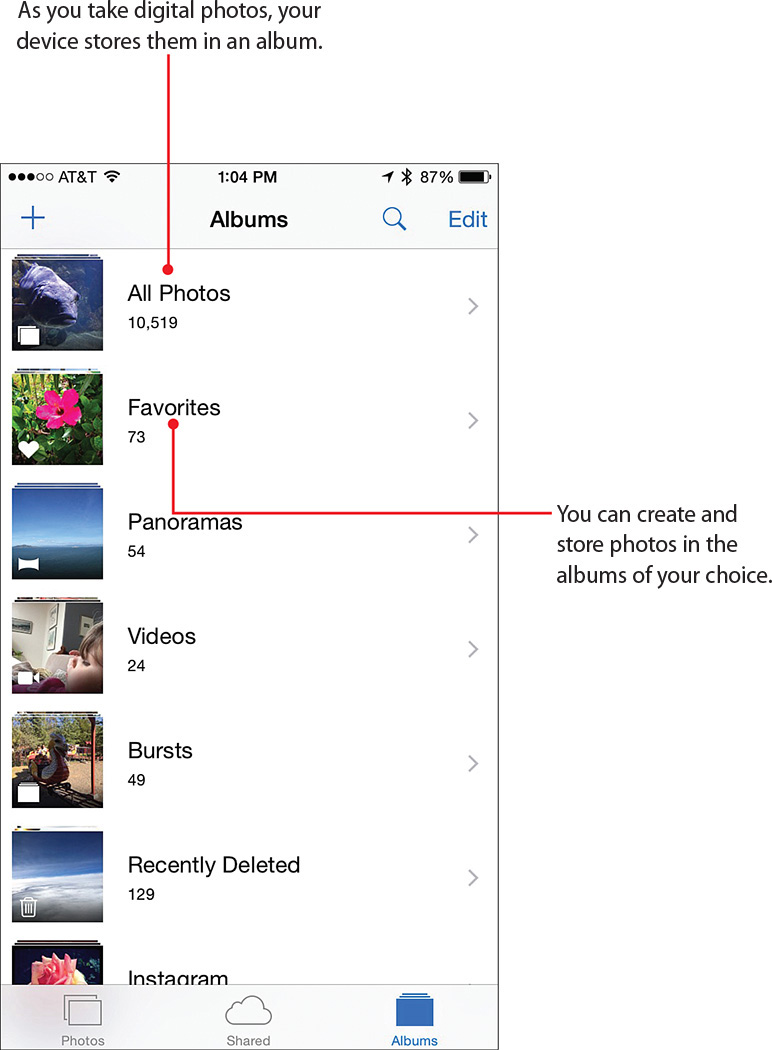
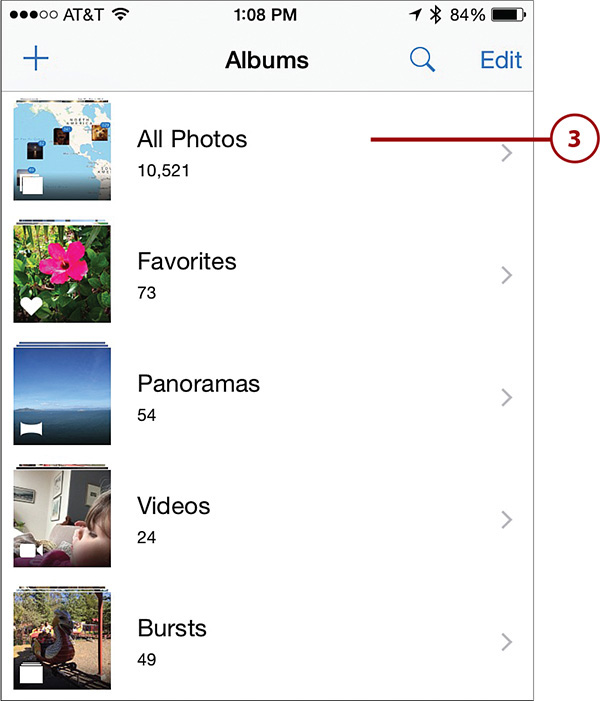
After taking photos using the Camera app built in to your mobile device, images are stored automatically by the Photos app in the All Photos album. (In past versions of the iOS and the Photos app, this folder was called Camera Roll.)
However, if you used the Burst shooting mode to take multiple photos in quick succession, you’ll find these images in a separate album, called Bursts. Panoramic photos are automatically stored in a folder called Panoramas.
Open an Album
To access the All Photos, Bursts, or Panoramas folder, follow these steps:
![]() Launch the Photos app from the Home screen.
Launch the Photos app from the Home screen.

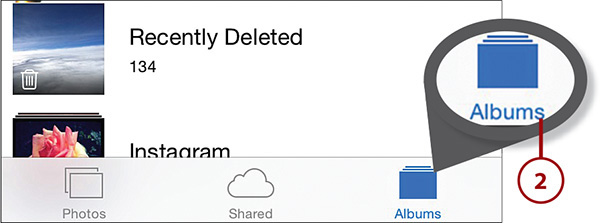
![]() Tap on the Albums icon displayed at the bottom of the screen. This allows you to view albums currently stored in your mobile device.
Tap on the Albums icon displayed at the bottom of the screen. This allows you to view albums currently stored in your mobile device.
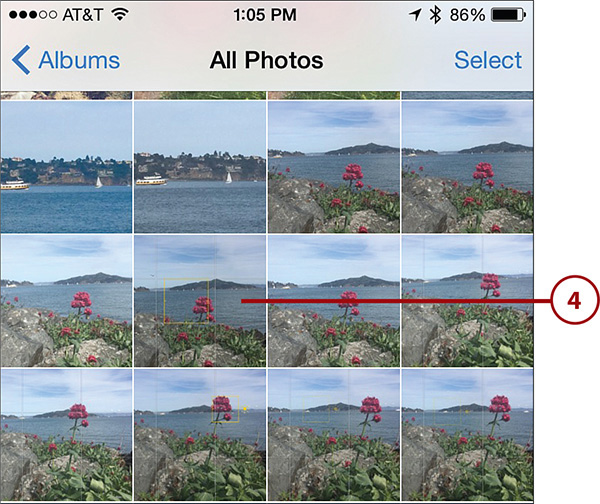
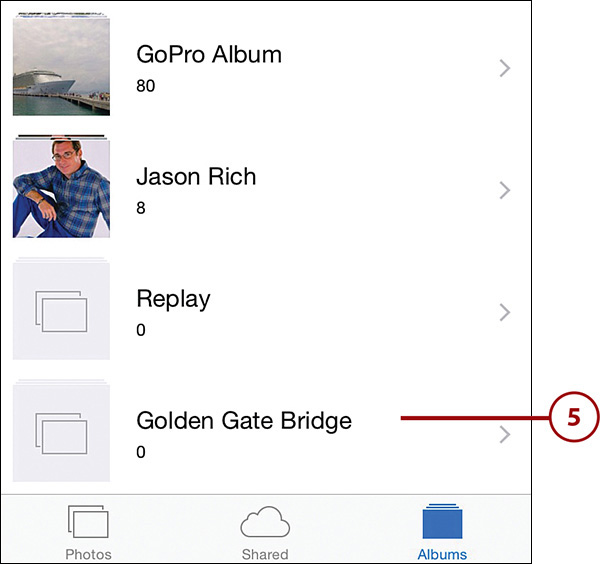
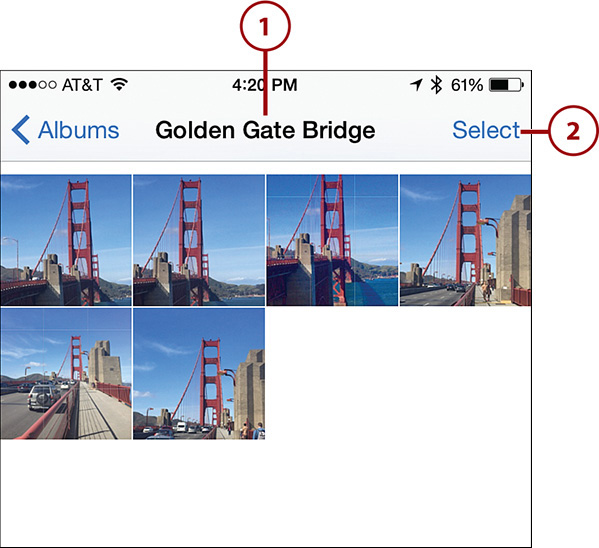
![]() Tap on the thumbnail that represents the album you want to open. The All Photos album displays your photos in chronological order, for example, so your newest images always are displayed last (by scrolling to the bottom of the album).
Tap on the thumbnail that represents the album you want to open. The All Photos album displays your photos in chronological order, for example, so your newest images always are displayed last (by scrolling to the bottom of the album).
![]() Tap a photo to view it full screen.
Tap a photo to view it full screen.
Moving Pictures Around
When you’re viewing images in an album, it’s possible to organize specific images by moving any of them to a different album, for example. How to do this is explained in these sections.
Browse Collections
Instead of viewing your images based on the albums they’re stored in, you can view all your images together in chronological order, regardless of the album. To do this, launch the Photos app and follow these steps:
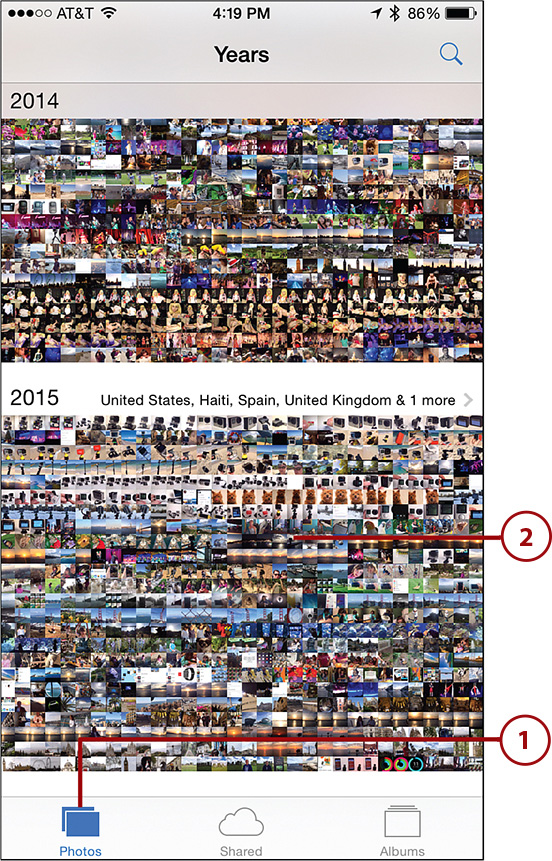
![]() Tap the Photos icon. The Photos option enables you to sort images and view them based on the year they were shot, the location they were shot, or as a collection or moment—which automatically sorts and displays the photos based on where and when they were shot.
Tap the Photos icon. The Photos option enables you to sort images and view them based on the year they were shot, the location they were shot, or as a collection or moment—which automatically sorts and displays the photos based on where and when they were shot.
![]() Tap on the photos for a selected year. This opens the Collections page, which sorts photos by the location and the month they were taken.
Tap on the photos for a selected year. This opens the Collections page, which sorts photos by the location and the month they were taken.
Starting Out
Photos might not start you out on the Years page shown here. If it doesn’t, you can back out to it by tapping the < option near the top-left part of the screen until you get to the Years page.
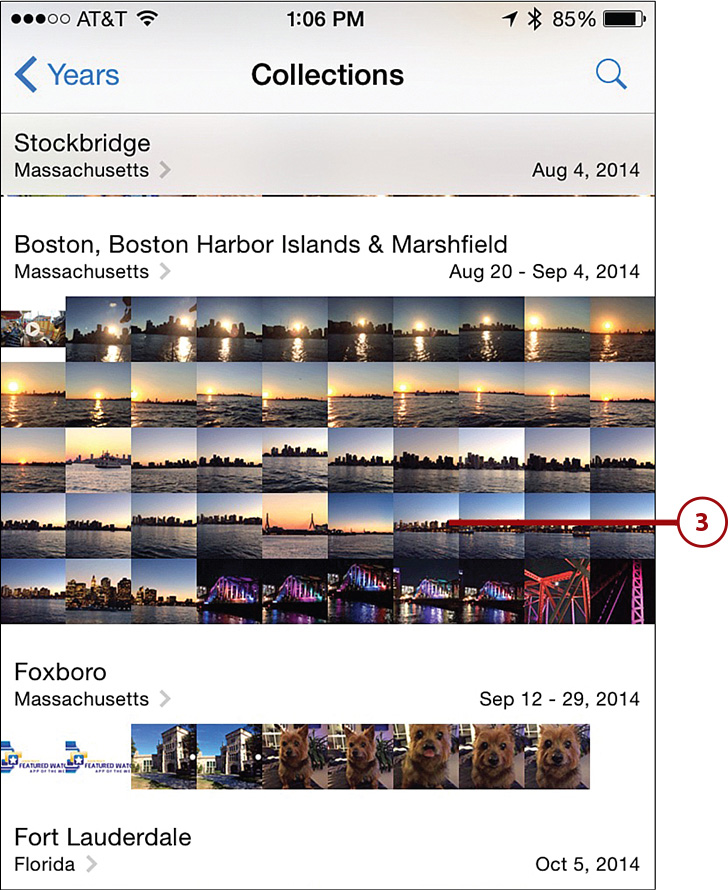
![]() Tap on the photos for a collection to view that collection’s Moments. This page organizes photos based on the location and day they were taken.
Tap on the photos for a collection to view that collection’s Moments. This page organizes photos based on the location and day they were taken.
![]() Tap on a photo on the Moments page to see that photo.
Tap on a photo on the Moments page to see that photo.

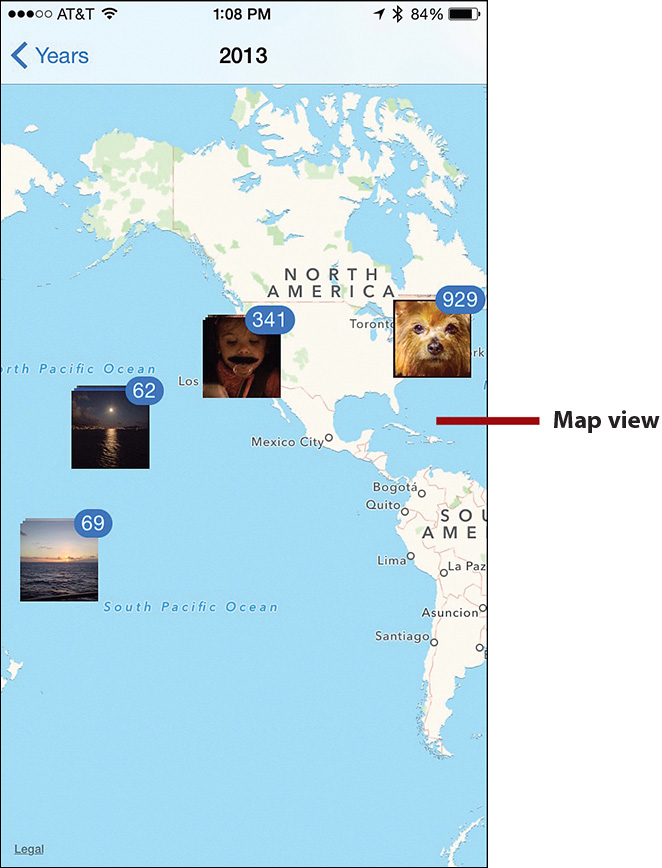
>>>Go Further: Mapping Photos
Create New Albums
One of the best ways to organize your personal photo collection is to organize your images into custom-named albums, using names that make sense to you. For example, you can group photos together by events, such as “2015 Christmas Vacation,” “40th Anniversary Cruise,” or “Natalie’s 3rd Birthday Party.” To create a new album, open the Photos app and follow these steps:
![]() Tap on the Albums icon displayed at the bottom of the screen.
Tap on the Albums icon displayed at the bottom of the screen.
![]() Tap on the Create Album (plus-sign icon).
Tap on the Create Album (plus-sign icon).

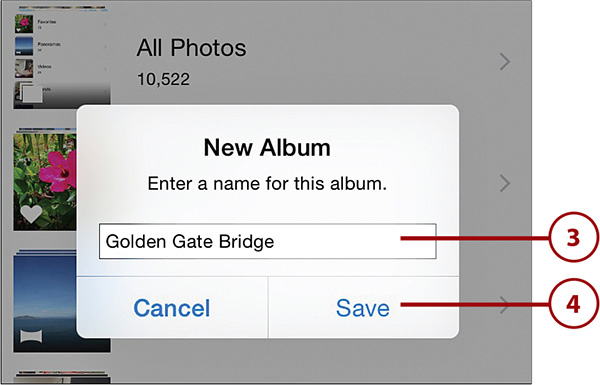
![]() In the New Album pop-up window, type the name for the new album you’re creating.
In the New Album pop-up window, type the name for the new album you’re creating.
![]() Tap Save to create the album, which is displayed instantly on your Albums screen.
Tap Save to create the album, which is displayed instantly on your Albums screen.
![]() Under the album’s name you see a zero, indicating that no images are currently stored in it. You can now begin copying images into the album by following the directions listed in the section “Copy Photos Between Albums,” later in the chapter.
Under the album’s name you see a zero, indicating that no images are currently stored in it. You can now begin copying images into the album by following the directions listed in the section “Copy Photos Between Albums,” later in the chapter.
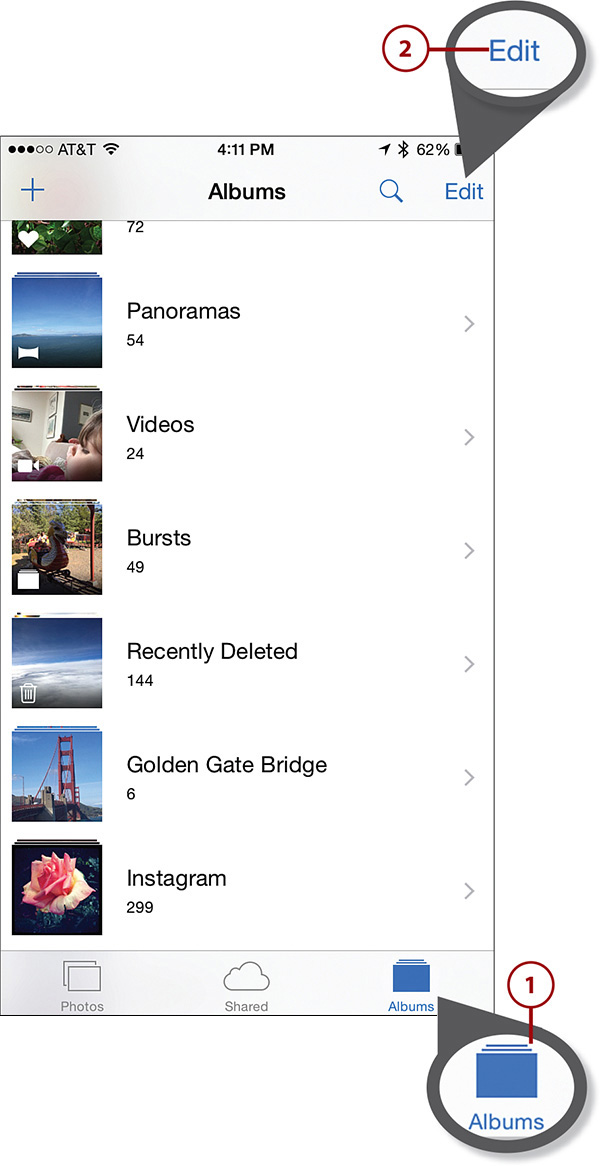
Delete or Move an Album
Although it is not possible to delete the default albums that come precreated in the Photos app (All Photos, Favorites, Panoramas, and so on), any album you create yourself can later be deleted from your mobile device. To delete an album open the Photos app and follow these steps:
![]() Tap on the Albums icon displayed at the bottom of the screen.
Tap on the Albums icon displayed at the bottom of the screen.
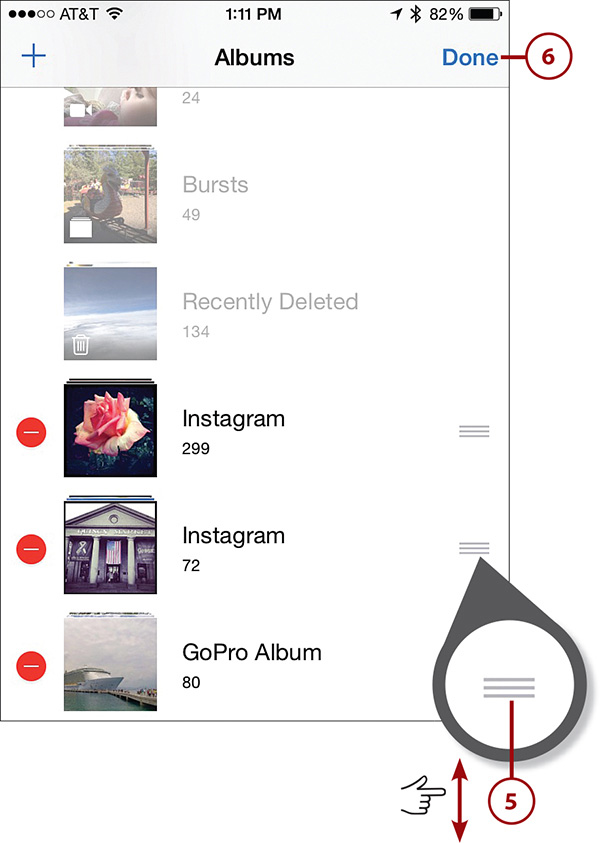
![]() From the Albums screen, tap on the Edit option displayed in the top-right corner.
From the Albums screen, tap on the Edit option displayed in the top-right corner.
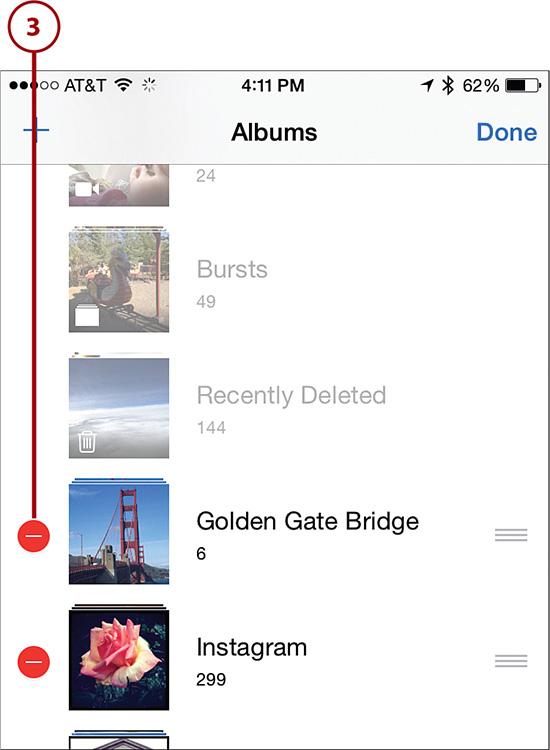
![]() Tap on the red-and-white negative sign icon associated with an album listing, when applicable, to delete an unwanted album.
Tap on the red-and-white negative sign icon associated with an album listing, when applicable, to delete an unwanted album.
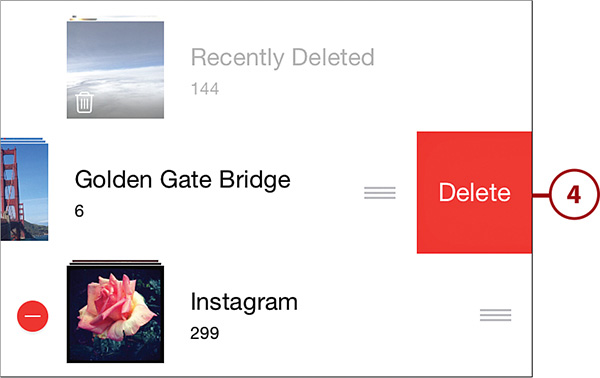
![]() Tap on the Delete button to confirm your decision.
Tap on the Delete button to confirm your decision.
![]() To change the order in which albums are listed, tap and hold on the move icon (three rows of lines) and drag the album to the position you want it placed in.
To change the order in which albums are listed, tap and hold on the move icon (three rows of lines) and drag the album to the position you want it placed in.
![]() Tap on the Done option to save your changes. Keep in mind that the albums created by the Photos app (All Photos, Favorites, Panoramas, and so on) are always listed first.
Tap on the Done option to save your changes. Keep in mind that the albums created by the Photos app (All Photos, Favorites, Panoramas, and so on) are always listed first.
Copy Photos Between Albums
Once you’ve created one or more custom-named albums, the next step is to populate those albums with your photos to better organize them. To do this, open the Photos app and follow these steps:
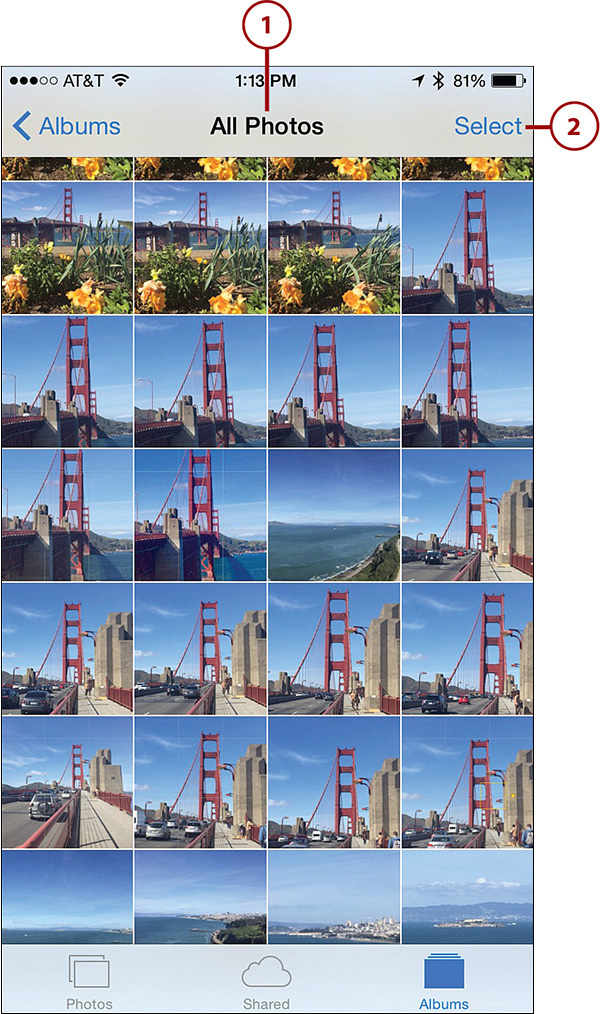
![]() Tap an album, such as All Photos, that contains the image(s) you want to move into the newly created album (or any other album). (Not shown.)
Tap an album, such as All Photos, that contains the image(s) you want to move into the newly created album (or any other album). (Not shown.)
Create an Album First
If you haven’t yet created a custom album, make sure to follow the steps earlier in this chapter in the section “Create New Albums.”
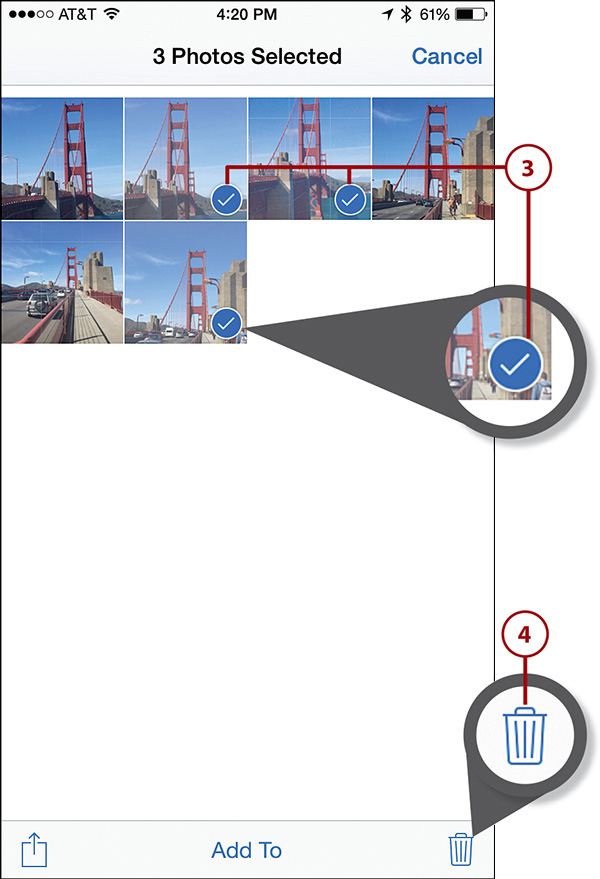
![]() Tap on the Select option displayed in the top-right corner.
Tap on the Select option displayed in the top-right corner.
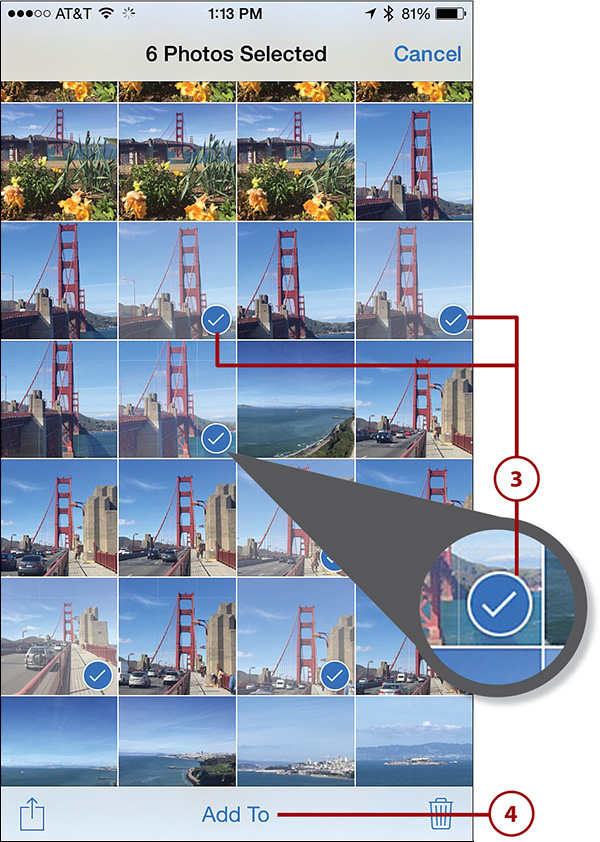
![]() One at a time, tap on the thumbnail for each image that you want to move into the newly created album. A blue-and-which check mark icon appears in the bottom-right corner of each thumbnail you select.
One at a time, tap on the thumbnail for each image that you want to move into the newly created album. A blue-and-which check mark icon appears in the bottom-right corner of each thumbnail you select.
![]() Tap on the Add To option displayed at the bottom center of the screen after you’ve selected each photo you want to move. The Add To Album screen is displayed.
Tap on the Add To option displayed at the bottom center of the screen after you’ve selected each photo you want to move. The Add To Album screen is displayed.
![]() Tap on the album where you want the photos placed. (Although all the albums in your mobile device are shown, only the custom albums you’ve created are accessible.) The selected photos now appear in the designated album.
Tap on the album where you want the photos placed. (Although all the albums in your mobile device are shown, only the custom albums you’ve created are accessible.) The selected photos now appear in the designated album.
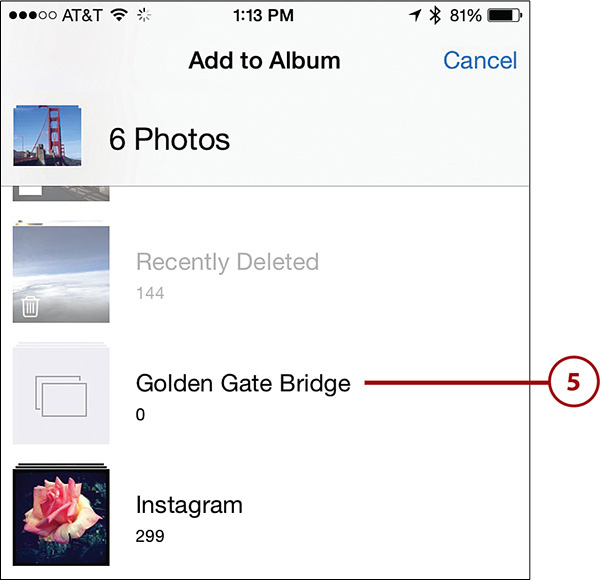
No Copies
If you copied the image(s) from the All Photos album, you can see them both there and in the new album you selected. This does not mean you’ve made copies of the images. They merely appear in both albums.
Delete Images from Albums
In addition to adding images to albums, you can just as easily remove (delete) individual images from an album. To do this, open the Photos app and follow these steps:
![]() Open the album that contains the image(s) you want to delete.
Open the album that contains the image(s) you want to delete.
![]() Tap on the Select option.
Tap on the Select option.
![]() Tap on the thumbnails for the images you want to delete. A blue-and-white check mark icon appears on the thumbnail of each selected image.
Tap on the thumbnails for the images you want to delete. A blue-and-white check mark icon appears on the thumbnail of each selected image.
![]() Tap on the Trash icon displayed in the bottom-right corner of the screen.
Tap on the Trash icon displayed in the bottom-right corner of the screen.
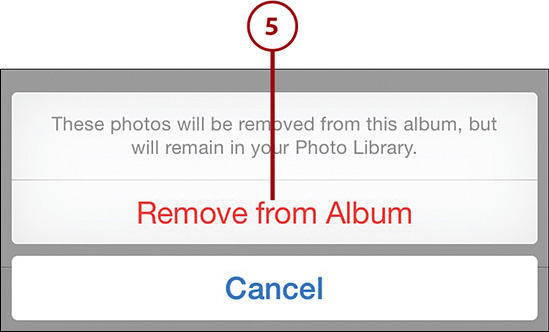
![]() Tap on the Remove From Album option to confirm your decision.
Tap on the Remove From Album option to confirm your decision.
Not All Images Can Be Deleted
If an album was created on another computer or mobile device and has been copied to the mobile device you’re using, for example, you might not have the option to delete those images, unless you’re using the device used to create the album.
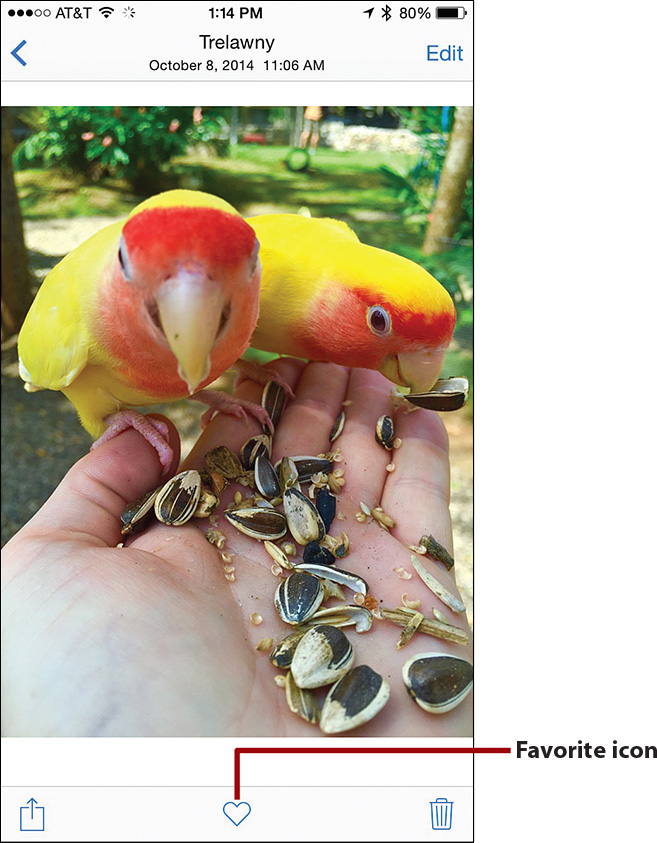
Add Images to Your Favorites Album
The Photos app on the iPhone and iPad comes with an album called Favorites precreated for you. To add images to this album, launch the Photos app and tap on any image thumbnail, within any album, to view the desired image.
As you’re viewing the image, tap on the heart-shaped Favorite icon displayed at the bottom center of the screen. The image remains stored in the album it’s currently in, but when you access the Favorites album from within the Photos app, all the images that you have favorited are displayed together.
Organizing Your Photos On an Android-Based Smartphone or Tablet
After taking photos using the Camera app preinstalled on your Android mobile device, images are stored automatically within the device’s internal storage and are accessible using the Photos or Gallery app, both of which come preinstalled on your device.
Photos Versus Gallery
The Photos app is ideal for editing and then sharing or syncing photos via mail or Google Drive. The Gallery app allows images to be viewed by Timeline, Album, Tags, or Location, for example, and is designed more for organizing the images stored on your mobile device.
Although the Gallery app has built-in tools that enable you to sort and view images by when and where they were shot or by tags you associate with individual photos, one of the best ways to organize your personal image library is to create a series of custom-named albums and then store your images in those appropriately named albums.
Using the Gallery app that comes preinstalled with Android (version 4.4.4, for example), it’s possible to create as many different custom-named albums as you want or need, and then include any number of images in each album. You are limited only by the storage capacity of your mobile device.
Access and View Your Albums
To access your images using the Gallery app, open the Apps page on your device’s Home screen and follow these steps:
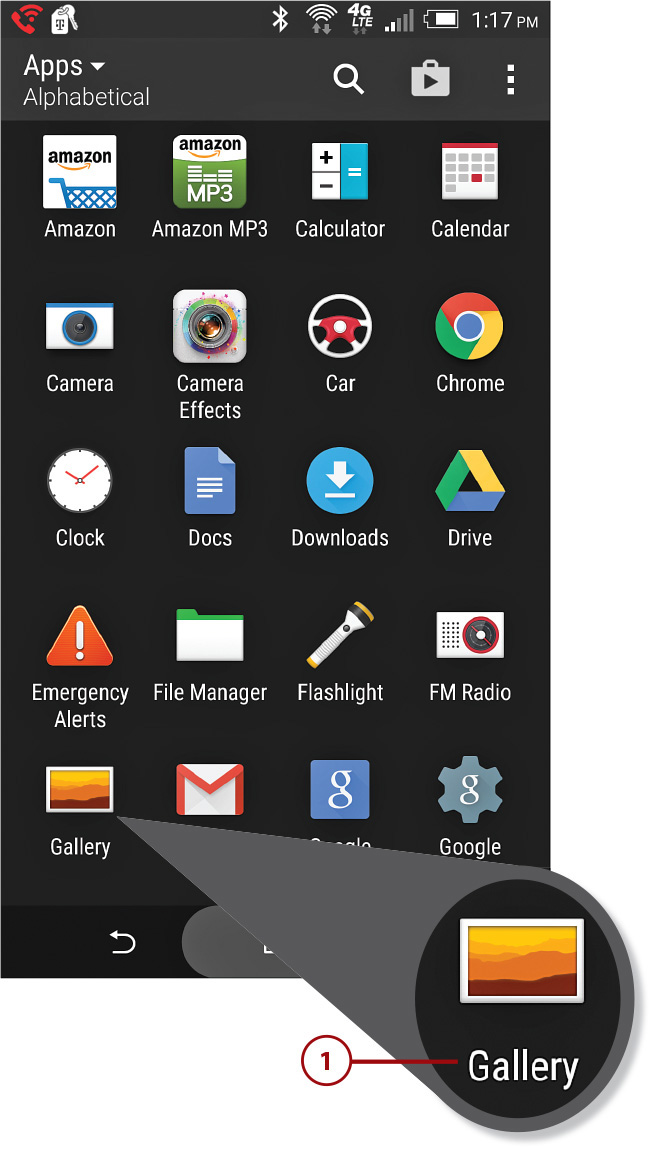
![]() Tap on the Apps icon Gallery app.
Tap on the Apps icon Gallery app.
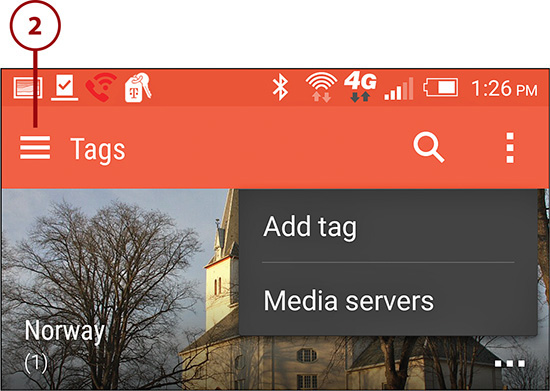
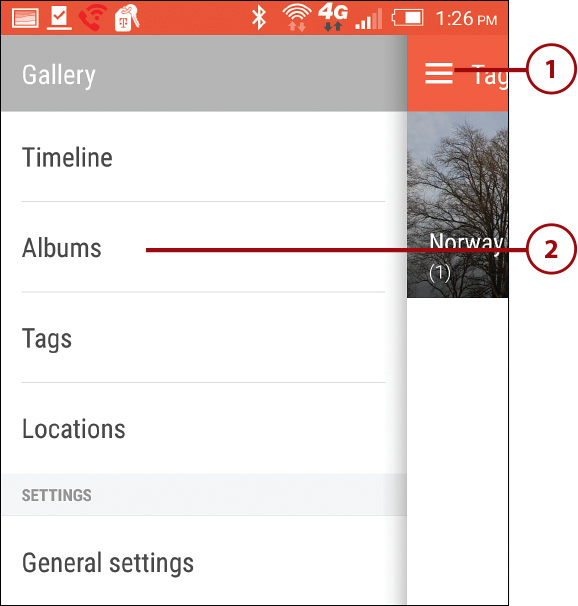
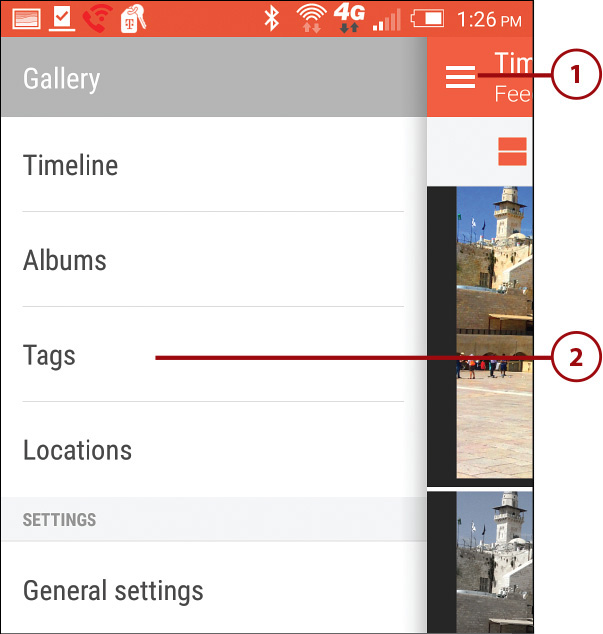
![]() Tap the Menu icon, if necessary, and select the Albums option that appears. (The Tags option is shown here.)
Tap the Menu icon, if necessary, and select the Albums option that appears. (The Tags option is shown here.)
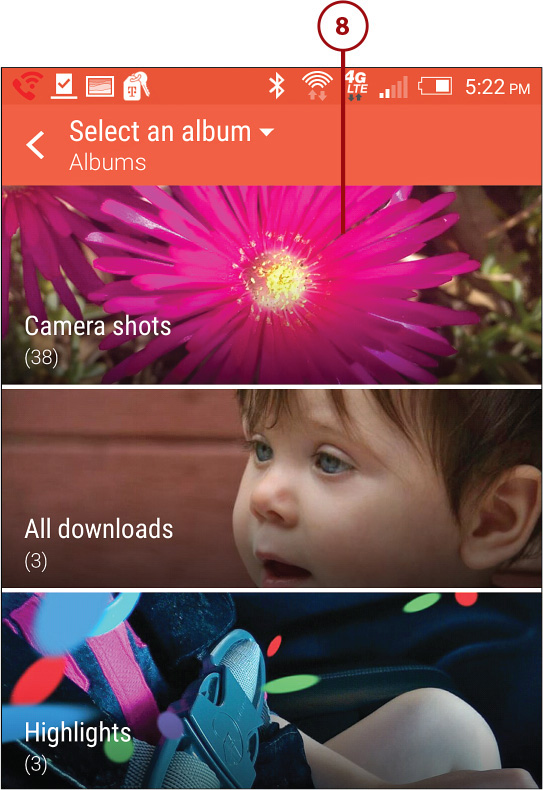
Understanding Albums
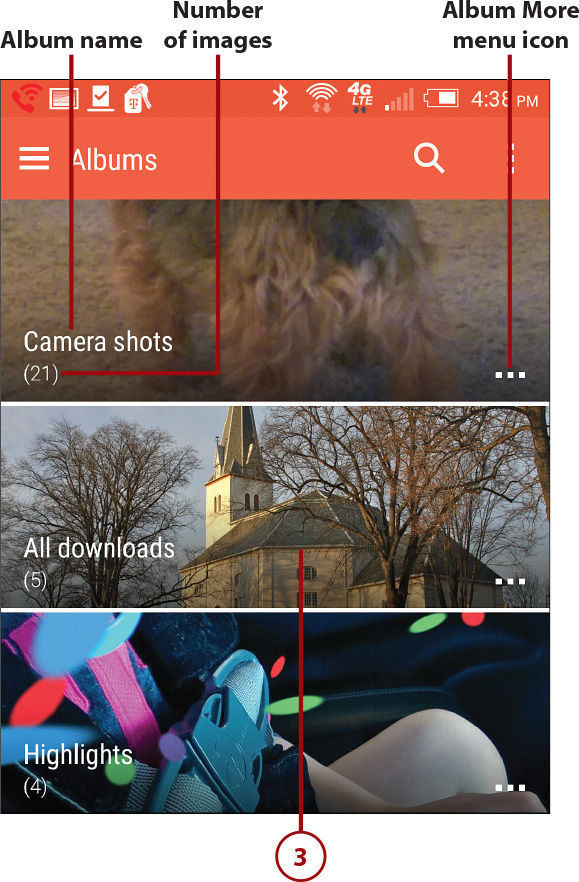
Each album is then displayed as a graphic banner labeled with the album’s name. Below each album title is a number in parentheses that tells you how many images are stored in that album.
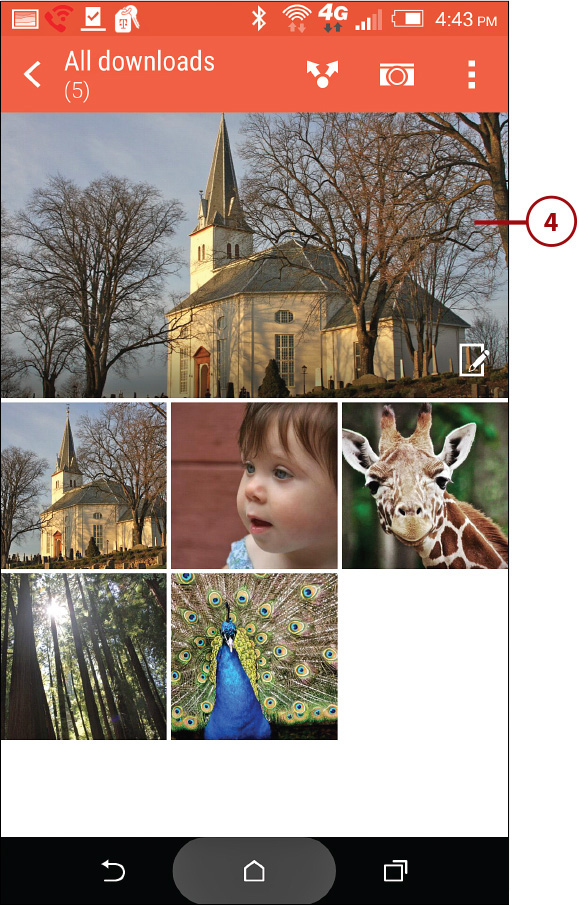
![]() Tap on an album’s banner to view its contents. You can also tap on the More icon displayed to the right of an album’s title and select the View option. The images in the selected album are displayed as thumbnails.
Tap on an album’s banner to view its contents. You can also tap on the More icon displayed to the right of an album’s title and select the View option. The images in the selected album are displayed as thumbnails.
![]() Tap on an image’s thumbnail to view that specific image, or manage the images in that album from this album thumbnail screen.
Tap on an image’s thumbnail to view that specific image, or manage the images in that album from this album thumbnail screen.
Finding Your Pictures
To display all the images you’ve taken using the cameras built in to your mobile device within the Gallery app, choose the album called Camera Shots.
Images downloaded from other sources, by default, are placed into an album called All Downloads, while pictures you favorite by tapping on the Highlight option are placed in the Highlights album.
Create New Albums
In addition to the precreated albums that are part of the Gallery app, it’s possible to create your own custom-named albums and then move images into those albums. To create and populate a new album, open the Gallery app and follow these steps:
![]() Tap on the Menu icon.
Tap on the Menu icon.
![]() From the menu, select the Albums option, if it’s not already selected.
From the menu, select the Albums option, if it’s not already selected.
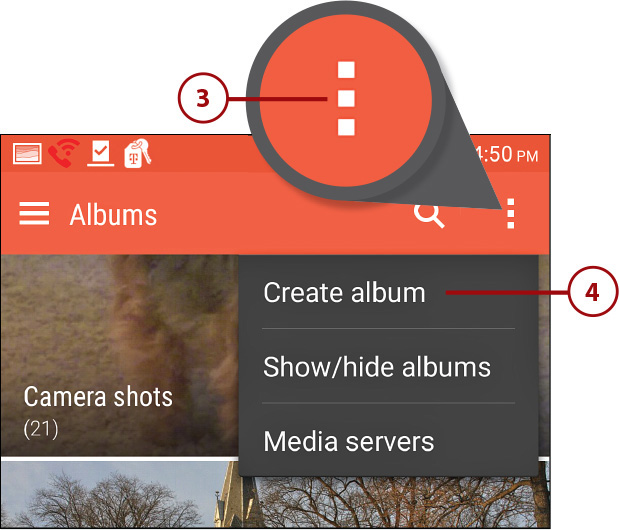
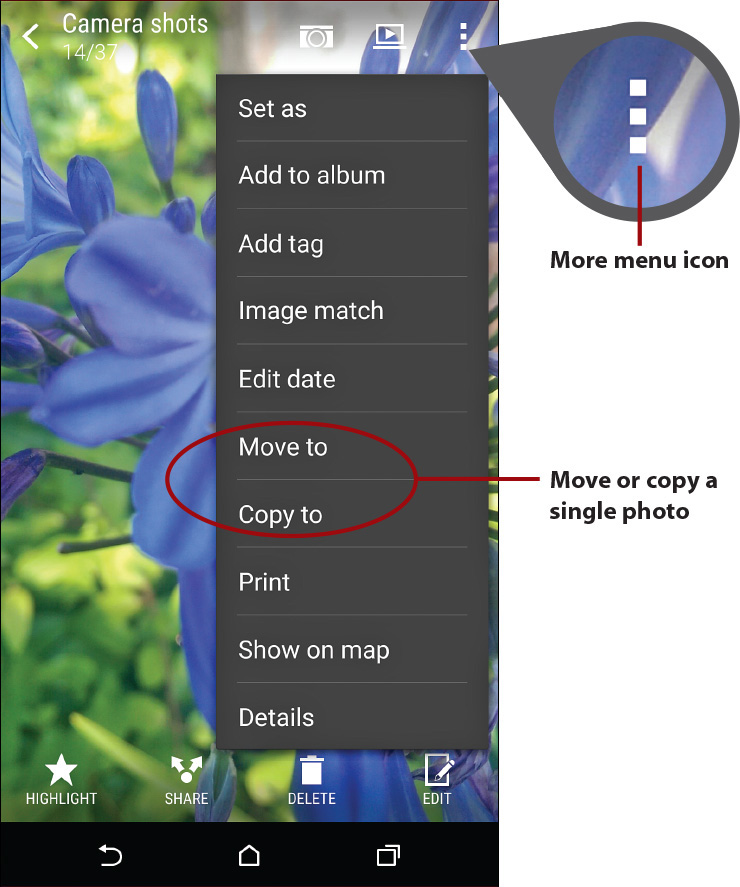
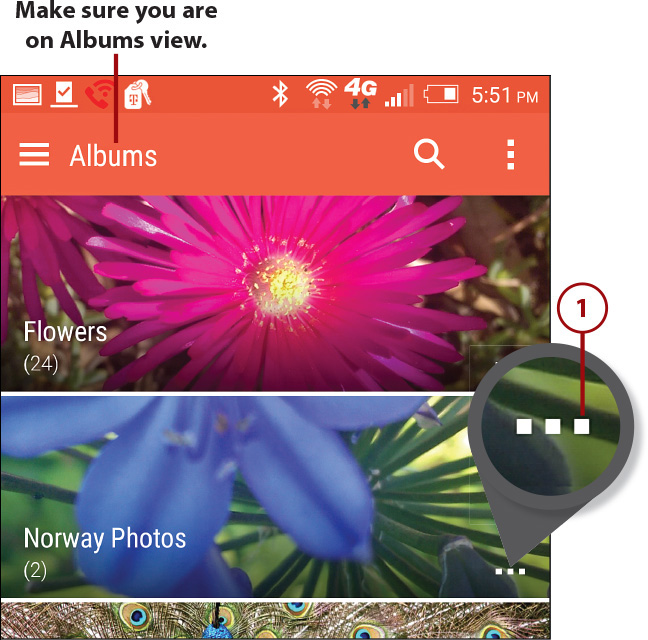
![]() From the Albums screen, tap on the More menu icon. It looks like three vertical dots.
From the Albums screen, tap on the More menu icon. It looks like three vertical dots.
![]() Tap the Create Album option.
Tap the Create Album option.
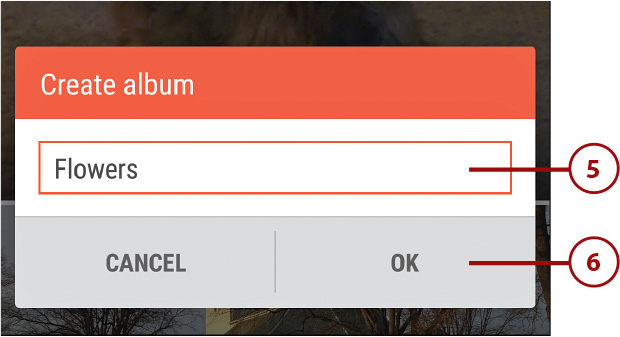
![]() Type the name of the album you want to create in the Create Album window.
Type the name of the album you want to create in the Create Album window.
![]() Tap the OK button. The new album is now ready to be populated with images you select.
Tap the OK button. The new album is now ready to be populated with images you select.
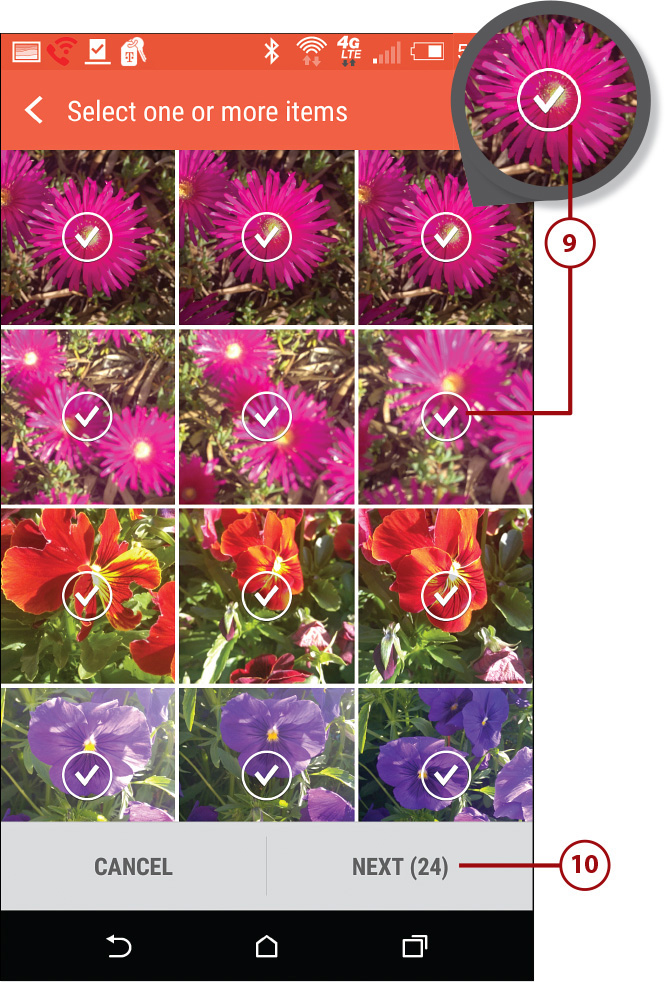
![]() You can either copy or move images into the new album by tapping on the appropriate button. This sends you to the Select an Album page.
You can either copy or move images into the new album by tapping on the appropriate button. This sends you to the Select an Album page.
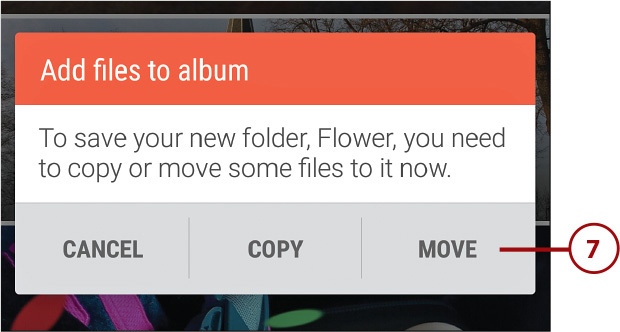
Copy Versus Move
If you select Copy, the image you select from its current album is also displayed and made available in the new album. Thus, the same image is accessible from two albums within your device. If you select Move, the selected image(s) are transferred from one album to another and listed only in one place.
![]() Tap on the album that currently contains the image(s) you ultimately want to place into the new album.
Tap on the album that currently contains the image(s) you ultimately want to place into the new album.
![]() Tap on the thumbnails that represent the images you want to place into the new album. As each is selected, a check mark icon appears on the thumbnail.
Tap on the thumbnails that represent the images you want to place into the new album. As each is selected, a check mark icon appears on the thumbnail.
![]() Tap on the Next button. The images are copied or moved (depending on what you selected in step 7) to the new album. Gallery returns you to the Albums screen.
Tap on the Next button. The images are copied or moved (depending on what you selected in step 7) to the new album. Gallery returns you to the Albums screen.
![]() Tap on the newly created album to view its contents.
Tap on the newly created album to view its contents.

New Albums Will Sync Online
Based on how you set up the Gallery app to work with Google Drive or any other compatible online service, anytime you create a new album, that album along with its contents automatically syncs with your account and becomes accessible from all your other mobile devices and computers also linked to that account.
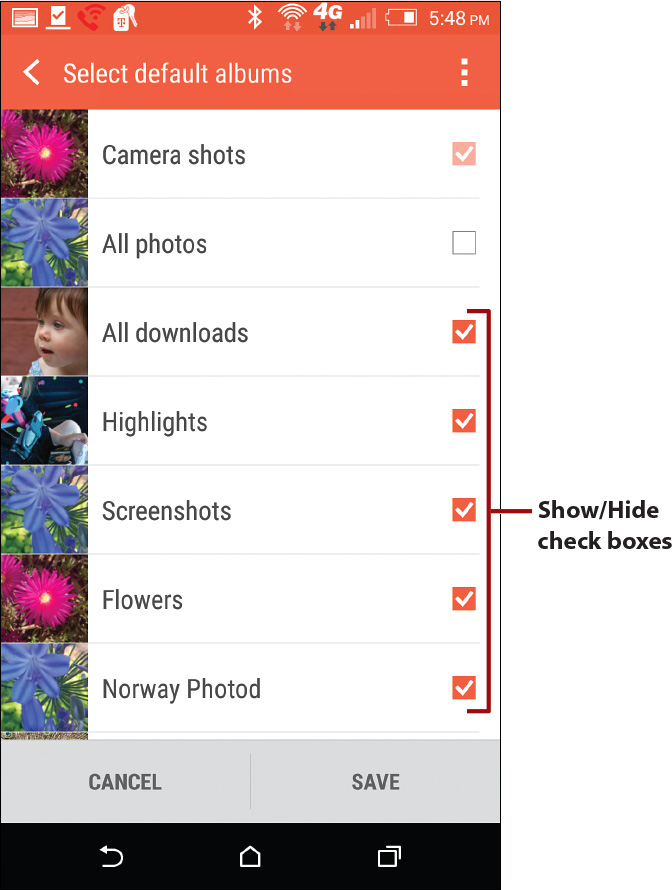
Hide Albums
You can hide any album (along with its contents) that you create from within the Gallery app. When an album is hidden, it remains stored on your mobile device but is not listed with the rest of your albums.
To do this, from the Albums screen, tap on the album you want to hide. When the album opens, tap on the More menu icon and select the Show/Hide Albums option.
All of your albums are listed. To the right of each album listing is a check box. To hide an album, simply remove the check mark from its respective check box.
Delete or Rename Albums
Any album you create on your mobile device can be deleted, along with all its content. To do this, open the Gallery app to the Albums view and follow these steps:
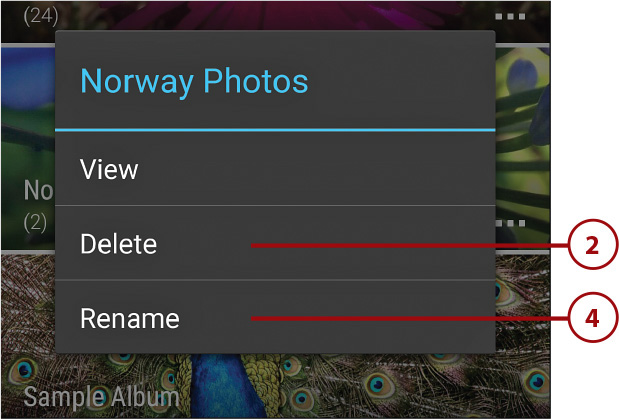
![]() Tap on the More icon associated with the album you want to delete or rename.
Tap on the More icon associated with the album you want to delete or rename.
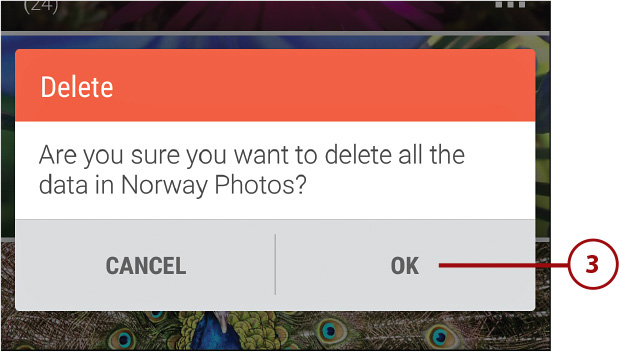
![]() Tap on the Delete option to delete the album altogether.
Tap on the Delete option to delete the album altogether.
![]() Confirm your decision by tapping on the OK button. Keep in mind, there is no “undo” option.
Confirm your decision by tapping on the OK button. Keep in mind, there is no “undo” option.
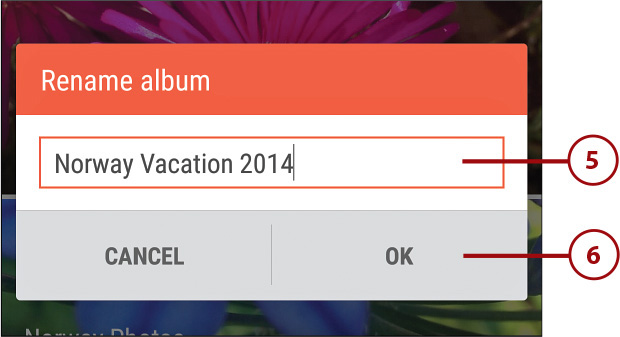
![]() Tap on the Rename option (instead of Delete), if you want to rename the album.
Tap on the Rename option (instead of Delete), if you want to rename the album.
![]() When prompted, type a new title for the album.
When prompted, type a new title for the album.
![]() Tap the OK button to save your changes.
Tap the OK button to save your changes.
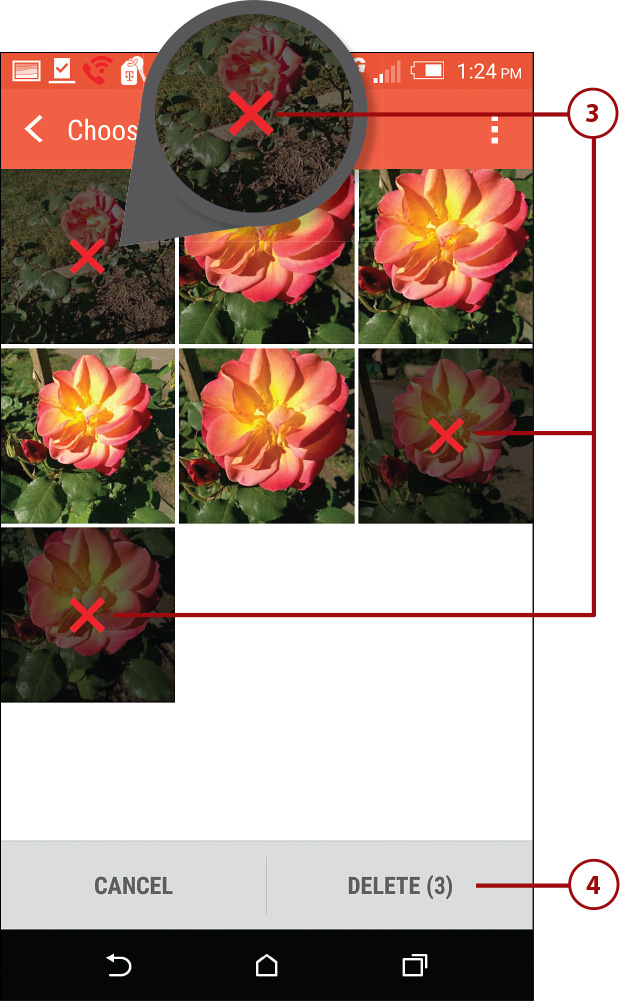
Delete Images from Albums
To delete individual images from a specific album, first open that album from the Gallery app’s Albums screen, and then follow these steps:
![]() Tap on the More menu icon for the selected album.
Tap on the More menu icon for the selected album.
![]() Tap on the Delete option. You see a list of thumbnail images that your album contains.
Tap on the Delete option. You see a list of thumbnail images that your album contains.
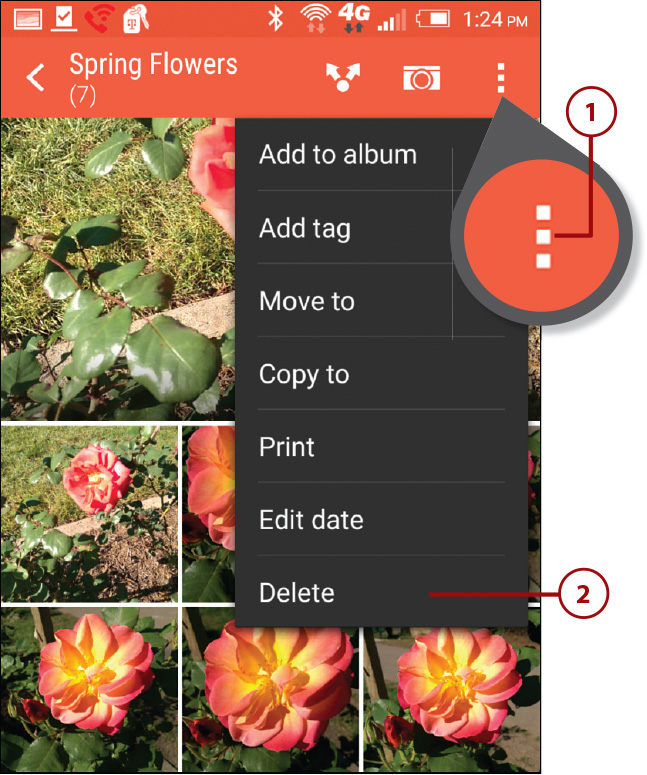
![]() Tap on the thumbnails for the items you want to delete. (A red X appears over selected items.)
Tap on the thumbnails for the items you want to delete. (A red X appears over selected items.)
![]() Tap the Delete button to continue.
Tap the Delete button to continue.
Sorting Images
Instead of viewing your images based on the album they’re stored in, tap on the menu icon displayed in the top-left corner of the screen and select one of the following options—Timeline, Tags, and Locations. The next three sections detail each of these options. As you may recall, a tag is a description keyword that is associated with an image.
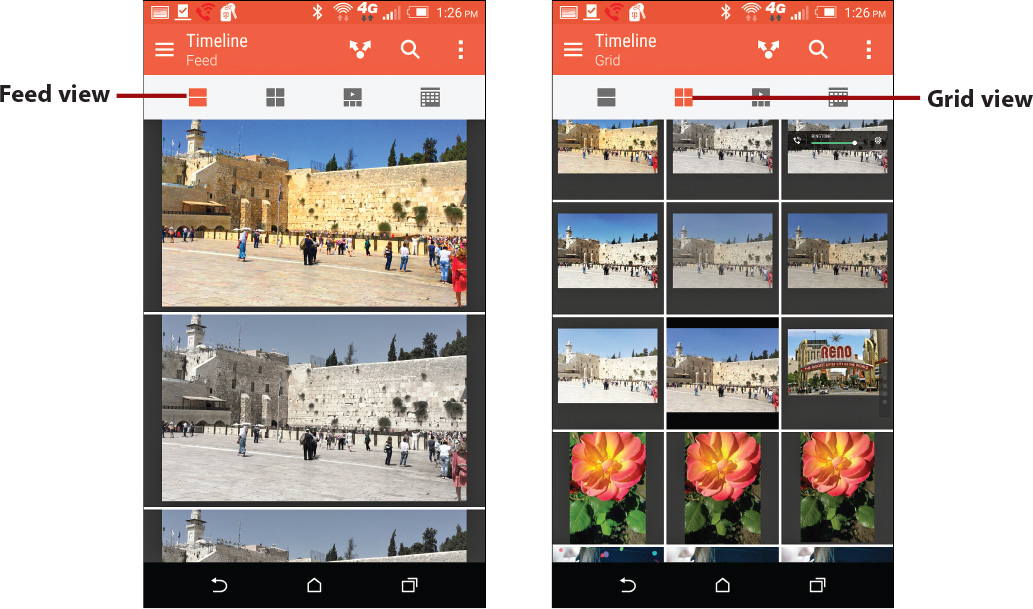
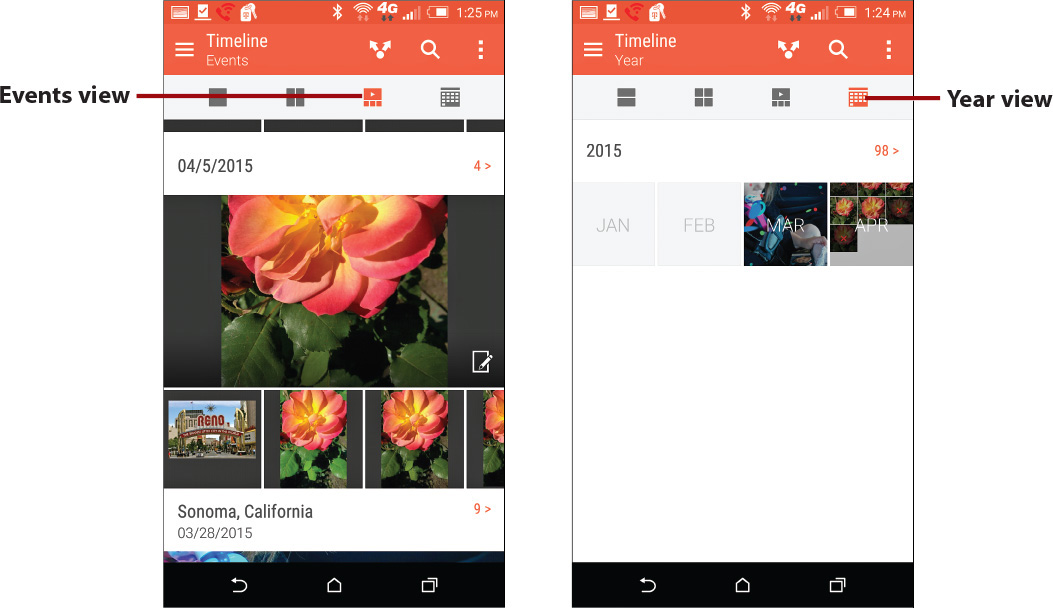
Timeline
Timeline view lets you see all images stored on your smartphone or tablet in chronological order, regardless of which album they’re stored in. After tapping on the Timeline menu option, select the format you want to use to display the image thumbnails.
Four icon choices for sorting and displaying image thumbnails are displayed near the top of the screen. They include
• Feed—Displays large size thumbnails
• Grid—Displays smaller, square-shaped thumbnails
• Events—Displays images sorted by date and shooting location
• Year—Sorts and displays images by the date associated with them
Tags
Once you manually add tags to your images, it’s possible to sort them based on those tags by tapping on this menu option. To create a master tag list and then associate images to a tag, open the Gallery app and follow these steps:
![]() Tap on the Menu icon displayed in the top-right corner of the screen.
Tap on the Menu icon displayed in the top-right corner of the screen.
![]() Tap on the Tags option.
Tap on the Tags option.
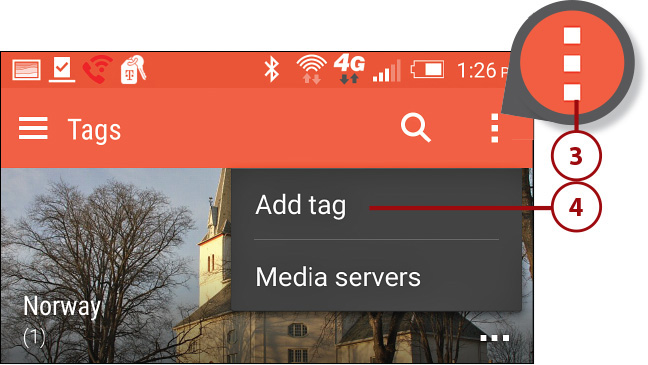
![]() Tap on the More menu icon.
Tap on the More menu icon.
![]() Select the Add Tag option in the menu that appears.
Select the Add Tag option in the menu that appears.
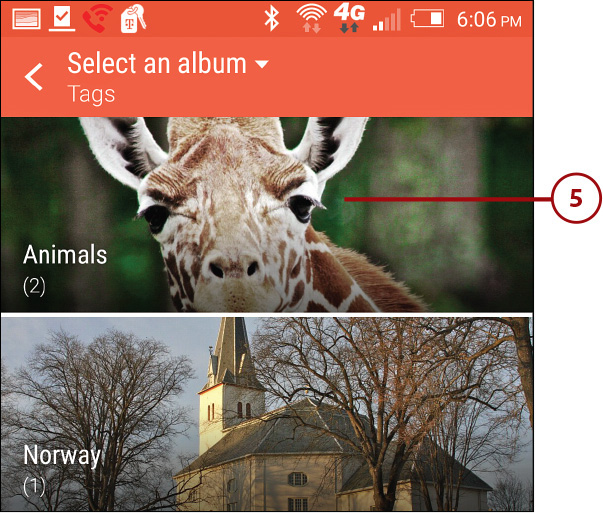
![]() Tap on the Select An Album option displayed in the top-left corner of the screen, and then select the album containing the image you want to add tags to. That album opens when you tap on its thumbnail or listing.
Tap on the Select An Album option displayed in the top-left corner of the screen, and then select the album containing the image you want to add tags to. That album opens when you tap on its thumbnail or listing.
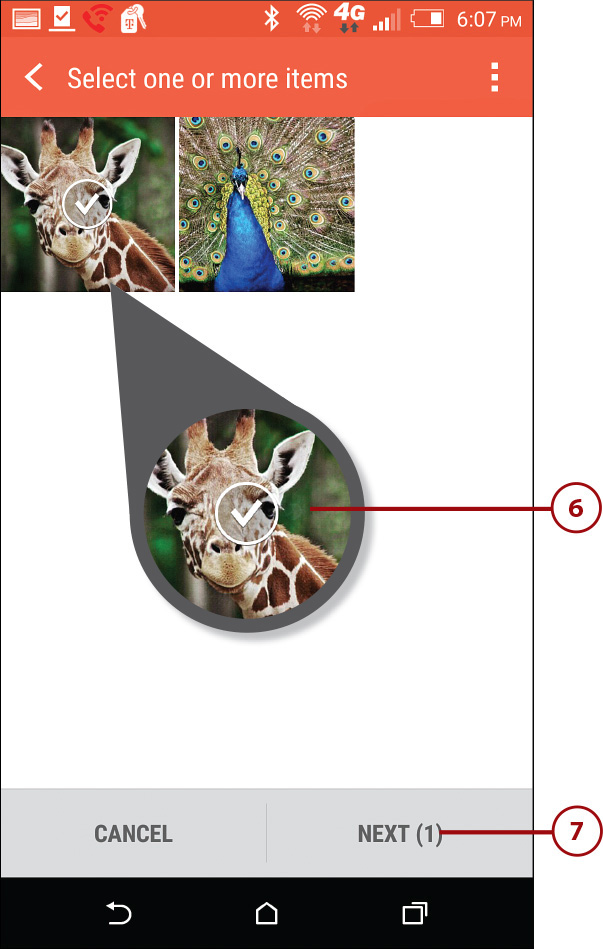
![]() Tap on an image that you want to add a tag to. A check mark icon appears on the image thumbnail.
Tap on an image that you want to add a tag to. A check mark icon appears on the image thumbnail.
![]() Tap on the Next option to open the Tags screen.
Tap on the Next option to open the Tags screen.
![]() To create a new tag, enter its name in the field provided. It appears in the list of existing tags.
To create a new tag, enter its name in the field provided. It appears in the list of existing tags.
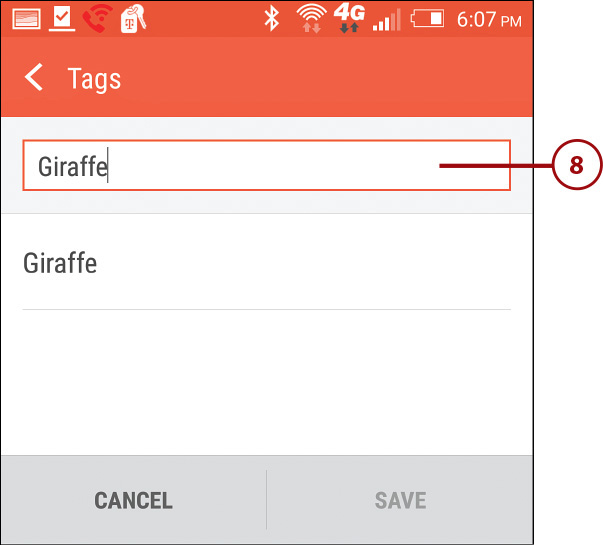
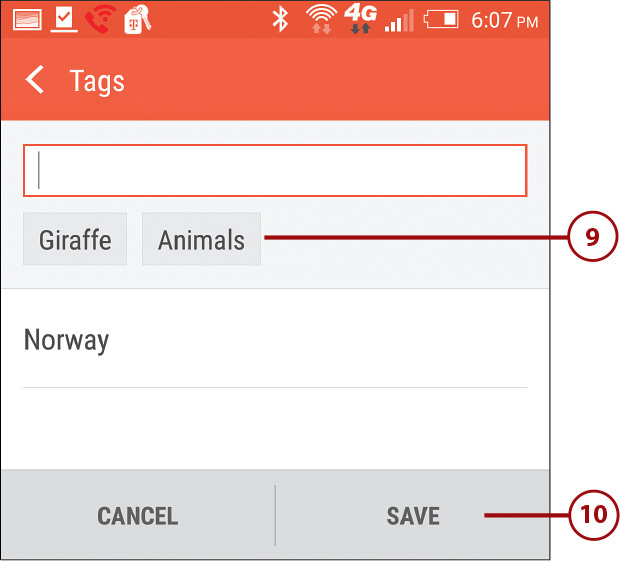
![]() Tap on the tags you want applied to the selected photo. (Shown here, the Giraffe and Animals tags have been selected but the Norway tag has not been selected.)
Tap on the tags you want applied to the selected photo. (Shown here, the Giraffe and Animals tags have been selected but the Norway tag has not been selected.)
![]() Tap on the Save button. The image, with the new tags associated with it, are now displayed in an album accessible from the Tags menu.
Tap on the Save button. The image, with the new tags associated with it, are now displayed in an album accessible from the Tags menu.
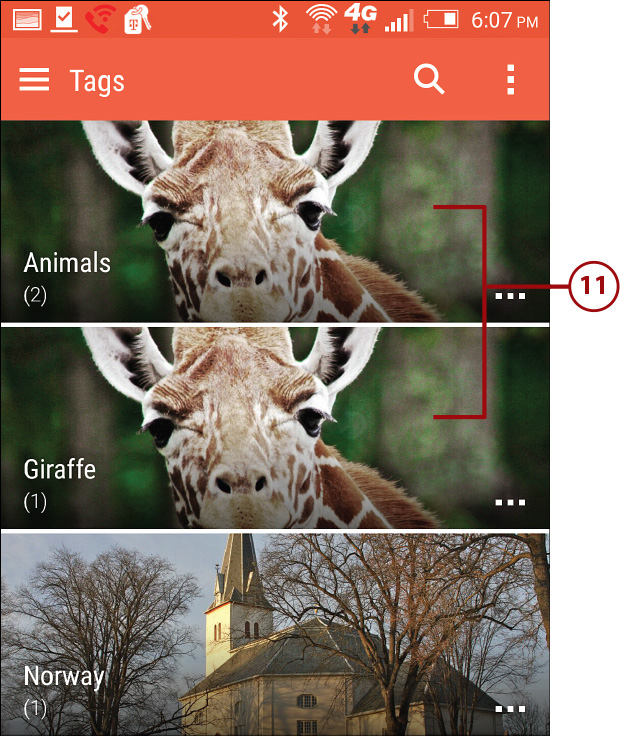
![]() When you return to the Tags screen, each Tag is listed. Tap on the album with the tag you want to see all images that are linked to that tag. Shown here, the giraffe photo appears in the Animals and Giraffe tag albums, because it now has these two tags associated with it.
When you return to the Tags screen, each Tag is listed. Tap on the album with the tag you want to see all images that are linked to that tag. Shown here, the giraffe photo appears in the Animals and Giraffe tag albums, because it now has these two tags associated with it.
Locations
Thanks to the GPS capabilities built in to your smartphone or tablet, each time you snap a photo with the GPS feature enabled, the location where that image was taken is automatically recorded.
Thus, the Gallery app can easily sort your photos based on where they were taken when you select the Locations option from the Gallery app’s menu. When you select the Locations option, a listing of locations where you’ve taken photos is displayed as banners. Tap on a banner to view all photos taken at that location, regardless of which album the images are stored in or when they were shot.
To view a detailed map that depicts your various shooting locations, tap on the Map icon displayed in the top-right corner of the screen.
