
15. Creating and Sharing Animated Digital Slide Shows
In this chapter, you’ll learn about some of your options for producing an animated digital slide show to showcase a group of your images. Topics include
→ Producing a slide show on your PC or Mac
→ Using apps for creating a slide show on your mobile device
→ Using online-based tools for slide show production.
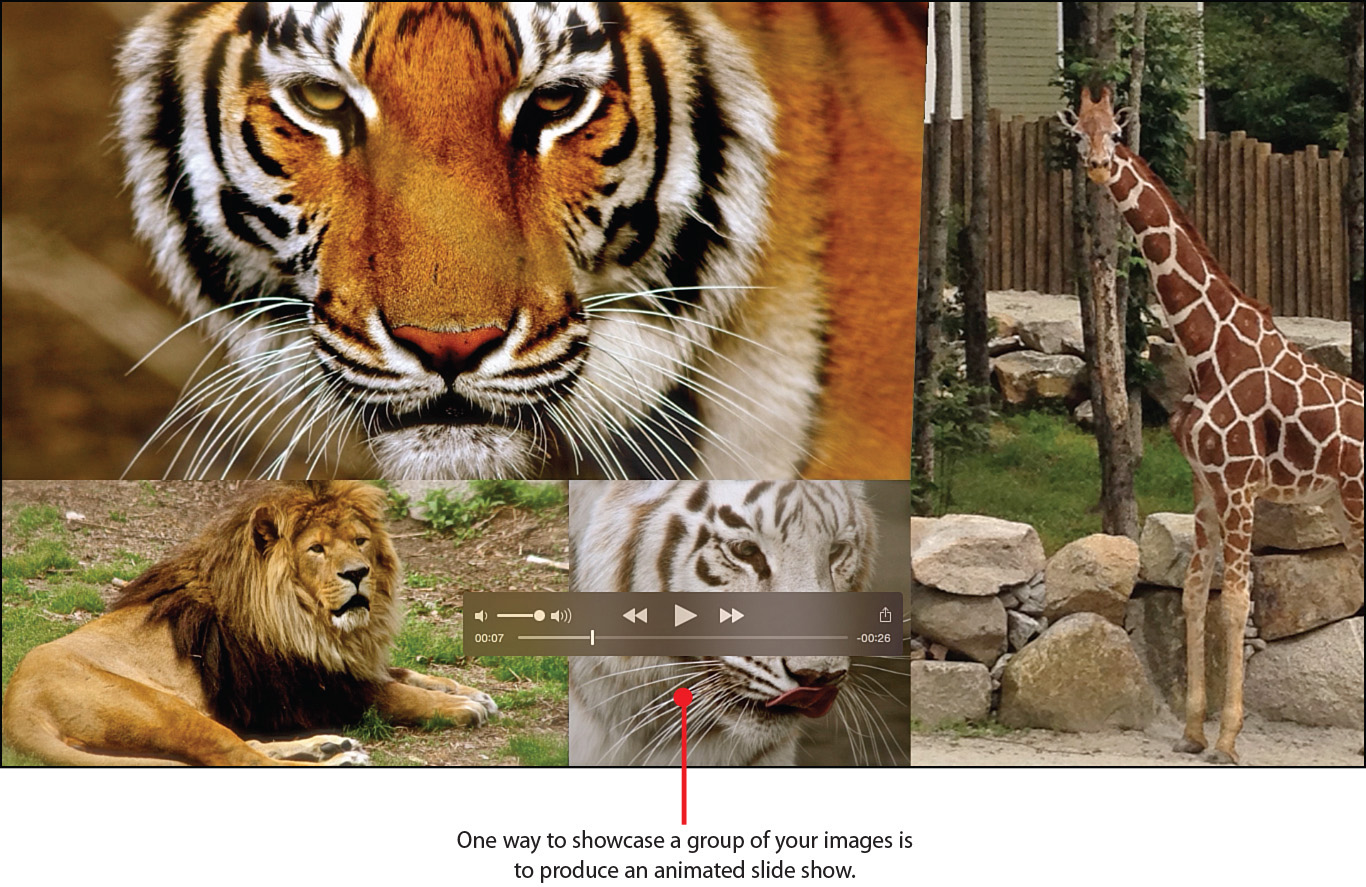
Using your computer or online-based tools, it’s easy to create animated digital slide shows to showcase a bunch of your favorite or related images.
A digital slide show can help you tell a coherent story with your images. You decide which photos to showcase and in what order. But that’s only the beginning.
When you create an animated digital slide show, you can often choose between many animated slide transition effects to make the presentation more visually interesting, and then select your favorite music to play as your slides (images) are being presented. It’s also typically possible to add a title slide and/or text-based captions to your slides.
Best of all, producing a digital slide show using your images requires no programming knowledge, graphic design skill, or other technical know-how. It can be done using the Photos app that comes preinstalled on your Windows PC or Mac, or you can use tools offered by an online-based photo sharing service.
To gain access to a more robust set of slide show production and presentation tools, however, you need to download and install an optional app onto your computer or mobile device, unless you’re using an online-based service to produce your slide show presentations.
Animated Slide Show Options
Depending on which slide show creation method you choose, it’s possible to share your presentation online, via email, using social media, or as part of a website. You can also view it on a computer screen, a mobile device’s screen, or on a flat-screen HD television set.
You must decide which slide show production software to use, based on how you want to present the slide show later to reach your intended audience. In terms of specialized software for creating slide shows, here are a few of your many options:
• Magix Photostory Easy (PC/Mac)—$39.99, www.magix.com
• Photodex ProShow (PC/Mac)—$69.95, www.photodex.com/photoslideshows
• PhotoImpact Pro 13 (PC)—$79.96, www.novadevelopment.com/software/photoimpact-pro-129013
• PhotoStage Slideshow Software (PC/Mac)—$29.99–$49.99, www.nchsoftware.com/slideshow
• Photostory 2015 Deluxe (PC)—$59.99, www.amazon.com/MAGIX-Photostory-2015-Deluxe-Download
Make Your Slide Show Look Amazing
Regardless of what tools you use to create your animated digital slide shows, use these strategies to make them look more professional:
• Plan on keeping your presentation short—3 to 5 minutes, maximum. Otherwise, you risk boring your audience.
• Select a group of images, between 15 and 50, that best convey the story you want to tell, without having to rely too much on text-based captions or verbal narration.
• Place your images in an order that makes sense, and that tells your intended story visually and coherently.
• While you can incorporate many different special effects and animated transitions into your presentations, keep things simple but visually interesting. Don’t overuse the special effects or eye candy to the point where these effects become distracting and take away attention from your photos.
• When adding text-based titles or captions, use the fewest words possible with the largest size text that’s appropriate. This ensures the titles and captions are easily readable whether your audience sees the presentation on the small screen of a smartphone, on a tablet, on a computer screen, or on a flat-screen HD television.
• Choose background music appropriate to the story you’re telling. If you plan to publish your animated slide presentations online via YouTube, or plan to use it for any commercial purpose whatsoever, keep in mind that copyright issues pertaining to your music selection apply.
• When choosing how long each slide will be seen, when possible, set the time to between 3 and 5 seconds per image. If the time is too short, people will miss seeing the image. But if an image remains on the screen (stagnant) for too long, the slide show as a whole becomes boring to watch.
Creating Slide Shows from Your Windows PC
The Photos software that comes with Windows 8 and newer enables you to select a group of images from a particular album or folder and display those images in the form of a basic animated slide show. However, this slide show is not very customizable.
For example, it is not possible to choose the order of the images, select specific animated slide transitions, or add titles or captions to your slides (photos). Slide shows created using the Photos app can be viewed on your computer screen but not shared with other people.
Photos Are Displayed Alphabetically
Based on how you have your image filenames sorted within the Pictures folder, that’s the order in which they’ll be displayed. This can be alphabetical or by date, for example. One way to customize the order of the slides in your presentation using the Photos app is to manually rename each image file using alphabetical filenames or numeric filenames that go in sequential order.
If you want to produce truly customized slide show presentations, visit the Windows Store and download optional software, such as AutoSlide, Image Slideshow, My Memories Interactive Slideshow, Picture Frame Slideshow, or Slideshow Creator. You can find these and other related applications using the Search field of the Windows Store. Enter the specific name of an app, or to see what’s available, enter the search phrase “slideshow.”
Start a Slide Show with the Photos App
To use the Slide Show feature of the Photos app, launch it and follow these steps:
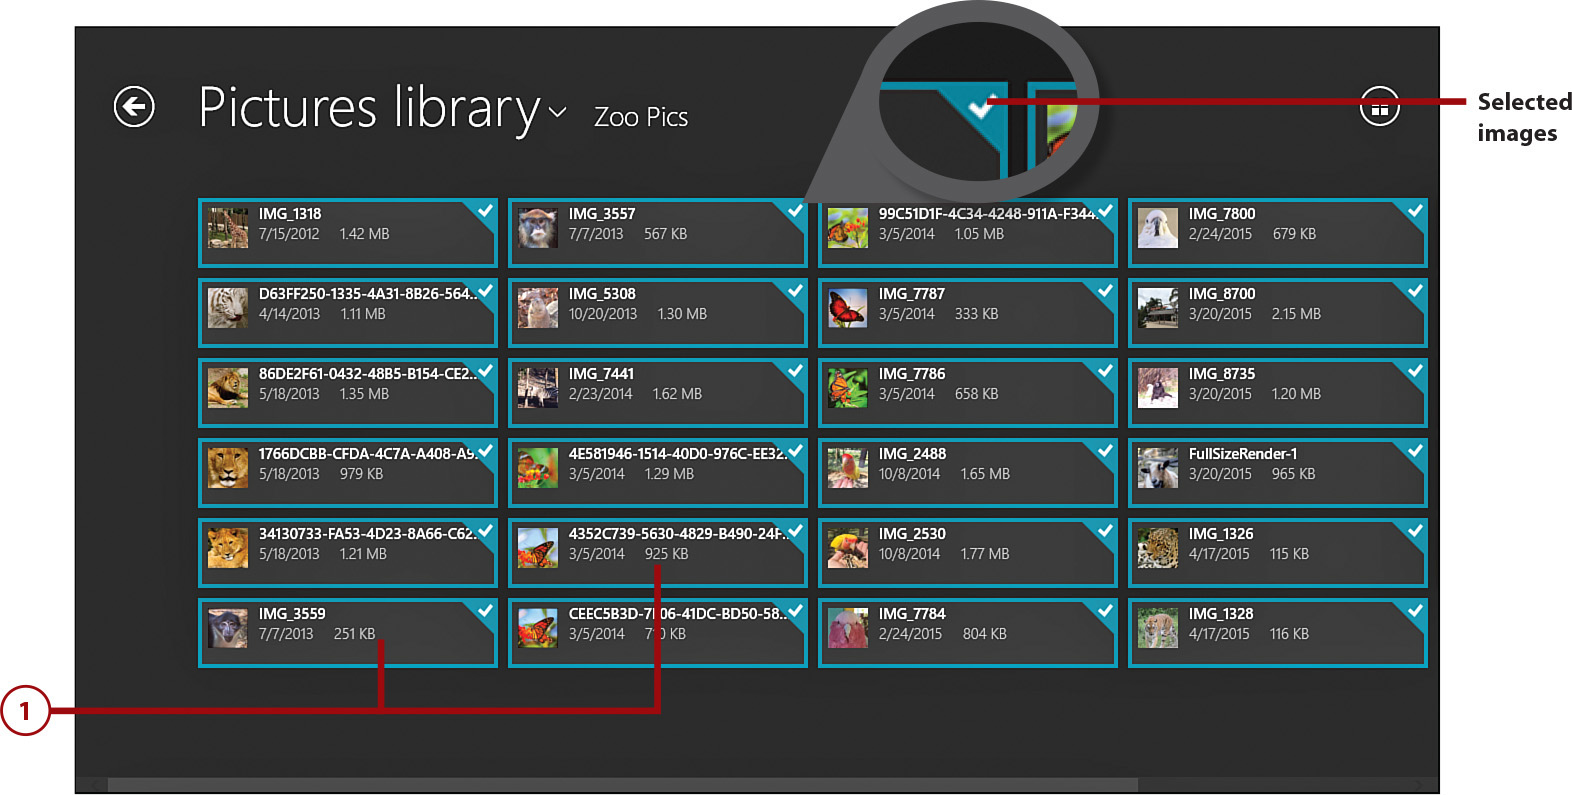
![]() Select the pictures you want to feature in your slide show from the Pictures Library screen. To select images, click on the Select icon and then right-click on specific image thumbnails.
Select the pictures you want to feature in your slide show from the Pictures Library screen. To select images, click on the Select icon and then right-click on specific image thumbnails.
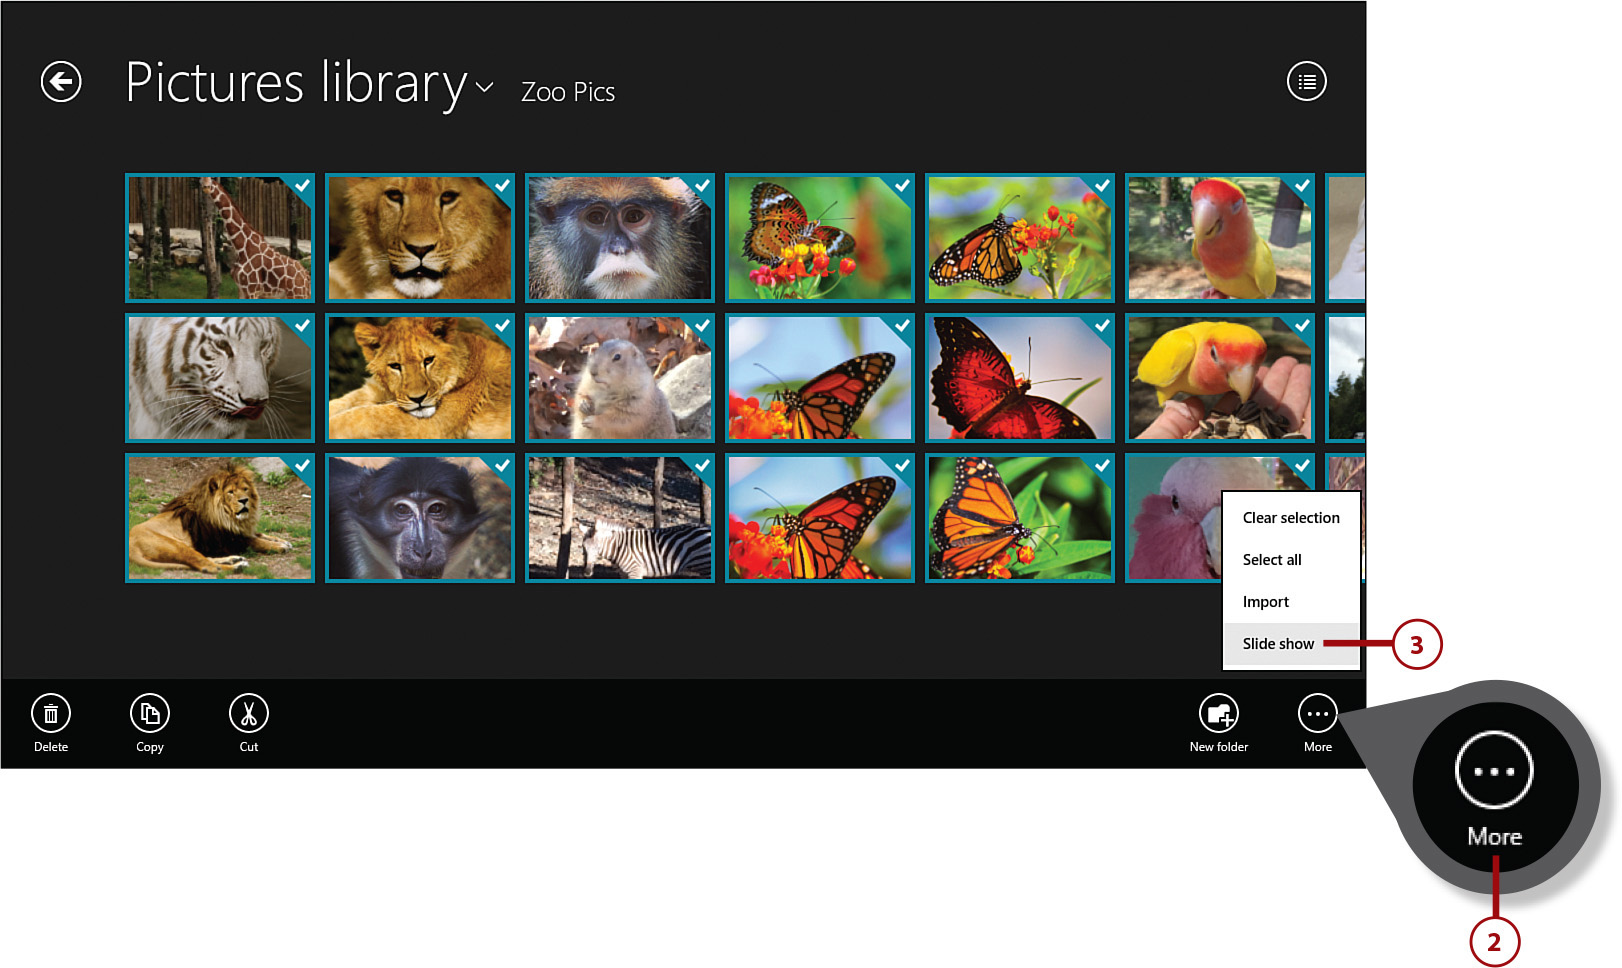
![]() Click the More menu.
Click the More menu.
![]() Click on Slide Show to begin watching your slide show in full-screen mode. The show repeats continuously until you manually stop it.
Click on Slide Show to begin watching your slide show in full-screen mode. The show repeats continuously until you manually stop it.
![]() Press the ESC key to stop and exit the slide show (not shown).
Press the ESC key to stop and exit the slide show (not shown).
Producing and Sharing Slide Shows from Your Mac
The Photo apps that comes preinstalled on a Mac has a built-in slide show production tool that allows you to create customized slide presentations, as well as save, export, and share these presentations.
Available from the Mac App Store are standalone software packages designed for producing animated slide shows without using the Photos app. Some of these options include HD Slideshow Maker, Photo Slideshow Generator, Photo Theater Pro, and Xilisoft Photo Slideshow Maker.
Although some of these options offer many extra features and functions, some do little more than what’s possible using the Photos app but cost upward of $50. Based on the complexity and professional quality you’re trying to achieve, choose a software package that can create a slide show that meets your personal expectations and needs. If you’re simply creating a slide show for friends and family, a free or low-cost software option (priced less than $20) will most likely work fine. However, if you’ll be using the slide show for professional purposes, a higher-end application may offer a better solution for creating a slicker looking presentation.
Create a Slide Show Using the Photos App
To begin using the Photos app to produce an animated slide show, launch the Photos app and follow these steps:
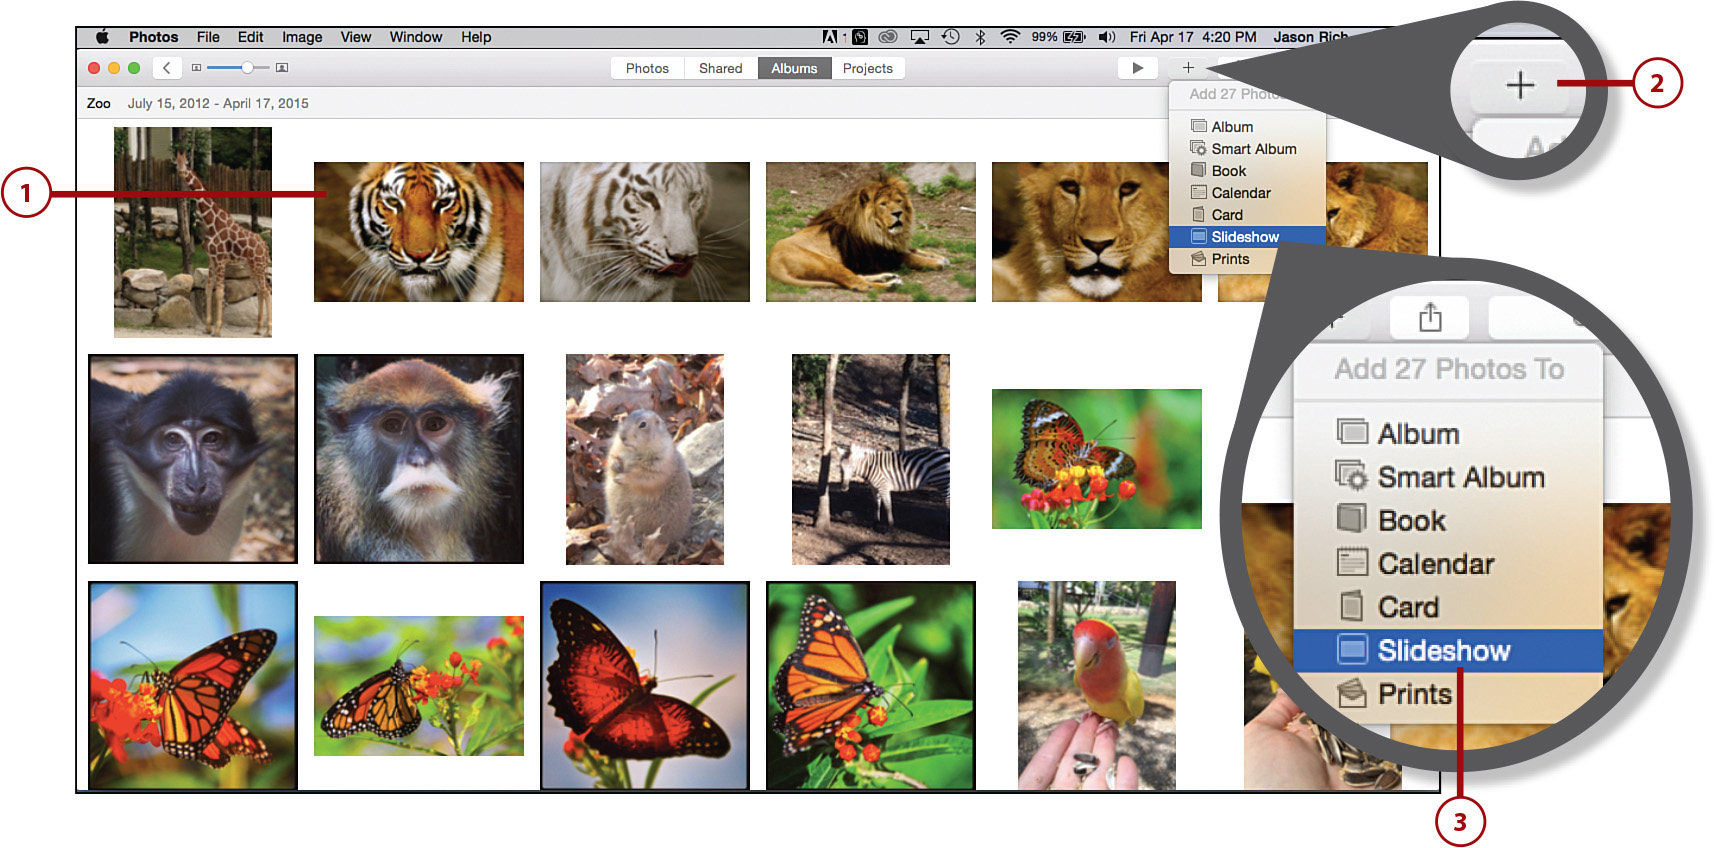
![]() Gather the photos you want to use in your slide show into one album.
Gather the photos you want to use in your slide show into one album.
![]() Click on the Add To (plus sign icon) in the opened album.
Click on the Add To (plus sign icon) in the opened album.
![]() Select Slideshow from the menu.
Select Slideshow from the menu.
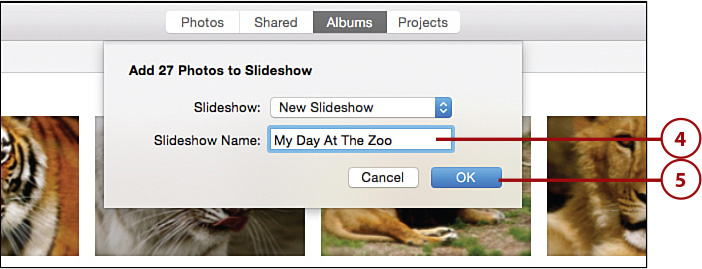
![]() Create and enter the name for your slide show in the pop-up window.
Create and enter the name for your slide show in the pop-up window.
![]() Click OK to open the Slideshow Production screen.
Click OK to open the Slideshow Production screen.
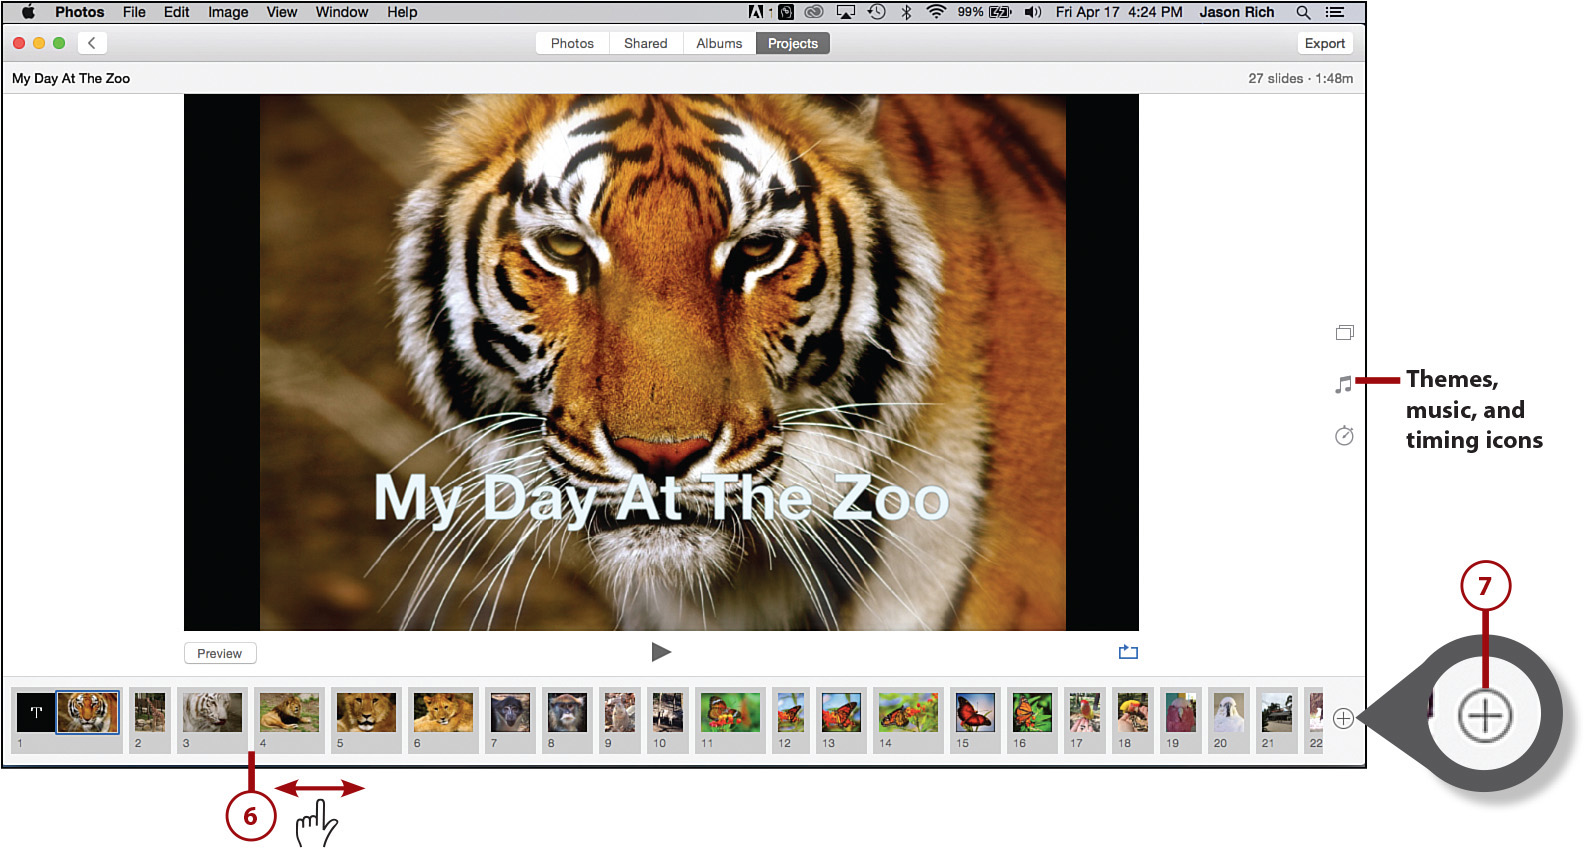
![]() Using the mouse, reorder your slides along the bottom of the screen by dragging one thumbnail at a time either right or left. Place the images in the order you want them displayed in your presentation.
Using the mouse, reorder your slides along the bottom of the screen by dragging one thumbnail at a time either right or left. Place the images in the order you want them displayed in your presentation.
![]() Click on the Add icon to add more images to your slide show.
Click on the Add icon to add more images to your slide show.
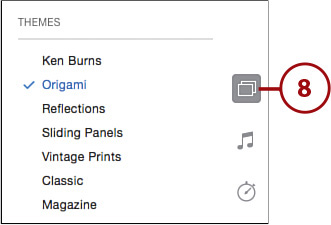
![]() Click on the Themes icon, and choose from among the seven animated slide show themes, each of which presents your images in a different way.
Click on the Themes icon, and choose from among the seven animated slide show themes, each of which presents your images in a different way.
Preview Each Theme
To see what each theme looks like using your images, select them one at a time and then click on the Preview button.
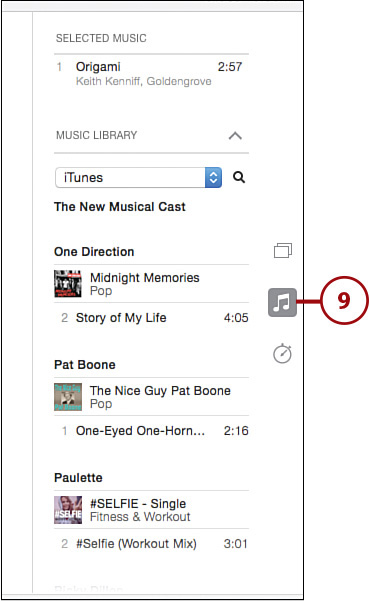
![]() Click on the Music icon and select the background music to use with your presentation. Each theme has its own music; however, you can select your own. To do this, click on the downward-pointing arrow icon next to the Music Library heading.
Click on the Music icon and select the background music to use with your presentation. Each theme has its own music; however, you can select your own. To do this, click on the downward-pointing arrow icon next to the Music Library heading.
![]() Click on the Music Library pull-down menu to choose between Theme Songs (music built in to the Photos app) or iTunes (any music stored in your personal iTunes music library). Depending on the desired length of your slide show, you might need to choose multiple songs or have the selected song repeat.
Click on the Music Library pull-down menu to choose between Theme Songs (music built in to the Photos app) or iTunes (any music stored in your personal iTunes music library). Depending on the desired length of your slide show, you might need to choose multiple songs or have the selected song repeat.
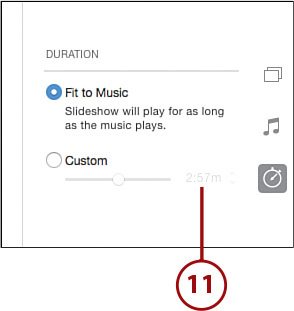
![]() Tap on the Timing icon, and under the Duration heading, select either Fit To Music or Custom.
Tap on the Timing icon, and under the Duration heading, select either Fit To Music or Custom.
Custom Durations
By selecting the Custom option, you decide how long the slide show will last, and the music is adjusted accordingly.
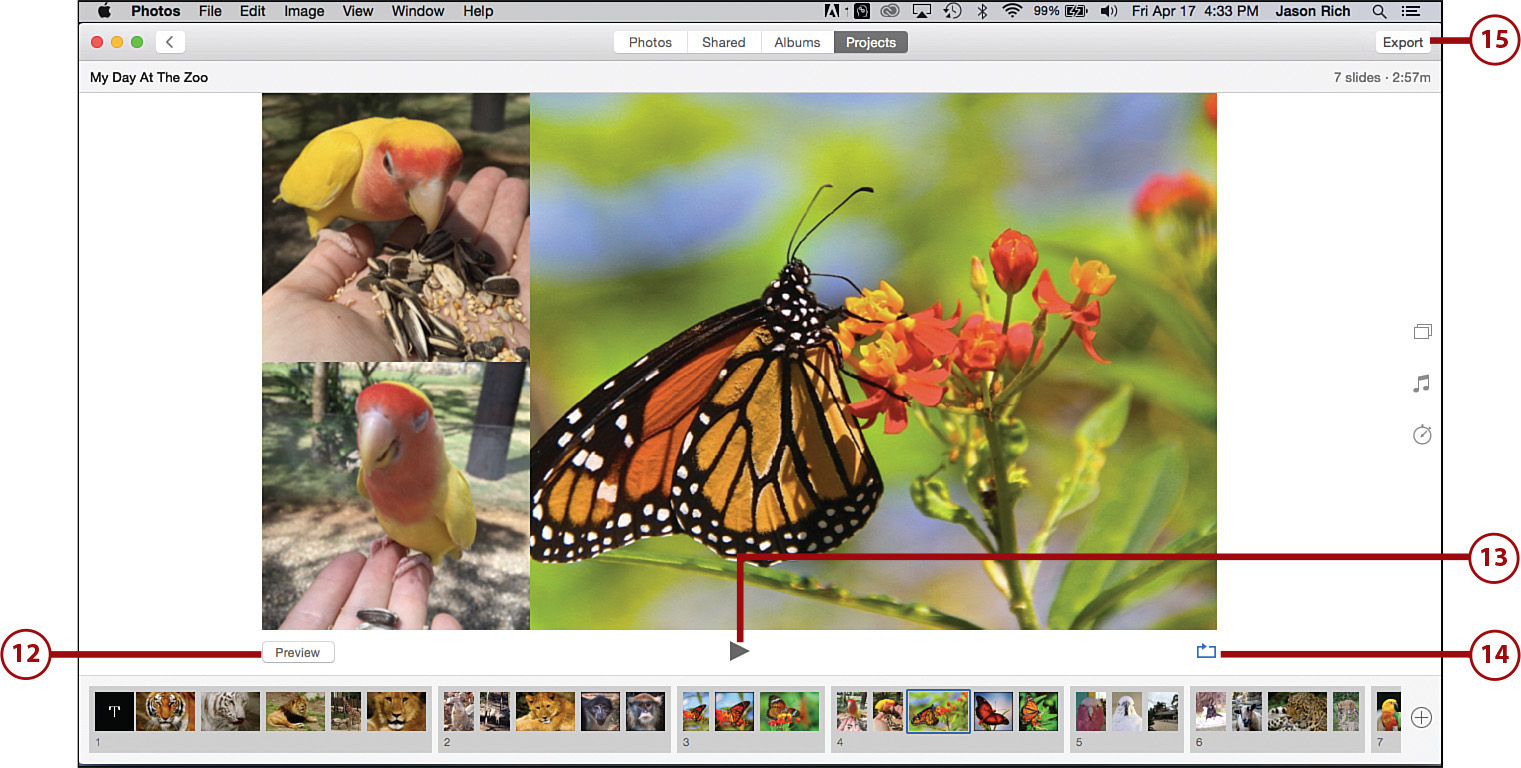
![]() Click on the Preview button to view your slide show, with all its current settings, and within the preview window of the Photos app.
Click on the Preview button to view your slide show, with all its current settings, and within the preview window of the Photos app.
![]() Click on the Play icon to play your slide show in full-screen mode.
Click on the Play icon to play your slide show in full-screen mode.
![]() If you click on the Repeat icon, the slide show plays repeatedly in a loop until you manually stop it by pressing the spacebar or Esc key.
If you click on the Repeat icon, the slide show plays repeatedly in a loop until you manually stop it by pressing the spacebar or Esc key.
![]() When your slide show is finished, click on the Export button to save it.
When your slide show is finished, click on the Export button to save it.
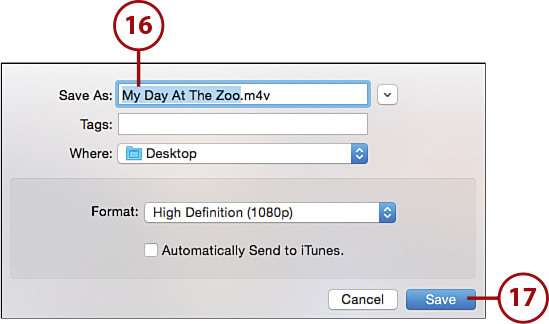
![]() Adjust the Export options, as needed. Make sure to provide at least a name for it.
Adjust the Export options, as needed. Make sure to provide at least a name for it.
![]() Click on the Save button.
Click on the Save button.
Producing Slide Shows on Your Mobile Device
From the App Store associated with your mobile device, find, download, and install an optional app designed for producing slide shows. For the iPhone and iPad, third-party app options include Flipgram, Flipjam, MakeMyMovie, Photo Slideshow Director, PicFlow, ProShow Web Slideshow Creator, and Slideshow Builder.
The Google Play App Store also offers a vast selection of optional slide show production apps for Android-based mobile devices, including Slide Show Creator, Slidegram, Slideshow 365, and Slideshow Maker.
Each of these optional apps offers its own selection of animation effects, features, and functions but follows the same basic set of tools for creating, exporting, and sharing an animated slide presentation.
Finding Slide Show Tools Online
Depending on which online-based photo sharing service you choose to use (refer to Chapter 10, “Sharing Photos Online”), many of them, including Flickr.com, enable you to create and share animated slide shows that feature your images. These productions, however, are created and stored online.
There are also a handful of standalone websites and online services dedicated exclusively to creating online-based slide shows that feature your images. To use these services, you need to first upload your images to that service and then use the available online-based tools to create the slide show.
A few of the popular online-based slide show services include
• Animoto—https://animoto.com
• Kizoa—www.kizoa.com
• PhotoSnack—www.photosnack.com
• ProShow—www.photodex.com
• SmileBox—www.smilebox.com
In some cases, a free software download is required. As you can see here, the SmileBox software for PC or Mac (shown) enables you to drag and drop photos into one of many available slide show templates and then customize the template with your own title slides and color scheme.
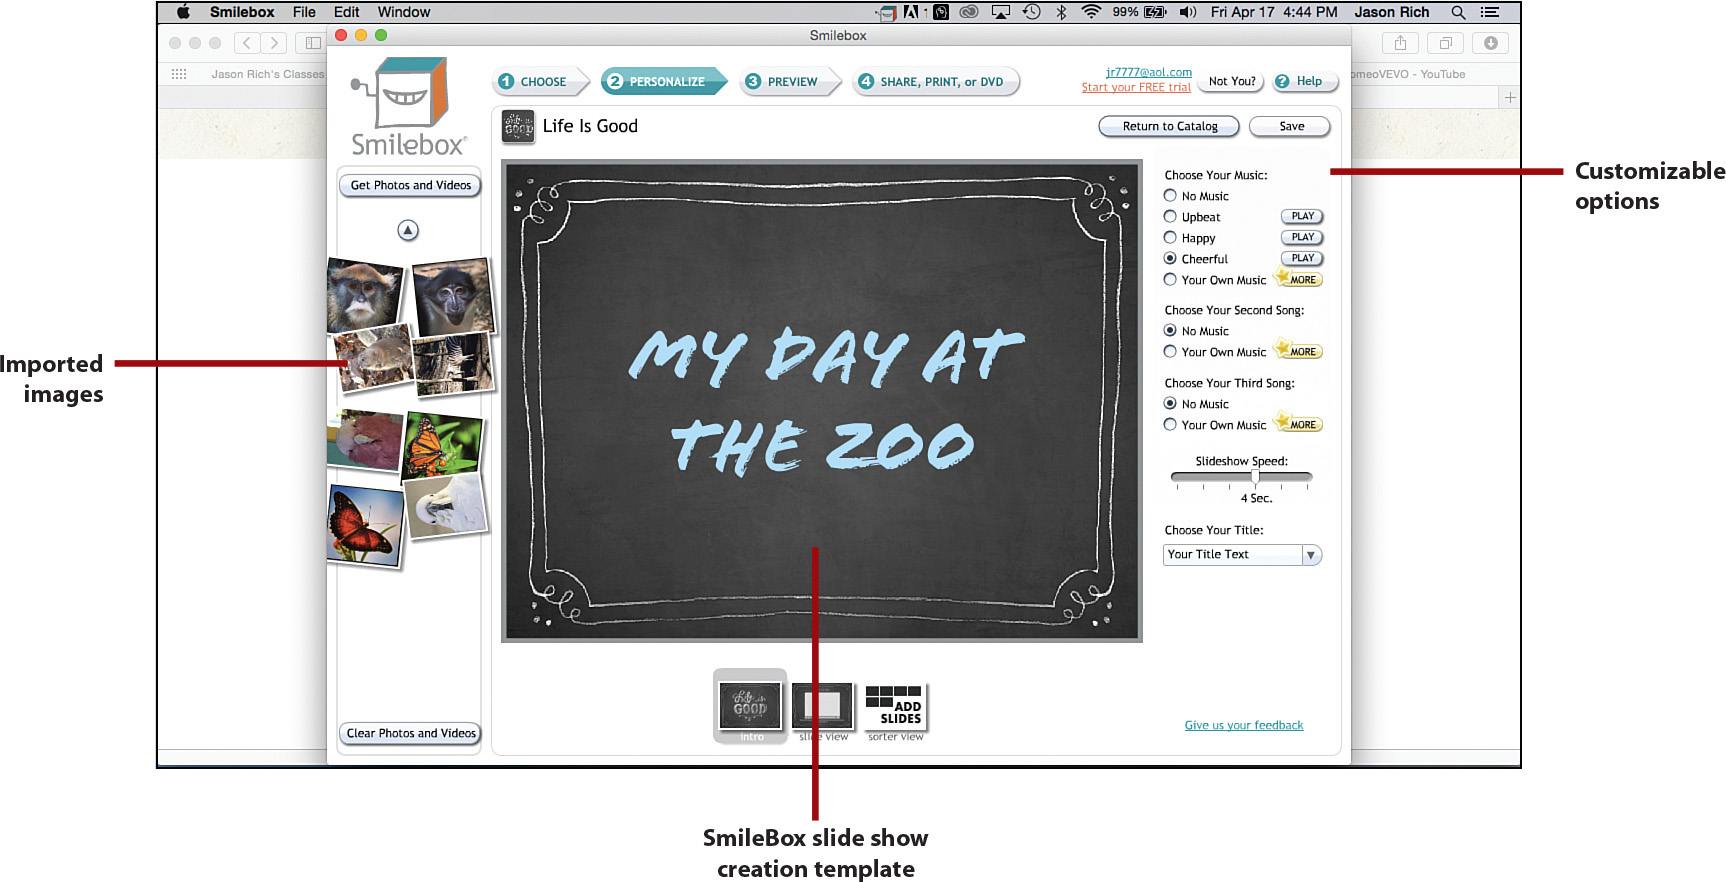
After you create your slide show presentation, you can share it with others via that online service.
Each of these services offers its own set of animations, music options, title and caption options, and in some cases, overall slide show themes to choose from. These services also allow you to share your finished productions on Facebook or via other social media, in addition to having people use a custom website link (URL) from their web browser to view your online-based presentations hosted by the service you choose.