13. Printing Digital Photos from Your Own Printer
In this chapter, you’ll learn how to use a home photo printer to create prints from the digital images stored on your computer or mobile device. Topics include
→ Choosing a home photo printer
→ Buying the right photo paper and printer ink
→ Creating prints from your computer
→ Creating prints from your iPhone or iPad
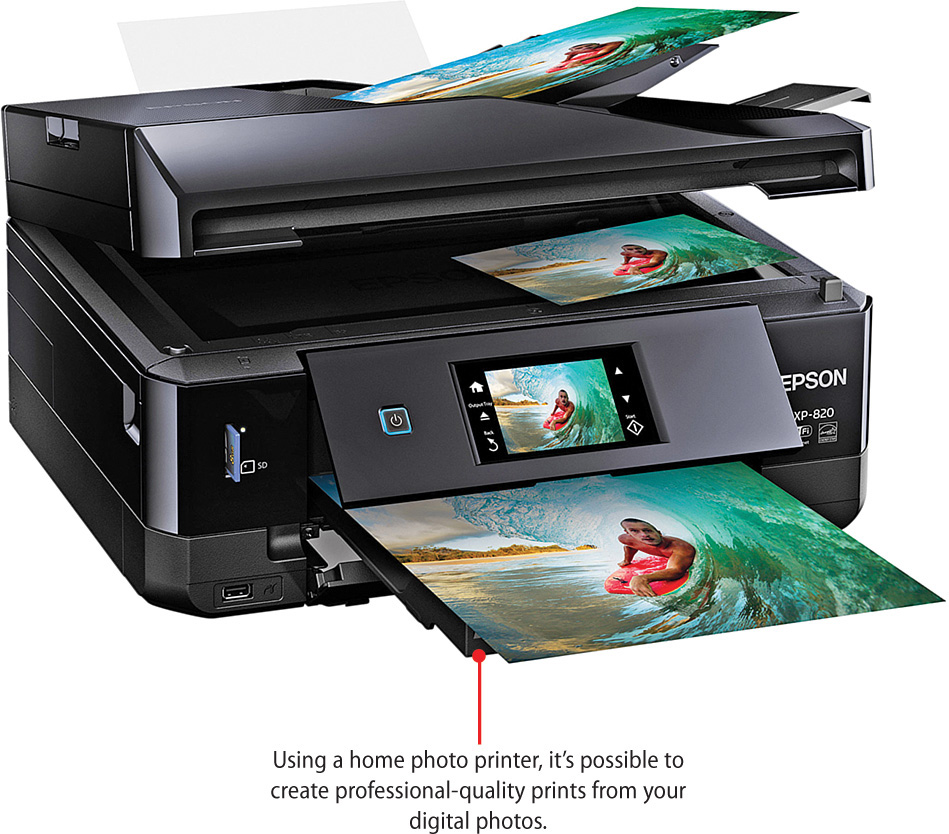
You already know that you can have prints made from your digital images using a one-hour photo lab or online-based photo lab. However, if you want to create your own prints, in whatever sizes you want, within minutes and without leaving your home, it’s possible to use a home photo printer to accomplish this.
A home photo printer and a color inkjet printer are similar; however, a photo printer uses special inks and photo paper to create professional-quality prints from the digital images stored on your computer or mobile device.
In recent years the prices for home photo printers have dropped considerably. However, the price of the ink cartridges and photo paper needed to create professional-quality prints from your computer or mobile device winds up costing a bit more than using a one-hour or online-based photo lab.
The benefit is that with a home photo printer, you can create prints at home in minutes and often in various sizes.
Shopping for a Photo Printer
Many printer manufacturers sell inexpensive photo printers that work with PCs and/or Macs, either by connecting the computer to the printer using a USB cable or by connecting the computer and printer to a Wi-Fi wireless home network.
AirPrint
To wirelessly create prints on a home photo printer from your iPhone or iPad, you must invest in an AirPrint-compatible wireless printer.
Some specialty home photo printers are small, and even battery powered, but can create prints in only a single print size (typically 4×6-inch or 5×7-inch). These cost around $200.
However, most full-size home photo printers can create prints that are 8.5×11-inch or smaller. Thus, you can choose between common print sizes, such as 4×6-inch, 5×7-inch, 8×10-inch, or wallet-size prints, based on what size photo paper you feed into the printer.
These printers start as low as $100 and go up in price to $500 (or more), depending on the features and functions offered.
For a bit more money, a wide-carriage home photo printer can accept larger size photo paper and thus create larger prints, up to poster size, for example.
Photo printers and related supplies can be purchased from stores that sell consumer electronics (such as Best Buy, BJ’s Wholesale Club, or Costco), office supply superstores (Office Depot or Staples, for example), computer specialty stores, photography specialty stores, and a wide range of online merchants.
Three popular home photo printer manufacturers, each of which offers many different printer models, include
• Canon—www.cannon.com/MAXIFYPrinters
• Epson—www.epson.com
• HP—www.hp.com
At least once or twice per year, these printer manufacturers release new home photo printer models and discontinue older models. After several years, it often becomes difficult to find and purchase replacement ink cartridges for older and discontinued printer models.
Understanding Printer Ink and Photo Paper
Regardless of which home photo printer make and model you ultimately purchase, it will require multiple proprietary black and color ink cartridges to create prints. In some cases, each color ink cartridge is sold separately, while other printers use a black and single multicolor ink cartridge.
Either way, you need to purchase only the ink cartridges made for your specific printer make and model, which can cost anywhere from $20 to $60 per set. How many prints can you create from each cartridge set typically varies between 50 and 200 4×6-inch prints.
In addition to the printer manufacturers selling their own photo paper that’s compatible with their printers, many companies sell their own or generic photo paper that’s just as good but priced considerably less than name-brand photo paper from the printer manufacturers.
The following are the most important things to understand about photo paper:
• Any brand of photo paper can be used with any home photo printer, as long as the size of the photo paper fits in your printer.
• Photo paper typically comes in packs of 10, 25, 50, or 100 sheets and in specific sizes, including 4×6-inch, 5×7-inch, or 8.5×11-inch (which can be trimmed to create 8×10-inch prints).
• All photo paper is rated between one and five stars, which determines its quality. If you want create professional-quality prints that will last for years without fading, choose three star or higher-rated photo paper.
• Photo paper is available in different finishes, including matte, semi-glossy, glossy, and luster. Semi-glossy and glossy are the most common and readily available from office supply superstores and other retailers, for example. Higher grade, professional-quality, five-star photo paper with a matte or luster finish is typically available from retail or online-based photo specialty stores.
Photo Paper Quality Is Also Worth Considering
Higher-quality photo papers tend to be acid-free and/or archival-grade. This means that the paper will not fade or crumple over time, and the prints will last much longer. If prints are exposed to direct sunlight, this does cause fading.
Focus on Quality
To create the best-quality prints at home, consider investing in five-star photo paper, precut in the size you want, with a semi-glossy or luster finish.
Creating Prints from Your Computer or Mobile Device
After connecting your home photo printer to your computer via a USB printer cable, or connecting both the printer and computer (or mobile device) to the same wireless home network, install the ink and photo paper into the printer, and turn on the printer so that it’s set up to create prints.
The process of connecting a printer with your home network or computer varies by the model. If you’re having a hard time, check the manufacturer’s instructions or, if necessary, call its tech support line.
Each popular home photo printer comes with proprietary software for PCs and Macs that enables you to create prints from digital images stored on your computer. Home photo printers with wireless capabilities also typically offer a free mobile app that can be used with Android and/or iOS mobile devices.
An easier option for creating prints, however, is to use the Photos app that comes preinstalled on OS X Yosemite (Mac), as well as on Android and iOS-based mobile devices. To print files from a PC, access the Desktop, launch File Explorer, and print images directly from the File Explorer window.
Based on which equipment you’re using, follow the steps provided in one of the next sections.
Instead of Printing from Your Mobile Device
If you are unable to print directly from your mobile device, instead transfer the images from your smartphone or tablet to your computer, and then create your prints. Refer to Chapter 4, “Transferring Photos to Your Computer,” for information on how to do this.
Create Prints on Windows PCs
To create prints using a home photo printer connected to your Windows PC, make sure your printer is on and connected, and follow these steps:
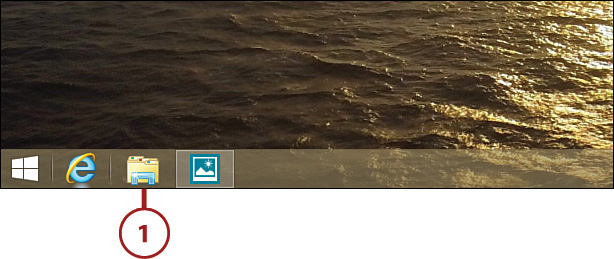
![]() From your PC’s Desktop, launch File Explorer.
From your PC’s Desktop, launch File Explorer.
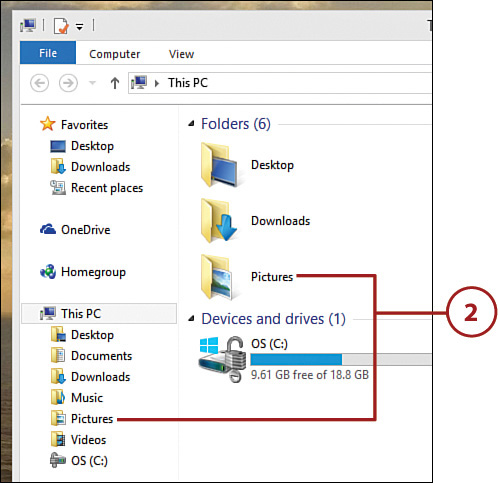
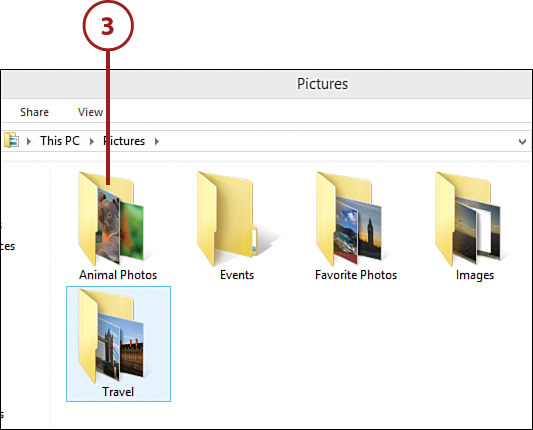
![]() From the File Explorer window, open the Pictures Library (or whichever folder contains the image you want to print) by clicking on its icon in the navigation pane (or double-click it in the main This PC view).
From the File Explorer window, open the Pictures Library (or whichever folder contains the image you want to print) by clicking on its icon in the navigation pane (or double-click it in the main This PC view).
![]() Double-click on the folder that contains the image you want to print.
Double-click on the folder that contains the image you want to print.
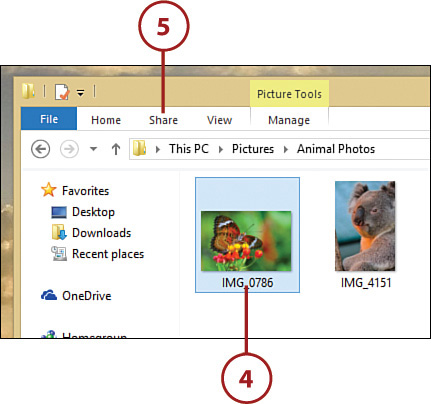
![]() When looking at the image thumbnails, click on the desired thumbnail to select and highlight it.
When looking at the image thumbnails, click on the desired thumbnail to select and highlight it.
![]() Click on the Share option.
Click on the Share option.
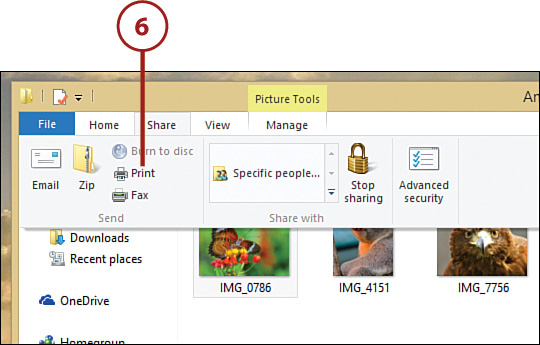
![]() Click on the Print option.
Click on the Print option.
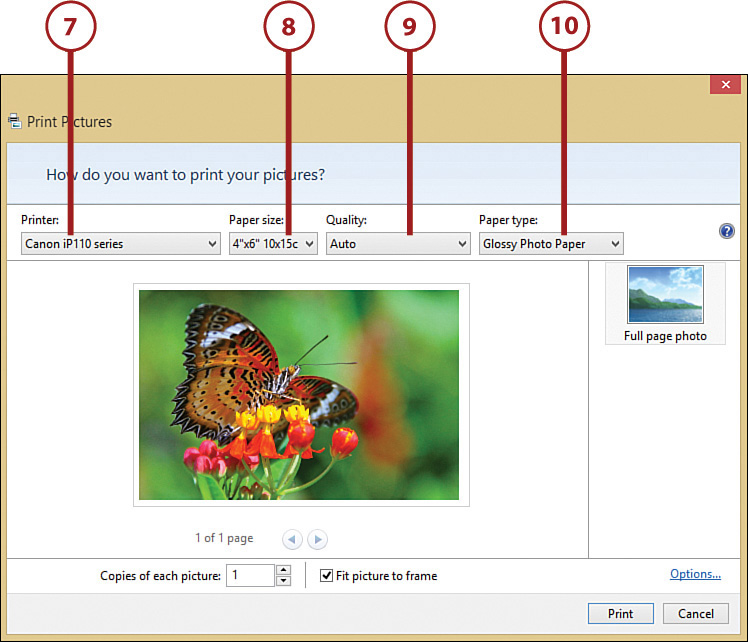
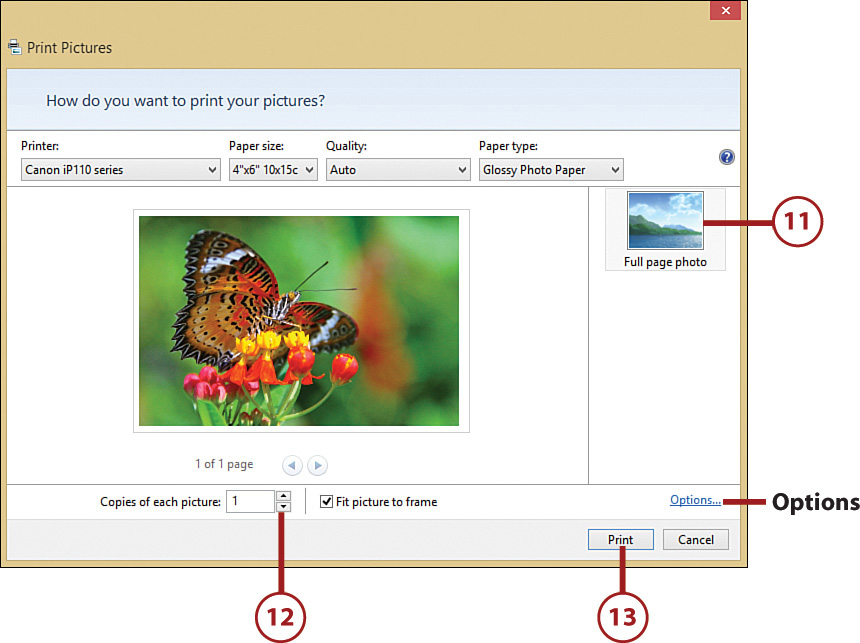
![]() From the Print Pictures window, select your home photo printer from the Printer pull-down menu.
From the Print Pictures window, select your home photo printer from the Printer pull-down menu.
![]() Choose the appropriate print size option, based on the photo size and paper you’re using, from the pull-down menu.
Choose the appropriate print size option, based on the photo size and paper you’re using, from the pull-down menu.
![]() Click on the Quality pull-down menu, and if applicable choose the highest quality option listed. This varies by printer. Otherwise, leave the default Auto option selected.
Click on the Quality pull-down menu, and if applicable choose the highest quality option listed. This varies by printer. Otherwise, leave the default Auto option selected.
![]() Click on the Paper Type pull-down menu to select the type of photo paper you’ll be using. This relates to the paper’s finish. The options vary based on your printer make and model.
Click on the Paper Type pull-down menu to select the type of photo paper you’ll be using. This relates to the paper’s finish. The options vary based on your printer make and model.
Always Use Photo Paper
Although photo printers can print full-color images on plain paper, for the best results that closely resemble professionally created prints from a photo lab, use high-quality photo paper when printing your images.
![]() From the options displayed as thumbnails along the right margin of the Print Pictures window, choose a printing format.
From the options displayed as thumbnails along the right margin of the Print Pictures window, choose a printing format.
Page Formats
Typically, you use the Full Page Photo option to print one image on one sheet of photo paper. However, other multi-image per page options are available, including wallet-size photos.
![]() Click on the Copies of Each Picture option to determine how many prints per image you want to create.
Click on the Copies of Each Picture option to determine how many prints per image you want to create.
![]() Click on the Print button to create your prints.
Click on the Print button to create your prints.
Print Options
For additional formatting and print quality options, which vary by photo printer, click on the Options button shown here.
Create Prints on Macs
To create prints using a home photo printer connected to your Mac, launch the Photos app and follow these steps:
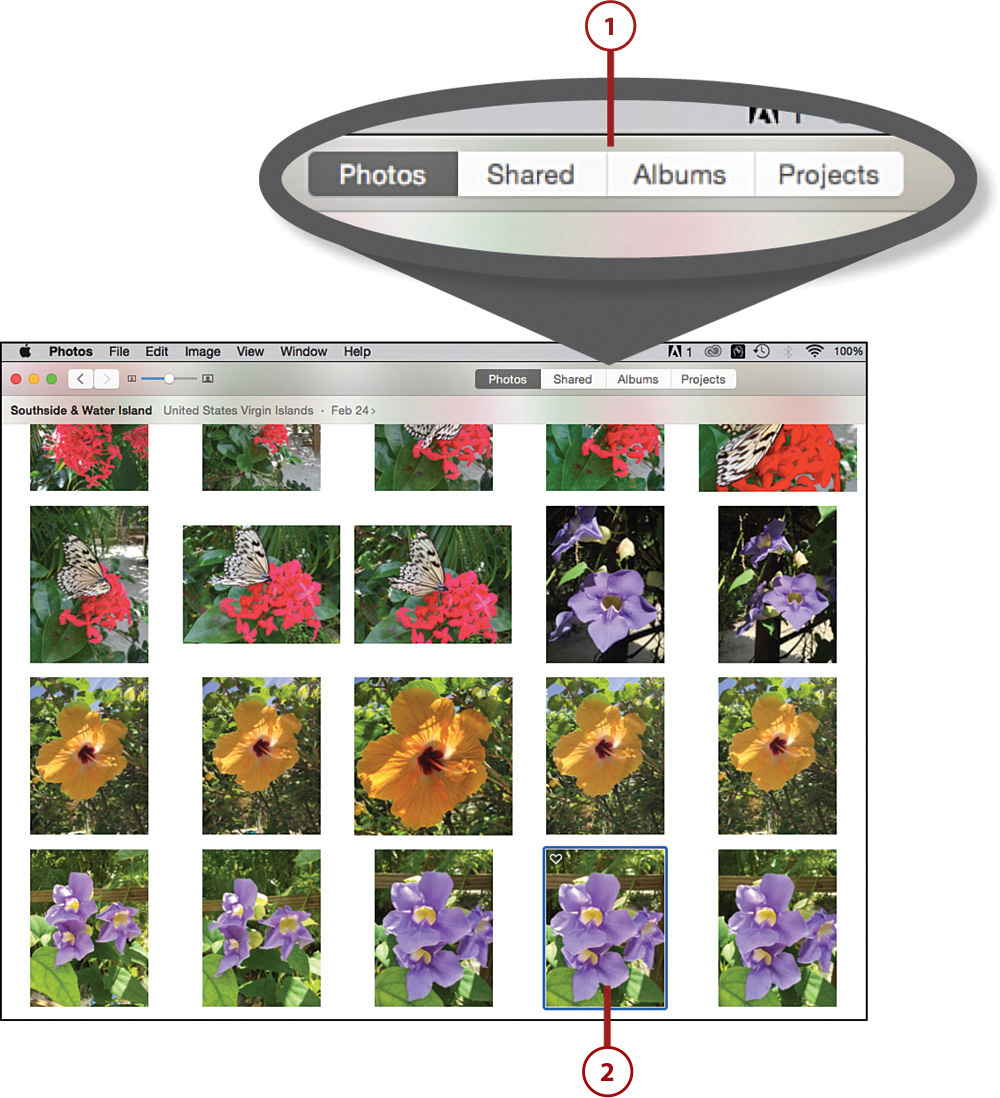
![]() Click on the Photos, Shared, or Albums tab to locate the image(s) you want to print.
Click on the Photos, Shared, or Albums tab to locate the image(s) you want to print.
![]() Select the desired image.
Select the desired image.
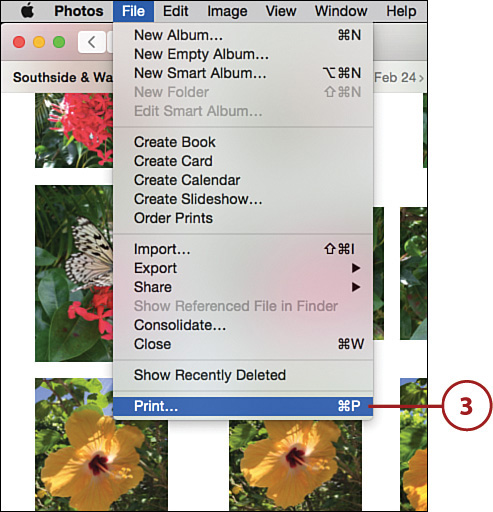
![]() From the File pull-down menu, select the Print option, or use the Command (
From the File pull-down menu, select the Print option, or use the Command (![]() )+P keyboard shortcut.
)+P keyboard shortcut.
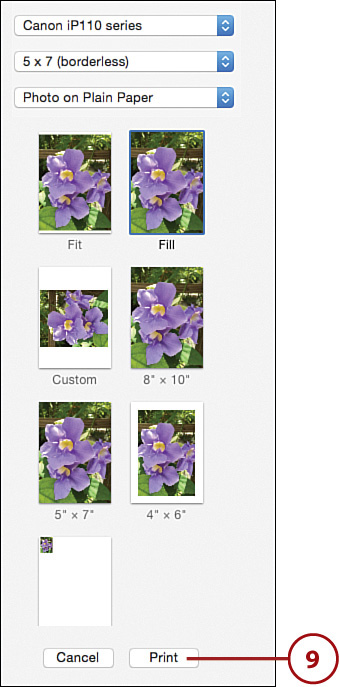
![]() Click on the Printer pull-down menu from the Print screen’s sidebar, and select your home photo printer.
Click on the Printer pull-down menu from the Print screen’s sidebar, and select your home photo printer.
![]() Select the Paper Size option from the pull-down menu.
Select the Paper Size option from the pull-down menu.
![]() Select the type of photo paper you are using. The options vary based on your printer make and model and should match the type of paper you inserted into your printer. Typically, you’ll use Glossy Photo Paper.
Select the type of photo paper you are using. The options vary based on your printer make and model and should match the type of paper you inserted into your printer. Typically, you’ll use Glossy Photo Paper.
![]() Click on one of the page formatting options, which are displayed as thumbnails. For example, choose whether you want a thin border to appear around your image by selecting the Fit or Fill option, respectively.
Click on one of the page formatting options, which are displayed as thumbnails. For example, choose whether you want a thin border to appear around your image by selecting the Fit or Fill option, respectively.

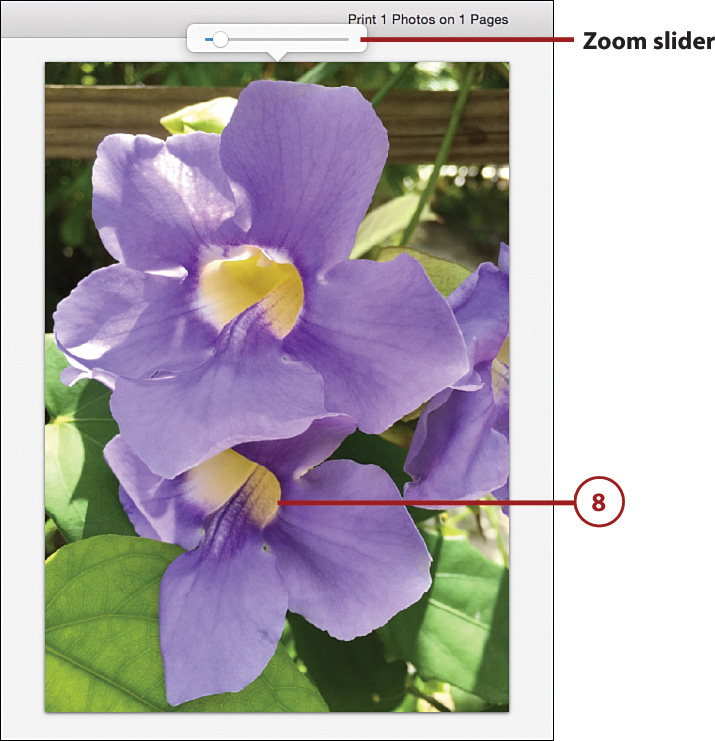
![]() Based on the print-related options you select, a preview of your print is displayed on the left side of the screen. This shows exactly what will appear within your print. Click on this image preview to access the Zoom slider to zoom in, and then hold down the mouse button with the cursor on the preview image to drag it around to reframe the shot.
Based on the print-related options you select, a preview of your print is displayed on the left side of the screen. This shows exactly what will appear within your print. Click on this image preview to access the Zoom slider to zoom in, and then hold down the mouse button with the cursor on the preview image to drag it around to reframe the shot.
![]() Click on the Print button to create your print.
Click on the Print button to create your print.
Create Prints Using AirPrint
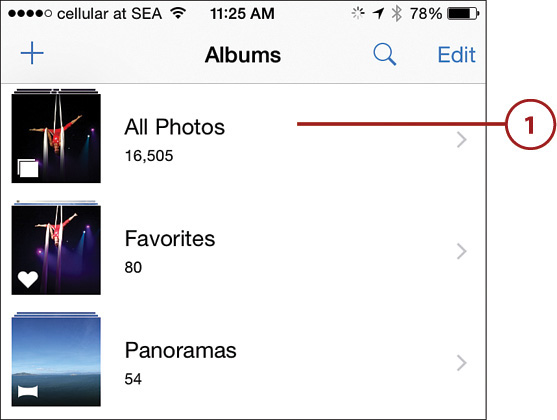
To wirelessly create prints using an AirPrint-compatible home photo printer connected to your iPhone or iPad, launch the Photos app and follow these steps:
![]() Open the album that contains the image(s) you want to print.
Open the album that contains the image(s) you want to print.
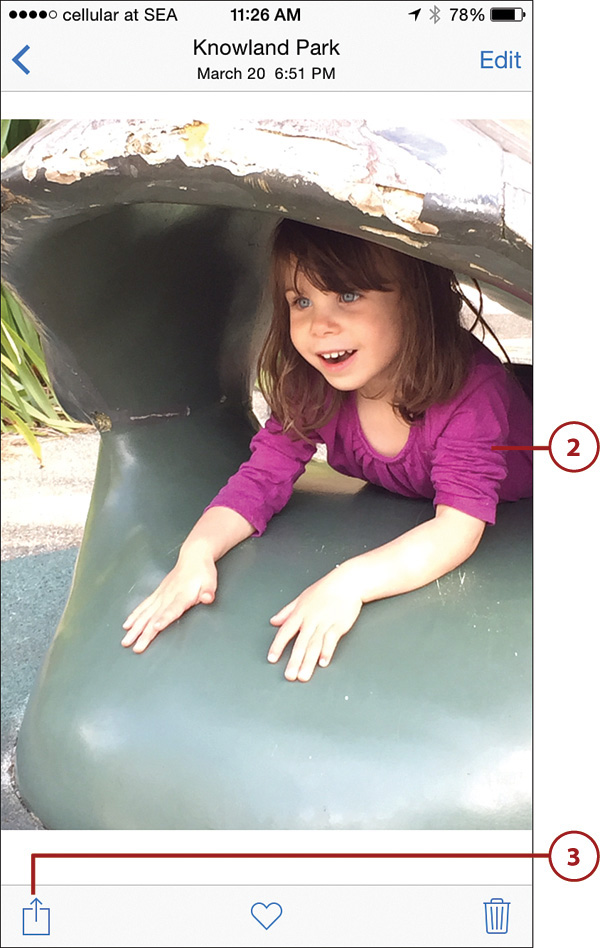
![]() Tap on the image thumbnail to open and view the desired image.
Tap on the image thumbnail to open and view the desired image.
![]() Tap on the Share icon.
Tap on the Share icon.
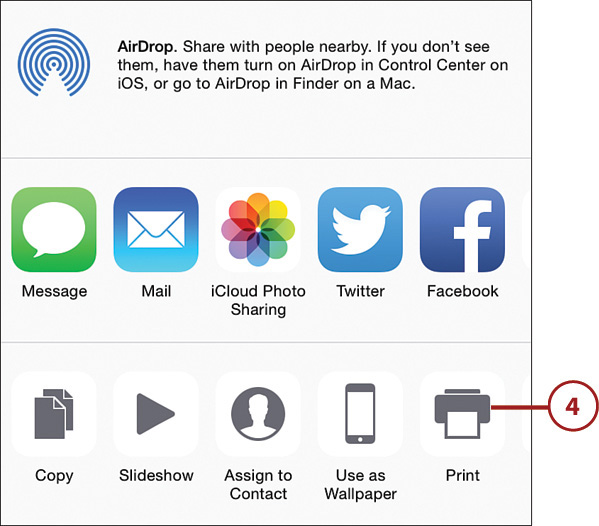
![]() Tap on the Print icon displayed as part of the Share menu.
Tap on the Print icon displayed as part of the Share menu.
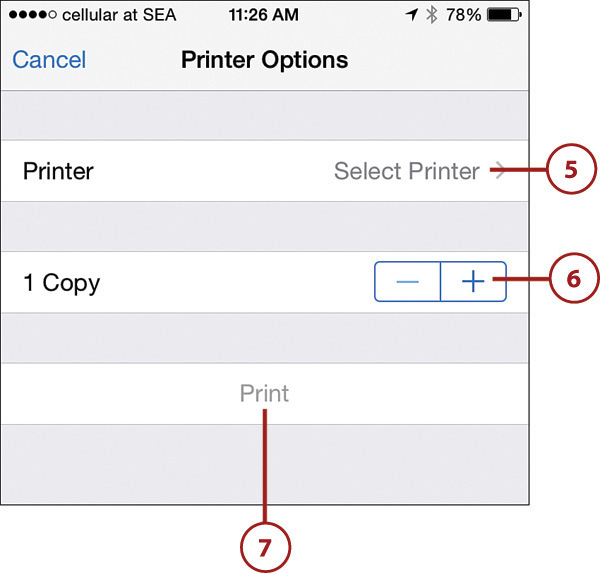
![]() Tap on the Printer option and select your wireless (AirPrint-compatible) home photo printer.
Tap on the Printer option and select your wireless (AirPrint-compatible) home photo printer.
![]() Tap on the number of copies you want to create.
Tap on the number of copies you want to create.
![]() Tap on the Print button to make your prints.
Tap on the Print button to make your prints.
Other Options
When using an Android or iOS mobile device, based on your printer make and model, additional print-related options might be available. However, you have more control over your image printing if you download and install the mobile app available specifically for your printer make and model. This app walks you through the print creation process and can be acquired from the App Store.