
13. Working with Web Animation and Video
Lesson overview
In this lesson, you’ll learn how to incorporate web-compatible animation and video components into your webpage and do the following:
• Insert web-compatible animation
• Insert web-compatible video
This lesson will take about 40 minutes to complete. Download the project files for this lesson from the Lesson & Update Files tab on your Account page at www.peachpit.com, store them on your computer in a convenient location, and define a new site based on the lesson13 folder, as described in the “Getting Started” section of this book. Your Account page is also where you’ll find any updates to the lessons or to the lesson files. Look on the Lesson & Update Files tab to access the most current content.

Understanding web animation and video
The web can provide a variety of experiences to the average user. One second, you are downloading and reading a best-selling novel. Next, you’re listening to your favorite radio station or performing artist. Then, you’re watching live television coverage or a feature-length movie. Before Adobe Flash, animation and video were hard to incorporate onto websites. That’s because HTML was invented at a time when even static images were difficult to use on the Internet; video was a dream far off in the future.
Video and animation content was eventually provided in a variety of formats using a hodgepodge of applications, plug-ins, and coder-decoders (codecs) that could transfer data across the Internet to your computer and browser. Often this was accomplished with enormous difficulties and incompatibilities. Frequently, a format that worked in one browser was incompatible with another. Applications that worked in Windows didn’t work on the Mac. Most formats required their own proprietary players or plug-ins.
For a time, Adobe Flash brought order to this chaos. It provided a single platform for creating both animation and video. Flash started as an animation program and changed the web for everyone. A few years ago, it revolutionized the industry again by making it a simple task to add video to a site. By inserting a video into Flash and saving the file as a SWF or FLV file, web designers and developers were able to take advantage of the almost universal distribution of the Flash Player (installed on over 90 percent of all desktop computers). No more worries over formats and codecs—Flash Player took care of all that.
With the invention and rise in popularity of smartphones and tablet devices over the last decade, Flash has fallen on hard times. For most manufacturers, the power and capability of Flash were too difficult to support on these devices, and it was abandoned. Flash is not dead. It’s still unmatched for its multimedia power and functionality. But today, all bets are off when it comes to animation and video. The techniques for creating web-based media are being reinvented. As you may have guessed, this trend away from Flash is ringing in a new era of chaos on the web media front. Half a dozen or more codecs are competing to become the “be-all, end-all” format for video distribution and playback for the web.
The only ray of sunshine in this morass is that HTML5 was developed with built-in support for both animation and video. Great strides have already been made to replace much of the capability of Flash-based animation using native HTML5 and CSS3 functionality. The status of video is not as clear. So far, a single standard has not yet emerged, which means that to support all the popular desktop and mobile browsers, you’ll have to produce several different video files. In this lesson, you’ll learn how to incorporate different types of web animation and video into your site.
Previewing the completed file
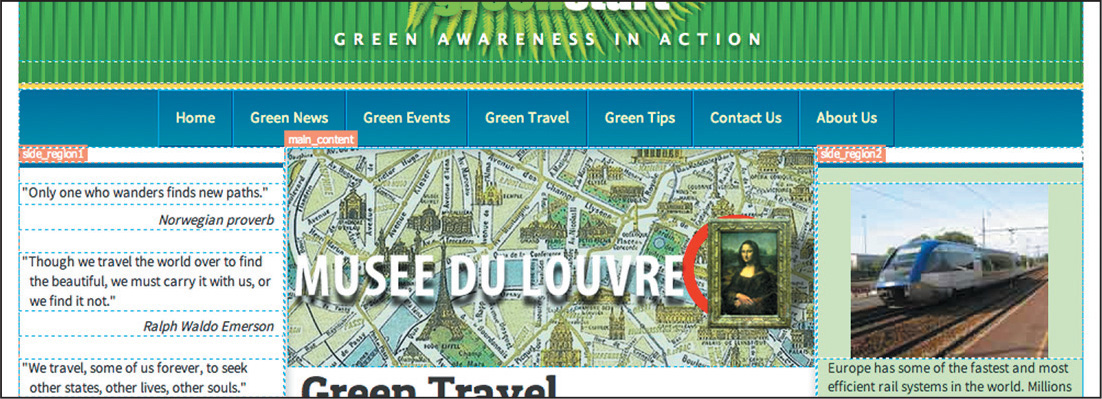
To see what you’ll work on in this lesson, preview the completed page in a browser. The finished page is based on the travel page you created in Lesson 12, “Adding Interactivity.”
1. Launch Adobe Dreamweaver CC (2015.1 release) or later.
2. If necessary, define a site based on the lesson13 folder. Press F8 to open the Files panel, and choose lesson13 from the site list drop-down menu.
3. Open travel_finished.html from the finished folder. Preview the page in your default browser.
![]() Note
Note
Internet Explorer may block dynamic content from playing when it’s on your local hard drive. You will probably have to click a button to allow this content to play.
The page includes two media elements: the banner animation at the top of the main_content region and the video inserted below. Depending on the browser used to view the page, the video may be generated from one of four different formats: MP4, WebM, Ogg, or Flash Video.
4. Note that the banner ad plays when the page loads and loops after it calls you to sign up for the Eco-Tour.
5. To view the video, click the Play button. If you do not see a Play button, your browser may be showing a Flash fallback version of the video. Move the cursor over the video to display the control skin, and click the Play button.

Different browsers support different types of video. Depending on the video format your browser supports, you may notice that the controls fade if you move the cursor away from the video, but that they return once you position the cursor over the video again.
6. When you’re finished previewing the media, close your browser.
Return to Dreamweaver and close travel_finished.html.
Video and animation provide powerful venues for rich web content, and Dreamweaver makes it a simple matter to insert this type of content.
Adobe Edge Animate

Adding web animation to a page
Dreamweaver has a built-in and simplified workflow for inserting Edge Animate compositions, making the process a point-and-click operation. Dreamweaver takes advantage of a feature in Edge Animate designed to assist in deploying compositions to other programs and workflows, such as Adobe InDesign, Adobe Dreamweaver, and Apple’s iBooks Author. The File > Publish Settings command (shown in the figure) enables you to export your Edge Animate compositions into a single file or folder.

By defining your Publish settings appropriately, you can create a complete set of files that are compatible with these applications. For the purposes of this exercise, we published an OAM file for you, which is an archive file format that contains all the constituent elements needed to support the animation in Dreamweaver.
1. Open travel.html from the lesson13 site root folder in Live view.
The banner will be inserted above the main heading. But we have to take an interim step to get it into this page. At the time of this writing, Dreamweaver can’t insert OAM files into child pages still connected to a template. So you will have to insert the animation into an empty page and then manually transfer the code to the travel page.
2. Select File > New.
The New Document dialog appears.
3. Choose HTML in the Document Type section of the dialog.
4. Choose None in the Framework section.
A new blank document appears. Before you can insert the banner, you have to save the file.
6. Save the file as animation_transfer.html.
If necessary, switch to Live view.
7. Choose Insert > HTML > Animated Composition. You may also use the Animated Composition option in the Insert panel’s HTML category.

8. Navigate to the lesson13/resources folder.
Select ecotour.oam.
9. Click OK/Open to insert the composition.

The banner should appear and begin to play. It is designed to loop over and over.
10. Save the file and switch to Code view.
11. Examine the HTML code.
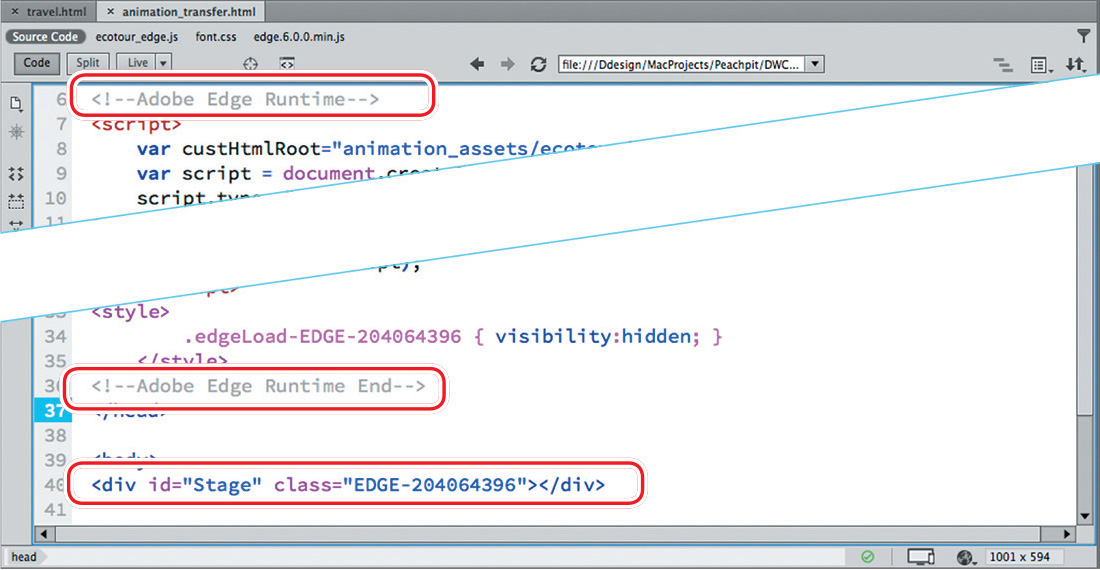
The file contains the structure of a basic webpage, including <head> and <body> sections, as well as the Edge Animate stage and support code.
12. In the Code view window, select and copy all the markup contained between the <!--Adobe Edge Runtime--> and <!--Adobe Edge Runtime End--> comments.

![]() Tip
Tip
When selecting large amounts of code, click or drag the line numbers.
13. Click the travel.html document tab and switch to Code view.
14. In the Code view window, scroll to the <head> section. Insert the cursor at the end of the notation <!-- InstanceBeginEditable name="doctitle" --> and press Enter/Return to create a new line (approximately line 7).
15. Paste the runtime markup copied in step 12.

The next step is to transfer the composition stage.
16. Switch to animation_transfer.html.
![]() Note
Note
When selecting the stage, don’t forget the closing </div> tag.
17. In Code view, select the markup <div id="Stage" class="EDGE-204064396"> </div> and copy it (approximately line 40).

18. Switch to travel.html.
19. In the Code view window, scroll to the <body> section. Insert the cursor before the markup <h1>Green Travel</h1> (approximately line 114) and paste the stage.
20. Press Return/Enter to move the heading to a new line, if necessary.

21. Switch to Live view.

The banner animation plays automatically in Live view once the code is processed.
It may seem like a miracle that this amazing banner animation was created by one simple file, but what you cannot see is that Dreamweaver just created in the site root directory a new folder that is populated by more than a dozen files.
![]() Warning
Warning
Dreamweaver will not automatically upload all the support files needed for the Edge Animate composition. Be sure to upload the entire contents of the animation_assets folder when publishing the site to the web.
22. Open the Files panel and examine the list of folders in the site root.

The folder named animation_assets now appears in the root directory. The folder was generated automatically and contains all the files needed to support the composition. The entire folder must be uploaded to the web host when travel.html is posted.
23. Save all files.
Congratulations! You’ve successfully incorporated an HTML5- and CSS3-based animation in your page.

Adding web video to a page
Implementing HTML5-compatible video in your site is a bit more involved than it was when you had to insert only a single Flash-based file. Unfortunately, no single video format is supported by all browsers in use today. To make sure your video content plays everywhere, you’ll have to supply several different formats. Dreamweaver CC now provides a built-in technique to add multiple video files so you won’t have to do all the coding yourself. In this exercise, you will learn how to insert HTML5-compatible video on a page in your site.
1. If necessary, open travel.html in Live view.
You will insert the video in the main_content section of the page.
2. Click the paragraph Click here to sign up.
The HUD appears focused on the p tag.
![]() Note
Note
Open the Property inspector and dock it to the bottom of the document window, if necessary.
3. Choose Insert > HTML > HTML5 Video.
The Position Assist HUD appears.

An HTML5-compatible video placeholder appears on the page, and the Property inspector displays new options for targeting the video source files. Note that this interface enables you to specify up to three video source files and one Flash fallback file. The first step is to select your primary video source.
5. In the Property inspector, click the Browse icon ![]() in the Source field. Navigate to the movies folder and select the paris.mp4 file. Click OK/Open.
in the Source field. Navigate to the movies folder and select the paris.mp4 file. Click OK/Open.


The MP4 video replaces the video placeholder. Note that Alt Source 1 is automatically populated with a WebM version of the movie.
The MP4 file format will be the primary video format loaded. MP4, also known as MPEG-4, is a video format based on Apple’s QuickTime standard. It is supported natively by iOS-compatible devices, such as the iPhone and iPad, as well as by Apple’s Safari browser. Many experts advise loading MP4 files first; otherwise, iOS devices may ignore the video element altogether.
WebM is an open-source, royalty-free video format sponsored by Google. It is compatible with Firefox 4, Chrome 6, Opera 10.6, and Internet Explorer 9 and later.
![]() Note
Note
Ogg is a container format. When the container contains a video, it uses the extension .ogv.
To round out our HTML5 video selections, the next format you’ll load is a lossy, open-source multimedia format: Ogg. It is designed for the distribution of multimedia content that is free of copyright and other media restrictions.
6. Click the Browse icon ![]() for the Alt Source 2 field. Select the file paris.theora. ogv from the movies folder and click OK/Open.
for the Alt Source 2 field. Select the file paris.theora. ogv from the movies folder and click OK/Open.

These three formats support all the modern desktop and mobile browsers. But to support older software and devices, using a stalwart old friend—Flash video—may be necessary. By adding it last, you ensure that only browsers that don’t support the other three formats will load the Flash content. Although many are abandoning Flash, Dreamweaver still provides support for inserting both FLV and SWF files.
7. Click Browse in the Flash Fallback field.
Select the paris.flv file from the movies folder and click OK/Open.
8. Save the file.
9. If necessary, switch to Live view.
In some browsers, the <video> element won’t generate a preview of the video content. You can add an image placeholder by using the Poster field in the Property inspector.
10. If necessary, select the <video> tag selector.
In the Property inspector, click Browse in the Poster field.
11. In the movies folder, select paris-poster.png and click OK/Open.

A preview image has been applied to the <video> element. It won’t be visible in Dreamweaver, but you may see the poster in the browser. The advantage of using a poster is that something will always appear on the page, even in the rare browsers that do not support HTML5 or Flash video formats.
12. Save all files.
Video controls appear below the poster depending on what video format is displayed. In the next exercise, you will learn how to configure these controls and how the video will respond to the user.
1. Select the <video> tag selector.
2. Switch to Code view. If necessary, select Source Code in the Related Files interface.
3. Select the entire <embed> element containing the reference to paris.flv and delete it.

4. Choose Insert > HTML > Flash Video.
5. In the Insert FLV dialog, click the Browse icon.
Select paris.flv from the movies folder and click OK/Open.
The filename paris.flv appears in the URL field of the dialog. Flash video supplies its own controls via a SWF skin interface. You can choose your own skin design in this dialog.
6. Choose Corona Skin 2 from the Skin pop-up menu.

Before you can insert the file, you have to specify the dimensions of the video.
7. In the Width field, enter: 400
In the Height field, enter: 300
You can use the options below these fields to specify whether you want the video to autoplay and autorewind.
8. Click OK to insert the FLV video.

Choosing HTML5 video options
The final step for configuring the video is to decide what other HTML5-supported options to specify. The options are displayed within the Property inspector whenever the <video> element is chosen. The options are selectable in all views.
1. If necessary, open travel.html in Live view.
Select the <video> tag selector.
Observe the left side of the Property inspector.
• Controls displays visible video controls.
• AutoPlay starts the video automatically after the webpage loads.
• Loop causes the video to replay from the beginning automatically once it finishes.
• Muted silences the audio.
• Preload specifies the method in which the video loads.
2. If necessary, select the Controls option and deselect the AutoPlay, Loop, and Muted options. Set Preload to none.

Video is very memory- and bandwidth-intensive. This is especially true for phones and tablets. Setting Preload to none prevents any video resources from downloading until the user actually clicks the video. It may take the video a few more seconds to download when launched, but your visitors will appreciate that you are respectful of their minutes and data plan.
The <video> element is now complete, but it’s not responsive. Adding a simple rule can take care of that issue.
3. Select the video tag selector, if necessary.
4. In the CSS Designer, select green_styles.css > GLOBAL.
Create a new selector: video
5. Create the following properties:
max-width: 100%
height: auto
6. Preview the page in Live view or in a browser. If the video controls are not visible, move your cursor over the still image to display them. Click the Play button to view the movie.

![]() Note
Note
In Microsoft Internet Explorer, a notice may appear notifying you that the active content was blocked. Click the Allow Blocked Content button to play the video.
Depending on where you preview the page, you will see one of the four video formats. For example, in Live view you will see the MP4-based video. The controls will appear differently depending on what format is displayed. This movie has no sound, but the controls will often include a speaker button to adjust the volume or mute the audio.
7. Drag the Scrubber to the left to check the display of the video at various screen widths.
The video resizes as needed to fit the available space.
You’ve embedded three HTML5-compatible videos and an FLV fallback, which gives you support for most browsers and devices that can access the Internet. But you’ve learned only one possible technique for supporting this evolving standard. To learn more about HTML5 video and how to implement it, check out the following links:
• http://tinyurl.com/video-HTML5-1
• http://tinyurl.com/video-HTML5-2
• http://tinyurl.com/video-HTML5-3
To learn more about implementing video for mobile devices, check out these links:
• http://tinyurl.com/fluid-video
• http://tinyurl.com/fluid-video-1
Review questions
1. What advantage does HTML5 have over HTML 4 regarding web-based media?
2. What programming language(s) created the HTML5-compatible animation used in this lesson?
3. True or false: To support all web browsers, you can select a single video format.
4. In browsers or devices that do not support video, what can you do to provide some form of content to these users?
5. What video format is recommended to support older browsers?
Review answers
1. HTML5 has built-in support for web animation, video, and audio.
2. The animation used in this lesson was created by Adobe Edge Animate natively using HTML5, CSS3, and JavaScript.
3. False. A single format supported by every browser has not emerged. Developers recommend incorporating four video formats to support the majority of browsers: MP4, WebM, Ogg, and FLV.
4. You can add a static poster image (GIF, JPG, or PNG) via an option in the Property inspector to provide a preview of the video content in incompatible browsers and devices.
5. FLV (Flash video) is recommended as the fallback format for older browsers because of the widespread installation of the Flash Player.