
Getting Started
Adobe® Dreamweaver® CC is the industry-leading web-authoring program. Whether you create websites for others for a living or plan to create one for your own business, Dreamweaver offers all the tools you need to get professional-quality results.
About Classroom in a Book
Adobe Dreamweaver CC Classroom in a Book® (2015 release) is part of the official training series for graphics and publishing software developed with the support of Adobe product experts.
The lessons are designed so you can learn at your own pace. If you’re new to Dreamweaver, you’ll learn the fundamentals of putting the program to work. If you are an experienced user, you’ll find that Classroom in a Book teaches many advanced features, including tips and techniques for using the latest version of Dreamweaver.
Although each lesson includes step-by-step instructions for creating a specific project, you’ll have room for exploration and experimentation. You can follow the book from start to finish, or complete only those lessons that correspond to your interests and needs. Each lesson concludes with a review section containing questions and answers on the subjects you’ve covered.
TinyURLs
At several points in the book, we reference external information available on the Internet. The uniform resource locators (URLs) for this information are often long and unwieldy, so we have provided custom TinyURLs in many places for your convenience. Unfortunately, the TinyURLs sometimes expire over time and no longer function. If you find that a TinyURL doesn’t work, look up the actual URL provided in the appendix.
Prerequisites
Before using Adobe Dreamweaver CC Classroom in a Book (2015 release), you should have a working knowledge of your computer and its operating system. Be sure you know how to use the mouse, standard menus, and commands, and also how to open, save, and close files. If you need to review these techniques, see the printed or online documentation included with your Windows or Mac operating system.
Conventions used in this book
Working in Dreamweaver means you’ll be working with code. We have used several conventions in the following lessons and exercises to make working with the code in this book easier to follow and understand.
Code font
In many instructions, you will be required to enter HTML code, CSS rules, and properties and other code-based markup. To distinguish the markup from the instructional text, the entries will be styled with a code font, like this:
Examine the following code <h1>Heading goes here</h1>
In instances where you must enter the markup yourself, the entry will be formatted in color, like this:
Insert the following code <h1>Heading goes here</h1>
Strikethrough
In several exercises, you will be instructed to delete markup that already exists within the webpage or style sheet. In those instances, the targeted references will be identified with strikethrough formatting, like this:
Delete the following values:
Be careful to delete only the identified markup so that you achieve the following result:
margin: 10px 10px;
background-image: url(images/fern.png);
Missing punctuation
HTML code, CSS markup, and JavaScript often require the use of various punctuation, such as periods (.), commas (,) and semicolons (;), among others, and can be damaged by their incorrect usage or placement. Consequently, periods and other punctuation expected in a sentence or paragraph may be omitted from an instruction or hyperlink whenever it may cause confusion or a possible error, as in the following two instructions:
Enter the following code: <h1>Heading goes here</h1>
Type the following link: http://adobe.com
Element references
Within the body of descriptions and exercise instructions, elements may be referenced by name or by class or id attributes. When an element is identified by its tag name, it will appear as <h1> or h1. When referenced by its class attribute, the name will appear with a leading period (.) in a code-like font, like this: .content or .sidebar1. References to elements by their id attribute will appear with a leading hash (#) and in a code font, like this: #top. This practice matches the way these elements appear in Dreamweaver’s tag selector interface.
Windows vs. OS X instructions
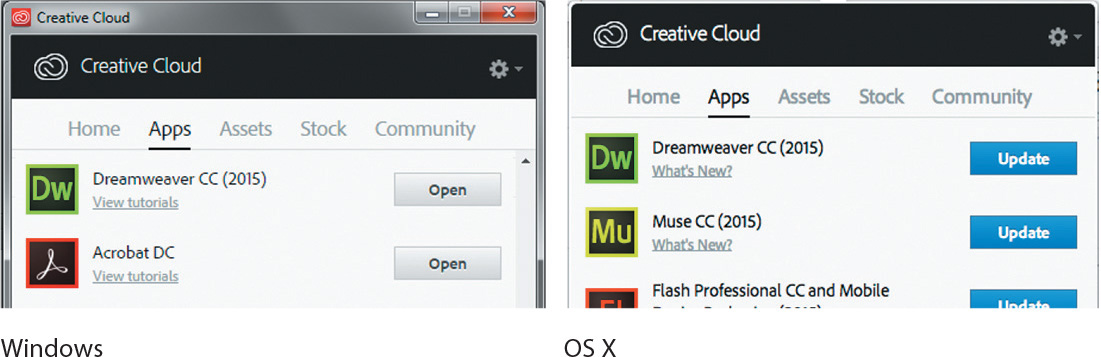
In most cases, Dreamweaver performs identically in both Windows and OS X. Minor differences exist between the two versions, mostly due to platform-specific issues out of the control of the program. Most of these are simply differences in keyboard shortcuts, how dialogs are displayed, and how buttons are named. In most cases, screen shots were made in the OS X version of Dreamweaver and may appear differently from your own screen.
Where specific commands differ, they are noted within the text. Windows commands are listed first, followed by the OS X equivalent, such as Ctrl+C/Cmd+C. Common abbreviations are used for all commands whenever possible, as follows:

As lessons proceed, instructions may be truncated or shortened to save space, with the assumption that you picked up the essential concepts earlier in the lesson. For example, at the beginning of a lesson you may be instructed to “press Ctrl+C/Cmd+C.” Later, you may be told to “copy” text or a code element. These should be considered identical instructions.
If you find you have difficulties in any particular task, review earlier steps or exercises in that lesson. In some cases if an exercise is based on concepts covered earlier, you will be referred back to the specific lesson.
Installing the program
Before you perform any exercises in this book, verify that your computer system meets the hardware requirements for Dreamweaver, that it’s correctly configured, and that all required software is installed.
If you do not have Dreamweaver, you will first have to install it from Creative Cloud. Adobe Dreamweaver must be purchased separately; it is not included with the lesson files that accompany this book. Go to www.adobe.com/products/dreamweaver/tech-specs.html to obtain the system requirements.
Go to https://creative.adobe.com/plans to sign up for Adobe Creative Cloud. Dreamweaver may be purchased with the entire Creative Cloud family or as a standalone app. Adobe also allows you to try Creative Cloud and the individual applications for 30 days for free.

Check out www.adobe.com/products/dreamweaver.html to learn more about the different options for obtaining Dreamweaver.
Updating Dreamweaver to the latest version
Although Dreamweaver is downloaded and installed on your computer hard drive, periodic updates are provided via Creative Cloud. Some updates provide bug fixes and security patches, while others supply amazing new features and capabilities.
The lessons in this book are based on Dreamweaver CC (2015.1 release) and may not work properly in any earlier version of the program. To check which version is installed on your computer, choose Help > About Dreamweaver in Windows or Dreamweaver > About Dreamweaver on the Macintosh. A window will display the version number of the application and other pertinent information.

If you have an earlier version of the program installed, you will have to update Dreamweaver to the latest version. You can check the status of your installation by opening the Creative Cloud manager and logging in to your account.
Check out https://helpx.adobe.com/creative-cloud/help/download-install-trials.html to learn how to download and install a limited-period trial of Creative Cloud to your computer or laptop.
Accessing the Classroom in a Book files
In order to work through the projects in this book, you will need to download the lesson files from your Account page at peachpit.com.
![]() Warning
Warning
Do not copy one lesson folder into any other lesson folder. The files and folders for each lesson cannot be used interchangeably.
If you purchased an eBook from peachpit.com or adobepress.com, the files will automatically appear on your Account page, under the Lesson & Update Files tab.
If you purchased an eBook from a different vendor or a print book, use the unique code in this book to gain access to the lesson files.
To download the Lesson files
1. On a Mac or PC, go to www.peachpit.com/redeem and enter the code that you’ll find on the card bound into the back of your book.
This code is not the same as the book’s ISBN.

2. Click Redeem Code and sign in or create an account. You will be taken to your Account page.
You need to enter the code only once. After you redeem the code, you’ll be able to access your lesson files on peachpit.com anytime you want without entering the code again.
![]() Warning
Warning
Once the code has been used, it cannot be used again.
3. Click the Lesson & Update Files tab of your Account page to see a list of downloadable files.

4. Click the lesson file links to download them to your computer. You can download the files for individual lessons, or download them all at once in one large file.
The files are compressed into ZIP archives to speed up download time and to protect the contents from damage during transfer. You must uncompress (or “unzip”) the files to restore them to their original size and format before you use them with the book. Modern Mac and Windows systems are set up to open ZIP archives by simply double-clicking.

5. Do one of the following:
• If you downloaded DWCC2015_lesson_files.zip, unzipping the archive will produce a folder named DWCC2015_Lesson_Files containing all the lesson files used by the book.
• If you downloaded the lessons individually, create a new folder on your hard drive and name it DWCC2015. Unzip the individual lesson files to this folder. That way, all the lesson files will be stored in one location. Do not share or copy files between lessons.

Recommended lesson order
The training in this book is designed to take you from A to Z in basic to intermediate website design, development, and production. Each new lesson builds on previous exercises, using supplied files and assets to create an entire website. We recommend that you download all lesson files at once and then perform each lesson in sequential order to achieve a successful result and the most complete understanding of all aspects of web design.
The ideal training scenario will start in Lesson 1 and proceed through the entire book to Lesson 14. Each lesson builds the skills and understanding necessary to complete subsequent tasks. We recommend that you do not skip any lessons, or even individual exercises. Although ideal, this method may not be a practicable scenario for every user. So, each lesson folder contains all the files needed to complete every exercise within it using partially completed or staged assets, allowing you to complete individual lessons out of order, if desired.
However, don’t assume that the staged files and customized templates in each lesson represent a complete set of assets. It may seem that these folders contain duplicative materials. But these “duplicate” files and assets, in most cases, cannot be used interchangeably in other lessons and exercises. Doing so will probably cause you to fail to achieve the goal of the exercise.
For that reason, you should treat each folder as a standalone website. Copy the lesson folder to your hard drive, and create a new site for that lesson using the Site Setup dialog. Do not define sites using subfolders of existing sites. Keep your sites and assets in their original folders to avoid conflicts.
One suggestion is to organize the lesson folders in a single web or sites master folder near the root of your hard drive. But avoid using the Dreamweaver application folder or any folders that contain a web server, such as Apache, ColdFusion, or Internet Information Services (IIS). In most cases, you’d want to use such a local web server as your testing server, which is described in Lesson 14, “Publishing to the Web.”
Web Edition
This book comes with a free Web Edition that provides many benefits and can be accessed from any device with a connection to the Internet.
Your Web Edition contains the complete text of the book, plus hours of instructional video keyed to the text and interactive quizzes. In addition, the Web Edition will be updated when Adobe adds significant feature updates between major Creative Cloud releases.
Accessing the free Web Edition
You must register your book purchase on peachpit.com in order to access the free Web Edition:
1. Go to www.peachpit.com/register, and then sign in or create a new account.
2. Enter the book’s ISBN: 9780134309996.
3. Answer the questions as proof of purchase.
The Web Edition will appear under the Digital Purchases tab on your Account page.
4. Click the Launch link to access the product.
Bonus material
We’ve provided additional material for both Lessons 2 and 3 on the Peachpit website. You’ll find “HTML Basics Bonus” for Lesson 2 and “CSS Basics Bonus” for Lesson 3 on your account page (Lessons & Update Files tab) once you register your book as described earlier in “Accessing the Classroom in a Book files.”
Defining a Dreamweaver site
In the course of completing the following lessons, you will create webpages from scratch and use existing files and resources that are stored on your hard drive. The resulting webpages and assets make up what’s called your local site. When you are ready to upload your site to the Internet (see Lesson 14, “Publishing to the Web”), you publish your completed files to a web-host server, which then becomes your remote site. The folder structures and files of the local and remote sites are usually mirror images of one another.
![]() Warning
Warning
You must unzip the lesson files before you create your site definition.
The first step is to define your local site:
1. Launch Adobe Dreamweaver CC (2015.1 release) or later.
2. Open the Site menu.
The Site menu provides options for creating and managing standard Dreamweaver sites.
3. Choose New Site.

To create a standard website in Dreamweaver, you need only name it and select the local site folder. Site names typically relate to a specific project or client and appear in the Files panel. This name is intended for your own purposes, so there are no limitations to the name you can create. Use a name that clearly describes the purpose of the website. For the purposes of this book, use the name of the lesson you intend to complete, such as lesson01, lesson02, lesson03, and so on.
4. Type lesson01 or another name, as appropriate, in the Site Name field.
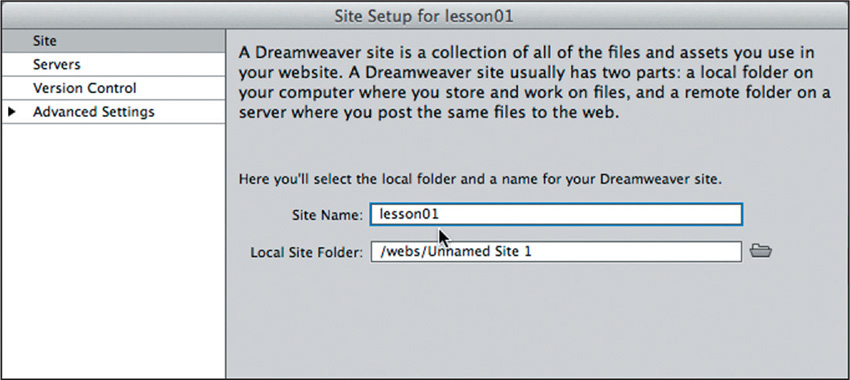
5. Next to the Local Site Folder field, click the Browse for Folder icon ![]() .
.

The Choose Root Folder dialog appears.
6. Navigate to the appropriate folder containing the lesson files you downloaded from Peachpit.com (as described earlier), and click Select/Choose.

![]() Note
Note
The main folder that contains the site will be referred to throughout the book as the site root folder.
![]() Note
Note
The folder that contains the image assets will be referred to throughout the book as the site default images folder or the default images folder.
You could click Save at this time and begin working on your new website, but we’ll add one more piece of handy information.
7. Click the arrow ![]() next to the Advanced Settings category to reveal the categories listed there. Select Local Info.
next to the Advanced Settings category to reveal the categories listed there. Select Local Info.
Although it’s not required, a good policy for site management is to store different file types in separate folders. For example, many websites provide individual folders for images, PDFs, videos, and so on. Dreamweaver assists in this endeavor by including an option for a Default Images folder. Later, as you insert images from other places on your computer, Dreamweaver will use this setting to automatically move the images into the site structure.
8. Next to the Default Images Folder field, click the Browse for Folder icon ![]() . When the dialog opens, navigate to the appropriate images folder for that lesson or site and click Select/Choose.
. When the dialog opens, navigate to the appropriate images folder for that lesson or site and click Select/Choose.

![]() Note
Note
The Web URL is not needed for most static HTML sites, but it’s required for working with sites using dynamic applications or to connect to databases and a testing server.
The path to the images folder appears in the Default Images Folder field. The next step would be to enter your site domain name in the Web URL field.
![]() Note
Note
Resource folders for images and other assets should always be contained within the main site root folder.
9. Enter http://green-start.org for the lessons in this book, or enter your own website URL, in the Web URL field.

You’ve entered all the information required to begin your new site. In subsequent lessons, you’ll add more information to enable you to upload files to your remote and testing servers.
10. In the Site Setup dialog, click Save.

The Site Setup dialog closes.
In the Files panel, the new site name appears in the site list drop-down menu. As you add more site definitions, you can switch between the sites by selecting the appropriate name from this menu.

Whenever a site is selected or modified, Dreamweaver will build, or rebuild, a cache of every file in the folder. The cache identifies relationships between the web pages and the assets within sites, and will assist you whenever a file is moved, renamed, or deleted to update links or other referenced information.

11. Click OK.
Setting up a site is a crucial first step in beginning any project in Dreamweaver. Knowing where the site root folder is located helps Dreamweaver determine link pathways and enables many sitewide options, such as orphaned-file checking and Find and Replace.
Setting up the workspace
Dreamweaver CC (2015.1 release) includes five main workspaces to accommodate various computer configurations and individual workflows. For this book, the Design workspace is recommended.
1. If the Design workspace is not displayed by default, you can select it from the Workspace drop-down menu on the upper-right side of the screen.

2. If the default Design workspace has been modified—where certain toolbars and panels are not visible (as they appear in the figures in the book)—you can restore the factory setting by choosing Reset ‘Design’ from the Workspace drop-down menu.

Workspace Layout options can also be accessed from the Window menu.

Most of the figures in this book show the Design workspace. When you finish the lessons in this book, experiment with each workspace to find the one that you prefer, or build your own configuration and save the layout under a custom name.
For a more complete description of the Dreamweaver workspaces, see Lesson 1, “Customizing Your Workspace.”
Checking for updates
Adobe periodically provides software updates. To check for updates in the program, choose Help > Updates in Dreamweaver. An update notice may also appear in the Creative Cloud update desktop manager.

For book updates and bonus material, visit your Account page on Peachpit.com and select the Lesson & Update Files tab.
Additional resources
Adobe Dreamweaver CC Classroom in a Book (2015 release) is not meant to replace documentation that comes with the program or to be a comprehensive reference for every feature. Only the commands and options used in the lessons are explained in this book. For comprehensive information about program features and tutorials, refer to these resources:
Adobe Dreamweaver Learn & Support: helpx.adobe.com/dreamweaver (accessible in Dreamweaver by choosing Help > Help And Support > Dreamweaver Support Center) is where you can find and browse tutorials, help, and support on Adobe.com.
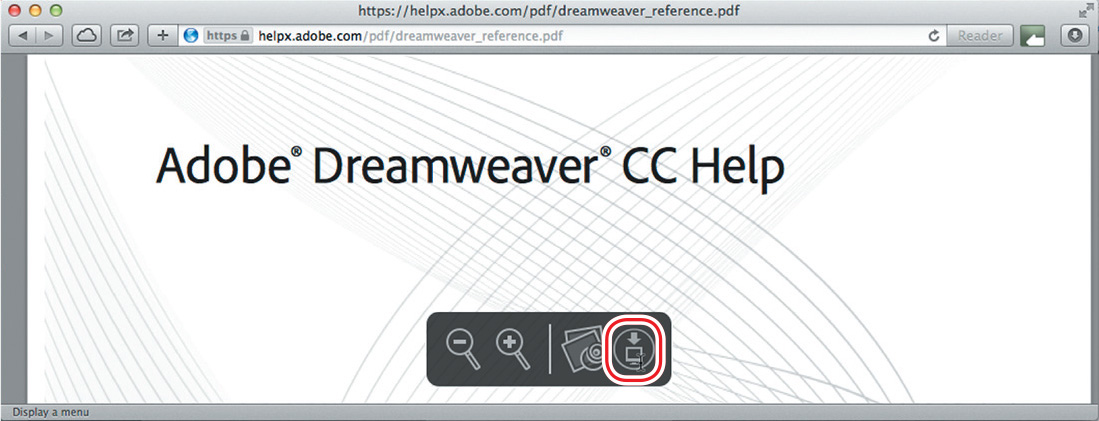
Dreamweaver Help: helpx.adobe.com/dreamweaver/topics.html is a reference for application features, commands, and tools (press F1 or choose Help > Help And Support > Dreamweaver Online Help). You can also download Help as a PDF document optimized for printing at helpx.adobe.com/pdf/dreamweaver_reference.pdf.
Adobe Forums: forums.adobe.com lets you tap into peer-to-peer discussions and questions and answers on Adobe products.
Resources for educators: www.adobe.com/education and edex.adobe.com offer a treasure trove of information for instructors who teach classes on Adobe software. You’ll find solutions for education at all levels, including free curricula that use an integrated approach to teaching Adobe software and that can be used to prepare for the Adobe Certified Associate exams.
Also check out these useful links:
Adobe Add-ons: creative.adobe.com/addons is a central resource for finding tools, services, extensions, code samples, and more to supplement and extend your Adobe products.
Adobe Dreamweaver CC product home page: www.adobe.com/products/dreamweaver has more information about the product.
Adobe Authorized Training Centers
Adobe Authorized Training Centers offer instructor-led courses and training on Adobe products. A directory of AATCs is available at training.adobe.com/trainingpartners.