
Chapter 10
Updating, Showing, and Deleting Users
In this chapter, we will complete the REST actions for the Users resource (Table 7.1) by adding edit, update, index, and destroy actions. We’ll start by giving users the ability to update their profiles, which will also provide a natural opportunity to enforce an authorization model (made possible by the authentication code in Chapter 8). Then we’ll make a listing of all users (also requiring authentication), which will motivate the introduction of sample data and pagination. Finally, we’ll add the ability to destroy users, wiping them clear from the database. Since we can’t allow just any user to have such dangerous powers, we’ll take care to create a privileged class of administrative users authorized to delete other users.
10.1 Updating Users
The pattern for editing user information closely parallels that for creating new users (Chapter 7). Instead of a new action rendering a view for new users, we have an edit action rendering a view to edit users; instead of create responding to a POST request, we have an update action responding to a PATCH request (Box 3.2). The biggest difference is that, while anyone can sign up, only the current user should be able to update their information. The authentication machinery from Chapter 8 will allow us to use a before filter to ensure that this is the case.
To get started, let’s start work on an updating-users topic branch:
$ git checkout -b updating-users10.1.1 Edit Form
We start with the edit form, whose mockup appears in Figure 10.1.1 To turn the mockup in Figure 10.1 into a working page, we need to fill in both the Users controller edit action and the user edit view. We start with the edit action, which requires pulling the relevant user out of the database. Note from Table 7.1 that the proper URL for a user’s edit page is /users/1/edit (assuming the user’s id is 1). Recall that the id of the user is available in the params[:id] variable, which means that we can find the user with the code in Listing 10.1.
1. Image courtesy of CREATISTA/Shutterstock.
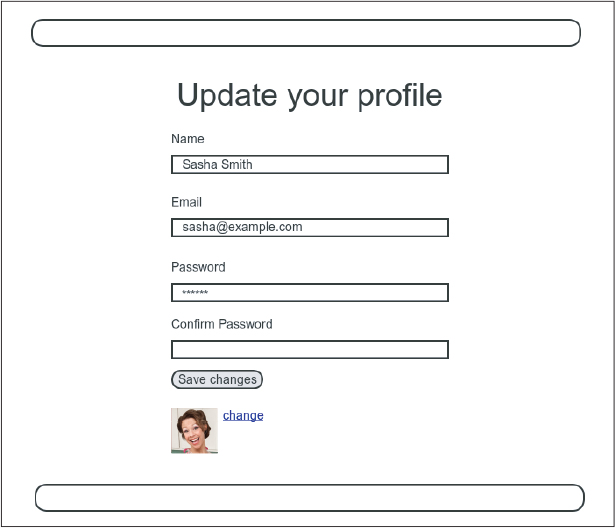
Figure 10.1: A mockup of the user edit page.
Listing 10.1: The user edit action.app/controllers/users_controller.rb
class UsersController < ApplicationController

  def show
    @user = User.find(params[:id])
  end

  def new
    @user = User.new
  end

  def create
    @user = User.new(user_params)
    if @user.save
      reset_session
      log_in @user
      flash[:success] = "Welcome to the Sample App!"
      redirect_to @user
    else
      render 'new', status: :unprocessable_entity
    end
  end

  def edit
    @user = User.find(params[:id])
  end

  private

    def user_params
      params.require(:user).permit(:name, :email, :password,
                                   :password_confirmation)
    end
end
The corresponding user edit view (which you will have to create by hand) is shown in Listing 10.2. Note how closely this resembles the new user view from Listing 7.15; the large overlap suggests factoring the repeated code into a partial, which is left as an exercise (Section 10.1.1).
Listing 10.2: The user edit view.
app/views/users/edit.html.erb
<% provide(:title, "Edit user") %>
<h1>Update your profile</h1>

<div class="row">
  <div class="col-md-6 col-md-offset-3">
    <%= form_with(model: @user) do |f| %>
      <%= render 'shared/error_messages' %>

      <%= f.label :name %>
      <%= f.text_field :name, class: 'form-control' %>

      <%= f.label :email %>
      <%= f.email_field :email, class: 'form-control' %>

      <%= f.label :password %>
      <%= f.password_field :password, class: 'form-control' %>

      <%= f.label :password_confirmation, "Confirmation" %>
      <%= f.password_field :password_confirmation, class: 'form-control' %>

      <%= f.submit "Save changes", class: "btn btn-primary" %>
    <% end %>

    <div class="gravatar_edit">
      <%= gravatar_for @user %>
      <a href="https://gravatar.com/emails" target="_blank">change</a>
    </div>
  </div>
</div>
Here we have reused the shared error_messages partial introduced in Section 7.3.3. By the way, the use of target="_blank" in the Gravatar link is a neat trick to get the browser to open the page in a new window or tab, which is sometimes convenient behavior when linking to third-party sites. (There’s a minor security issue associated with target="_blank"; dealing with this detail is left as an exercise (Section 10.1.1).)
With the @user instance variable from Listing 10.1, the edit page should render properly, as shown in Figure 10.2. Note how Rails automatically pre-fills the “Name” and “Email” fields using the attributes of the existing @user variable.
Looking at the HTML source for Figure 10.2, we see a form tag as expected, as in Listing 10.3 (slight details may differ).
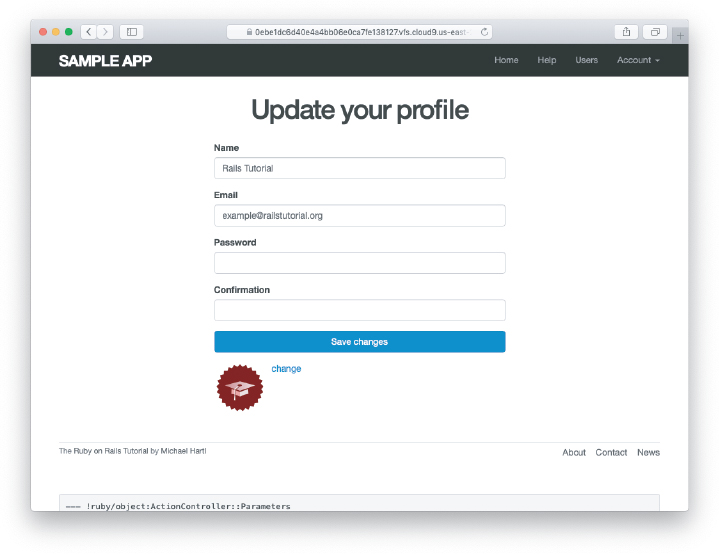
Figure 10.2: The initial user edit page with prefilled name and email.
Listing 10.3: HTML for the edit form defined in Listing 10.2 and shown in Figure 10.2.
<form accept-charset="UTF-8" action="/users/1" class="edit_user"
      id="edit_user_1" method="post">
  <input name="_method" type="hidden" value="patch" />
  .
  .
  .
</form>
Note here the hidden input field:
<input name="_method" type="hidden" value="patch" />Since web browsers can’t natively send PATCH requests (as required by the REST conventions from Table 7.1), Rails fakes it with a POST request and a hidden input field.2
2. Don’t worry about how this works; the details are of interest to developers of the Rails framework itself, and by design are not important for Rails application developers.
There’s another subtlety to address here: The code form_with(@user) in Listing 10.2 is exactly the same as the code in Listing 7.15—so how does Rails know to use a POST request for new users and a PATCH for editing users? The answer is that it is possible to tell whether a user is new or already exists in the database via Active Record’s new_record? boolean method:
$ rails console
>> User.new.new_record?
=> true
>> User.first.new_record?
=> false
When constructing a form using form_with(@user), Rails uses POST if @user.new_record? is true and PATCH if it is false.
As a final touch, we’ll fill in the URL of the settings link in the site navigation. This is easy using the named route edit_user_path from Table 7.1, together with the handy current_user helper method defined in Listing 9.9:
<%= link_to "Settings", edit_user_path(current_user) %>The full application code appears in Listing 10.4.
Listing 10.4: Adding a URL to the “Settings” link in the site layout.app/views/layouts/_header.html.erb
<header class="navbar navbar-fixed-top navbar-inverse">
  <div class="container">
    <%= link_to "sample app", root_path, id: "logo" %>
    <nav>
      <div class="navbar-header">
        <button id="hamburger" type="button" class="navbar-toggle collapsed">
          <span class="sr-only">Toggle navigation</span>
          <span class="icon-bar"></span>
          <span class="icon-bar"></span>
          <span class="icon-bar"></span>
        </button>
      </div>
      <ul id="navbar-menu"
          class="nav navbar-nav navbar-right collapse navbar-collapse">
        <li><%= link_to "Home", root_path %></li>
        <li><%= link_to "Help", help_path %></li>
        <% if logged_in? %>
          <li><%= link_to "Users", '#' %></li>
          <li class="dropdown">
            <a href="#" id="account" class="dropdown-toggle">
              Account <b class="caret"></b>
            </a>
            <ul id="dropdown-menu" class="dropdown-menu">
              <li><%= link_to "Profile", current_user %></li>
              <li><%= link_to "Settings", edit_user_path(current_user) %></li>
              <li class="divider"></li>
              <li>
                <%= link_to "Log out", logout_path,
                                       data: { "turbo-method": :delete } %>
              </li>
            </ul>
          </li>
        <% else %>
          <li><%= link_to "Log in", login_path %></li>
        <% end %>
      </ul>
    </nav>
  </div>
</header>
Exercises
To see other people’s answers and to record your own, subscribe to the Rails Tutorial course (https://www.railstutorial.org/) or to the Learn Enough All Access Subscription (https://www.learnenough.com/all-access).
There’s a minor security issue associated with using
target="_blank"to open URLs in older browsers, which is that the target site gains control of what’s known as the “windowobject” associated with the HTML document. The result is that the target site could potentially introduce malicious content, such as a phishing page. This is extremely unlikely to happen when linking to a reputable site like Gravatar, but it turns out that we can eliminate the risk entirely by setting therelattribute (“relationship”) to"noopener"in the origin link. Add this attribute to the Gravatar edit link in Listing 10.2.Remove the duplicated form code by refactoring the
new.html.erbandedit.html.erbviews to use the partial in Listing 10.5, as shown in Listing 10.6 and Listing 10.7. Note the use of theprovidemethod, which we used before in Section 3.4.3 to eliminate duplication in the layout.33. Thanks to Jose Carlos Montero Gómez for a suggestion that further reduced duplication in the
newandeditpartials.
Listing 10.5: A partial for the new and edit form.app/views/users/_form.html.erb
<%= form_with(model: @user) do |f| %>
  <%= render 'shared/error_messages', object: @user %>

  <%= f.label :name %>
  <%= f.text_field :name, class: 'form-control' %>

  <%= f.label :email %>
  <%= f.email_field :email, class: 'form-control' %>

  <%= f.label :password %>
  <%= f.password_field :password, class: 'form-control' %>

  <%= f.label :password_confirmation %>
  <%= f.password_field :password_confirmation, class: 'form-control' %>

  <%= f.submit yield(:button_text), class: "btn btn-primary" %>
<% end %>
Listing 10.6: The signup view with partial.app/views/users/new.html.erb
<% provide(:title, 'Sign up') %>
<% provide(:button_text, 'Create my account') %>
<h1>Sign up</h1>
<div class="row">
  <div class="col-md-6 col-md-offset-3">
    <%= render 'form' %>
  </div>
</div>
Listing 10.7: The edit view with partial.app/views/users/edit.html.erb
<% provide(:title, 'Edit user') %>
<% provide(:button_text, 'Save changes') %>
<h1>Update your profile</h1>
<div class="row">
  <div class="col-md-6 col-md-offset-3">
    <%= render 'form' %>
    <div class="gravatar_edit">
      <%= gravatar_for @user %>
      <a href="https://gravatar.com/emails" target="_blank">Change</a>
    </div>
  </div>
</div>
10.1.2 Unsuccessful Edits
In this section, we’ll handle unsuccessful edits, following similar ideas to unsuccessful signups (Section 7.3). We start by creating an update action, which uses update (Section 6.1.5) to update the user based on the submitted params hash, as shown in Listing 10.8. With invalid information, the update attempt returns false, so the else branch renders the edit page. We’ve seen this pattern before; the structure closely parallels the first version of the create action (Listing 7.18).
Listing 10.8: The initial user update action.app/controllers/users_controller.rb
class UsersController < ApplicationController

  def show
    @user = User.find(params[:id])
  end

  def new
    @user = User.new
  end

  def create
    @user = User.new(user_params)
    if @user.save
      reset_session
      log_in @user
      flash[:success] = "Welcome to the Sample App!"
      redirect_to @user
    else
      render 'new', status: :unprocessable_entity
    end
  end

  def edit
    @user = User.find(params[:id])
  end

    def update
      @user = User.find(params[:id])
      if @user.update(user_params)
        # Handle a successful update.
      else
        render 'edit', status: :unprocessable_entity
      end
    end

    private

      def user_params
        params.require(:user).permit(:name, :email, :password,
                                     :password_confirmation)
      end
end
Note the use of user_params in the call to update, which uses strong parameters to prevent mass assignment vulnerability (as described in Section 7.3.2).
Because of the existing User model validations and the error-messages partial in Listing 10.2, submission of invalid information results in helpful error messages (Figure 10.3).
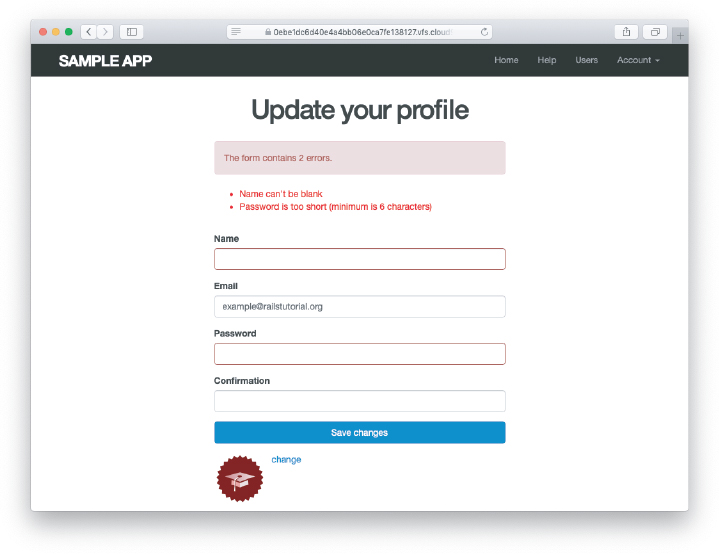
Figure 10.3: Error messages from submitting the update form.
Exercises
To see other people’s answers and to record your own, subscribe to the Rails Tutorial course or to the Learn Enough All Access Subscription.
Confirm by submitting various invalid combinations of username, email, and password that the edit form won’t accept invalid submissions.
10.1.3 Testing Unsuccessful Edits
We left Section 10.1.2 with a working edit form. Following the testing guidelines from Box 3.3, we’ll now write an integration test to catch any regressions. Our first step is to generate an integration test as usual:
$ rails generate integration_test users_edit
      invoke  test_unit
      create    test/integration/users_edit_test.rb
Then we’ll write a simple test of an unsuccessful edit, as shown in Listing 10.9. The test in Listing 10.9 checks for the correct behavior by verifying that the edit template is rendered after getting the edit page and re-rendered upon submission of invalid information. Note the use of the patch method to issue a PATCH request, which follows the same pattern as get, post, and delete.
Listing 10.9: A test for an unsuccessful edit. GREENtest/integration/users_edit_test.rb
require "test_helper"

class UsersEditTest < ActionDispatch::IntegrationTest

  def setup
    @user = users(:michael)
  end

  test "unsuccessful edit" do
    get edit_user_path(@user)
    assert_template 'users/edit'
    patch user_path(@user), params: { user: { name: "",
                                              email: "foo@invalid",
                                              password:              "foo",
                                              password_confirmation: "bar" } }
    assert_template 'users/edit'
  end
end
At this point, the test suite should still be GREEN:
Listing 10.10: GREEN
$ rails testExercises
To see other people’s answers and to record your own, subscribe to the Rails Tutorial course or to the Learn Enough All Access Subscription.
Add a line in Listing 10.9 to test for the correct number of error messages. Hint: Use an
assert_select(Table 5.2) that tests for adivwith classalertcontaining the text “The form contains 4 errors.”
10.1.4 Successful Edits (with TDD)
Now it’s time to get the edit form to work. Editing the profile images is already functional since we’ve outsourced image upload to the Gravatar website: We can edit a Gravatar by clicking on the “change” link in Figure 10.2, which opens the Gravatar site in a new tab (due to target="_blank" in Listing 10.2), as shown in Figure 10.4. Let’s get the rest of the user edit functionality working as well.
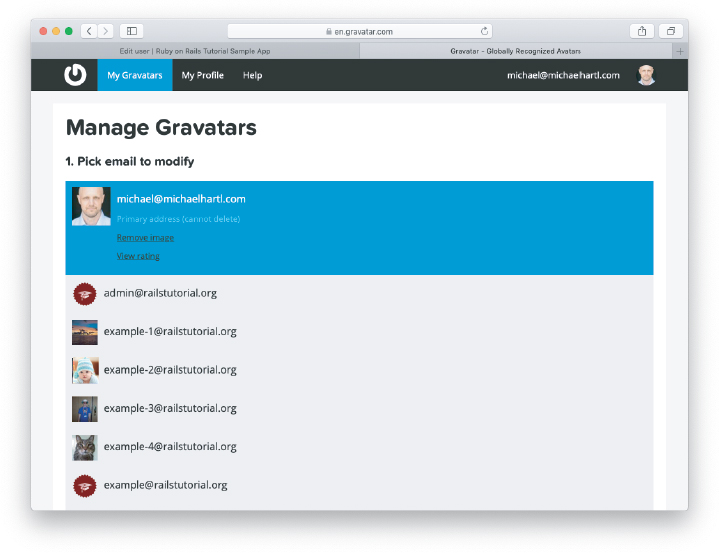
Figure 10.4: The Gravatar image-editing interface.
As you get more comfortable with testing, you might find that it’s useful to write integration tests before writing the application code instead of after. In this context, such tests are sometimes known as acceptance tests, since they determine when a particular feature should be accepted as complete. To see how this works, we’ll complete the user edit feature using test-driven development.
We’ll test for the correct behavior of updating users by writing a test similar to the one shown in Listing 10.9, only this time we’ll submit valid information. Then we’ll check for a nonempty flash message and a successful redirect to the profile page, while also verifying that the user’s information correctly changed in the database. The result appears in Listing 10.11. Note that the password and confirmation in Listing 10.11 are blank, which is convenient for users who don’t want to update their passwords every time they update their names or email addresses. Note also the use of @user.reload (first seen in Section 6.1.5) to reload the user’s values from the database and confirm that they were successfully updated. (This is the kind of detail you could easily forget initially, which is why acceptance testing (and TDD generally) require a certain level of experience to be effective.)
Listing 10.11: A test of a successful edit. RED
test/integration/users_edit_test.rb
require "test_helper"

class UsersEditTest < ActionDispatch::IntegrationTest

  def setup
    @user = users(:michael)
  end
  .
  .
  .
  test "successful edit" do
    get edit_user_path(@user)
    assert_template 'users/edit'
    name  = "Foo Bar"
    email = "[email protected]"
    patch user_path(@user), params: { user: { name:  name,
                                              email: email,
                                              password:              "",
                                              password_confirmation: "" } }
    assert_not flash.empty?
    assert_redirected_to @user
    @user.reload
    assert_equal name,  @user.name
    assert_equal email, @user.email
  end
end
The update action needed to get the tests in Listing 10.11 to pass is similar to the final form of the create action (Listing 8.40), as seen in Listing 10.12.
Listing 10.12: The user update action. REDapp/controllers/users_controller.rb
class UsersController < ApplicationController
  .
  .
  .
  def update
    @user = User.find(params[:id])
    if @user.update(user_params)
      flash[:success] = "Profile updated"
      redirect_to @user
    else
      render 'edit', status: :unprocessable_entity
    end
  end
  .
  .
  .
end
As indicated in the caption to Listing 10.12, the test suite is still RED, which is the result of the password length validation (Listing 6.43) failing due to the empty password and confirmation in Listing 10.11. To get the tests to GREEN, we need to make an exception to the password validation if the password is empty. We can do this by passing the allow_nil: true option to validates, as seen in Listing 10.13.
Listing 10.13: Allowing empty passwords on update. GREENapp/models/user.rb
class User < ApplicationRecord
  attr_accessor :remember_token
  before_save { self.email = email.downcase }
  validates :name, presence: true, length: { maximum: 50 }
  VALID_EMAIL_REGEX = /A[w+-.]+@[a-zd-.]+.[a-z]+z/i
  validates :email, presence: true, length: { maximum: 255 },
                    format: { with: VALID_EMAIL_REGEX },
                    uniqueness: true
  has_secure_password
  validates :password, presence: true, length: { minimum: 6 }, allow_nil: true
  .
  .
  .
end
In case you’re worried that Listing 10.13 might allow new users to sign up with empty passwords, recall from Section 6.3.3 that has_secure_password includes a separate presence validation that specifically catches nil passwords. (Because nil passwords now bypass the main presence validation but are still caught by has_secure_password, this also fixes the duplicate error message mentioned in Section 7.3.3.)
With the code in this section, the user edit page should be working (Figure 10.5), as you can double-check by rerunning the test suite, which should now be GREEN:
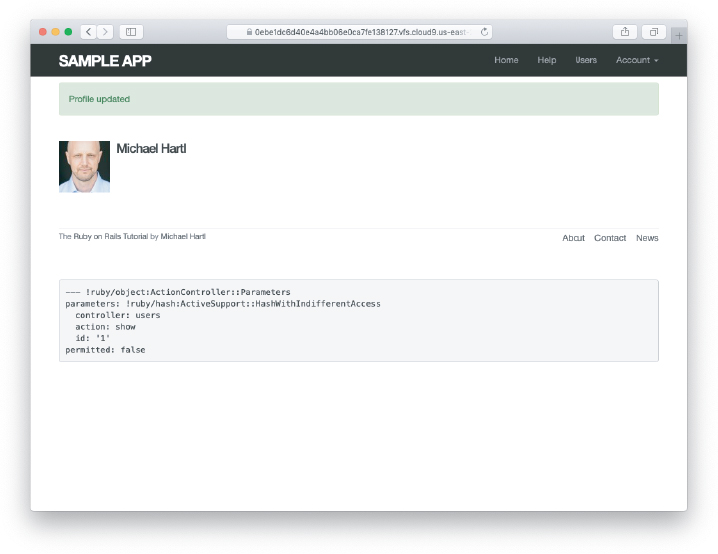
Figure 10.5: The result of a successful edit.
Listing 10.14: GREEN
$ rails testExercises
To see other people’s answers and to record your own, subscribe to the Rails Tutorial course or to the Learn Enough All Access Subscription.
Double-check that you can now make edits by making a few changes on the development version of the application.
What happens when you change the email address to one without an associated Gravatar?
10.2 Authorization
In the context of web applications, authentication allows us to identify users of our site, while authorization lets us control what they can do. One nice effect of building the authentication machinery in Chapter 8 is that we are now in a position to implement authorization as well.
Although the edit and update actions from Section 10.1 are functionally complete, they suffer from a ridiculous security flaw: They allow anyone (even non-logged-in users) to access either action and update the information for any user. In this section, we’ll implement a security model that requires users to be logged in and prevents them from updating any information other than their own.
In Section 10.2.1, we’ll handle the case of non-logged-in users who try to access a protected page to which they might normally have access. Because this could easily happen in the normal course of using the application, such users will be forwarded to the login page with a helpful message, as mocked up in Figure 10.6. On the other hand, users who try to access a page for which they would never be authorized (such as a logged-in user trying to access a different user’s edit page) will be redirected to the root URL (Section 10.2.2).
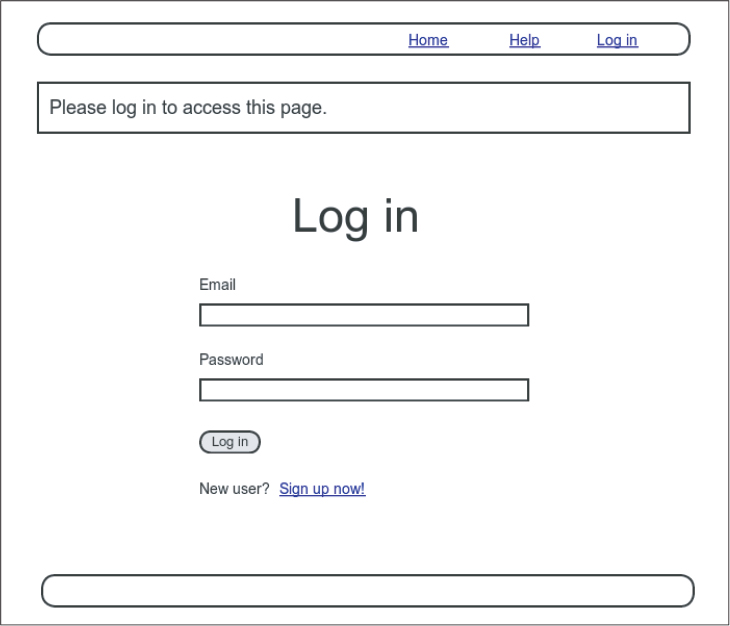
Figure 10.6: A mockup of the result of visiting a protected page.
10.2.1 Requiring Logged-in Users
To implement the forwarding behavior shown in Figure 10.6, we’ll use a before filter in the Users controller. Before filters use the before_action command to arrange for a particular method to be called before the given actions.4 To require users to be logged in, we define a logged_in_user method and invoke it using before_action :logged_in_user, as shown in Listing 10.15.
4. The command for before filters used to be called before_filter, but the Rails core team decided to rename it to emphasize that the filter takes place before particular controller actions.
Listing 10.15: Adding a logged_in_user before filter. REDapp/controllers/users_controller.rb
class UsersController < ApplicationController
  before_action :logged_in_user, only: [:edit, :update]
  .
  .
  .
  private

    def user_params
      params.require(:user).permit(:name, :email, :password,
                                   :password_confirmation)
    end

    # Before filters

    # Confirms a logged-in user.
    def logged_in_user
      unless logged_in?
        flash[:danger] = "Please log in."
        redirect_to login_url, status: :see_other
      end
    end
end
By default, before filters apply to every action in a controller, so in Listing 10.15 we restrict the filter to act only on the :edit and :update actions by passing the appropriate only: options hash. Because the filter might be used to protect :destroy actions at some point, we’ve future-proofed our code by including the same :see_other status code used in Listing 8.45. (Recall from Section 8.3 that, for full compatibility with Turbo, the :see_other status code is necessary when redirecting after a DELETE request.) And indeed we’ll run into exactly this situation when deleting users in Section 10.4.2, and again when deleting microposts in Section 13.3.1.
We can see the result of the before filter in Listing 10.15 by logging out and attempting to access the user edit page /users/1/edit, as seen in Figure 10.7.
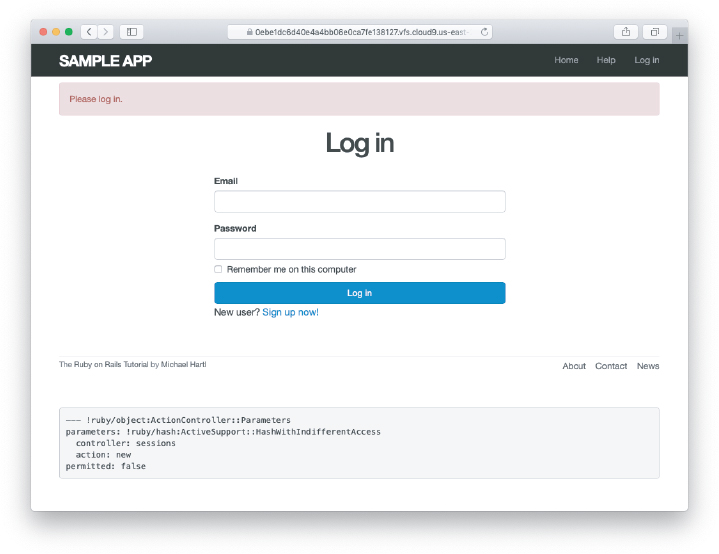
Figure 10.7: The login form after trying to access a protected page.
As indicated in the caption of Listing 10.15, our test suite is currently RED:
Listing 10.16: RED
$ rails testThe reason is that the edit and update actions now require a logged-in user, but no user is logged in inside the corresponding tests.
We’ll fix our test suite by logging the user in before hitting the edit or update actions. This is easy using the log_in_as helper developed in Section 9.3 (Listing 9.25), as shown in Listing 10.17.
Listing 10.17: Logging in a test user. GREENtest/integration/users_edit_test.rb
require "test_helper"

class UsersEditTest < ActionDispatch::IntegrationTest

  def setup
    @user = users(:michael)
  end

  test "unsuccessful edit" do
    log_in_as(@user)
    get edit_user_path(@user)
    .
    .
    .
  end

  test "successful edit" do
    log_in_as(@user)
    get edit_user_path(@user)
    .
    .
    .
  end
end
(We could eliminate some duplication by putting the test login in the setup method of Listing 10.17, but in Section 10.2.3 we’ll change one of the tests to visit the edit page before logging in, which isn’t possible if the login step happens during the test setup.)
At this point, our test suite should be GREEN:
Listing 10.18: GREEN
$ rails testEven though our test suite is now passing, we’re not finished with the before filter, because the suite is still GREEN even if we remove our security model, as you can verify by commenting it out (Listing 10.19). This is a Bad Thing—of all the regressions we’d like our test suite to catch, a massive security hole is probably #1, so the code in Listing 10.19 should definitely be RED. Let’s write tests to arrange that.
Listing 10.19: Commenting out the before filter to test our security model. GREENapp/controllers/users_controller.rb
class UsersController < ApplicationController
  # before_action :logged_in_user, only: [:edit, :update]
  .
  .
  .
end
Because the before filter operates on a per-action basis, we’ll put the corresponding tests in the Users controller test. The plan is to hit the edit and update actions with the right kinds of requests and verify that the flash is set and that the user is redirected to the login path. From Table 7.1, we see that the proper requests are GET and PATCH, respectively, which means using the get and patch methods inside the tests. The results (which include adding a setup method to define an @user variable) appear in Listing 10.20.
Listing 10.20: Testing that edit and update are protected. REDtest/controllers/users_controller_test.rb
require "test_helper"

class UsersControllerTest < ActionDispatch::IntegrationTest

  def setup
    @user = users(:michael)
  end
  .
  .
  .
  test "should redirect edit when not logged in" do
    get edit_user_path(@user)
    assert_not flash.empty?
    assert_redirected_to login_url
  end

  test "should redirect update when not logged in" do
    patch user_path(@user), params: { user: { name: @user.name,
                                              email: @user.email } }
    assert_not flash.empty?
    assert_redirected_to login_url
  end
end
Note that the second test shown in Listing 10.20 involves using the patch method to send a PATCH request to user_path(@user). According to Table 7.1, such a request gets routed to the update action in the Users controller, as required.
The test suite should now be RED, as required. To get it to GREEN, just uncomment the before filter (Listing 10.21).
Listing 10.21: Uncommenting the before filter. GREENapp/controllers/users_controller.rb
class UsersController < ApplicationController
  before_action :logged_in_user, only: [:edit, :update]
  .
  .
  .
end
With that, our test suite should be GREEN:
Listing 10.22: GREEN
$ rails testAny accidental exposure of the edit methods to unauthorized users will now be caught immediately by our test suite.
Exercises
To see other people’s answers and to record your own, subscribe to the Rails Tutorial course or to the Learn Enough All Access Subscription.
As noted above, by default before filters apply to every action in a controller, which in our cases is an error (requiring, e.g., that users log in to hit the signup page, which is absurd). By commenting out the
only:hash in Listing 10.15, confirm that the test suite catches this error.
10.2.2 Requiring the Right User
Of course, requiring users to log in isn’t quite enough; users should only be allowed to edit their own information. As we saw in Section 10.2.1, it’s easy to have a test suite that misses an essential security flaw, so we’ll proceed using test-driven development to be sure our code implements the security model correctly. To do this, we’ll add tests to the Users controller test to complement the ones shown in Listing 10.20.
In order to make sure users can’t edit other users’ information, we need to be able to log in as a second user. This means adding a second user to our users fixture file, as shown in Listing 10.23.
Listing 10.23: Adding a second user to the fixture file.test/fixtures/users.yml
michael:
  name: Michael Example
  email: [email protected]
  password_digest: <%= User.digest('password') %>
archer:
  name: Sterling Archer
  email: [email protected]
  password_digest: <%= User.digest('password') %>
By using the log_in_as method defined in Listing 9.25, we can test the edit and update actions as in Listing 10.24. Note that we expect to redirect users to the root path instead of the login path because a user trying to edit a different user would already be logged in.
Listing 10.24: Tests for trying to edit as the wrong user. REDtest/controllers/users_controller_test.rb
require "test_helper"

class UsersControllerTest < ActionDispatch::IntegrationTest

  def setup
    @user       = users(:michael)
    @other_user = users(:archer)
  end
  .
  .
  .
  test "should redirect edit when logged in as wrong user" do
    log_in_as(@other_user)
    get edit_user_path(@user)
    assert flash.empty?
    assert_redirected_to root_url
  end

  test "should redirect update when logged in as wrong user" do
    log_in_as(@other_user)
    patch user_path(@user), params: { user: { name: @user.name,
                                              email: @user.email } }
    assert flash.empty?
    assert_redirected_to root_url
  end
end
To redirect users trying to edit another user’s profile, we’ll add a second method called correct_user, together with a before filter to call it (Listing 10.25). Note that the correct_user before filter defines the @user variable, so Listing 10.25 also shows that we can eliminate the @user assignments in the edit and update actions. As with logged_in_user, we’ve future-proofed our code with status :see_other after the redirect so the filter will still work if it is used to protect a destroy action (Section 8.3).
Listing 10.25: A before filter to protect the edit/update pages. GREENapp/controllers/users_controller.rb
class UsersController < ApplicationController
  before_action :logged_in_user, only: [:edit, :update]
  before_action :correct_user,   only: [:edit, :update]
  .
  .
  .
  def edit
  end

  def update
    if @user.update(user_params)
      flash[:success] = "Profile updated"
      redirect_to @user
    else
      render 'edit', status: :unprocessable_entity
    end
  end
  .
  .
  .
  private

    def user_params
      params.require(:user).permit(:name, :email, :password,
                                   :password_confirmation)
    end

    # Before filters

    # Confirms a logged-in user.
    def logged_in_user
      unless logged_in?
        flash[:danger] = "Please log in."
        redirect_to login_url, status: :see_other
      end
    end

    # Confirms the correct user.
    def correct_user
      @user = User.find(params[:id])
      redirect_to(root_url, status: :see_other) unless @user == current_user
    end
end
At this point, our test suite should be GREEN:
Listing 10.26: GREEN
$ rails testAs a final refactoring, we’ll adopt a common convention and define a current_user? boolean method for use in the correct_user before filter. We’ll use this method to replace code like
unless @user == current_userwith the more expressive
unless current_user?(@user)The result appears in Listing 10.27. Note that by writing user && user == current_user, we also catch the edge case where user is nil.5 Also note that Listing 10.27 incorporates the solution to the exercise on session fixation from Section 9.3.2; if you didn’t complete that exercise, be sure to update your log_in and current_user methods as in Listing 10.27 and your User model with the code from Listing 10.28 (which is a copy of Listing 9.37).
5. Thanks to reader Andrew Moor for pointing this out. Andrew also noted that we can use the safe navigation operator introduced in Section 8.2.6 to write this as user&. == current_user.
Listing 10.27: The current_user? method.app/helpers/sessions_helper.rb
module SessionsHelper

  # Logs in the given user.
  def log_in(user)
    session[:user_id] = user.id
    # Guard against session replay attacks.
    # See https://bit.ly/33UvK0w for more.
    session[:session_token] = user.session_token
  end

  # Remembers a user in a persistent session.
  def remember(user)
    user.remember
    cookies.permanent.encrypted[:user_id] = user.id
    cookies.permanent[:remember_token] = user.remember_token
  end

  # Returns the user corresponding to the remember token cookie.
  def current_user
    if (user_id = session[:user_id])
      user = User.find_by(id: user_id)
      if user && session[:session_token] == user.session_token
        @current_user = user
      end
    elsif (user_id = cookies.encrypted[:user_id])
      user = User.find_by(id: user_id)
      if user && user.authenticated?(cookies[:remember_token])
        log_in user
        @current_user = user
      end
    end
  end

  # Returns true if the given user is the current user.
  def current_user?(user)
    user && user == current_user
  end
  .
  .
  .
end
Listing 10.28: Adding a session token method on users (a copy of Listing 9.37).app/models/user.rb
class User < ApplicationRecord
  .
  .
  .
  # Remembers a user in the database for use in persistent sessions.
  def remember
    self.remember_token = User.new_token
    update_attribute(:remember_digest, User.digest(remember_token))
    remember_digest
  end

  # Returns a session token to prevent session hijacking.
  # We reuse the remember digest for convenience.
  def session_token
    remember_digest || remember
  end
  .
  .
  .
end
Replacing the direct comparison in current_user with the boolean method from Listing 10.27 gives the code shown in Listing 10.29.
Listing 10.29: The final correct_user before filter. GREENapp/controllers/users_controller.rb
class UsersController < ApplicationController
  before_action :logged_in_user, only: [:edit, :update]
  before_action :correct_user,   only: [:edit, :update]
  .
  .
  .
  def edit
  end

  def update
    if @user.update(user_params)
      flash[:success] = "Profile updated"
      redirect_to @user
    else
      render 'edit', status: :unprocessable_entity
    end
  end
  .
  .
  .
  private

    def user_params
      params.require(:user).permit(:name, :email, :password,
                                   :password_confirmation)
    end

    # Before filters

    # Confirms a logged-in user.
    def logged_in_user
      unless logged_in?
        flash[:danger] = "Please log in."
        redirect_to login_url, status: :see_other
      end
    end

    # Confirms the correct user.
    def correct_user
      @user = User.find(params[:id])
      redirect_to(root_url, status: :see_other) unless current_user?(@user)
    end
end
Exercises
To see other people’s answers and to record your own, subscribe to the Rails Tutorial course or to the Learn Enough All Access Subscription.
Why is it important to protect both the
editandupdateactions?Which action could you more easily test in a browser?
10.2.3 Friendly Forwarding
Our site authorization is complete as written, but there is one minor blemish: When users try to access a protected page, they are currently redirected to their profile pages regardless of where they were trying to go. In other words, if a non-logged-in user tries to visit the edit page, after logging in the user will be redirected to /users/1 instead of /users/1/edit. It would be much friendlier to redirect them to their intended destination instead.
The application code will turn out to be relatively complicated, but we can write a ridiculously simple test for friendly forwarding just by reversing the order of logging in and visiting the edit page in Listing 10.17. As seen in Listing 10.30, the resulting test tries to visit the edit page, then logs in, and then checks that the user is redirected to the edit page instead of the default profile page. (Listing 10.30 also removes the test for rendering the edit template since that’s no longer the expected behavior.)
Listing 10.30: A test for friendly forwarding. REDtest/integration/users_edit_test.rb
require "test_helper"

class UsersEditTest < ActionDispatch::IntegrationTest

  def setup
    @user = users(:michael)
  end
  .
  .
  .
  test "successful edit with friendly forwarding" do
    get edit_user_path(@user)
    log_in_as(@user)
    assert_redirected_to edit_user_url(@user)
    name  = "Foo Bar"
    email = "[email protected]"
    patch user_path(@user), params: { user: { name:  name,
                                              email: email,
                                              password:              "",
                                              password_confirmation: "" } }
    assert_not flash.empty?
    assert_redirected_to @user
    @user.reload
    assert_equal name,  @user.name
    assert_equal email, @user.email
  end
end
Now that we have a failing test, we’re ready to implement friendly forwarding. In order to forward users to their intended destination, we need to store the location of the requested page somewhere, which we’ll encapsulate in a store_location method in the Sessions helper (Listing 10.31).
Listing 10.31: Code to store the forwarding URL. REDapp/helpers/sessions_helper.rb
module SessionsHelper
  .
  .
  .
  # Stores the URL trying to be accessed.
  def store_location
    session[:forwarding_url] = request.original_url if request.get?
  end
end
Here the storage mechanism for the forwarding URL is the same session facility we used in Section 8.2.1 to log the user in. Listing 10.31 also uses the request object (via request.original_url) to get the URL of the requested page.
The store_location method in Listing 10.31 puts the requested URL in the session variable under the key :forwarding_url, but only for a GET request. This prevents storing the forwarding URL if a user, say, submits a form when not logged in (which is an edge case but could happen if, e.g., a user deleted the session cookies by hand before submitting the form). In such a case, the resulting redirect would issue a GET request to a URL expecting POST, PATCH, or DELETE, thereby causing an error. Including if request.get? prevents this from happening.6
6. Thanks to reader Yoel Adler for pointing out this subtle issue, and for discovering the solution.
To make use of store_location, we need to add it to the logged_in_user before filter, as shown in Listing 10.32.
Listing 10.32: Adding store_location to the logged-in user before filter. REDapp/controllers/users_controller.rb
class UsersController < ApplicationController
  before_action :logged_in_user, only: [:edit, :update]
  before_action :correct_user,   only: [:edit, :update]
  .
  .
  .
  def edit
  end
  .
  .
  .
  private

    def user_params
      params.require(:user).permit(:name, :email, :password,
                                   :password_confirmation)
    end

    # Before filters

    # Confirms a logged-in user.
    def logged_in_user
      unless logged_in?
        store_location
        flash[:danger] = "Please log in."
        redirect_to login_url, status: :see_other
      end
    end

    # Confirms the correct user.
    def correct_user
      @user = User.find(params[:id])
      redirect_to(root_url, status: :see_other) unless current_user?(@user)
    end
end
To implement the forwarding itself, we’ll redirect to the forwarding URL if it exists, or some default URL otherwise, which we add to the Sessions controller create action to redirect after successful login. Because of the call to reset_session (added in Listing 8.15 to guard against session-fixation attacks), we need to pull the forwarding URL (if any) out of the session first:
forwarding_url = session[:forwarding_url]
reset_session
log_in user
We can then redirect either to that URL or, if it’s nil, to the user’s profile:
redirect_to forwarding_url || userThe result appears in Listing 10.33. (Note: If you completed the exercise in Section 9.3.1, you should replace user with @user in Listing 10.33.)
Listing 10.33: The Sessions create action with friendly forwarding. GREENapp/controllers/sessions_controller.rb
class SessionsController < ApplicationController
  .
  .
  .
  def create
    user = User.find_by(email: params[:session][:email].downcase)
    if user && user.authenticate(params[:session][:password])
      forwarding_url = session[:forwarding_url]
      reset_session
      params[:session][:remember_me] == '1' ? remember(user) : forget(user)
      log_in user
      redirect_to forwarding_url || user
    else
      flash.now[:danger] = 'Invalid email/password combination'
      render 'new', status: :unprocessable_entity
    end
  end
  .
  .
  .
end
Note that the call to reset_session in Listing 10.33 automatically removes the forwarding URL from the session, which is important because otherwise subsequent login attempts would forward to the protected page until the user closed their browser. (Testing for this is left as an exercise (Section 10.2.3).)
With that, the friendly forwarding integration test in Listing 10.30 should pass, and the basic user authentication and page protection implementation is complete. As usual, it’s a good idea to verify that the test suite is GREEN before proceeding:
Listing 10.34: GREEN
$ rails testExercises
To see other people’s answers and to record your own, subscribe to the Rails Tutorial course or to the Learn Enough All Access Subscription.
Write a test to make sure that friendly forwarding only forwards to the given URL the first time. On subsequent login attempts, the forwarding URL should revert to the default (i.e., the profile page). Hint: Add to the test in Listing 10.30 by checking for the right value of
session[:forwarding_url].Put a
debugger(Section 7.1.3) in the Sessions controller’snewaction, then log out and try to visit /users/1/edit. Confirm in the debugger that the value ofsession[:forwarding_url]is correct. What is the value ofrequest.get?for thenewaction? (Sometimes the terminal can freeze up or act strangely when you’re using the debugger; use your technical sophistication (Box 1.2) to resolve any issues.)
10.3 Showing All Users
In this section, we’ll add the penultimate user action, the index action, which is designed to display all the users instead of just one. Along the way, we’ll learn how to seed the database with sample users and how to paginate the user output so that the index page can scale up to display a potentially large number of users. A mockup of the result—users, pagination links, and a “Users” navigation link—appears in Figure 10.8. In Section 10.4, we’ll add an administrative interface to the users index so that users can also be destroyed.
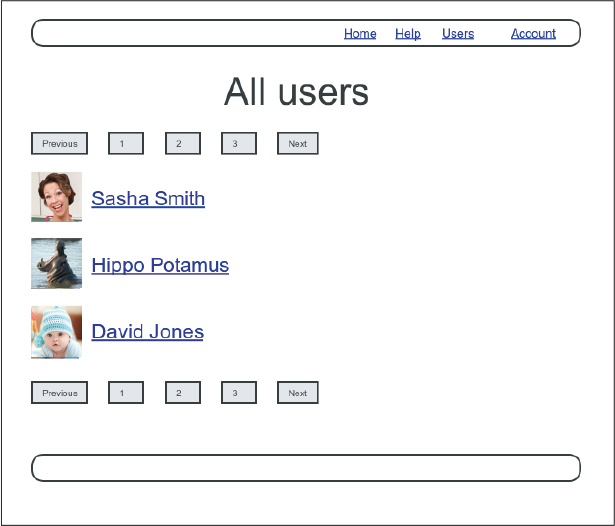
Figure 10.8: A mockup of the users index page.
10.3.1 Users Index
To get started with the users index, we’ll first implement a security model. Although we’ll keep individual user show pages visible to all site visitors, the user index will be restricted to logged-in users so that there’s a limit to how much unregistered users can see by default.7
7. This is the same authorization model used by Twitter.
To protect the index page from unauthorized access, we’ll first add a short test to verify that the index action is redirected properly (Listing 10.35).
Listing 10.35: Testing the index action redirect. REDtest/controllers/users_controller_test.rb
require "test_helper"

class UsersControllerTest < ActionDispatch::IntegrationTest

  def setup
     @user       = users(:michael)
     @other_user = users(:archer)
  end

  test "should get new" do
    get signup_path
    assert_response :success
  end

  test "should redirect index when not logged in" do
    get users_path
    assert_redirected_to login_url
  end
  .
  .
  .
end
Then we just need to add an index action and include it in the list of actions protected by the logged_in_user before filter (Listing 10.36).
Listing 10.36: Requiring a logged-in user for the index action. GREENapp/controllers/users_controller.rb
class UsersController < ApplicationController
  before_action :logged_in_user, only: [:index, :edit, :update]
  before_action :correct_user,   only: [:edit, :update]

  def index
  end

  def show
    @user = User.find(params[:id])
  end
  .
  .
  .
end
To display the users themselves, we need to make a variable containing all the site’s users and then render each one by iterating through them in the index view. As you may recall from the corresponding action in the toy app (Listing 2.9), we can use User.all to pull all the users out of the database, assigning them to an @users instance variable for use in the view, as seen in Listing 10.37. (If displaying all the users at once seems like a bad idea, you’re right, and we’ll remove this blemish in Section 10.3.3.)
Listing 10.37: The user index action.app/controllers/users_controller.rb
class UsersController < ApplicationController
  before_action :logged_in_user, only: [:index, :edit, :update]
  .
  .
  .
  def index
    @users = User.all
  end
  .
  .
  .
end
To make the actual index page, we’ll make a view (which you’ll have to create) that iterates through the users and wraps each one in an li tag. We do this with the each method, displaying each user’s Gravatar and name, while wrapping the whole thing in a ul tag (Listing 10.38).
Listing 10.38: The users index view.app/views/users/index.html.erb
<% provide(:title, 'All users') %>
<h1>All users</h1>

<ul class="users">
  <% @users.each do |user| %>
    <li>
      <%= gravatar_for user, size: 50 %>
      <%= link_to user.name, user %>
    </li>
  <% end %>
</ul>
The code in Listing 10.38 uses the result of Listing 10.39 from Section 7.1.4, which allows us to pass an option to the Gravatar helper specifying a size other than the default. If you didn’t do that exercise, update your Users helper file with the contents of Listing 10.39 before proceeding. (You are also welcome to use the Ruby 2.0–style version from Listing 7.13 instead.)
Listing 10.39: Adding an options hash in the gravatar_for helper.app/helpers/users_helper.rb
module UsersHelper

  # Returns the Gravatar for the given user.
  def gravatar_for(user, options = { size: 80 })
    size         = options[:size]
    gravatar_id  = Digest::MD5::hexdigest(user.email.downcase)
    gravatar_url = "https://secure.gravatar.com/avatar/#{gravatar_id}?s=#{size}"
    image_tag(gravatar_url, alt: user.name, class: "gravatar")
  end
end
Let’s also add a little CSS (or, rather, SCSS) for style (Listing 10.40).
Listing 10.40: CSS for the users index.app/assets/stylesheets/custom.scss
.
.
.
/* Users index */

.users {
  list-style: none;
  margin: 0;
  li {
    overflow: auto;
    padding: 10px 0;
    border-bottom: 1px solid $gray-lighter;
  }
}
Finally, we’ll add the URL to the users link in the site’s navigation header using users_path, thereby using the last of the unused named routes in Table 7.1. The result appears in Listing 10.41.
Listing 10.41: Adding the URL to the users link.app/views/layouts/_header.html.erb
<header class="navbar navbar-fixed-top navbar-inverse">
  <div class="container">
    <%= link_to "sample app", root_path, id: "logo" %>
    <nav>
      <div class="navbar-header">
        <button id="hamburger" type="button" class="navbar-toggle collapsed">
          <span class="sr-only">Toggle navigation</span>
          <span class="icon-bar"></span>
          <span class="icon-bar"></span>
          <span class="icon-bar"></span>
        </button>
      </div>
      <ul id="navbar-menu"
          class="nav navbar-nav navbar-right collapse navbar-collapse">
        <li><%= link_to "Home", root_path %></li>
        <li><%= link_to "Help", help_path %></li>
        <% if logged_in? %>
          <li><%= link_to "Users", users_path %></li>
          <li class="dropdown">
            <a href="#" id="account" class="dropdown-toggle">
              Account <b class="caret"></b>
            </a>
            <ul id="dropdown-menu" class="dropdown-menu">
              <li><%= link_to "Profile", current_user %></li>
              <li><%= link_to "Settings", edit_user_path(current_user) %></li>
              <li class="divider"></li>
              <li>
                <%= link_to "Log out", logout_path,
                                       data: { "turbo-method": :delete } %>
              </li>
            </ul>
          </li>
        <% else %>
          <li><%= link_to "Log in", login_path %></li>
        <% end %>
      </ul>
    </nav>
  </div>
</header>
With that, the users index is fully functional, with all tests GREEN:
Listing 10.42: GREEN
$ rails testOn the other hand, as seen in Figure 10.9, it is a bit… lonely. Let’s remedy this sad situation.
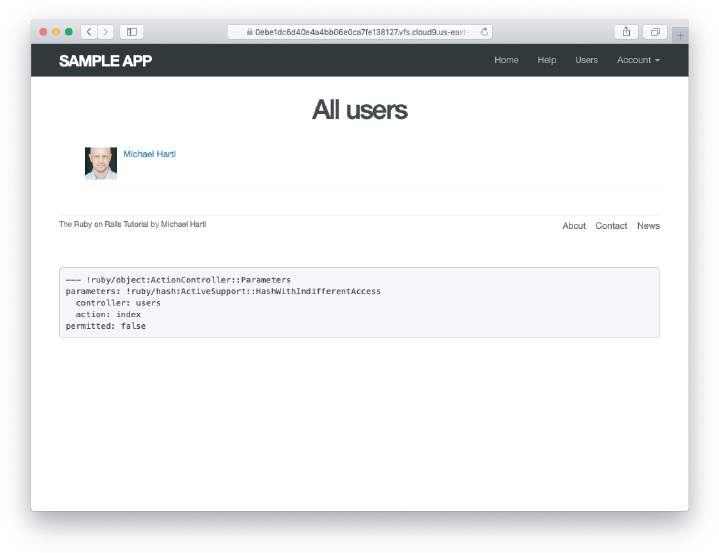
Figure 10.9: The users index page with only one user.
Exercises
To see other people’s answers and to record your own, subscribe to the Rails Tutorial course or to the Learn Enough All Access Subscription.
We’ve now filled in all the links in the site layout. Write an integration test for all the layout links, including the proper behavior for logged-in and non-logged-in users. Hint: Use the
log_in_ashelper and add to the steps shown in Listing 5.32.
10.3.2 Sample Users
In this section, we’ll give our lonely sample user some company. Of course, to create enough users to make a decent users index, we could use our web browser to visit the signup page and make the new users one by one, but a far better solution is to use Ruby to make the users for us.
First, we’ll add the Faker gem to the Gemfile, which will allow us to make sample users with semi-realistic names and email addresses (Listing 10.43).8 (Ordinarily, you’d probably want to restrict the faker gem to a development environment, but in the case of the sample app we’ll be using it on our production site as well (Section 10.5).)
8. As always, you should use the version numbers listed at gemfiles-7th-ed.railstutorial.org if they differ from the ones listed here.
Listing 10.43: Adding the Faker gem to the Gemfile.
source "https://rubygems.org"
git_source(:github) { |repo| "https://github.com/#{repo}.git" }

ruby "3.1.2"

gem "rails",           "7.0.4"
gem "bcrypt",          "3.1.13"
gem "faker",           "2.21.0"
gem "bootstrap-sass",  "3.4.1"
.
.
.
Then install as usual:
$ bundle _2.3.14_ installNext, we’ll add a Ruby program to seed the database with sample users, for which Rails uses the standard file db/seeds.rb. The result appears in Listing 10.44. (The code in Listing 10.44 is a bit advanced, so don’t worry too much about the details.)
Listing 10.44: A program for seeding the database with sample users.db/seeds.rb
# Create a main sample user.
User.create!(name:  "Example User",
             email: "[email protected]",
             password:              "foobar",
             password_confirmation: "foobar")

# Generate a bunch of additional users.
99.times do |n|
  name = Faker::Name.name
  email = "example-#{n+1}@railstutorial.org"
  password = "password"
  User.create!(name:  name,
               email: email,
               password:              password,
               password_confirmation: password)
end
The code in Listing 10.44 creates an example user with name and email address replicating our previous one, and then makes 99 more. The create! method is just like the create method, except it raises an exception (Section 6.1.4) for an invalid user rather than returning false. This behavior makes debugging easier by avoiding silent errors.
With the code as in Listing 10.44, we can reset the database and then invoke the code in Listing 10.44 using db:seed:9
9. These two commands can be combined as rails db:reset, but here we use separate commands for clarity.
$ rails db:migrate:reset
$ rails db:seed
Seeding the database can be slow, and on some systems could take up to a few minutes. Also, some readers have reported that they are unable to run the reset command if the Rails server is running, so you may have to stop the server first before proceeding (Box 1.2).
After running rails db:seed, our application should have 100 sample users. As seen in Figure 10.10, I’ve taken the liberty of associating the first few sample addresses with Gravatars so that they’re not all the default Gravatar image.
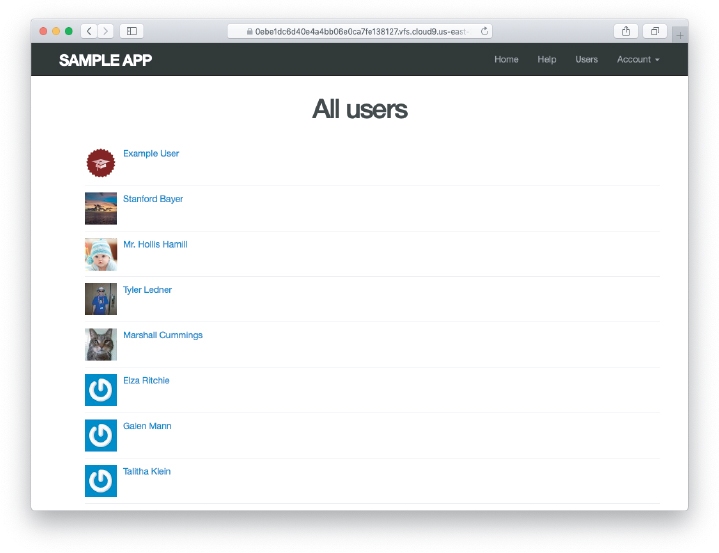
Figure 10.10: The users index page with 100 sample users.
Exercises
To see other people’s answers and to record your own, subscribe to the Rails Tutorial course or to the Learn Enough All Access Subscription.
Verify that trying to visit the edit page of another user results in a redirect as required by Section 10.2.2.
10.3.3 Pagination
Our original user doesn’t suffer from loneliness anymore, but now we have the opposite problem: Our user has too many companions, and they all appear on the same page. Right now there are a hundred, which is already a reasonably large number, and on a real site it could be thousands. The solution is to paginate the users, so that (for example) only 30 show up on a page at any one time.
There are several pagination methods available in Rails; we’ll use one of the simplest and most robust, called will_paginate. To use it, we need to include both the will_paginate gem and bootstrap-will_paginate, which configures will_paginate to use Bootstrap’s pagination styles. The updated Gemfile appears in Listing 10.45.10
10. As always, you should use the version numbers listed at gemfiles-7th-ed.railstutorial.org if they differ from the ones listed here.
Listing 10.45: Including will_paginate in the Gemfile.
source "https://rubygems.org"
git_source(:github) { |repo| "https://github.com/#{repo}.git" }

gem "rails",                    "7.0.4"
gem "bcrypt",                   "3.1.13"
gem "faker",                    "2.21.0"
gem "will_paginate",            "3.3.1"
gem "bootstrap-will_paginate",  "1.0.0"
.
.
.
Then run bundle install:
$ bundle _2.3.14_ installYou should also restart the web server to ensure that the new gems are loaded properly.
To get pagination working, we need to add some code to the index view telling Rails to paginate the users, and we need to replace User.all in the index action with an object that knows about pagination. We’ll start by adding the special will_paginate method in the view (Listing 10.46); we’ll see in a moment why the code appears both above and below the user list.
Listing 10.46: The users index with pagination.app/views/users/index.html.erb
<% provide(:title, 'All users') %>
<h1>All users</h1>

<%= will_paginate %>

<ul class="users">
  <% @users.each do |user| %>
    <li>
      <%= gravatar_for user, size: 50 %>
      <%= link_to user.name, user %>
    </li>
  <% end %>
</ul>

<%= will_paginate %>
The will_paginate method is a little magical; inside a users view, it automatically looks for an @users object, and then displays pagination links to access other pages. The view in Listing 10.46 doesn’t work yet, though, because currently @users contains the results of User.all (Listing 10.37), whereas will_paginate requires that we paginate the results explicitly using the paginate method:
$ rails console
>> User.paginate(page: 1)
  User Load (1.5ms)  SELECT "users".* FROM "users" LIMIT 11 OFFSET 0
   (1.7ms)  SELECT COUNT(*) FROM "users"
=> #<ActiveRecord::Relation [#<User id: 1,...
>> User.paginate(page: 1).length
  User Load (3.0ms)  SELECT "users".* FROM "users" LIMIT ? OFFSET ?
  [["LIMIT", 30], ["OFFSET", 0]]
=> 30
Note that paginate takes a hash argument with key :page and value equal to the page requested. User.paginate pulls the users out of the database one chunk at a time (30 by default), based on the :page parameter. So, for example, page 1 is users 1–30, page 2 is users 31–60, etc. If page is nil, paginate simply returns the first page. (The console result above shows 11 results rather than 30 due to a console limit in Active Record itself, but calling the length method bypasses this restriction.)
Using the paginate method, we can paginate the users in the sample application by using paginate in place of all in the index action (Listing 10.47). Here the page parameter comes from params[:page], which is generated automatically by will_paginate.
Listing 10.47: Paginating the users in the index action.app/controllers/users_controller.rb
class UsersController < ApplicationController
  before_action :logged_in_user, only: [:index, :edit, :update]
  .
  .
  .
  def index
    @users = User.paginate(page: params[:page])
  end
  .
  .
  .
end
The users index page should now be working, appearing as in Figure 10.11. (On some systems, you may have to restart the Rails server at this point.) Because we included will_paginate both above and below the user list, the pagination links appear in both places.
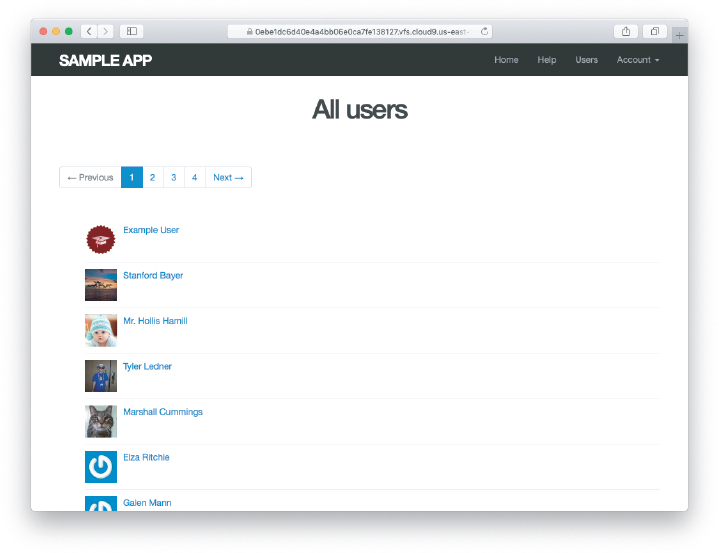
Figure 10.11: The users index page with pagination.
If you now click on either the 2 link or Next link, you’ll get the second page of results, as shown in Figure 10.12.
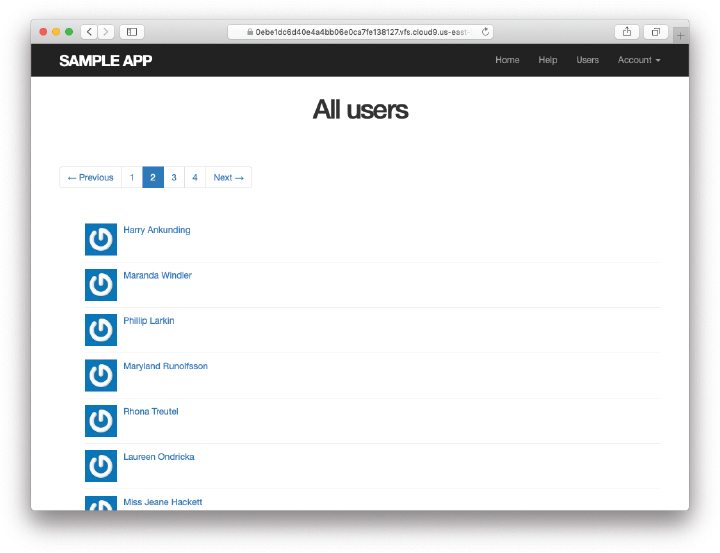
Figure 10.12: Page 2 of the users index.
Exercises
To see other people’s answers and to record your own, subscribe to the Rails Tutorial course or to the Learn Enough All Access Subscription.
Confirm at the console that setting the page to
nilpulls out the first page of users.What is the Ruby class of the pagination object? How does it compare to the class of
User.all?
10.3.4 Users Index Test
Now that our users index page is working, we’ll write a lightweight test for it, including a minimal test for the pagination from Section 10.3.3. The idea is to log in, visit the index path, verify the first page of users is present, and then confirm that pagination is present on the page. For these last two steps to work, we need to have enough users in the test database to invoke pagination, i.e., more than 30.
We created a second user in the fixtures in Listing 10.23, but 30 or so more users is a lot to create by hand. Luckily, as we’ve seen with the user fixture’s password_digest attribute, fixture files support embedded Ruby, which means we can create 30 additional users as shown in Listing 10.48. (Listing 10.48 also creates a couple of other named users for future use.)
Listing 10.48: Adding 30 extra users to the fixture.test/fixtures/users.yml
michael:
  name: Michael Example
  email: [email protected]
  password_digest: <%= User.digest('password') %>

archer:
  name: Sterling Archer
  email: [email protected]
  password_digest: <%= User.digest('password') %>

lana:
  name: Lana Kane
  email: [email protected]
  password_digest: <%= User.digest('password') %>

malory:
  name: Malory Archer
  email: [email protected]
  password_digest: <%= User.digest('password') %>

<% 30.times do |n| %>
user_<%= n %>:
  name:  <%= "User #{n}" %>
  email: <%= "user-#{n}@example.com" %>
  password_digest: <%= User.digest('password') %>
<% end %>
With the fixtures defined in Listing 10.48, we’re ready to write a test of the users index. First we generate the relevant test:
$ rails generate integration_test users_index
      invoke  test_unit
      create    test/integration/users_index_test.rb
The test itself involves checking for a div with the required pagination class and verifying that the first page of users is present. The result appears in Listing 10.49.
Listing 10.49: A test of the users index, including pagination. GREENtest/integration/users_index_test.rb
require "test_helper"

class UsersIndexTest < ActionDispatch::IntegrationTest

  def setup
    @user = users(:michael)
  end

  test "index including pagination" do
    log_in_as(@user)
    get users_path
    assert_template 'users/index'
    assert_select 'div.pagination'
    User.paginate(page: 1).each do |user|
      assert_select 'a[href=?]', user_path(user), text: user.name
    end
  end
end
The result should be a GREEN test suite:
Listing 10.50: GREEN
$ rails testExercises
To see other people’s answers and to record your own, subscribe to the Rails Tutorial course or to the Learn Enough All Access Subscription.
By commenting out the pagination links in Listing 10.46, confirm that the test in Listing 10.49 goes RED.
Confirm that commenting out only one of the calls to will_paginate leaves the tests GREEN. How would you test for the presence of both sets of will_paginate links? Hint: Use a count from Table 5.2.
10.3.5 Partial Refactoring
The paginated users index is now complete, but there’s one improvement I can’t resist including: Rails has some incredibly slick tools for making compact views, and in this section we’ll refactor the index page to use them. Because our code is well-tested, we can refactor with confidence, assured that we are unlikely to break our site’s functionality.
The first step in our refactoring is to replace the user li from Listing 10.46 with a render call (Listing 10.51).
Listing 10.51: The first refactoring attempt in the index view. RED
app/views/users/index.html.erb
<% provide(:title, 'All users') %>
<h1>All users</h1>

<%= will_paginate %>

<ul class="users">
  <% @users.each do |user| %>
    <%= render user %>
  <% end %>
</ul>

<%= will_paginate %>
Here we call render not on a string with the name of a partial, but rather on a user variable of class User;11 in this context, Rails automatically looks for a partial called _user.html.erb, which we must create (Listing 10.52).
11. The name user is immaterial—we could have written @users.each do |foobar| and then used render foobar. The key is the class of the object—in this case, User.
Listing 10.52: A partial to render a single user. GREENapp/views/users/_user.html.erb
<li>
  <%= gravatar_for user, size: 50 %>
  <%= link_to user.name, user %>
</li>
This is a definite improvement, but we can do even better: We can call render directly on the @users variable (Listing 10.53).
Listing 10.53: The fully refactored users index. GREENapp/views/users/index.html.erb
<% provide(:title, 'All users') %>
<h1>All users</h1>

<%= will_paginate %>

<ul class="users">
  <%= render @users %>
</ul>

<%= will_paginate %>
Here Rails infers that @users is a list of User objects; moreover, when called with a collection of users, Rails automatically iterates through them and renders each one with the _user.html.erb partial (inferring the name of the partial from the name of the class). The result is the impressively compact code in Listing 10.53.
As with any refactoring, you should verify that the test suite is still GREEN after changing the application code:
Listing 10.54: GREEN
$ rails testExercises
To see other people’s answers and to record your own, subscribe to the Rails Tutorial course or to the Learn Enough All Access Subscription.
Comment out the
renderline in Listing 10.53 and confirm that the resulting tests are RED.
10.4 Deleting Users
Now that the users index is complete, there’s only one canonical REST action left: destroy. In this section, we’ll add links to delete users, as mocked up in Figure 10.13, and define the destroy action necessary to accomplish the deletion. But first, we’ll create the class of administrative users, or admins, authorized to do so. In the context of authorization, such a set of special privileges is known as a role.
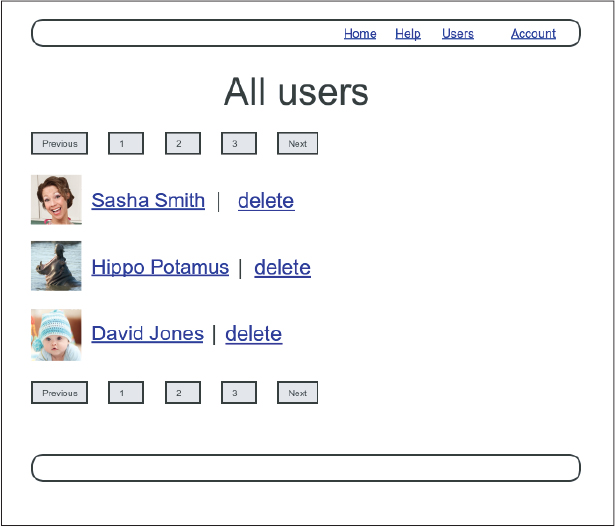
Figure 10.13: A mockup of the users index with delete links.
10.4.1 Administrative Users
We will identify privileged administrative users with a boolean admin attribute in the User model, which will lead automatically to an admin? boolean method to test for admin status. The resulting data model appears in Figure 10.14.
Figure 10.14: The User model with an added admin boolean attribute.
As usual, we add the admin attribute with a migration, indicating the boolean type on the command line:
$ rails generate migration add_admin_to_users admin:booleanThe migration adds the admin column to the users table, as shown in Listing 10.55. Note that we’ve added the argument default: false to add_column in Listing 10.55, which means that users will not be administrators by default. (Without the default: false argument, admin will be nil by default, which is still false, so this step is not strictly necessary. It is more explicit, though, and communicates our intentions more clearly both to Rails and to readers of our code.)
Listing 10.55: The migration to add a boolean admin attribute to users.db/migrate/[timestamp]_add_admin_to_users.rb
class AddAdminToUsers < ActiveRecord::Migration[7.0]
  def change
    add_column :users, :admin, :boolean, default: false
  end
end
Next, we migrate as usual:
$ rails db:migrateAs expected, Rails figures out the boolean nature of the admin attribute and automatically adds the question-mark method admin?:
$ rails console --sandbox
>> user = User.first
>> user.admin?
=> false
>> user.toggle!(:admin)
=> true
>> user.admin?
=> true
Here we’ve used the toggle! method to flip the admin attribute from false to true.
As a final step, let’s update our seed data to make the first user an admin by default (Listing 10.56).
Listing 10.56: The seed data with an admin user.db/seeds.rb
# Create a main sample user.
User.create!(name:  "Example User",
             email: "[email protected]",
             password:              "foobar",
             password_confirmation: "foobar",
             admin: true)

# Generate a bunch of additional users.
99.times do |n|
  name  = Faker::Name.name
  email = "example-#{n+1}@railstutorial.org"
  password = "password"
  User.create!(name:  name,
               email: email,
               password:              password,
               password_confirmation: password)
end
Then reset and reseed the database:
$ rails db:migrate:reset
$ rails db:seed
Revisiting Strong Parameters
You might have noticed that Listing 10.56 makes the user an admin by including admin: true in the initialization hash. This underscores the danger of exposing our objects to the wild Web—if we simply passed an initialization hash in from an arbitrary web request, a malicious user could send a PATCH request as follows:12
12. Command-line tools such as curl can issue PATCH requests of this form.
patch /users/17?admin=1This request would make user 17 an admin, which would be a potentially serious security breach.
Because of this danger, it is essential that we update only attributes that are safe to edit through the web. As noted in Section 7.3.2, this is accomplished using strong parameters by calling require and permit on the params hash:
    def user_params
      params.require(:user).permit(:name, :email, :password,
                                   :password_confirmation)
    end
Note in particular that admin is not in the list of permitted attributes. This is what prevents arbitrary users from granting themselves administrative access to our application. Because of its importance, it’s a good idea to write a test for any attribute that isn’t editable, and writing such a test for the admin attribute is left as an exercise (Section 10.4.1).
Exercises
To see other people’s answers and to record your own, subscribe to the Rails Tutorial course or to the Learn Enough All Access Subscription.
By issuing a
PATCHrequest directly to the user path as shown in Listing 10.57, verify that theadminattribute isn’t editable through the web. To be sure your test is covering the right thing, your first step should be to addadminto the list of permitted parameters inuser_paramsso that the initial test is RED. For the final line, make sure to load the updated user information from the database (Section 6.1.5).
Listing 10.57: Testing that the admin attribute is forbidden.test/controllers/users_controller_test.rb
require "test_helper"

class UsersControllerTest < ActionDispatch::IntegrationTest

  def setup
    @user       = users(:michael)
    @other_user = users(:archer)
  end
  .
  .
  .
  test "should redirect update when not logged in" do
    patch user_path(@user), params: { user: { name: @user.name,
                                              email: @user.email } }
    assert_not flash.empty?
    assert_redirected_to login_url
  end

  test "should not allow the admin attribute to be edited via the web" do
    log_in_as(@other_user)
    assert_not @other_user.admin?
    patch user_path(@other_user), params: {
                                    user: { password:              "password",
                                            password_confirmation: "password",
                                            admin: FILL_IN } }
    assert_not @other_user.FILL_IN.admin?
  end
  .
  .
  .
end
10.4.2 The destroy Action
The final step needed to complete the Users resource is to add delete links and a destroy action. We’ll start by adding a delete link for each user on the users index page, restricting access to administrative users. The resulting "delete" links will be displayed only if the current user is an admin (Listing 10.58).
Listing 10.58: User delete links (viewable only by admins).app/views/users/_user.html.erb
<li>
  <%= gravatar_for user, size: 50 %>
  <%= link_to user.name, user %>
  <% if current_user.admin? && !current_user?(user) %>
    | <%= link_to "delete", user, data: { "turbo-method": :delete,
                                          turbo_confirm: "You sure?" } %>
  <% end %>
</li>
Note the two options in the data hash: "turbo-method": :delete, which arranges for the link to issue the necessary DELETE request, and turbo_confirm: "You sure?", which displays a JavaScript confirm box. (In previous versions of Rails, these were method and confirm in all cases, but as of Rails 7 the turbo versions are necessary when Turbo is activated.) We’ve also wrapped each link inside an if statement so that only admins can see them. The result for our admin user appears in Figure 10.15.
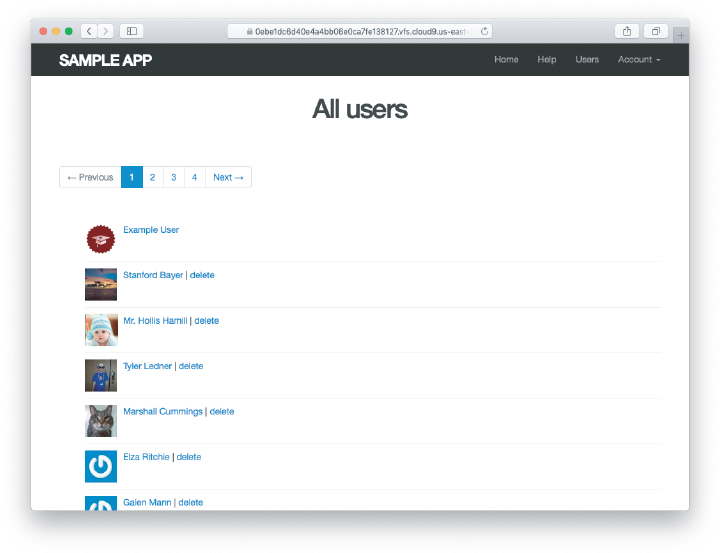
Figure 10.15: The users index with delete links.
Web browsers can’t send DELETE requests natively, so Rails fakes them with JavaScript. This means that the delete links won’t work if the user has JavaScript disabled. If you must support non-JavaScript-enabled browsers you can fake a DELETE request using a form and a POST request, which works even without JavaScript.13
13. See the RailsCast on “Destroy Without JavaScript (revised)” (http://railscasts.com/episodes/77-destroy-without-javascript-revised) for details.
To get the delete links to work, we need to add a destroy action (Table 7.1), which finds the corresponding user and destroys it with the Active Record destroy method, finally redirecting to the users index, as seen in Listing 10.59. As in Listing 8.45, we’ve included status: :see_other when redirecting after a DELETE request in order to be compatible with Turbo. Because users have to be logged in to delete users, Listing 10.59 also adds :destroy to the logged_in_user before filter (thus rendering status: :see_other in Listing 10.15 necessary for the same reason).
Listing 10.59: Adding a working destroy action.app/controllers/users_controller.rb
class UsersController < ApplicationController
  before_action :logged_in_user, only: [:index, :edit, :update, :destroy]
  before_action :correct_user,   only: [:edit, :update]
  .
  .
  .
  def destroy
    User.find(params[:id]).destroy
    flash[:success] = "User deleted"
    redirect_to users_url, status: :see_other
  end

  private
  .
  .
  .
end
As constructed, only admins can destroy users through the web since only they can see the delete links, but there’s still a terrible security hole: Any sufficiently sophisticated attacker could simply issue a DELETE request directly from the command line to delete any user on the site.14 To secure the site properly, we also need access control on the destroy action, so that only admins can delete users.
14. Command-line tools such as curl can issue such direct DELETE requests.
As in Section 10.2.1 and Section 10.2.2, we’ll enforce access control using a before filter, this time to restrict access to the destroy action to admins. The resulting admin_user before filter appears in Listing 10.60.
Listing 10.60: A before filter restricting the destroy action to admins.app/controllers/users_controller.rb
class UsersController < ApplicationController
  before_action :logged_in_user, only: [:index, :edit, :update, :destroy]
  before_action :correct_user,   only: [:edit, :update]
  before_action :admin_user,     only: :destroy
  .
  .
  .
  private
    .
    .
    .
    # Confirms an admin user.
    def admin_user
      redirect_to(root_url, status: :see_other) unless current_user.admin?
    end
end
Exercises
To see other people’s answers and to record your own, subscribe to the Rails Tutorial course or to the Learn Enough All Access Subscription.
As the admin user, destroy a few sample users through the web interface. What are the corresponding entries in the server log?
10.4.3 User Destroy Tests
With something as dangerous as destroying users, it’s important to have good tests for the expected behavior. We start by arranging for one of our fixture users to be an admin, as shown in Listing 10.61.
Listing 10.61: Making one of the fixture users an admin.test/fixtures/users.yml
michael:
  name: Michael Example
  email: [email protected]
  password_digest: <%= User.digest('password') %>
  admin: true

archer:
  name: Sterling Archer
  email: [email protected]
  password_digest: <%= User.digest('password') %>

lana:
  name: Lana Kane
  email: [email protected]
  password_digest: <%= User.digest('password') %>

malory:
  name: Malory Archer
  email: [email protected]
  password_digest: <%= User.digest('password') %>

<% 30.times do |n| %>
user_<%= n %>:
  name:  <%= "User #{n}" %>
  email: <%= "user-#{n}@example.com" %>
  password_digest: <%= User.digest('password') %>
<% end %>
Following the practice from Section 10.2.1, we’ll put action-level tests of access control in the Users controller test file. As with the logout test in Listing 8.46, we’ll use delete to issue a DELETE request directly to the destroy action. We need to check two cases: First, users who aren’t logged in should be redirected to the login page; second, users who are logged in but who aren’t admins should be redirected to the Home page. The result appears in Listing 10.62.
Listing 10.62: Action-level tests for admin access control. GREENtest/controllers/users_controller_test.rb
require "test_helper"

class UsersControllerTest < ActionDispatch::IntegrationTest

  def setup
    @user       = users(:michael)
    @other_user = users(:archer)
  end
  .
  .
  .
  test "should redirect destroy when not logged in" do
    assert_no_difference 'User.count' do
      delete user_path(@user)
    end
    assert_response :see_other
    assert_redirected_to login_url
  end

  test "should redirect destroy when logged in as a non-admin" do
    log_in_as(@other_user)
    assert_no_difference 'User.count' do
      delete user_path(@user)
    end
    assert_response :see_other
    assert_redirected_to root_url
  end
end
Note that Listing 10.62 also makes sure that the user count doesn’t change using the assert_no_difference method (seen before in Listing 7.23).
The tests in Listing 10.62 verify the behavior in the case of an unauthorized (non-admin) user, but we also want to check that an admin can use a delete link to successfully destroy a user. Since the delete links appear on the users index, we’ll add these tests to the users index test from Listing 10.49. The only really tricky part is verifying that a user gets deleted when an admin clicks on a delete link, which we’ll accomplish as follows:
assert_difference 'User.count', -1 do
  delete user_path(@other_user)
end
This uses the assert_difference method first seen in Listing 7.31 when creating a user, this time verifying that a user is destroyed by checking that User.count changes by −1 when issuing a delete request to the corresponding user path.
At the same time, we’ll verify that the redirect URL and HTTP status code are correct. After deleting a user, we’ll just redirect to the same page using redirect users_url. Because we’re using a delete request, we’ll indicate a status code :see_other as in Section 8.3. The result looks like this:
assert_difference 'User.count', -1 do
  delete user_path(@other_user)
  assert_response :see_other
  assert_redirected_to users_url
end
Putting everything together gives the pagination and delete test in Listing 10.63, which includes tests for both admins and non-admins. (A broken-up version of Listing 10.63, using the techniques from Listing 8.48, appears in Listing 11.42.)
Listing 10.63: An integration test for delete links and destroying users. GREENtest/integration/users_index_test.rb
require "test_helper"

class UsersIndexTest < ActionDispatch::IntegrationTest

  def setup
    @admin     = users(:michael)
    @non_admin = users(:archer)
  end

  test "index as admin including pagination and delete links" do
    log_in_as(@admin)
    get users_path
    assert_template 'users/index'
    assert_select 'div.pagination'
    first_page_of_users = User.paginate(page: 1)
    first_page_of_users.each do |user|
      assert_select 'a[href=?]', user_path(user), text: user.name
      unless user == @admin
        assert_select 'a[href=?]', user_path(user), text: 'delete'
      end
    end
    assert_difference 'User.count', -1 do
      delete user_path(@non_admin)
      assert_response :see_other
      assert_redirected_to users_url
    end
  end

  test "index as non-admin" do
    log_in_as(@non_admin)
    get users_path
    assert_select 'a', text: 'delete', count: 0
  end
end
Note that Listing 10.63 checks for the right delete links, including skipping the test if the user happens to be the admin (which lacks a delete link due to Listing 10.58).
At this point, our deletion code is well-tested, and the test suite should be GREEN:
Listing 10.64: GREEN
$ rails testExercises
To see other people’s answers and to record your own, subscribe to the Rails Tutorial course or to the Learn Enough All Access Subscription.
By commenting out the admin user before filter in Listing 10.60, confirm that the tests go RED.
10.5 Conclusion
We’ve come a long way since introducing the Users controller way back in Section 5.4. Those users couldn’t even sign up; now users can sign up, log in, log out, view their profiles, edit their settings, and see an index of all users—and some can even destroy other users.
As it presently stands, the sample application forms a solid foundation for any website requiring users with authentication and authorization. In Chapter 11 and Chapter 12, we’ll add two additional refinements: an account activation link for newly registered users (verifying a valid email address in the process) and password resets to help users who forget their passwords.
Before moving on, be sure to merge all the changes into the main branch:
$ git add -A
$ git commit -m "Finish user edit, update, index, and destroy actions"
$ git checkout main
$ git merge updating-users
$ git push
You can also deploy the application and even populate the production database with sample users (using the pg:reset task to reset the production database):
$ rails test
$ git push heroku
$ heroku pg:reset DATABASE
$ heroku run rails db:migrate
$ heroku run rails db:seed
Of course, on a real site you probably wouldn’t want to seed it with sample data, but I include it here for purposes of illustration (Figure 10.16). Incidentally, the order of the sample users in Figure 10.16 may vary, and on my system doesn’t match the local version from Figure 10.11; this is because we haven’t specified a default ordering for users when retrieved from the database, so the current order is database-dependent. This doesn’t matter much for users, but it will for microposts, and we’ll address this issue further in Section 13.1.4.
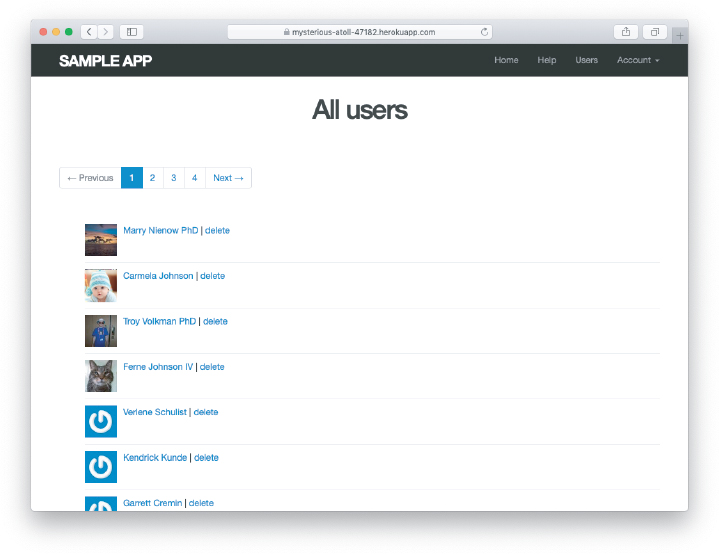
Figure 10.16: The sample users in production.
10.5.1 What We Learned in This Chapter
Users can be updated using an edit form, which sends a
PATCHrequest to theupdateaction.Safe updating through the web is enforced using strong parameters.
Before filters give a standard way to run methods before particular controller actions.
We implement an authorization using before filters.
Authorization tests use both low-level commands to submit particular HTTP requests directly to controller actions and high-level integration tests.
Friendly forwarding redirects users where they wanted to go after logging in.
The users index page shows all users, one page at a time.
Rails uses the standard file
db/seeds.rbto seed the database with sample data usingrails db:seed.Running
render @usersautomatically calls the_user.html.erbpartial on each user in the collection.A boolean attribute called
adminon the User model automatically creates anadmin?boolean method on user objects.Admins can delete users through the web by clicking on delete links that issue
DELETErequests to the Users controllerdestroyaction.We can create a large number of test users using embedded Ruby inside fixtures.