
Part 3
Light
_______________________
Light
NATURAL AND AMBIENT
NATURAL LIGHT
Working with natural light means working with what the sun provides, good or bad. Although the photographer can add some measure of flash to fill in shadows ( see Flash ), this portion of the book deals with images made only with light that’s available from the sun.
There are many ways to work with natural light, indoors or outside. Indeed, some photographers work with natural light exclusively. They’re comfortable with it, understand it, and have built a career around the look. It’s not always easy to do, especially if a shoot has been booked for a day that turns out to be dismal and rainy, but these photographers thrive on the natural light challenge, even though the shoot may have to be rescheduled more than once.
Daylight
Photography in full daylight can be problematic because shadows can be deep and contrasty. Also, when the sun is high, the shadow it throws can be unattractive, especially on people. Squinting is also an issue, and it’s difficult to get an unstrained expression when the sun is in your subject’s eyes. These are a few of the reasons why seasoned photographers avoid midday hours, although the shadow angle problem is worse in the summer when the sun is more directly overhead.
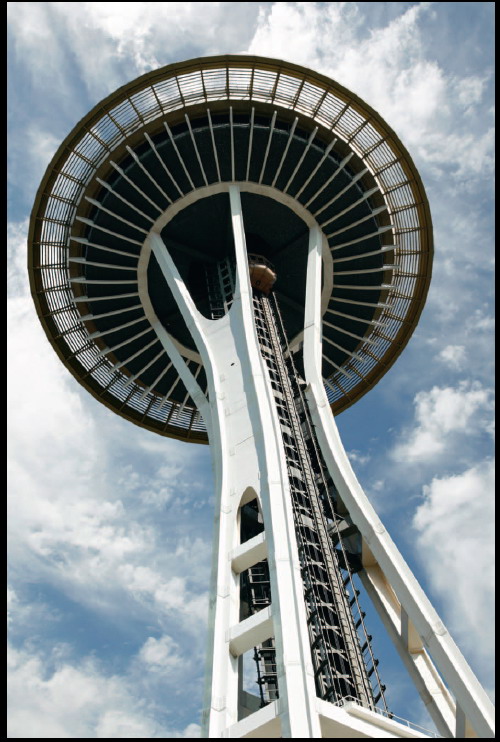
One solution is to put the sun behind your subject. Backlighting can be an effective and beautiful solution but will introduce its own issues. For example, if you use a metering mode that encompasses too much of the viewfinder, the meter may correctly expose the background but underexpose the subject. The first image on the next page would have been better with spot metering, at least on the subject, but more of the background would have been correspondingly overexposed.
Moving the subject into an area that’s dominated by nonlit shapes forces the meter (in any mode except Spot) to give precedence to the unlit tones. The sunlit background is still overexposed, and the end result is much more pleasant, but the lack of front light and the wraparound effect of the backlight renders a result that needs improvement. This is a good opportunity for fill flash ( see Flash ), which I used (with the Ultimate Light Box modifier) to create a visual situation that’s completely believable and natural.

If you must work with the midday sun, the best light will come from a sky with a light overcast. High, thin clouds effectively turn the entire sky into a large softbox but maintain enough directionality for shadows to form. The softbox effect will open any deep shadows and give an impression of light that’s closer to what we see in our mind’s eye when we think of someone in sunlight.

Open shade is a term used for indirect sunlight. In other words, if a subject is lit by light that bounces into an area that is not receiving any direct sunlight, that subject is in open shade. Even though there is a White Balance preset for open shade, you should consider where the light is coming from before using it. The Open Shade preset is designed to add warmth to what is typically cooler light (shade at high noon) and may not be the correct choice if the light is warm to begin with. This dog’s portrait was made on a porch against a warm-toned home, so the daylight that bounced in was actually warmed as it bounced off the house.

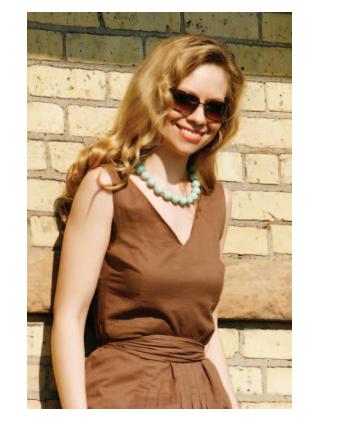
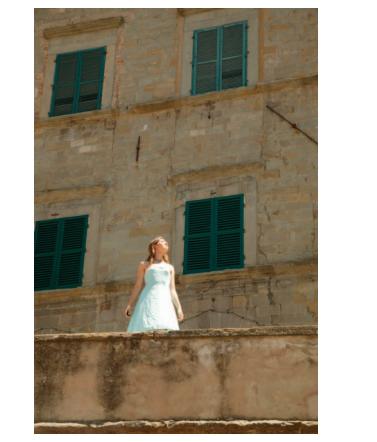
Should you be in a situation where light is bouncing strongly off the side of a building into otherwise shadowed areas, take a look at the quality and color of that light. Cold-toned structures will bounce cold-toned light, a good argument to use Auto White Balance (for neutral color) or the Open Shade or Cloudy presets (for warmer color). Should the structure be warm in color, as it was in this young woman’s portrait, Daylight is the correct preset if you wish to retain the actual color of the light.

SHOOTING TIP
There are a million variations of daylight but only six unchangeable presets. Personally, I think the Open Shade and Cloudy presets should be ignored because they will change the character of the light you see into something it’s not. Using the Daylight preset will keep some of that character in the final image. Similarly, AWB should be avoided because it seeks to neutralize any color balance it sees. This image, using the Daylight preset, retains the subtle color of fog in a rainforest, a color that would otherwise be lost or changed with AWB or a preset.
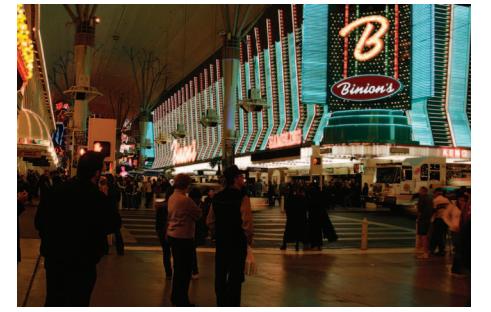
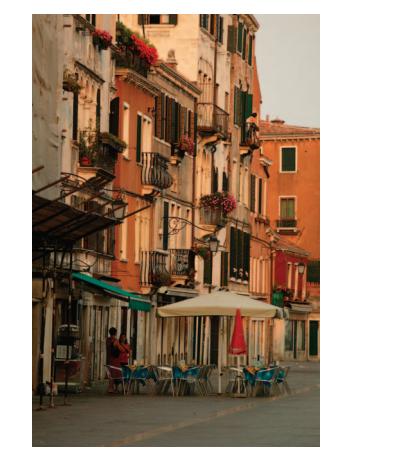
Another aspect of daylight that presents many interesting photo opportunities is when it’s almost nonexistent, the kind of light you might find in an alley or in one of the concrete canyons of a large city. Your exposures will be longer than usual or you may e to bump up the ISO higher you typically would, but results can be worth it. Deep, saturated color in cool light along with short focus can contribute to beautiful images. When you


come across such a scenario, try using the Standard Picture Style and the Daylight white balance together.
You may have heard the term “sweet light,” used to describe the light thrown by the sun in its last half hour (or so) of the day. This is truly beautiful light, warmed and softened by extra atmospheric density as the sunlight fights its way through thicker air, almost horizontally, to the subject. Try this light with images of people or places. Your window of opportunity is short, but the images created within this time frame are uniquely beautiful, mostly because of the color of the light—another argument for using the Daylight preset.

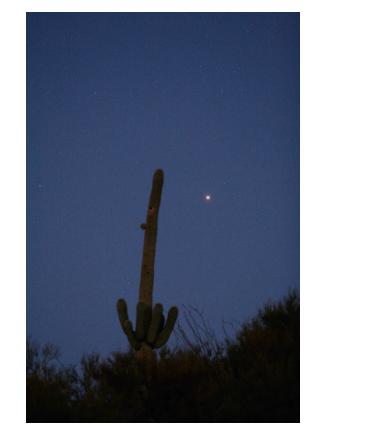
It’s possible that some of your best shots will actually happen after the sun sets, because for about an hour after sunset there is still enough light to register both on the subject and in the sky. A tripod and higher ISO are both required, of course, and you may have to focus manually because the light levels are so low the auto focus may have trouble locking on. I’ve stated earlier that my favorite “everyday ” exposure mode is Aperture Priority, which is perfect for images like this cactus, made at f2.8 approximately 45 minutes after sunset with a Canon 70–200 mm f2.8 IS zoom lens. In subjective situations like this, let the camera find the exposure. It will.
AMBIENT LIGHT
Light that is incidental to the scene you’re photographing is called ambient light. Yes, totally natural light can be rightfully called ambient, even though the term often includes a mix of natural and artificial light sources or artificial light entirely.
In many situations, AWB can be the best way to achieve neutral white balances in difficult images. The problem is in determining how neutral you wish the light to be. Many circumstances demand a neutral white, and some of those may not actually be achievable with AWB because overwhelming accent color will actually taint the AWB’s attempt at neutralization and skew color in the opposite direction. For example, this first image, made under stage lighting and using the Incandescent WB preset, truthfully represents the colored gels used on the lights and preserves a beautiful skin tone on the dancer.
When I attempted AWB, the camera correctly saw the overall blue cast from the background lights and did its best to add enough yellow to neutralize that color. It did its job admirably, but at the expense of flesh tones and the beautiful mood the lighting director threw at the

background. There is no set formula for how much off-color light is needed before AWB will skew the color of the image. This is more a matter of practice and testing, but when faced with a scenario in which the scene is lit with predictable light, you may get better results using a predictable preset.
When the ambient light is bright enough, the Rebel is definitely capable of delivering great images without supplementary lighting. Either

Av or Tv exposure modes work well in this case, but be aware that too small an aperture (f5.6 here), too long a shutter speed (1/10 second here), or a low ISO will present a shutter/aperture combination that may be difficult to use without seeing motion blur.
Situations lit with unusual lighting, such as sodium or mercury-vapor lamps, can be somewhat neutralized with AWB but will give you the most accurate color with a custom white balance.

THE COLOR OF LIGHT
The actual color of light, its “color temperature, ” changes over the course of the day. Clouds, whether thick or thin, will also influence how your images look. I mentioned previously that the Daylight white balance preset will allow those influences to add mood to a scene without the possibility of being neutralized by AWB.
Early morning light is warm, typically on the yellow/pink side. Air is cleaner in the morning, with fewer airborne particulates to absorb some colors and scatter others as is typical of sunset light, so you usually won’t see color saturation issues that may be encountered late in the day. Early morning light is also quite delicate, with a sweetness and clarity that changes rapidly as the sun climbs higher. The first rays of dawn are truly remarkable.
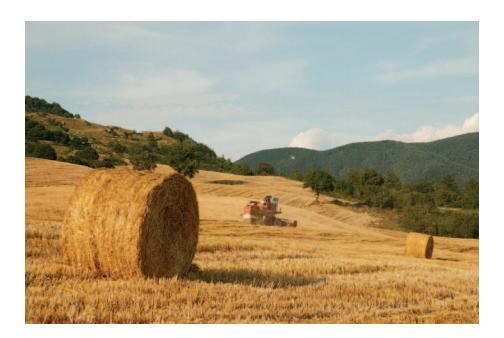
In summer, the general guideline is to not shoot in direct sun between 10 a.m. and 4 p.m. The sun is almost directly overhead, and the light it produces is hot and contrasty, with distinct shadows that are often unflattering. There’s certainly nothing preventing you from taking pictures during those hours, but you’ll frequently have to decide whether to sacrifice highlight or shadow detail or work in more shaded areas. Because this image was so rich in shadow detail, I decided to shoot for that rather than the brighter highlights on this woman’s face and dress. Even though the background is warm in tone, look how much cooler (and how much more harsh) the high daylight looks on her.
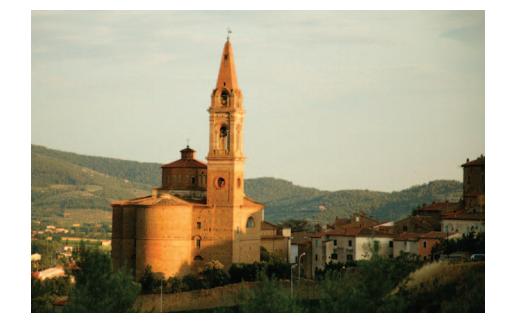
Somewhere around about three-fourths into the day, and once the shadows have lengthened, the contrasty nature of the light begins to diminish. This is the time to get the Rebel out of the bag and start shooting, for this is the start of the best afternoon light. Your camera, set to the Daylight preset, will see light that is richer than your eyes can perceive and will create images with that beautiful, warm bias.
As the last rays of sunlight are fading, take a look around at what they might be falling on. Those last rays, being so close to the horizon, tend to model the shapes they fall on in a wonderful, and very fleeting, manner.
SHOOTING TIP
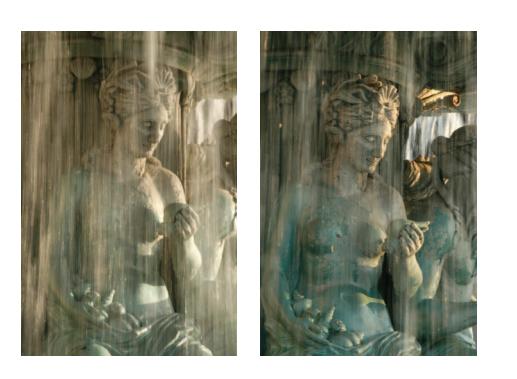
The last direct rays of daylight do not necessarily appear at sunset. Be aware of how sunlight is being affected by buildings, mountains, or any shape that may fall between your subject and the sun. Paying attention to how the sun is moving and what might be in its way can present stunning photo opportunities if you make yourself aware of how the light is changing. These two images were made over the course of only 14 minutes, as the sun moved between two buildings across the street from this fountain, about an hour before actual sunset.
REFLECTORS
It can often be advantageous to use a reflector to bounce light onto your subject. Collapsible reflectors, made by manufacturers such as Lastolite, PhotoFlex, Westcott, and others, bounce light back to the subject that opens up the shadows and that can be the difference between a snapshot and a salable shot (this image used Lastolite’s 36” Soft Gold reflector). Of course, you can clamp the reflector to a stand, but it may be necessary to employ an assistant to hold the reflector while you concentrate on the shot. It’s hard to direct a light stand to make a subtle change.
