Chapter 8 AMQP/RabbitMQ
In the preceding chapter on Starling, you learned about distributed message queues and how and when they can be advantageous to use. I also said that Starling has been a mainstay in the Ruby community for several years. Recently a new contender to the throne has arisen: RabbitMQ.1 Here is what the developers of RabbitMQ have to say about it:
“RabbitMQ is a complete and highly reliable Enterprise Messaging system. The RabbitMQ client libraries and broker daemon can be used together to create an AMQP network, or used individually to bring the benefits of RabbitMQ to established networks.”
In short, they are saying that it is a distributed messaging queue, not too dissimilar from Starling, but it implements the AMQP2 protocol instead of the Memcached protocol that Starling implemented.
It allows implementations of a few other interesting architectural designs that can prove to be useful in the world of distributed programming.
What Is AMQP?
AMQP stands for Advanced Message Queuing Protocol. AMQP is being designed as a common queuing protocol for enterprise systems to use. The protocol was designed by Cisco, Microsoft, Novell, and Red Hat, to name just a few. The goal of the project is to have a stable, fast, and reliable system that can be run on multiple environments and that is accessible from any language.
The AMQP website answers the questions of “why” and “what” quite nicely:
“Though many networking protocol needs have been addressed, a large gap exists in common guaranteed-delivery messaging middleware. AMQP fills that gap. AMQP enables complete interoperability for messaging middleware; both the networking protocol and the semantics of broker services are defined in AMQP.”
When working with an AMQP-compatible server, you should be aware of three main parts. The first is the exchange, which inspects the incoming message and finds the appropriate binding for it. The binding tells the exchange which message queue the message should be delivered to. Figure 8-1 shows this interaction.
Figure 8-1 The typical flow of an AMQP-compatible server.

To help clarify what these different parts of the server do, the team developing AMQP use the example of an email system. This metaphor is quite nice and easy to understand:
• A message is analogous to an email message.
• A message queue is similar to that of an email mailbox for a particular email address.
• The exchange acts in much the same way that a mail transfer agent (MTA) would. It inspects the message and decides, based on routing keys and tables, to which message queue the message should be delivered. This is similar to how an MTA inspects the email and decides to which email mailbox it should be delivered based on things like the To: and Cc: address.
• A routing key is much like an email address attached to an email. It is important to note that domain information, like in an email address, is unnecessary, because all routing is done entirely internal to an AMQP server.
• A binding is like an entry in an MTA routing table.
Because this is just a high-level introduction to idea of the AMQP, I won’t go into much more detail. If you are interested in knowing about the fundamentals of AMQP, I strongly encourage you to read the great specifications document posted on the AMQP site. It goes into much detail about the inner workings of the AMQP protocol to a level that isn’t covered in this book.
Installation
Because AMQP is just a protocol, we need to install a server that implements that protocol. One of the leading servers that does just that is RabbitMQ, which has achieved quite a buzz in the Ruby community, despite not being written in Ruby. The reason for this is its speed, reliability, and ease of use.
Installation of RabbitMQ can be either quite simple or a bit difficult, depending on your platform. RabbitMQ is built using the Erlang language, so you need to make sure that it is installed before you try to install RabbitMQ. I won’t go into detail about how to install RabbitMQ, because the process varies greatly for each environment, and relatively easy instructions can be found at http://www.rabbitmq.com/install.html.
After you have installed RabbitMQ, it is easy to get up and running in a Ruby environment. To use RabbitMQ with Ruby, we simply need to install the AMQP gem3 using RubyGems:
$ gem install amqp
Upon installation you should see the following message:
Successfully installed amqp-0.6.0
“Hello World” the AMQP Way
After everything is installed and ready to go, we can start using RabbitMQ and the AMQP gem to build a highly robust and stable distributed message queue. First, though, we need to be sure to start the RabbitMQ server. Follow the instructions for your operating system on how to start the server. For Mac OS X this command should work:
$ sudo -H -u rabbitmq rabbitmq-server
On Mac OS X this results in something similar to the following being printed to the screen:

You need to have RabbitMQ running for each of the examples we will look at, but I highly recommend that you stop and restart the server before each set of examples. See the documentation for your operating system to learn how to stop and restart the server on your system. In production I recommend running it as a background daemon using the -detached option. I also recommend that you read the accompanying documentation for other configuration information.
You will know if your server is running when you try to run your code and you see an error message similar to this:
AMQP::Error: Could not connect to server 127.0.0.1:5672
With our RabbitMQ server now running, we can commence with our routine first exercise of saying, “Hello, World!”. Let’s start by publishing our “Hello, World!” message:

Unlike most RubyGems, the AMQP gem breaks with the convention of using the name of the gem as the file you need to use the gem. It is for this reason that we require the file mq and not amqp. Although I applaud Aman on a lot of how the AMQP gem is written, this is certainly not one of them. I am a firm believer in using the gem name as the name of the required file, and not another file.
After obtaining the proper files, we can start using the AMQP gem. To get started we call the start method on the AMQP module. This method makes our connection for us. Because of that, the start method takes an optional Hash of options to allow for configuration. The options are as follows, along with their respective defaults:

The other argument we need to pass to the start method is a block representing the code we want to run in the context of the AMQP server we just connected to. In this block we need to gain access to the queue we are looking for. The easiest way is to use the queue method of the MQ class, as we have done in our example.
The Magic Queue
You might be wondering where your queue comes from when you call the queue method. You didn’t create a queue through any configuration, but the queue method returns a valid queue for you anyway.
The answer is simple. When you access a queue, if it doesn’t already exist, it is created. This allows you to write simple code that requires less error handling. More important, it lets you get on with designing and building your application without having to worry about creating new configuration files, installing and running those files, and so on.
Beware, though—this does have a drawback. Should you mistype the name of the queue, you then will either be trying to place messages into the wrong queue, or you’ll pull them out of the wrong queue. If you are placing messages into a queue named my_queue and you are trying to pull them out of a queue named myqueue, you will not receive any errors, and debugging can be time consuming and difficult. If you are having some issues, make sure to check this first—it could very well be a simple typo causing your problems.
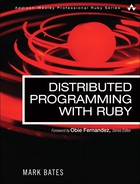
One solution for this might be creating a wrapper class around your queue and using that to access it, like such:
Another solution would be to use a configuration tool to define the names of your queues, and then use that whenever you try to access a queue.
When we have the queue, we can call the publish method on it, passing it our message that we want our consumer to retrieve.
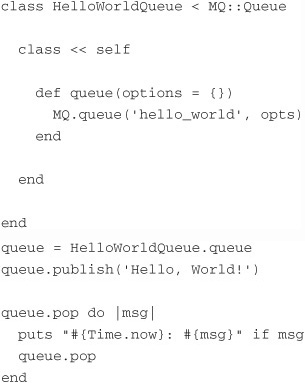
Now, let’s look at that consumer to see what we are dealing with:
Like our publisher, we need to call the start method on the AMQP module to connect to our server. Then we can call the pop method on the queue to retrieve the next message in the queue. We pass the pop method a block that we want to execute.
In our case we say that as long as the message we receive is not nil, print that message to the screen. Once we have done that, we call the pop method again. We call the pop method again to create an infinite loop that is continually pulling messages off the queue. We do not need to pass it a block again, because it retains the block information from the first time we called it.
Running this code should produce something similar to the following:
Sun May 24 23:03:39 -0400 2009: Hello, World!
Why Does the Publisher Code Never Exit?
If you are observant, you probably noticed that both the consumer and publisher code, when executed, seem to run in an infinite loop and never exit. This seems to be the correct behavior for the consumer, because we want it to run forever and constantly look for new messages. But why is the publisher doing the same thing?
The publisher code does not need to hang; we just coded it that way—but for a very good reason. When we call the start method on AMQP and pass it a block, that block is run inside a Thread that never exits. We could easily have rewritten our publisher code to look like this:

When we call the start method without the block, it does not create a Thread for us. Instead, it binds to the Thread that starts it. To get the real benefits of AMQP, it needs to be run in a separate Thread, so we have wrapped it in a new Thread.
In fact, this is also how we would have rewritten the code had it been in a larger application, such as a web application, that we know will run forever.
So why didn’t we write our code like that? The answer is simple, and it might surprise you. When you call the publish method, it delivers the message asynchronously. This means that, in our example, the message might not get delivered before the program exits.
To prevent that, I could have added a call to sleep to tell the application to pause for a second before it exits. But that wouldn’t have made much sense in the context of the examples in this chapter.
I also could have written the publisher example like this:

In this version of the example we tell the application to join the Thread we have created to the application. However, this prevents the application from exiting, which brings us back to the original problem with the sample code.
I chose to use the start method call with the block for the examples merely because it is cleaner and makes things a bit nicer to look at.
In earlier chapters we used a proprietary HelloWorld class that looked something like this:

To use this proprietary HelloWorld class, you would think we could do something like the following for our publisher:

The only difference in our new version of the publisher is that, when we call the publish method on our queue, we are passing it an instance of our HelloWorld class, and not just a String representing our message.
Learning from our previous mistakes with trying to run proprietary classes in a separate Ruby VM, we need to be sure to include the HelloWorld class definition in our consumer. With that said, we would expect our consumer to look like the following:

Here we retrieve our queue and call the pop method on it to start retrieving instances of our HelloWorld class. If we find an instance, we call the say_hi method on it and print it to the screen with the current time. If we don’t find an instance, we call the add_timer method on the EM class that ships with the EventMachine4 library. The add_timer method is similar to the sleep method found on Kernel. In essence, it says wait n seconds until you run what is contained in the block.
Everything seems okay with our publisher and consumer, but when we try to run it, we receive the following error:
NoMethodError: undefined method 'say_hi' for
"#<HelloWorld:0x10173a8>":String
Well, there is a good reason that AMQP returns a String instead of our instance of the HelloWorld class. When we publish a message to our queue using the publish method, the to_s method on that message is called to make sure that the message is a String. The reason for this is because RabbitMQ is not a Ruby-based library; AMQP needs to be able to consistently send “safe” messages to it that will easily read when they come back again. String is definitely the easiest way to achieve that goal.
So how do we get around this problem? The answer is pretty simple and not overly complex. We need to serialize our HelloWorld instance to a String before we call the publish method. Then, when we retrieve the message from the queue again, we need to deserialize it and reconstitute our HelloWorld instance.
Our publisher needs just a simple change to make its part of the equation work:

Notice that this time, when we call the publish method, we are passing it a variable called dumped_hw. This variable is the result of passing our HelloWorld instance into the dump method on the Marshal module. The dump method converts our HelloWorld instance into a serialized String format that can easily be reconstituted later by our consumer.
Now that we have serialized our HelloWorld instance in our publisher, we need to update our consumer code to deserialize it:

Now when we find a message waiting for us on our queue, we first pass it through the load method on the Marshal module to deserialize it into an instance of the HelloWorld class. With it safely reconstituted, we can now run this code and get the following output:
Sun May 24 22:31:02 -0400 2009: Hello, World!
Building a Distributed Logger with AMQP
Most of the other chapters in this book have had a section dedicated to the task of building a distributed logger. This chapter is no exception. The good news for you, the reader, is that the AMQP gem has thoughtfully included an MQ::Logger class to make this task easy for us to accomplish.
Our code to publish messages to the log is fairly straightforward:

As you can see, using the MQ::Logger class is actually no different from using the regular Logger class that ships with Ruby. In fact, the examples that ship with the AMQP gem even go so far as to alias the standard Ruby Logger class to the MQ::Logger class. I don’t know if I agree with that, but it does say something about how easy the class is to use, that it can be a drop-in replacement.
You might have noticed that in our example we call the error method on the MQ::Logger instance and pass it an instance of a NoMethodError exception class. You’ll remember that earlier we talked about how if we want to put a “complex” Ruby object in a queue, we have to marshal it first, but here we are not doing that. We simply pass it the full instance of the object. We can do that here because the MQ::Logger class takes care of marshaling the messages sent to its logging methods so that they can easily be unmarshaled on the receiving end. This also helps maintain compatibility with the standard Logger that ships with Ruby.
Now let’s look at our consumer code:

Not too much should be surprising when you look at this code. It is, in essence, the same code from our previous “Hello World” examples. There are really only two differences. The first one is that we are accessing a queue named logger. We did not explicitly set a queue name when we set up our MQ::Logger instance earlier, but as part of the initialization of that class, it automatically sets up the queue. Unfortunately, this queue name is hardcoded in the AMQP gem, so if you don’t like the name, you have to learn to live with it. The second difference in the code is simply that we print the value returned by the inspect method of the msg object we get back from the queue, after we have unmarshaled it. The reason for this is nothing more than it is a quick way to nicely print a Hash to the screen, which is the object we receive from the queue.
When we run this code, we should see results similar to the following:

That wasn’t so bad, was it? Compared to some of the other hoops we have had to jump through in this book to get distributed loggers to work, that was relatively easy and straightforward. One note, though. Earlier in this chapter I made a great deal of fuss about how great the AMQP gem is documented, and that certainly is true—with the exception of the MQ::Logger class. It’s a simple class, and its usage is pretty straightforward, but it would be nice to see some documentation around this class. Hopefully, Aman will document it soon.
Persisted AMQP Queues
When creating and using a queue, it is important to decide whether that queue needs to be persisted. If the RabbitMQ server is terminated or restarted, how important to you is it that the messages are delivered when that server comes back online? For example, it might not be that important to persist debugging messages, but it might be very important to persist new stock purchase requests that come in.
So with that in mind, let’s briefly talk about how we can make our AMQP queues, and messages, persistent. First, I would like to point out that according to the documentation, persistent queues are slower than nonpersistent queues. This makes sense if you think about how a nonpersistent queue retains messages in memory, whereas a persistent queue has to write and read messages from disk. This is important to keep in mind when designing your queue.
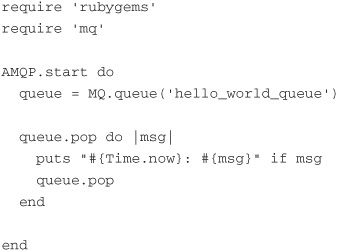
With those few architectural concerns out of the way, let’s look at our publisher for this example:

This example is straightforward. We access the long_live_queues queue and write to it ten messages, each with the current time and a number. Now, let’s run the publisher code. After we see the “Finished publishing” message, let’s stop and restart our RabbitMQ server.
After the RabbitMQ server has restarted, let’s run the following consumer:

The consumer code runs, but we did not receive any messages to process. It just continues to loop without printing anything. Why is that? Well, to start with, we need to make the queue it set a persistent queue.
By default all queues are nonpersistent. This is because of the performance concerns mentioned earlier. To make a queue persistent, we simply have to pass it the :durable option the first time we create the queue. Let’s see what our publisher would look like when we add this flag:

When we call the queue method to retrieve the queue, we set the :durable flag to true. By default, this setting is false. So now we should have a persistent queue, right? Not quite. First we need to make a change to our consumer:

In our consumer we also set the :durable flag to true. You might be wondering why our consumer must know whether the queue is persistent. That is a great question. The answer, according to the documentation, is that the first person to create a queue and set the :durable flag wins. This means that all subsequent calls that attempt to set this flag are ignored. Because of that, we don’t know which might start the consumer or the publisher first, so we have to be careful and set the correct flags in both places. I am not a big fan of this architecture, but that’s the way it is, so we just have to accept it and work with it.
Now if we were to run our publisher, and then restart the RabbitMQ server, and then run our consumer code, we would expect to see the ten messages printed to the consumer’s screen. However, this does not happen. Why?
Our messages did not get persisted because we did not tell the queue to persist them when we published them. Confused? That’s okay; it’s a little confusing at first. We have declared that our queue is a persisted queue. This means that we are allowed to put persistent messages into that queue. It does not mean that all messages are persistent messages. We need to declare that when we publish the message itself.
To tell the queue to persist a particular message, we need to pass the :persistent flag to the publish method. Let’s look at our publisher code again, this time with the :persistent flag set for our messages:

Now, if we were to run our publisher code, restart the RabbitMQ server, and then run our consumer code, we should see the following printed:

I know it seems a little strange to first have to declare the queue as being persistent and then have to declare each message on that queue as persistent for it to work. But that is how the system is architected. It would be nice to have a flag that can be set on the queue to tell it to always persist every message it receives, but currently that functionality does not exist.
If you are struggling to figure out when you might use a mix of persisted and nonpersisted messages in a persisted queue, let me point you toward logging. It is usually mission-critical to log error- and fatal-level messages. However, debug messages could probably be lost on a server reboot, and most people wouldn’t even notice. So when we would publish our log messages, we would set the :persistent flag to true for error and fatal messages, and probably not set it for the other log levels.
Subscribing to a Message Queue
In all our earlier examples, we used the pop method to retrieve messages from our queues. Although this method is straightforward and easy to understand, it is not the most direct way of getting these messages. I wanted you to understand the mechanics of what happens in a queue. With that said, there is a much easier way of getting messages from a queue—the subscribe method.
The subscribe method is a method on the MQ::Queue class. When called, the subscribe method registers a callback with the queue, telling it to call the attached block whenever a message appears in the queue. Let’s look at an example.
Let’s say we want to write an application that waits for stock prices to get published and then prints them to the screen. In the past we would have written the consumer of this queue similar to this:

Although this code works, it is a bit heavy-handed. For a start, it constantly polls the queue, looking for new messages. Unfortunately, this can cause a heavy load on the server if a lot of people are constantly polling, trying to get their stock prices. And what about when the market is closed? Should we still keep pounding the queue, looking for changes?
A better approach is to subscribe to the queue and let the queue notify the consumers when a new message has been added to the queue. This is a much more efficient approach. So with that in mind, what would our consumer look like with this new subscription approach?

As you can see, we simply call the subscribe method on our queue, and we are instantly notified of new messages that appear. The block that is passed into the subscribe method is run when a new message is delivered. The block yields two objects. The first object is an instance of AMQP::Protocol::Header. If we were to inspect this header, we would see information similar to the following:

There is a lot of information here, some of which we will cover a bit later in this chapter. Other bits we won’t look at. Either way, it is nice to know what information you can retrieve from this header.
The second object that is yielded to us from this block is the actual message from the queue. It should be noted, however, that if you ask the block to yield just one object, that object will be the message, not the header object.
For the sake of completeness, here is the publisher that goes along with this consumer:

We will expand on this code a bit in the next section, when we talk about topics. If we were to run both the consumer and the publisher, we would see output similar to the following:

Topic Queues
Up to this point we have been writing all messages to one big queue and hoping that our consumer is prepared to handle each of these messages. But what if we want to handle different types of messages within a single queue differently?
Let me explain what I mean with a simple example. Consider the idea of logging. We want to log all our messages to a single “logging” queue. That makes sense, because they are all logging messages. Normally we want to write all the messages to a log file. However, when we get an error- or fatal-level message, we also want to send an email to someone to alert him or her of the problem.
So how would we do that with a single queue? We could write an if statement that parses the log message and determines its level and then decides accordingly, or we could use the concept of a topic.
Topic queues allow us to effectively write all our messages to a single queue. But by adding a routing key to the message, we can then write what is basically a filtered queue on our consumer side.
When we talked earlier about subscribing to a queue, we built a simple system that published stock prices for a few different stocks and then a consumer that read those prices and printed them to the screen. What if we wanted to monitor a particular stock and get an alert if the price should change by more than 5%? We could write an if statement, or we could use the power of topic queues. Guess which one we will use in this section? If you guessed using the if statement approach, then that was a swing and a miss.
Let’s start by making a simple adjustment to the stock publisher code we looked at earlier:


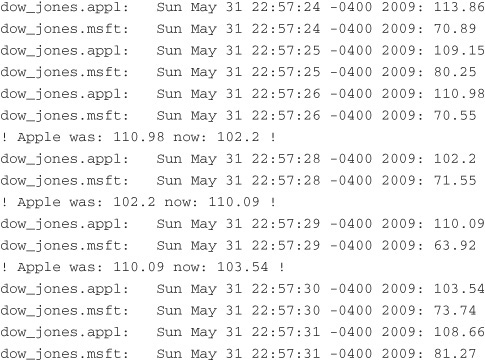
There is nothing new in this code, except for the line where we call the publish method. Notice that we are now passing in a flag called :key with the values dow_jones.appl and dow_jones.msft. Those values allow us to build our “custom” queue in the consumer code.
AMQP uses dot notation to associate topics with each other. By giving our messages a :key value of something like dow_jones.appl, we are saying that this message and topic, appl, are a subset of the dow_jones topic and should be treated as such.
Let’s look at our consumer code, because that might help further explain what we are talking about:


At first glance this code might make our eyes go a bit crossed, but after we start looking at it, it is actually straightforward.
To kick things off, first we need to get the topic we want to deal with. In our case we are interested in the dow_jones topic, so we retrieve it with the following line:
topic = MQ.topic(’dow_jones’)
When we have the topic, we create a new queue for apple so that we can monitor its stock and be notified with an alert if its price fluctuates by more than 5%. That is done with the following line that you should be familiar with by now:
appl_queue = MQ.queue(‘apple’)
The next line is where the secret sauce of topics comes in:
appl_queue.bind(topic, :key => ‘dow_jones.appl’)
With this line we are binding the dow_jones topic to the apple queue, but we are telling it to feed only the apple queue messages that have a key of dow_jones.appl. In essence, messages are now copied to the apple queue for it do with as it pleases. The original message stays in the dow_jones queue, waiting for someone else to come and claim it.
The rest of the code in the apple queue subscribe block just determines whether it is changed by more than 5%, and then it prints a message.
Moving on, we want to print all our messages. Again we create a new queue:
all_queue = MQ.queue(’all stocks’)
This time we are calling the queue all stocks. We want to bind that queue to the dow jones topic:
all_queue.bind(topic, :key => ’dow_jones.*’)
Notice that this time we use the wildcard * to tell the topic to give us all messages that are a subset of dow_jones.
If we were to run our publisher and our consumer, we should see something like the following printed:
We could have just subscribed directly to the dow jones topic, but I wanted to show you how to use the wildcard system built into topic queues. If the top-level topic was stocks, and you had two subtopics, stocks.us.appl and stocks.us.msft, you might then just want to show all the us stocks. The wildcard would be a great way of doing just that. Figure 8-2 shows how different messages flow through a single topic and end up in one or more different queues.
Figure 8-2 Different messages flow through a topic and end up in one or more queues.

Fanout Queues
A moment ago, when we discussed queues, we mentioned a style of queue known as a direct queue. This means that when we place a message on a queue, that message can be consumed only by direct access to that queue. This is the most straightforward, and common, type of queue. If you wanted several consumers to operate independently on a message, you were out of luck, because it was a shared queue.
Topic queues allow us to create filtered queues on-the-fly and manipulate the messages on those queues in a safe manner, because each filtered queue receives its own copy of the message. They also have the disadvantage of being more complicated; therefore, they are slower than a direct queue. Because of that, they are overkill for the simple task of creating a queue that allows multiple consumers to work on each message safely and independently of each other.
A third type of queue is called fanout. Fanout queues are a hybrid of sorts between direct and topic queues. They allow us to send a message to a single destination and allow that message to then be copied into multiple receiving queues. Once in each of those queues the messages can be operated on independently. Fanout allows us to perform 1:n-style communication quickly and easily.
The caveat about using fanout with AMQP, and the big differentiator with topics, is that unlike with topics, you cannot filter out messages from the queue. With topics we can bind to a small subset of the messages in the queue. With fanout, our queues receive all messages that are placed in the original queue. This sounds an awful lot like the queues we discussed at the beginning of the chapter. The big difference between those queues and fanout queues is that each queue that is bound to the fanout queue gets its own copy of the message; it is not just popped off the top of the queue, as we have seen earlier. Figure 8-3 illustrates this point quite nicely.
Figure 8-3 A fanout queue places a copy of each message into each queues that is bound to the queue.

Let’s look at an example of how to use fanout queues with AMQP. In our example we want to write simple log messages to the queue and have them set to three log servers. These servers are there as redundancy. If one goes down, two servers are still available to write our logs for us. I know this is a fairly contrived example, but it works well enough for our purposes.
Building our publisher code to write to a fanout queue is not that different from some of our other queues:

In our publisher code, where we would normally call the queue method on MQ, we instead call the fanout method, giving it a name for the fanout queue. We then publish a few messages to it as normal.
On the consumer side of things, handling fanout queues is not much different from topics:

This code should not look too different from our earlier topic examples. First we create a new queue to allow us to get a copy of the messages:
log_server_1 = MQ.queue(’log server #1’)
We then bind that queue to the fanout queue and subscribe to the resulting queue:
log_server_1.bind(MQ.fanout(’logger’)).subscribe
After we have bound the new queue and the fanout queue, the subscribe method, as mentioned earlier, takes a block that yields a message for us to manipulate as we please.
Conclusion
The AMQP gem, protocol, and RabbitMQ are a powerful combination. This chapter has only touched on what they can do. These systems have proven to be stable, fast, and, as you’ve seen, easy to use. Because of these traits, AMQP and RabbitMQ have quickly risen to the top of the list when it comes to distributed message queuing systems.
I have mentioned several times in this chapter that the documentation that comes bundled with the AMQP gem is superb, but it deserves another mention here. Although I have outlined and given you brief examples of each of the highlights of this gem, it is important to know all the different options that are available for each of the methods and queues. Please take a good look at the documentation. It will definitely save you time and make your systems more stable, secure, and reliable.
Endnotes
3. http://github.com/tmm1/amqp/tree/master