Are you ready to add images to your Web page? Images include photographs, logos, clip art, backgrounds, clickable buttons, and more. You can add images to your Web page using the <IMG> tag and then adjust the alignment, size, and padding of the images with tag attributes. You can also use HTML code to determine how nearby text wraps around your images. Understanding how to place images on a Web page is important because photos and illustrations can be key to adding visual appeal.

Understanding Web Page Images 66
Insert an Image 68
Specify an Image Size 70
Add Alternative Text 72
Create an Image Label 73
Align an Image Horizontally 74
Align an Image Vertically 75
Center an Image 76
Stop Text Wrap 77
Add Space around an Image 78
Add a Background Image 79
You can use images in a variety of ways on your Web pages. Images include everything from graphics and clip art to photographs and other visual objects. Images can illustrate text, show a product, provide background decoration, or act as navigational buttons for a Web site. Most of the images used on the Web today are of one of three file formats: JPEG, GIF, and PNG. Knowing when to use each file format, and how to minimize the file size when you save an image, can help you create pages that look great and download fast.
Image File Formats
Although numerous file types are used for computer images, JPEG and GIF are the two most popular types used on the Web. Both formats are cross-platform and offer file compression. PNG is a newer arrival in the image file format world and is gaining popularity among Web developers. The current versions of all of today's popular Web browsers can display JPEG, GIF, and PNG images. All three formats offer file-size compression, which make images download quickly from a Web server to your computer.

JPEG
JPEG, which stands for Joint Photographic Experts Group, supports 24-bit color, allowing for millions of colors. The JPEG format is commonly used with complex images, such as photos or graphics that use millions of colors and feature lots of detail. JPEG is not a good choice for solid-color artwork because it results in a larger overall file size, which translates to longer download times. JPEG images usually use a .jpg file name extension.

GIF
GIF, which stands for Graphics Interchange Format, supports up to 256 colors. The GIF format is more commonly used for simple images, such as logos and graphics containing basic shapes and lines. If your image or graphic contains few colors and not a lot of detail, GIF is a good file format choice. A single GIF file can also store multiple images and display them as an animation. GIF images use a .gif file name extension.
The PNG (Portable Network Graphics) format offers rich color support and advanced compression schemes, so it is a good choice for a variety of image types. Like JPEG, PNG supports 24-bit color but can also be saved with fewer colors, similar to GIF. Because PNG is a relatively new file format, use it if your intended audience most likely uses up-to-date browsers. PNG images use a .png file name extension.
Downloading Considerations
Browsers must download an image before users can view it on the Web page. Large images can take a long time to display, especially if Internet connection speeds are slow. For this reason, consider the overall file size of an image when deciding whether or not to add it to a Web page. If you fill your page with several large pictures, the download time for the page to fully display will be excessive.
Optimize Images
Most image-editing programs allow you to adjust the quality of an image to control its file size. You can also control file size by shrinking or cropping an image. For best results, make sure your image file size does not exceed 60K. If you use larger image files, users with slow connections may not be willing to wait for the pictures to download. With GIFs and some PNGs, you can decrease the number of colors in an image to reduce the file size. Affordable image editors include Adobe Photoshop Elements and Corel Paint Shop Pro. Paint, which comes free with Windows, also offers image-optimization features.
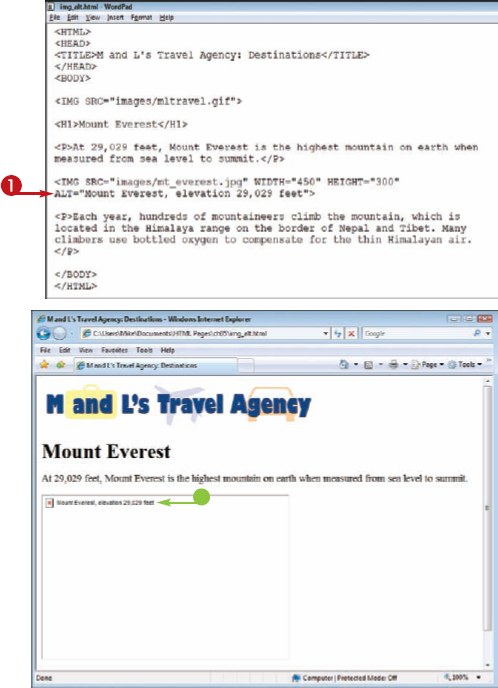
Alternative Text
Some Web users may turn off the browser's image-display setting to help speed up the downloading of Web pages. Also, some visually impaired users view the Web using screen readers that do not display images at all. To accommodate such users, be sure to include alternative text (

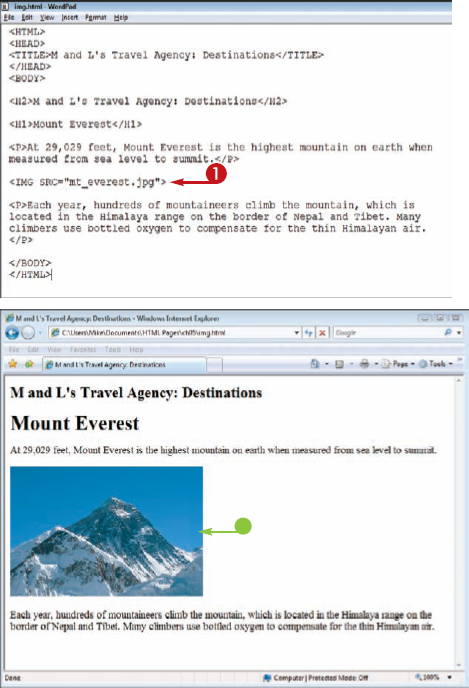
You can add images to your Web page to add visual interest or illustrate a topic. For example, you can add a photograph of a product or a company logo to a business's Web page. HTML coding lets you display images as inline elements, which means they appear within the body of the page along with text. You can use image files from a digital camera or scanner, or you can create illustrations with a graphics program. If you are not the original author of the image, you need permission to use the image before placing it on a Web site.

In this example, because the image was saved in the same folder as the HTML file, you reference it with just the file name.

INSERT A GRAPHIC FILE
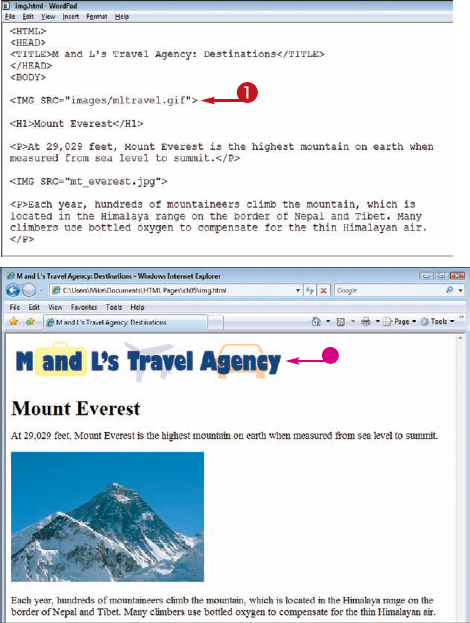
In this example, because the graphic was saved in an
imagessubdirectory relative to the HTML file, you reference it with the subdirectory name followed by a forward slash (/) and then the file name.
Note
How can I download an image from a Web page?
Internet Explorer, Firefox, and most other Web browsers allow you to copy an image from a Web site by right-clicking the image and selecting a save command. If you save an image in the same folder as your HTML files, you can then use the image on your pages using the previous steps. Make sure you have permission from the image owner before using the image on your Web site.
How can I insert an image in my eBay auction?
Many auction sites, such as eBay, allow you to include certain HTML code in your listing descriptions. If you have your auction item's image file hosted on a Web server, you can use an HTML <IMG> tag to insert the image into your auction description. Using HTML to insert an image yourself is an alternative to using eBay's photo-hosting feature. See Chapter 13 for more about moving content to a Web server.
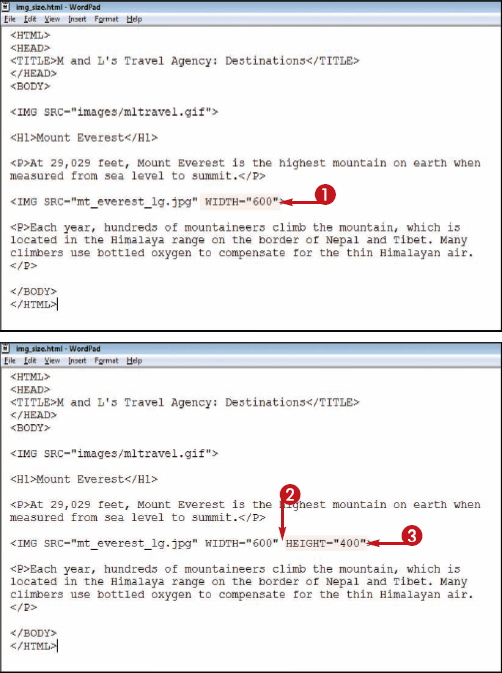
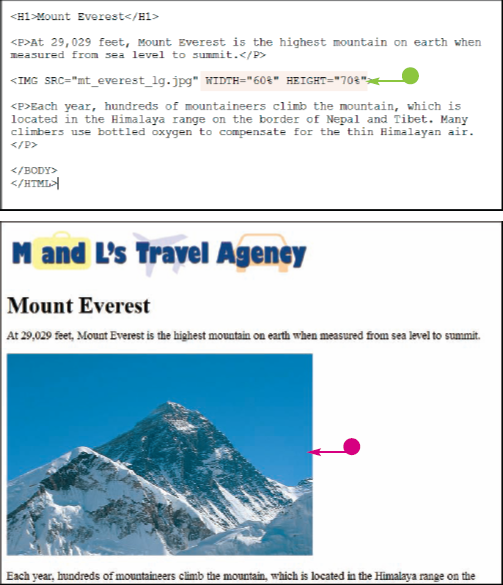
If your image appears too big or too small on a Web page, you can use HTML coding to change the size with image attributes. You can set the width and height of an image in pixels or as a percentage of the overall window size. This can enable you to combine your images nicely with the text and other content around them. Make sure to carefully test your page when resizing images using HTML because too much stretching or shrinking can cause a loss of image quality.


When giving a percentage value, be sure to follow it with a percent sign (%).
Note
If you specify only one dimension, whether the width or the height, for your image, a browser sizes the other dimension proportionally based on the original size.
Note
What size should I set for a Web page image?
The best size for an image depends on how you want to use it on the Web page. The vast majority of Web users access pages with their monitors set at least 800 pixels in width and 600 pixels in height. At these settings, browsers can usually display images 750 pixels in width and 400 pixels in height without requiring the user to scroll. Making your images smaller can allow users to see more than one image at a time, depending on the layout.
Is it better to resize an image in an editing program or using HTML coding?
Resizing images using HTML can reduce the quality of your images, especially if you use HTML to enlarge them. Also, shrinking an image using HTML does not actually reduce its file size, which means the image does not download any faster. For these reasons, it is better to resize images using an image editor if you have one. This allows you to maintain an image's quality and optimize its file size.
For users who have images turned off in their browsers, you can add alternative text that identifies the images on your page. Alternative text, sometimes called placeholder text, can describe what appears in an image and is an important addition to your Web page markup. Most search engines, because they process text but not images, use alternative text to better understand the content of your page. This can help improve the placement of your Web site in search results.
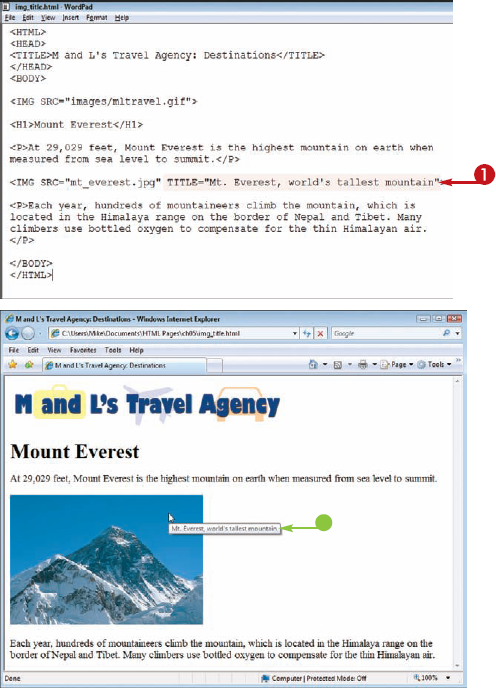
You can add a label that appears whenever the user positions the mouse pointer over a particular image on a Web page. You can use labels to offer detailed information about the image. Labels work differently from alternative text. Alternative text appears on the page itself when images are turned off. A label appears in a pop-up box when the user positions the mouse over the image. You add a label by including a TITLE attribute in the <IMG> tag.
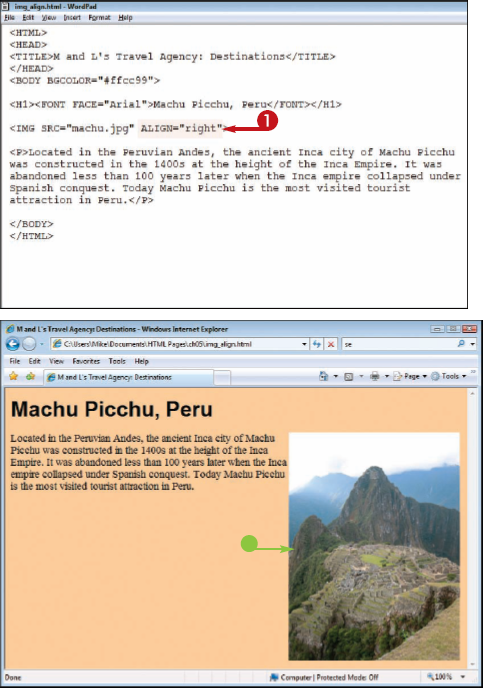
You can use the left and right alignment attributes to control the horizontal positioning of an image on a page. The alignment attributes also control how text wraps around the image. When you align an image to the right, text after it wraps around the left, and vice versa for left alignment. You can center-align an image using the <DIV> tag. See "Center an Image" for details. You can also align an image vertically on a page. See the section "Align an Image Vertically" to learn more.
The Web browser aligns the image as specified.
Note
To center-align an image, see the section "Center an Image."
Note
For greater control over image alignment, consider placing your images in tables. Learn more about using tables in Chapter 7.
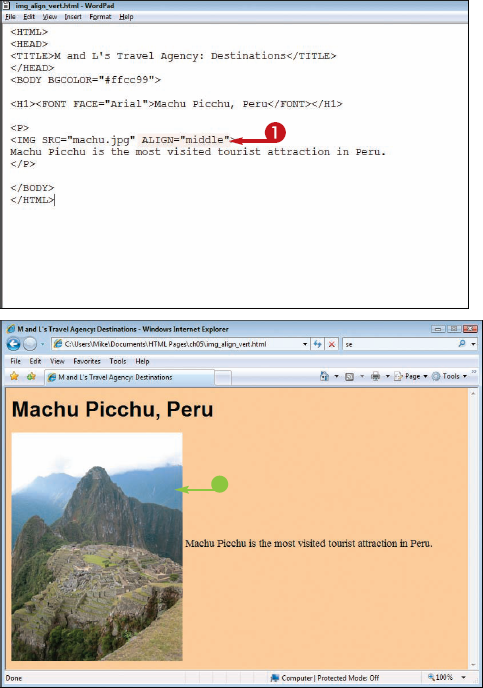
You can use the alignment attributes to control the vertical positioning of an image on a page relative to text that follows it. The alignment attributes are top, middle, and bottom. This can be useful when adding short caption text to an image. You can also align an image horizontally on a page. See the section "Align an Image Horizontally" to learn more.
If the image shares the same line as text, the alignment attribute controls the position of the image relative to the text.
The Web browser aligns the image as specified.
Note
For greater control over image alignment, consider placing your images in tables. Learn more about using tables in Chapter 7.
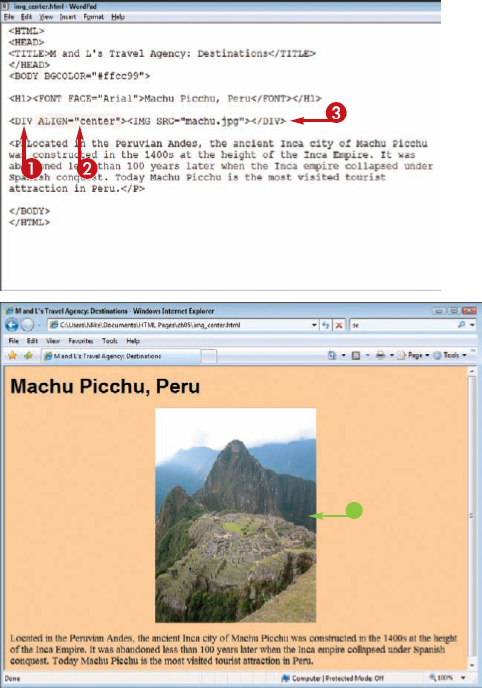
You can center your image on the page using a <DIV> tag and the ALIGN attribute. Centering an image can give it more emphasis and help it stand out from the text or other page elements. You can center an image at the top of a Web page to give the page a fancy or colorful title. You can also align an image horizontally or vertically on the page. See the other sections in this chapter for details.
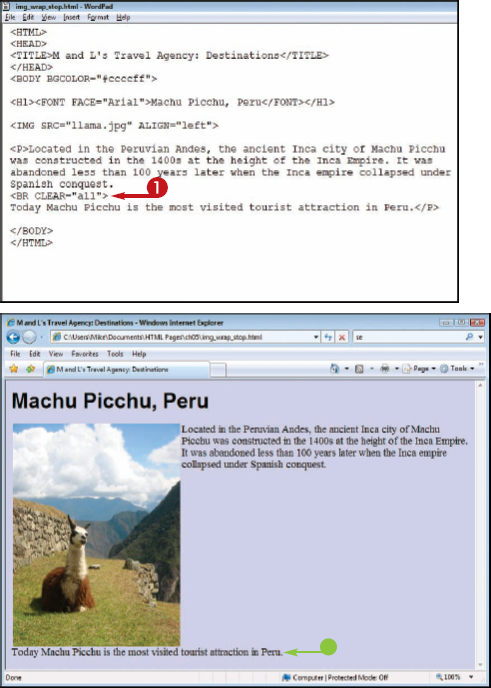
You can stop text wrapping around your images using the line break tag along with the CLEAR attribute. This causes the text or other content following the line break tag to begin at the bottom of the image. You can cause text to wrap around your image in the first place by aligning the image using the ALIGN attribute. See "Align an Image Horizontally" for details.
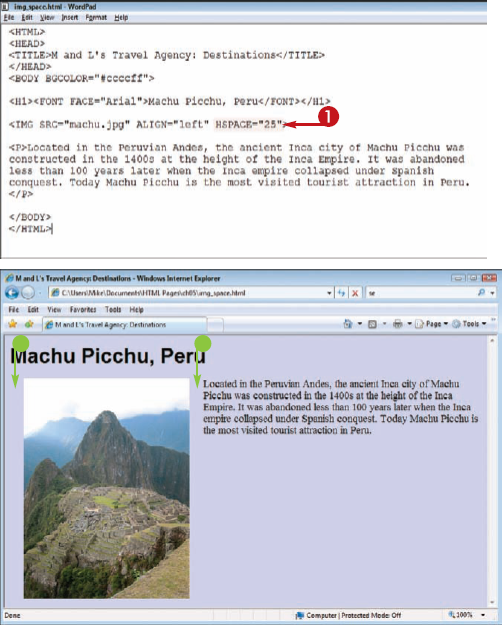
Most Web browsers display only a small amount of space between images and text. You can increase the amount of space, also called padding, to make the page more visually appealing and easier to read. You can control padding on the left and right sides of an image with the HSPACE attribute. You can control the padding above and below an image with the VSPACE attribute. Padding can add whitespace between the image and its caption.
The values used with the attributes specify the padding in pixels.
You can add one or both attributes to an image.
If you add both attributes, separate them with a space in the HTML coding.
HSPACE and VSPACE add space to two sides at a time. To add space to just one side, for example the bottom of an image, use style sheets. See Chapter 11 for details.
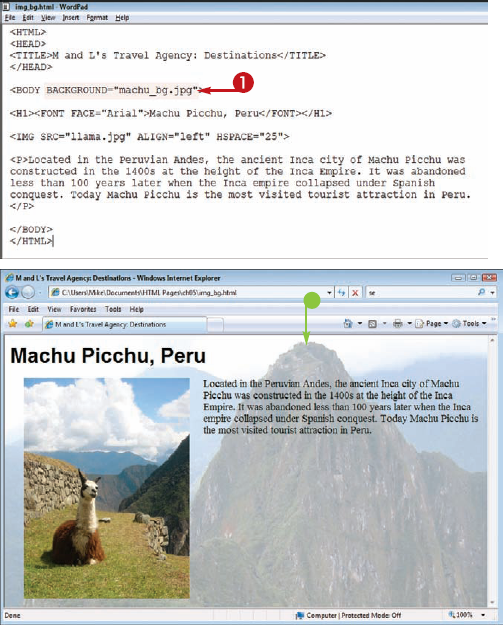
You can turn an image into a background for your Web page by setting an attribute in the <BODY> tag. When selecting an image for a background, try to factor in how your text will appear against the image. You may need to change the color of the text to make it legible. See Chapter 4 for details about changing the text color. If you use a large image file, it fills the entire background. If you use a smaller image, the browser tiles the image across and down the page to fill the background with a repeating pattern. Seamless background images have opposite edges that align with one another. This can make a tiling background look like a single image.
In this example, because the image was saved in the same folder as the HTML file, you reference it with just the file name.
Note
To learn how to change the text color, see Chapter 4.