
Integrating text from a data source
Dreamweaver Technique: Adding Dynamic Data
Formatting dynamic text
Inserting graphics dynamically
Dreamweaver Technique: Making Dynamic Images
Working with Flash dynamically
By the time a visitor sees an active Web page in his or her browser, its data should blend seamlessly into the rest of the page. As with a well-crafted form letter, the reader shouldn't be able to tell where the basic structure starts and the dynamically generated data begins. Much of the work in Dreamweaver consists of properly placing and formatting data into a page layout.
You're not limited to dynamically integrating basic text into your Web applications with Dreamweaver. After text is included, you can format its look and feel on both the client and the server sides. Additionally, you can include images, form elements such as checkboxes, drop-down lists, and even multimedia elements such as Flash movies on-the-fly. Finally, Dreamweaver permits almost any HTML attribute to be dynamically altered. This chapter explores all the fundamentals necessary for integrating dynamic data into your Web page.
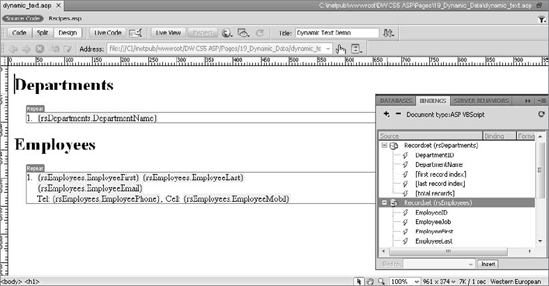
The Bindings panel is the key tool for accessing dynamic text. With a recordset expanded, any or all of the available fields within it are ready to be placed on the page. Moreover, after a field is inserted into the page and selected, the Bindings panel reflects its current data format.
Note
Before you begin including dynamic data, you need to establish a data source connection and recordset, so be sure you're familiar with the techniques described in Chapter 18 before proceeding.
After you have a recordset or other data source declared, adding dynamic text is as simple as dragging a field name onto the page. After the field is inserted, Dreamweaver displays it with the syntax {recordset_name.field_name}. For example, the column named CITY located in a recordset named rsLocations is displayed as {rsLocations.CITY}. If you choose View
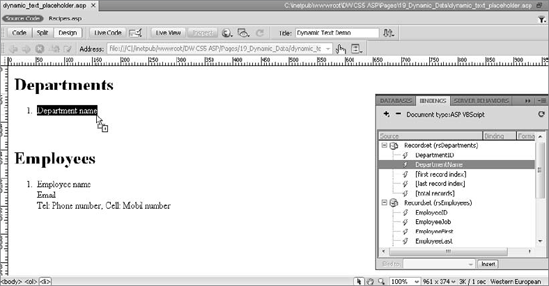
Dynamic pages are a combination of standard HTML and dynamic elements. It's possible to build the page in any order. You can insert your dynamic elements first, followed by HTML objects, or you can build the HTML page before adding your data. Many designers, whether they're working by themselves or on a team, find the latter method more productive. One common technique is to use static placeholders to mark where the dynamic data should go, as shown in Figure 19-2.
Perhaps the quickest way to bring dynamic data onto the page is to use the drag-and-drop capability, as detailed in the following steps:
In the Document window, select the static placeholder text to be replaced by the dynamic data.
From the Bindings panel, expand your recordset or other data source until the desired field or dynamic element is displayed.
Drag the dynamic data from the Bindings panel and drop it on the selected text.
If you are not using placeholder text, you can drop the dynamic data wherever you'd like it to appear.
In some situations — when a table has many dynamic data fields, for example — the Insert method is easier than the drag-and-drop technique. For those cases, first select the placeholder text or position your cursor if no placeholders are used. Then highlight the desired dynamic data and click the Insert button on the bottom of the Bindings panel.
Tip
Occasionally, the dot notation syntax leads to extremely long names, which can make the layout process more difficult. You can switch from using the curly braces and full data name to just using the curly braces — and then switch back again — by choosing the desired option from the Show Dynamic Text As drop-down list. (This list is found under the Invisible Elements category of Preferences.)
You have three basic ways to see your page with the data extracted from the data source and fully integrated into the HTML:
Upload the page to your remote testing server and view it through a Web browser.
Use Dreamweaver's Preview in Browser feature to test your page on the testing server. Dreamweaver takes care of uploading the files for you.
Switch to Live View within Dreamweaver.
Which should you use? Uploading or previewing your page is great for giving an accurate browser rendering of your dynamic (or static) page, but you can't edit the elements or styles. The final method — Live View — is handiest when you want to display your dynamic data and still retain CSS editability. The other methods are important to keep in mind and should be included in a regular routine of Web application development.
To see your data within the page quickly in Live Data view, choose View
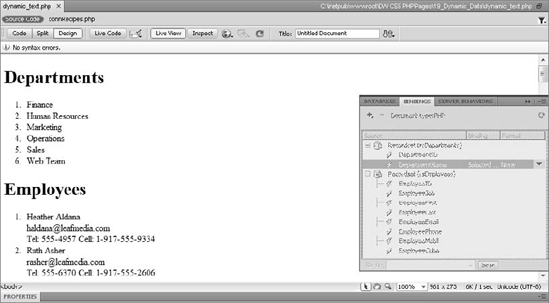
Figure 19-3. Live View uses your designated testing server to display actual data from your data source in design time.
Without any additional server behaviors — most notably Repeat Region — all data displayed is from the first record of the chosen recordset.
Note
Live View has more features regarding data than are noted here — all of which are covered in Chapter 21.
Adding Dynamic Data
In this Technique, you begin to familiarize yourself with binding dynamic data to the page.
From the Techniques - Dynamic site (established in Chapter 18), expand the 18_Dynamic_Data folder and open the
dyn_data_startfile for your server model.From the Bindings panel, click Add (+) and select Recordset (Query) from the list.
When the Recordset dialog box opens, make sure that you're in Simple, not Advanced, mode; if necessary, click Simple.
In the Name field, enter rsAgents.
From the Connection list, choose RelativeRealty.
From the Table list, choose Agents (agents in PHP).
Leave the Columns option set to All.
From the Sort list, choose agentLastName and Ascending.
Click OK to close the dialog box.
Now that the recordset has been created, you can begin to bind the data to the page. You'll find it easier to work with the table if you enable Visual Aids

Place your cursor in the second cell from the left, in the second row under the middle of the phrase, Leading Agents.
In the Bindings panel, expand the rsAgents recordset.
Select the agentFirstName entry from the Bindings panel and click Insert.
Move your cursor to the right of the dynamic data just inserted and add a space.
From the Bindings panel, choose agentLastName and click Insert.
Place your cursor in the cell under the Office Phone label, choose agentPhone from the Bindings panel, and click Insert.
Place your cursor in the cell under the Cell Phone label, choose agentCell from the Bindings panel, and click Insert.
Choose View
Choose View
In the next Technique, you add a dynamic image to the page along with some server-side formatting.
After a field has been incorporated into a page, it acts just like any other text within a tag. Dynamic text can be formatted with either HTML tags — such as <h2>, <strong>, or <span> — or styled with Cascading Style Sheets (CSS). The easiest method is simply to replace the static placeholder text, styled as your layout demands, with the dynamic text. The tags and CSS surrounding any dynamic text can be altered at any time.
Tip
It's also possible to include HTML tags in the stored data. When the data is included in the page, the browser interprets the HTML normally. For example, you can have a memo field in an Access database (for data containing more than 255 characters) with italic tags (<i>) surrounding key phrases. This is perfectly acceptable to Access — which sees the tags as just text — and also perfectly acceptable to Dreamweaver.
Dreamweaver not only supports client-side formatting of your dynamic data; it also offers a wide range of server-side formats, and it gives you the capability to create your own. Information is stored in databases according to a particular type. Some fields are designated as text, others are numbers, and still others fall under the date/time category. The same data type within a specific category may be formatted in numerous ways.
Dates are a good example of why data formatting is important. In the United States, dates are typically presented in a month-day-year format — such as March 31, 2008. In much of the rest of the world, however, dates are presented in a day-month-year format, as in 31 March 2008. By default, servers are generally set to display dates appropriate to their regions. The same holds true for currency: U.S. currency figures are presented with a dollar sign, for example, and UK currency is shown as euros or English pounds.
When initially inserted onto the page from the Bindings panel, dynamic data does not have a specific format applied. Data from currency and time/date use the default formats for their data types. Different formats are chosen from the Bindings panel, as outlined in the following steps:
Select the dynamic data that you want to format from the Document window. The corresponding field in the Bindings panel is highlighted.
From the Bindings panel, click the down arrow under the Format column to reveal the format list, as shown in Figure 19-4.
Tip
The Bindings panel is usually pretty narrow. The Format column may be hidden off the right side of the screen. Use the scrollbar to move to the right and resize the Source column to make it narrower, or simply make the Bindings panel wider to get access to the right-hand columns.
From the Format List, select the appropriate category for your data.
If more than one format is available, choose a specific format from the category's submenu.

To see the newly applied format, choose View
Each of Dreamweaver's five server models offers slightly different data formats through the Bindings panel. A complete list of all the standard data formats, with relevant examples, is shown in Tables 19-1 (ASP), 19-2 (ColdFusion), and Table 19-3 (PHP).
Table 19-1. ASP Data Formats
Format | Option | Example |
|---|---|---|
Date/Time | General Format Long Format Short Format Weekday, Month Date, Year Date Month Year Month Date, Year YY-M-DD YY-MM-DD DD-MM-YYYY M/D/YY DD/MM/YY YY/MM/DD Long Time Format Short Time Format h:MM:SS AM/PM HH:MM:SS hh:MM:SS a.m./p.m. HH:MM | 3/31/2008 Monday, March 31, 2008 3/31/2008 Monday, March 31, 2008 31 March 2008 March 31, 2008 08-3-31 08-03-31 31-03-2008 3/31/08 31/03/08 08/03/31 9:15:00 PM 21:15 9:15:00 PM 21:15:00 09:15:00 p.m. 21:15 |
Default 2 Decimal Places Rounded to Integer Leading 0 If Fractional No Leading 0 If Fractional () If Negative Minus If Negative Group Digits Do Not Group Digits | $2,300.99 $23.99 $23.51 = $24 $0.99 $.99 ($23.99) −$23.99 $2,300.99 $2300.99 | |
Default 2 Decimal Places Rounded to Integer Leading 0 If Fractional No Leading 0 If Fractional () If Negative Minus If Negative Group Digits Do Not Group Digits | 2,300 23.00 23.51 = 24 0.99 .99 (23) −23 2,300 2300 | |
Percent | Default 2 Decimal Places Rounded to Integer Leading 0 If Fractional No Leading 0 If Fractional () If Negative Minus If Negative Group Digits Do Not Group Digits | 2,300% 23.00% 23.51% = 24% 0.99% .99% (23%) −23% 2,300% 2300% |
Upper Lower | Mixed Case = MIXED CASE Mixed Case = mixed case | |
Trim | Left Right Both | " Widgets " = "Widgets " " Widgets " = " Widgets" " Widgets " = "Widgets" |
Absolute Value | N/A | +23 or −23 = 23 |
Round Integer | N/A | 23.51 = 24 |
Encode — Server.HTMLEncode | N/A | I'm <b>bold</b> =I'm <b>bold</b> |
Encode — Server.URLEncode | N/A |
|
Path — Server.MapPath | N/A | Server.MapPath(/myDocs) = D:/HTDOCS/lowery/myDocs |
Table 19-2. ColdFusion Data Formats
Format | Option | Example |
|---|---|---|
General Date Format Weekday, Month Date, Year Date Month Year Month Date, Year DD-MM-YY YY-M-DD YY-MM-DD DD-MM-YYYY M/D/YY DD/MM/YY YY/MM/DD General Time Format h:MM:SS AM/PM HH:MM:SS hh:MM:SS A/P HH:MM | 31-Mar-08 Monday, March 31, 2008 31 March 2008 March 31, 2008 31-03-08 08-3-31 08-03-31 31-03-2008 3/31/08 31/03/08 08/03/31 9:15 PM 9:15:00 PM 21:15:00 09:15:00 P 21:15 | |
Currency | General Format Dollar Format Local Format International Format | 2,300.99 $2,300.99 $2,300.99 USD2,300.00 |
Default 2 Decimal Places Rounded to Integer () If Negative Minus If Negative Do Not Group Digits | 2,300.99 23.99 23.51 = $24 (23.99) −23.99 2300.99 | |
AlphaCase | Upper Lower | Mixed Case = MIXED CASE Mixed Case = mixed case |
Trim | Left Right Both StripCR | " Widgets " = "Widgets " " Widgets " = " Widgets" " Widgets " = "Widgets" "The End" = "The End" |
Abs Atn Ceiling Cos DecrementValue Exp Fix IncrementValue Int Log Log10 Randomize Round Sgn Sin Sqr Tan | Returns the absolute valueReturns the arctangentReturns the next highest integerReturns the cosineLowers the number by 1Returns the exponentRounds the number toward zeroIncreases the number by 1Returns an integerReturns the natural logarithmReturns the logarithm to base 10Seeds the random number generatorRounds to the closest integerReturns 1 for positive numbers, −1 for negative numbersReturns the sineReturns the square rootReturns the tangent | |
Encode — URLEncoded Format | N/A |
|
Encode — PreserveSingleQuotes | N/A | 'The Answer' = 'The Answer' |
String — Reverse | N/A | 'The Answer' = 'rewsnA ehT' |
Table 19-3. PHP Data Formats
Format | Option | Example |
|---|---|---|
AlphaCase | Lower Upper First Letter Upper Capitalize | My Widgets = my widgets My Widgets = MY WIDGETS My Widgets = My widgets My Widgets = My Widgets |
Trim | Left Right Both | " Widgets " = "Widgets " " Widgets " = " Widgets" " Widgets " = "Widgets" |
Encode | HTML Encode URL Encode Raw URL Encode URL Decode Raw URL Decode | I'm <b>bold</b> = I'm <b>bold</b>
|
Although Dreamweaver includes a wide variety of format selections, sometimes only a custom format will do. In Dreamweaver, you can edit existing currency, number, or percent formats, or you can create your own version of any of these types from scratch. After a new format has been defined — or an old one has been altered — that format is available for any sites using the same server model under which it was created. To edit or create a new data format, follow these steps:
Select the inserted dynamic data in the Document window that requires the custom format. The corresponding field is highlighted in the Bindings panel.
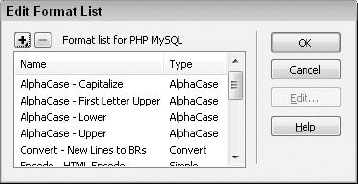
In the Bindings panel, click the down arrow in the Format column and choose Edit Format List from the drop-down menu. The Edit Format List dialog, shown in Figure 19-5, is displayed.
To alter an existing currency, number, or percent format, select the format and click the Edit button. If you prefer to create an entirely new format, click the Add (+) button and from the pop-up list select Number, Currency, or Percent. The appropriate dialog box opens. If you attempt to edit a format other than the three types allowed, Dreamweaver notes that the format has no parameters to customize.
Note
You can't edit any of the built-in formats or add additional formats in the .NET server model without manually editing the format configuration files in the Dreamweaver Configuration folder.
In the Number, Currency, or Percent dialog box, design your format by adjusting the four available drop-down lists:
# Digits after Decimal Point: Choose a value from 0 to 20.
Leading Zero (if Fraction): Select Yes, No, or Default for locale.
Negative: Select Parentheses, Minus sign, or Default for locale.
Group Digits: Select Yes, No, or Default for locale.
When you're finished, click OK to close the specific format dialog box.
Give the format a name to be displayed in the Format column in the Bindings panel.
To edit or create another format, repeat Steps 3 through 6.
To delete a format, select it from the list and click Remove.
When you're finished, click OK.
Dreamweaver applies your newly created format to the selected dynamic data. Use Live View to preview your new format.
The Web is both a textual and a visual medium. You've seen how Dreamweaver replaces static text with dynamic text from a database. But how does it handle images? Dreamweaver dynamically inserts images by using the path to the image rather than the image itself. Proper database setup is critical for Dreamweaver to correctly deliver dynamic images. For example, a product database might have the following records:
SKU# | Name | Cost | Image |
|---|---|---|---|
10101 | Widget-O-Wonder | $99.99 |
|
10102 | WidgetMatic | $49.99 |
|
10103 | Widget-Ultimo | $999.99 |
|
In this example, Dreamweaver extracts the data from the Image field and plugs that data into an attribute of the <img> tag's src attribute. Because site-root–relative links are used in the data source, the images can be inserted dynamically from any page in the site. If your dynamic images are located on a remote server, you must enter a full URL — with the http:// prefix — in a text field in the data source.
Warning
Some databases, including Access, allow fields to be set up as hyperlink types. Although it may not seem logical, fields containing paths to images should be a text type, not a hyperlink type. Hyperlink type fields are used only inside Microsoft Access applications and are never used for live sites. Hyperlink-type images already include the HTML code for a link. That won't work in Dreamweaver.
It is also possible to use document-relative pathnames in image fields of the database. However, you have to be careful which pages the dynamic images are inserted into; the pages must be stored in the proper location relative to the path of the images.
Perhaps the best course of action is to store just the filenames of the images themselves in the data source. When the dynamic image is inserted into Dreamweaver, additional path information can be added as needed. For example, suppose the image field contained only filenames with no path information, such as w_wonder.gif in a field named images of a recordset rsProducts. Here's an example of how that code would be generated by Dreamweaver for ASP:
<%=(rsProducts.Fields.Item("images").Value)%>In Dreamweaver, you can preface that code — either when it is inserted or through the Property inspector — with any necessary path information. If my document is at the site root and the images are stored in the /images/products folder, I adjust the code like this:
images/products/<%=(rsProducts.Fields.Item("images").Value)%>After your data source is correctly set up for images, inserting them in Dreamweaver is very straightforward, as shown in the following steps:
Make sure that you define a recordset with at least one field consisting of paths to graphics.
Position your cursor where you want your dynamic image to appear.
From the Common category of the Insert panel, select Insert Image.
Alternatively, you can drag the Insert Image button to the proper place on the page. In either case, the Select Image Source dialog box appears.
From the Select Image Source dialog, Windows users should choose the Select file name from Data sources option at the top of the page. Macintosh users should click the Data Sources button found just below the URL field.
If necessary, expand the data source to locate and select the desired image field, as shown in Figure 19-6. Dreamweaver places the code for inserting the dynamic image into the URL field.
If your image data (the paths to the images) contains spaces, tildes, or other nonstandard characters, the data must be encoded properly to be read by the server. From the Format List, select Encode — HTML Encode (PHP), Encode — Server.HTMLEncode (ASP), or Encode — URLEncoded Format (ColdFusion).
If your data is stored as filenames only, enter any required path in the URL field before the existing code. The path information may be document-relative, site-root–relative, or absolute.
When you're finished, click OK.
You can get a quick view of your work by choosing View
Tip
If possible, store the height and width of your images in separate fields in the database. This prevents images from resizing in the browser and causing the page to jump as the browser determines each image's size. You also need the height and width for each image if you're validating against an XHTML DOCTYPE.
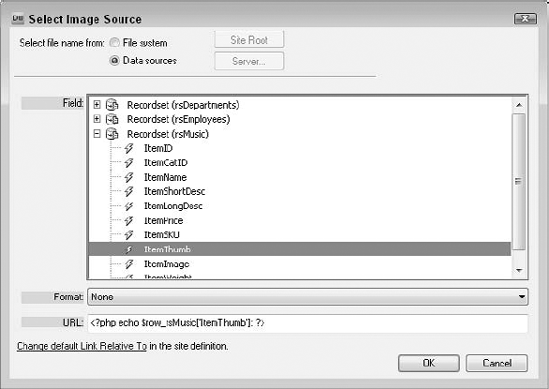
Figure 19-6. When inserting a dynamic image, you specify only the data source and field. Dreamweaver automatically inserts the image with the correct dimensions.
If you use static graphic placeholders in your design, you can use an alternative technique. From the Bindings panel, drag the field containing the image names onto the static graphic. If your data is just filenames without path information, you have to add the required path to the beginning of the src attribute in the Property inspector or the Tag inspector.
Note
Some databases support storing the actual images as a Binary Large Object (BLOB). The BLOB protocol is not supported directly in Dreamweaver.
Just as you can assign a dynamic value to the <img> tag's src attribute, you can assign any data-source–derived value to any other attribute by binding (attaching) the field to the attribute. Attributes are generally assigned dynamic values through the Bindings panel or the Property inspector, after which the Bindings panel displays the attribute attached to each field in the Binding column. A data field used for dynamic images, for instance, shows img.src in its Binding column.
I recently used Dreamweaver to create a content-management system for a client. The page uses a standard template with areas for the heading, bylines, content, and images, served dynamically according to the topic. The images each have a specific alignment — some are set to the browser default, whereas others are aligned left or right. To handle this correctly, you create a separate field for image alignment in the data source.
With the database properly prepared, the attributes are set dynamically by following these steps:
Select the placeholder for the dynamic image, which is already inserted on the page.
From the Bindings panel, select the field that contains the data for the attribute you'd like to dynamically generate.
At the bottom of the Bindings panel, choose the desired attribute from the Bind To list, as shown in Figure 19-7, or click the down arrow in the Binding column if you've already bound an attribute to the image.
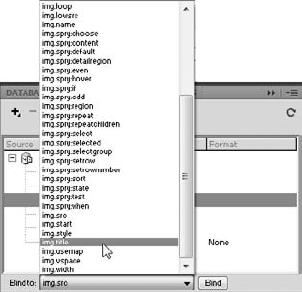
Figure 19-7. Change more than just the image dynamically by using the Bind To feature to link any tag attribute to a data source.
The Bind To list changes according to the object selected. To change the alignment on an
<img>tag, chooseimg.alignfrom the list.Select Bind. The selected attribute is displayed in the Binding column of the chosen field.
To get an idea of what's possible, select a dynamic image and then look at the list in the Binding column. The <img> tag offers 23 different attributes that may be dynamically generated — everything from the heavily recommended alt parameter to the special case vrml attribute.
Note
To find the details on any or all of these attributes, choose Help
Making Dynamic Images
The next phase in developing this dynamic page is to add thumbnail images and server-side formatting.
Open the
dyn_data_startfile for your server model previously worked upon.Select the rsAgent.agentFirstName dynamic text on the page.
Press Shift+Tab to move to the previous cell.
An alternative approach to make sure your cursor is properly placed is to enter Expanded Table mode by pressing F6.
From the Common category of the Insert toolbar, choose Images: Image.
When the Select Image Source dialog box opens, choose the Select file name from Data sources option.
Expand the rsAgents recordset, and select agentPhoto.
In the URL field, place your cursor at the beginning of the inserted code and enter the path to the images folder:
../images/.
Test your page by switching to Live View (View
From the Bindings panel, select the agentFirstName entry.
Select the Format list on the far right of the entry and, from the list, choose AlphaCase
You may need to scroll the Bindings panel to the left to see the drop-down arrow in the Format column. After you make the format change, the agent's first name will automatically be uppercased.
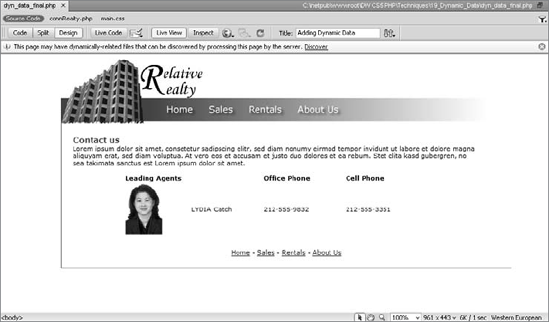
Choose View
You'll revisit this page in the next chapter when you learn how to show additional data from a recordset on the page using a Dreamweaver server behavior.
Just as text and images can be inserted into documents on-the-fly, all manner of multimedia — including Flash and files requiring ActiveX controls or applets — can also be dynamically incorporated. The core technique of attaching a data source is the same for multimedia files as it is for images; when you insert a multimedia object, choose the desired data source from Dreamweaver's dialog box. The linking code is automatically written into the proper parameter for the object.
Most multimedia objects are inserted into HTML by using an <object> tag, an <embed> tag, or a combination of the two; Java applets use the <applet> tag. Dreamweaver handles the basic file assignments for specific programs with its own icon in the Insert panel: examples are Flash and Shockwave. If you examine the code, you can see that even these objects use the <param> tag (short for parameter) to declare the source of the media file. ActiveX and applet files rely on <param> tags to specify needed attributes. Dreamweaver enables you to choose either static or dynamic values for any <param> tag.
Note
When you insert a Flash or Shockwave movie, Dreamweaver now includes a JavaScript file and references a function from that file. All parameters (dynamic and otherwise) inserted through the Property inspector and associated dialog boxes are correctly written into the JavaScript code automatically.
You enter the <param> values through the Parameters dialog box, which is displayed when you click the Parameters button on the Property inspector. As shown in Figure 19-8, the Dreamweaver Parameters dialog box consists of two columns, one for the name of the parameter and one for the corresponding value. Entries in either column can be assigned dynamic content by clicking the lightning bolt icon. When this icon is selected, the Dynamic Data dialog box opens and an appropriate data source — from those already declared in the Bindings panel — can be assigned.
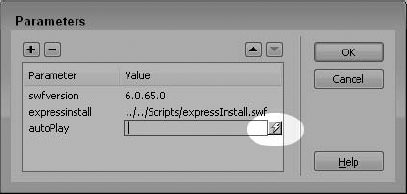
Figure 19-8. Dynamically alter parameters for any multimedia object by clicking the lightning bolt icon and picking a proper data source.
How you store the path to the movie is critical if you're dynamically switching Flash movies. As with images, perhaps the best tactic is to use only the filename in the database field and supply additional path information as needed. Here are the steps to display different Flash movies dynamically:
Position your cursor where you'd like your dynamic content to appear, and click Insert Flash from the Common category of the Insert panel.
Alternatively, you can drag the Insert Flash button to the proper place on the page. In either case, the Select File dialog box appears.
Windows users choose the Select file name from Data sources option at the top of the page. Macintosh users select the Data Sources button found just below the URL field.
Expand the data source to locate and select the desired field with the Flash movie filenames.
If your Flash data (the paths to the movies) contains spaces, tildes, or other nonstandard characters, the data must be encoded to be read properly by the server. From the Format List, select Encode — Server.HTMLEncode (ASP); Encode — HTMLEncodedFormat (.NET); Encode — URLEncoded Format (ColdFusion); or Encode — Response.EncodeURL (JSP).
If your data is stored as filenames only, enter any required path in the URL field before the existing code.
You can also link any Flash attributes to a dynamic source by clicking the Parameters button to open the Parameters dialog box, entering a dynamic value by clicking the lightning bolt symbol under the Name or Value column, and choosing an appropriate data source from the Dynamic Data dialog box.
Click OK when you're finished.
Note
For more details on integrating Flash movies in your Web pages, see Chapter 25.
Incorporating dynamic data into your standard Web pages is a core skill for building data-driven Web applications, along with establishing a data source connection and defining a recordset. After you have these three components in place, you can begin combining HTML pages with text, images, and even multimedia data. Dreamweaver combines sophisticated connectivity with drag-and-drop simplicity for quick insertion of dynamic content. Keep the following items in mind as you begin to integrate data-driven and static content:
The Bindings panel displays fields available for insertion into a Web document, much like the Assets panel, which shows available images and other elements. Like the Assets panel, data is inserted from the Bindings panel through a drag-and-drop procedure. For complex layouts, you can position your cursor precisely and click the Insert button instead of dragging and dropping the dynamic fields.
Dynamic text accepts two types of formatting: client-side and server-side. Client-side formatting is another term for standard HTML and CSS formatting; dynamic text may be styled with the same tags and attributes as regular text. The final look for these tags and attributes is interpreted by the browser. Server-side formatting, on the other hand, reshapes the data from the data source before it passes it on to the browser.
If you encounter trouble inserting dynamic images into your Web applications, chances are you're not doing anything wrong in Dreamweaver. The error may lie in your database setup. It's key to store the path and/or filename of the images in the data source as a text field rather than as a hyperlink.
Dreamweaver does not support loading images as binary images from data sources, otherwise known as Binary Large Objects (BLOBs).
Flash movies — in fact, any multimedia file — can be dynamically inserted into a Dreamweaver page. Again, storing just the filename or the filename and path in the database field is the best approach.
Any attribute, whether of a multimedia object or regular image, can be dynamically derived. The Parameters dialog offers options for inputting either dynamic or static attributes and values on multimedia objects, and the Bindings panel allows you to bind dynamic data to attributes.
In the next chapter, you see how to begin managing your data in Dreamweaver.