
Chapter 9
Sites, Subsites, and Workspaces
You've seen all the amazing things you can configure with lists and libraries. Now it's time to look at what you can do to the site overall and how to leverage SharePoint to provide multiple sites for multiple purposes and users. Adding new sites to a site collection is easy, and you can customize these sites to do almost anything. From adding additional Team Sites to providing blogging and wiki services, SharePoint offers numerous site types and configuration offerings.
In this chapter, you'll learn how to
- Create and customize a new site
- Adjust a site's settings for administrative purposes
- Understand the different types of SharePoint site templates available
Definitions and Concepts
To better understand the different types of SharePoint sites, let's first review some core definitions and concepts:
Site A site is simply a shorter way of saying a SharePoint website. A site (as opposed to a site collection) is a collection of web page documents, connected by links, usually under a single URL, such as http://spf2/default.aspx and http://spf2/lists/tasks/allitems.aspx. A site in SharePoint is either a top-level site or a subsite in a site collection.
Site Definition Each SharePoint site is based on a site definition. This determines what all sites based on the definition can do, what web parts are available, whether any custom features are loaded, and how libraries and lists are configured. The site definition is the underlying framework for SharePoint sites.
Site Template A site template is similar to the site definition in that it determines how a site is displayed; what premade lists, libraries, and web parts are created; and what settings and configuration are available. It essentially refines the potential of a site definition into discrete sites for different purposes. A site template is used to generate the site and is applied when a site is created; once the site is created, the template is done, and the site can be customized further. All templates have, as their base, a site definition. Site templates require a site definition to work from. Thus, regardless of which template you use for a site, they all have the same capabilities set by the site definition; they differ only in which capabilities have been applied, what is pre-built, how it is laid out, and how it looks.
SITES CAN BE BASED ON TEMPLATES OR SITE DEFINITIONS
The sites we will be looking at are those created by the default templates available with SharePoint Foundation. However, it is possible, if you are a developer, to create a great site definition and simply use it to create a site, avoiding the need for a template. Site definitions can even contain information for separate basic sites based on their settings and features (which is what meeting workspaces use). The details are beyond the scope of this book, but it does need to be said, should you come across a fancy site definition and are told it can be applied to a site without a template. Most often, though, for the convenience, people create templates based on an existing site definition and use those instead.
Site Collection A site collection is just that, a collection of sites under one starting address. Often they are created to be a grouping of related sites. The first site in the collection is called the top-level site, and all subsequent sites below that are called subsites. All sites in a site collection can share users and permissions and many galleries and can reside in the same basic path. Each site is created based on a template, including a blank one if you simply want to customize it from the ground up in SharePoint Designer. Site collections are contained in web applications. There can be more than one site collection per web application. For web applications with one content database, 2,000 site collections is the supported limit. For more about site collections and related topics, see Chapter 10, “Site Collections and Web Applications.”
Top-Level Site This is the first and “top” site in a collection. All site collections require at least one site: the top-level site. This is the site that holds the settings for administering the entire site collection. Although the top-level site is created based on a template just like all others, its security settings and galleries can affect all other sites in the collection. See Chapter 10 for more about top-level sites and their settings.
Subsite This is a site that resides under another site. Often the upper site is called the parent site, and the subsite is called a child site. All top-level sites and their subsites reside in a site collection. A site considered “under” another site is one that has its address further down the path from the site “above” it, such as http://spf2/subsite1/. Subsitel is a child of the top-level site located at http://spf2.
Self-service Site This is a site collection (not a site) that is user-created and user-controlled. The ability to create self-service sites is administratively enabled per web application and is not on by default.
When creating SharePoint sites (whether top-level sites or subsites), you can use site templates based on site definitions to configure the new site to do exactly what you need. By default, SharePoint has several existing site templates:
- Team Site
- Blank Site
- Document Workspace
- Blog
- Group Work Site
- Meeting Workspaces (there are several different types of meeting workspace templates to choose from, all using the same site definition)
- Custom
Before we dig deeper into what these sites can do and how they differ from each other, let's first take a closer look at how to create a new subsite and apply different settings from custom themes to site administration. Once you've seen how you can modify any site, we'll examine each of the default templates and even create one.
Creating a New Subsite
Before creating a new subsite, you need to keep the overall structure of your site collection in mind. At first, creating a new subsite below your main site is straightforward; however, as your SharePoint deployment grows, you'll need to keep track of where a subsite is located relative to other sites. In a similar fashion to designing organizational units (OUs) in Active Directory, it pays to plan ahead before creating a new subsite. Consider the purpose of the new site, user access desired, and how long you intend the site to exist. Subsites can be created with the intention of being temporary, such as a workspace for a project, or permanent, such as a team site for a particular department or organization.
For this example, we'll build a new team site for the human resources (HR) department to give them a place to work and share documents without cluttering the main site. It will need to be just like the main Company Site but designed specifically for human resources.
To create a new site, follow these steps:
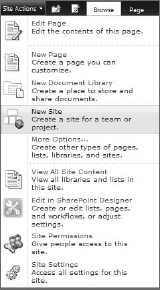
Go to the New SharePoint Site page by clicking Site Actions and choosing New Site, as shown in Figure 9.1. For this example, the site will be created off the top-level site.
FIGURE 9.1 The Site Actions menu
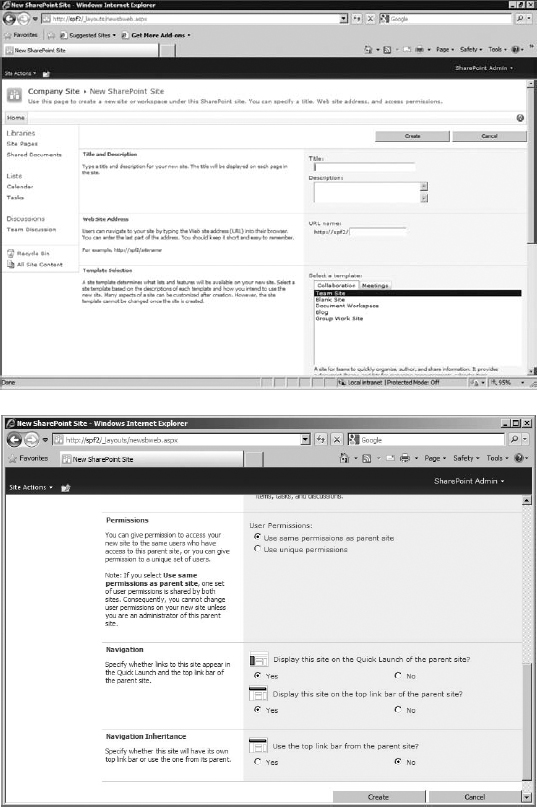
The New SharePoint Site page will appear, as shown in Figure 9.2. This is where you enter the initial settings for the new site.
FIGURE 9.2 The New SharePoint Site page: (top) the first three sections; (bottom) the last three sections
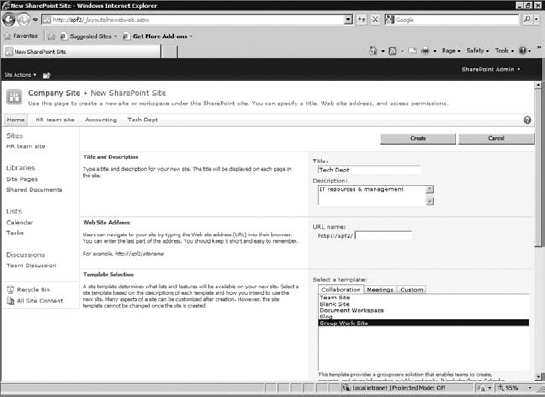
- The Title And Description section is pretty clear. Enter a name for the site (my example is HR team site). For the description, enter something useful to describe the purpose of the site; my example will contain forms, data, and documents pertaining to the human resources department. This site is intended to be a resource for all employees and staff.
For Web Site Address, you can set the URL for the site. SharePoint has a limit of 260 characters in a single URL, so keep this short—you could end up placing more sites, libraries, and workspaces below the new site. It's a good idea to use one word without spaces. Enter an appropriate web page name; my example uses HRteam.
URL LIMIT DETAILS
Microsoft's documentation says that SharePoint has a limit of 260 characters in URL paths, which includes the protocol, server name, and file path, ending with the filename and extension (such as http://spf2/subsite1/documents/Shared%Documents/a11items.aspx).
However, SharePoint has a maximum character limit of 255 characters for a single line of text field, so you might want to consider that your URL limit instead. It might not seem to have much to do with the URL in the address bar, but if you are going to use the Send To capability of libraries or use links to access SharePoint resources (such as adding links to the Quick Launch bar, top link bar, or Links list), then you can't enter URLs longer than 255 characters into their fields.
This is why many people will say that SharePoint doesn't support more than 255 characters in a URL. It's not technically accurate, but it could be considered practically so.
Something you might have noticed is that SharePoint adds extra parameters to URLs, appending things such as view names to the path (the parameter usually starts with a question mark at the end of a URL path). The URL path character limit affects the URL path only; parameters have no impact on the limit. With added parameters, the URL can easily exceed 260 characters. You may have seen this and wondered why the page still opens. Now you know why.
- Under Template Selection, there are a number of templates you can use to speed up the design and layout of your new site. Each template pulls data from a site definition. Under Collaboration, you'll see the Team Site, Blank Site, Document Workspace, Blog, and Group Work Site templates. The Blank Site option creates a completely blank site so that you can customize it using SharePoint Designer or Visual Studio. Under Meetings are the choices for each Meeting Workspace definition. For this example, choose Team Site to create a main site for the HR team. This template has, as you know, a lot of useful lists and web parts already premade and is perfect for HR's uses.
For Permissions, you have two basic choices: Inherit or Custom. You can choose Inherit to have this site use permissions from the parent site. Choosing Custom will force you to create the permissions manually. If you choose to inherit permissions, you can later edit the site, break inheritance, and move to a custom permission set if you need. For more details on permissions, see Chapter 12, “Users and Permissions.” For now, leave the default in place, and use the same permissions as the parent.
WHAT IF YOU CHANGE YOUR MIND?
Don't worry. All of these settings, even the site name and URL, can be changed after the new site is created.
The only option you can't change is the template used. After a site is created, you can't apply a different template. That being said, anything on the Create page is available anywhere in the site collection. This means that if you want a list for your subsite, but it doesn't seem to be available by default, you can easily create it from resources available for all sites in the collection.
- For Navigation, you have the option to have this new site appear as a link on the parent site's Quick Launch bar and top link bar. Adding the links lets people who go to the main site easily move to the HR team site. Selecting No for both will not place the link on the Quick Launch bar or top link bar, but people can still get to the new site by using View All Site Content on the main page or by entering the URL directly in their web browser (http://sp2/HRteam/). Set both of these options to Yes so users can easily visit the HR team site from the top-level site.
- The Navigation Inheritance option sets the new site's top link bar to be the same as the parent site's. This is not always a good idea; it really depends on the new site's intended use. Consider your new site's role and whether the top-level site's top link bar is appropriate. Choosing No will give the new site a new top link bar, with a default Home link that goes to the top page of the new subsite (and not the parent site). This means there won't be an easy way to get back to the parent site from the subsite's home page, but that makes users focus on this site. Choosing Yes will mean this site won't have its own bar; it will use the bar from the parent site (in which case the Home link goes to the parent site). Leave this option set to the default No. When you have finished with your settings, click Create.
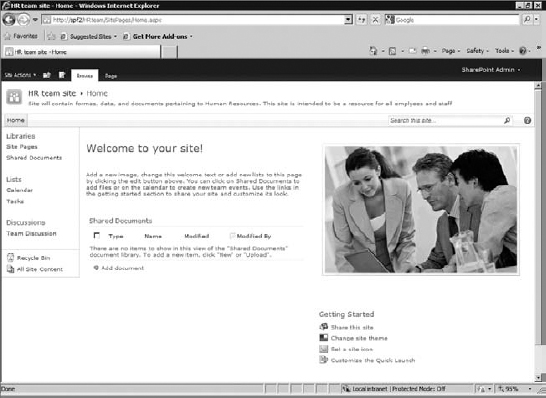
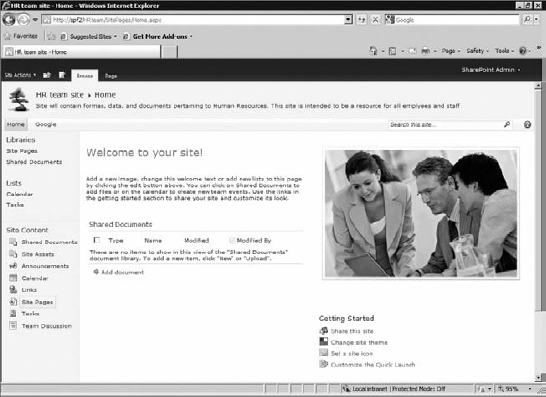
That's it! You now have a new site for human resources, as shown in Figure 9.3. It looks just like the main site. Remember to keep your current path in mind (using the breadcrumbs and Up One Level button) so you keep track of these sites and the page you're using. Another thing to consider is changing the theme of the subsite to make it easy to distinguish whether you are on the top-level team site or the human resources team subsite.
FIGURE 9.3 The HR team site
Site Settings
Your new site is obviously a lot like the old site because it's based on the same template. Fortunately, SharePoint is very customizable, and a lot can be done to the sites to make them unique without any web development.
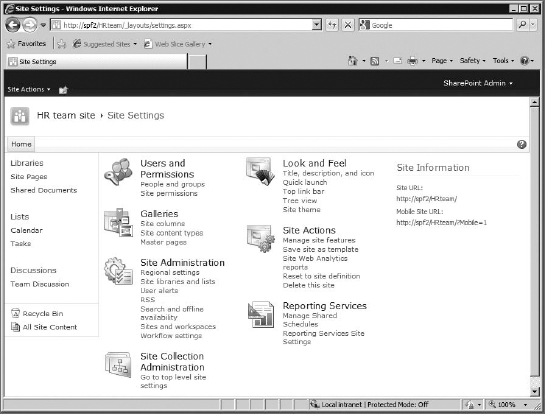
To edit the site's settings, go to the Site Actions menu, and choose Site Settings. You'll see the page shown in Figure 9.4.
FIGURE 9.4 The Site Settings page for a subsite
TOP-LEVEL SITE VS. SUBSITE SETTINGS
The Site Settings page for the HR team site shows the settings available for that site only—as you'd expect. But top-level sites are different. A top-level site is the first site in a site collection, and all subsites that reside below it. So, a top-level site (such as the Company Site in my example) needs to provide the settings for both itself and the entire site collection. For this reason, there are more items available on the Site Settings page for a top-level site.
These site collection settings are not kept in a separate section but dispersed among the site settings based on their function. For example, there are three galleries for sites and an additional four galleries for site collections. So, although the Galleries section for the HR team subsite contains three links, the Galleries section for the company site contains seven.
These additional top-level site settings affect the entire site collection and are covered in Chapter 10.
Users and Permissions
Users and permissions are covered in more detail in Chapter 12, so for now let's just see how they relate to the new HR team site compared to the main Company Site.
PEOPLE AND GROUPS
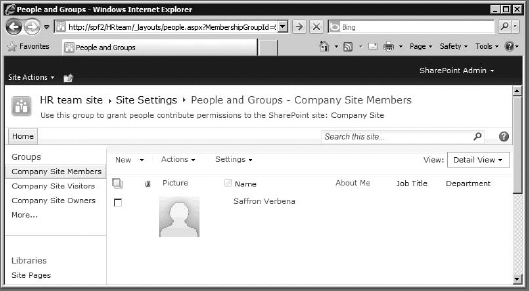
This page indicates who has what permissions to the site and what groups they belong to. Remember that if you chose to inherit permissions from the parent, this page reflects the people and groups created at the top-level site. And any changes made here will actually be made on the Site Settings page for the Company Site (the top-level and parent site in this example), not just to this HR team subsite. In Figure 9.5, notice the single line referring to the Members group of the site: “Use this group to give people Contribute permissions to the SharePoint site: Company Site.” Anything you do on this page—adding groups, users, and so on—is actually done to the permissions for the Company Site. This is because the HR team subsite doesn't have its own permissions, so if you want to see what permissions are affecting it, those are the permissions of the parent site.
FIGURE 9.5 People And Groups page
If you want to break inheritance (and have this site use its own, custom permissions), you need to click Site Permissions on the Site Settings page (you can go back to the Site Settings page by clicking its link in the title breadcrumb). For more about users, groups, permissions, and breaking inheritance see Chapter 12.
SITE PERMISSIONS
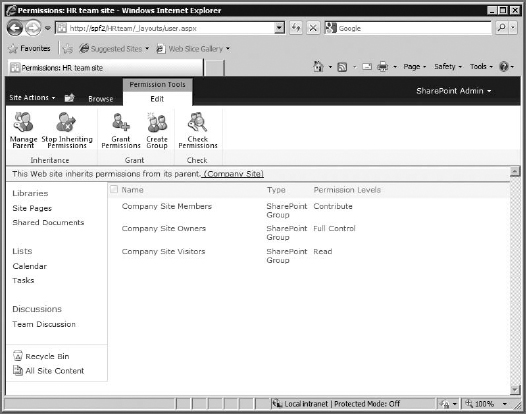
The Site Permissions page displays the permission levels applied to the groups of the parent site and therefore to the subsite. This page is where you can drill down to see what permissions and permission levels are being applied to the subsite. There are also buttons to manage those settings on the parent and to break that permission inheritance between the two. To break inheritance, simply click the Stop Inheriting Permissions button, as shown in Figure 9.6. (We're just looking at this point, so leave everything alone for now and don't break inheritance.) There are also buttons to add users (Grant Permissions) and create a new user group (Create Group), both of which add users or groups to the whole site collection. The Check Permissions button conveniently lets you check the permissions on the site being applied to a user.
FIGURE 9.6 Editing the site permissions
MOVING FROM CUSTOM TO INHERITED PERMISSIONS
If you break inheritance and use custom permissions (or start with custom permissions from initial creation) and later decide you want to inherit permissions from the parent site, enabling inheritance will erase any custom permissions you might have set.
Look and Feel
The Look And Feel category on the Site Settings page focuses on what the end users care about: the user interface. Everything in this category is designed to modify the site for ease of use and layout.
TITLE, DESCRIPTION, AND ICON
This section allows you to edit the site's title and description. Those fields are identical to the fields on the New SharePoint Site page.
The page also lets you change the website address (the site's URL). Changing the URL will cause searches to fail until the next time the index service runs (because all the paths will change). For details on setting the index frequency, see Chapter 3, “Complete Installation.”
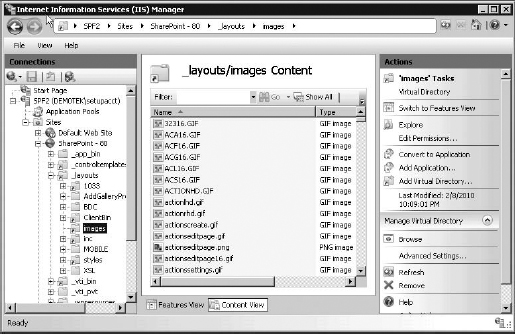
Finally, this section has Logo URL And Description. This feature wasn't present during creation, and it is a great way to customize a new site. The new icon replaces the SharePoint “play-toy people” icon in the top-left corner of the page. You can enter a URL for a new image hosted elsewhere, but you probably have a company logo or team photograph you'd like to place on the web server directly (files in the SharePoint root are replicated between SharePoint servers, so each accesses files from there locally, making for quick load times). In that case, the full path to the suggested location is C:Program FilesCommon FilesMicrosoft SharedWeb Server Extensions14TEMPLATEIMAGES. You can also easily navigate to this location in the IIS Manager (see Figure 9.7) should you not remember the exact path.
- For this example, place your new logo in the images directory (or directory of your choice). It can be any image file you like, but consider its size. Because it's going to be placed at the top left of every page in the site, you'll probably want to use something small. (60×60 is recommended.) Once the logo is in place, you can use a relative path in the Logo URL field.
- Change the logo for the site. My example uses a small GIF; you can use whatever you like.
- For the logo URL, enter /_layouts/images/imagefilename, and click OK. See Figure 9.8 for my example.
The site icon will change immediately, and you'll have a custom icon for the site.
FIGURE 9.7 The IIS images location
QUICK LAUNCH
The Quick Launch link on the Site Settings page lets you add, edit, and delete links from the Quick Launch bar (not disable or enable the Quick Launch bar, which is done in tree view settings for some reason). On the Quick Launch page (Figure 9.9) are links to add new links or new headings or to change the order of the existing links and headings.
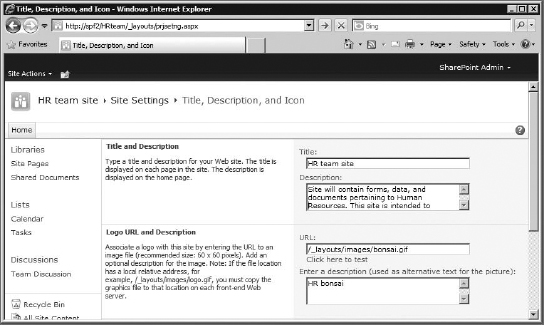
FIGURE 9.9 The Quick Launch settings
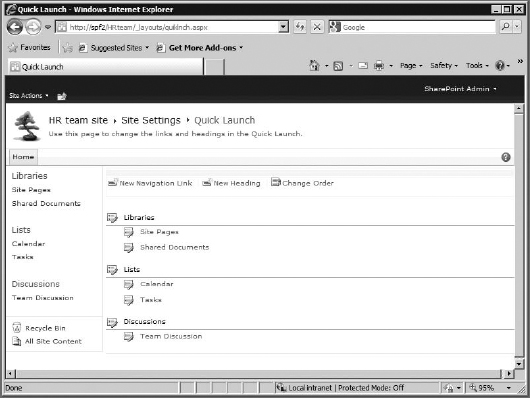
The existing links (Site Pages, Shared Documents, Calendar, Tasks, and Team Discussion) were autocreated. Autocreated links cannot be deleted or changed, only renamed; they are managed. If the list or library they refer to is deleted, the link is also deleted.
Links that you create yourself are manual links. A manual link can be any browser-readable link. It can be part of the SharePoint site, an external link, or anything else your browser can read. Quick Launch doesn't manage these links. If you manually create a link to a page that later disappears, the link will stay. This includes manual links to pages within this site or site collection.
Links are sorted in groups under a heading (Libraries, Lists, or Discussions in my example). These heading can also be added, removed, and edited. You can also edit a link to move it from one heading to another. If a new kind of site object is created, such as Survey or Picture Library, the heading for that type of object is added, along with the managed link. Something to keep in mind is that the Quick Launch can only support about 50 links by default, before it simply stops displaying any new links.
To demonstrate how easy it is to remove links or headings from the Quick Launch bar, let's delete the Discussions heading. Maybe it's company policy to remove it from the Quick Launch bar to avoid distracting the users with the discussion list. Getting that heading off the Quick Launch bar will help keep things neat. To delete the heading, click the Edit button next to the Discussions heading, and then choose Delete. See Figure 9.10.
FIGURE 9.10 The Edit Heading page
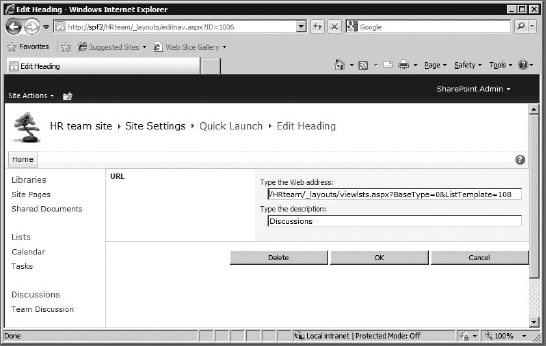
Deleting a heading will also delete any links underneath it. If you ever want to delete a heading and retain the links, you'll need to edit each link and move it to a new heading.
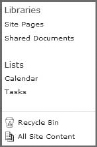
Once you confirm the deletion, you can see that the Discussions heading is no longer on the Quick Launch bar. See Figure 9.11.
FIGURE 9.11 The modified Quick Launch bar with no Discussions
THE TOP LINK BAR
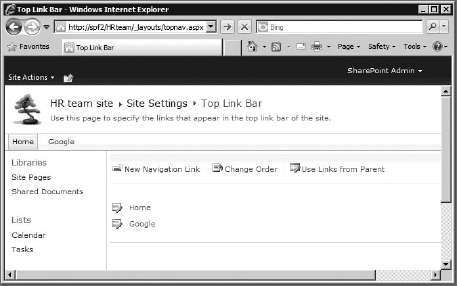
If a site inherits the top link bar from its parent site, the only choice you have if you want to customize it is to stop inheriting links (if you do stop inheriting links, you can change your mind and go back to the top link bar settings and use Links From Parent again). However, if this is a top-level site or the subsite is not inheriting the top link bar, then you can add, edit, and delete links from the bar without that additional step. The HR team site is not inheriting the bar, so it's easy to edit the top link bar directly. See Figure 9.12.
FIGURE 9.12 The Top Link Bar settings
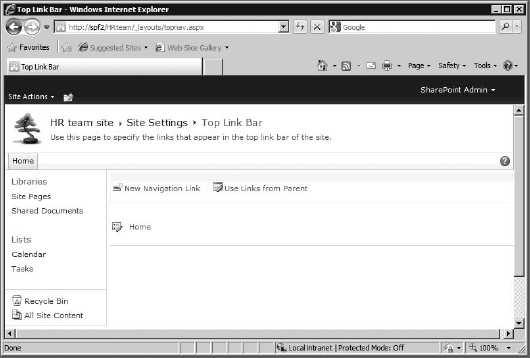
To add a link, use the New Navigation Link button. To edit or delete a link, click its Edit button. To change the order in which the links appear on the bar, click Change Order (Change Order is visible only if there is more than one link on the top link bar).
GOING YOUR OWN WAY WITH THE TOP LINK BAR
When a subsite doesn't inherit its top link bar from its parent, it cuts its top link bar off from all sites above it and effectively considers itself to be a “top” site. This means there will be only one link in its top link bar, and that will be the “home” tab that points to itself. All subsites of that site, if they inherit the top link bar, will consider that parent subsite to be the top, home tab of their top link bar. This can be used to create a kind of mini site collection, where you can have a collection of subsites that don't use the top link bar to conveniently point back up the collection to the more top-level sites.
However, keep in mind that the Navigate Up button at the top of all SharePoint pages will always have a link to the top-level site, regardless of whatever you do with the Quick Launch and top link bars. This is a good example of why SharePoint has built-in navigational redundancy.
Just like the links on the Quick Launch bar, the autocreated links on the top link bar are managed. They'll disappear if the referenced site is deleted. However, manually created links (even links to pages on the SharePoint site) are unmanaged and will remain if the referenced page is deleted.
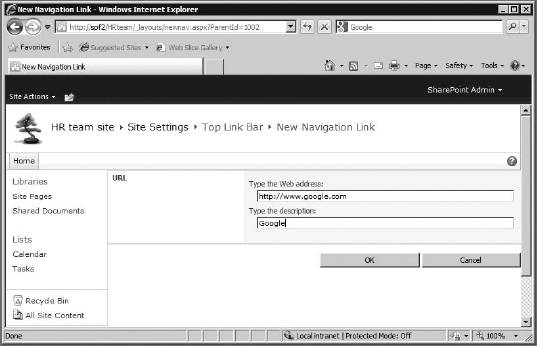
Let's create a new link to an external website (for example, your company's site, webmail interface, local news, weather, or whatever). My example creates a link to Google, as shown in Figure 9.13. Put the URL for the link in the web address field, and then type a description. The description is what will be in the top link tab, so keep it short. When you are done, click OK to create the new link.
FIGURE 9.13 The new link
A Google link appears on the top link bar, as shown in Figure 9.14. Clicking this link will take you to www.google.com. Obviously, this will cause your browser to leave your SharePoint site. The only way to return to SharePoint is to use your browser's Back button.
FIGURE 9.14 The modified top link bar
TREE VIEW
By default all SharePoint sites have the Quick Launch bar for navigation on the left side of most pages. However, there is an alternative: tree view. This view can be used instead of or in addition to the Quick Launch bar. The Quick Launch bar contains site links grouped logically, whereas the tree view shows the full site hierarchy in a physical sense. It behaves the same way as the tree pane in Windows Explorer or most MMC consoles. You can enable just the Quick Launch bar (the default), just the tree view, both, or neither. See Figure 9.15.
FIGURE 9.15 The Tree View page
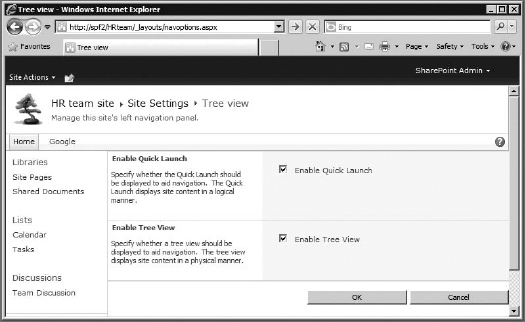
When you enable both settings, a new Site Contents section will be added to the Quick Launch bar showing the site's contents using the tree view. Enabling neither doesn't reclaim that space (meaning disabling Quick Launch too); it just leaves the All Site Content link and the Recycle Bin in place (moving them up the page), and removes all the other headings and links. This flexibility in controlling what links are on the Quick Launch bar, what order they go in, whether there should be a display of site hierarchy, or even whether there should be much of anything there at all allows you more control over what the users see conveniently and therefore what they use conveniently. And keep in mind that the navigation design decision affects all pages on the site except settings pages. So, give it some serious thought when planning your subsites.
For this example, let's go ahead and enable both, then click OK.
TREE VIEW IS A POWERFUL THING
We've created a subsite beneath the top-level site. And because location has its privilege, the child sites directly beneath top-level sites are added to the parent site's Quick Launch and top link bars.
However, if the child site spawned a child site of its own, such as the HR team site having an HR blog subsite (called HR in Action!, for example), that subsite would not be on the top link bar of the main Company Site. It's too far away from the top-level site for it to even realize the sub-subsite was created.
This is because the HR blog is inheriting the top links from its parent site, the HR team site, which has its own, unique top link bar. This means that the HR blog has the same top link bar as the HR team site, which is different from the top link bar on the main company site because the HR team site is not inheriting the main company site's top link bar.
The bottom line is that sub-subsites are not naturally listed in the Quick Launch bar or top link bar on the top-level site or any level above the subsite's parent (depending on the inheritance of these navigation features). The only site that will always have a link to it (if you don't disable it) is the sub-subsite's parent. So, to get to the HR blog, you first have to know that you need to go to the HR team site and then click the HR Blog link in the Quick Launch bar or top link bar to get to the HR blog.
If you want users to be able to find and access all subsites in the site collection more conveniently from the top-level site, consider enabling tree view for the top-level site. This will add the Site Content section to the Quick Launch bar area. (It can take up a lot of space and clutter the Quick Launch bar, which is why so many people leave it off.) However, if you have Site Content on (which is what the tree view is called when enabled), you can use it to see what sites are where at any level throughout the site collection. And if you had your subsites inheriting the Quick Launch bar from the top-level site, they would automatically have the Site Content section available as well.
In the Site Content section of the Quick Launch bar (on the far left of the page), the lists, libraries, and subsites are displayed. Subsites are indicated first, with the rest of the local content displayed below. Subsites have arrows, so you can expand them in the hierarchy to see what content they have available. If a subsite has sites beneath it, they will be displayed with arrows so you can expand them as well.
So if you have a lot of subsites that contain subsites and you don't want to have to add them manually to the top link bar or to the Links List View web part of the top-level site, consider tree view.
SITE THEME
Site themes are a convenient and dramatic way to change the appearance of a SharePoint site. Because SharePoint pages are rendered on the fly, changing the appearance using themes is easy. The theme changes the colors and fonts for the site. It does not change the actual content in any way. There are 20 built-in themes, but you can also design themes in PowerPoint 2010 and import the resulting .thmx file to the Theme Gallery on the top-level site and use it for the site throughout the site collection.
When you access the Site Theme page (Figure 9.16), you see the colors and fonts for that theme displayed in a palette. On the palette, the top row shows the main colors used. The first four colors are the big ones; these will have the greatest impact on the site. The remaining six are for minor things (borders, text color for menu items, group title colors, and so on). So, focus on the first four colors for the big stuff. The rest of the palettes are the accent colors, used for tinting or shadowing (such as with the top link bar).
FIGURE 9.16 The Site Theme page
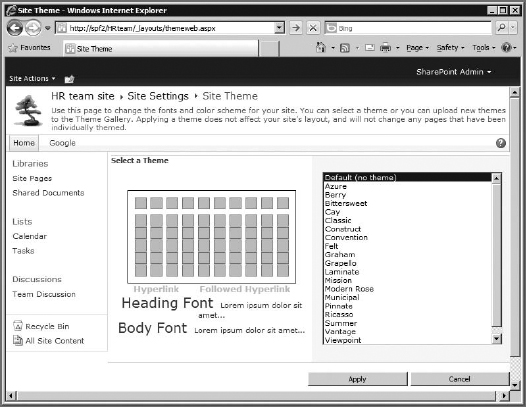
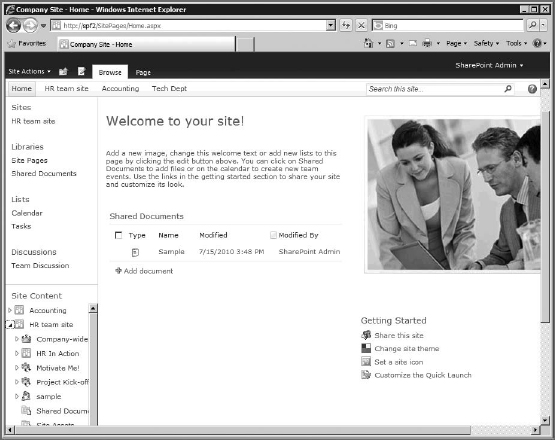
Browse through the themes, pick one you like, and change your site. My example uses Graham. After you apply your theme, go back to the HR team site (or whatever you named your subsite) to check it out, as in Figure 9.17. The site now has a custom logo and a new theme, and the Site Content section should appear on the Quick Launch bar.
FIGURE 9.17 The newly themed HR team site
Galleries
Galleries are for storing customized lists, sites, web parts, and more (usually in the form of template files, but there are exceptions). There are even galleries for site columns and content types. Galleries are generally document libraries, used to organize and make available those files for download, upload, and so on. There are seven galleries; three are available at all site levels, and four site collection galleries are accessible only from the top-level site, although their contents are applicable throughout the site collection. (These will be covered in Chapter 10.) Items added to the site-level galleries are for that site specifically. The galleries that are available at all site levels are for site columns, site content types, and master pages.
SITE COLUMNS
This gallery collects all the premade columns available to the lists and libraries in the site (think convenient templates for list fields). Once again, this gallery displays inherited columns, and everything here is available to all subsites. You can create new site columns that apply just to this subsite (and not the parent site) or edit any of the inherited columns. You can find more details about site columns in Chapter 7, “Creating Lists.”
SITE CONTENT TYPES
This gallery contains all the content types for this site. Content types are a kind of list item template. Or more precisely, they are the definition files for site list or library item types, which can include the templates for documents and pages that can be generated in document libraries, such as Word files or basic web pages. The gallery is available to the site and all subsites and shows the content types inherited from the parent site. Chapter 8, “Introduction to Libraries,” explains content types in more detail.
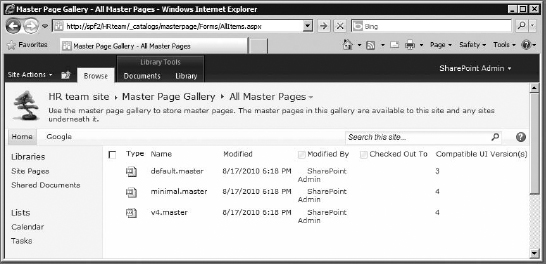
MASTER PAGES
Master pages are HTML files (actually, they support XHTML) that reference the ASP.NET-based code that controls general features for the site's pages. General features in this case are things that appear on every page of the site, such as navigation, header, footer, and content areas. The master page has the code for the top ribbon bar, top link bar, Account menu, the help icon, and the Quick Launch bar. Site definitions have a master page, and templates create an initial master page when a new site is first created. Every site has, by default, a default.master file, which is backward-compatible with WSS 3.0 (for visual upgrades when migrating), as well as master pages for the current version of SharePoint: v4.master and minimal.master (a basic, starter master page). You can add custom master pages (or create and edit them in SharePoint Designer or Visual Studio) and add them to the site using the Master Page Gallery, as shown in Figure 9.18. You can also download them and import them into other sites or even other servers. When you change a master page for a site, either a top-level site or a subsite, it changes only that master page for that site. Even though there may be other sites in the site collection using the same template and their own copy of the same master page, they are not going to be affected. If you change a site's master page, it affects only that site. If you change a site definition, the change will be reflected in all sites that are based on that site definition.
FIGURE 9.18 The Master Page Gallery
Site Actions
This section is focused on making changes to the site as a whole, rather than certain portions or particular settings. Designed for the site administrator, it handles site-wide settings, from available features to deleting the site altogether.
MANAGE SITE FEATURES
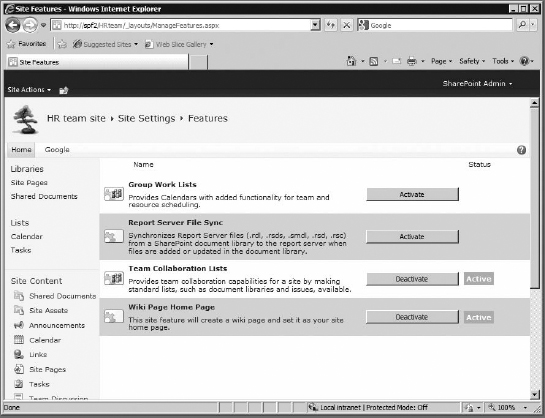
This option shows all the features deployed to the site. All you can do on this page is activate or deactivate the features available. See Figure 9.19.
FIGURE 9.19 The Manage Site Features page
Site features are customizations that extend or modify the existing SharePoint site. Features can be used for almost anything—something minor such as a change to one of the existing menu options or something major such as a complete overhaul of SharePoint to provide ecommerce solutions. Features are typically written by third-party companies to integrate their software solutions into SharePoint or by helpful developers, many of whom give them away free over the Web.
At the core of a site feature is a feature.xml file, which tells SharePoint what to do. Each feature can also contain supporting files (additional XML, ASPX, DLL, or other files) if needed, but they aren't required. Many features do everything they need to do in the single feature.xml file. Everything involved with a feature is tucked away in a named folder that is stored at this path:
C:Program Fi1esCommon Fi1esMicrosoft Sharedweb server extensions14TEMPLATE
FEATURES
Features are usually provided by installation packages called solutions. Solutions can appear as custom SharePoint installation files (*.wsp). You can find step-by-step instructions for installing solutions (like additional features) in Chapter 15, “Migrating from WSS 3.0 to Windows SharePoint Foundation 2010.”
A feature can be scoped to apply at a certain level of a SharePoint farm, be that the entire farm, per web application, or even per site collection (and therefore can be uploaded to the site collection's solutions gallery to be activated there). If a feature has be deployed (at whatever level it is scoped), that often just makes it available to be activated or deactivated at the site level.
The available site features vary from site template to site template (particularly as to which have been activated). For the Team Site template, the features available out of the box are as follows:
Group Work Lists The new site template, Group Work Site, offers resource and team scheduling for the site calendars. This is a feature that is actually available to most site templates; it's just not turned on, or activated, for non-group work sites. You can activate it to use the group work calendar capabilities if you like. For more on the Group Work Site template and what it can do, see the “Group Work Site” section later in this chapter. By default this feature is not activated for a team site.
Report Server File Sync This feature generally requires that you have Reporting Services enabled on the SQL Server and in Central Administration, as well as configured for the site, so you can synchronize reports made with SQL Server Reporting Services' Report Builder in a document library, with the data the reports reference in SQL Server. As you can see, this feature has quite a number of requirements and is usually off by default.
Team Collaboration Lists This feature allows the site to offer most of the list and library templates available for use on a team site. If it is off (and the Wiki Page Home Page feature is off), you can create subsites, workspaces, and web part pages, and that's it. All other list and library templates are gone. Even making a custom list is not an option. This feature should always be activated by default.
Wiki Page Home Page This feature forces a file named Home in the wiki library Site Pages on a team site to be the site's home page. The rich content area of a wiki page replaces the web part area of a standard home page. Interestingly, if this feature is activated and Team Collaboration Lists is deactivated, it will cause wiki library templates and the creation of new wiki pages to still be available when all other list and library templates go away. This feature tends to be activated for a team site by default. To revert the home page of the site to a web part page, deactivate this feature (something we do in Chapter 5, “Introduction to Web Parts”).
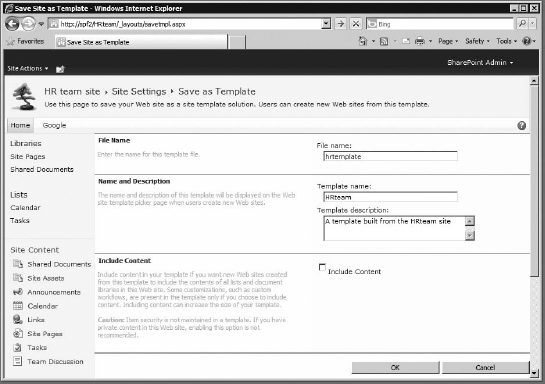
SAVE SITE AS TEMPLATE
After you've done a lot of work on a site—adding your custom logo, adjusting a theme, creating new lists or document libraries, customizing the top link bar or Quick Launch bar—you may want to make a copy of that site to make a new one just like it later. This is where saving it as a template can come in handy. You can use the saved template to create new sites.
The site template can also include the actual data content of the site, including all the items in the lists, document libraries, and workflows. Include the content only if you really want all this data to be part of the template. For example, it might be nice to have a custom list as part of the template, but you probably don't want to include all your private human resource documents.
In general, “content” consists of the items inside lists and libraries but not those lists and libraries themselves. So, the template “without content” will still include a Shared Documents library, but it will be empty. Web parts are not considered content and will be included in the template either way, but if the web part references any particular item in a list or library (such as a picture in a picture library), it will not be included unless you include content. Naturally there are exceptions—for example, the wiki home page (contained within the Site Pages library) is included with the template, even if you chose to not include content.
One item that is not included in the template (regardless of whether you choose to include content) is your custom icon. No matter what, you'll have to relink the icon on the new site.
![]() Real World Scenario
Real World Scenario
THE SITE TEMPLATE SIZE LIMIT
By default, there is a 50 MB limit to the size of a site template. Anything larger will fail to be created. You can change this size limit using the STSADM command-line tool, up to a maximum of 524,288,000 (500 MB). To change the size limit, open a command prompt on your SharePoint server, navigate to the SharePoint root BIN folder (or just open the PowerShell console), and run the following:
stsadm -o setproperty -pn max-template-document-size -pv <size-in-bytes> -url
<site_ur1>
Replace <size-in-bytes> with the desired size—for example, 100000000 would be approximately 100 MB. Replace <site_url> with the site collection's URL, for example http://spf1. STSADM is discussed in greater detail in Chapter 14, “STSADM and Powershell.”
- To create a template out of the HR team site and save what you've done so far as a template, click the Save Site As Template link.
- On the Save Site As Template page, enter a title and description for the template, as shown in Figure 9.20. In this example, you don't need to include the content. Then click OK at the bottom of the page to complete the process. When it's saved, it will let you know; click Continue to return to the main page.
We'll come back to this template later and see how to use it.
FIGURE 9.20 Saving the site as a template
PRIVATE CONTENT IN SITE TEMPLATES
Keep in mind that saving the contents of a site in a template means that data might be available to anyone allowed to create a site elsewhere in the collection; a site's security settings are not saved with the template for the site. Beware of the temptation of saving secure content with a site template unless you intend to download it from the gallery and remove it from the list before anyone gets to use it for nefarious purposes.
SITE WEB ANALYTICS REPORTS
It's always a good idea to keep track of how much a site is being used. Perhaps you need to monitor some sites for inactivity to help you decide whether to delete them, or maybe you need to know which users are frequently accessing the site. When usage analysis is enabled in Central Administration (discussed in Chapter 3), the web analytics reports become available for all sites in the server farm.
HEY, WHAT HAPPENED TO MY SITE WEB ANALYTICS REPORT?
To use the Site Usage Report and the Site Collection Usage Summary, you need to enable Usage Analysis Processing. This is done in SharePoint Foundation Central Administration. Follow these steps:
- Connect to Central Administration.
Once you've logged into Central Administration, navigate to Monitoring
 Reporting, and click Configure Usage And Health Data Collection. This will take you to the page shown here.
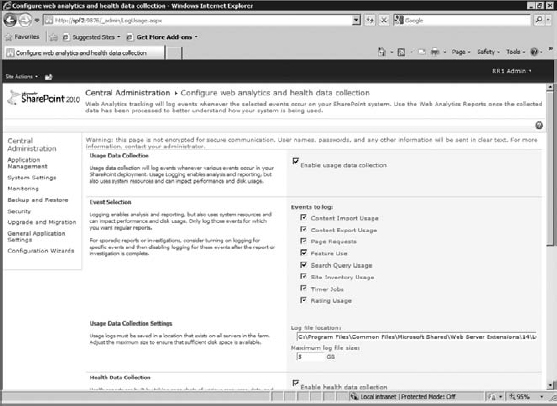
- Check the additional events you want to track, but keep in mind that the more you log, the larger the log files will be (and the more space they'll consume in the database).
For the Usage Data Collection settings, you can change the Log File Location setting or leave the default in place:
C:Program FilesCommon FilesMicrosoft Sharedweb server extensions14Logs
My example leaves the default in place. You can also change the maximum log size (the default is 5 GB). You can change the maximum log size here if you want; I'm keeping the default.
- You can edit the schedule for the health data collection; this takes you to the Job Definitions page.
- Log Collection Schedule lets you schedule how frequently the server pulls the logs from the file structure (above) and places them into the logging database.
- Logging Database Server is where you choose what database to store the log files—typically they're stored in a separate database (you don't want to fill your content database with log file information).
- Click OK. You've enabled usage reports; now all you need to do is wait a day or two before you can check them out.
Let's take a look at web analytics reports for the HR team site. See Figure 9.21.
FIGURE 9.21 Web Analytics Reports page
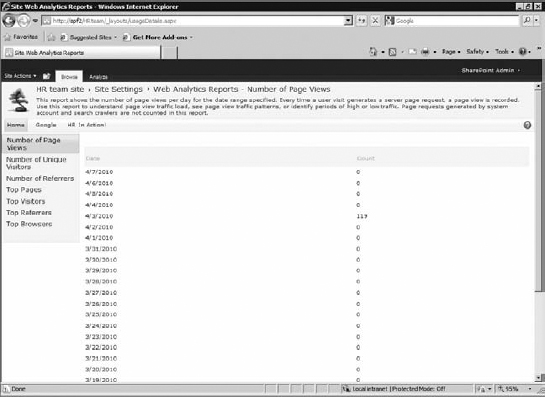
Seven reports are available on the Quick Launch bar for this page:
Number Of Page Views Shows the number of page views the site has received each day. A page view is simply every time the page is rendered (viewed).
Number Of Unique Visitors Displays the number of logins (users) that accessed the site each day.
Number Of Referrers Shows how many referrers were logged each day. A referrer is the URL that directed people to the site. This is probably the least-used report, because most SharePoint pages are accessed directly or referred from another page in the same site.
Top Pages Lists the most frequently accessed pages.
Top Visitors Displays the users who have accessed the site, listed by frequency of visit.
Top Referrers Displays the referrer URLs that directed people to the site.
Top Browsers Displays the browser identified, sorted by the beloved count. At the time of this writing, this report was identifying IE8 as IE7, so you should treat IE7 as “IE7 or later.”
When viewing a report, you'll also notice an Analyze tab appears at the top of the page next to Browse. Clicking this tab will open a ribbon containing two buttons: Previous Day and Previous Month. Both of these buttons are grayed out and do nothing. They appear to be designed for use with SharePoint Server 2010 (and not SharePoint Foundation).
WHAT EXACTLY DO THE “TOP” REPORTS CALCULATE?
You may be wondering where the reports get the numbers listed under Count in the Top Pages, Top Visitors, Top Referrers, and Top Browsers reports. For example, does Top Visitors calculate the count based on the number of times users logged in or based on the total page views? And how far back does the metric go in time? Is this a list of top visitors today, this week, this month, or since the site was created?
In WSS 3.0, it was possible to view reports on the top pages, visitors, and browsers as well. These were calculated by counting page views, and you had the option to see it broken down by each day or with a monthly summery.
Now, with SharePoint Foundation, it's not so clear—it appears the count is still calculated by page views, but there is no date range specified. Since the first three reports (Number Of Page Views, Number Of Unique Visitors, and Number of Referrers) display data going back one month only, it's likely the metrics for the “Top” reports is similarly truncated, covering data for one month. But at the time of this writing, this is not explicitly stated anywhere in SharePoint or Microsoft's TechNet documentation.
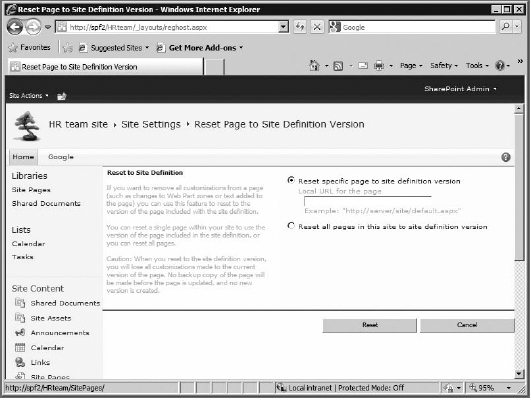
RESET TO SITE DEFINITION
Resetting a site to the default definition completely removes any extensive customization of either a single page or the entire site. As you can see in Figure 9.22, there is no Undo button.
That's the bad news. The good news is that customization doesn't mean exactly what you might think it does. Nothing you've done so far—the custom logo, the theme, the top link bar, or the Quick Launch bar—has edited the site's definition. From a site definition perspective, you've done nothing to customize this site; you've only changed some settings and maybe augmented it. It's still a team site. Resetting its definition won't change anything. However, if the site had been customized using SharePoint Designer, clicking the Reset button can reset it to the default. This is sometimes handy if someone completely corrupts a site using SharePoint Designer.
FIGURE 9.22 Resetting to the site definition
SITE DEFINITIONS VS. SITE TEMPLATES
Site templates are used to speed up new site creation. You've looked at them briefly and even created a custom template from the HR team site. So, what's a site definition?
Templates are used when you're creating a site—and that's it. Once a site is created, the template no longer matters. You can customize the site well beyond the template.
Site definitions are more important. The site definition defines what can and cannot be available in a template based on it. The site definition controls what type of site the site is—a meeting, a blog, a wiki, a team site, or even Central Administration. Site definitions are the underlying XML and ASPX files used to generate the page regardless of what kind of theme, logo, or change you apply to the site. Under the hood, every site still adheres to its site definition. The core files are located in C:Program FilesCommon FilesMicrosoft Sharedweb server extensions14TEMPLATESiteTemplates in their own folders.
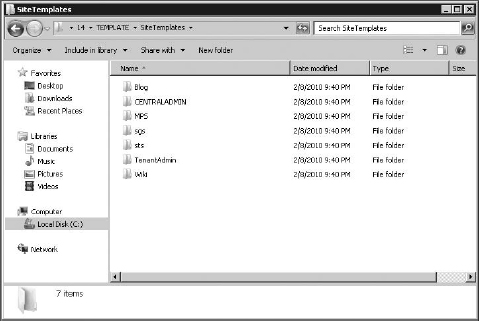
There are seven existing site definitions:
- Blog (for blog sites)
- CENTRALADMIN (for the Central Administration site)
- MPS (for meeting sites)
- sgs (for SharePoint group work sites)
- sts (for SharePoint team sites)
- TenantAdmin (for tenant admin pages, used with multi-tenant hosting)
Wiki (in case there are older WSS 3.0 wiki sites; deprecated)Site definitions have their own v4.master file, which is a master page that determines the layout of their web pages.
A site template takes all the potential of its site definition and narrows that down to its own application of the layout, theme, prebuilt lists, web parts, and so on, of that definition. For example, you can have a Meeting Workspace site definition and from that make a template for a social, basic, or decision meeting workspace. Each one is based on the same definition but laid out differently based on the presumed use. All have the same potential; they just apply it differently for your convenience. This explains why everything in SharePoint looks so similar and has the same interface. Many of the sites are using the same site definition under their particular theme and template. It also explains why meetings, wikis, and blogs look different from normal team sites.
DELETE THIS SITE
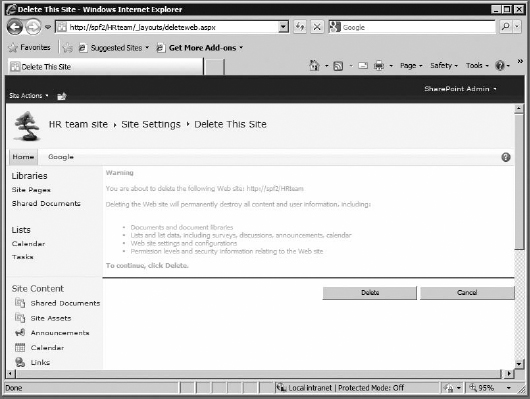
The last option under Site Actions is to simply delete the site, as shown in Figure 9.23.
Deleting a site is not something you do lightly, because it deletes the entire site—all web parts, lists, discussions, document libraries, documents in the libraries, customizations, unique permissions, you name it. Sites don't go to the Recycle Bin; if you delete a site, it will be deleted permanently. There is no Undo, no Recycle Bin, and no chance to correct a mistaken deletion. Make sure you've salvaged anything you need from the site before you destroy it. For example, if you're about to delete a document workspace because the document is finished, make sure you copy the final version of the document to the parent site first.
FIGURE 9.23 The Delete This Site page
Site Administration
This section provides administrative links to change site behavior and appearance beyond the general look and feel. Most site administration settings are applied or configured right after site creation and then left alone.
REGIONAL SETTINGS
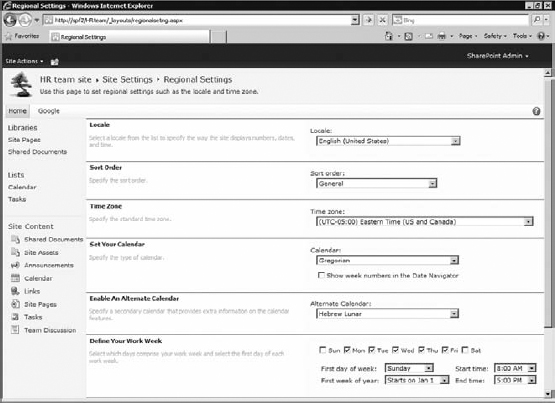
The Regional Settings page deals with location-specific settings, such as Time Zone, Date, Calendar, and so on. By default, a new site is given the same settings as its parent site. So, it's a good idea to examine these settings (shown in Figure 9.24), especially settings such as Define Your Work Week, which can really impact the way the calendar works for all site participants unless they explicitly override it with their own regional settings. Letting the site know your organization's daily start and end times will assist in tracking appointments (or overtime) and ensure that the calendars are created with the correct settings.
The settings you can adjust here include the following:
Locale This setting determines the world region, such as English (US) or English (UK). This will determine such things as the way dates are displayed (3/28/2010 or 28/3/2010), decimal points or decimal commas, and other regional-specific modifiers.
Sort Order This setting changes the sort order for lists and libraries. The sort order determines the way alphabetically sorted lists are handled. Certain languages have different sort orders for characters. Although American English speakers are used to seeing X-Y-Z at the end of the alphabet, users in other regions may not be.
FIGURE 9.24 The Regional Settings page
PERSONAL REGIONAL SETTINGS
By clicking the Account menu and choosing My Settings, an individual user can adjust their regional settings to differ from the site's regional settings. For example, a user can set their time zone to PST even though the site is in the EST zone. The only exception is Sort Order, which cannot be adjusted by individual users.
Time Zone The setting ensures that all posted announcements, modification dates, and other time listings are adjusted for your local time zone.
Set Your Calendar This setting determines the calendar you use in your daily life. Most people will use Gregorian, but you can adjust this for custom calendars, such as Buddhist.
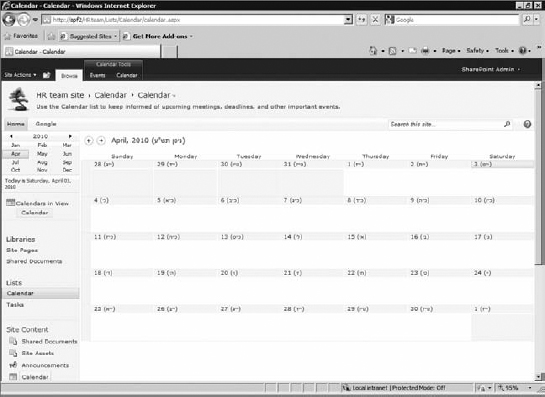
Enable An Alternate Calendar If you need to track dates in two calendar forms, this setting allows you to have one calendar that easily shows both forms—for example, if you need Gregorian and also need the Hebrew Lunar calendar, enable the alternate calendar for Hebrew Lunar and easily see both, as in Figure 9.25.
Define Your Work Week With this setting, you can choose which days are considered “work” days (such as Monday through Friday) and when work starts and stops (such as 8 a.m. through 5 p.m.). You can start the week on Sunday or Monday—or even Thursday if you like.
Time Format With this setting, you can choose whether you want 12-hour or 24-hour time displayed. This setting can change automatically if you change the Locale setting, so make sure you double-check it if you make any changes to this page.
FIGURE 9.25 The alternate calendar
SITE LIBRARIES AND LISTS
This settings page, shown in Figure 9.26, provides you with a list of all the site's lists and libraries, with easy links to the Settings page for each one as well. These links take you to the same places that the specific list or library's settings will take you. For more details about customizing lists and libraries, see Chapters 6 through 8.
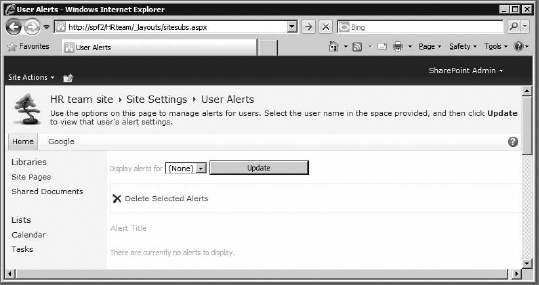
USER ALERTS
This setting gives you an easy way to see user alerts on lists or libraries. You can't see a complete list of all alerts for the site, but you can display alerts for individual users (see Figure 9.27). The only thing you can do to an alert from here is delete it; no editing or creation is possible. You can find more information about alerts in Chapter 6, “Introduction to Lists.”
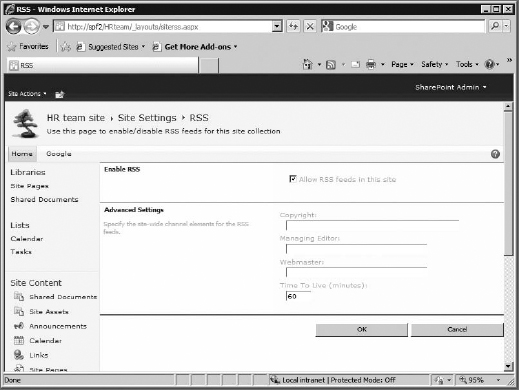
RSS
This setting is available under the category of Site Administration at every site, from the top level to the lowest subsite. However, at the subsite level, it allows you to enable or disable RSS feeds for the site and to specify channel elements for the RSS feeds on the site (see Figure 9.28). On the top-level site, the settings are the same, but there is an extra option to allow or disallow RSS feeds for the entire site collection from there, not just the top-level site. So, make certain that option is not disallowed if you want RSS to work at all for any site in the site collection. If RSS is disabled at the site collection level, the RSS option will not appear on Site Settings for any of the subsites in the collection.
Really Simple Syndication (RSS) is the protocol for what are commonly called web feeds, which frequently update web content you can subscribe to so your computer will automatically download any updates. RSS feeds are frequently used for the Announcements list. With RSS enabled, you can have your web browser subscribe to this list so any new announcements will appear in the feed.
FIGURE 9.26 The Site Libraries And Lists page
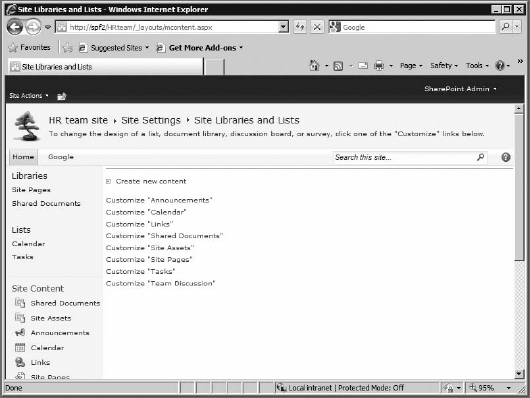
FIGURE 9.27 The User Alerts page
You can apply additional channel elements to the feed, tagging it with a copyright, editor name, and webmaster name. These tags are seen by some RSS readers and are a good idea to have. The elements entered in this location will be applied to all RSS feeds throughout the site.
The Time To Live setting determines the minimum refresh time permitted for the site. The refresh rate is the shortest amount of time an RSS reader has to wait between update checks. Although it sounds like a good idea to keep this rate low so updates are frequent, remember that every RSS reader out there could be constantly hitting the site for updates if you make this setting too low.
HOW DO I VIEW RSS FEEDS?
You can view an RSS feed in Internet Explorer by clicking the RSS Feed button. This button is active only when you're looking at a page that has a corresponding feed. When you click the button, the page changes to the RSS view.
Click Subscribe To This Feed to add the feed to your browser list of feeds and place the feed in a folder. Doing so works similarly to making a favorite (or bookmark).
When you've subscribed, you can see the RSS feed on your Feed tab under Favorites.
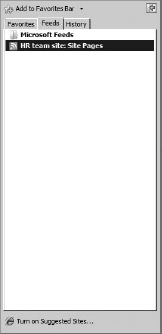
Note that Internet Explorer by default uses NTLM/Kerberos credential pass-through. This means that the feed will be able to autoupdate only if you are logged in to the local machine with the same account that you use for SharePoint. You can change the username/password used (if it's different from your Windows account) by editing the feed's properties.
A lot of third-party RSS viewers, including other web browsers and custom applications, are available as well, if you would rather use something other than IE.
SEARCH AND OFFLINE AVAILABILITY
As shown in Figure 9.29, you can disable search indexing if you don't want this site or any of its contents to show up in search results. Note that Search is already permissions-aware, and users will not see results they do not have permission to see. In general, it's OK to leave indexing turned on (even on sites with private information) because unauthorized users can't search the site anyway. However, sites using fine-grained permissions or connected web parts with different permissions can allow unauthorized users to see restricted items in their search results.
FIGURE 9.29 Search and offline availability
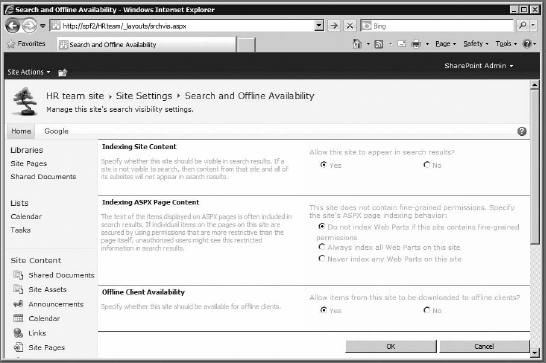
Fine-grained permissions restrict parts of a site above and beyond the main site permissions. For example, suppose you have a document library (with certain inherited permissions) and you decide to change the permissions on one document item in the library to make it more restrictive than the rest of the library. In that case, users with permission to the document library could see this restricted document in their search results. They won't be able to open it (the link will fail), but even seeing the name of the document could be a security concern.
Another security concern occurs when web parts link to another web part containing different permissions. For example, a Contacts list (with relatively open permissions) connected to a list of performance evaluations (with more restrictive permissions) could cause the more restricted information to be listed in the search results when it shouldn't.
It is unfortunate, but in the case that you need to use such fine-grained permissions or web part connections, Microsoft recommends that you disable the indexing for the site. Fortunately, the Indexing ASPX Page Content section will tell you whether you're using fine-grained permissions, and SharePoint has the default behavior of disabling indexing if such permissions exist. This also explains why Search suddenly does not work for a site's new information when it did before you enabled unique permissions on a list item.
Most of the time, you'll want to leave the default in place and allow indexing for most sites and disallow indexing on those sites with fine-grained permissions or linked web parts. However, if being able to search is more important than letting users see the search results for list items and files they can't open anyway, then you can enable search to always index ASPX pages regardless.
New in SharePoint Foundation is the ability to restrict caching of the website for offline client access. By default, clients can cache the site locally, allowing for access when offline. Setting this to No will prevent the client from using offline file caching on the site and will require an active connection at all times.
SITES AND WORKSPACES
The Sites And Workspaces page (shown in Figure 9.30) displays a list of subsites below the current site. Because the HR team site has no subsites, let's look at this section under the main Company Site. So, navigate up to the Company Site, go to its Site Settings page, and then click the Sites And Workspaces link under the Site Administration section.
FIGURE 9.30 The Company Site's “Sites And Workspaces” page
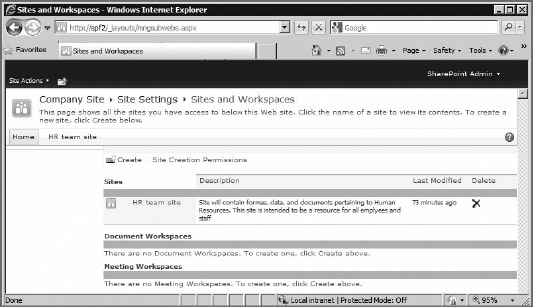
The HR team site you created is displayed here in the Site Content tree view. Clicking the site's name takes you to that site.
Clicking the Create button takes you to the New SharePoint Site page.
THE SITE CREATION PERMISSIONS BUTTON
On the top-level site, the Sites And Workspaces page also has a handy Site Creation Permissions link. (Subsites don't have this feature, even if they themselves have subsites beneath them, if they all inherit permissions from the top-level site.) Clicking the Site Creation Permissions button will display a partial list of permission levels for the site.
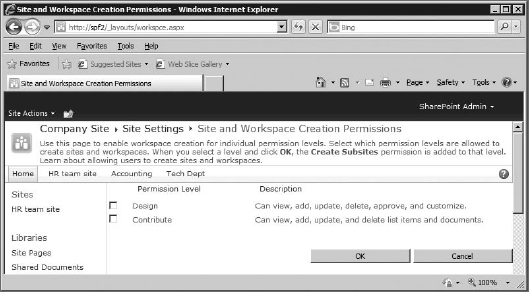
By selecting the box beside a permission level and clicking OK, you're assigning the Create Subsites permission for that permission level (and therefore giving the power to create new subsites to any groups or users with that permission level). The Site Owners group already has the right to create subsites, and by default the Visitors group cannot have the right to create subsites, because they have only read rights to the site. That leaves the Contribute and Design permission levels, both of which could be granted with the Create Sites permission.
By clicking the permission level's name, you can manually edit the permission levels to give each level the specific permissions you want. See Chapter 12 for more about permissions and permission levels.
Let's create another site below the main site, so we can use the site template we made earlier:
- Click Create.
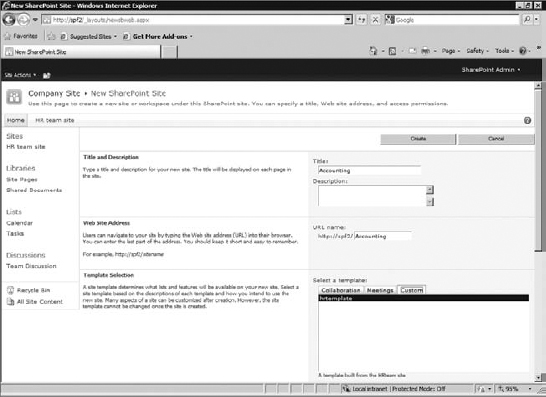
- Here you'll find yourself at the familiar New SharePoint Site page (Figure 9.31). I'm going to name the site Accounting and leave the description blank.
- For Web Site Address, the path is already displayed, so enter the last part of the path indicating the site. For my example, that is Accounting.
- For the template selection, let's apply the template we saved from the HR team site earlier. If you click the Custom tab, you'll see our custom template! Let's pick that, leave all the other settings at the default, and hit Create.
FIGURE 9.31 Creating a site from a custom template
SITE TEMPLATES LOCATION
Site templates actually reside in a Solution Gallery—stored at the site collection level (and accessed via the Site Settings page for the top-level site) but are used at all levels of the collection. For more information about working with this gallery, see Chapter 10.
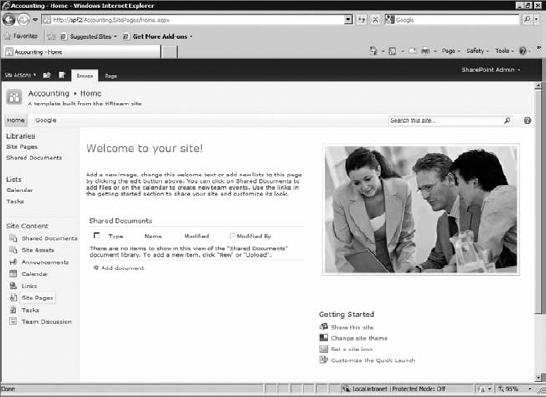
As you can see in Figure 9.32, the new site is exactly like the one from which the template was created, except that the custom icon is gone and the content is missing (unless you selected the Include Content box when you created the template). All your custom links in the top link bar and Quick Launch bar are there, the theme is applied, and any edits or additions you made to the home page are all there.
WORKFLOW SETTINGS
This section is merely a rendered list of all the currently in-use workflows on the site. You cannot make any changes from here. There's no way to add, edit, or delete workflows from this gallery. SharePoint Foundation comes with one workflow by default: the Three-State workflow, but even this will not show up unless it's actually in use. You can obtain other workflows from third-party software developers or build them using SharePoint Designer or Visual Studio 2010. For more information on workflows, see Chapter 7.
Reporting Services
New in SharePoint Foundation is built-in integration with SQL Server 2008 R2's Reporting Services. This allows SharePoint to integrate with the SQL Server reporting server to provide easier access to reports generated by SQL Server Reporting Services. In other words, this integration does not enable additional report features for SharePoint; it simply allows you to store, edit, and view SQL Server reports (created initially using Report Builder, a separate product meant to generate reports from data in databases in SQL) via the SharePoint library.
FIGURE 9.32 A new subsite made from a custom template
If you have a SQL Server instance running Reporting Services for SharePoint, you can configure Reporting Services for SharePoint. This builds a new database that can run in SharePoint Integrated mode. Fundamentally, this allows you to use SQL Server Reporting Services to store reports in a SharePoint library, allowing direct access to the reports via the SharePoint interface. Once the reports (and related content types) are in the library, they can be accessed by any users with permission in SharePoint and can even be viewed directly using a Report Viewer web part (also new to this version of SharePoint).
Reporting Services first needs to be set up on SQL Server 2008 R2 where a copy of SharePoint has been installed and added to the SharePoint farm; then you need to configure the correct URL, integration, and authentication settings in Central Administration, which will attach the SharePoint farm to the reporting service (it will work only with SQL Server 2008 R2, not SQL Server 2008). Once it's connected, you can activate Reporting Services on any site in the farm.
Should you be interested in setting up SQL Server 2008 R2 with Reporting Services and you want a handy way to store and access the reports generated, consider using this SQL Server integration capability.
MANAGING SHARED SCHEDULES
Shared schedules are used to run reports unattended. They're typically first created on a report directly (via the library where the report is stored). When a schedule is set as shared, it can then be used by other reports (when configured to run unattended). Here you can see the currently configured shared schedules and pause, edit, expire, or even delete them. (Expire causes the schedule to stop running at a certain date but does not delete the schedule.)
This link does not go anywhere productive unless you have Reporting Services configured and attached to a SQL Server report server.
REPORTING SERVICES SITE SETTINGS
This link takes you to the Reporting Services Site Settings page, shown in Figure 9.33.
FIGURE 9.33 Reporting Services Site Settings page
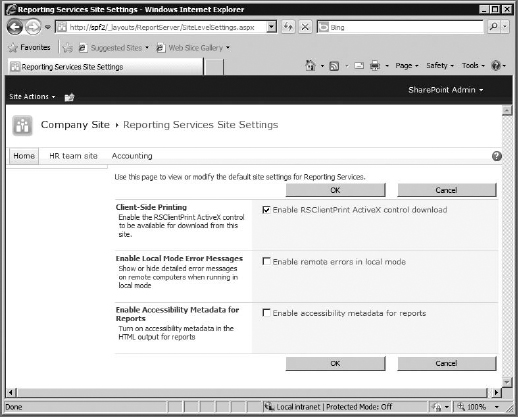
Here you can enable three options:
Client-Side Printing This enables the RSClientPrint ActiveX control for the SharePoint site. This ActiveX control allows the users to print the reports to their local printer directly (Internet Explorer required, obviously).
Enable Local Mode Error Messages New with SharePoint Foundation 2010 is the ability to run the SharePoint Reporting Services in local mode, which lets you store and view reports in the library without an active connection to a SQL Server Reporting Services server (but connected to another data, such as Access 2010). This option allows you to display any errors that pop up on the remote computer when running reports.
Enable Accessibility Metadata For Reports When generating reports in HTML format, you can have the server also write the accessibility metadata into the HTML code. This is applicable only for simple table or matrix structured reports, and it simply identifies rows and columns, header cells, and frame titles. This is designed for rendering the HTML report accurately on multiple disparate platforms (for example, seeing the report on a mobile phone browser).
Site Collection Administration
On a subsite, this category contains only a single link: Go To The Top-Level Site Settings. This takes you to the Site Settings page for the top-level site, which is where all Site Collection settings and administration is done. Site Collections (and their settings) are covered in Chapter 10.
Additional Default Site Templates
Now that you've seen all the ways to customize and control sites, let's take a closer look at the different types of sites available in SharePoint and how they differ from each other. Choosing a template during site creation will prebuild the site with lists, libraries, and custom features designed for that type of site. This speeds up the customization process, since you're starting from a prebuilt default that will (ideally) contain what you need. There are several existing site templates, and each contains key differences in layout and intent. The following templates are available choices during site creation, starting with the most common, the Team Site template.
Team Site
The Team Site template is the SharePoint workhorse. So far, everything you've done has been in a team site. Team sites are the most general and the most common sites. They're typically what administrators choose for the main site from which all other sites branch. Containing lists, libraries, some web parts, and a nice custom theme, they're perfect for your all-purpose SharePoint site. If you just need a site, you're looking for a team site.
Blank Site
Would you prefer to start with a site that is not cluttered with the trappings of someone else's idea of a site? This is the site for you. Nothing prebuilt, and no assumptions or existing libraries or lists. If you'd rather build the site from scratch with your own libraries, lists, web parts, and layout, you can start with a Blank site.
Document Workspace
A Document Workspace site is all about managing one document. There are two ways to create a document workspace: either through the Sites and Workspaces page in Site Settings, the usual New SharePoint Site page (under Site Actions ![]() New Site), or directly from a document. I've added a sample document to the HR team's Shared Documents library; from there you can create the document workspace by selecting Send To
New Site), or directly from a document. I've added a sample document to the HR team's Shared Documents library; from there you can create the document workspace by selecting Send To ![]() Create A Document Workspace from the document's drop-down menu, as shown in Figure 9.34. You can also select the document, go to the Documents ribbon, and in the Copies section click the drop-down menu for the Send To button.
Create A Document Workspace from the document's drop-down menu, as shown in Figure 9.34. You can also select the document, go to the Documents ribbon, and in the Copies section click the drop-down menu for the Send To button.
Why would you want to have a separate site for one document? Say you have a large number of people working on one file—a legal brief, screenplay, or other complex document. That sort of collaboration will require discussion, versioning, additional documents, and other collaboration, all of which can be done in a library on the main team site. But why have all those document-specific items clutter the main site? It's better to give the document its own space so you can add supporting documents, discussions boards, and assign tasks separately from the rest of the site. Go ahead and create the workspace, and then click OK when prompted to confirm.
When the document workspace (Figure 9.35) is first created, a copy of the document is placed in the workspace's Shared Documents library. The creating user (in my case SharePoint Admin) is added to the workspace Members list. All other users who need to work on the document need to be added to the Members list; it does not inherit the permissions of the parent site. Fortunately, there is a link on the main page of the document workspace to do this. Users without permission to access the workspace will not even see it in the site hierarchy.
FIGURE 9.34 Creating a workspace
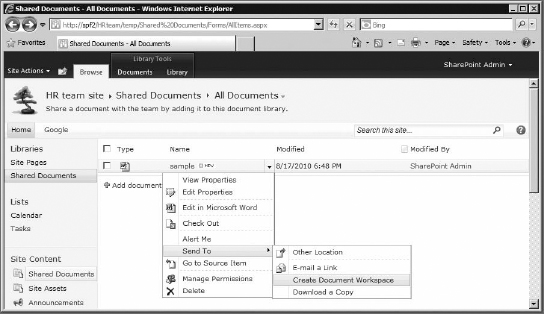
FIGURE 9.35 The document workspace
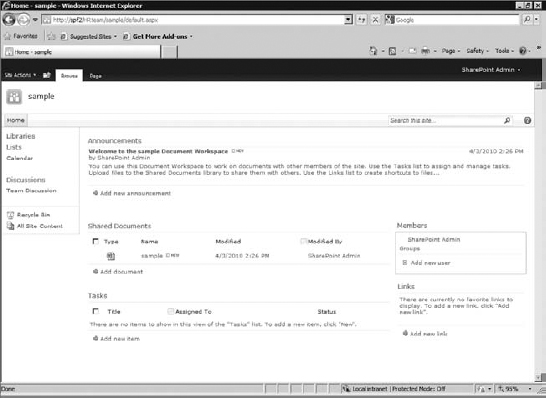
A document workspace comes prebuilt with the document library containing the document, a Tasks list to assign tasks to members, a calendar to track deadlines and milestones, and a discussion board to discuss the document's development. If you created the document workspace via the New SharePoint Site page, then the Shared Documents library will be empty (since you hadn't specified for which document the workspace was created).
When you're creating a document workspace, remember that a copy of the document is still sitting in the original document library. It's important to keep track of which copy is the primary one and keep that in the document workspace. Why else have it? The last thing you want is to have someone working on the original document while someone else is also working on a copy in the workspace. You may want to remove or check out the copy from the original Shared Documents document library to prevent confusion.
Once the document is finished and the purpose of the workspace is completed, you may want to remove the workspace to keep the server clean. Before you do so, make sure you copy everything you want to keep (in particular, the actual final document) to the parent site. Once the workspace is deleted, it's gone. Sites don't go to the Recycle Bin.
Blog
Blogs, probably the most notorious form of website, are basically public diaries and journals with frequent postings listed in reverse chronological order. SharePoint blogs support comments so users can comment on posts, with categories to organize the posts, and permalinks, which are fixed links to posts. From the HR team site, I've created a blog called HR In Action! using the now-familiar New SharePoint Site page. I have it set to inherit permissions and appear on both the Quick Launch and top link bars. I also set the blog to inherit the top link from the parent site (the HR team site). When the blog is created, it automatically takes you to its home page (Figure 9.36).
FIGURE 9.36 A SharePoint blog

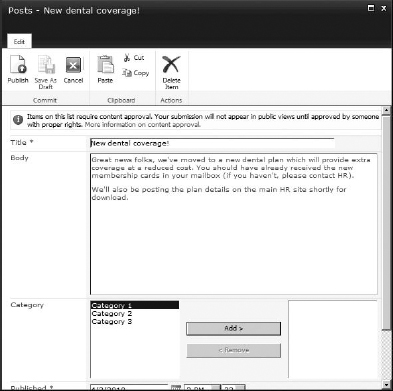
On the left side of the page is a modified Quick Launch bar, unique to the Blog template's home page. On the right side are the Blog Tools links to create and manage the posts and comments on the site. They appear only when you are logged in as the blog's creator or another user with rights to create posts. Clicking Create A Post will take you to the new post page, shown in Figure 9.37. To create a post, you can enter a title and text in the body of the post. You can assign a category and specify a published date for the post. You can save the post as a draft, or you can publish it. When published, the post appears on the home page of the blog. Blogs are based on a Posts list with Content Approval enabled, as well as lists for Comments and Categories.
FIGURE 9.37 A new post
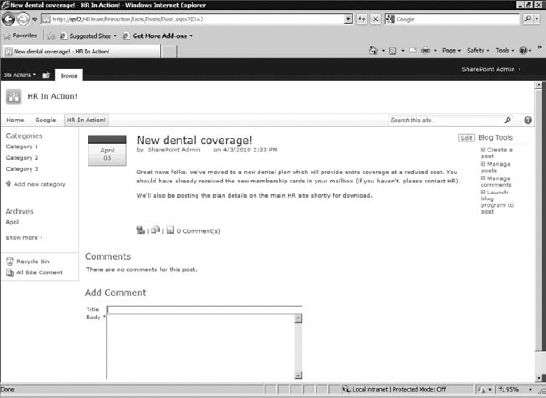
Once the post is created, it will appear on the main page. Figure 9.38 shows an example. To edit the categories and add more, click the Categories heading in the Quick Launch bar.
Each blog post has buttons at the bottom—for providing a permanent link to the posting (which will take you to the post's permanent page), for sending a link to the posting via email, and for comments. Comments are feedback posts that are linked to the main post and are typically created by other users. When looking at the main page, you can see the Comments link below each post, with a number showing the current comment count. Clicking this link will take you to the comments (see Figure 9.39) and let you add a new comment.
Comments are actually stored in the Comments list and referenced to the main post with a lookup field to the Posts list column called Post Title. The Posts list also contains a linked field called Number Of Comments, which looks up the Comments list and does a count of comments that are related to the post's title.
SharePoint blog posts can be written and edited right there in the browser itself, or with any SharePoint-compatible blog-editing software, such as Word 2010 or Windows Live Writer.
FIGURE 9.38 A blog with a post
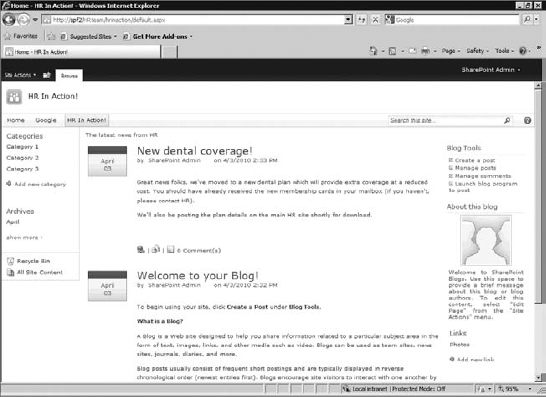
FIGURE 9.39 Comments
Group Work Site
The Group Work Site template is designed to manage and organize groups of people. This site will be invaluable for managers, administrators, secretaries, or anyone who needs to keep track of people, schedules, and resources, as well as anyone who needs to keep everyone in sync. If you have a busy department and need to keep track of everyone, this is the site for you (assuming you don't find its flaws too distracting, that is).
The Group Work Site template has some prebuilt lists that work best when the site's permissions are explicitly set a certain way, and for this reason, it's recommended to break inheritance when creating a group site (For more information on breaking inheritance, see Chapter 12).
Let's create one for the tech department:
From the Company Site, go to Site Settings
New Site. This will again take you to the New SharePoint Site page, as shown in Figure 9.40.FIGURE 9.40 Creating the tech department group site
- In this example, let's call the new site Tech Dept. Give it a description “techdept.” Select the Group Work Site template. For Permissions, make sure it's set to Use Unique Permissions. You can leave the rest at the default settings. Click Create.
Because you selected the option to use unique permissions, you now need to set up groups for the site. See Figure 9.41. Here we build new groups for the site (or use existing groups). These are then applied to the site and can of course be changed later.
By default SharePoint wants to set up three groups, basically the same groups we had on the company site: Visitors, Members, and Owners. You should already be familiar with these groups and their corresponding permission levels, but you can find more information in Chapter 12. Visitors have read-only access, Members can read-write, and Owners can do everything (including changing permissions).
- With a group site, these groups really matter for the custom lists, and your assumptions based on team sites may not be accurate. With a group site, it's best to place most users in the Visitors group and reserve the Members group for people who need access to everyone's items and schedule. This will become clear as we delve into the site. For now, I'm creating a new group for both Visitors and Members, placing all the “technicians” in the tech department in the Visitors group and placing their manager and administrative staff in Members. And of course I'm making sure I'm the Owner of the site. When you're done, hit OK.
Welcome to the new tech department group site, as shown in Figure 9.42.
FIGURE 9.41 Setting up groups for the tech department site
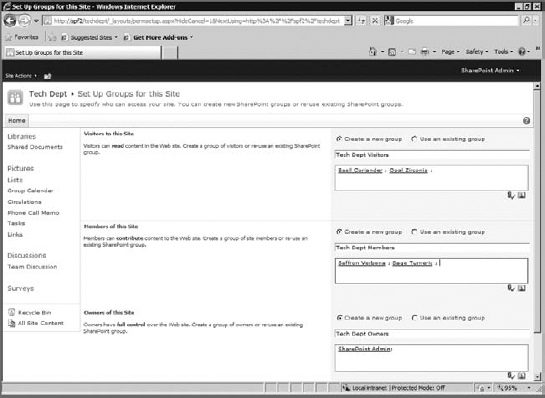
FIGURE 9.42 The tech department group site
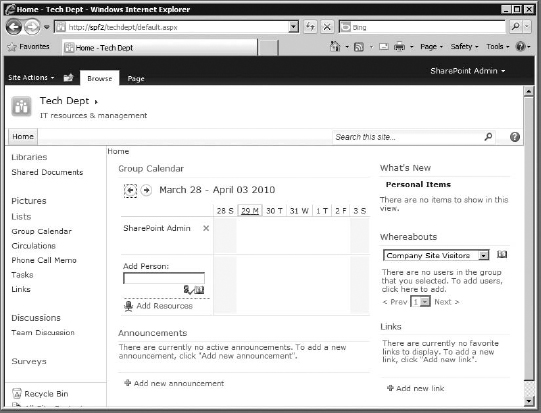
The group site comes prebuilt with the usual Shared Documents library, a Team Discussion list, a custom group calendar, and some extremely handy lists. Let's populate these lists and take a closer look at what the group site can do.
FAMILIAR LIBRARIES AND LISTS
There is a standard document library, which will be used by the tech department to store documentation and guides. You could also create a wiki-page library for tips and tricks. There is also a Team Discussion list available for debates and discussions about technical topics. You'll also notice the Quick Launch bar has a header for Pictures, but no picture libraries, and a header for Surveys but no survey list. So, you can either create these lists and libraries or edit the Quick Launch bar to remove these unnecessary headers.
On the right side of the home page you'll see a What's New web part—this will populate with new items on the Circulation, Phone List Memo, and Group Calendar lists as they get used, all filtered by the current user (so when you log in, you can see what's new for you at a glance). At the bottom is the normal Links list web part.
There's also a Whereabouts web part, which ties directly into the Whereabouts list. This is one of two background lists.
BACKGROUND LISTS
You should look at and set up two background lists before you go much further. They don't appear on the Quick Launch bar, because they're designed to be set up first, and their primary focus is to support and enhance the other lists and the home page. These need to be populated before you can use all the features of the group site.
These two lists are Resources and Whereabouts, and you can see them if you click the Lists header in the Quick Launch bar (or if you go to the All Site Content page).
Resources
The Resources list (see Figure 9.43) is for physical items—rooms, projectors, vehicles, or any other resources that are shared within the group. These are then added to events in the group calendar, so (for example) you can list Conference Room A as a resource. Then, if an event is created for a meeting in Conference Room A, you can add the resource to the event, which marks it as booked for the duration of the meeting (even if the meeting event is later rescheduled, that resource is rescheduled with it). I'm going to quickly populate the list with some resources available to the tech department.
The Resources list also supports resource groups—a different content type for the list, used to group resources. We'll use resource groups later when it comes time to reserve resources. Think of a resource group as a filter for the type of resource. For example, you can place all the conference rooms into a resource group called Rooms. To add a new resource group, hit the arrow at the base of the New Item button and choose Resource Group. When creating the group, you can select the resources that belong in the group. See Figure 9.44.
You'll notice that you can select only existing resources, so you'll need to add all the resources first, before creating the groups. Otherwise, you'll need to edit the resource group after you've added the missing resources.
Go ahead and create a resource group called Rooms and place conference rooms into it. Now you have some resources and resource groups to work with later.
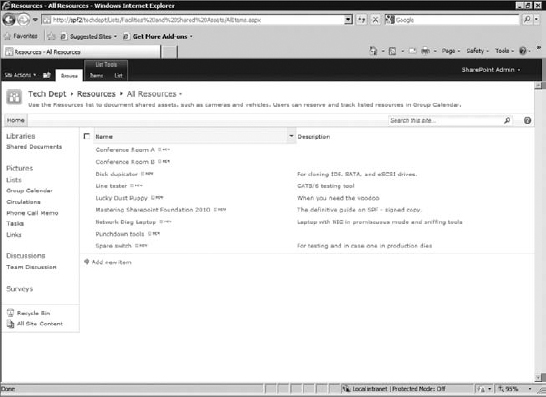
FIGURE 9.44 Adding a resource group

Whereabouts
The Whereabouts list is designed to track the location of people, tracking whether they're in the office, home, on vacation, or any other location you want to use. The list first needs to be populated with people. Clicking the Add New Item Link opens a People Picker, and you can quickly add some users to the list. When you're done, you'll have a list item for each user (see Figure 9.45).
FIGURE 9.45 Populating the Whereabouts list
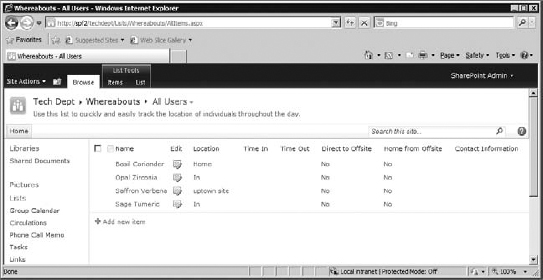
Once the users are added, you can edit the rest of the columns for each item. Pick a user, and click the Edit button to open the list item's settings. Here you can set the person's location (where they are currently), what time they came in, what time they left for the day, and if they go directly offsite in the morning or head directly home after work (and didn't actually come into the office). For the My Location field, the values In, OOF (Out of Facility), and Home are hard-coded. You can also have up to five custom locations, two of which are preset with BizTrip and Vacation (both of these can be edited or deleted). You can also have up to five values for the Contact Information field; none is populated by default. These custom values (for Location and Contact Information) are stored per user, so each user can have five custom locations.
Once you have the list populated, you can go back to the home page of the site, and you'll notice the Whereabouts web part is now showing where everyone is (Figure 9.46).
FIGURE 9.46 The home page with the Whereabouts web part populated
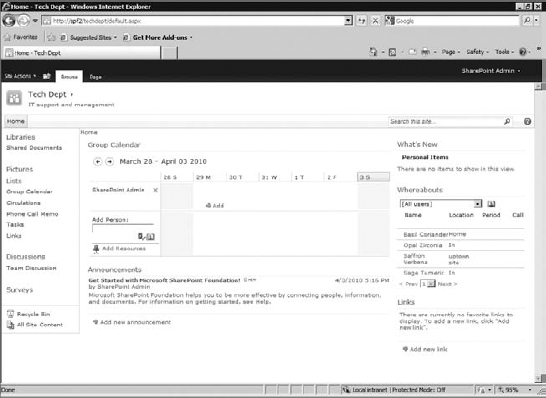
From this web part, you can quickly update the person's location, see their work hours under Period, and even see whether any phone call memos are waiting for that person (more on phone call memos shortly).
GROUP CALENDAR
The group calendar has been modified from a normal calendar and has some interesting tricks. You'll notice it's displayed in a web part on the home page of the site, and a link to the actual calendar is also available on the Quick Launch bar. The group calendar is designed for two uses. For the techs, it'll be the way they see what events have been scheduled for them and potentially where everyone else is. Administrators can create events, assign them to techs, and also assign resources (from conference rooms to particular vehicles or tools the techs need to share).
The modifications to the regular calendar are provided by a site feature called Group Work Lists (which you can deactivate in Site Settings ![]() Manage Features). Adding features to sites is covered in Chapter 11.
Manage Features). Adding features to sites is covered in Chapter 11.
The first significant change is the ability to add multiple users to the calendar so you can see everyone's events at a glance. Just enter each user's account in the Add Person field to add their name and see any events they have scheduled. See Figure 9.47.
FIGURE 9.47 Multiple people on the group calendar
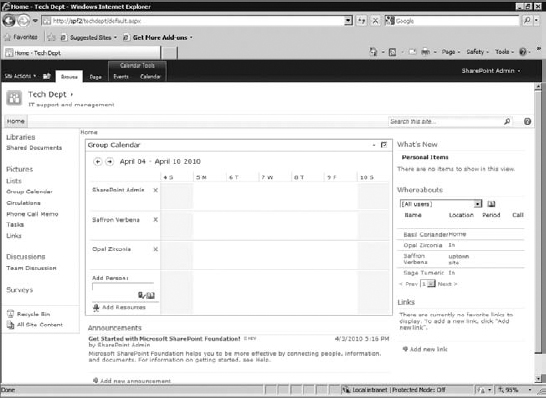
Now, before you get too excited about this, there is one inexplicable flaw: this view change is not saved. So, you can view all the people you added as long as you don't leave the page and go anywhere else. For example, if you go into the Shared Documents list and come back, the additional users will be gone, reverting the view to just your account. Microsoft has confirmed that (at the time of this writing) this is the intended behavior. Baffling.
The second interesting thing is the resources picker. Clicking the Add Resources link will open a list of existing resources to add to the calendar (see Figure 9.48). This is a People Picker for list items, so although you can use it to select an existing resource, you can't add new resources this way. For that you need to go to the Resources list. When you add a resource to the calendar, it's treated like another user and shows where that resource is booked over the course of the week.
FIGURE 9.48 Adding a resource to the calendar
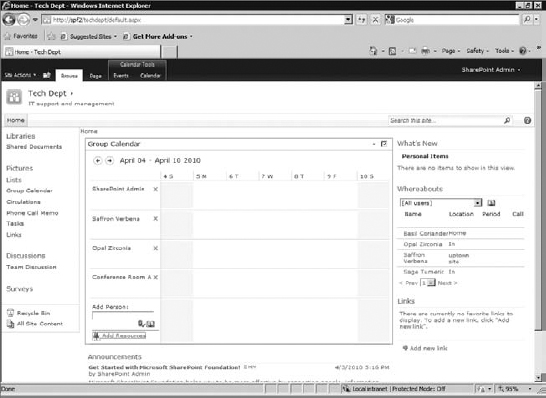
Obviously, the main purpose of the calendar is to schedule events—and with the group calendar you can assign both people and resources to the event. Let's add a new event to the calendar by simply double-clicking the date we want to have the event. (You can also go to the calendar directly and choose New Event, just like you would with any other calendar.) It will open the Group Calendar – New Item window (see Figure 9.49).
Here you can enter the title of the event, a location (not required), and the start and end times. Other settings are as follows:
Attendees Unlike a normal calendar, the group calendar allows you to specify the people who need to attend the event.
Resources The resource list is visible, and you can select what resources you want to book for the event. If the resources are in categories, you can also filter the visible list by resource group. Selecting the resource and clicking Add will assign them to the event (as will simply double-clicking the resource).
Free/Busy As you add attendees and resources to the event, they'll appear here, with bars showing the times they're already booked. This lets you see, at a glance, whether there are any known conflicts with your proposed event times.
Check Double Booking Hitting the Check button will examine the resources in the list to make sure they're not already booked. This information is already visible under Free/Busy, but you can hit the Check button to make sure. Note that this does not check the availability of people, only resources.
FIGURE 9.49 The Group Calendar – New Item window
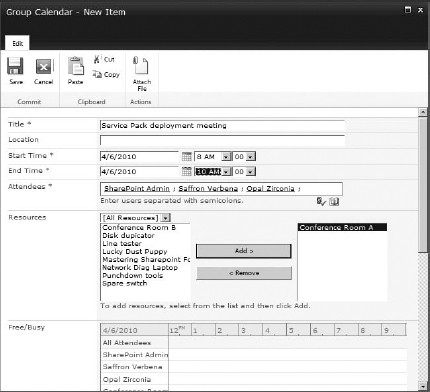
Description This is a brief description of the event.
Category This is the type of event, from meeting to project to party. You can use one of the prebuilt categories or add your own.
All Day Event This defines the event as all-day and removes the start and end times.
Recurrence Check to create an event that repeats on a set schedule.
Workspace Checking this box will create a new meeting workspace for the event as a subsite of the group site. Once this box is selected, choosing Save for the event will immediately take you to the New Meeting Workspace page, where you can enter the settings desired for the new subsite, including the type of meeting workspace the site will be. The newly created meeting workspace does not autopopulate with the attendees from the Calendar event, so you'll need to treat it like any other new meeting workspace and add the attendees again.
You'll find more information about this topic in “Meeting Workspaces” later in this chapter.
CREATING A WORKSPACE REQUIRES THE CREATE SUBSITE PERMISSION
To create a meeting workspace from the group calendar, you need the Create Subsite permission. By default, this is available only to Site Owners (Contribute, the permission level that Site Members use, does not have this permission). If you don't have the permission, the Workspace box will be available, and when you save the event, you'll still get to the New Meeting Workspace page, but you will be unable to choose the Inherit Permissions option, and the actual creation of the workspace with fail, giving you an Access Denied error.
I'm going to create a meeting for some of the tech staff, book Conference Room A, and not bother to make a workspace. When it's done, the event will appear on the calendar and be shown for every attendee when they log in. See Figure 9.50.
FIGURE 9.50 The new event on the group calendar
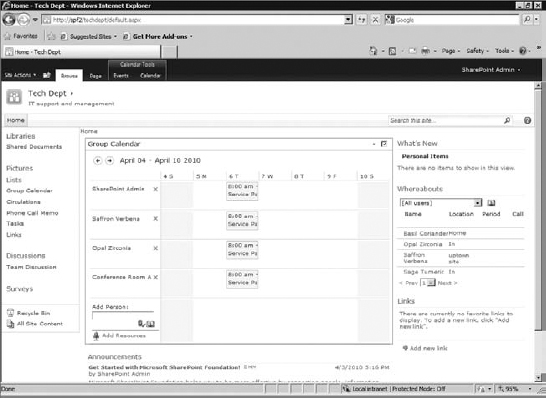
CIRCULATION
The Circulation list is probably the most confusing one on the group site, and it may not be appropriate for your site. It is designed for handouts—basically a way to replace those “CC everyone” emails you end up dealing with in the course of a day. It's intended to be sent to multiple people either for their input or for simple confirmation they've read the contents.
The list supports two content types: Circulation and Official Notice. The way these items behave depends on the permissions at the site level, which is why it's recommended you break inheritance when you first created the group site. This is where placing your general users (the techs, for example) into the site Visitors group becomes critical.
The list has several custom views:
My Unconfirmed Circulation This view shows any circulations where you're a recipient and have not yet confirmed you've read (and, if expected, edited) the circulation. This is the default view.
My Circulation This view shows any circulations where you are a recipient, both unconfirmed and confirmed.
Circulation From Me This view shows any circulations you have created and sent to other recipients.
All Circulations This shows all circulations.
Let's take a closer look at the list by creating a new circulation. Hit the New Item box to open the Circulations – New Item window (see Figure 9.51).
FIGURE 9.51 Creating a new circulation
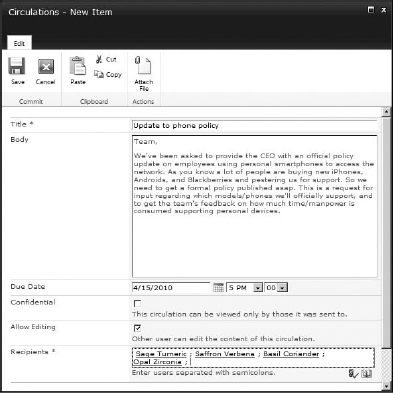
A circulation has the following fields:
Title This is the title of the circulation.
Body This is the text for the circulation.
Due Date If the circulation is time sensitive (responses, confirmation, or actions need to be done by a particular date or time), you can set the due date here.
Confidential Selecting this box allows the recipients to view and edit the circulation, regardless of their normal access to the site. It also prevents anyone other than the creator and recipients from even seeing the circulation, regardless of their normal access to the site.
Allow Editing This box does nothing. It has no impact on who can or cannot edit the circulation. Permission to edit the file is determined by normal site permissions or the Confidential check box.
Recipients This is a required field; it specifies the people for whom the circulation is intended.
Once you've set up the circulation, click Save. At this point, you'll be taken back to the main list, and if you're on the default view (My Unconfirmed Circulation), you won't see your new circulation (since you're not a recipient). Change the view to All Circulations to see the new circulation. If you now edit the circulation, you'll see it has a new field, Comments (see Figure 9.52). This lets recipients (if they have permission) post comments without having to touch the body of the circulation.
FIGURE 9.52 Editing a circulation
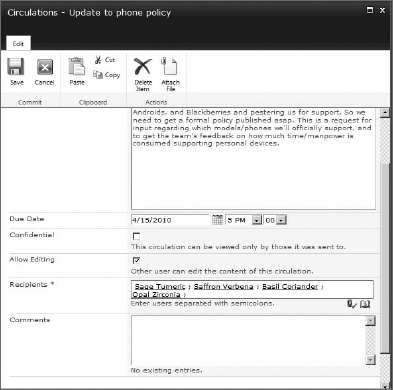
Keep in mind that if you want recipients to be able to edit the circulation, either they must be Site Members (and thus have the Contribute permission level) or you need to set Confidential (to allow them to edit). Otherwise, they will not even be able to confirm the circulation.
THE CONFIDENTIAL OPTION
The Circulation list works by playing with permissions. Whenever you create a new circulation in the list, people have permission to do whatever they normally have permission to do on the site. People who can read-write on the site (the site members) can read-write the circulations. People who can only read on the site (site visitors) can only read the circulation, so they can't edit or even confirm the circulations.
The exception to this is when you click Confidential. At that point, the following happens:
- The action breaks inheritance on the new circulation, removing all permissions from the item.
- It then adds the creator of the item (whoever you're logged in as) to the item explicitly with Full Control. And it adds the recipient(s) of the circulation (or official notice) with the permission level Contributor.
- It adds the recipient(s) to the site's permissions with the level Limited Access (even if they're already listed in an existing group).
This means that if something is marked Confidential, then all recipients can edit the item, regardless of what their normal permissions on the site permit. And people who were not previously able to access the site at all now have Limited Access to the site (and, if the site its self is inheriting permissions, they have access to its parent, potentially going all the way to the top-level site).
For more information on permissions, see Chapter 12.
The other content type for a circulation is the Official Notice type. This is almost identical to Circulation except for two minor things:
- The Allow Editing button is not available. But since it doesn't do anything, this is minor.
- There is no Comments field on the resulting list item. So although people can edit the notice (if they have permission, it's same rules as for Circulation), they can't place comments in the comment field (it's simply not there).
PHONE CALL MEMO
The Phone Call Memo list is designed to replace the “while you were out” paper pad or email—a way to let co-workers know that they missed a call. Like the Circulation list, the Phone Call Memo list has four views, with options to sort the list by My Unresolved Memos, My Memos, Memos from Me, and All Unresolved Memos.
Click Add New Item to create a new Phone Call Memo list. See Figure 9.53.
FIGURE 9.53 A new Phone Call Memo item
You'll notice this list also has a Confidential check box; it behaves the same way as it does on the Circulation list. Selecting this box allows the recipients to edit and resolve the memo, regardless of their normal access to the site. It also prevents anyone other than the creator and recipients from even seeing the memo, regardless of their normal access to the site. Once you've filled out the memo, click Save.
Back on the main home page for the group site, you'll now notice that the memo's recipients have an alert icon by their names in the Whereabouts web part, as shown in Figure 9.54. This icon shows up whenever someone has a new memo waiting; it's a quick way to see whether you or someone else has a memo waiting. Note that if the memo was tagged Confidential, you won't see the icon unless you're either the memo author or the recipient. Clicking this icon will take you back to the Phone Call Memo list, but it will be filtered by that person's name in the recipient field.
When you open the memo, you can quickly see who called, along with their number to call back (if entered) and the message. When you're done resolving the memo, you can click the Resolve button. (Note that you need permission to edit the item to use the Resolve button; read-only access will not be sufficient, even if you're the recipient.)
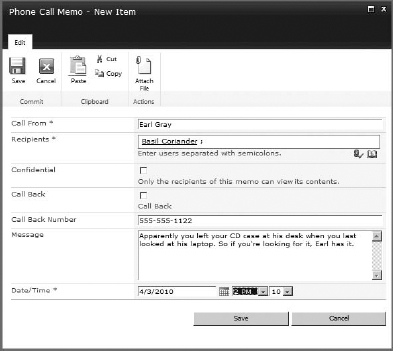
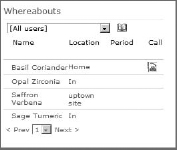
Hitting the Resolve button causes a couple of things to happen:
- The Resolved field is updated to Yes, and your name and the current date/time are automatically entered into the Resolved By and Resolved Date columns. These columns are hidden from the default views, but they're visible when you edit the list or create a custom list view.
- If this was the only unresolved memo, the icon on the Whereabouts web part goes away.
- The memo will no longer appear in any of the default views (which show only unresolved memos). It has not been deleted; it's just visible with a custom view. You can find more information about List views in Chapter 6. (Because it's hidden and not deleted, over time the list can fill with old, unwanted phone memos. You may want to periodically clear out old list items or write a workflow to do it for you.)
Meeting Workspace
No one likes to be told they have to attend a meeting without knowing what it's about or who else is going to be there. No one likes to leave a meeting unsure of what was accomplished and who's supposed to do what to move the project forward. Typically, meeting agendas are emailed, and people look at the email's CC field to see who is attending. SharePoint has meeting workspace templates that were designed with the needs of the meeting organizer in mind.
With a meeting workspace, you can organize the meeting attendees, agenda, and objectives; post any required documents; resolve task assignments; and record any decisions made. There are several types of meeting workspaces and different templates that adjust the site for particular needs. All meeting workspaces are based on the same site definition. This is what gives meeting workspaces their unique layout—meeting workspaces usually appear to have only one page. There are several standard lists that are made available to users as List View web parts on the workspace's home page. The meeting workspace's home page is actually a content page that can contain multiple sets of web part pages displayed in the content area. Each page is indicated (and accessed) by its tab in the content area. To start, regardless of the type of meeting workspace template you choose, each will have at least one page, considered the home page.
You can create a meeting workspace in several ways. The first is through the now familiar New SharePoint Site page (using a template on the Meetings tab). The other way is more common, and that's creating the meeting workspace based on an event in a calendar on the SharePoint site. Create one from the calendar on the HR team subsite under the company site, as shown in Figure 9.55. When creating a new event in a calendar, there is an option for creating a new meeting workspace as well.
Checking the box in the Workspace section when creating a Calendar event will take you to the New Meeting Workspace page shown in Figure 9.56; there you can create the new meeting workspace. We're going to create one for a project kickoff meeting for the HR team from their main site's calendar.
FIGURE 9.55 The new calendar event
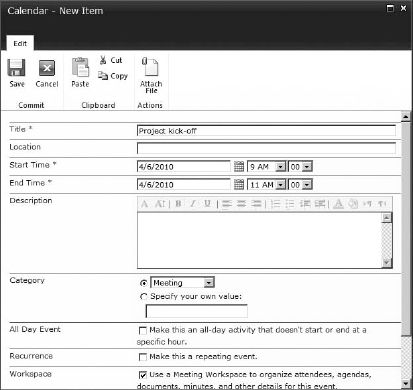
FIGURE 9.56 Create a new meeting workspace
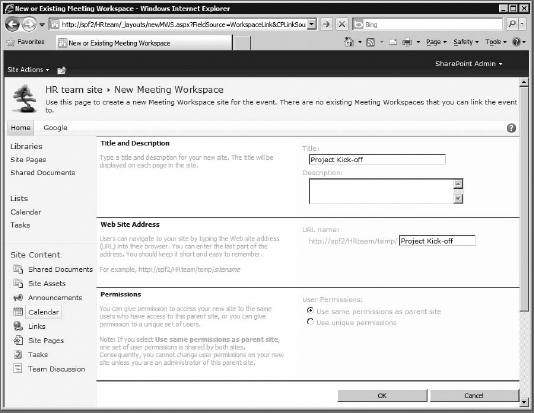
Once you've entered the meeting information and clicked OK, you will be prompted to choose the desired template (see Figure 9.57); these templates are the same templates as those listed on the Meetings tab on the New SharePoint Site page. All meeting workspaces are based on the Meeting Workspace (MPS) site definition. This is why they have a different look and feel than your standard document workspace or team site. Technically, meeting workspaces refer directly to the site definition and don't even have templates, but Microsoft tends to take liberties in referring to the different workspaces as templates. I'm going to create a Basic meeting workspace from this event and call it Project Kick-Off, as shown in Figure 9.58.
FIGURE 9.57 Selecting a template
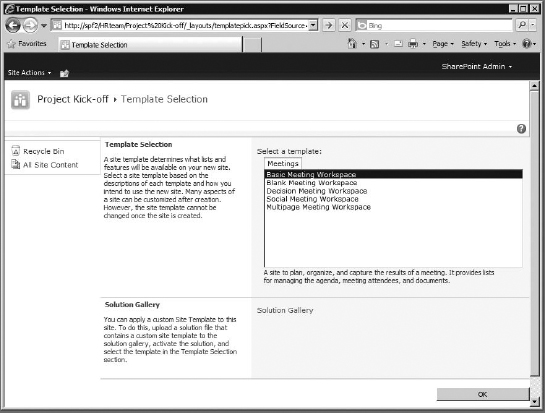
FIGURE 9.58 The Project Kick-Off meeting workspace
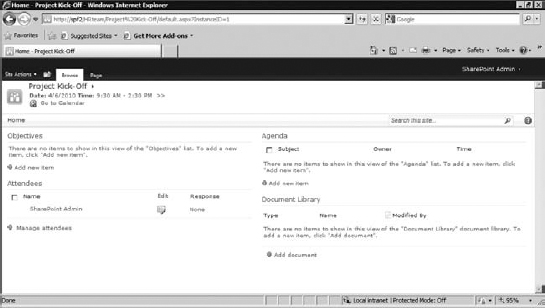
SharePoint supports linking the events in a calendar with meeting workspaces. We just created a new meeting workspace from an event, and these two items are now linked—each provides a link to the other—and are tied together. But there's a lot more you can do with these links, and there's some unique behavior in the relationships between meeting workspaces and calendar events.
If you create a repeating calendar event and then create a meeting workspace for it, the workspace will be aware of the recurrence, although it has an interesting way of showing it. It creates separate instances of the workspace (so the pages look the same but they aren't) for each meeting.
On the left side of the workspace (regardless of the template you choose) will be a Meeting Series pane showing a list of the dates of the recurring event (see Figure 9.59). You select the correct date, and the workspace will bring up the instance for that date.
FIGURE 9.59 The meeting workspace for a recurring event
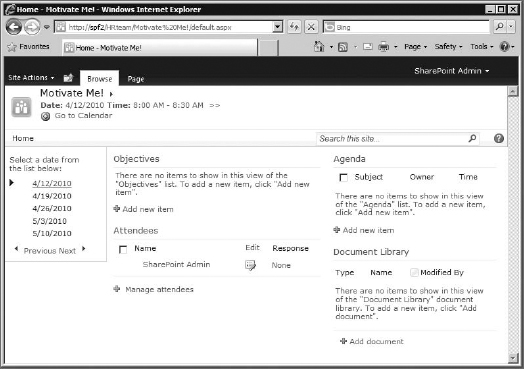
This gives you a single meeting workspace for the event, even though it occurs repeatedly. Each of the workspace's libraries and lists tracks the instances (dates) for the workspace, keeping them separate despite being in the same library, so you can have different attendees, tasks, and decisions for each event.
Sometimes you create the meeting workspace before an event has been scheduled. (You know there's going to be a big meeting, but you don't know when.) So, you create a meeting workspace from the New SharePoint Site page. When the time comes to place the meeting event on the calendar, you want to link this new event to your existing meeting workspace.
In this case, when you create the event and check the box to create a workspace, it takes you to a modified creation page called New or Existing Meeting Workspace (Figure 9.60). It's exactly like the New Meeting Workspace page shown in Figure 9.56, except for the option to either link an event to an existing meeting workspace or create a whole new workspace for it.
If you choose to link the event to an existing meeting, then you will have to choose the meeting from the drop-down menu. The catch is that the meetings available as choices must be directly off the site you are creating the calendar event on.
FIGURE 9.60 The New or Existing Meeting Workspace page
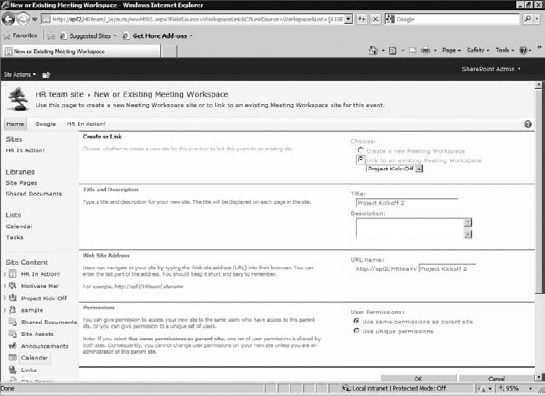
I CAN'T LINK TO MY EXISTING RECURRING EVENT WORKSPACE
You may notice the drop-down menu doesn't include your existing workspaces that were created directly from a recurring event.
Although it's possible to link events to a meeting workspace that already has one or more events linked to it, for some reason you cannot link a new event to an existing workspace if that workspace was created from a recurring event.
You also can't create a new recurring event and link it to an existing meeting workspace.
Recurring events cannot share workspaces with any other events.
When you choose the meeting to link the event to, that meeting workspace's home page spawns a new instance (with the same results as a workspace created from a reoccurring event).
Meeting workspaces maintain partial contact with the calendar event in the originating calendar; as long as they're linked, the workspace will reflect any changes made to the event. How they behave depends on the number and type of events to which the workspace is linked.
If you have a single event attached to a workspace and you make changes to the date or times of the event (for example, a meeting scheduled for 3 p.m. on Tuesday gets moved to 10 a.m. on Friday), the moment you change the event on the calendar, the meeting workspace will update to reflect the change. If you delete the event from the calendar altogether, it does not delete the workspace, but the home page of the workspace will show an alert telling you the event has been either unlinked or deleted. See Figure 9.61.
If you have a workspace linked to a recurring event, the linking gets a lot more confusing. Because there are multiple events linked, when you move/edit an event, the workspace reacts by marking the old event as unlinked/deleted and adding the updated date/time as a new event. So if you move a recurring event from every Thursday at 3 p.m. to every Friday at 1 p.m., the workspace will show both dates/times, some no longer linked to an event. You'll need to edit these instances manually. The bottom line is, it's best not to move a recurring event.
With a workspace linked to multiple nonrecurring events (several separately created events), the behavior is much better; moving one of the events to a new date/time will update the workspace correctly. And if you delete one of the linked events, going to the workspace will prompt you with an alert to do one of three things with the affected instance in the Meeting Series pane (Figure 9.62):
Move Merge all the data from the defunct instance into one of the other (still linked) instances. So, all the attendees, objects, agenda items, and so on, are moved to the other instance, potentially making that meeting pretty crowded.
Keep Leave the instance untouched—so you have an instance, with the old date/time and no corresponding calendar event.
Delete Delete the instance and all the data it contains.
FIGURE 9.61 The workspace has lost its event.
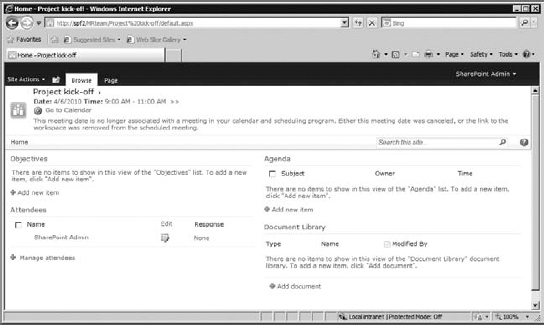
FIGURE 9.62 The Meeting Series pane has a canceled meeting.
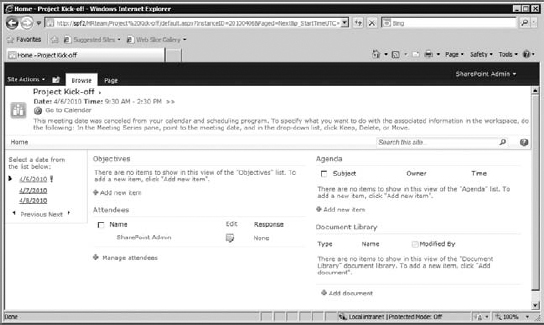
If you re-create the deleted event, it will show up as a new instance, so you could move the data from the old (deleted event) instance to the new instance and then delete the old one.
No matter how you create the new meeting workspace or if it's linked to a calendar event, you have a choice of five separate templates designed for different types of meetings. Let's take a look at how these templates differ from one another and see what you can do with them.
BASIC
The Basic meeting workspace is the general template based on the Meeting Workspace site definition. An example of a Basic meeting workspace is the Project Kick-Off meeting we created earlier, shown in Figure 9.63. This is why the home page for the site is so fundamentally different from the team site. It still has most of the features of a team site except for the Quick Launch bar Most scheduled meetings will be fine with Basic. The Basic workspace includes some prebuilt lists, such as Agenda, Objectives, and Attendees. It also includes a document library for storing related documents for the meeting.
FIGURE 9.63 The Basic meeting page
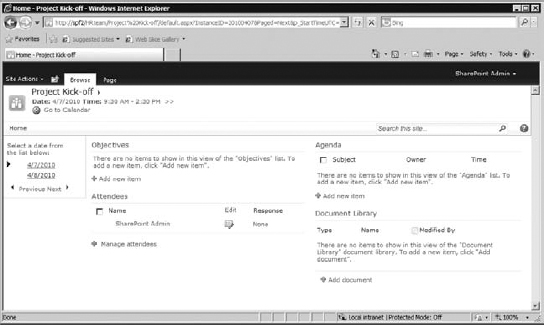
- The Objectives list is a simple list for notes used to list objectives for the meeting.
- The Agenda list item has a required Subject field, an Owner field (for whoever posted the agenda item), a Time field (for how long should this Agenda item should take to discuss during the meeting), and a Notes field.
The Attendees list is a place to list the users who are going to attend the meeting. When you add a new user, two additional fields, Response and Attendance, are required. They appear in Figure 9.64.
ATTENDEES REQUIRE EMAIL ADDRESSES
When adding attendees, you may get an error stating that the user does not have an email address, which is required. To add an email address to the user object, you will need to go to Site Settings
People And Groups and edit the user object to provide the email address.- The Response field, which the list creator will probably leave set to None, is simply the user's response to the meeting request: None, Accepted, Tentative, or Declined.
FIGURE 9.64 The new Attendees item
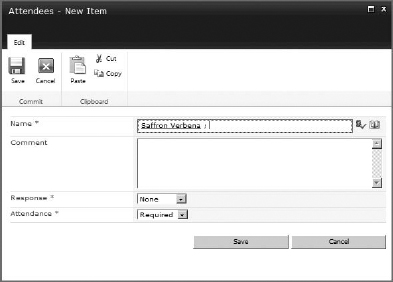
These meeting workspaces are simple sites. There is no automated way for a user to email a response and have their Response field change by default. The meeting organizer (or the attendee themselves if they have the permission to) will have to change that field manually. Also note that the attendees need to have permission to access the site in order to see it. Make certain the attendees can actually log in at least as visitors of the site.
Attendance also has three options, Required, Optional, and Organizer, which is a polite way of saying “really required because you're calling the meeting.”
A quick glance at the Attendees list will show you who's supposed to attend, whether they can make it, and who's running the show (see Figure 9.65).
FIGURE 9.65 The Attendees list
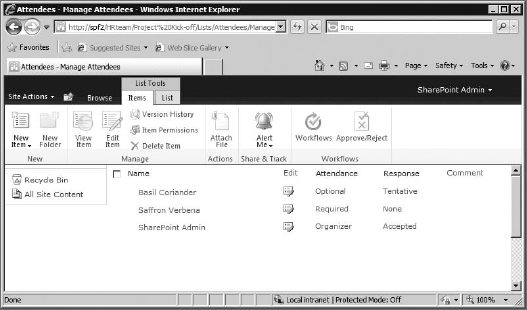
In addition, you can add other lists and therefore List View web parts to a meeting to add Tasks, Issue Tracking, and pretty much whatever else you need. Just as with team sites, you can adapt a meeting workspace to meet your needs. See Figure 9.66.
FIGURE 9.66 Adding to the meeting workspace
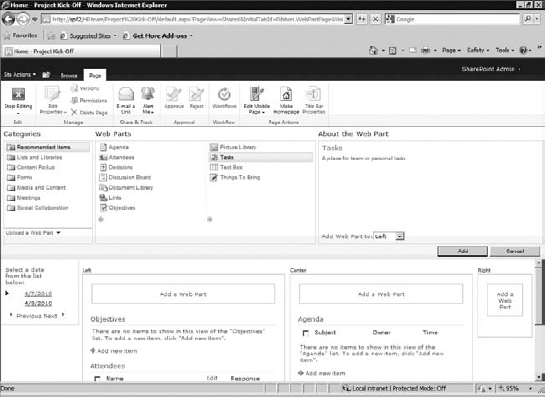
![]() Real World Scenario
Real World Scenario
THE CONVENIENCE OF HAVING ALL MEETINGS IN THE SAME PLACE
As many of us know all too well, either meetings can be regularly recurring or there can be meetings that stem from other meetings that cause yet more meetings.
The Team Site template treats each list and library as if they were their own pages with links to them from the home page. The Meeting Workspace template treats each list available on that site as a web part and considers pages to be separate content areas on the main workspace page, indicated by their own tabs. This is because you can add “pages” to the workspace. These pages can be used for separate meetings, each with their own lists, such as tasks, discussions, objectives, and attendees.
Most meeting workspaces start out with a home page (indicated with a tab in the top link bar named Home).
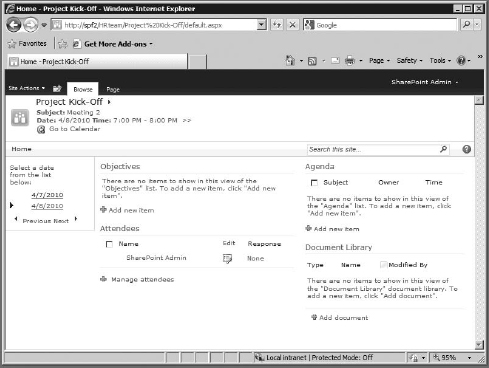
But you aren't limited to one page; you can add another page by going to Site Actions ![]() Add Page. This lets you add a page for each meeting. Note that the Site Actions menu allows you to go to the Site Settings and edit the page you're on, as well as add or manage pages.
Add Page. This lets you add a page for each meeting. Note that the Site Actions menu allows you to go to the Site Settings and edit the page you're on, as well as add or manage pages.
When you add a page to a meeting workspace, it will ask you to name the page and decide whether it should appear for just this one meeting instance or all meetings (if you have more than one calendar event assigned to the meeting workspace).
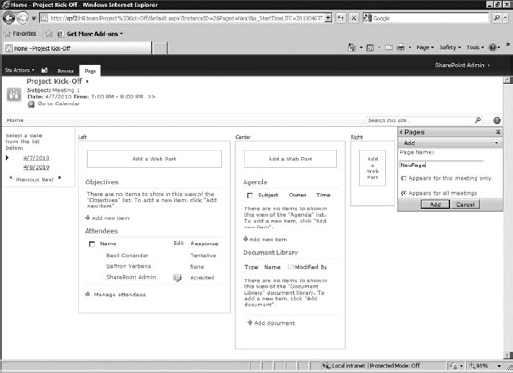
After you create a page, it starts in edit mode so you can add web parts to the new page, such as a document library, an Attendees list, or links, and then populate them with data pertinent to that meeting. (By default the new page contains no web parts.) Or, later you can click Site Actions ![]() Edit Page (just like any other web part page) and add web parts to the web part zones. For each page, the List View web parts for the meeting are incremented. So, the home page has Objectives, Agenda, Attendees, and so on, and the page you add will have Objectives, Agenda, and so on.
Edit Page (just like any other web part page) and add web parts to the web part zones. For each page, the List View web parts for the meeting are incremented. So, the home page has Objectives, Agenda, Attendees, and so on, and the page you add will have Objectives, Agenda, and so on.
Back on the Home page, you can see the new page is now showing up under the Pages section in the Quick Launch bar.
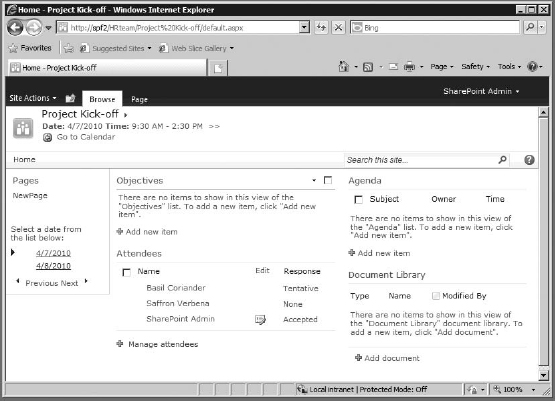
This can give you one central workspace to go to for data that's historical or shared between the different meetings, with separate pages for the collected details about the individual meetings themselves.
This is just something to think about when creating workspaces for those endlessly spawning meetings. Instead of creating a meeting workspace and then creating a subworkspace for the next one and the next, consider creating one workspace for meetings and simply adding each meeting as a separate page in that workspace's content area. It might save time, save space, and give the attendees one simple place to go for each meeting, rather than a different workspace every time.
BLANK
A blank workspace is like a blank site—no prebuilt lists, libraries, or web parts. So, you're starting from scratch with this template. It still adheres to the Meeting Workspace site definition, so it will register as a meeting workspace and can link to calendar events.
DECISION
The Decision template is focused on resolving questions or issues. See Figure 9.67. It contains the base web parts of the Basic template, but it adds additional Tasks and Decisions lists.
The Tasks list allows tasks to be assigned, progress to be tracked, and a deadline set for the task, as shown in Figure 9.68.
FIGURE 9.67 A decision meeting
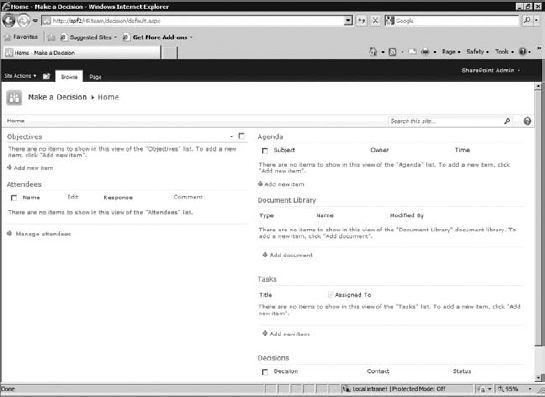
FIGURE 9.68 A new task item
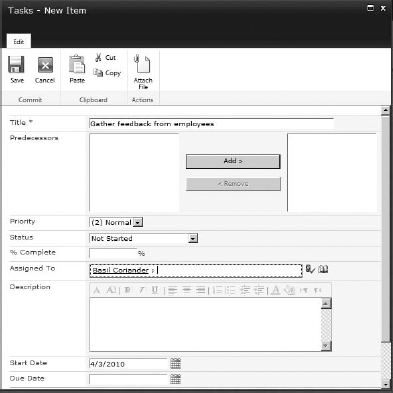
The Decisions list is used when decisions are actually being made. Each decision has a Contact field and a Status field that can contain Proposed, Pending Approval, or Final.
SOCIAL
Sometimes a meeting is less serious, and your primary goal is making sure everyone attends and has a good time. Rather than create a meeting with the objective “Have a party,” why not create a social meeting workspace? The Social template is geared toward both the before-party planning (attendees, who needs to bring what, location, and timing) and after-party reminiscence, with a discussion board and photo gallery, as shown in Figure 9.69. Social meetings are considered one-shots, so the interface uses separate tabs for each list, rather than each occurrence of a meeting.
FIGURE 9.69 The social meeting workspace

THE ACCIDENTALLY ENDLESS URL
When creating a workspace from a calendar event or document, the document or event name can automatically be part of the workspace's web address.
For example, the First Annual Tax Day Party Extravaganza social meeting workspace was generated from a calendar event in which all the defaults were kept. As you can see in Figure 9.69, the address for that workspace is particularly long and includes a lot of spaces (which URLs must render using the ASCII code %20).
If there is a typo in the URL or it is too long (such as First Annual Tax Day Party Extravaganza), you can easily change it. Just go to the site's settings under Site Actions, and click Title, Description, And Icon in the Look And Feel category. This will give you the chance to change the URL. All subsites below that workspace will also reflect the change.
MULTIPAGE
A Multipage template (see Figure 9.70) is simply a Basic template with two additional blank pages provided to do with as you see fit (just like taking a Basic meeting workspace and manually adding two new pages). The home page of the multipage site is a basic site, minus the document library.
FIGURE 9.70 A multipage meeting
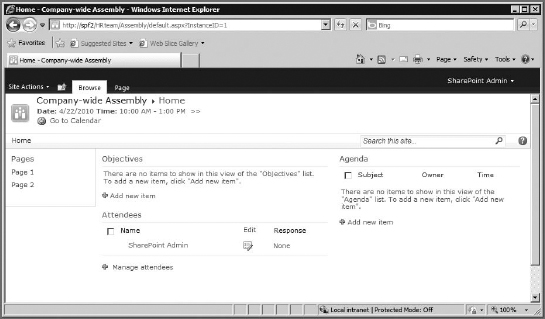
The two blank pages are really, really blank. You'll want to customize these pages by adding web parts to them before opening the workspace to users.
The Bottom Line
Create and customize a new site. Using the New SharePoint Site page, you can create a new subsite or workspace from one of several templates, or you can create a new workspace from an existing document or calendar event. The site can be customized using themes, custom logos, lists, and libraries.
Master It After you create a new site, you discover you left a space in the URL, making it hard for users to type (since it contains that darn %20 ASCII code). What steps do you need to take to safely change the URL without breaking links to the site and its subsequent subsites? Will anything fail the moment you change the URL?
Adjust a site's settings for administrative purposes. You can configure sites to inherit or set unique permissions on a site. You can also configure subsites to use tree view, manage user alerts, place the site on the top link bar, adjust regional settings, enable features such as RSS, and view usage reports.
Master It If you create a new subsite and choose to not place a link to this subsite on the parent site's top link bar and then set the subsite to inherit the top link bar from the parent, what happens when you click the Home link on the subsite?
Understand the different types of SharePoint site templates available. By default, SharePoint can create team sites, document workspaces, blogs, group sites, and meeting workspaces (from the Basic, Decision, Social, and Multipage templates).
Master It You create a new event on a calendar and select the option to create a new meeting workspace. Once it's created and you've entered attendees and objectives, someone accidently deletes the event from the calendar. What happens to the linked workspace?