6
ADORABLE ANIMALS

Capturing the likeness of small creatures in a painting is super fun and exciting. I often get requests from people for paintings of their adorable pets that they can treasure as keepsakes for years to come. I’ve done several acrylic paintings of my own lovable companions that I display in my home. Painting animals can be challenging because they’re living creatures with unique features, even within the same species. Our goal as artists is to capture the most identifiable traits in our paintings. In this chapter, we’ll learn how to render fur, feathers, scales, and other unique animal characteristics using the acrylic techniques we’ve learned so far, as well as new ones.
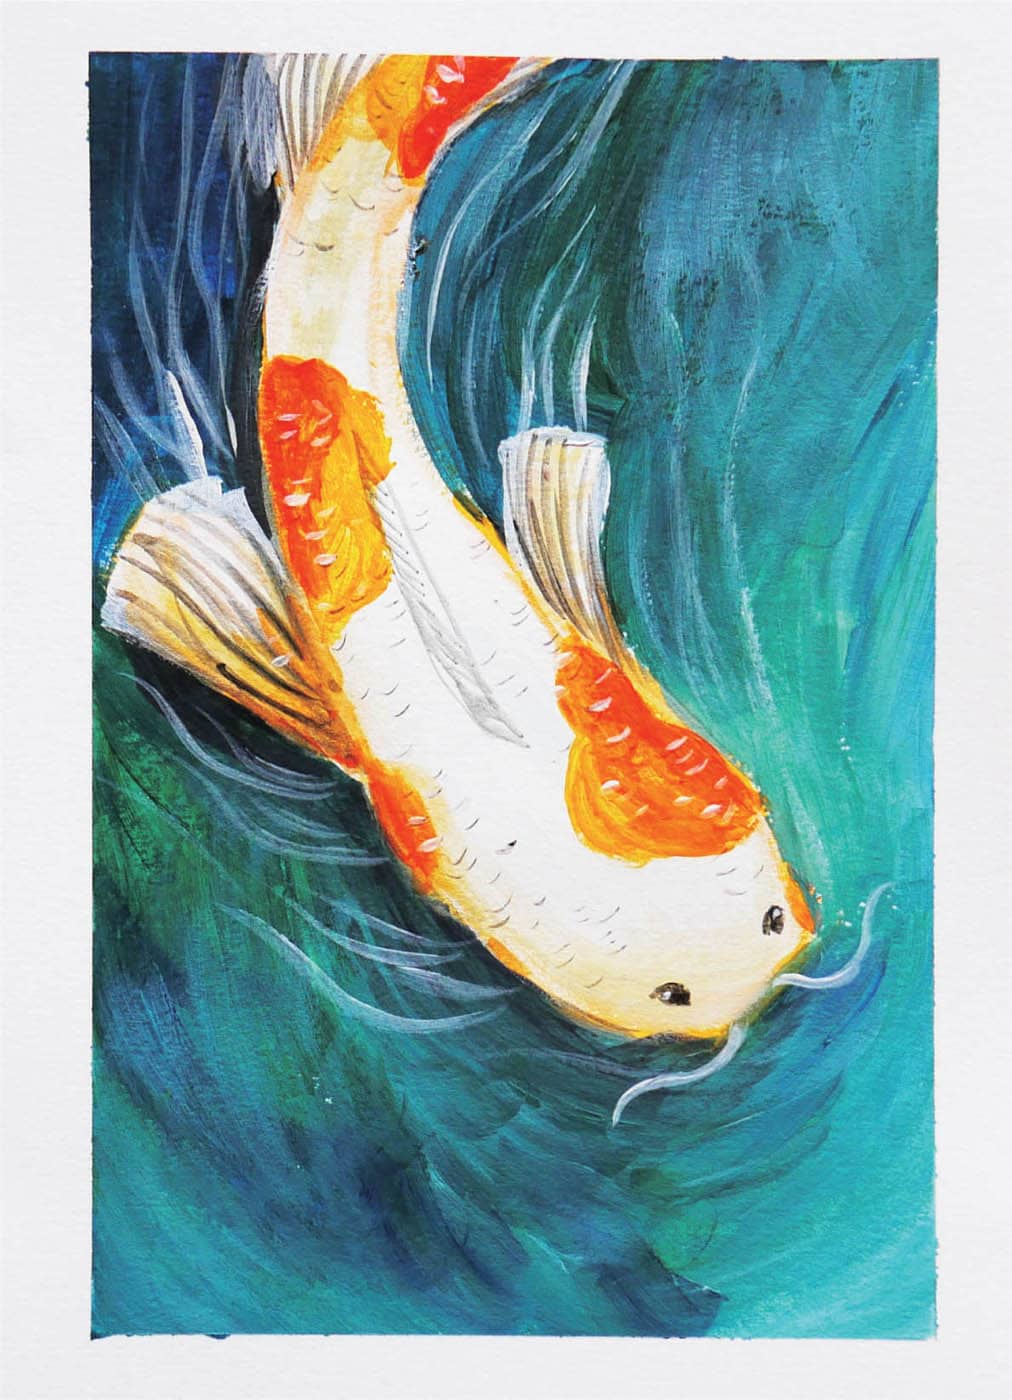
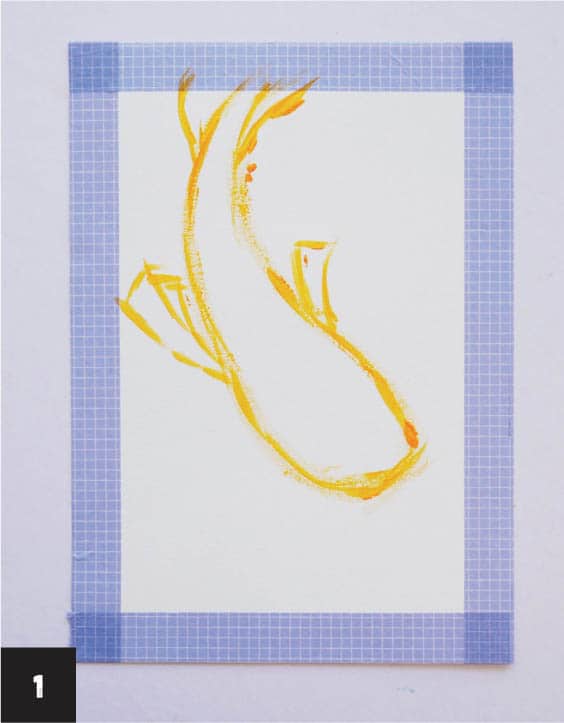
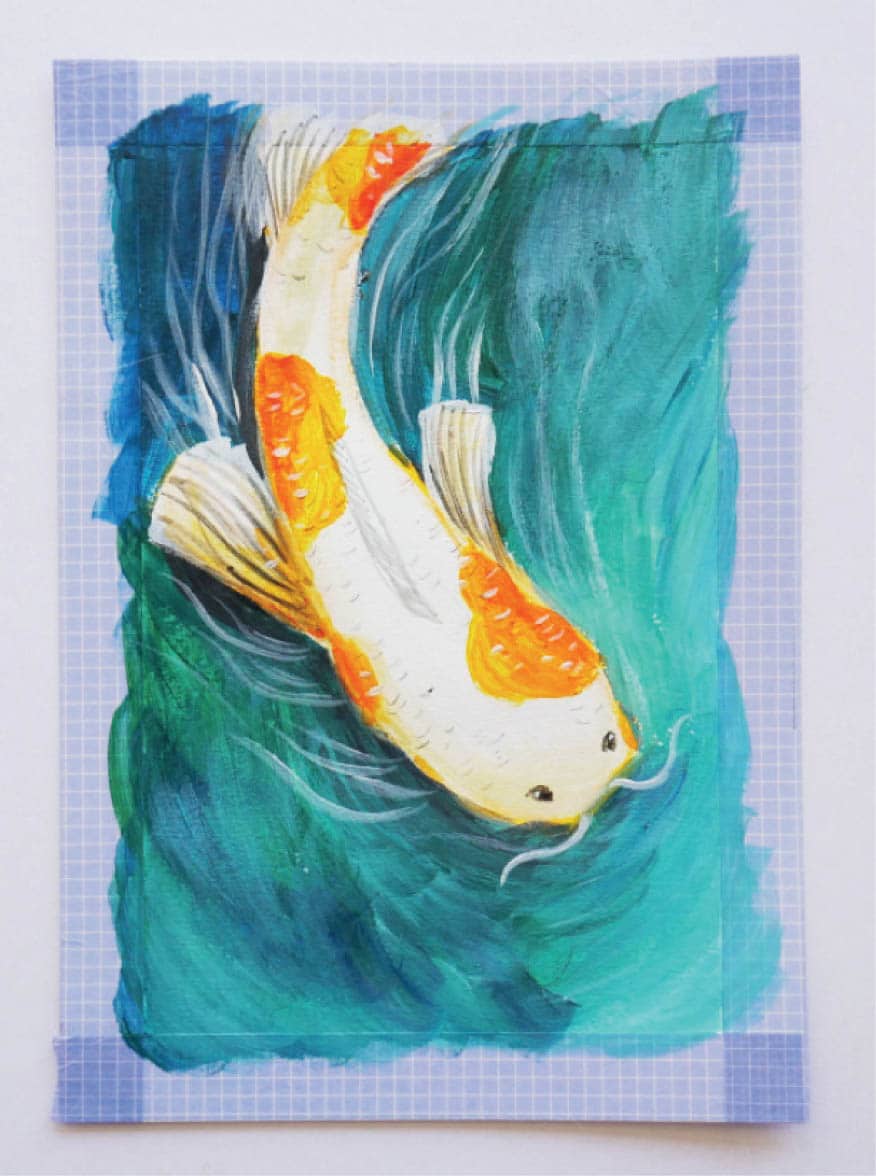
Koi fish symbolize abundance and good luck, and I love incorporating them in my paintings. These prized fish are not only celebrated for their symbolism but also for their beautiful and distinctive colorations. You’ll learn how to paint a simple koi fish, rendering its colorful scales and depicting how the fish moves in water. 1 Apply a small amount of orange paint to the palette and dilute it with water, using the flat brush. Paint the outline of the koi fish on the paper, including the fins and tail. The body of the fish should be a modified S shape to convey the flow and movement of the fish in water.
2 To paint the pond background the fish is swimming in, add equal amounts of blue, green, and white paint to the palette and lightly mix them together. Don’t worry about blending the colors too much, as this makes the water look more realistic. Clean the brush and begin blocking in the background with these shades, being careful not to paint over the koi fish outline.
3 Darken the background color by adding a small amount of black and a little water. Add this color under the fish’s belly to represent its shadow, using the flat brush. Add a bit of this color under the fins and tail as well. Allow the paint to dry. Clean the brush for the next step.
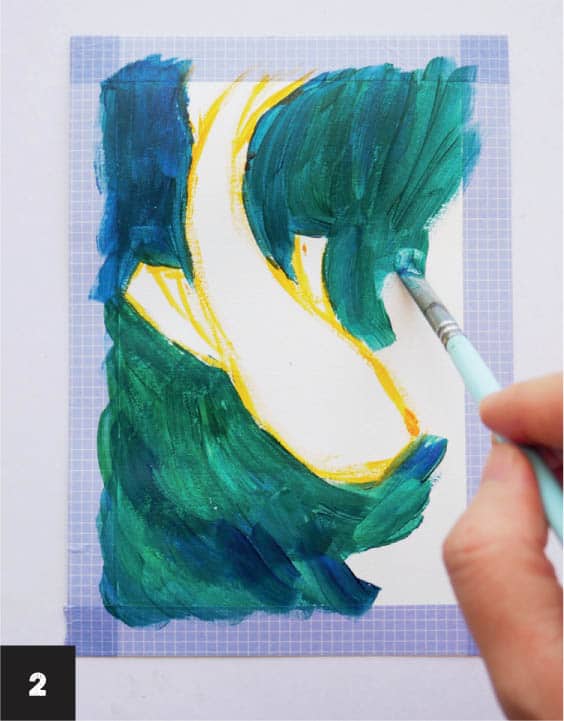
4 Add white paint to the palette and block in the koi fish, using the flat brush. Before the paint dries completely, dilute a small amount of brown paint with water on the palette and brush it on one side of the fish, adding a bit of warmth to the painting. Allow the paint to dry.
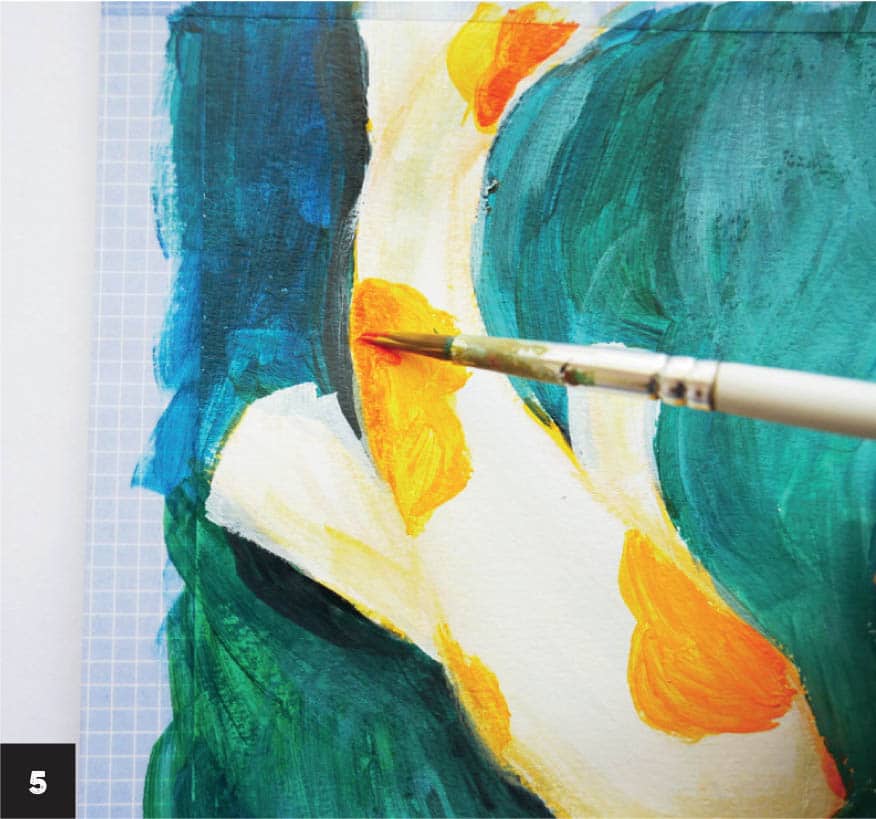
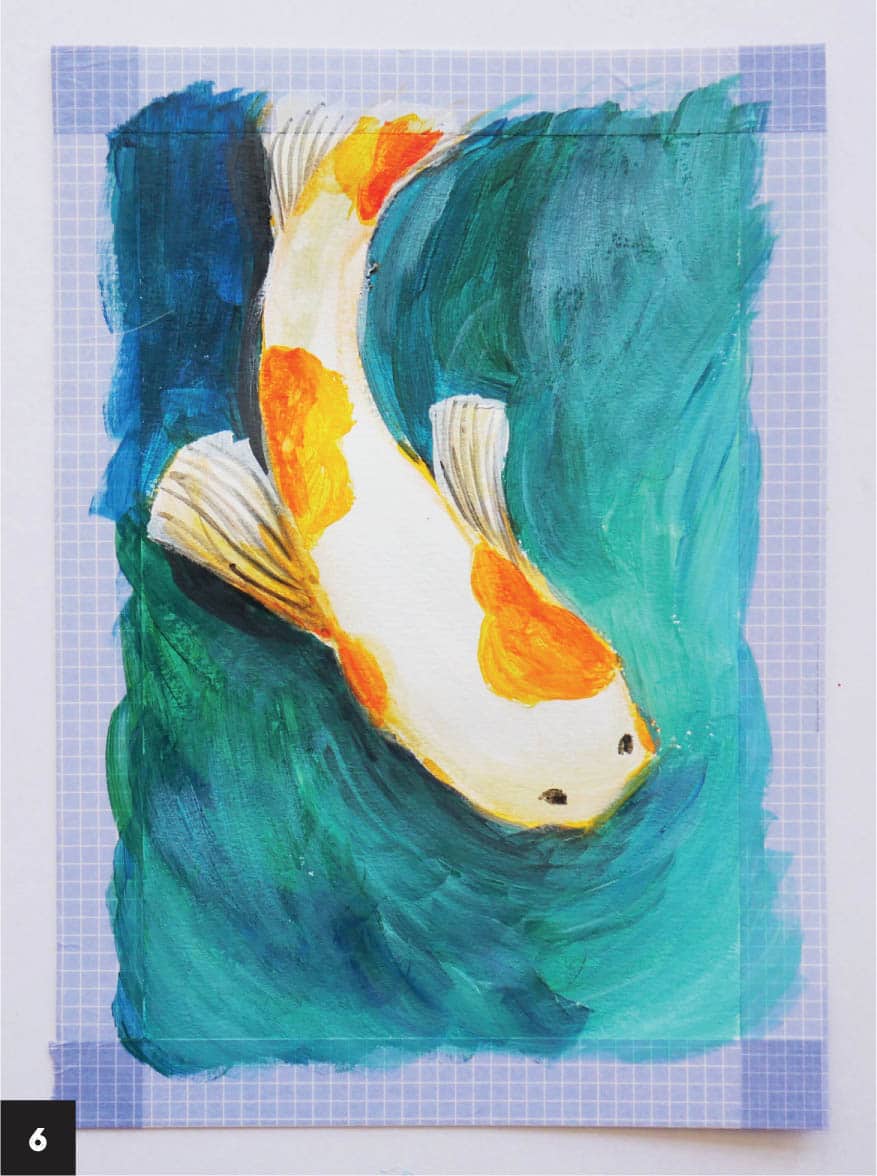
5 Add orange paint to the palette and add markings to the fish’s head, body, and tail with the round brush. Mix a bit of red with the orange and add this color to the markings near the edge to give them more depth. Allow the paint to dry.
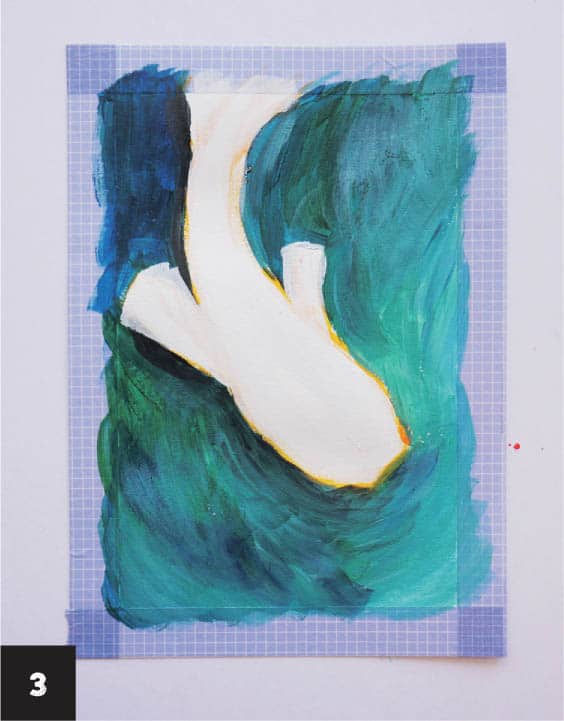
6 Add black paint to the palette and use the round brush to carefully paint small dots for the fish’s eyes. Add a small amount of water to the black paint and add details to the fins and tail. Create flowing lines that begin at the center of the body and go toward the edge, ending at the fin and tail tips.
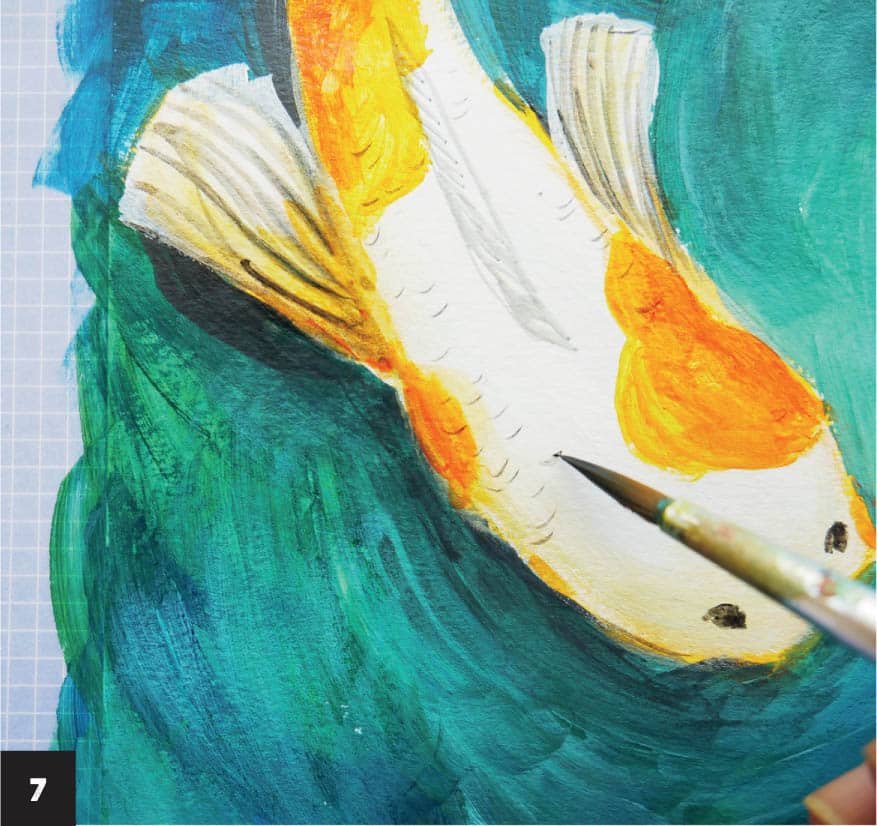
7 Make scattered small comma strokes on the side of the fish to create the scales, using the same diluted black paint and the round brush. Clean the brush.
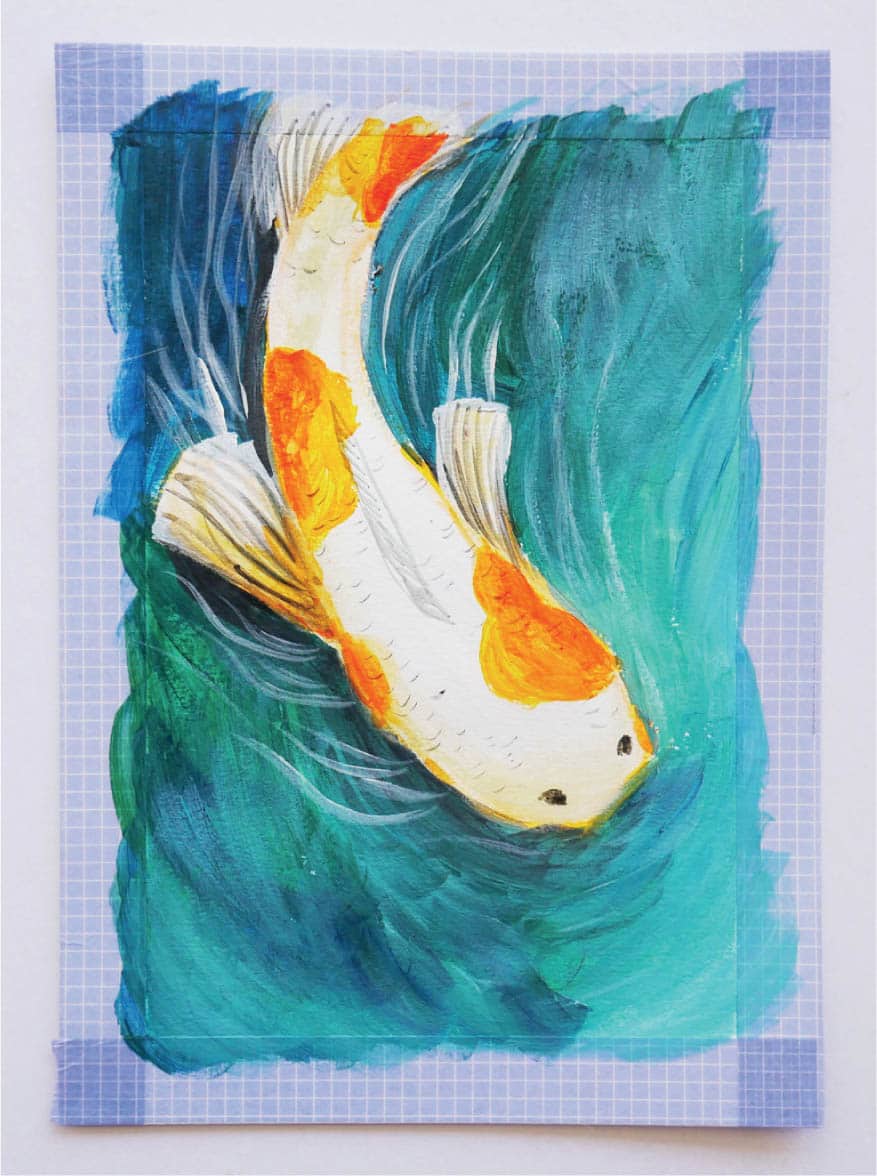
8 Add highlights to the painting. Using white acrylic paint and the round brush, add thin flowing lines at the side of the fish that move toward the tail. This accentuates the fish’s movement.
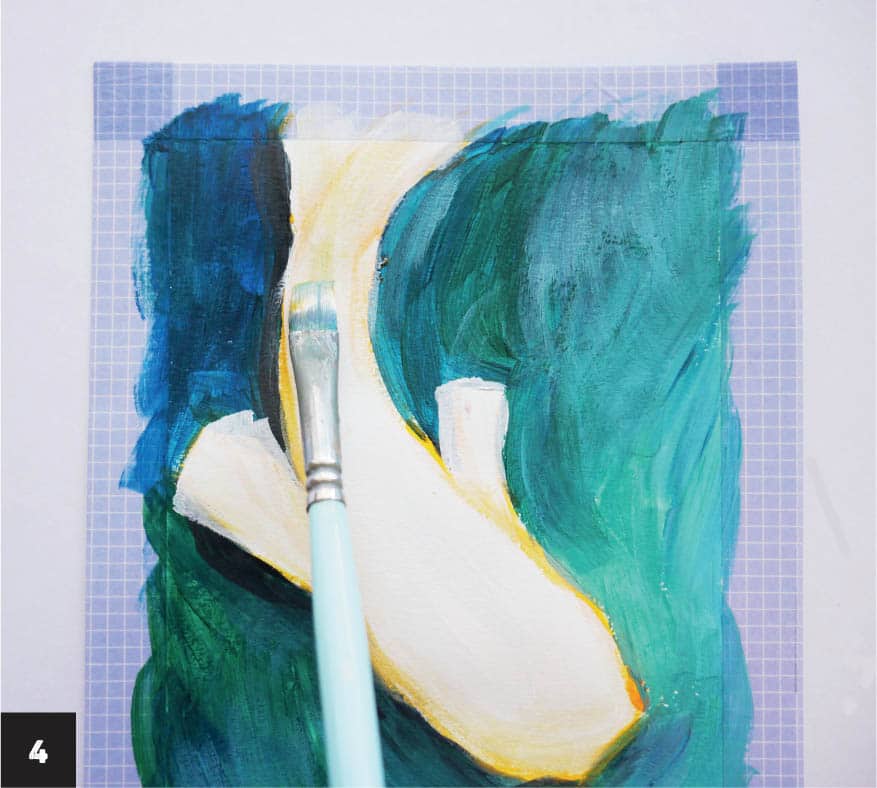
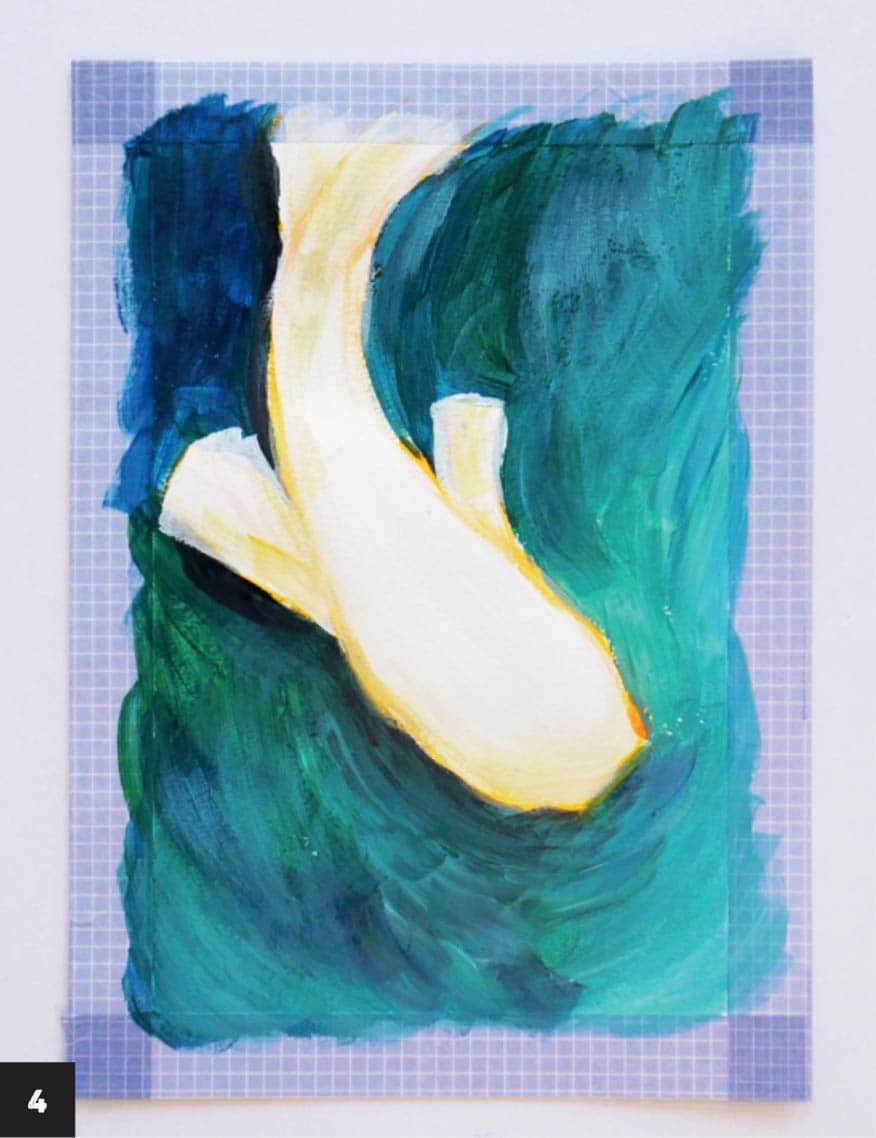
9 With white paint and the round brush, add the koi fish’s wispy moustache around its mouth. Create highlights on the scales you painted in step 7, adding smaller comma strokes in white on top of the scales. Add a tiny white dot to the black area of the fish’s eye; this highlight makes the fish look more realistic.KOI FISH
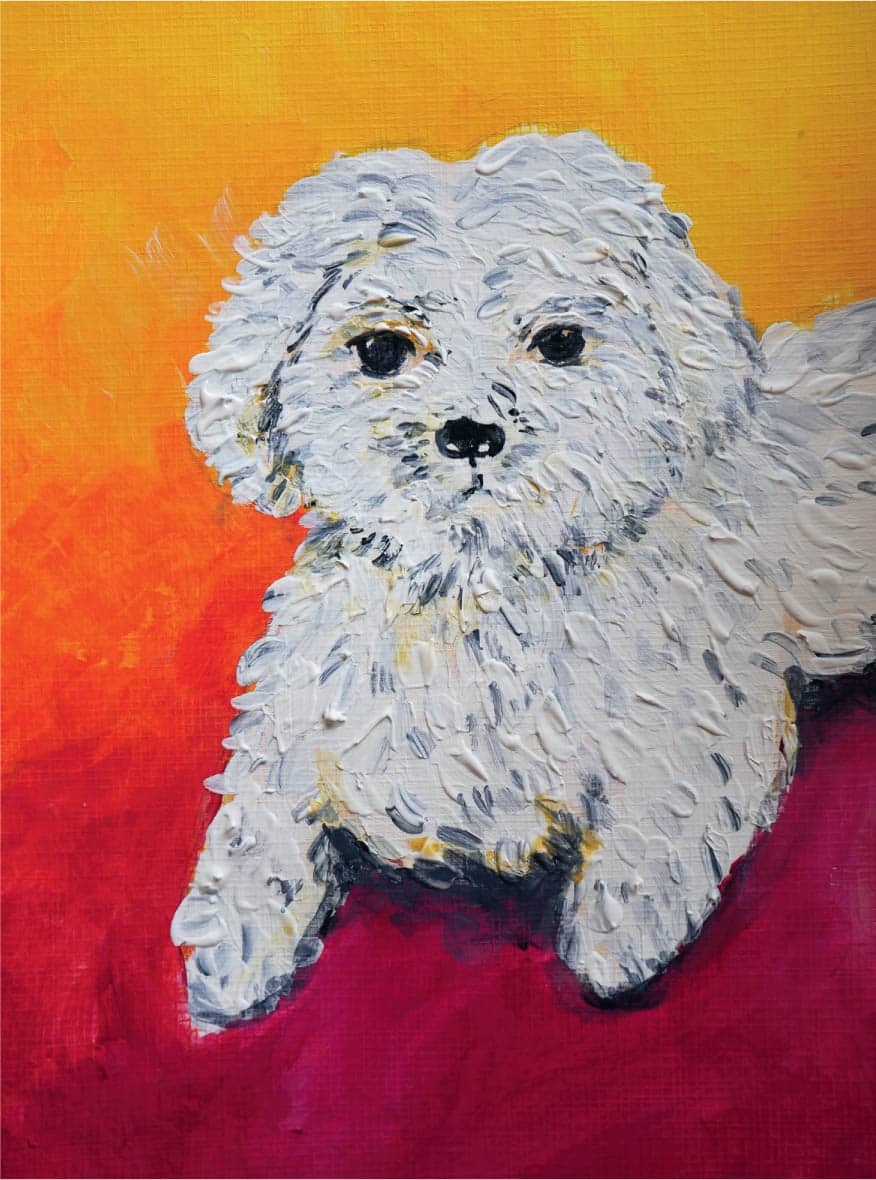
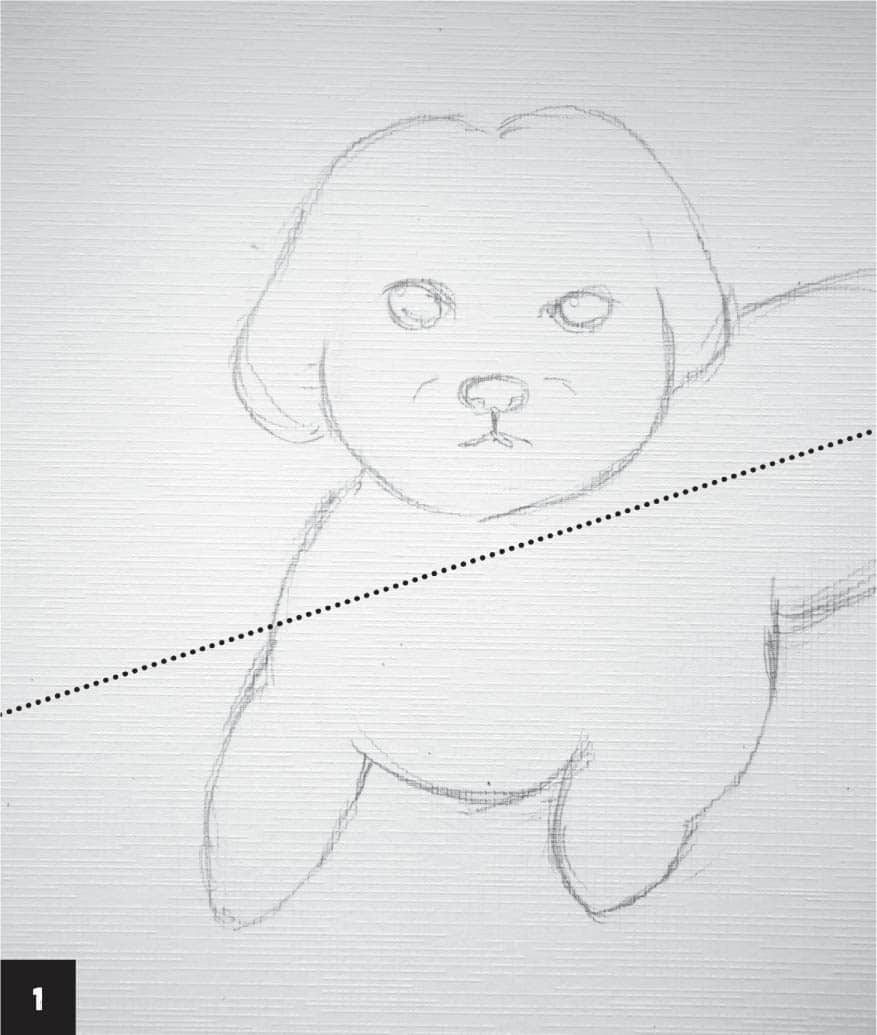
Creating texture with acrylic paint is easy and lends an eye-catching effect. Texture can add a new dimension to your artwork and can be added to a variety of subjects. This lesson is perfect for beginners. 1 Sketch a puppy in pencil, using a photo for inspiration or the template, and draw a diagonal line to delineate the foreground and background.
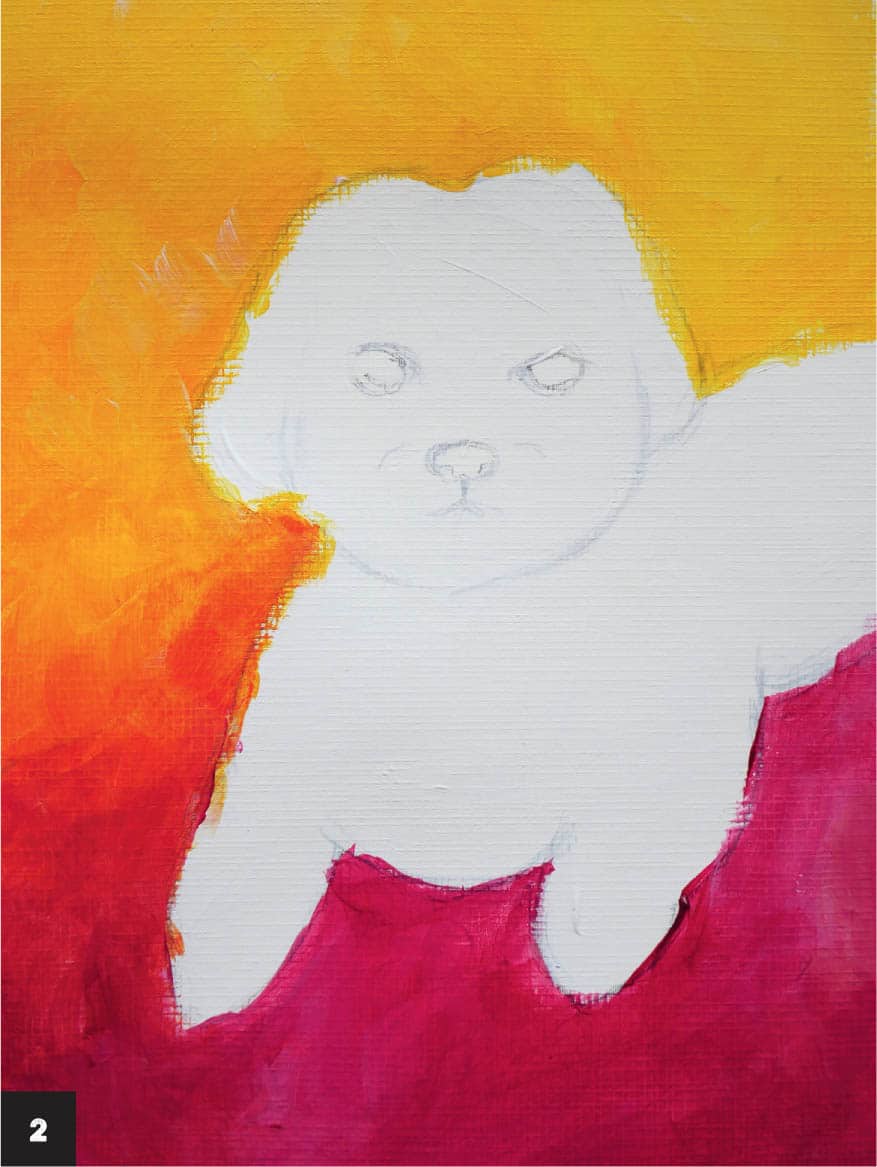
2 Block in the outline of the puppy, using white paint and the flat brush. Paint the background and foreground, using orange for the background and bright pink for the foreground. (I mixed red and white to create pink.) Use quick brushstrokes while the paint is still wet to blend the areas. Allow the paint to dry.
3 Add a yellow ocher glaze (see the glazing technique on this page) to outline the face, features, and body to create depth. Adding this layer prevents the puppy from looking too stark against the background.
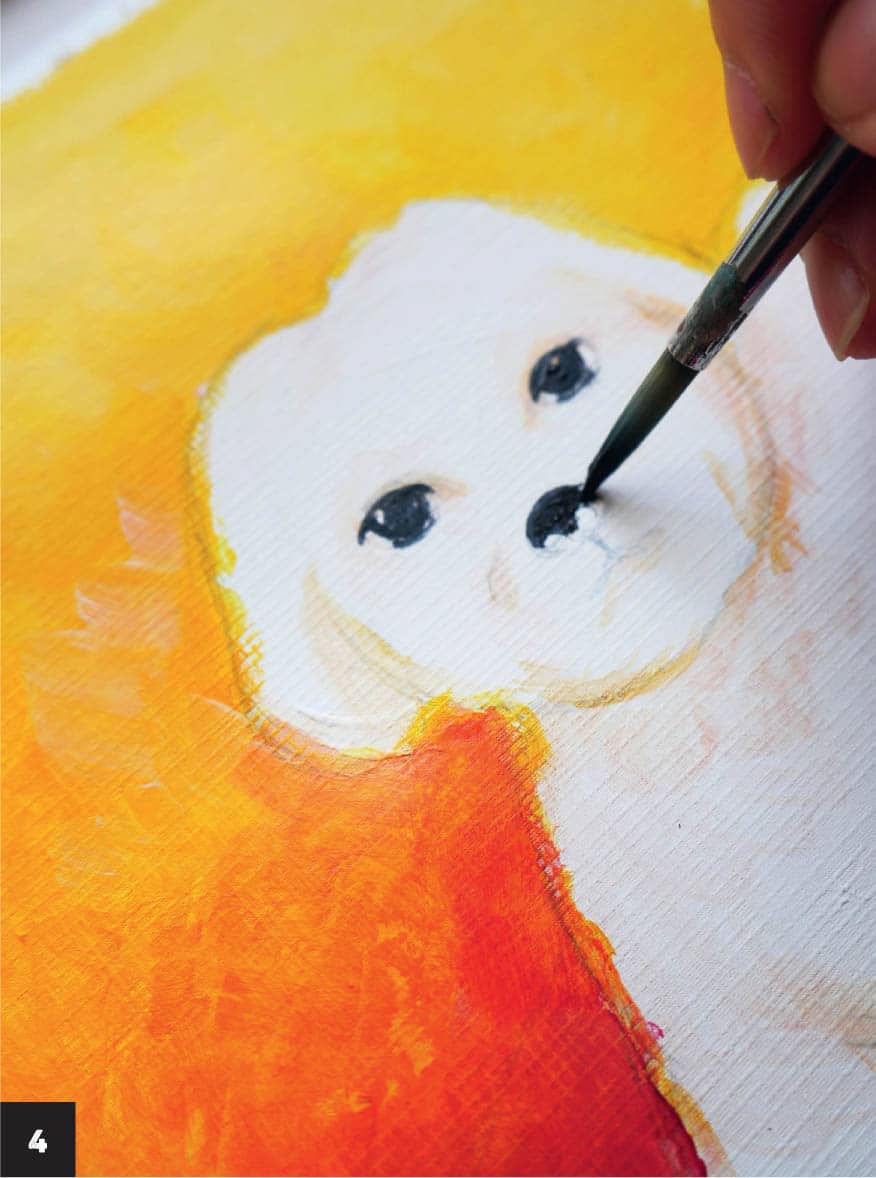
4 Paint the eyes and nose using Payne’s gray and the round brush. Add a pinpoint of white to the upper corners of the eyes. Eyes reflect light, and this will give life to the subject. Add two dots of white to the nose for nostrils.
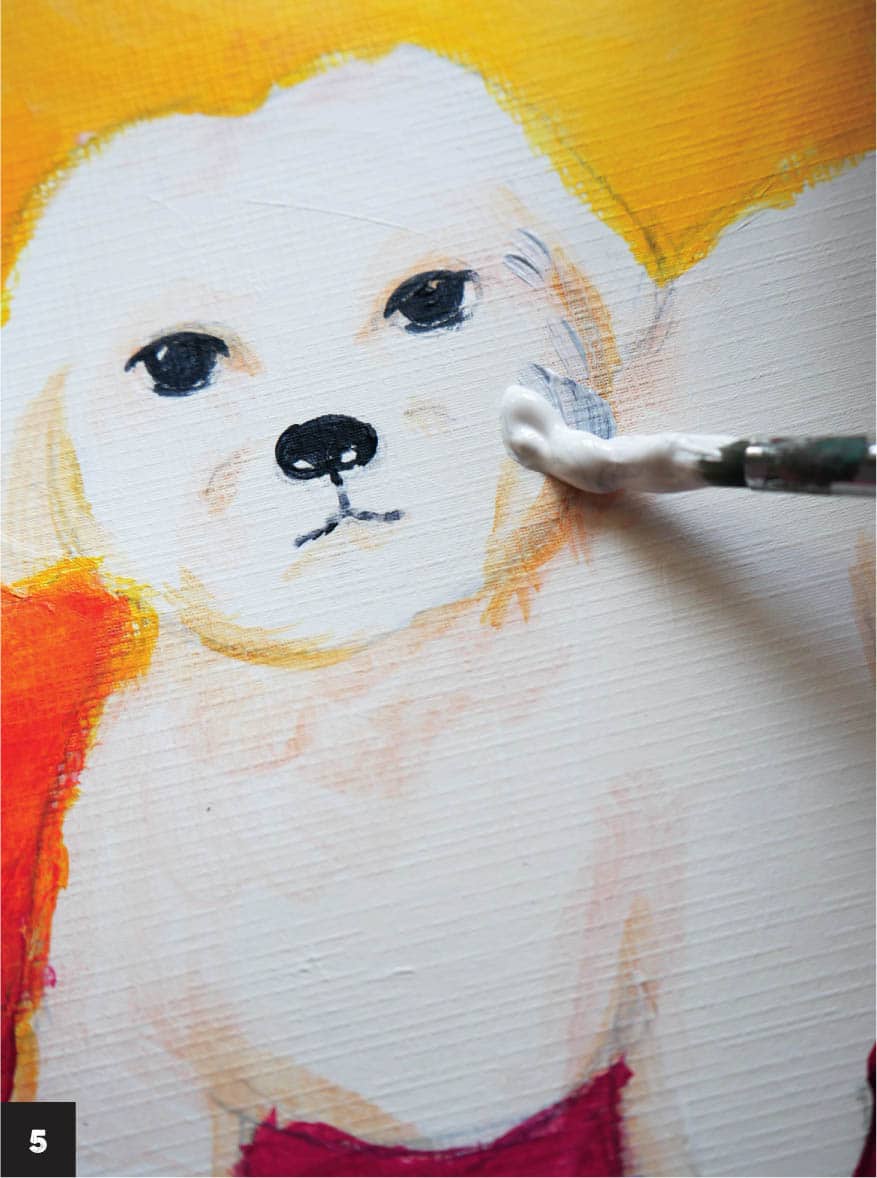
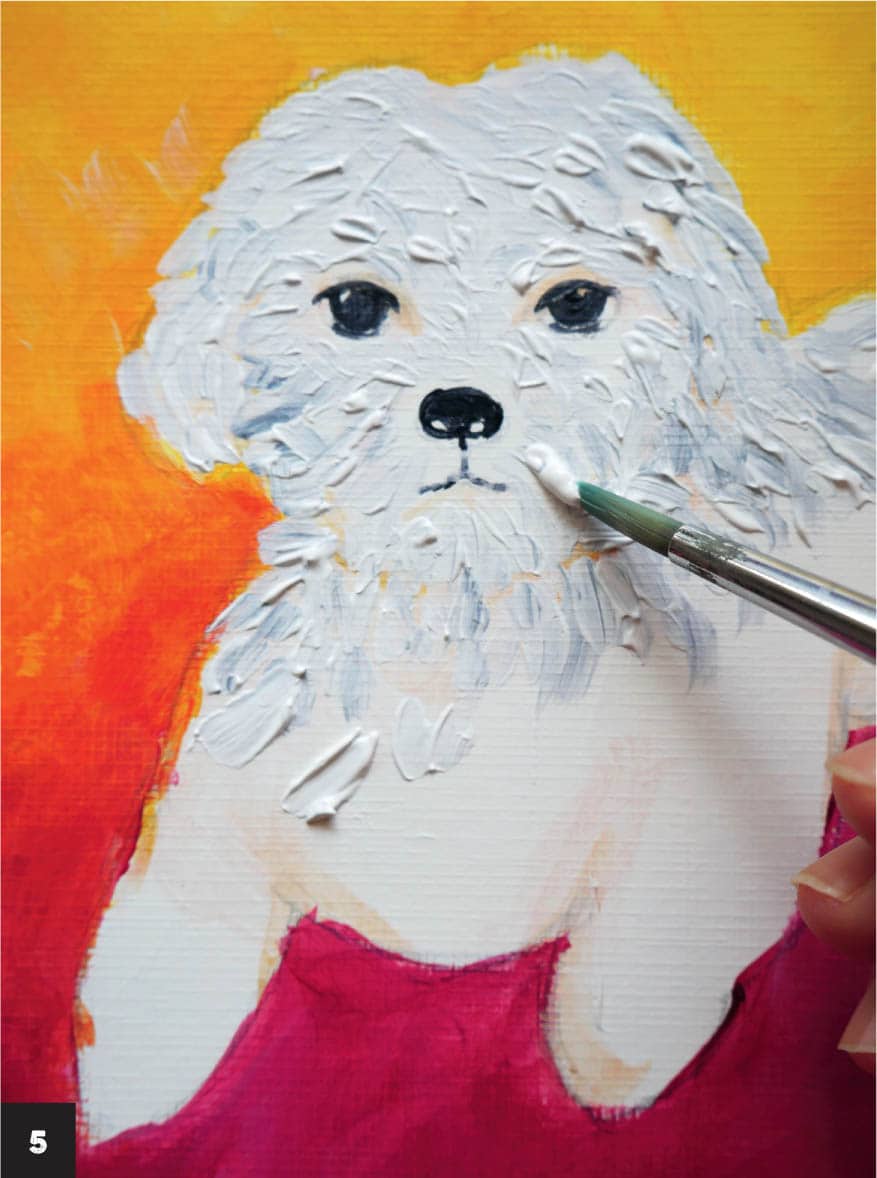
5 Begin to build up the fur texture, using the round brush and starting with a mixture of white with a little Payne’s gray. Don’t fully mix the colors; when the paint is applied, there should be streaks of white and gray, which mimic the look of fur. Start with lighter colors when creating texture on the puppy because its dominant color is white. You can easily adjust the color later by adding more Payne’s gray if necessary. To create the fur texture, move the brush in short strokes in the direction of the fur. For example, the fur on the body angles downward, while the fur around the eyes is in a circular pattern.
6 Imagine a light source and think about where the shadows would be, such as underneath the chest, belly, and face; where the ears meet the head; and under the chin.
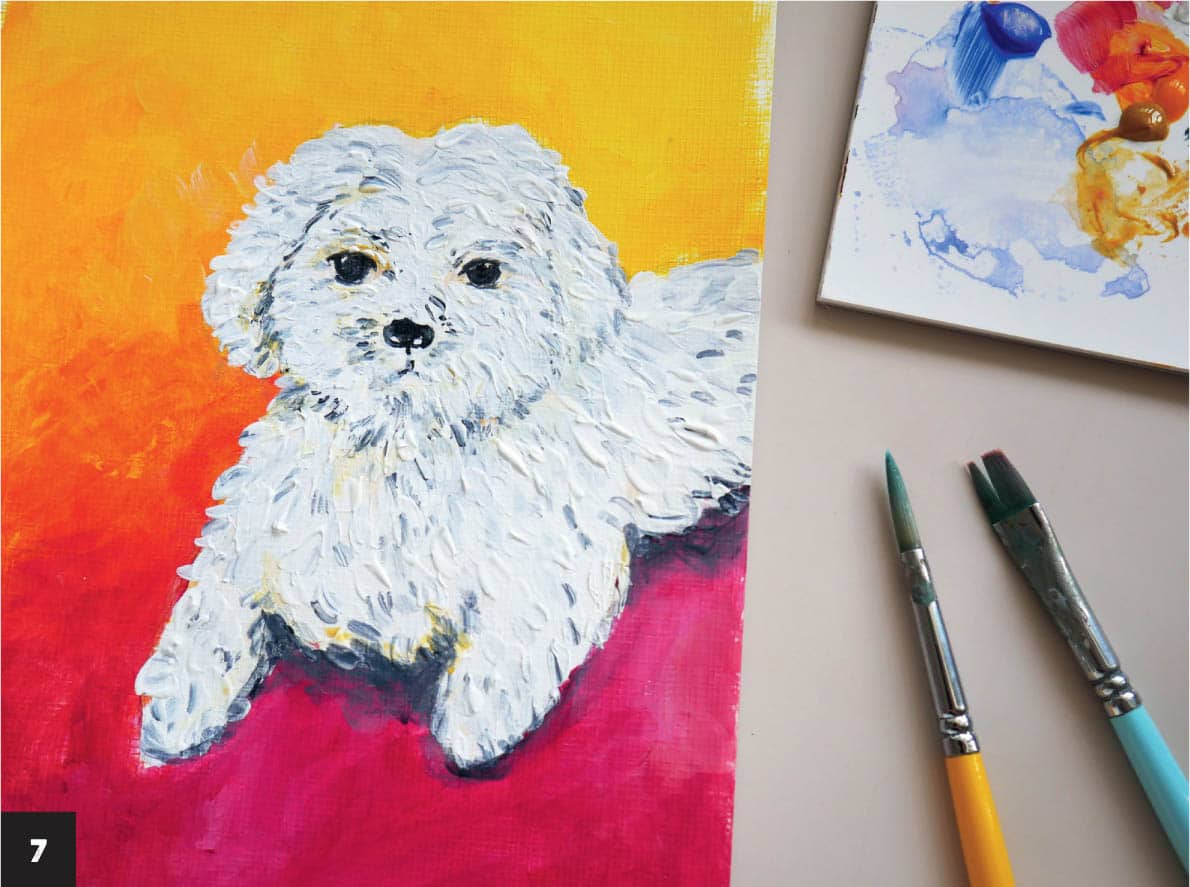
7 Create a glaze with Payne’s gray by adding a small amount of glazing medium to the acrylic paint. Use the mixture to paint the areas where the subject and the foreground meet to emphasize the shadow underneath the puppy. Wash your brush to remove some of the paint and soften the edges of the Payne’s gray glaze.FLUFFY PUPPY


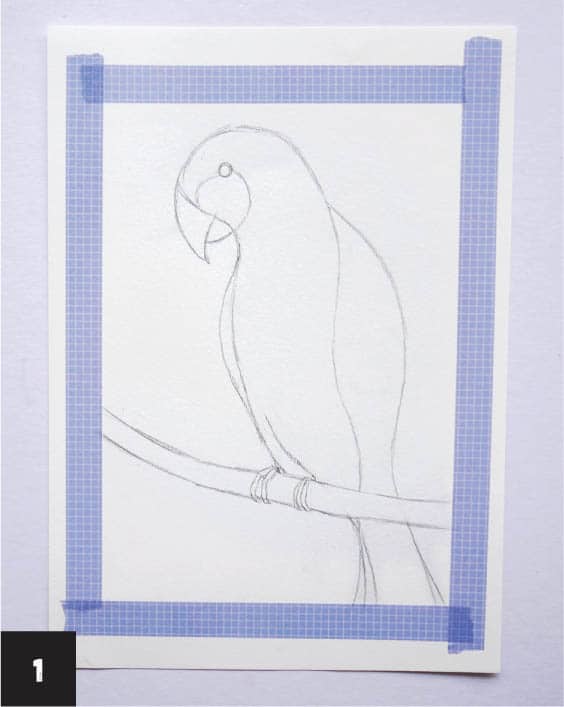
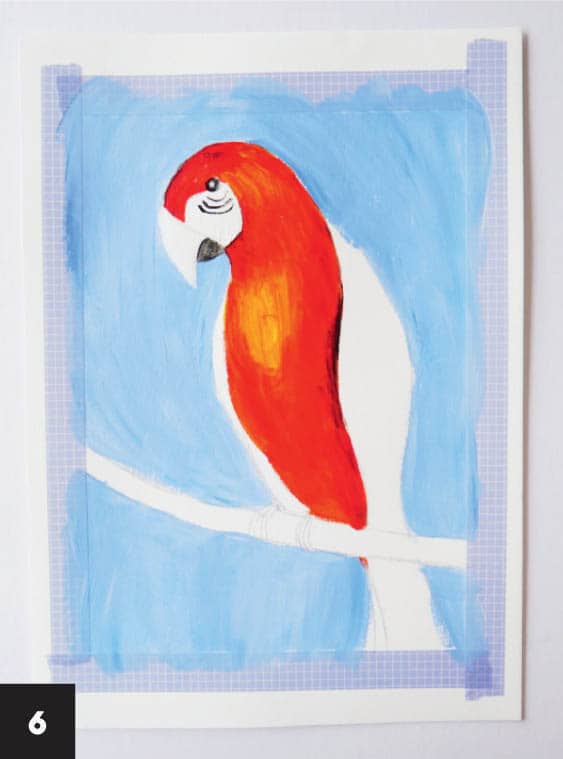
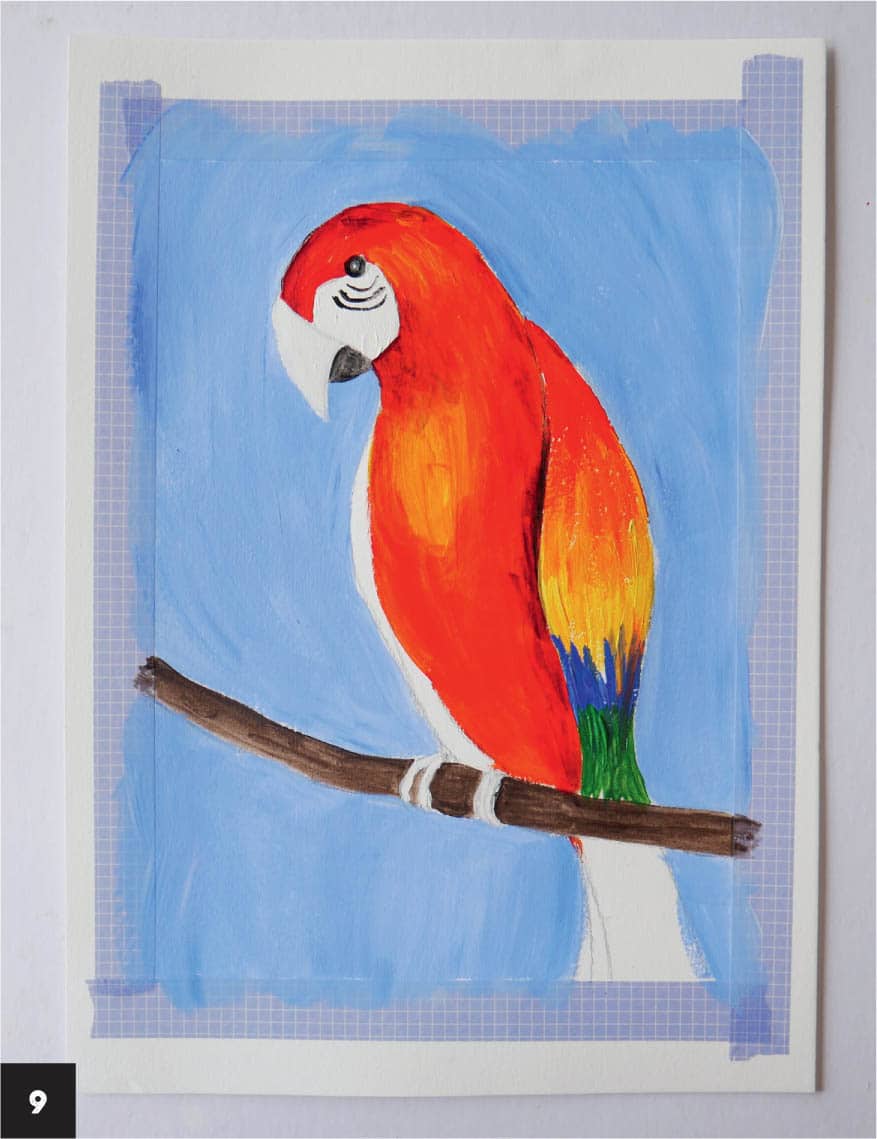
A bird’s colorful feathers are always mesmerizing, and these bright plumes can be easily depicted by layering acrylics. This lesson features a parrot hanging out in a palm tree. You’ll learn how to layer shades of acrylic paint using a dry-brush technique that adds texture and suggests numerous brightly colored feathers. This technique offers so many possibilities. Experiment with different types of brushes and test various effects before applying them to your paintings. 1 Sketch a parrot sitting on a branch in the center of the paper and include details such as the eye, beak, etc. Use the template on this page, a photo, or your imagination as inspiration.
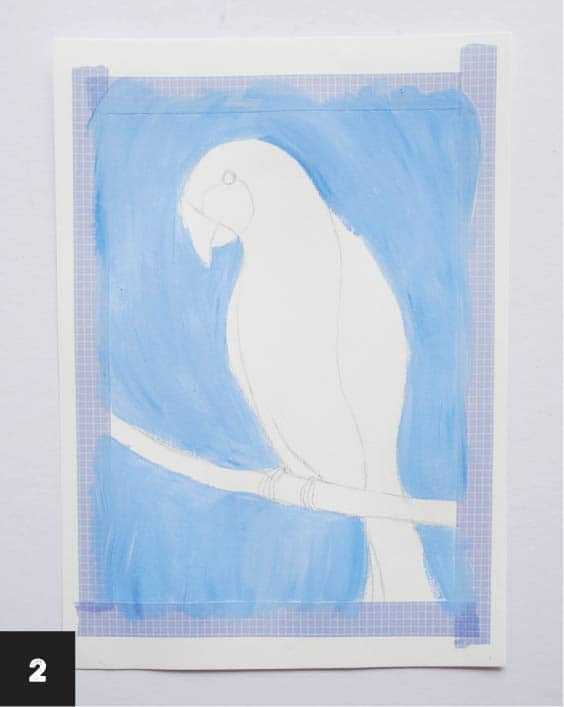
2 Mix blue paint with a larger amount of white to create a sky-blue shade, and paint the background, using the size 8 flat brush. Be careful not to paint over the parrot and the branch. Allow the paint to dry.
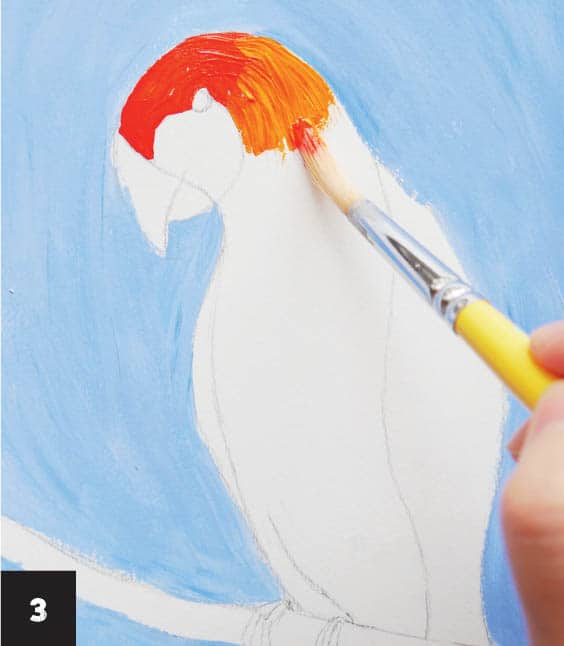
3 Blend equal parts red and orange paint on the palette to create a red-orange shade and paint the head of the parrot with the size 6 round brush, being careful not to paint the area around the eye. Without rinsing the brush and while the paint is still wet, pick up some orange paint and create a gradient in the area beside the parrot’s eye.
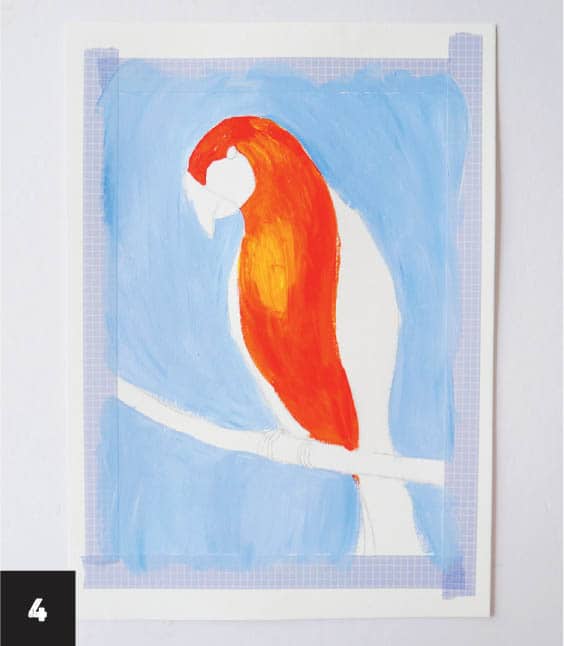
4 Clean the brush, pick up some red paint, and paint the parrot’s body. When you get to the chest, add orange paint to the brush and paint the area with that color. Paint the area around the eye white and allow the paint to dry.
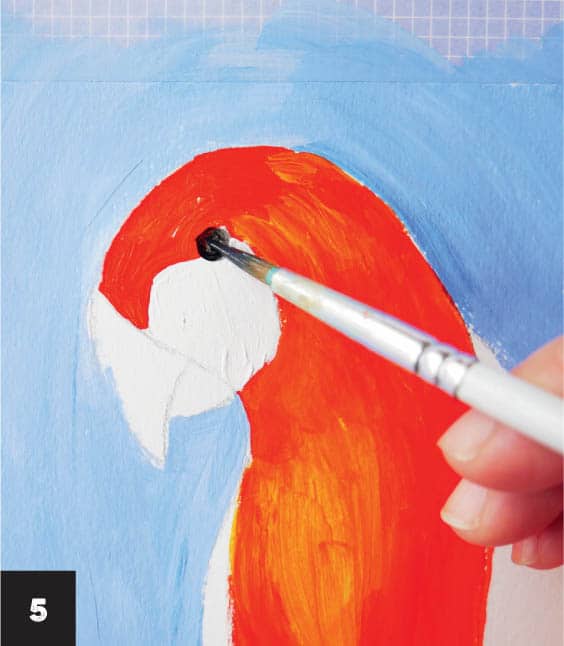
5 Add details and shadows. Add black paint to the palette, mix it with a little water, and paint the bottom part of the bird’s beak and round eye with the size 4 round brush.
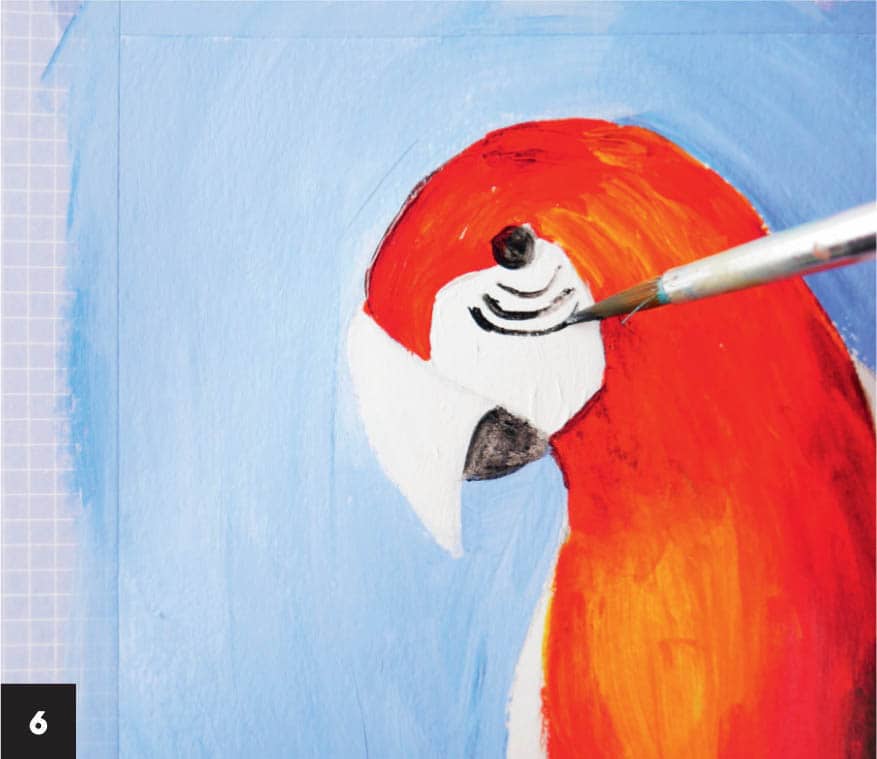
6 Add some red paint to the black to create a dark red color and brush on a light wash of this color at the top of the parrot’s head and underneath the white area of the eye, using the same brush. Paint the top part of the beak white and the bottom part black. Paint three thin black half-circles under the eye. Add a dot of white paint to highlight the center of the parrot’s eye. Using the size 2 round brush that’s mostly dry and Payne’s gray, add vertical streaks on the parrot’s back.
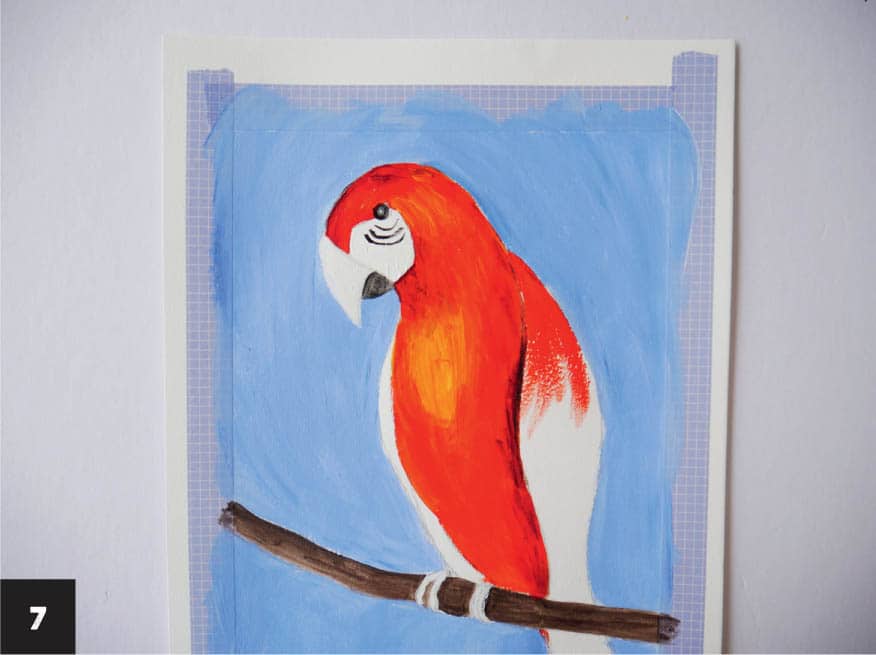
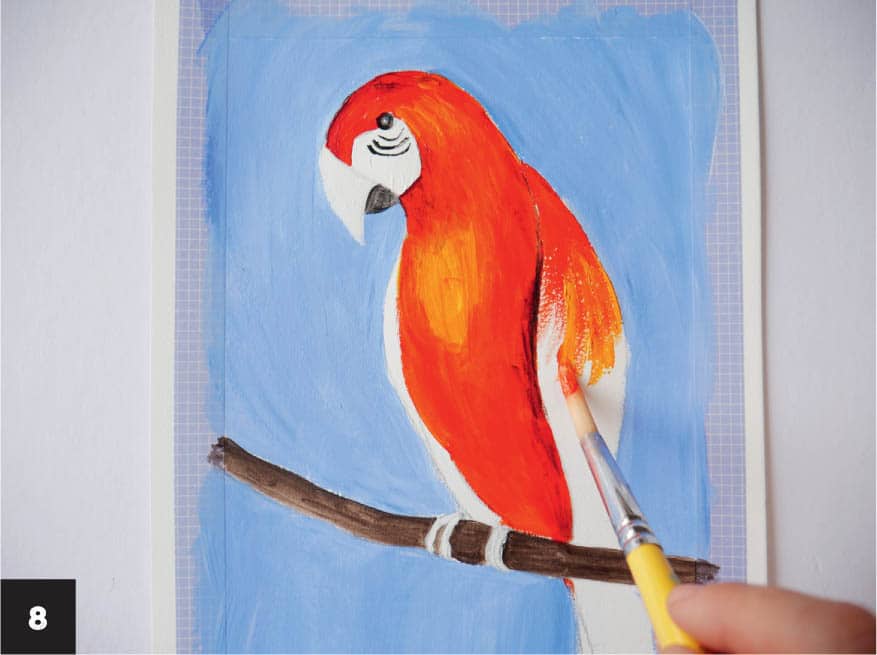
7 Add a small amount of brown paint to the palette and paint the branch using the size 6 round brush. Paint the tiny claws of the bird white. Add the following colors to the palette in preparation for painting the feathers: red, orange, yellow, blue, and green. Beginning at the top part of the wing, pick up some red paint with the round brush and make long downward strokes, going about a quarter of the way down the wing.
8 While the red paint is still semi-wet, clean the brush, pick up some orange paint, and paint with the same downward strokes on the wing. This time, however, start from the middle of the red area.
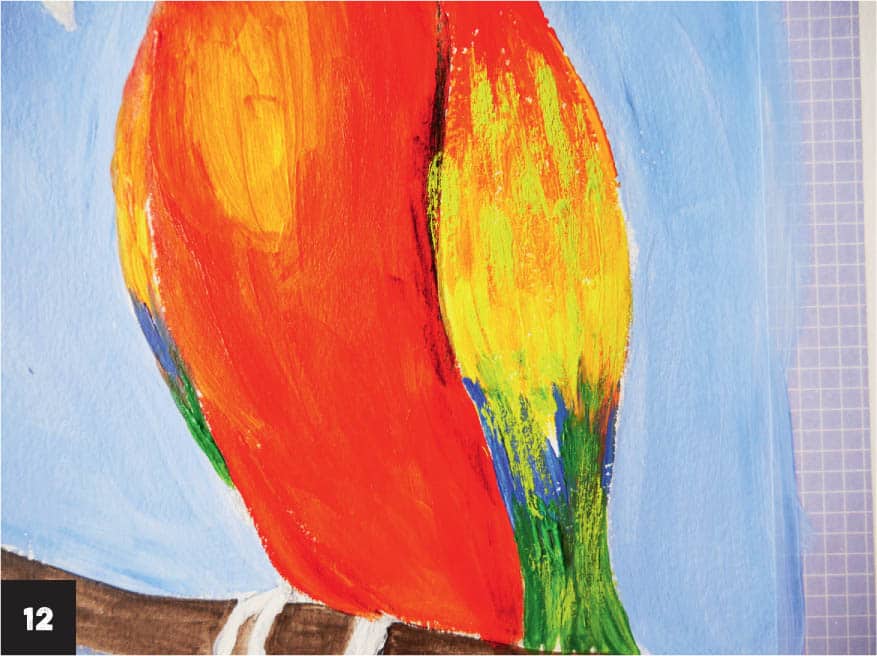
9 Continue painting the wing, adding yellow, blue, and green in the same way. Paint the bottom part of the wing below the branch red. Paint these colorful layers the same way on the bird’s other wing. Allow the paint to dry.
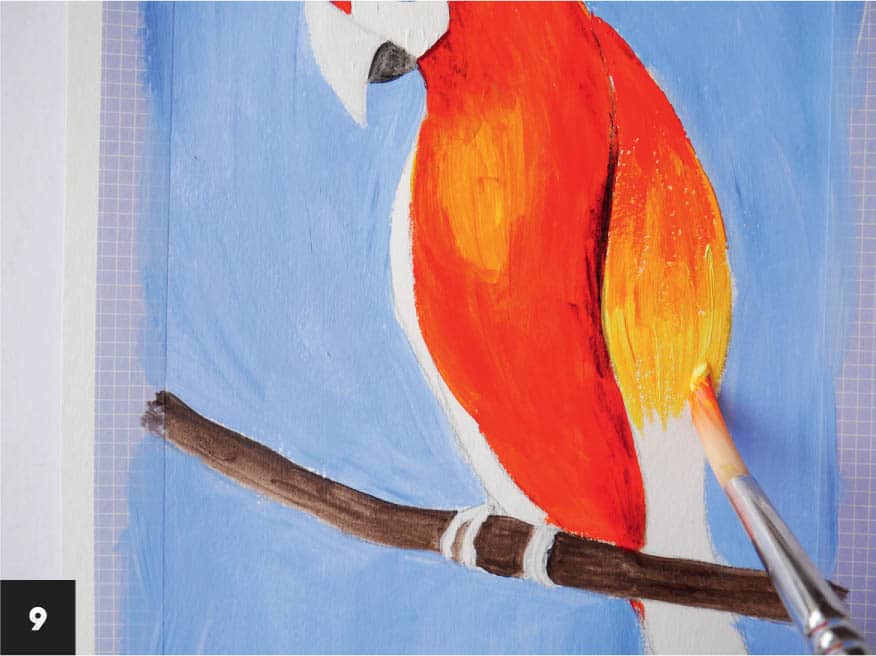
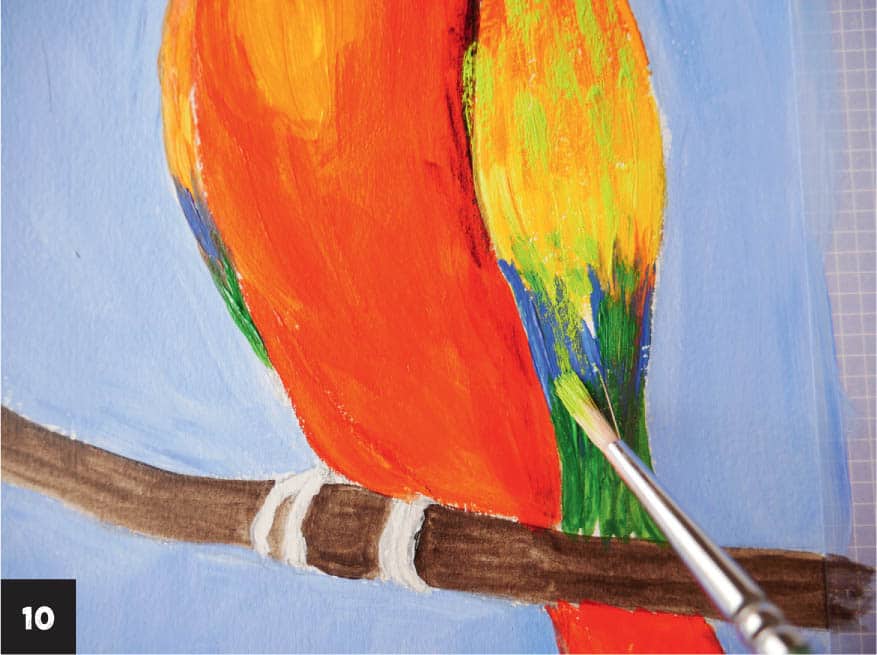
10 Mix a small amount of yellow paint with green on the palette to create a bright green and pick up some of the paint with the tip of the stiff round brush. Test the dry-brush technique (see here) on a piece of scrap paper before trying it on the painting. Paint short, quick strokes on top of the yellow, blue, and green layers. This gives the impression of the feathers subtly alternating colors.
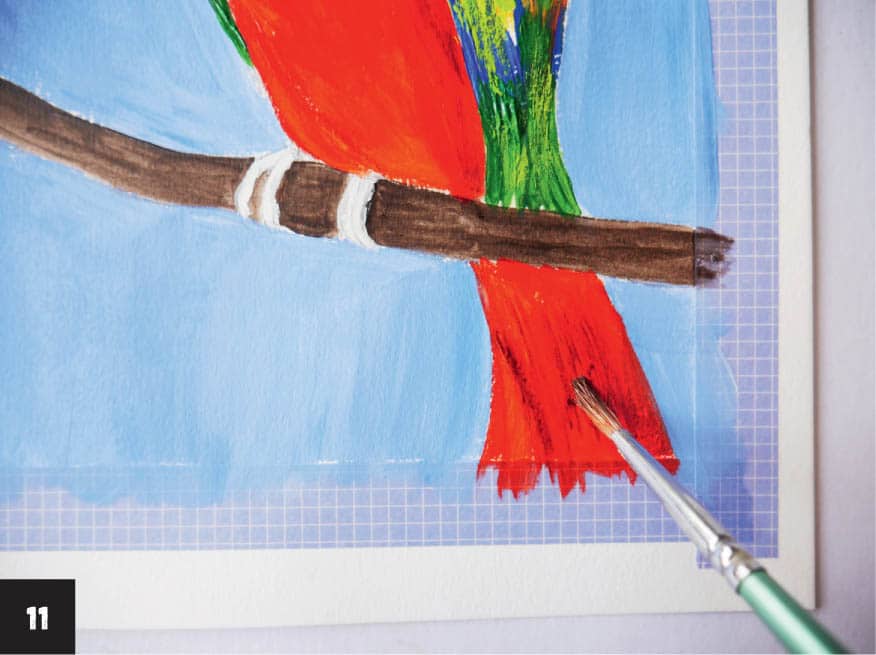
11 Clean and dry the brush and blend red and black paint on the palette to make a dark red. Brush this color toward the end of the bird’s tail, adding shadow and depth in that area. Make several vertical strokes toward the end of the parrot’s tail, right below the log where the bird is perching. The dry brush will make dark red shadow lines that will look like individual tails of the bird.
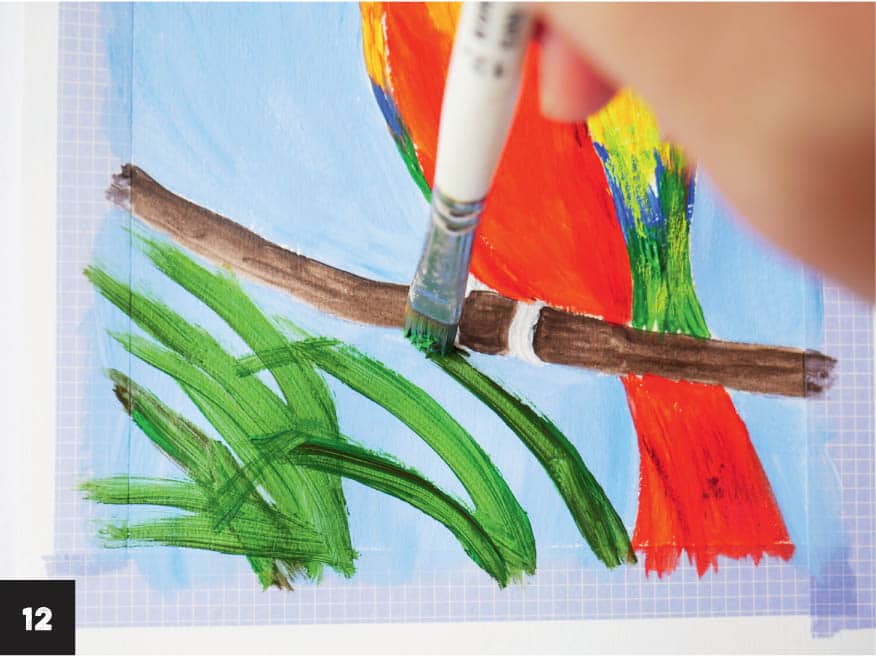
12 The dry-brush technique can be used with different types and sizes of brushes. Add green paint to the palette and pick up some of the paint with a dry, size 4 flat brush. Starting at the bottom of the painting, press down on the edge of the brush and drag it up to make a short upward stroke. Continue making these strokes in a fan shape to create palm leaves. Do the same at the top right corner of the paper (see finished image, here).COLORFUL PARROT

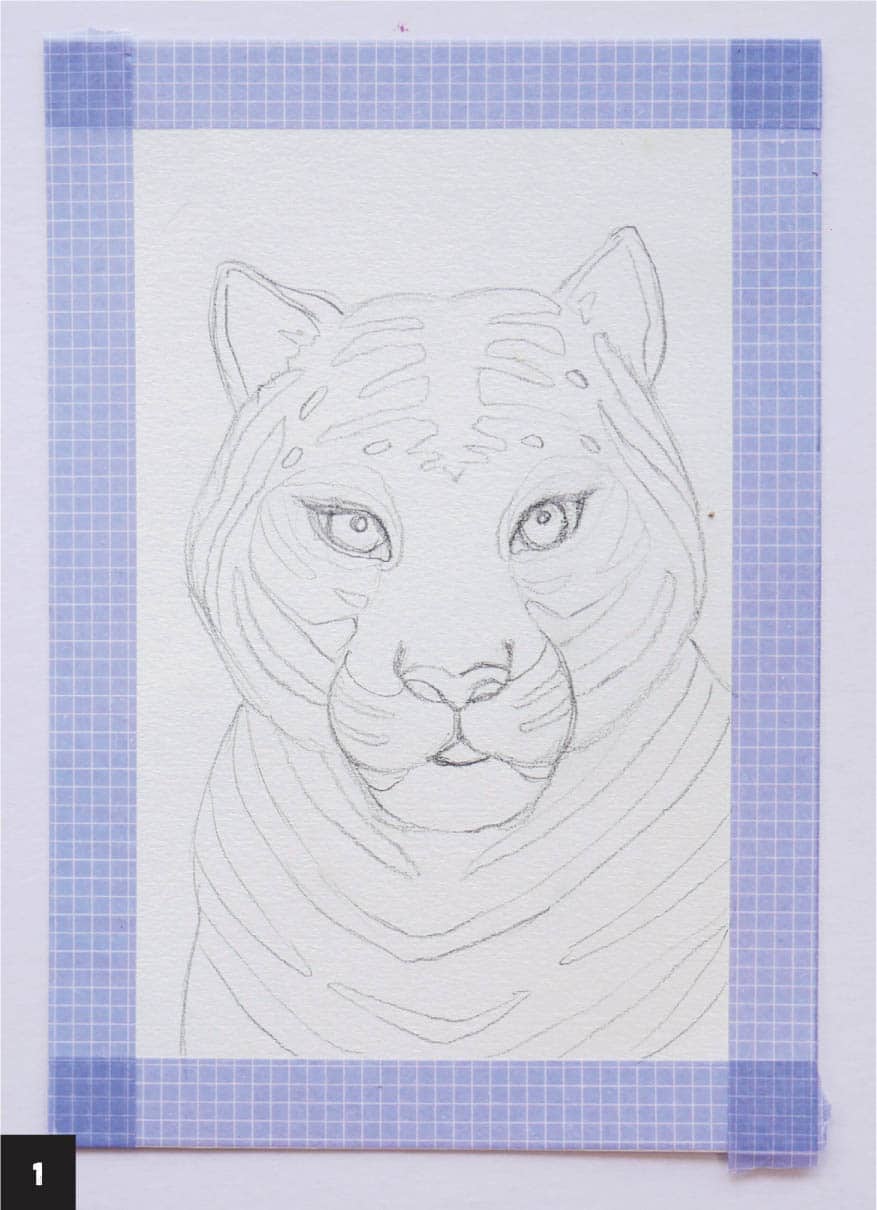
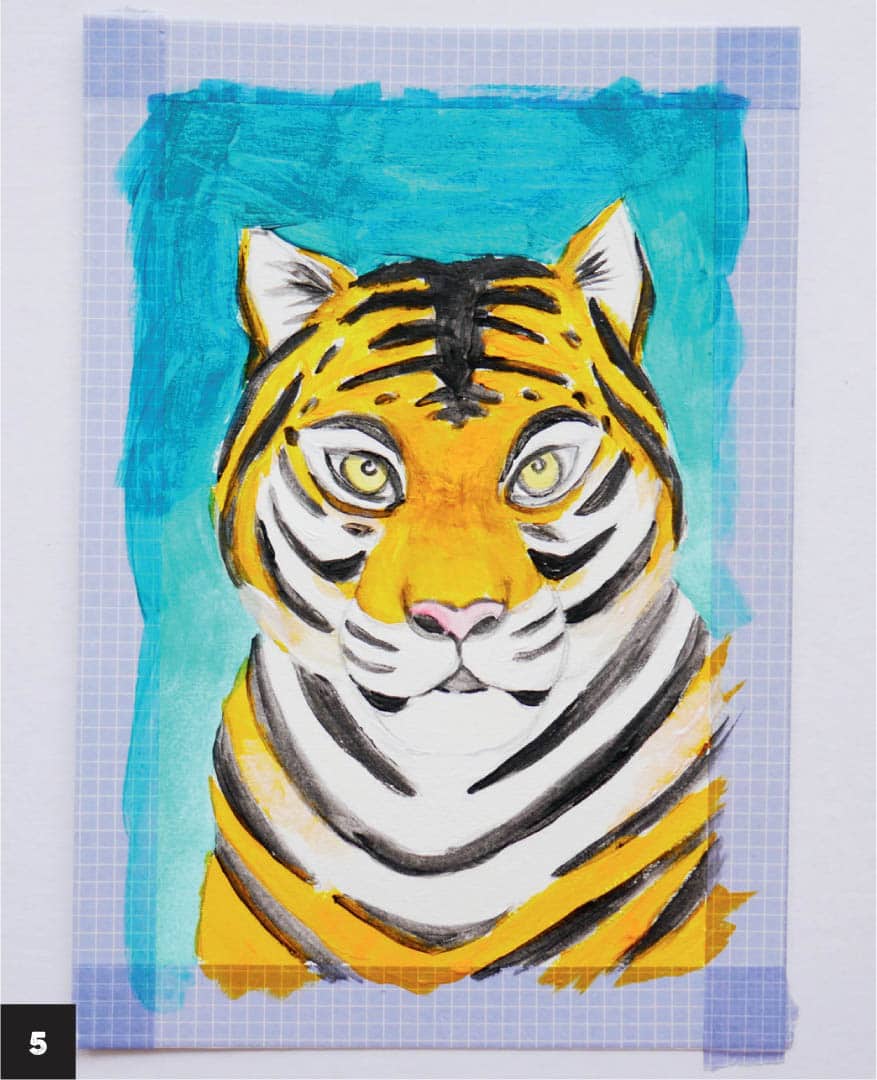
This not-so-small creature is part of one of my favorite animal families, the cat. Tigers may seem intimidating to paint, but with a step-by-step guide you’ll be able to create your own big cat using techniques for layering and dry brushing. 1 Sketch the tiger using the template, a photo, or your imagination as inspiration. Make sure to include details such as the eyes, nose, and mouth, and the placement of the stripes.
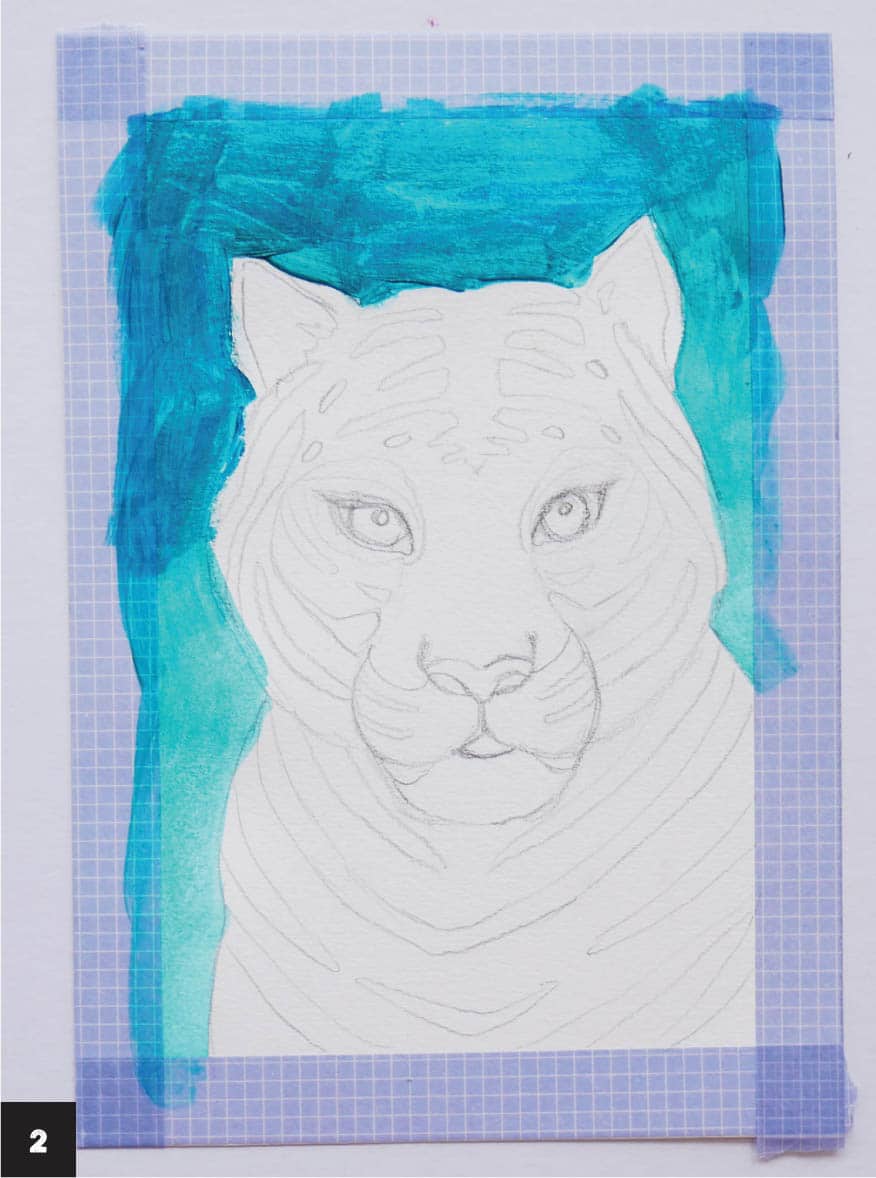
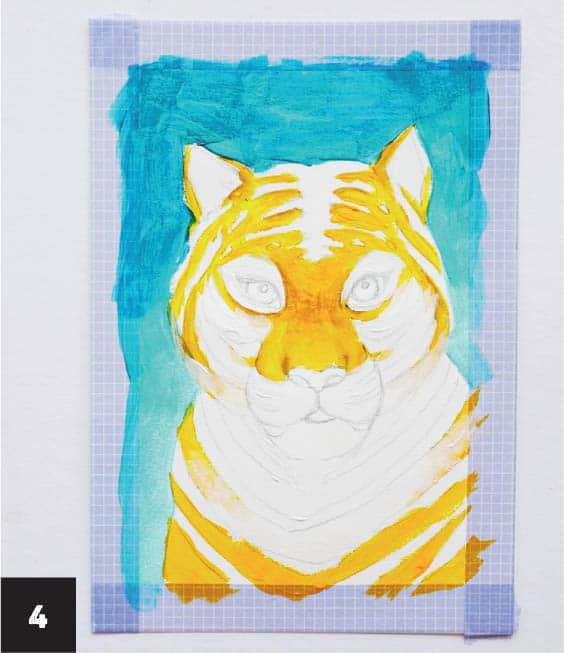
2 Blend green and blue paint on the palette to make a cyan color and paint the background, using the flat brush. Create a gradient on the paper, starting with a darker shade at the top and gradually lightening it toward the bottom. Make the blue-green shade lighter by adding more water to it. Allow the paint to dry.
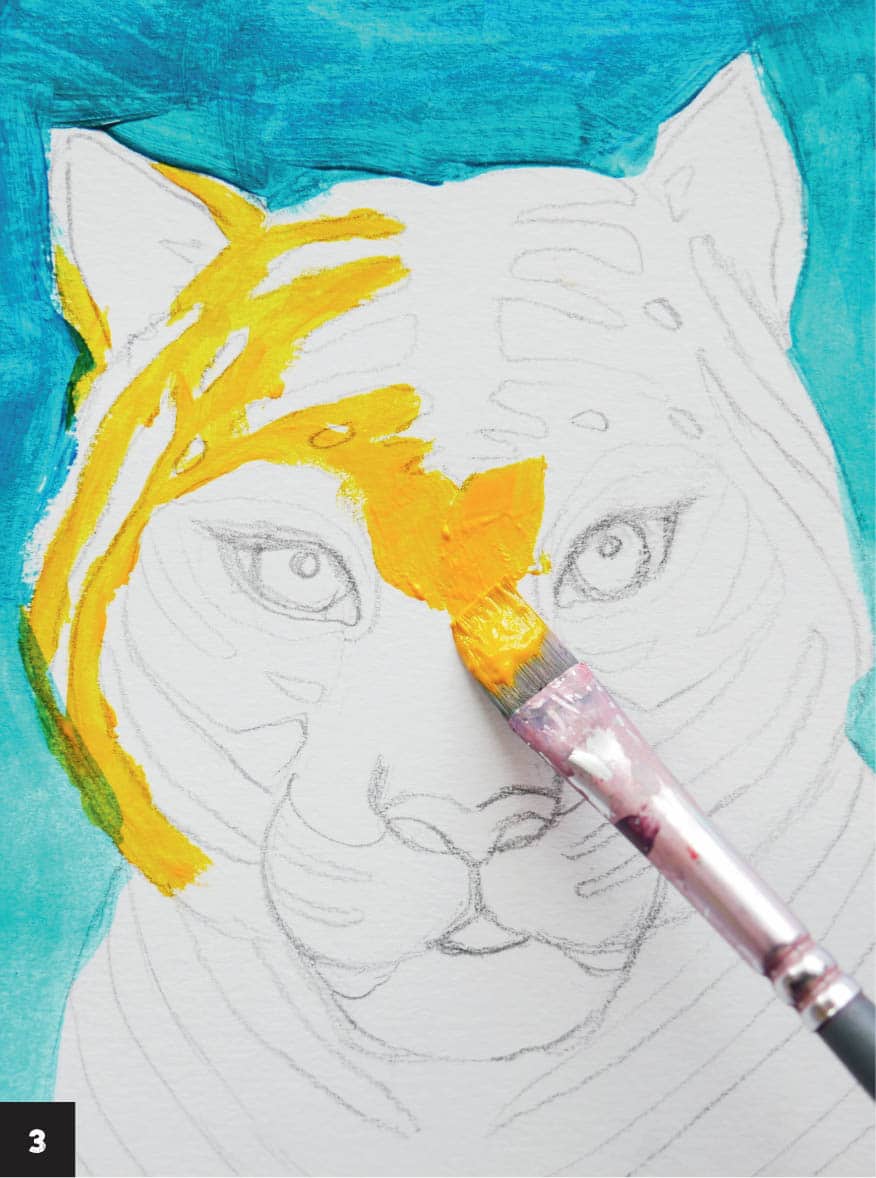
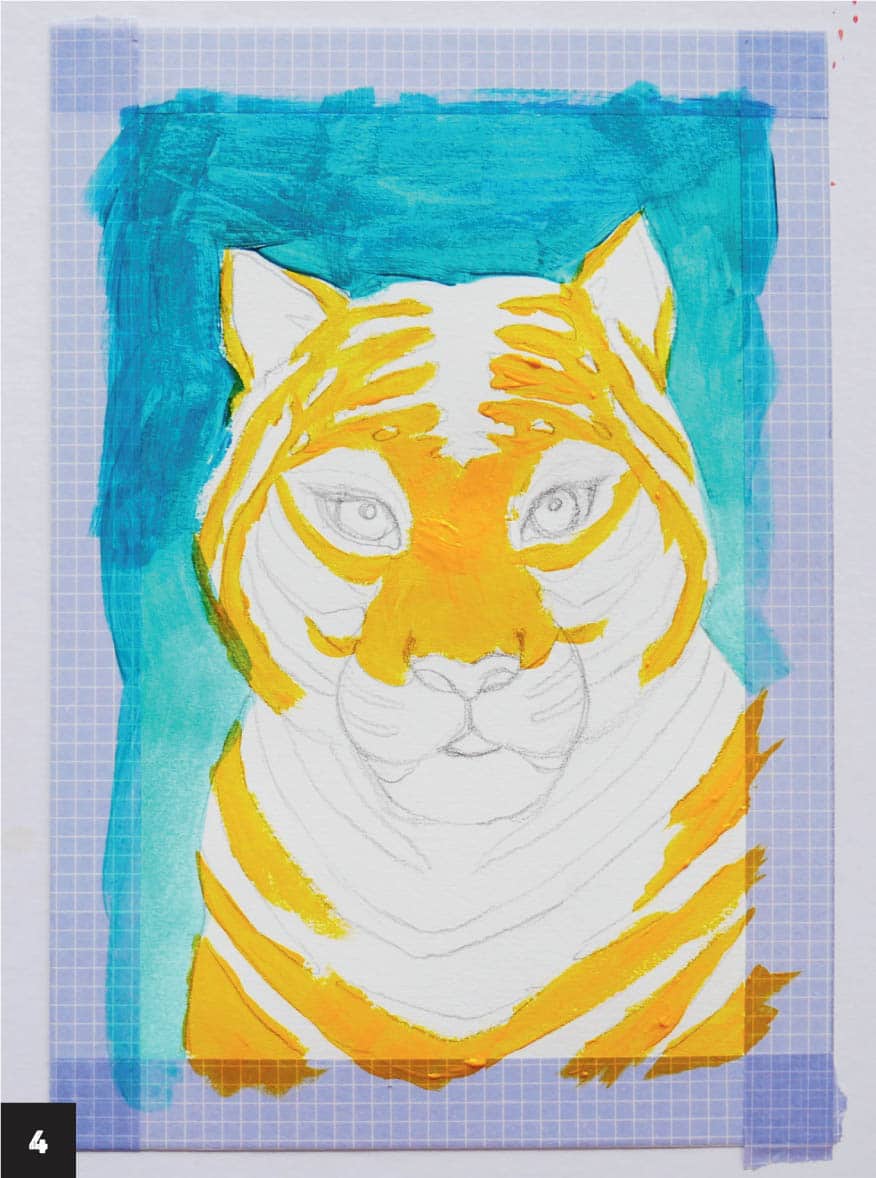
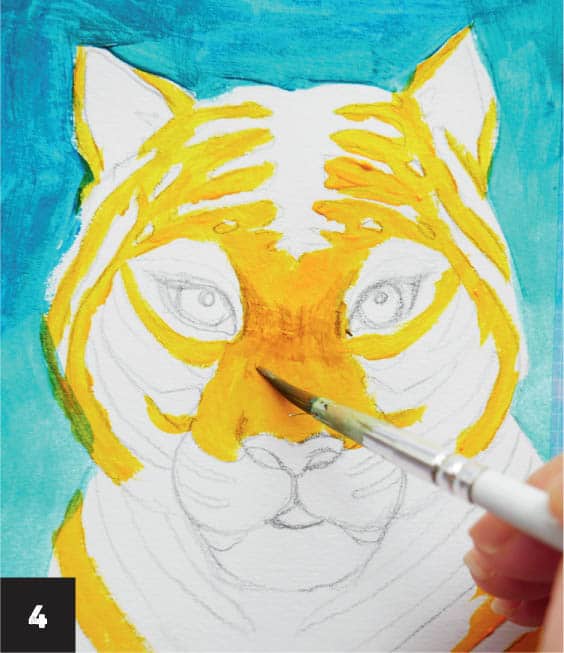
3 Mix yellow and orange paint on the palette to create the bright yellow-orange base color of the tiger. Paint the tiger’s face and body using the edge of the flat brush, being careful not to paint any of the stripes. The tiger’s chest area, cheeks, mouth, inner ear, and outer eye areas should also be left unpainted.
4 Mix a small amount of brown with the yellow-orange blend. With the round brush, use this shade to add shadows to the tiger’s nose, especially the area between the eyes, adding a little water to the brush and working it into the edges to diffuse them. Add shadows above the tiger’s nose, underneath the eyes, the yellow-orange stripes on the sides of the tiger’s face, and the stripes on its body. Paint all the unpainted areas white, using a clean flat brush.
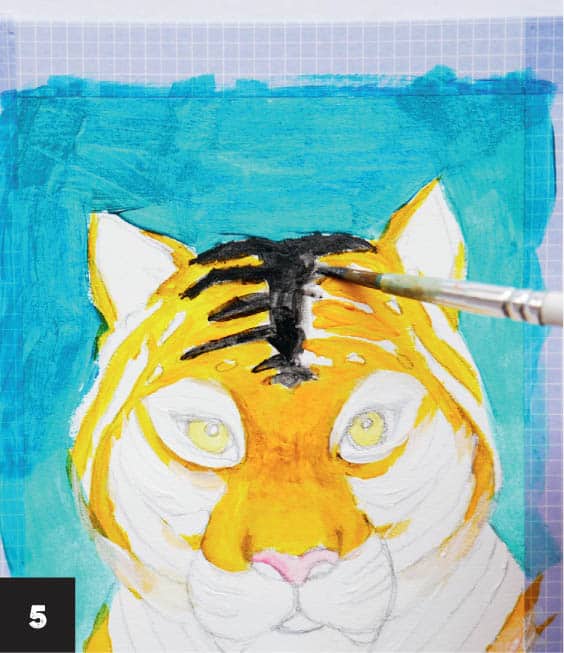
5 Pick up some black paint from the palette with the round brush and paint the black stripes on the face and body. Use black to outline the eyelids, nose, ears, and mouth. Allow the paint to dry.
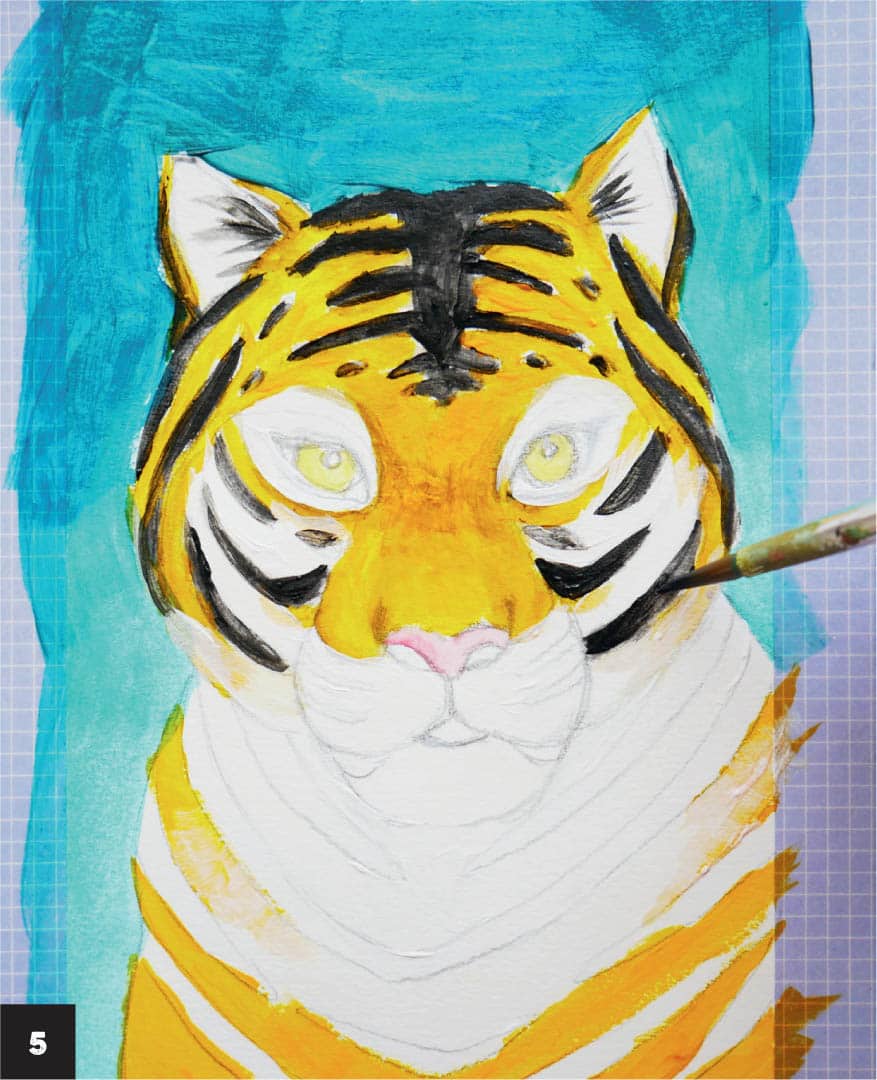
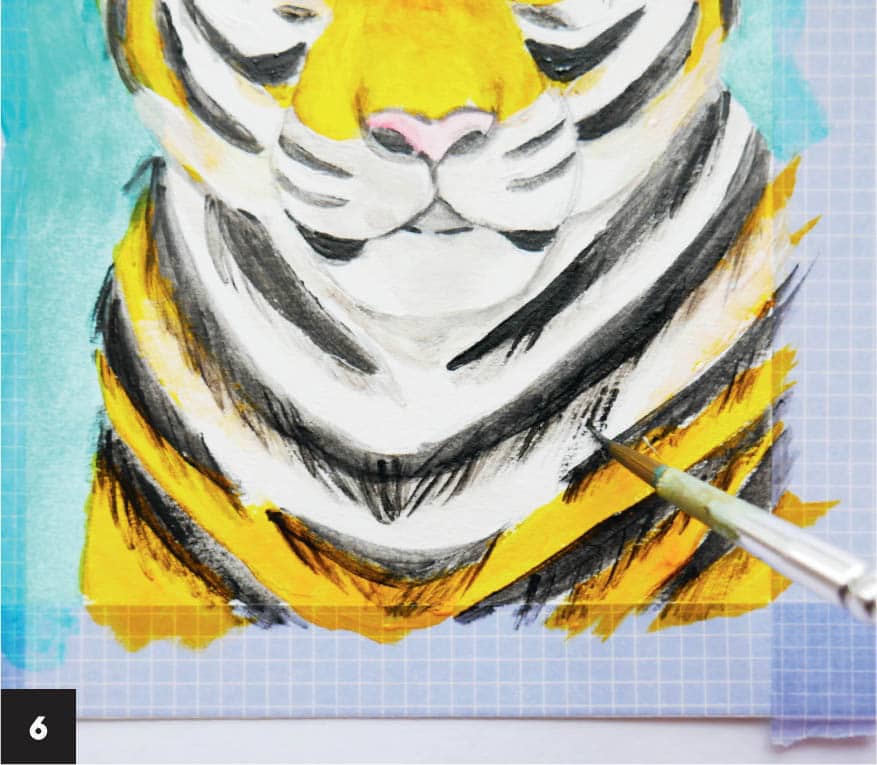
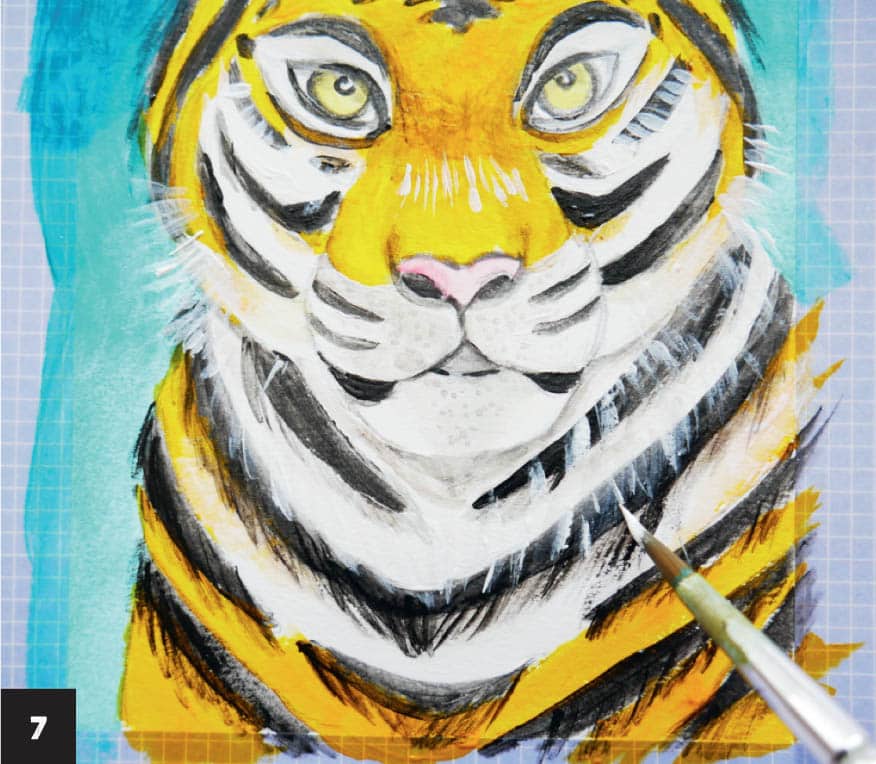
6 Create the fur texture using a dry-brush technique (see here). Wipe off any excess water from the round brush and pick up some black paint. Test the brush on some scrap paper to make sure you have the right amount of paint on the brush. Beginning with the tiger’s cheeks, brush outward on the stripes. Use downward brushstrokes for the stripes on the body. Don’t worry if the brushstrokes aren’t the same length—this better imitates the fine hairs of the fur. Allow the paint to dry.
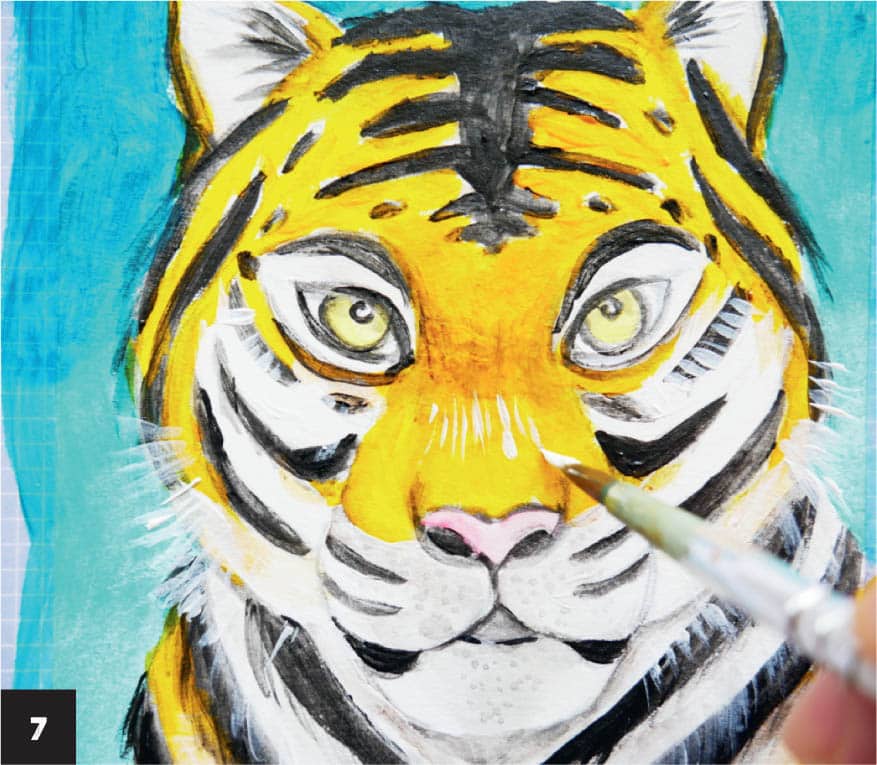
7 Paint the tiger’s eyes and nose; for the eyes I used light yellow, and for the nose, light pink. Allow the paint to dry.TIGER