4
FLOWERS

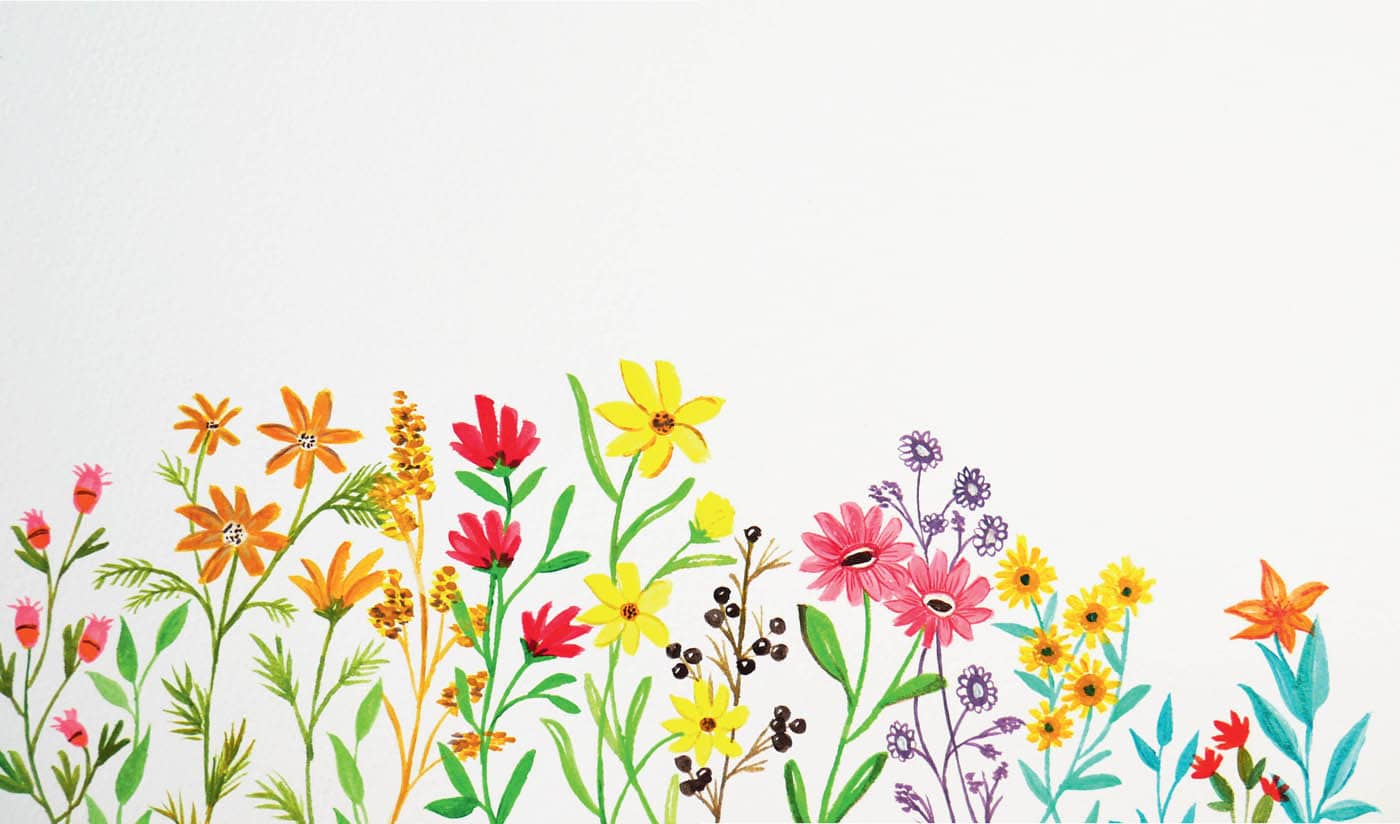
Flowers are among my favorite subjects to paint. They can be rendered loosely as an expression of their form or painted in intricate detail. Floral designs are popular motifs on notebooks, wrapping paper, wallpaper, decorative tape, and countless other items. I love that there are so many different kinds of flowers that inspire me. In this chapter, I chose some of my favorite flowers to paint, and I’ll show you a variety of techniques you can use to create them. You’ll learn how to paint loose and realistic florals and find the most harmonious compositions and color palettes for your artwork.
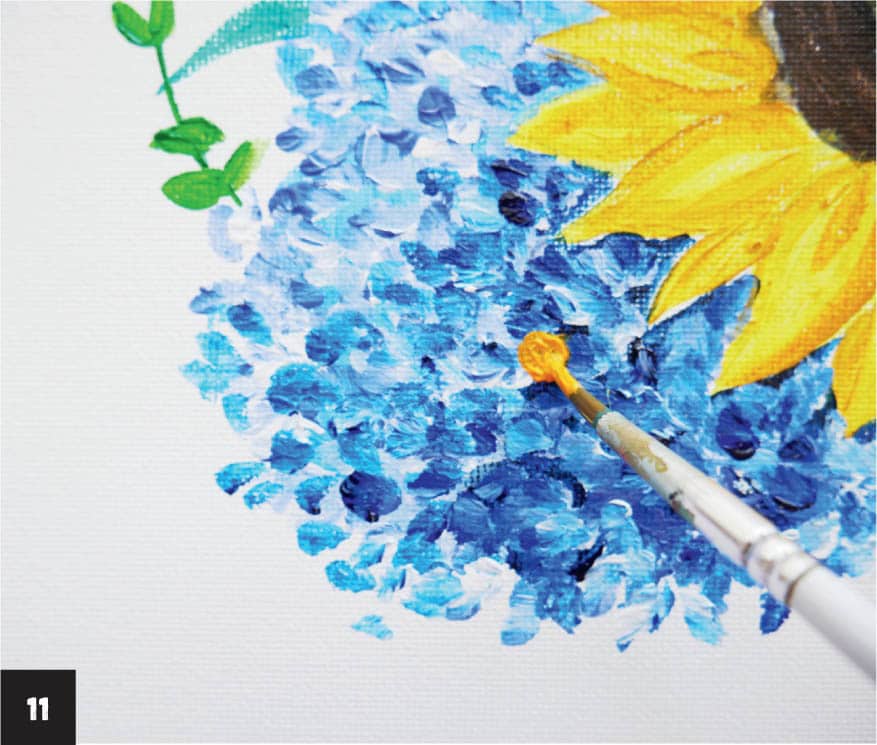
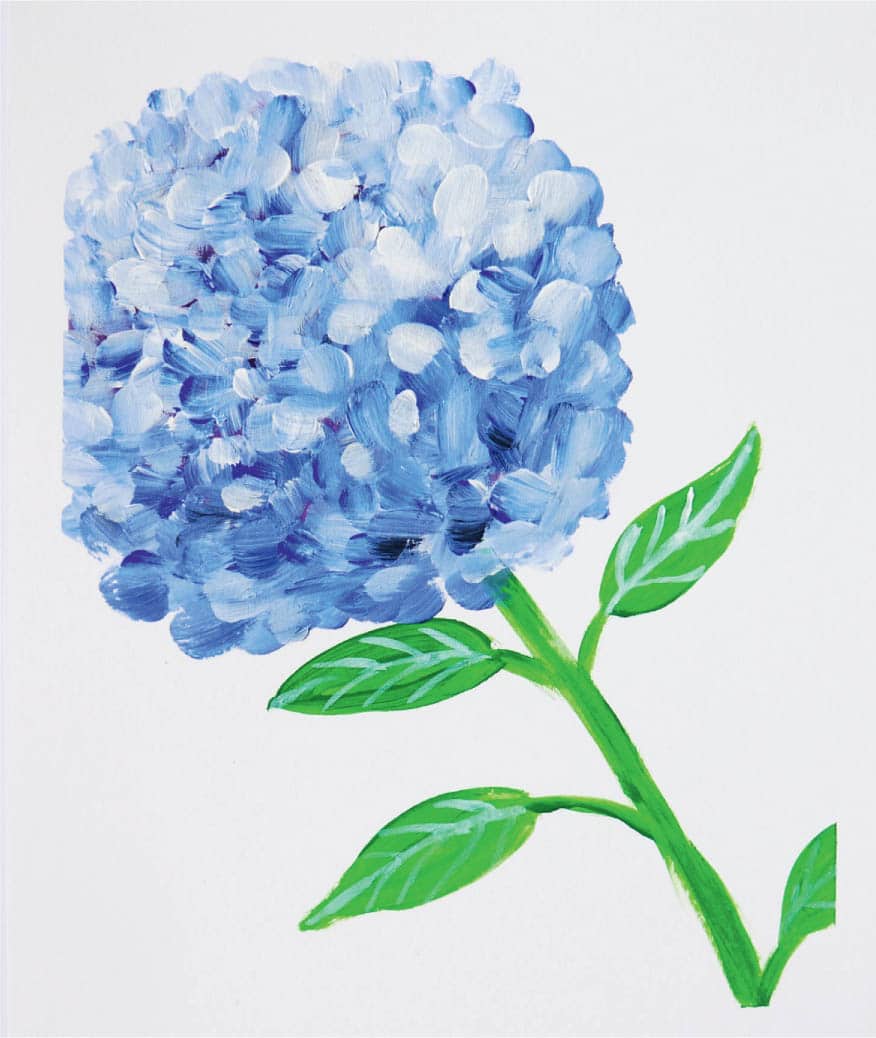
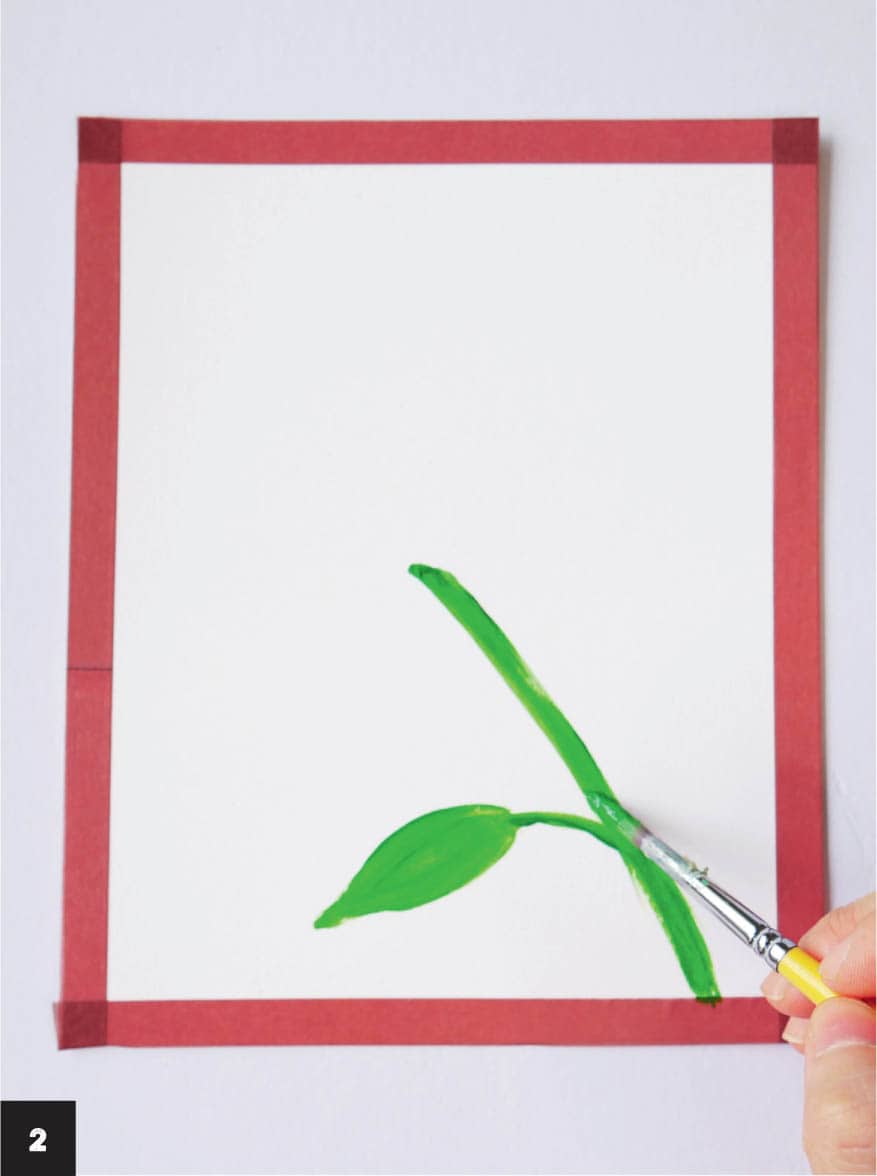
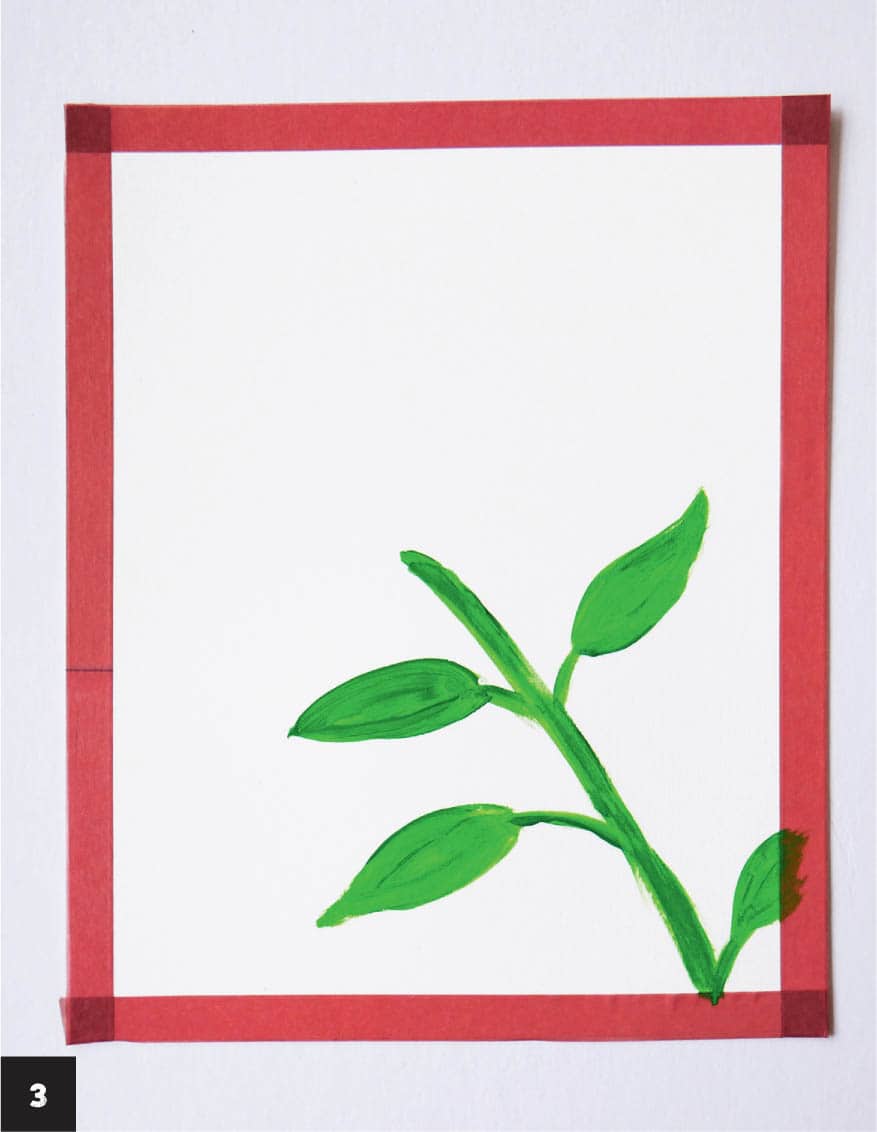
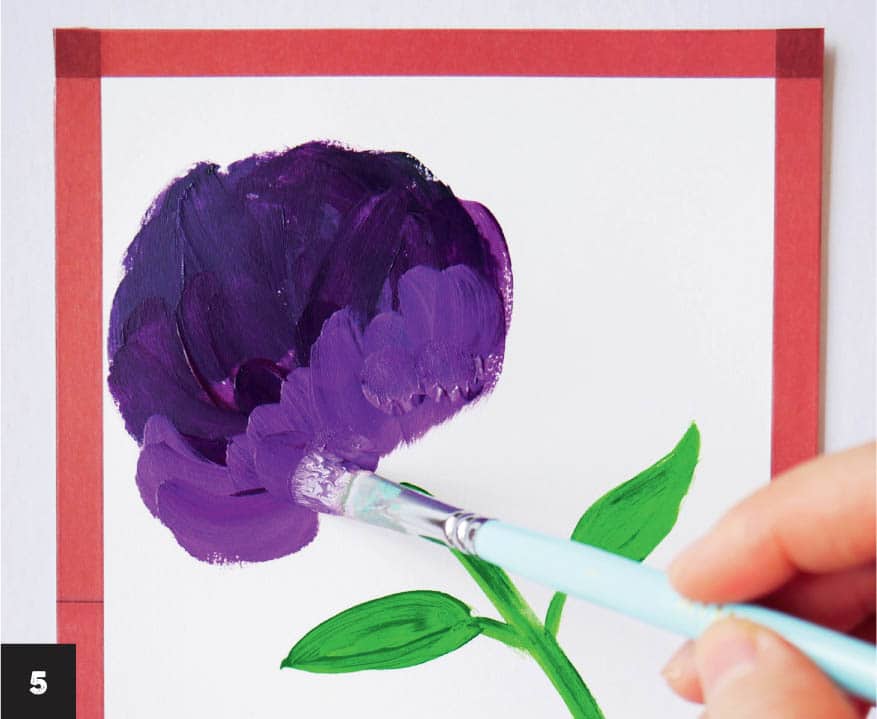
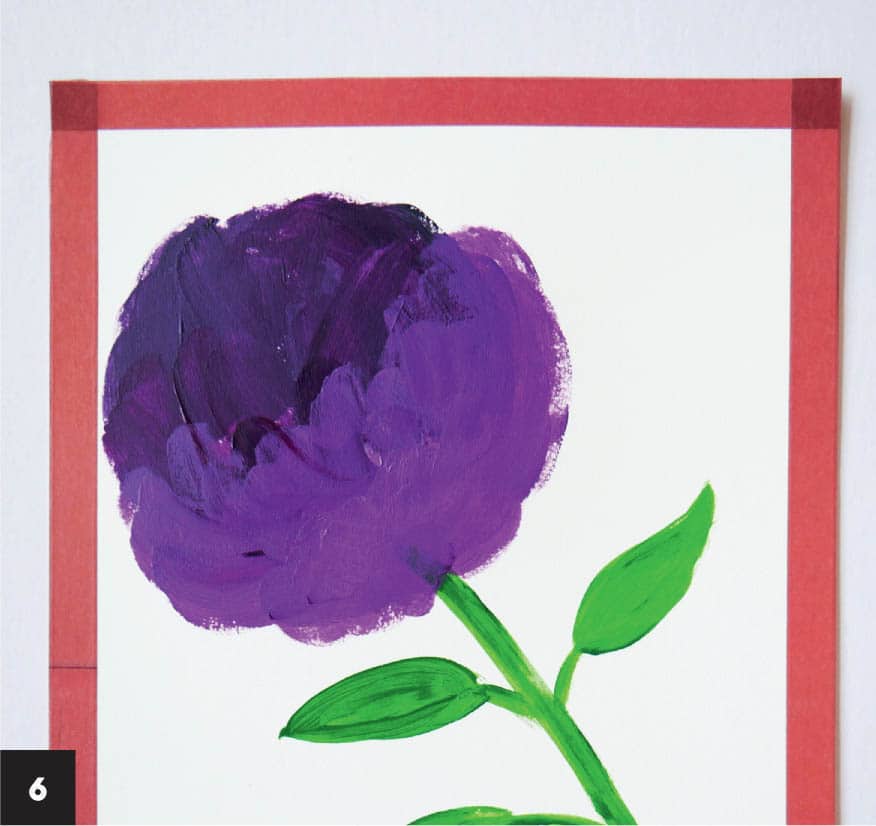
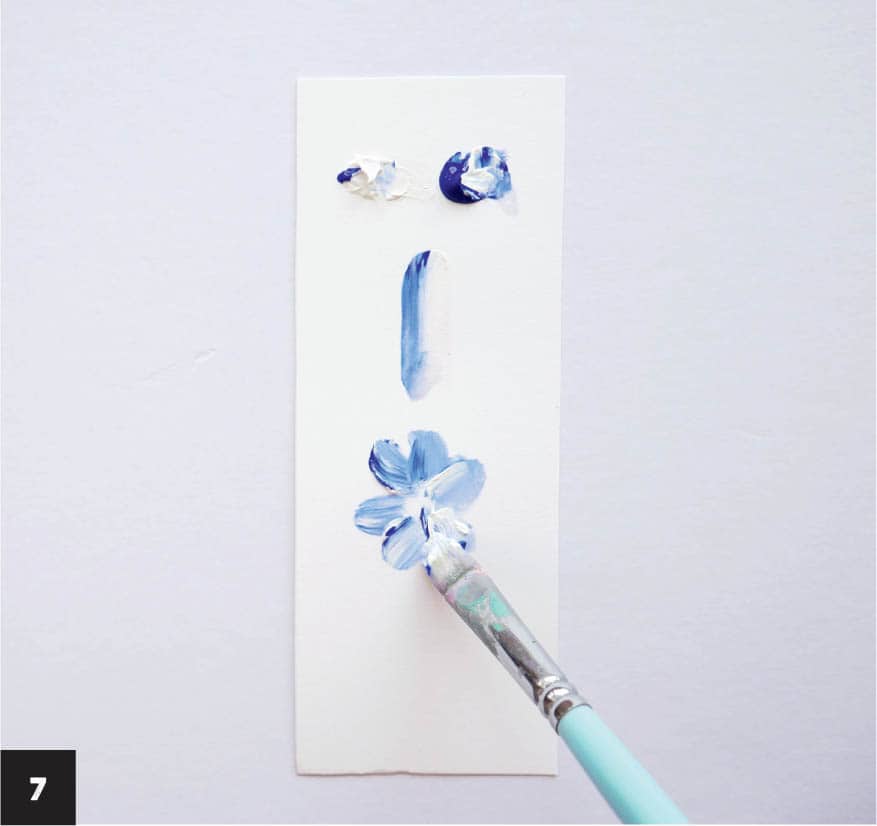
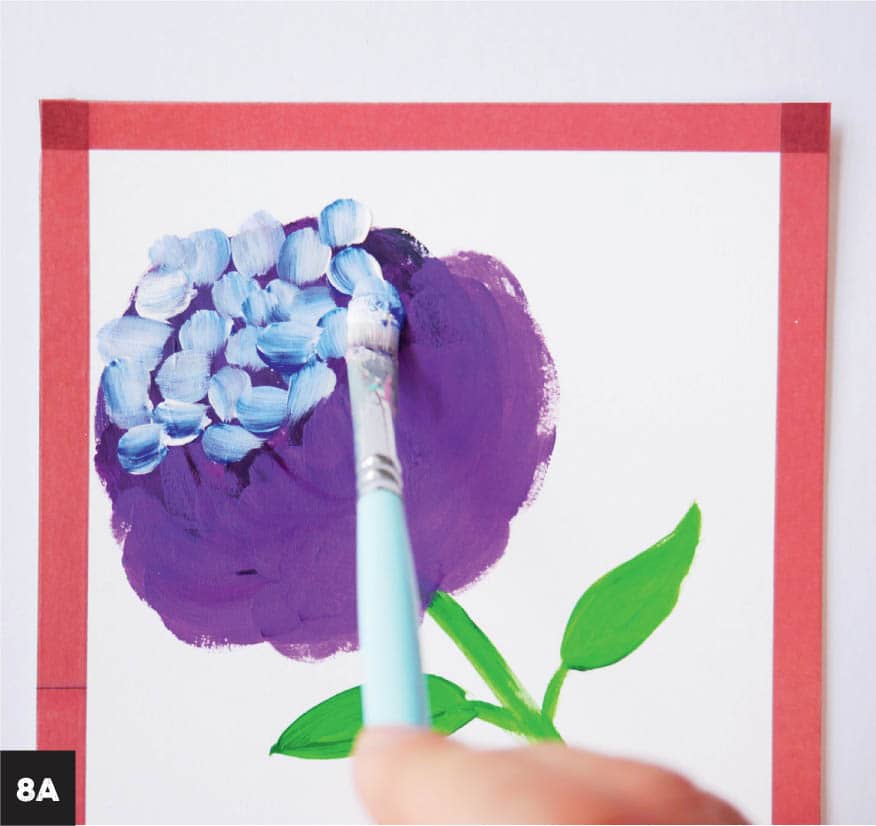
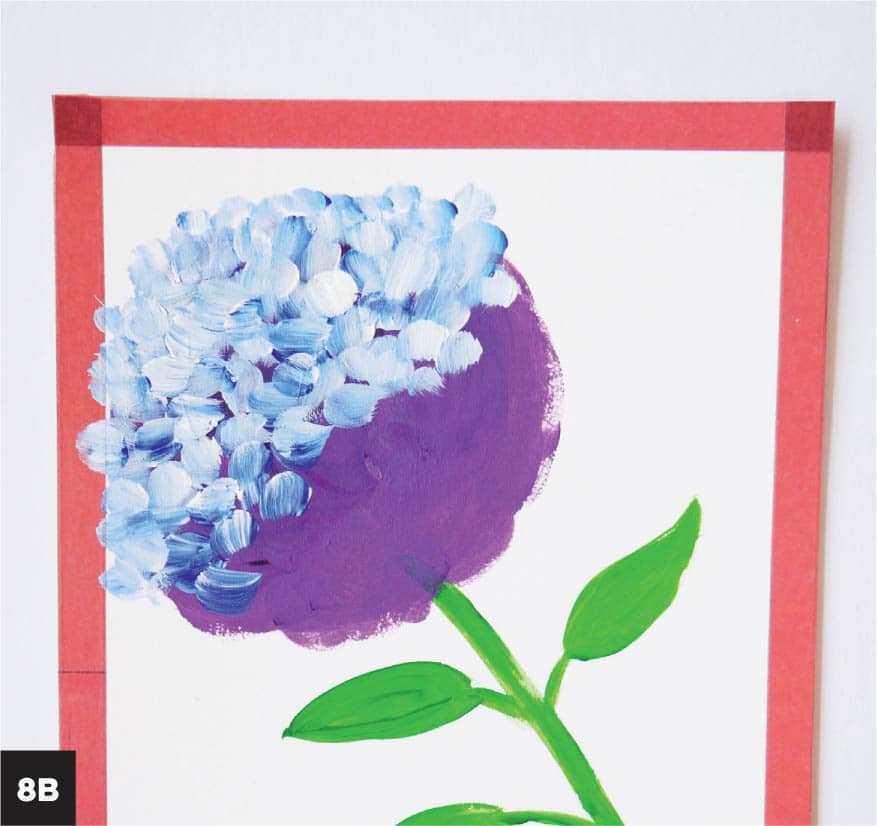
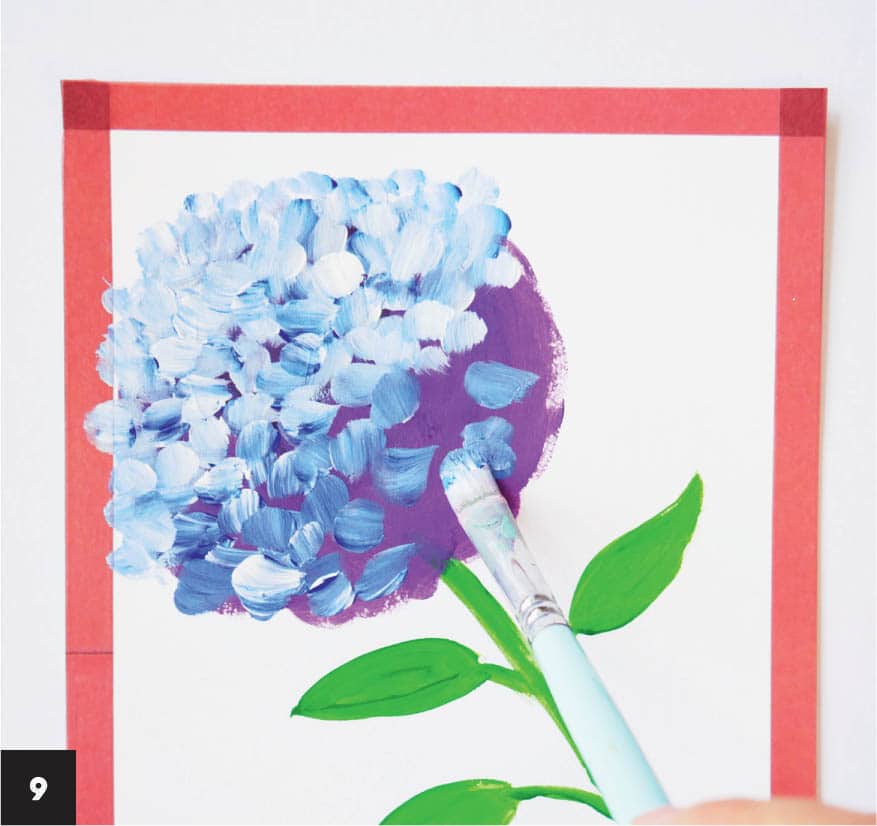
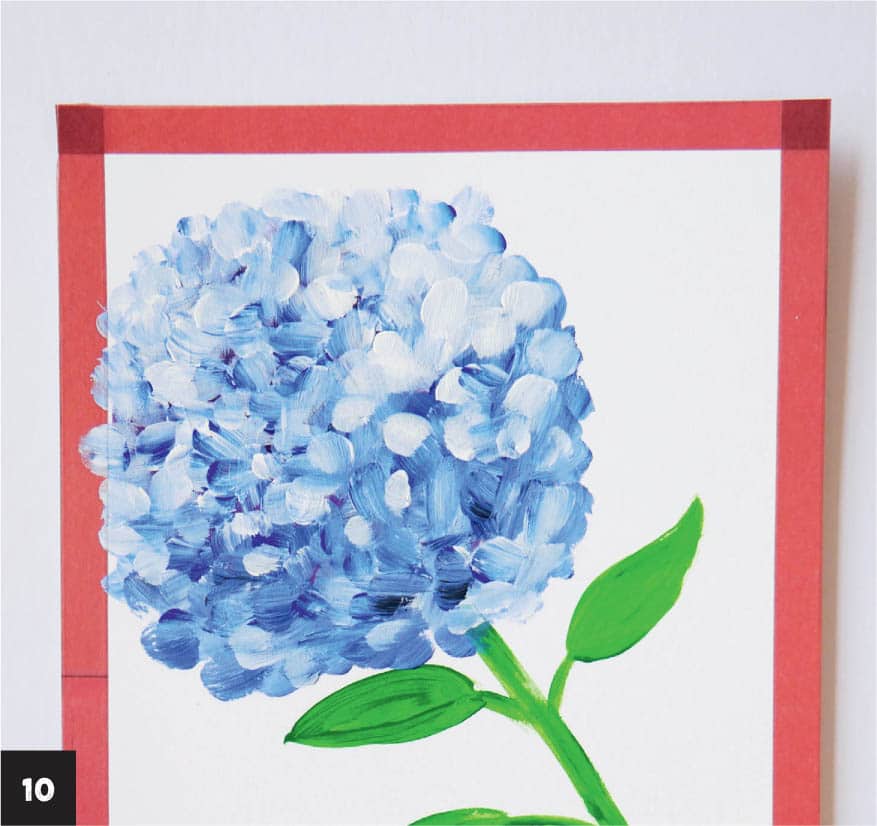
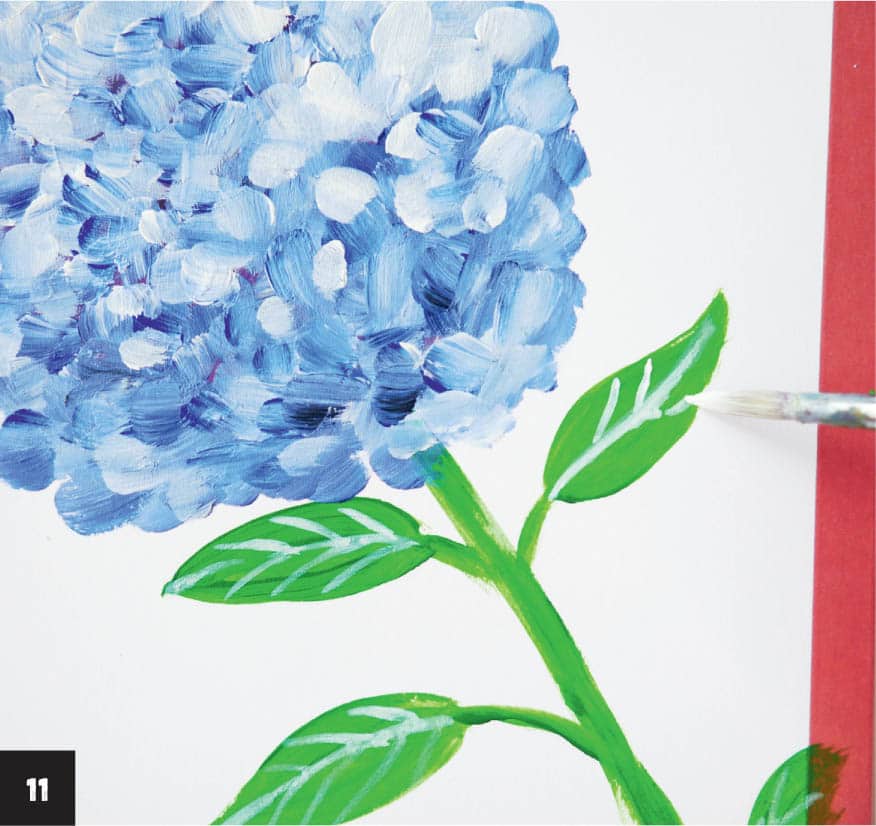
Hydrangeas come in beautiful round clusters that are easy to recreate using acrylics. Painting the individual tiny petals is easy when you learn how to load the brush with two colors. 1 Follow the directions to “Create Clean Borders” on this page. 2 Begin by painting the stems and leaves. With the round brush and green acrylic paint, add a long, slightly curved vertical line on the canvas. Angle the line a bit to the side so the flower will be in the center of the paper. 3 Paint two oval-shaped leaves on each side of the stem, staggering them a bit so they’re not perfectly symmetrical. Allow the paint to dry completely. 4 Paint the base layer of the hydrangea flower. Add dark violet paint to the palette and begin painting the top part of the flower using the Filbert brush. Hydrangeas are quite round, but the shape doesn’t have to be a perfect circle. Allow the paint to dry. 5 Mix some white with the violet on the mixing palette to create a lighter purple shade. Begin painting this color near the stem, slightly overlapping the dark violet. 6 Continue painting the lighter purple about halfway up the flower. This will contrast with the tiny flowers you’ll paint in the next step. Let dry. 7 Before painting the rest of the flower, prepare the paint mixes for the petals. Add blue and white paint to the palette and pick up a little bit of both colors on the Filbert brush. Check the brush hairs to make sure the two colors are there, but not fully mixed—this is the key to the painting. The images show how the brush should look and how the paint should look on paper. 8 Now that the brush is prepared, paint the tiny flowers. Make a short stroke with the brush on the dark violet area. You should see that the brushstroke created a blue-white streak (A). Apply this short blue-white streak at different angles, reloading the brush with blue and white paint when it runs out (B). 9 As you move toward the lighter purple area of the flower, load more blue onto the brush, still including a tiny bit of white. The petals here are darker because they’re at the bottom of the hydrangea. Continue adding short brushstrokes to cover the remainder of the base color. You can also paint petals slightly outside the edge of the circle to make the flower look more natural. 10 After filling the entire shape, you should have a light-to-dark gradient of petals. If needed, add more white petals on the top part of the hydrangeas. 11 Add veins to the leaves you painted in step 2, using white paint and the round brush. Once the paint is dry, carefully remove the low-tack tape and admire your beautiful hydrangea acrylic painting.HYDRANGEA


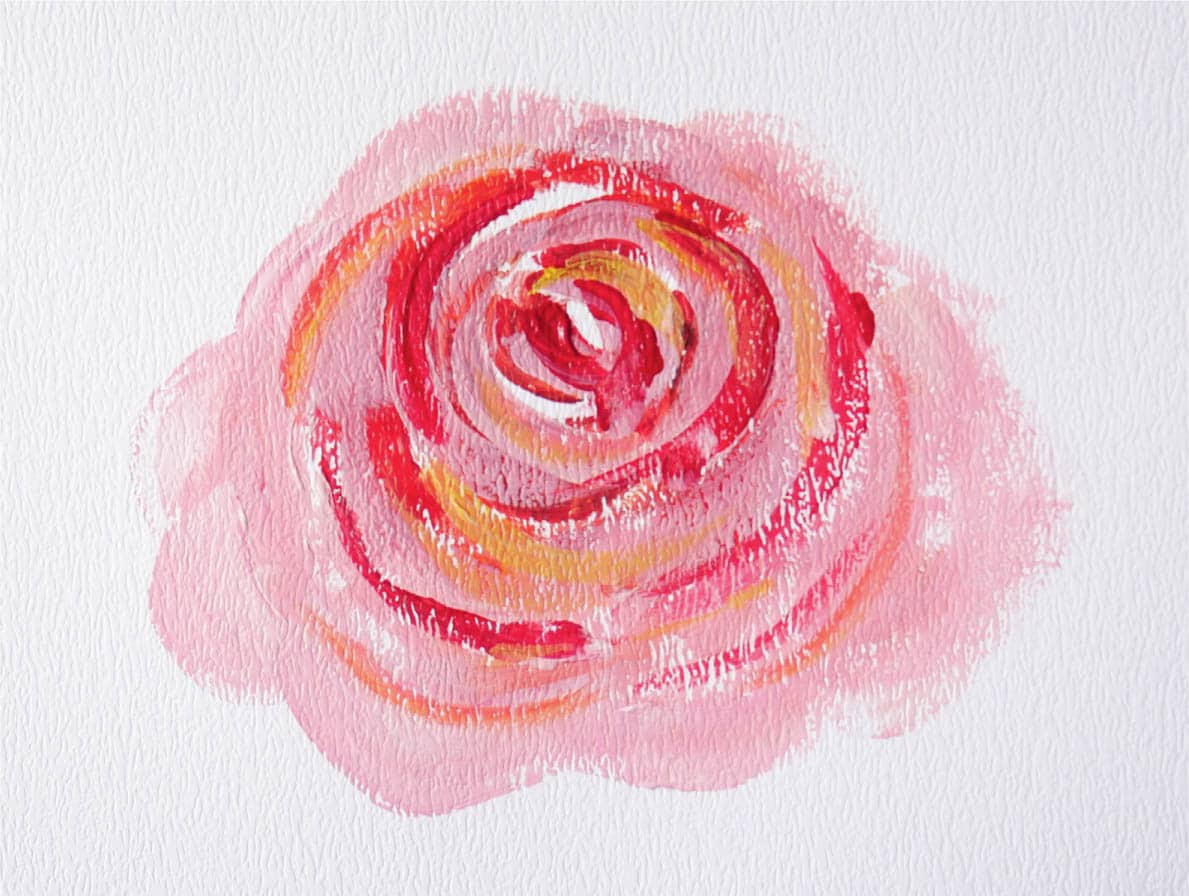
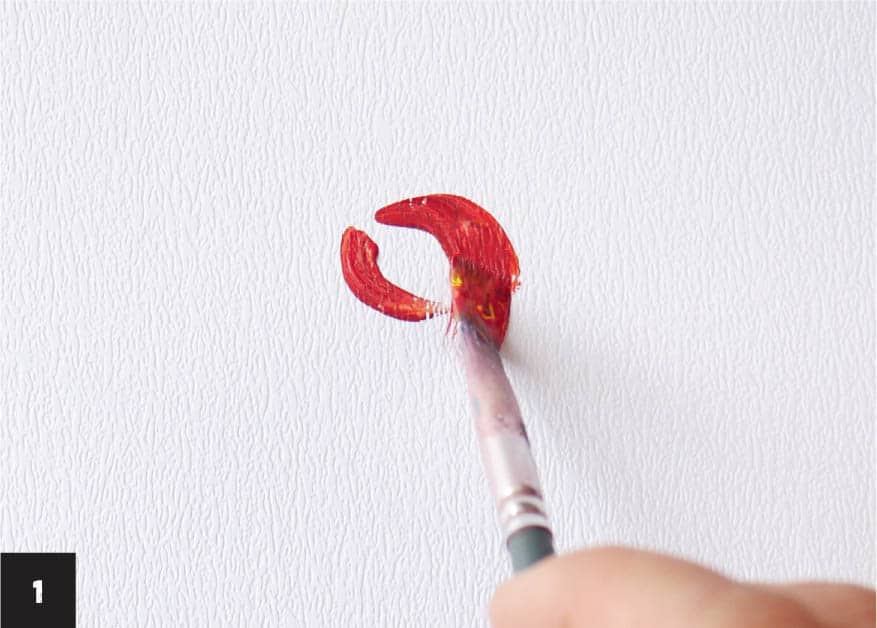
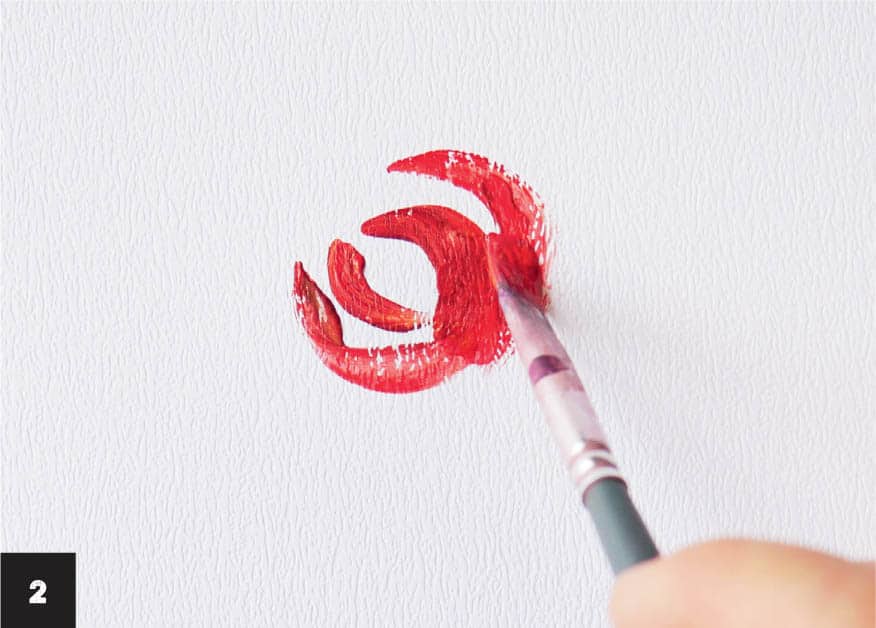
In this exercise, you’ll paint a simple and elegant pink rose. What I like about this technique is that you don’t need to sketch each rose petal, which can be challenging. Instead, you’ll use varying tones of red, pink, and white to express the rose’s multitude of layers. 1 Mix a bit of red and yellow acrylic paint on the palette; this color will be used for the rose centers. Paint two close parentheses shapes in the center of the paper using the flat brush.
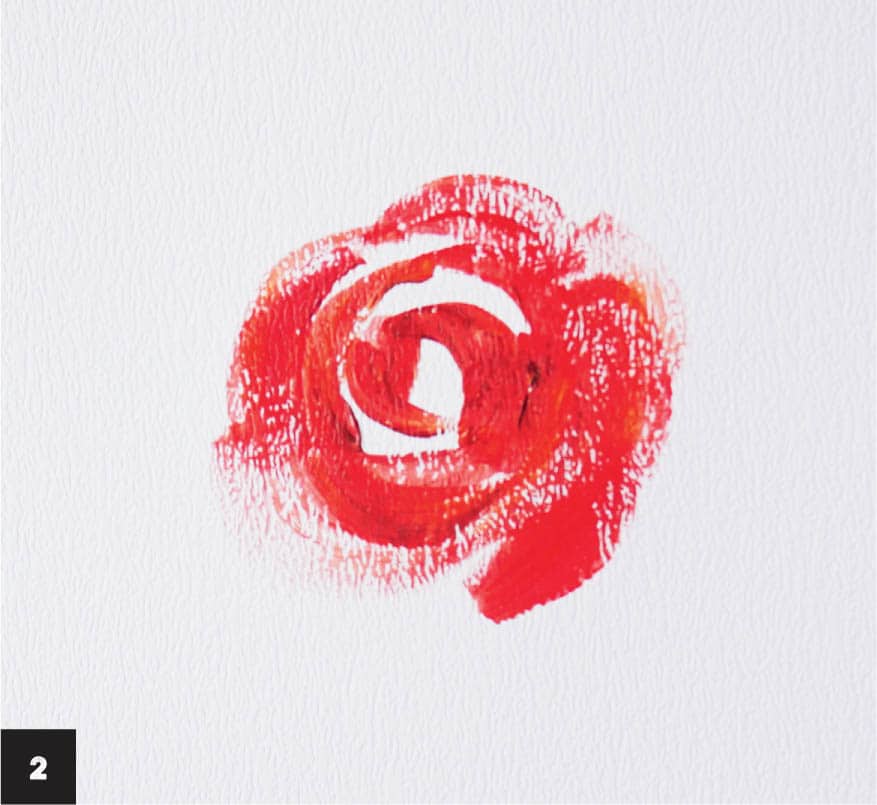
2 Use a light touch to make the curved petals on the sides of the rose.
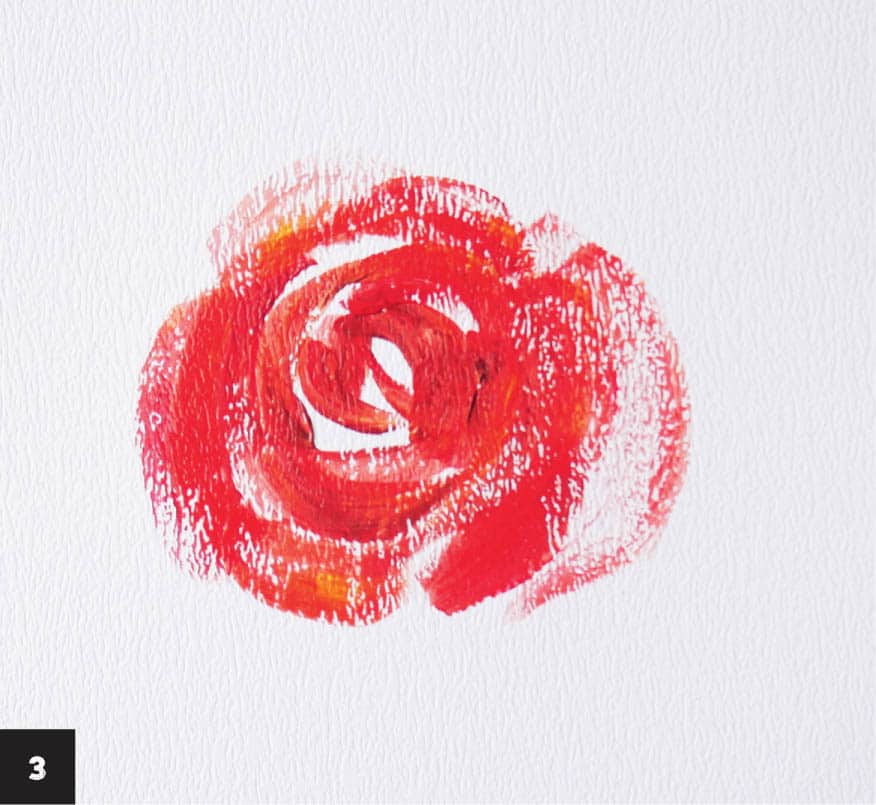
3 Add a bit more white to the red and yellow mixture as you paint the third layer of petals, as these outer layers are lighter compared to those in the center. Allow the paint to dry.
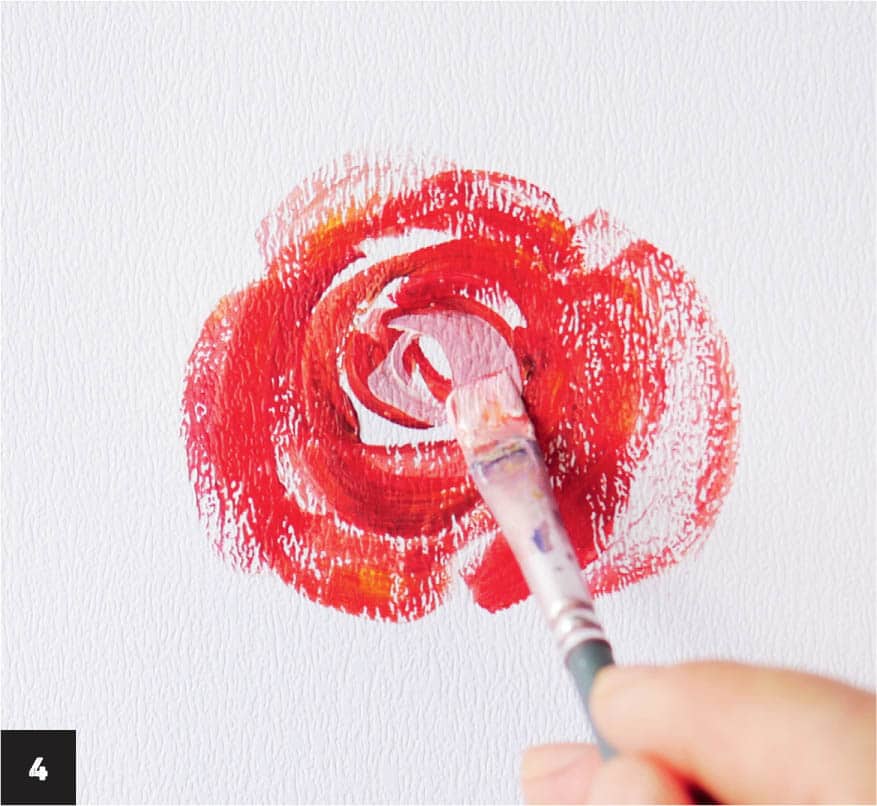
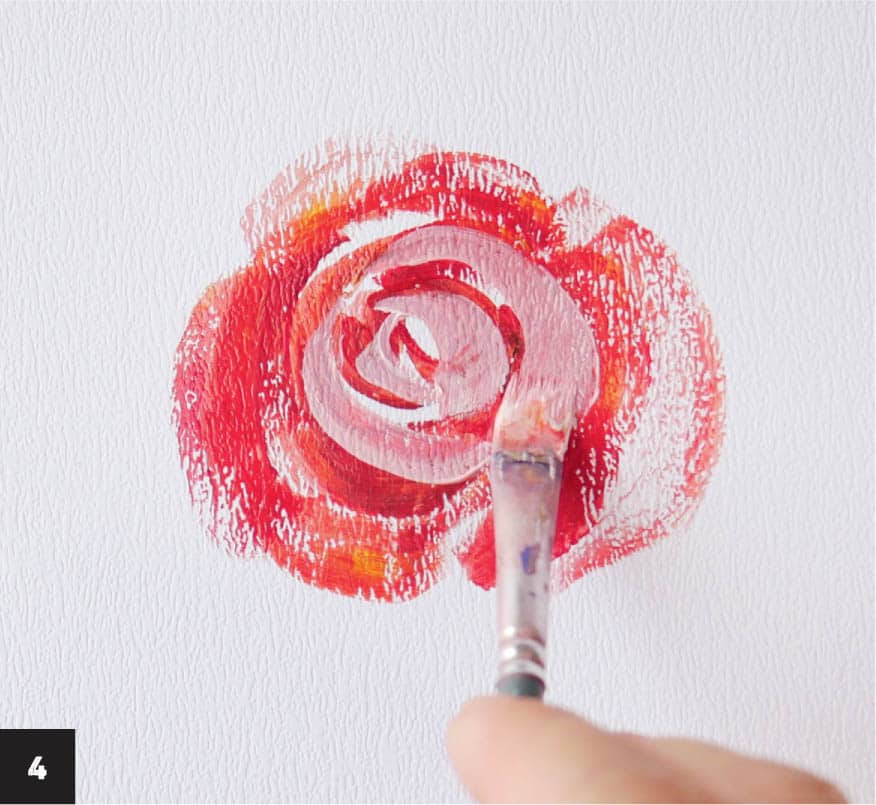
4 Blend white and red paint on the palette to make a pink shade. Use the flat brush to make an incomplete spiral on the base layer you created in step 1. Begin the spiral slightly off center, making sure you don’t paint over the center color.
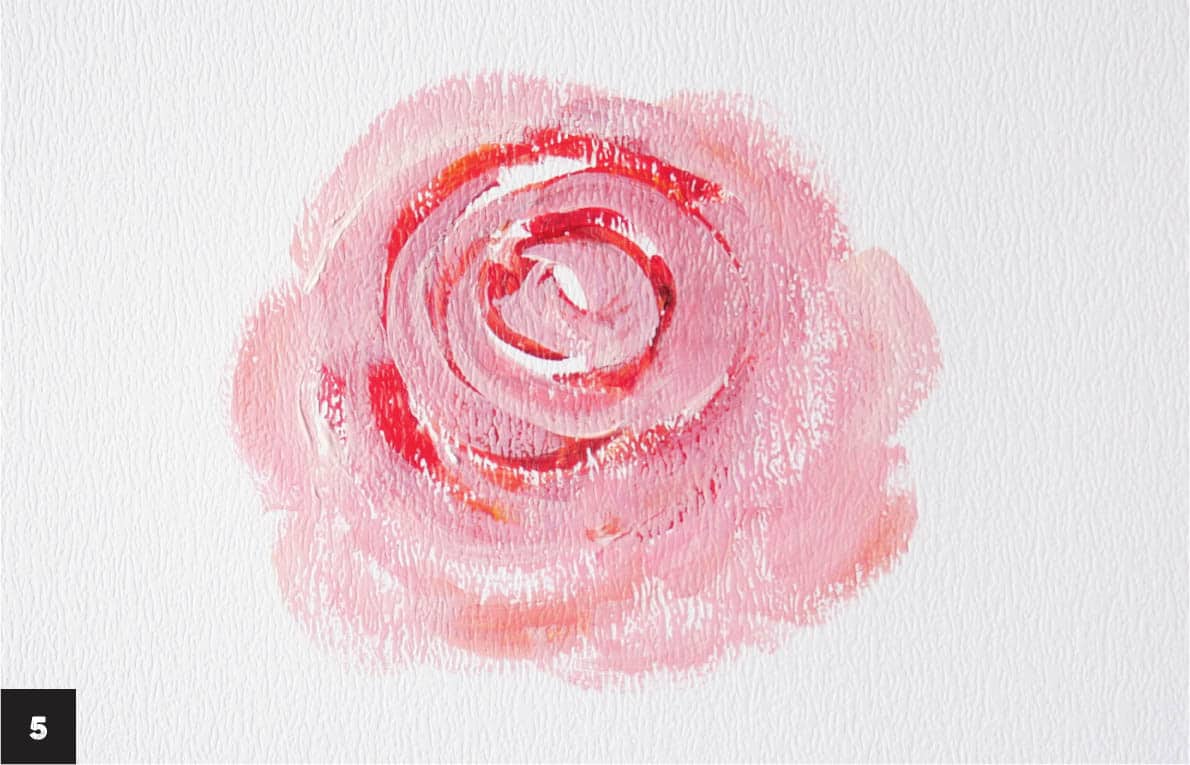
5 Paint the inner part of the spiral with a thin stroke and then press down on the brush a little more to paint the outer part of the spiral. Painting this pink layer over the darker layer creates outer petals that are more spread out than the compact petals in the middle of the rose. This layer doesn’t have to be completely dry before going on to the next step.
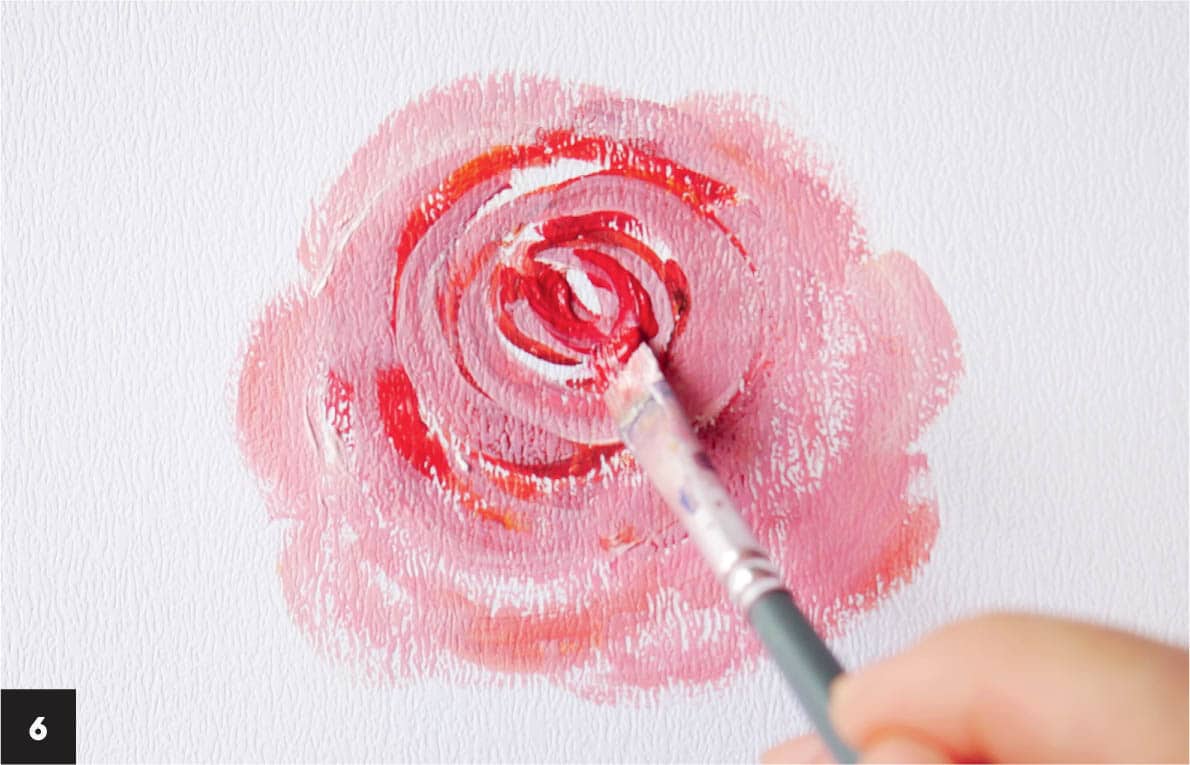
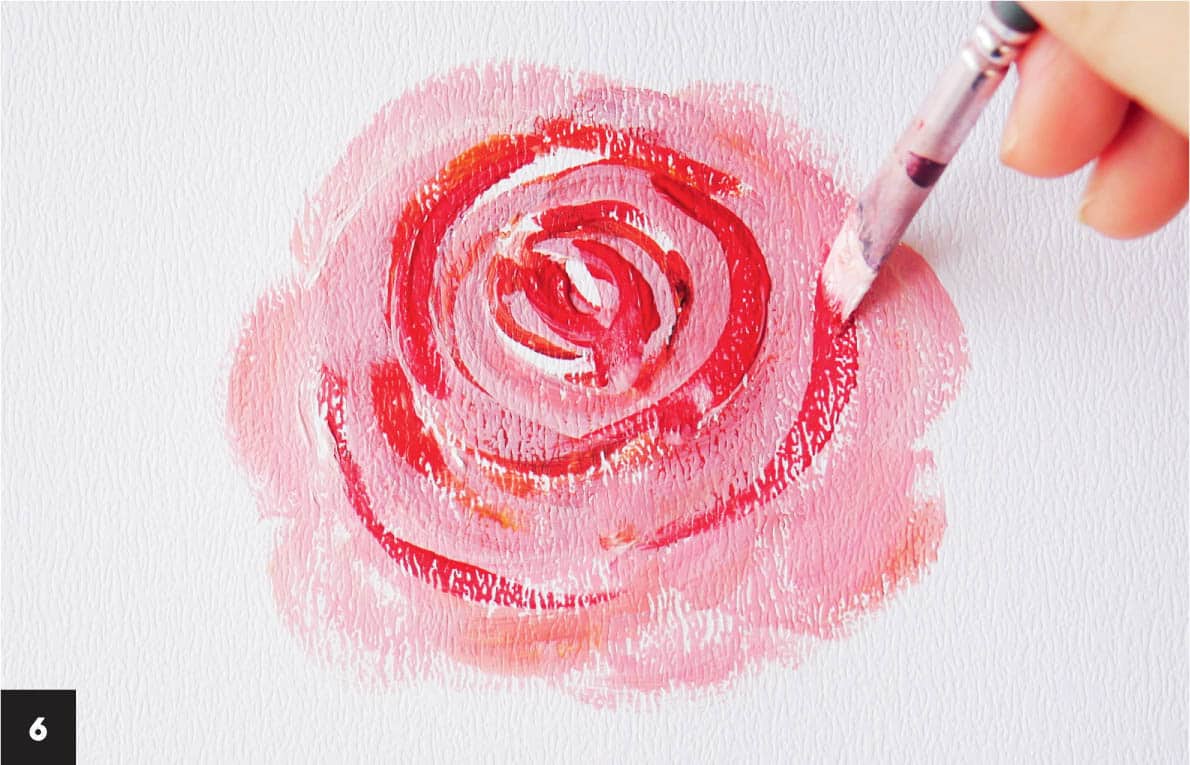
6 To give the flower more depth, mix red with a bit of Payne’s gray. Lightly add a thin spiral starting at the center of the rose, using the round brush. This makes it look as though the center of the rose has tightly packed petals.
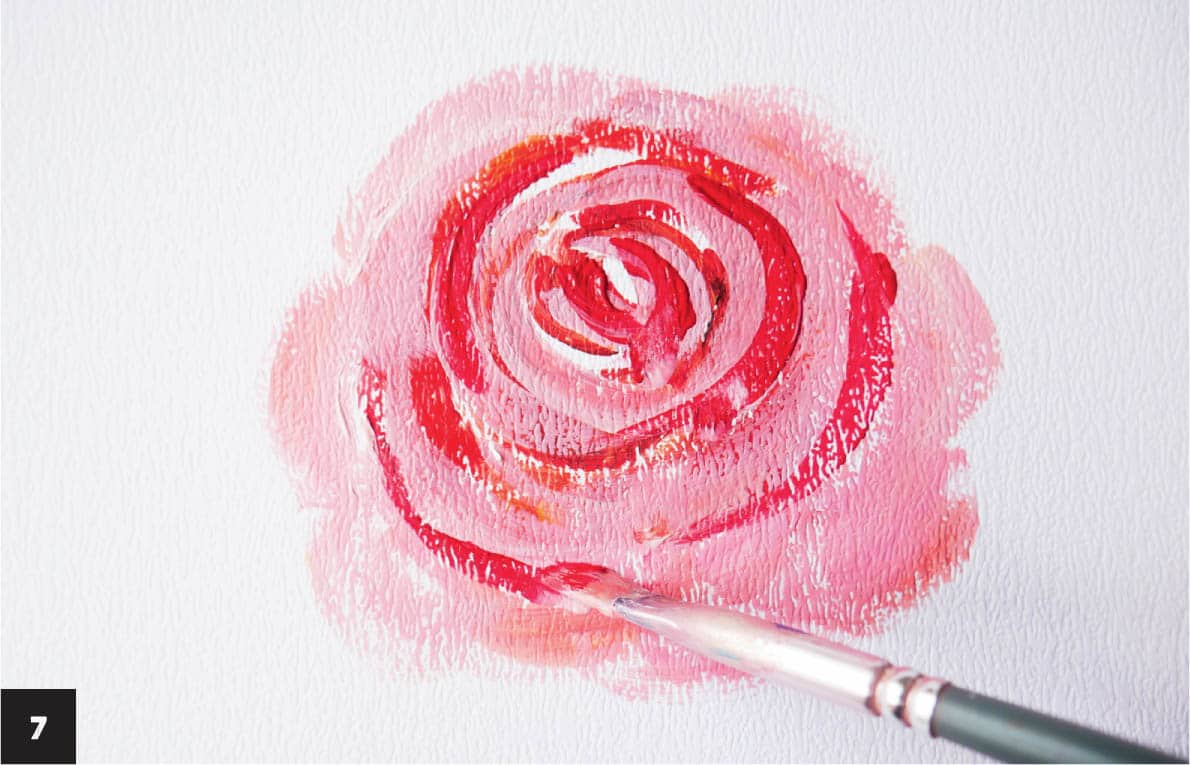
7 Add a bit of white to the dark red mix to soften it a bit and use this paint to make some of the outer petal layers pop.
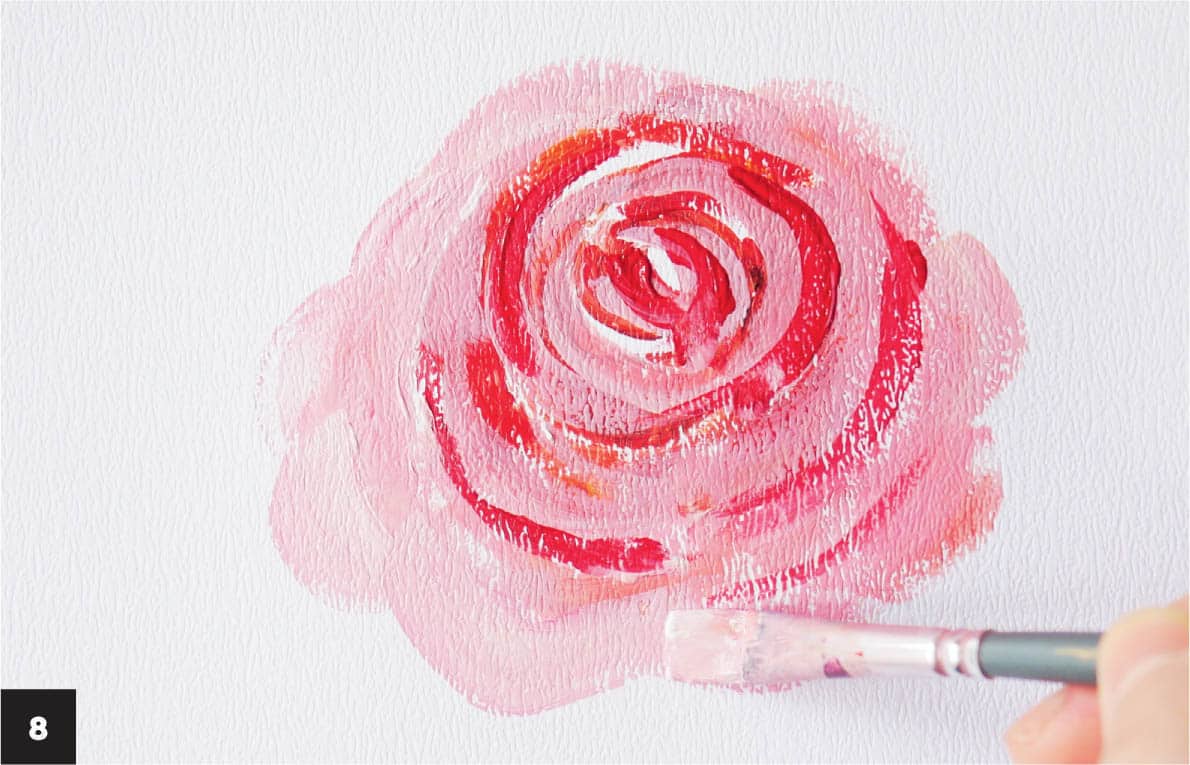
8 Add more white to the pink shade for the outer petals to better define the final shape to the rose. Create bold spiral strokes near the outer edge of the rose, pressing down with the flat brush. You don’t have to create a neat spiral; continue layering the spiral strokes until you’re satisfied with the shape of the rose. Painting a triangular- shaped corner on both sides of the rose creates large, loose petals.
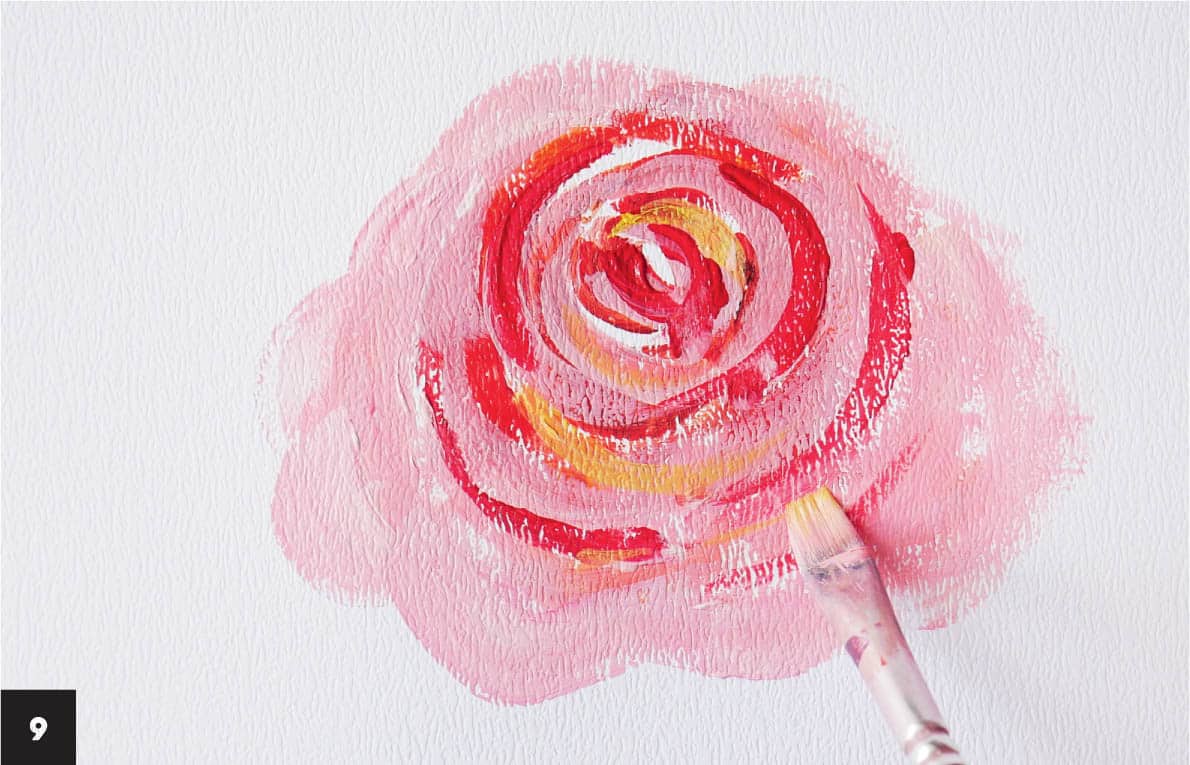
9 Add highlights to the rose using white or yellow for a warmer accent. Add thin curved strokes to the center of the rose with the round brush, then gradually add fewer highlights as you move toward the outer petals.ROSE
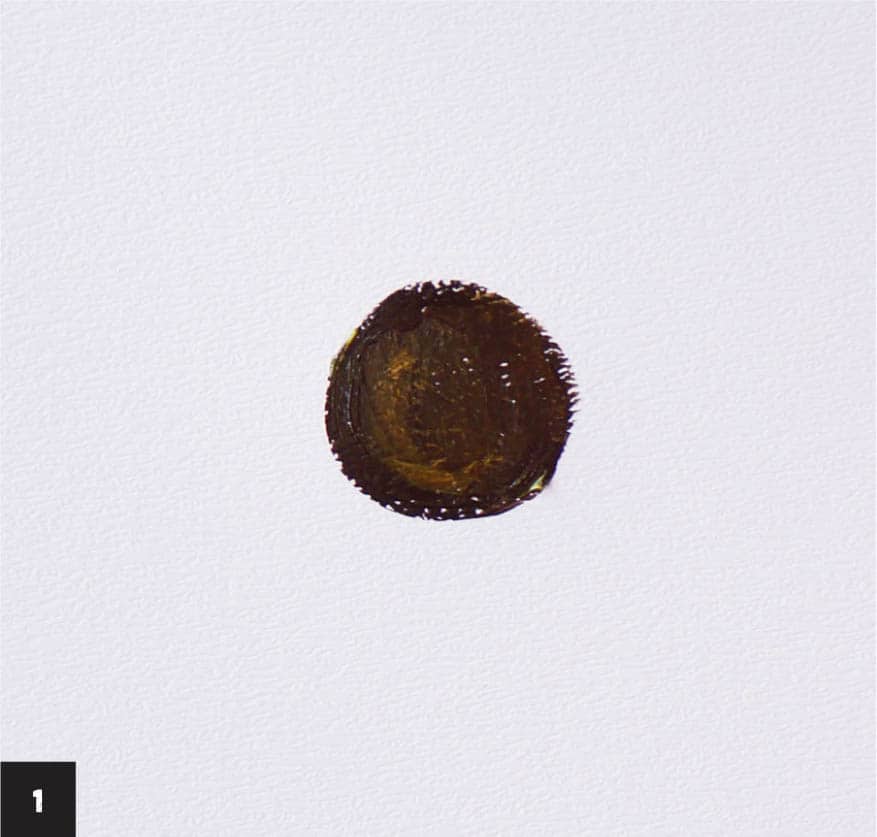
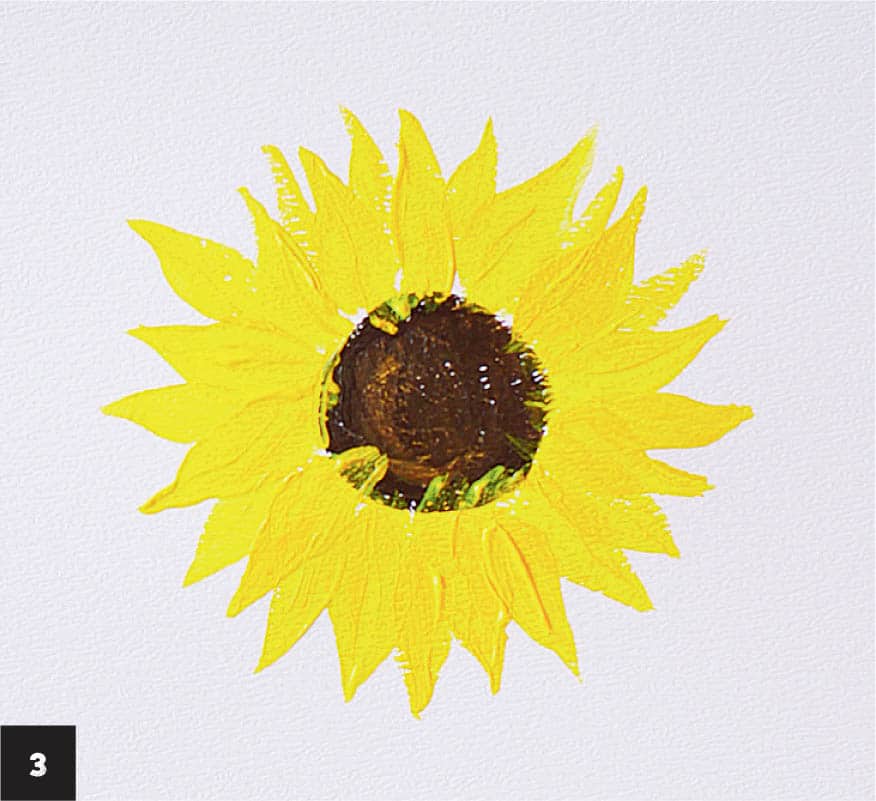
Sunflowers give such a positive vibe to any garden or bouquet, making them some of my favorite flowers to paint. Many people don’t realize how easy they are to create. In this lesson, you’ll learn brushstroke techniques that make beautiful petals instantly. 1 Start painting the flower from the center. Mix yellow and brown to create a medium brown. Paint a circle 3 inches (7.5 cm) in diameter in the center of the paper using the size 6 round brush. Allow the paint to dry.
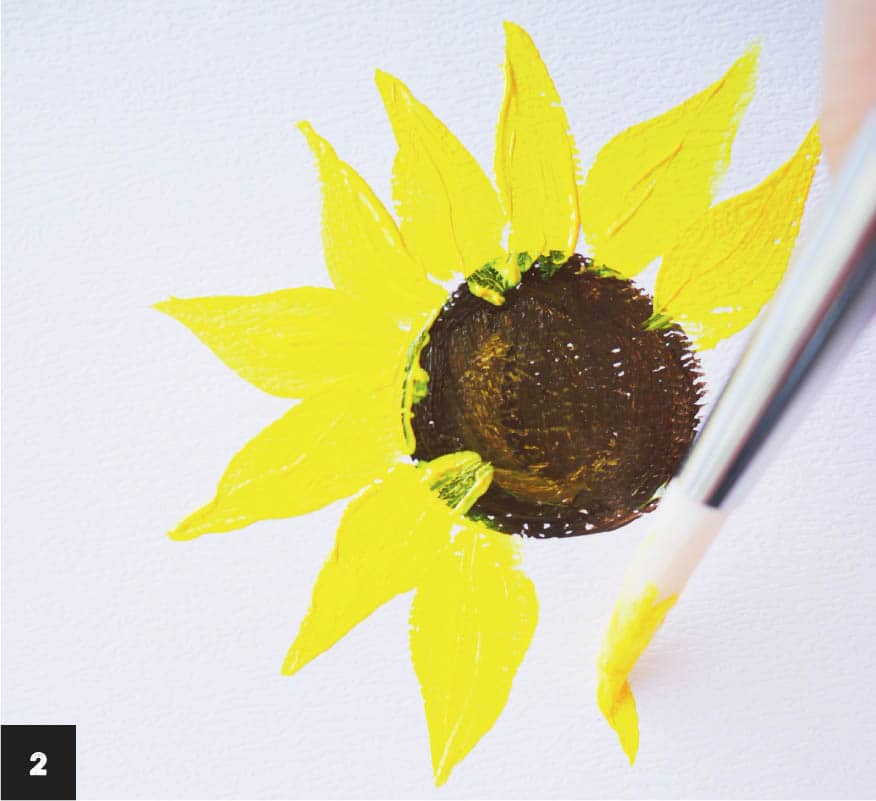
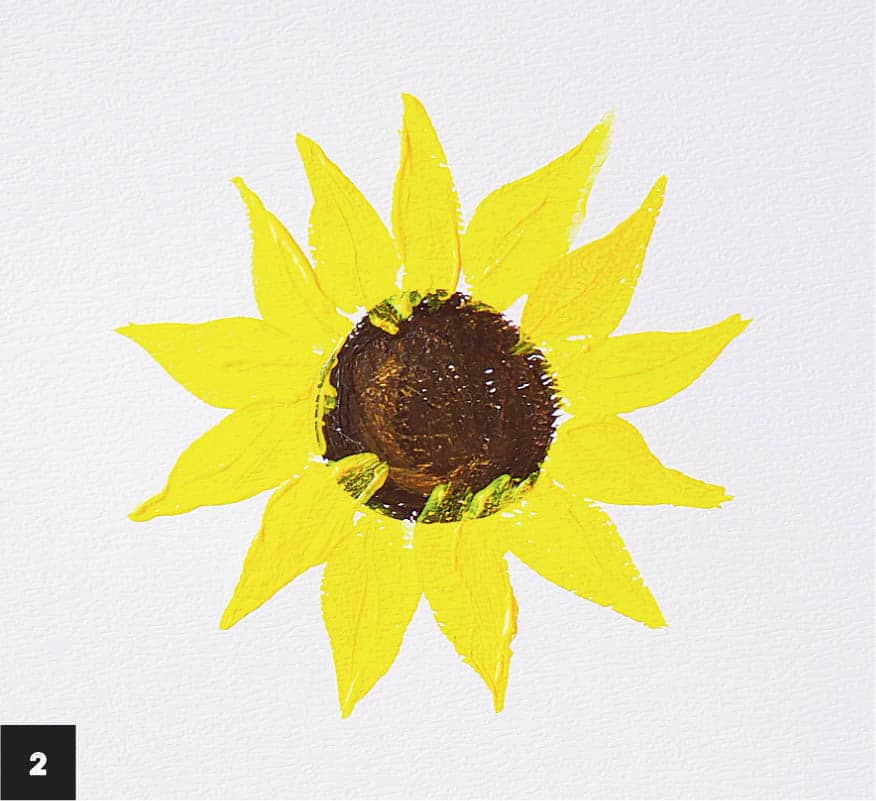
2 To mix the shade for the petals, add a generous amount of yellow paint to the palette and blend it with a bit of orange to create a deep, vibrant yellow. Position your brush about 1 inch (2.5 cm) out from the flower center and begin painting the petals from the tip. Make a short, thin line with the tip of the size 8 round brush, and, without pausing, gently press down and lift the brush as you reach the edge of the brown circle. Add a thin line of paint along the brown center and fill in the petal with yellow. Continue adding each petal in this manner, working your way around the center until you complete the circle.
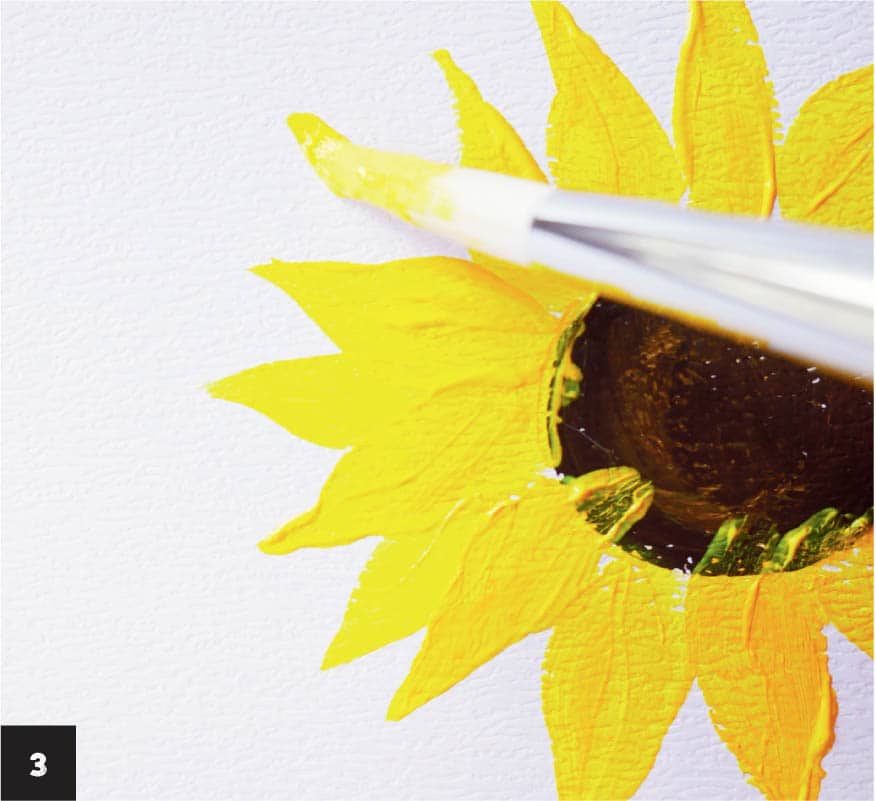
3 Create a second layer of petals, using the same method in step 2. Place each petal between the V of two petals in the first layer. Allow the paint to dry.
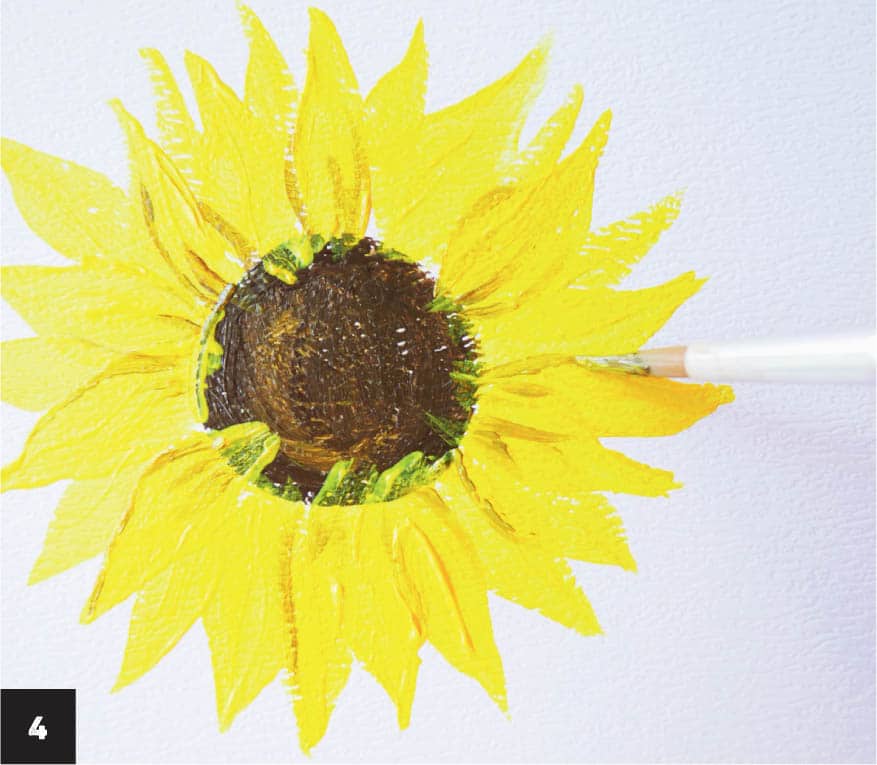
4 Add shadows to the petals to give them depth, using yellow and a hint of brown to create a color slightly darker than the petals. Starting with the first layer of petals, begin at the center of the petal and move outward, creating a gradient so the color fades as you reach the tip. Use a dry-brush technique for the shadows.
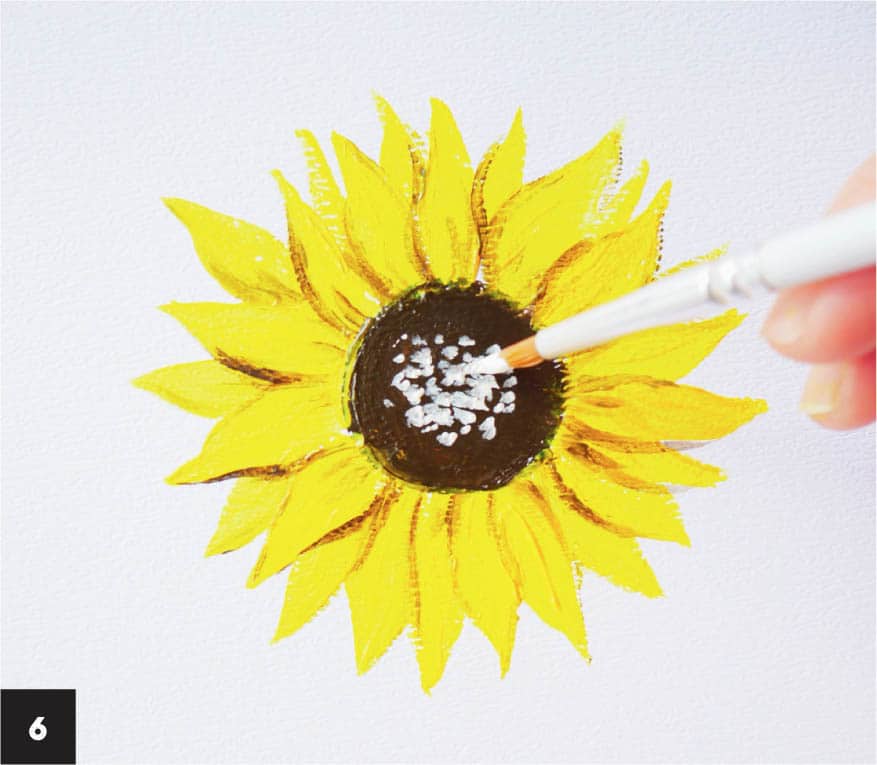
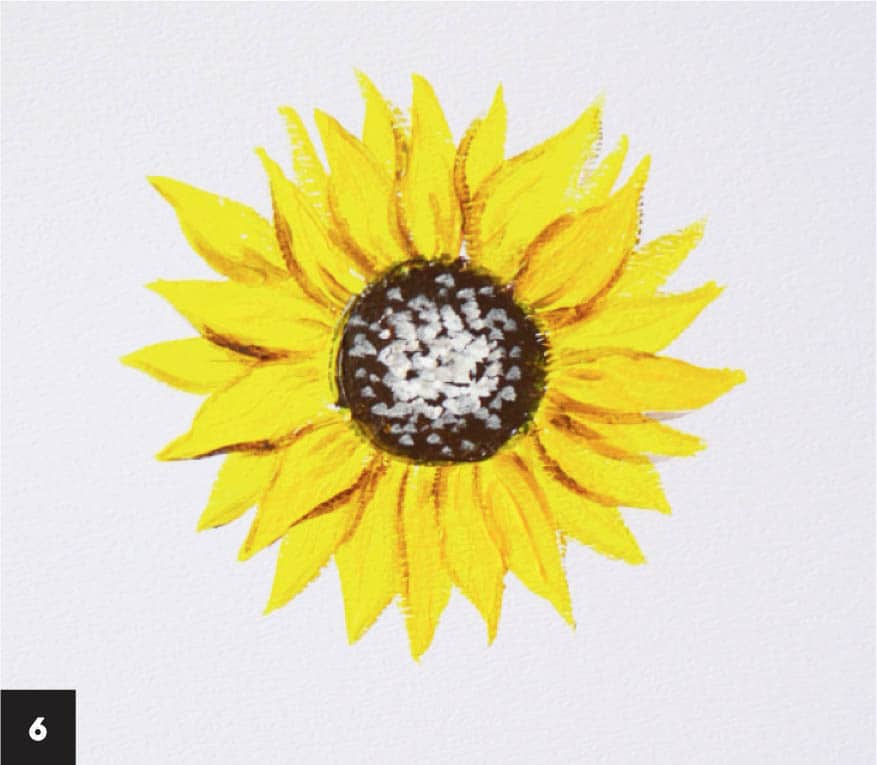
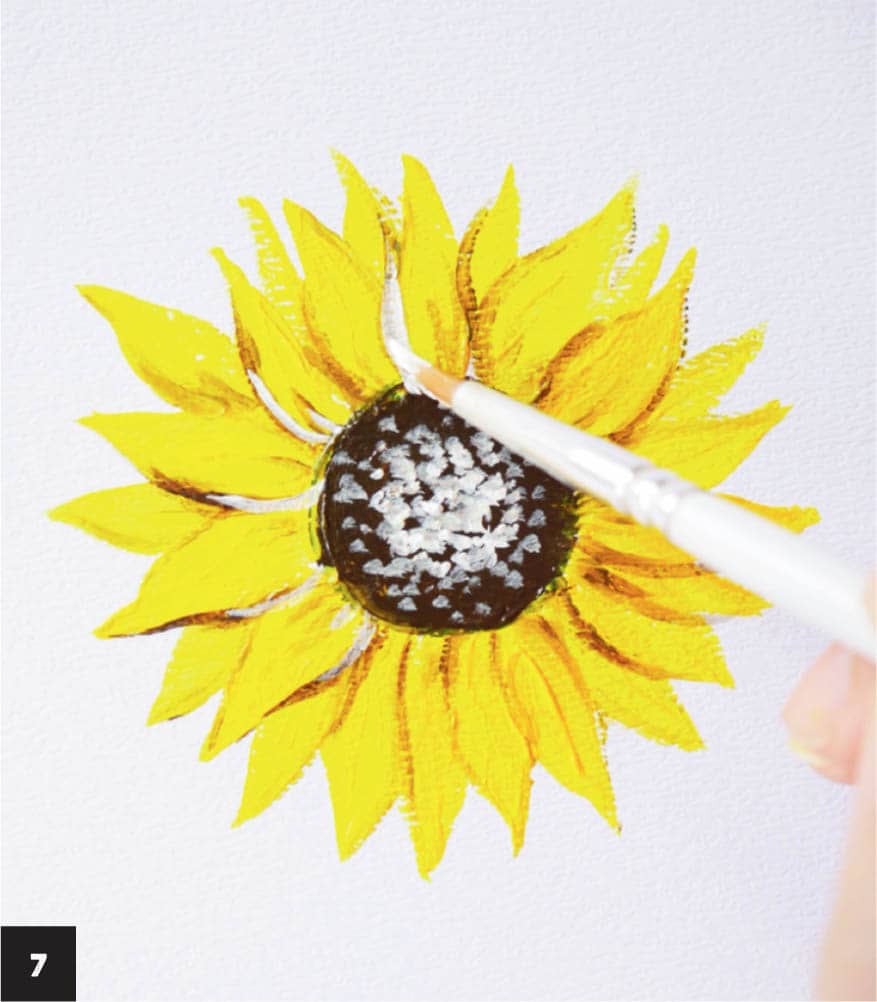
5 Add shadows to the petals in the outer layer using the size 6 round brush and brown paint mixed with a little water. If one petal overlaps another, add a shadow to the area where they meet. After painting the shadow, remember to wipe off the brush and soften the edges of the shadow. 6 Add highlights to the center of the flower. Paint tiny dots in the center of the flower using the tip of the size 6 round brush loaded with white acrylic paint. Pick up some brown and white acrylic paint and continue adding tiny dots around the flower’s center.
7 Add highlights to the petals and the center of the flower. On the side of each petal opposite the shadow, trace an outline of the highlight using the size 6 round brush loaded with white paint. This brightens up the petals and also separates them from each other.
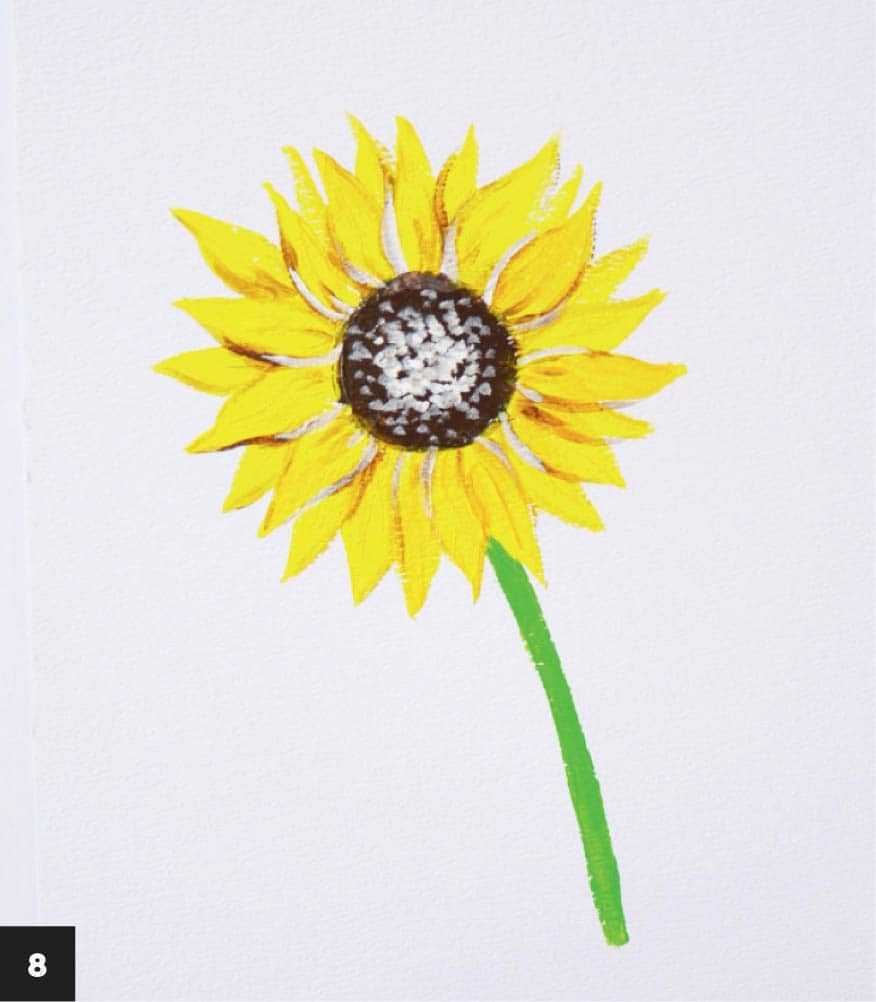
8 Paint the flower stem. Mix green with a little yellow on the palette to create a spring green. Load the size 6 round brush with the paint and, beginning at the bottom right of the flower, create a slightly diagonal line about 3 inches (7.5 cm) long.
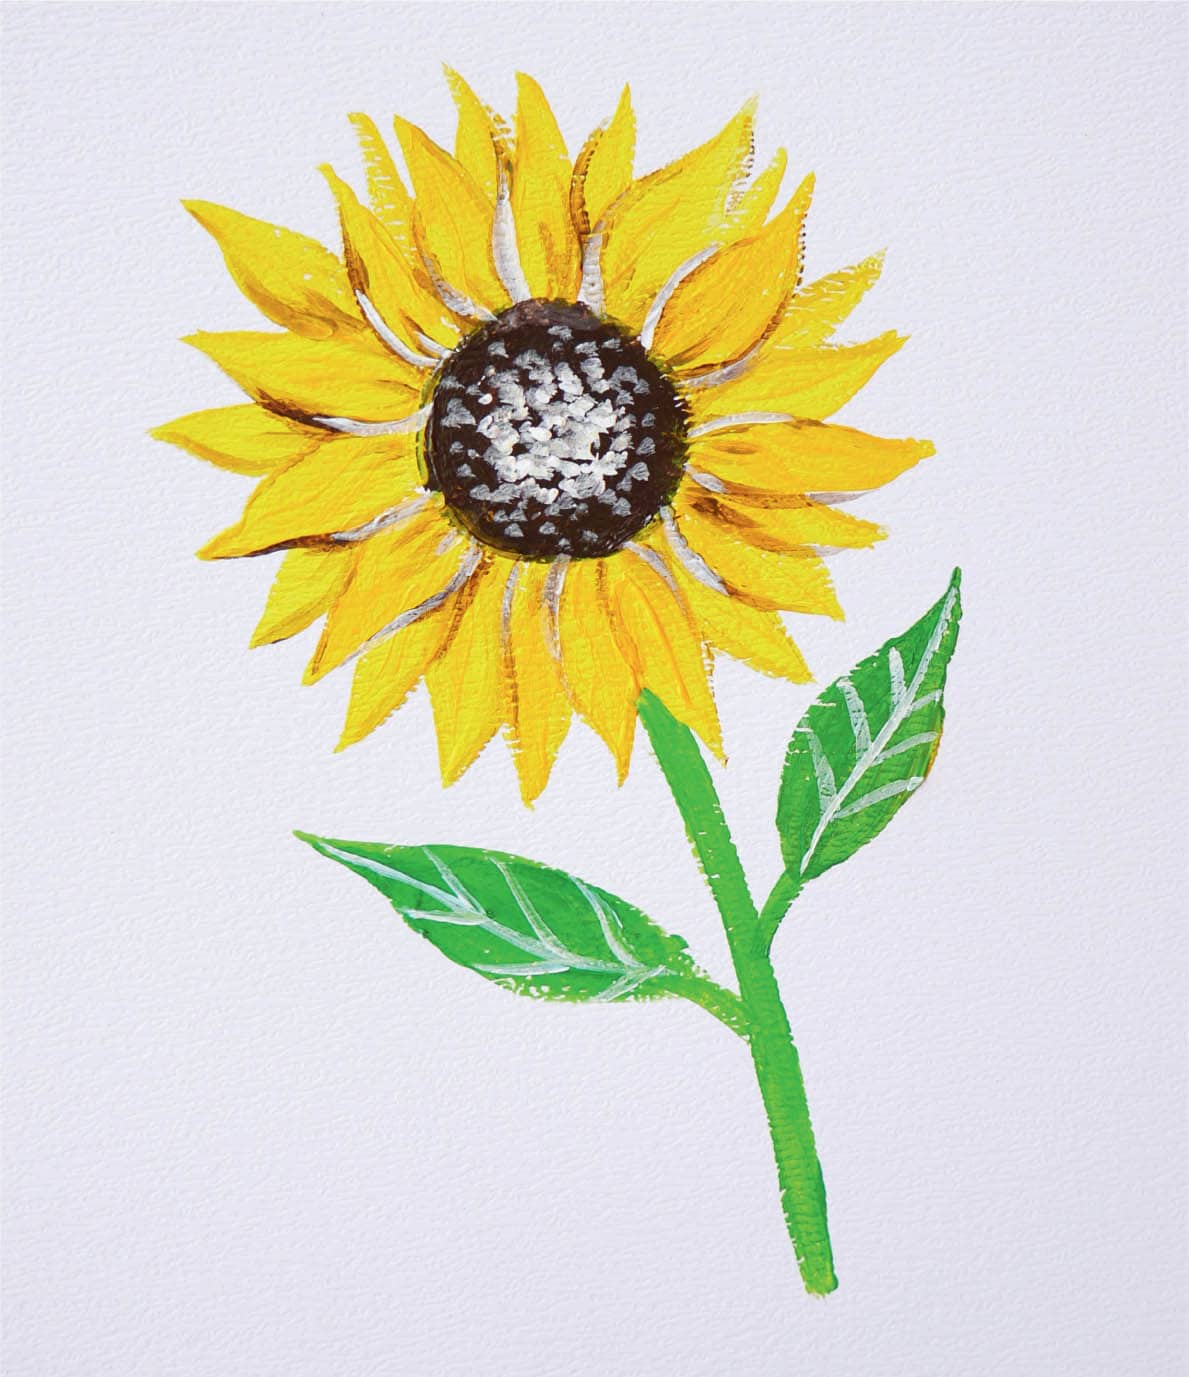
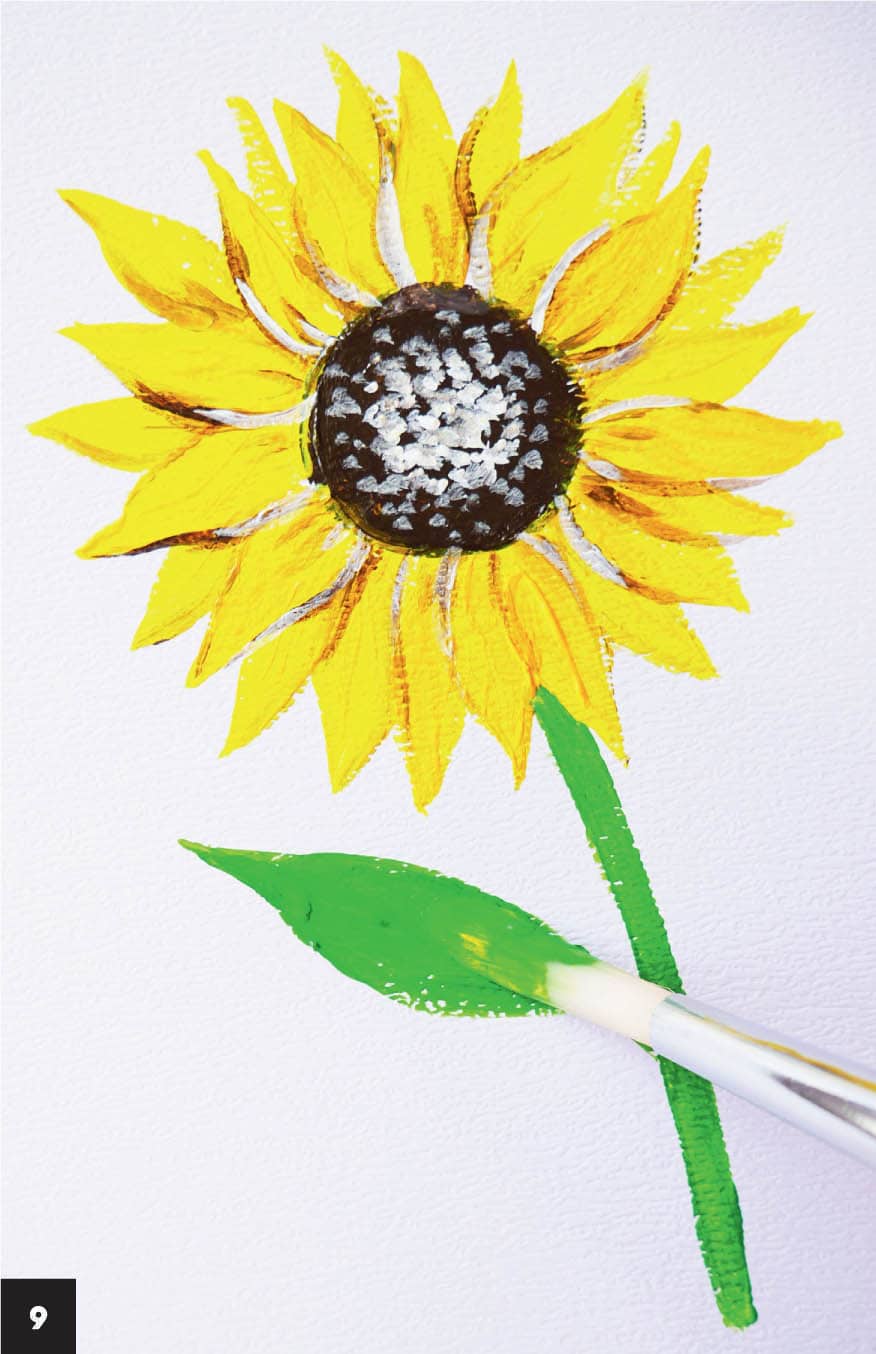
9 Paint a leaf. Using the same technique as with the petals, begin painting a thin line with the tip of the brush 1 to 1½ inches (2.5 to 3.75 cm) away from the stem and then press down to broaden the stroke, creating the leaf and connecting to the stem. 10 Paint another leaf on the other side of the stem. Use white acrylic paint and the size 6 round brush to add veins to the leaves to complete the sunflower (see finished image, here).SUNFLOWER
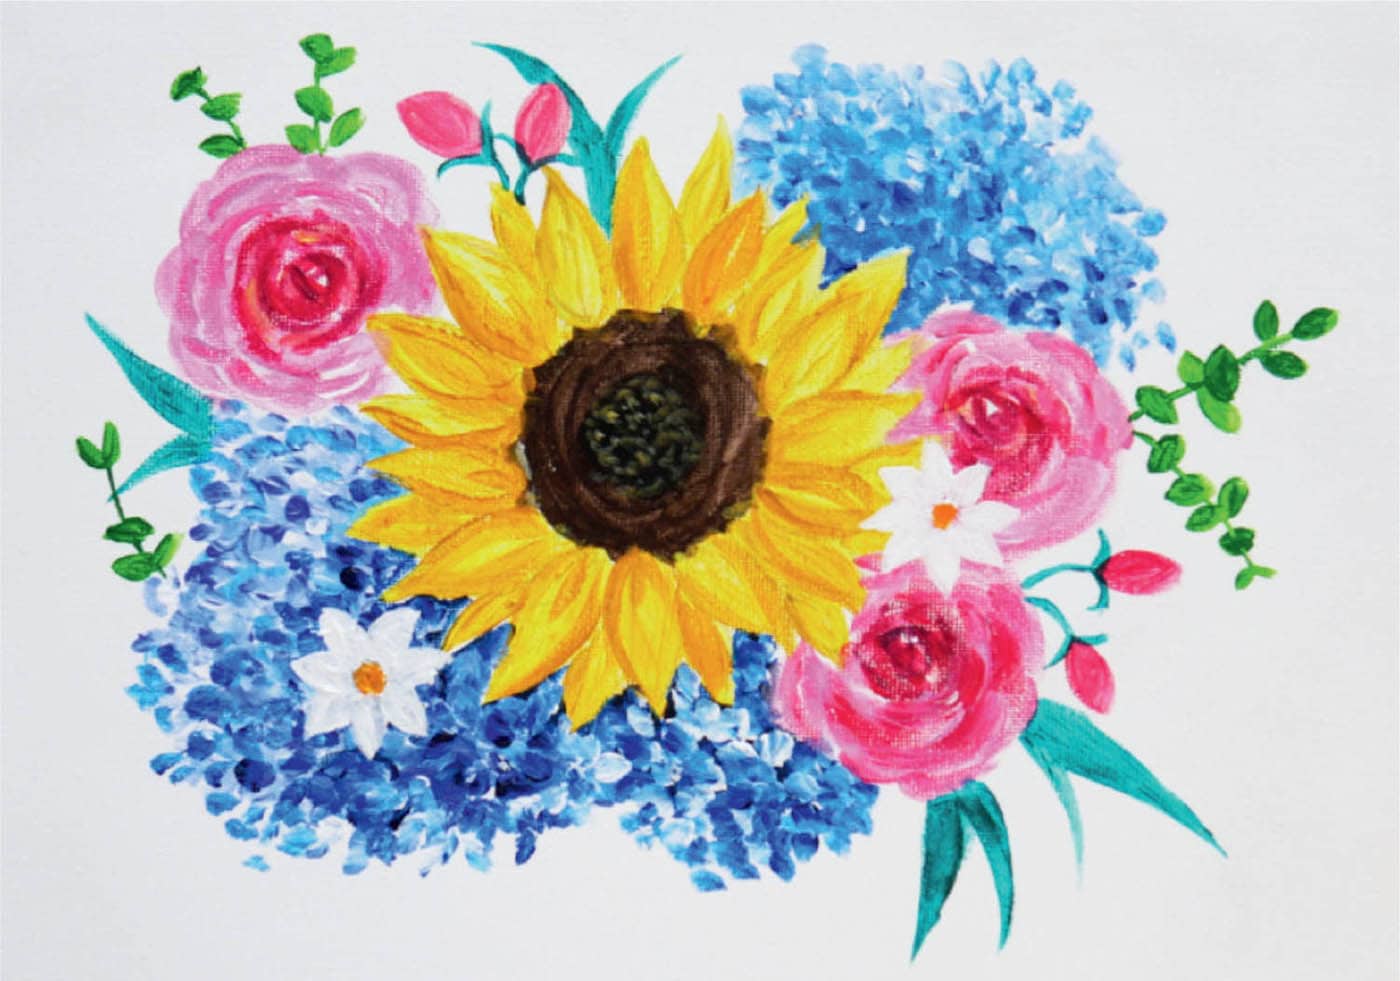
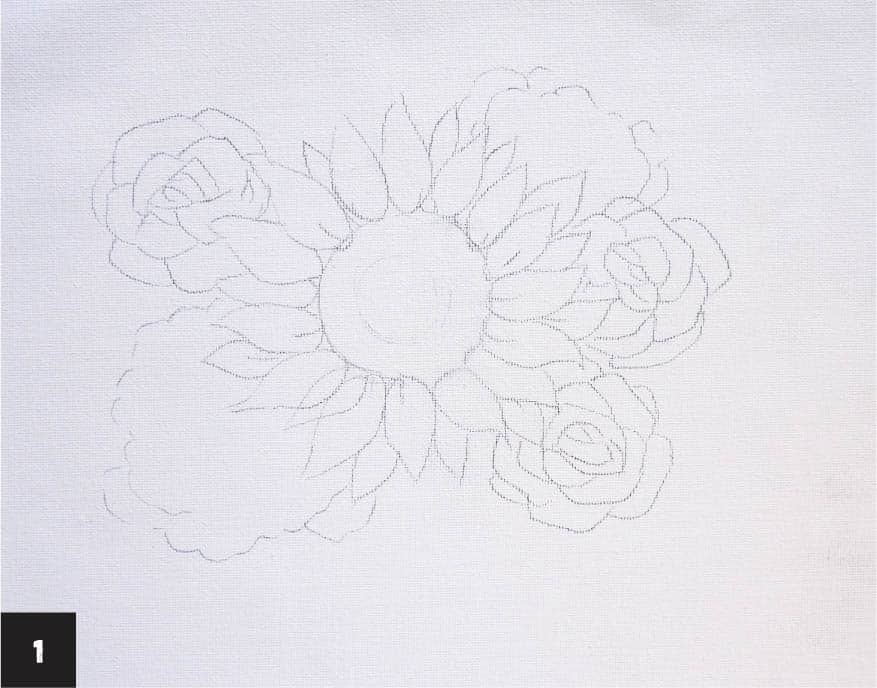
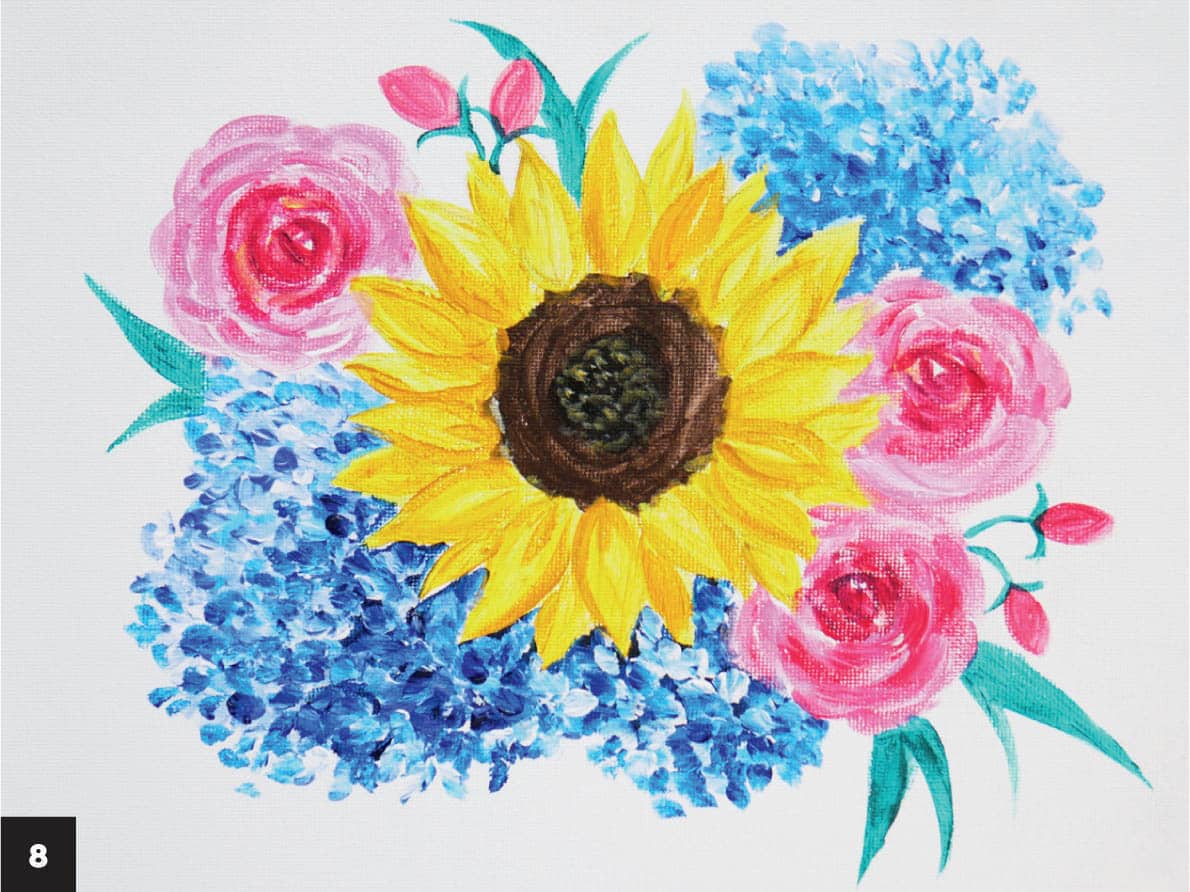
Let’s combine all the flowers you’ve painted so far into a harmonious composition. You’ll learn how to choose colors, how to position the flowers, and how to create different kinds of floral and greenery fillers that will make the final arrangement look like it’s in full bloom. The instructions for the individual flowers will refer back to the original lessons, allowing you to focus on the techniques that make the flower arrangement cohesive as you combine the different elements. 1 When painting a floral cluster, think about the flowers you want to include. For this lesson, we’ll paint hydrangeas, roses, and sunflowers. Next, choose one flower that will be the highlight of the entire piece; the others will be supporting and complementing that flower. Let’s make the sunflower the focus. Draw an outline of a sunflower in the center of the paper, then draw three roses surrounding the sunflower. Odd numbers in groupings look more interesting because the composition isn’t too symmetrical. When adding the roses, situate the blooms so they face the viewer. Hydrangeas are perfect additions because their large blooms can fill gaps in the arrangement. As you add flowers, have some petals and leaves overlap others slightly to make the arrangement look more realistic.
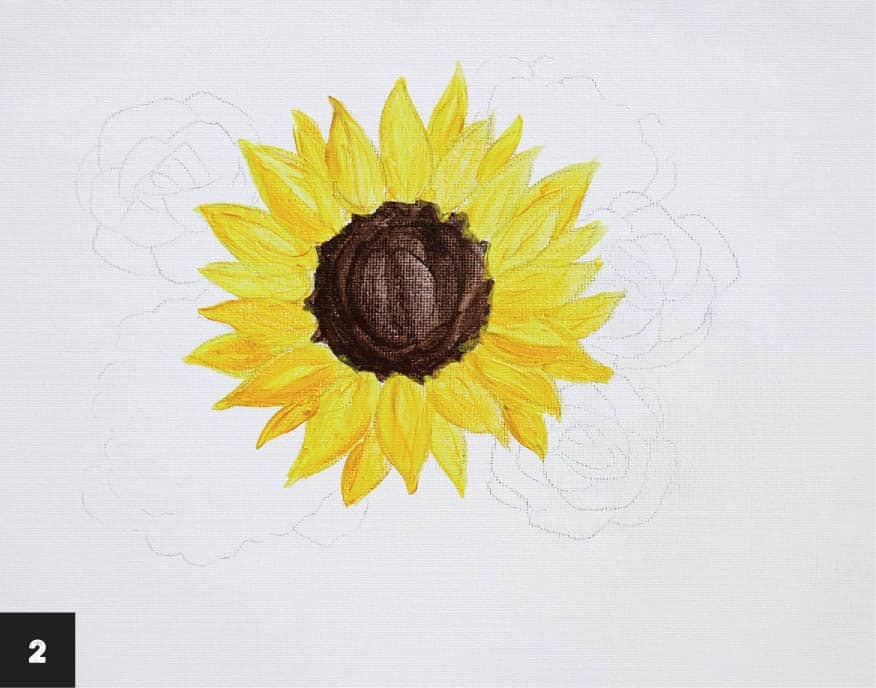
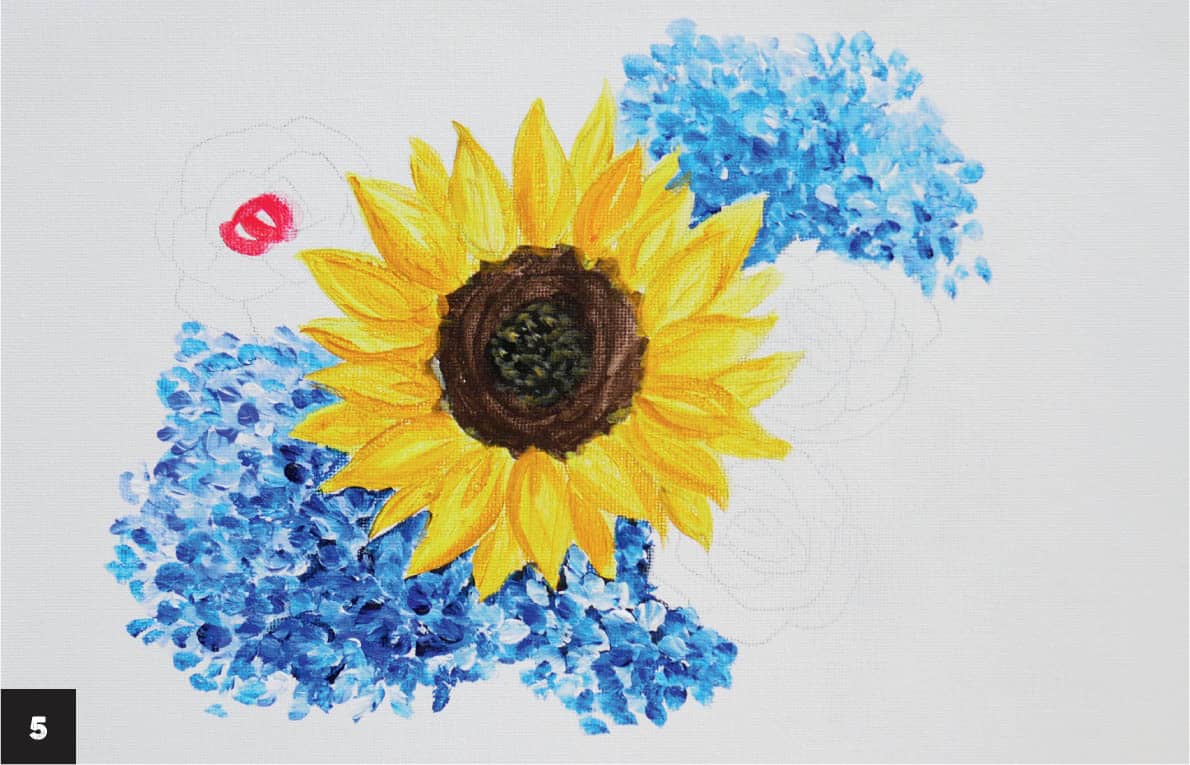
2 Choose a flower as a starting point. I prefer painting the main flower first, as it makes it easier to choose complementary colors and elements as I progress in the painting. Paint the center of the sunflower in a warm brown, allow it to dry, and then paint the petals in a rich yellow using the round brush (see here–71).
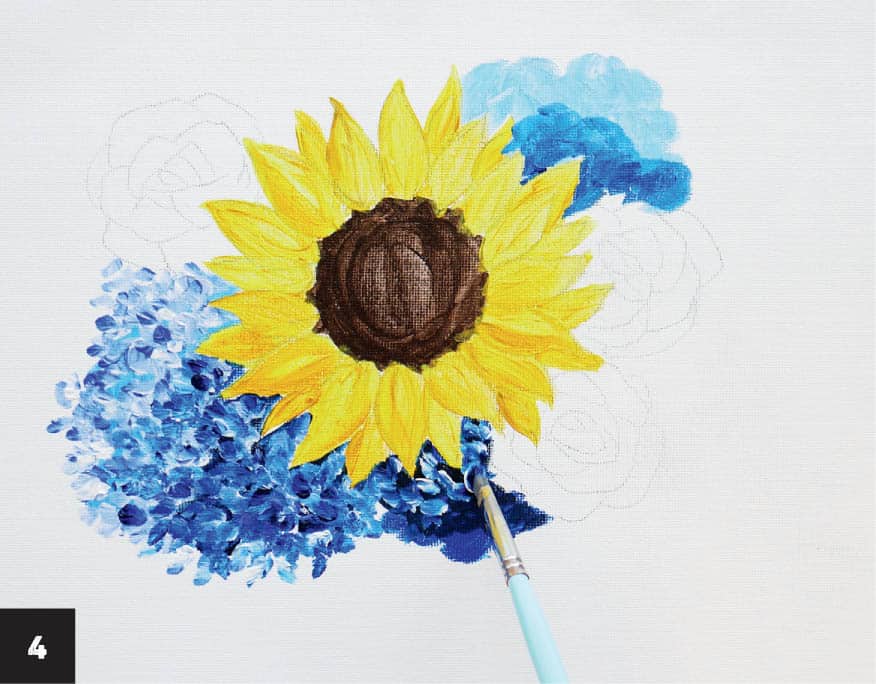
3 Add dark blue paint to the palette, load some onto the flat brush, and paint the lower, dark area of the hydrangea (see here–here). The dark blue provides great contrast to the yellow. Mix some white with the blue to create a lighter shade, then paint the top part of the flower.
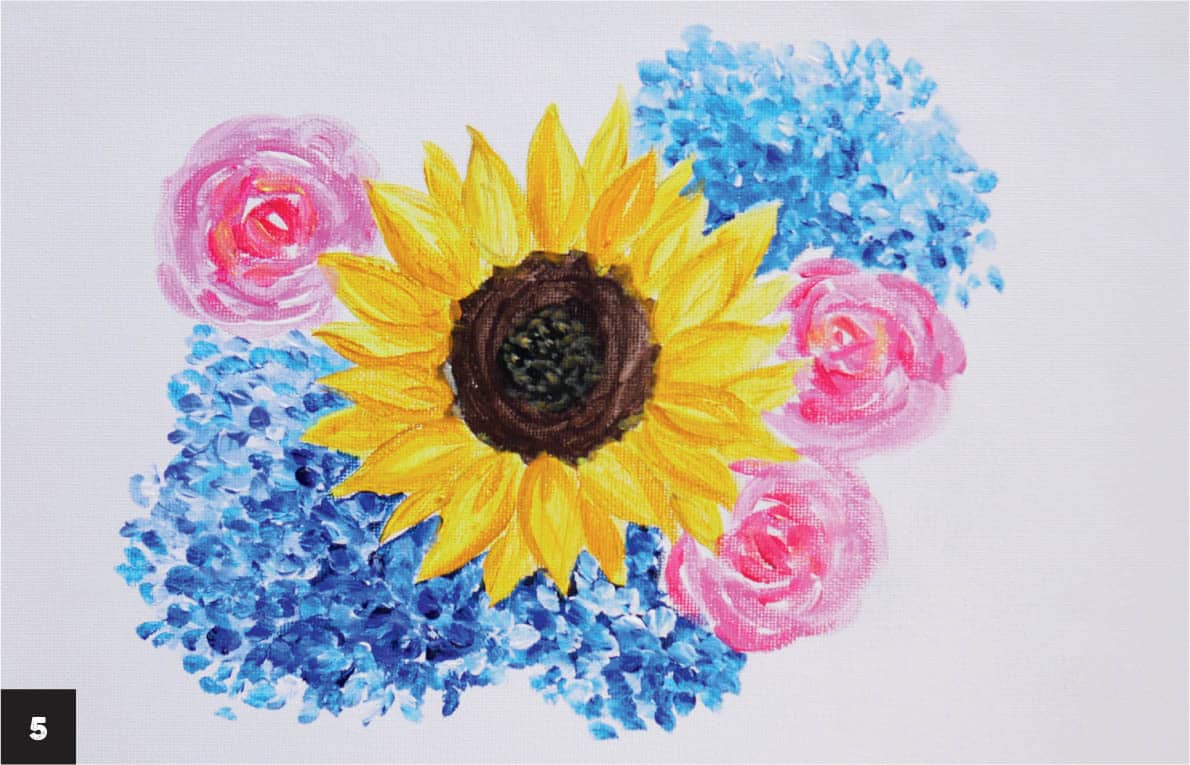
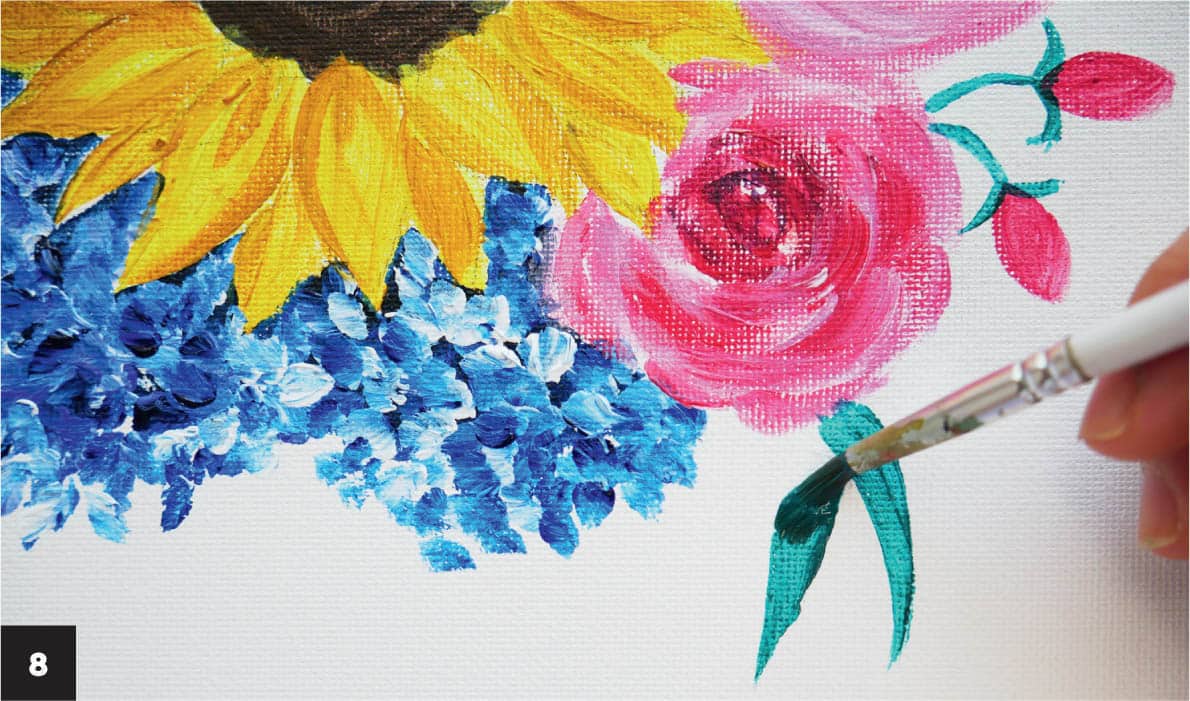
4 Wait for the base layer to dry. Then dab on the tiny hydrangea petals, using the two-color technique with blue and white paint on the flat brush. 5 Paint the roses that adorn the sunflower. Begin by painting the dark red center of the flowers first using the round brush and then adding lighter red shades as you paint the outer petals (see here–here). As some of the roses are underneath the petals of the sunflower, be careful not to paint over the sunflower petals. If you do, simply paint the sunflower petal after the rose has dried. Let this layer dry before adding more elements to complete the flower cluster.
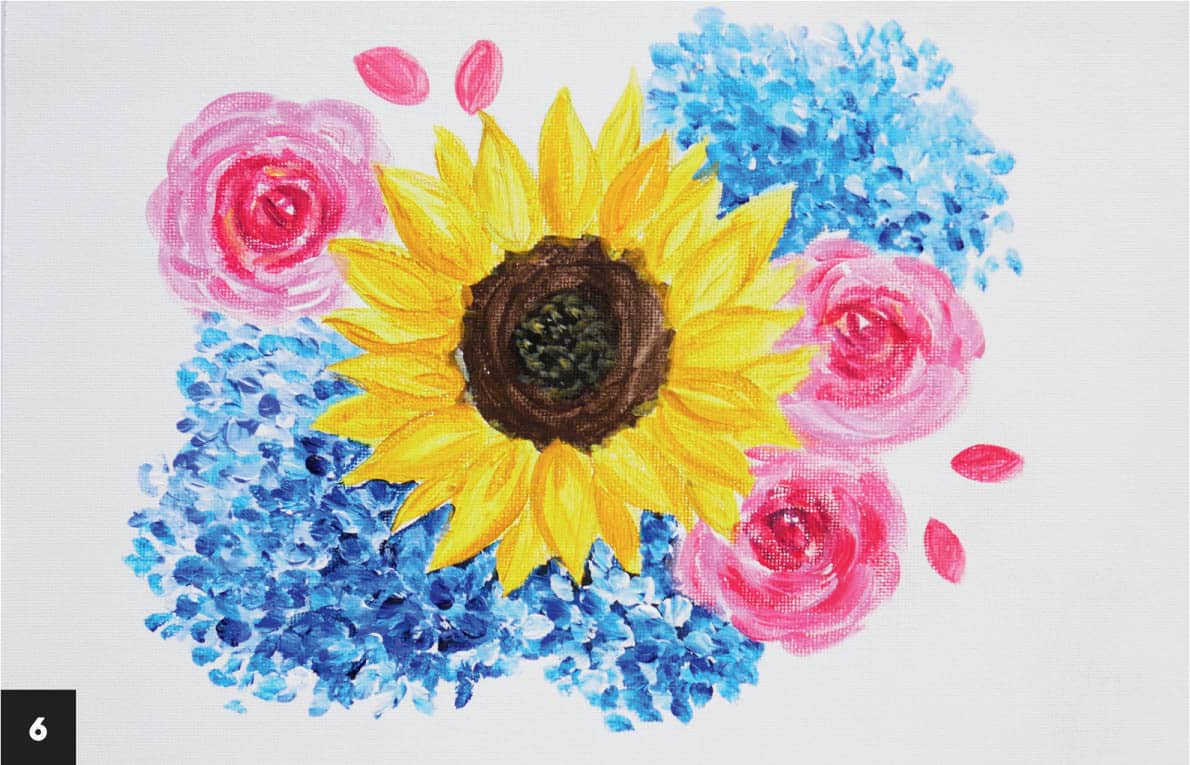
6 Add a variety of small elements to the painting to make it look more complete. Imagine you’re buying a bouquet from a florist, and you’re in charge of creating the arrangement. Tiny, pretty flower buds are great to include because their shape is different from the blooming flowers. You can select a similar color to the other flowers or a complementary shade. I chose light pink, in keeping with the roses. By choosing a shade that complements the other flowers, the elements in the arrangement add to the overall pleasing look of the flower cluster.
7 Paint a small, oblong shape representing the bud, using the round brush. I usually put two to three buds in an open area that doesn’t have any flowers. Paint a thin, curved V shape with green paint and the round brush at the bottom of the bud. Then, paint a thin line connecting the bud to the flowers. Paint a couple of tiny buds beside the two roses on the right.
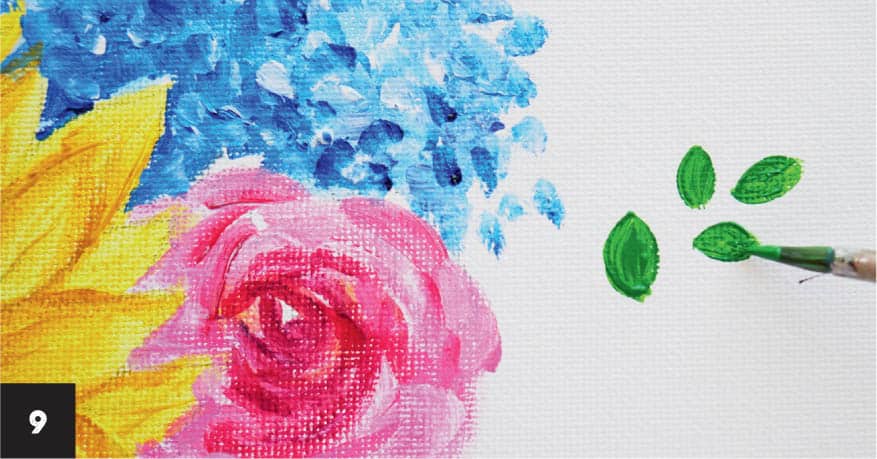
8 A flower cluster would not be complete without some leaves. I like painting two different kinds of leaves in two shades of green; this variety adds interest to the painting. Paint simple leaves first, using the round brush and green paint mixed with a touch of blue. Start painting the tip of the leaf a couple of inches (about 5 cm) away from the flowers with the tip of the brush. Then, gently press the brush down to make the leaf broader until it connects to the flower. Paint these in different lengths and directions around the cluster.
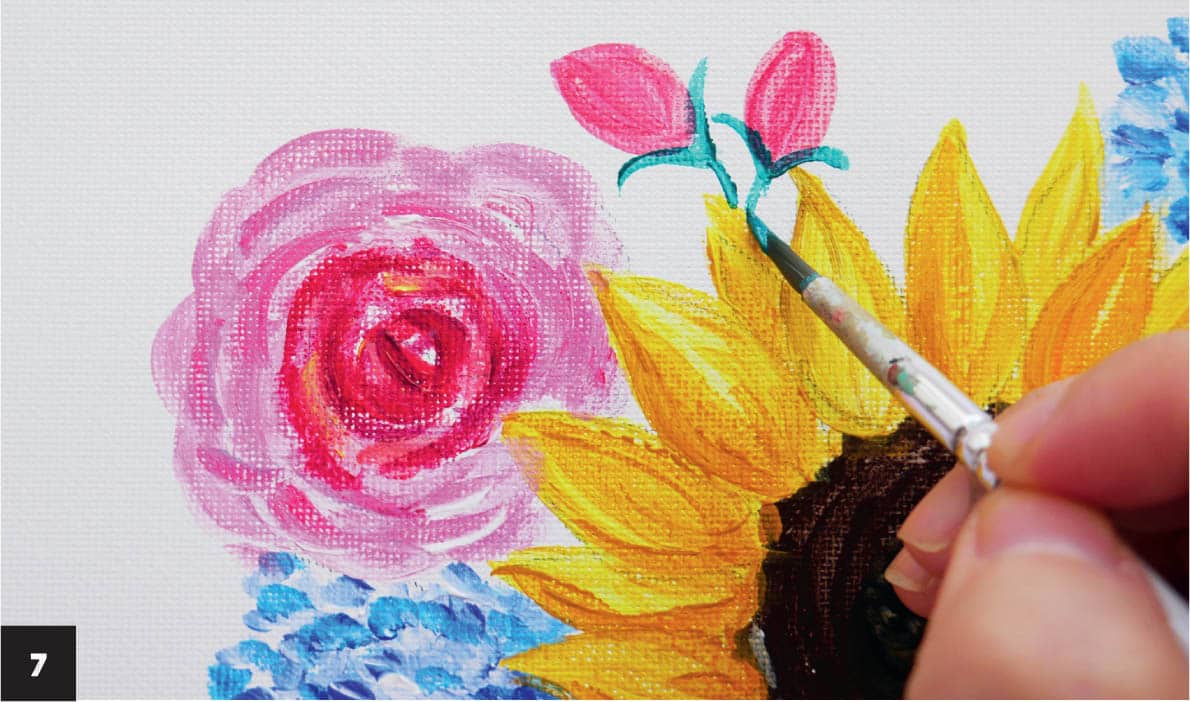
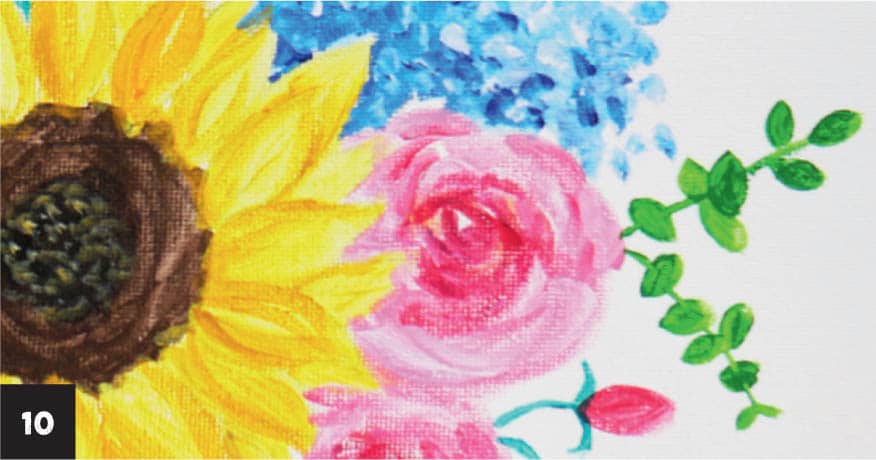
9 Paint eucalyptus leaves in yellow-green using the round brush. To create a couple of stems of these leaves, paint a row of several tiny oblong-shaped leaves, slightly opposite each other, and smaller than the buds in step 7.
10 Paint a thin green stem to connect the leaves. You can also paint two additional small leaves and connect the bottom of the leaves with the stem. Try using some of the simple leaves shown in this photo in your paintings.
11 The beauty of acrylics is that you can paint another flower layer even after you’ve painted the other components. As the final touch, paint an orange dot at the bottom left over the hydrangeas and another one between the two roses on the right. Using white acrylic paint and the round brush, create small, pointed petals surrounding the orange center to make small white flowers. This helps break up the blue of the hydrangea and the red of the roses, allowing the viewers’ eyes to explore each element of the flower cluster.FLORAL BOUQUET