
Chapter 13
Getting User Input with Message Boxes and Input Boxes
This chapter shows you how to start adding a user interface to recorded or written code in order to increase the power and functionality of your macros or applications.
You'll learn the three easiest ways of communicating with the user of your code, the two easiest ways of enabling the user to make decisions in a procedure, and the easiest way of soliciting input from the user. Along the way, you'll see how to decide what is the best way to communicate with the user in any given set of circumstances. This will set the scene for starting an examination of more complex interactions with the user via custom dialog boxes, later in the book.
In most Office applications, VBA offers you a choice of up to five ways of communicating with the user of a procedure:
- Displaying a message on the status bar at the bottom of the window (if the application provides a status bar). This is a bit limited, but it can be an effective way of communicating with the user. And it's not intrusive—users can easily ignore the status bar if they wish.
- Displaying a message box (usually in the middle of the screen). Message boxes are useful both for providing some information to users and for giving them the means to make a single choice based on the information you give them. You'll spend the bulk of this chapter working with message boxes.
- Displaying an input box (again, usually in the middle of the screen). You can use input boxes the same way you use message boxes—to communicate some information to users. But the primary purpose of an input box is input: to solicit one item of information from the user. Input boxes also provide users with the means of making a single choice to direct the flow of a procedure, although the mechanism for presenting this choice is much more limited than that in a message box. You'll look at input boxes toward the end of this chapter.
- Displaying a dialog box (once again, usually in the middle of a screen). You can use dialog boxes both to display information to the user and to let them make a variety of choices that are communicated back to your code. Dialog boxes are best reserved for those times when other forms of communication won't suffice; in other words, there's no point in using a dialog box when a simple message box or input box will do. You'll look at creating your own custom dialog boxes by using VBA user forms later in the book.
- Displaying an application's built-in dialog box, such as Word's FileOpen dialog box. This approach is explored in Chapter 14, “Creating Simple Custom Dialog Boxes.”
In this chapter you will learn to do the following:
- Display messages on the status bar
- Display message boxes
- Display input boxes
- Understand the limitations of message boxes and input boxes
Opening a Procedure to Work On
Make sure you're all set for editing in the Code window in the VBA Editor:
- Start the application for which you're creating code.
- Launch the Visual Basic Editor from the host application by pressing Alt+F11.
- Open a procedure for editing in the Code window: Use the Project Explorer to navigate to the module that holds the procedure, and then either scroll to the procedure in the Code window or choose it from the Procedures drop-down list in the Code window.
YOU CAN LOCATE PROCEDURES USING THE MACRO DIALOG BOX
Alternatively, in the VBA Editor, choose Tools ![]() Macros to display the Macros dialog box. Or to display this dialog box from an application such as Word, click the Developer tab on the Ribbon, then click the Macros icon. Once the Macros dialog box is open, you can select a procedure you've created from the Macro Name list box and click the Edit button to display the Visual Basic Editor with the procedure open in the Code window.
Macros to display the Macros dialog box. Or to display this dialog box from an application such as Word, click the Developer tab on the Ribbon, then click the Macros icon. Once the Macros dialog box is open, you can select a procedure you've created from the Macro Name list box and click the Edit button to display the Visual Basic Editor with the procedure open in the Code window.
If you've opened an existing procedure, test its code by using the F8 key to step through the statements or by clicking F5 (the Run Sub/UserForm) to run it without stepping. (You can also run it by typing the procedure's name into the Editor's Immediate window and pressing Enter.)
Nevertheless, it's probably best to work in a new procedure rather than in an existing one because that way you won't do any damage to a macro you may want to use in the future.
Create a new procedure in the Visual Basic Editor Code window by typing the Sub keyword, giving the procedure a name on a blank line in a module, and then pressing Enter. VBA adds the parentheses and End Sub statement. For example, you could type the following and press the Enter key:
Sub Experimentation_Zone
VBA adds the parentheses and End Sub statement, together with a separator line to separate the procedure from any adjacent procedures in the Code window:
Sub Experimentation_Zone()
End Sub
Displaying Status-Bar Messages in Word and Excel
Word and Excel let you display information on the status bar. This is often a convenient way to tell the user what's happening in a procedure without halting execution of the code (or, more important, without interrupting the user's work and requiring them to click a button to get rid of your message box).
By displaying status information on the status bar as the procedure works, you can indicate to the user not only what the procedure is doing, but also that it's still, in fact, running. Of course, the user might not notice the status bar. So if you are displaying crucial information, you must use a message box or one of the other types of boxes, like an input box. These force the user to pay attention; no further work can be done within the application until that box is dismissed.
HOW TO AVOID ALARMING THE USER
A problem you'll sometimes encounter is that the user thinks a procedure has frozen, crashed, gone into an infinite loop, or failed to work because no changes are visible onscreen, whereas in fact your procedure is working properly in the background. If you have a procedure that takes a long time to execute, updates on the status bar let the user see that the procedure is still working. To see example code that illustrates how to update the status bar, take a look at the sidebar entitled “i Is the Traditional Counter Variable Name for For…Next Loops” in Chapter 12, “Using Loops to Repeat Actions.”
But remember that the main disadvantage of displaying messages on the status bar is that users may miss them if they're not paying attention, if they've hidden the status bar, or if they're not expecting to see messages there.
HOW TO HIDE THE STATUS BAR
When I mentioned hiding the status bar in the previous paragraph, you might have launched an effort to do just that. You looked all over the Ribbon, paying particular attention to the View tab. Then you clicked the File tab to open the Options dialog box. But you didn't find a way, anywhere, to hide the status bar. Well, this is yet one more reason to learn VBA. As I've mentioned, you can do things with VBA that are not possible any other way. Here's the code that will hide the status bar:
Sub HideStatusBar()

      Application.CommandBars("Status Bar").Visible = True

End Sub
If an application uses the status bar extensively to give the user information (as Word and Excel do), this might not be a problem for attentive users. But if there's any doubt, notify the user that information will be displayed on the status bar. For example, you might display a message box at the beginning of a procedure to tell the user to watch the status bar for updates.
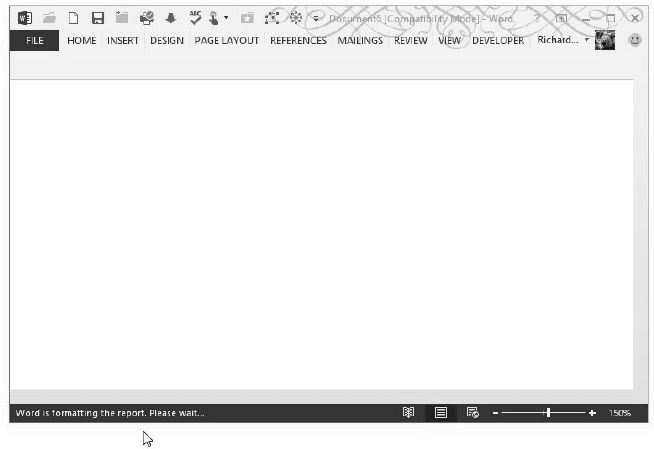
To display a message on the status bar in Word or Excel, you set the StatusBar property of the Application object to an appropriate string of text. The following example displays the status-bar information shown in Figure 13.1:
Application.StatusBar = "Word is formatting the report. Please wait…"
FIGURE 13.1 In some applications, you can display information on the status bar.
Typically, any information you display on the status bar remains displayed there until you change it, until the user clicks something, or until the application displays a message there itself.
For example, if you display a message on the status bar and then invoke the Copy command in Excel, Excel displays its normal Copy message, “Select destination and press ENTER or choose Paste,” on the status bar, wiping out your message. Application messages trump user-created messages.
If you display a message on the status bar in the course of a procedure, you should update it later in the procedure to avoid leaving a now-obsolete and potentially misleading message on the status bar after the procedure has finished running. For example, you might display another message saying that the procedure has finished or clear the status bar by displaying a blank string on it.
To clear the status bar, assign an empty string to it, as in the following statement:
Application.StatusBar = ""
To see the effect of this statement, run it from the Visual Basic Editor (click the upper-right corner to ensure that the Editor window isn't maximized) with the Word or Excel window (or at least its status bar) visible at the same time. You'll see the effect best if you run a statement that displays information on the status bar (such as Application.StatusBar = "Hello, World !") first so that the status bar has information for the Application.StatusBar = "" statement to clear:
Application.StatusBar = "Hello, World!"
Application.StatusBar = ""
PROGRESS INDICATORS CAN BE WRITTEN VARIOUS WAYS
It's especially helpful to display a progress indicator on the status bar during longer processes so that the user can tell that they're still running and that they're making progress. Progress indication is usually coded within a loop block. For example, you might display a readout of the progress, such as “Excel is working on sheet 9 out of 150.” Even more simply, adding increasing numbers of periods to the end of the status message gives an indication of progress, although it doesn't give an idea of how much longer the task will take. Here's how you can add periods to a string:
strPeriod = strPeriod & "."
Message Boxes
Another way to display information to the user is the message box; you've probably seen examples of it in almost every Windows application you've used. Message boxes are simple and limited, but they play an important role.
Here are some typical uses of message boxes:
- Telling users what a procedure is about to do (and giving them the chance to exit the procedure if it isn't what they thought it was).
- Presenting users with an explanation of what a procedure will do next and asking them to make a simple decision (usually, to let it proceed or to send it on a different course).
- Warning users of an error that the procedure encountered and allowing them to take action on it.
- Informing users that a procedure ran successfully and that it has finished. This message is particularly useful for procedures that turn off screen updating or otherwise hide from users what they are doing. Such procedures may leave users unsure of whether they are still running or have finished. You can also use the message box to report what a procedure has done—for example, that it changed particular items, made a certain number of changes, or discovered problems in the document that require attention.
This chapter shows you how to create a message box suitable for each of these tasks. In later chapters, you'll create specific message boxes to enhance various procedures.
The Pros and Cons of Message Boxes
These are the advantages of using a message box:
- Users can't miss seeing the message box. Users are prevented from continuing to use the application until they close the message box. (If you want, you can even display a message box that the user can't escape by pressing Alt+Tab to switch to another application. You'll look at this a little later in the chapter.)
- You can present the user with a simple choice among two or three options.
These are the disadvantages of using a message box:
- A message box can present only one, two, or three buttons, which means it can offer only a limited set of options to the user.
- The buttons in message boxes are predefined in sets—you can't put a custom button in a message box. (For that, you have to use a dialog box.)
- You can't use features such as text boxes, group boxes, or list boxes within message boxes.
Message-Box Syntax
The basic syntax for message boxes is as follows:
MsgBox(prompt[, buttons] [, title][, helpfile, context])
Here's what the elements of this syntax mean:
MsgBox The function that VBA uses to display a message box. You typically use it with a number of arguments enclosed in parentheses after it.
prompt A required argument for the MsgBox function that specifies what text is displayed in the message box. prompt is a String argument, meaning you need to type in the text of your choice; it can be up to 1,023 characters long, although it's usually a good idea to be more concise than this. (Any prompt longer than 1,023 characters is truncated to 1,023 characters without warning.)
buttons An optional argument that controls the type of message box that VBA displays by specifying which buttons it contains. For example, as you'll see in a couple of pages, you can display a message box with just an OK button; with OK and Cancel buttons; with Abort, Retry, and Ignore buttons; and so on. You can also add arguments to the buttons argument that control the icon in the message box and the modality of the message box. You'll also look at these options later in this chapter.
title An optional argument that controls the title bar of the message box. This too is a String argument. If you don't specify title, VBA uses the application's title—Microsoft Word for Word, Microsoft Excel for Excel, Microsoft PowerPoint for PowerPoint, and so on. Usually, it's best to specify the title because the application name on its own isn't helpful (unless the user has become confused as to which application is running the procedure).
helpfile An optional argument that controls which Help file VBA displays when the user presses F1 within the message box to get help (or clicks the Help button in a message box that contains a Help button).
context An optional argument that controls which topic in the Help file VBA jumps to. If you specify the helpfile argument, you must specify the context argument as well.
In the following sections, you'll first look at how you can build the simplest of message boxes and then explore how to add arguments to it to make it more complex.
Displaying a Simple Message Box
You can display the simplest message box by specifying only the prompt as a text string enclosed in double quotation marks:
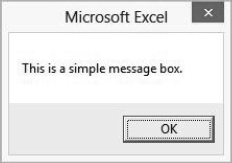
MsgBox "This is a simple message box."
Run from Excel, this statement produces the simple message box shown in Figure 13.2. With prompt as the only argument supplied, VBA produces a message box with only an OK button and with the application's name in the title bar. This message box does nothing except display information.
FIGURE 13.2 When you use only the prompt argument to display a simple message box, VBA uses the application's name as the title.
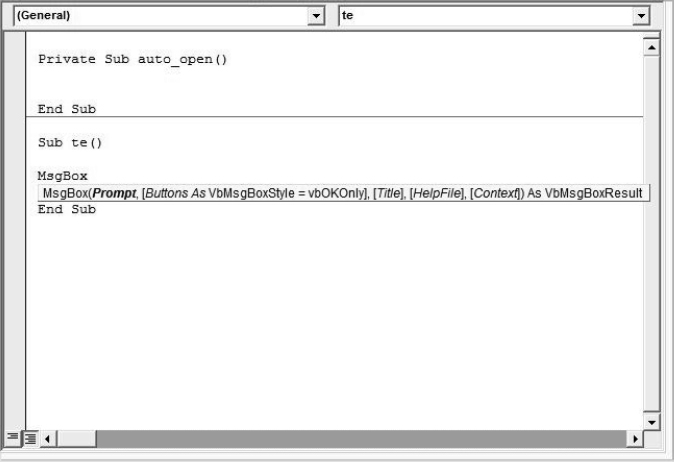
You can enter this MsgBox statement on any blank line within a procedure. After you type the MsgBox keyword, VBA's Auto Quick Info feature prompts you with the syntax of the function, as shown in Figure 13.3.
FIGURE 13.3 VBA's Auto Quick Info feature prompts you with the syntax for the message box.
Once you've entered the MsgBox statement with its required argument (prompt), you can display the message box by stepping through the code (by pressing the F8 key or clicking the Step Into button on the editor's Debug toolbar) or by running the procedure (by pressing the F5 key, by clicking the Run Sub/UserForm button, or by choosing Run ![]() Run Sub/UserForm).
Run Sub/UserForm).
Instead of entering a literal text string for the prompt argument, you can use a String variable. The following example uses a String variable named strMsg:
Dim strMsg As String
strMsg = "This is a simple message box."
MsgBox strMsg
This approach can be useful when you're working with long strings (you can build a big string by concatenating several shorter strings with the & operator). Using a variable is also useful when you need to display a string that has been defined earlier in the procedure or a string dynamically created by the procedure (for example, after having gotten the user's name via an input box).
Displaying a Multiline Message Box
By default, VBA displays short message strings as a single line in a message box and wraps longer strings onto two or more lines as necessary, up to the limit of 1,024 characters in a string.
You can deliberately break a string into more than one line by including line-feed and carriage-return characters in the string as follows:
- Chr(13) or vbCr represents a carriage return.
- Chr(10) or vbLf represents a line feed.
- Chr(10) + Chr(13) or vbCrLf represents a line-feed/carriage-return combination.
In message boxes, these three characters all have the same effect—moving down one line. Your code is easier to read if you use a built-in constant (vbCr, vbLf, or vbCrLf) rather than the corresponding Chr() construction; it's also quicker to type. Usually, it's clearest to use the vbCr constant.
You can add a tab to a string by using Chr(9) or vbTab. Again, vbTab is easier to read and to type.
The following code displays the Word message box shown in Figure 13.4. Note that each part of the text string is enclosed in double quotation marks (to tell VBA that they're part of the string). The Chr(149) characters are bullets, so the text after them starts with a couple of spaces to give the bullets some room:
Dim strMsg As String

strMsg = "Word has finished formatting the report you requested." _
    & vbCr & vbCr & "You can now run the following procedures:" & vbCr _
    & vbCr & Chr(149) & " Distribute_Report will email the report to " _
    & "the head office." & vbCr & vbCr & Chr(149) & _
    " Store_Report will copy the report to the holding directory." _
    & vbCr & vbCr & Chr(149) & " Backup_Report will create a backup " _
    & "of the report on the file server."
MsgBox strMsg
FIGURE 13.4 You can display a multiline message box by using linefeed and carriage-return characters within the prompt string.

VBA AUTOMATICALLY HELPS YOU PUNCTUATE YOUR CODE
You'll notice that in this example, a space appears on either side of each of the ampersands (&) and the equal sign. You can enter these spaces yourself or have VBA enter them for you when you move the insertion point to another line by pressing Enter or clicking the mouse. (Moving the insertion point to another line causes VBA to check the line you've just been working on and make various automatic changes if necessary. For example, some characters may be capitalized, or if you typed EndIf, VBA will make it two words as it's supposed to be.)
Choosing Buttons for a Message Box
The buttons argument controls which buttons a message box contains. VBA offers the types of message boxes shown in Table 13.1, controlled by the buttons argument.

You can specify these message-box types in your code by using either the numeric value or the constant. For example, you can specify either 1 or vbOKCancel to produce a message box with OK and Cancel buttons. The value is easier to type; the constant is easier to read. Either of the following statements produces the message box shown in Figure 13.5 when run from PowerPoint:
Dim lngR As Long
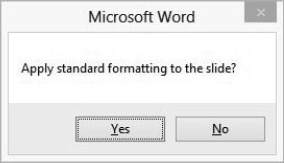
lngR = MsgBox("Apply standard formatting to the slide?", vbYesNo)
lngR = MsgBox("Apply standard formatting to the slide?", 4)
FIGURE 13.5 The vbYesNo constant produces a message box with Yes and No buttons.
From VBA's point of view, it doesn't matter whether you use values or constants in the message boxes for your procedures. For the human, though, the text constants are far preferable. Even if you're the only person who ever sees your code, the code is much easier to read if you use the constants.
Choosing an Icon for a Message Box
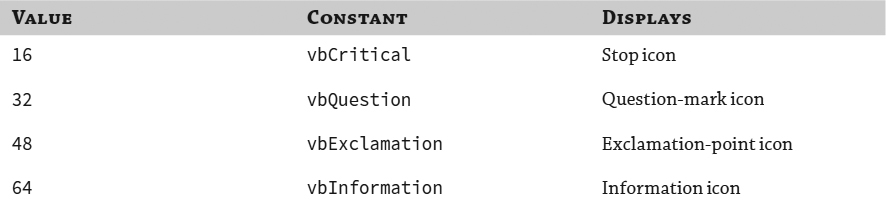
You can also add an icon to a message box by including the appropriate value or constant argument. Table 13.2 shows the options.
Again, you can refer to these icons by using either the value or the constant: Either 48 or vbExclamation will produce an exclamation-point icon. Again, the constant is much easier to read.
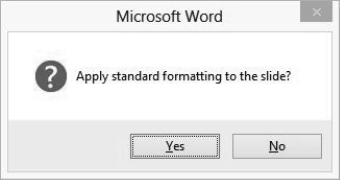
To link the value or constant for the message box with the value or constant for the icon, use a plus sign (+). For example, to produce a message box containing Yes and No buttons together with a question-mark icon (see Figure 13.6), you could enter vbYesNo + vbQuestion (or 4 + 32, vbYesNo + 32, or 4 + vbQuestion):
lngR = MsgBox("Apply standard formatting to the slide?", _
    vbYesNo + vbQuestion)
FIGURE 13.6 Adding an icon gives a message box greater visual impact.
Setting a Default Button for a Message Box
As usual in the Windows interface, the user is cued to a default button in a message box. It's the one with a blue border around its outside and a dotted line around its text area. (See the Yes button in Figure 13.6.) The user can move the selection to another button by using Tab or Shift+Tab or the →, ←, ↑, or ↓ key.
However, you can specify in your code which button you want to be the default.
 Real World Scenario
THE PRACTICAL USE OF DEFAULT BUTTONS
You can set a default button for a message box by specifying a particular button in the MsgBox statement. Specifying a default button can be a wise move when you give procedures that take drastic action to users who may be unfamiliar with what's going to happen. (The user might accidentally hit the Enter key or click the highlighted button—the default button.)
For example, consider a procedure that deletes the current document without the user having to close it and then switches to a file-management program (such as Windows Explorer) or messes around in one of the common dialog boxes (such as the Open or the Save dialog box). Common dialog boxes are demonstrated in the Real World Scenario sidebar titled “Control a For…Next Loop with User Input via a Dialog Box” in Chapter 12.
Because such procedures can destroy someone's work if they run it inadvertently, you'd probably want to set a default button of No or Cancel in a confirmation message box so that the user has to actively choose to run the rest of the procedure. The message box halts execution, allows the user to agree or disagree with the action, and then carries out the user's wishes based on which button is clicked in the message box.
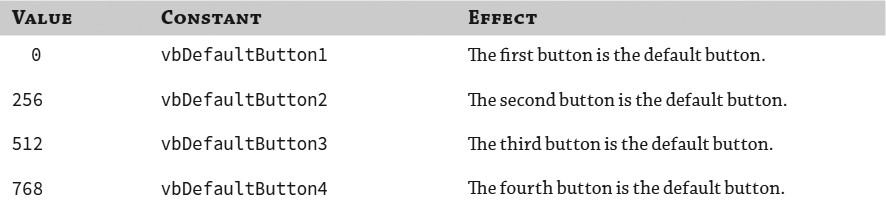
Why does VBA include a default button at all? This makes it easy for the user to choose the ordinary VBA default button (captioned Yes or OK) by simply pressing Enter. Having the appropriate default button on a message box or dialog box can help the user deal with the message box or dialog box more quickly. But you as the programmer should decide if there is a different, more appropriate, default button. VBA automatically sets the first button in a message box to be the default button. But there are times that you will want to specify that the default button be a different button than the first. If you are doing something potentially dangerous in a macro—such as deleting the current document without saving it—it would be a good idea to make the second button (the No button) the default. This way, if the user simply presses Enter, nothing happens; the macro exits without deletion. Using this technique, you force the user to make a deliberate decision to move the mouse and click the Yes button. Table 13.3 shows you how to adjust which button is the default by using various built-in constants. And the short code example that ends the section demonstrates this technique.
Table 13.3 lists the arguments for default buttons.
All the message boxes mentioned so far have only one, two, or three buttons, but you can add a Help button to any of the message boxes, making for a fourth button on those boxes that already have three buttons (such as vbYesNoCancel). You'll see how to add the Help button in the section “Adding a Help Button to a Message Box” later in this chapter.
In VBA, unless you specify otherwise, the first button on each of the message boxes is automatically the default button: for example, the OK button in a vbOKCancel message box, the Abort button in a vbAbortRetryIgnore message box, the Yes button in a vbYesNoCancel message box, the Yes button in a vbYesNo message box, and the Retry button in a vbRetryCancel message box. VBA counts the buttons in the order they're presented in the constant for the type of message box (which in turn is the left-to-right order in which they appear in the message box onscreen). So in a vbYesNoCancel message box, Yes is the first button, No is the second button, and Cancel is the third button.
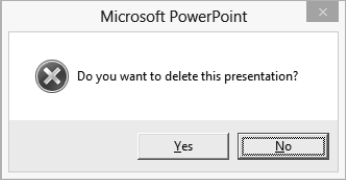
To make a different button the default, specify the value or constant as part of the buttons argument. When run in PowerPoint, this statement produces the message box shown in Figure 13.7:
Dim lngQuery As Long
lngQuery = MsgBox("Do you want to delete this presentation?", _
    vbYesNo + vbCritical + vbDefaultButton2)
FIGURE 13.7 Specify a default button to steer the user toward a particular button in a message box.
Controlling the Modality of a Message Box
VBA can display both application-modal message boxes and system-modal message boxes—at least in theory. Application-modal message boxes stop you from doing anything in the current application until you dismiss them, whereas system-modal message boxes stop you from doing anything on your entire computer until you dismiss them.
Most message boxes are application modal, allowing the user to switch to another application by pressing Alt+Tab (or switching via the Taskbar). The user can then work in the other application even though they haven't gotten rid of the message box. This gives them freedom and flexibility. In contrast, some message boxes (most often used during an installation process) are system modal, insisting that users concentrate their attention on them and them alone. Windows's critical system errors and “you must restart your computer now” messages are system modal to prevent you from avoiding them.
You probably know from your own experience how frustrating system-modal message boxes can be. So when designing procedures, use system-modal message boxes only when absolutely necessary—for example, when an action might result in data loss or system instability. For most conventional purposes, application-modal message boxes will do everything you need them to—and won't confuse or vex your users.
In theory, you can control the modality of a message box by using the two buttons arguments shown in Table 13.4.

In practice, even if you use the vbSystemModal argument, the user can switch to another application (provided that one is running) and continue working. However, the message box does stay “on top,” remaining displayed—enough to annoy users but not totally prevent them from accessing another application.
By default, message boxes are application modal, so you need to specify modality only on those rare occasions when you need a system-modal message box. When you do, add the vbSystemModal constant or 4096 value to the buttons argument:
Response = MsgBox("Do you want to delete this document?", _
    vbYesNo + vbCritical + vbDefaultButton2 + vbSystemModal)
Please note that system-modal message boxes look the same as application-modal message boxes.
Specifying a Title for a Message Box
The next component of the message box is its title bar, which is controlled by the optional title argument. If you omit title, VBA displays the application's name as the title, but users of your procedures will benefit from your providing a more helpful title.
title is a string expression and can be up to 1,024 characters in length, in theory (longer strings are truncated with no warning or error message), but in practice, any title longer than about 75 characters gets truncated with an ellipsis. If you want people to read the title bars of your message boxes, 25 characters or so is a reasonable maximum.
Title Bars Can Provide Useful Information
The title bar is usually the first part of a message box that the user notices, so make your title bars as helpful as possible. Conventional etiquette is to put the name of the procedure in the title bar of a message box and then use the prompt argument to explain what actions the buttons in the message box will trigger.
In addition, if you expect to revise your procedures, you may find it helpful to include their version number in the title so that users can easily check which version of the procedure they're using (and update to a more current version as appropriate). For instance, the Delete Workbook procedure is identified as version 12.39 in the message box shown in Figure 13.8.
FIGURE 13.8 Usually, you'll want to specify the title argument for your message boxes. You may also want to include a version number.
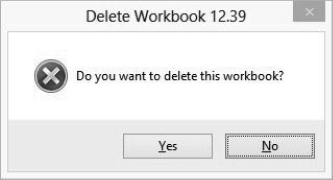
Specify the title argument after the buttons argument like this:
Dim lngQuery As Long
lngQuery = MsgBox("Do you want to delete this workbook?", vbYesNo _
    + vbCritical + vbDefaultButton2, "Delete Workbook 12.39")
You can use a string variable as the title argument. For example, you could declare a single string variable and use it to supply the title for each message box that a procedure calls. Or you might need to display in the title of the message box a string created or stored in the procedure.
AVOID USING SPECIAL CHARACTERS IN TITLES
Don't try putting line-feed, carriage-return, or tab characters in the title argument. VBA just ignores them.
Adding a Help Button to a Message Box
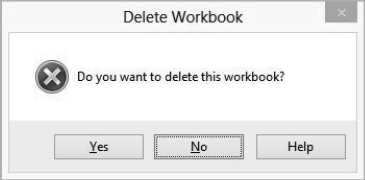
To add a Help button to a message box, use the vbMsgBoxHelpButton constant. You add this argument to whichever buttons you're specifying for the message box:
lngQuery = MsgBox("Do you want to delete this workbook?", vbYesNo _
    + vbCritical + vbDefaultButton2 + vbMsgBoxHelpButton, _
    "Delete Workbook")
Adding the vbMsgBoxHelpButton argument simply places the Help button in the message box—it doesn't make the Help button display a Help file until you specify which Help file and topic it should use (see the next section for details). Figure 13.9 shows the message box that this statement produces.
FIGURE 13.9 Use the vbMsgBoxHelpButton constant to add a Help button to a message box.
Specifying a Help File for a Message Box
The final arguments you can use for a message box are the helpfile and context arguments:
- The helpfile argument is a string argument specifying the name and location of the Help file that VBA displays when the user summons help from the message box.
- The context argument is a Help context number within the Help file. The Help context number controls which Help-file topic is displayed.
The helpfile and context arguments are primarily useful if you're writing your own Help files, because otherwise it's difficult to access the Help context numbers, which are buried in the official Help files.
If you're writing your own Help files, the syntax for specifying the helpfile and context arguments is simple:
Dim lngQuery As Long
lngQuery = MsgBox("Do you want to delete this workbook?", vbYesNo _
    + vbCritical + vbDefaultButton2 + vbMsgBoxHelpButton, _
    "Delete Workbook", "c:WindowsHelpMy_Help.chm", 1012)
In this case, the Help file is specified as My_Help.chm in the WindowsHelp folder. VBA displays the Help topic numbered 1012.
When the user clicks the Help button in the message box, VBA displays the specified topic in the Help file. The message box stays onscreen so that when users have finished consulting the Help file, they can make their choice in the message box.
The Help context number for the opening screen of a Help file is 0. Use 0 when you need to display a Help file for which you don't know the Help context number. Users must then locate the information they need on their own.
THREE UNUSUAL CONSTANTS FOR SPECIAL EFFECTS
VBA provides three special constants for use with message boxes. You probably won't need to use these often, but if you do, they'll come in handy. Specify them as the first argument in the buttons arguments:
vbMsgBoxSetForeground Tells VBA to make the message box the foreground window. You shouldn't need to use this constant often, because message boxes are displayed in the foreground by default (so that you can see them).
vbMsgBoxRight Tells VBA to right-align the text in the message box.
vbMsgBoxRtlReading Tells VBA to arrange the text from right to left on Hebrew and Arabic systems. It has no effect on non-BiDi (bidirectional) systems.
Using Some Arguments without Others
When displaying a message box, you can either specify or omit optional arguments. If you want to specify arguments later in the argument list without specifying the ones before them, use a comma to indicate each unused optional argument. (This technique can be used with any argument list.) For example, if you wanted to display the message box shown in the previous example without specifying buttons and title arguments, you could use the following statement:
Response = MsgBox("Do you want to format the report?",,, _
    "c:WindowsHelpProcedure Help.chm", 1012
Here, the triple comma indicates that the buttons and title arguments are omitted (which will cause VBA to display defaults—a vbOKOnly message box with a title bar containing the application's name), preventing VBA from confusing the helpfile argument with the buttons argument. Alternatively, you could use named arguments, which makes for less-concise but easier-to-read code:
Response = MsgBox("Do you want to format the report?", _
    HelpFile:="c:WindowsHelpProcedure Help.chm", Context:=1012)
Retrieving a Value from a Message Box
If you display a vbOKOnly message box, you know which button the user clicks because the message box contains only an OK button. But when you use one of the other message-box styles, which can have two, three, or four buttons, you must retrieve a value that tells you which button the user clicked. You can then branch execution to respond appropriately to the user's choice.
To retrieve a value from a message box, declare a variable for it. You can do so quite simply by telling VBA that the variable name is equal to the message box (so to speak), like this:
Dim lngResponse As Long
lngResponse = MsgBox("Do you want to create the daily report?", _
    vbYesNo + vbQuestion, "Create Daily Report")
You first declare a variable of the appropriate type (a Long variable) to contain the user's choice, as in the examples throughout this chapter:
When you run the code, VBA stores which button the user clicked as a value in the variable. You can then check the value and take action accordingly.
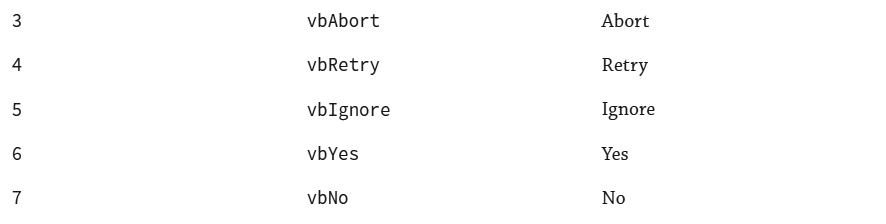
Table 13.5 shows the full list of buttons the user may choose. You can refer to the buttons by either the constant name or the value number. As usual, the constant is easier to read than the value.

For example, to check a vbYesNo message box to see which button the user chose, you can use a straightforward If… Then… Else statement:
Dim lngUserChoice As Long
lngUserChoice = MsgBox("Do you want to create the daily report?", _
    vbYesNo + vbQuestion, "Create Daily Report")
If lngUserChoice = vbYes Then
    Goto CreateDailyReport
Else
    Goto Bye
EndIf
Here, if the user chooses the Yes button, VBA goes to the line of code identified by the CreateDailyReport label and continues running the procedure from there; if not, it terminates the procedure by going to the Bye label at the end. The If condition checks the response generated by the choice the user made in the message box to see if it's a vbYes (generated by clicking the Yes button or pressing Enter with the Yes button selected). The Else statement runs if the response was not vbYes—that is, if the user clicked the No button or pressed Esc.
Input Boxes
Message boxes tell VBA which button the user clicked. But sometimes you want the user to supply your macro with some text, such as their name or birthday.
When you want to retrieve one simple piece of text information from the user, use an input box. You'll be familiar with input boxes by sight if not by name: they usually look something like the example shown in Figure 13.10.
FIGURE 13.10 Use an input box to retrieve a single piece of information from the user.

CREATE CUSTOM BOXES FOR COMPLEX INTERACTION
To retrieve two or more pieces of information from the user, you could use two or more input boxes in succession, but it's usually easier for the user if you create a custom dialog box. You'll start building custom dialog boxes in Chapter 14.
Input-Box Syntax
The syntax for displaying an input box is straightforward and similar to the syntax for a message box:
InputBox(prompt[, title] [, default] [, xpos] [, ypos] [, helpfile, context])
Here's what the arguments mean:
prompt A required string that specifies the prompt that appears in the input box. As with MsgBox, prompt can be up to about 1,024 characters long, and you can use the carriage-return constant (vbCr) to force separate lines. Like the MsgBox prompt argument, the InputBox prompt automatically wraps if the prompt is longer than about 35 characters.
title A string that specifies the text in the title bar of the input box. If you don't specify a title argument, VBA supplies the application's name.
default A string that you can use to specify text that will appear in the text box. Entering a default argument can be a good idea both for cases when the default text is likely to be suitable (so the user can just press Enter to accept that default) or when you need to display sample text so that the user can understand what type of response you're looking for.
Here's an example of suitable default text to cue the user: if you display an input box asking for the user's name, you could enter the Name value by fetching it from the BuiltInDocumentProperties collection of the ActiveDocument object, like this:
Dim strAuthor As String
  strAuthor = _
  ActiveDocument.BuiltInDocumentProperties(wdPropertyLastAuthor)
xpos and ypos These are optional numeric values for specifying the onscreen position of the input box. xpos governs the horizontal position of the left edge of the input box from the left edge of the screen (not of the Word window), whereas ypos governs the vertical position of the top edge of the input box from the top of the screen. Each measurement is in twips, described in the sidebar “Input Boxes Are Usually Best Displayed in the Center of the Screen” in this chapter. If you omit these two arguments, VBA displays the input box at the default position of halfway across the screen and one-third of the way down it.
helpfile and context Optional arguments for specifying the Help file and context in the Help file to jump to if the user summons help from the input box. If you use helpfile, you must also use context.
INPUT BOXES ARE USUALLY BEST DISPLAYED IN THE CENTER OF THE SCREEN
A twip is 1/1440 inch. An average computer screen uses 96 dots per inch (dpi), so there are 15 twips per pixel, and a computer screen at 1024 × 768 resolution is 15,360 × 11,520 twips. If you need to position your input boxes and dialog boxes precisely, experiment with twips at different screen resolutions until you achieve satisfactory results. Generally, it's most effective to display an input box in the default center position. Your users are likely to have a variety of screen resolutions.
You can omit any of the optional arguments for an input box. But if you want to use another argument later in the syntax sequence, remember that you need to indicate the omission with a spacer comma (or use named arguments as described earlier in this chapter).
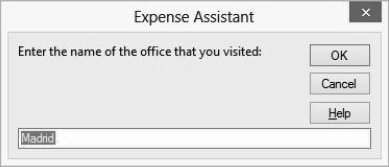
Unlike message boxes, input boxes come with a predefined set of buttons—OK and Cancel, plus a Help button if you specify the helpfile and context arguments—so there's no need to specify the main buttons for an input box. The following example declares the String variable strWhichOffice and assigns to it the result of the input box shown in Figure 13.11:
Dim strWhichOffice As String
strWhichOffice = InputBox( _
    "Enter the name of the office that you visited:", _
    "Expense Assistant", "Madrid", , , _
    "c:WindowsHelpProcedure Help.chm", 0)
FIGURE 13.11 The input box comes with a predefined set of buttons.
Retrieving Input from an Input Box
To retrieve the user's input from an input box, declare the numeric variable or String variable that will contain it. Here, the variable strWhichOffice will contain what the user types into the input box:
Dim strWhichOffice
strWhichOffice = _
    InputBox("Enter the name of the office that you visited:", _
    "Expense Assistant 2000", "Madrid", , , _
    "c:WindowsHelpProcedure Help.chm", 0)
Once the user has entered a value or a string and clicked the OK button, your code can then use the returned value as usual in VBA. To make sure the user has clicked the OK button, check that the input box hasn't returned a zero-length string (which it also returns if the user chooses the OK button with the text box empty), and take action accordingly:
strWhichOffice = InputBox _
    ("Enter the name of the office that you visited:", _
    "Expense Assistant 2000", "Madrid", , , _
    "c:WindowsHelpProcedure Help.chm", 0)
If strWhichOffice = "" Then End
Forms: When Message Boxes and Input Boxes Won't Suffice
As you've seen in this chapter, a message box can greatly enhance a procedure by enabling the user to make a choice at a turning point or by presenting the user with important information. But once you've used message boxes for a while, you're apt to start noticing their shortcomings:
- You can present only a limited amount of information, and you're constrained in the way you can display it (to whatever layout you can conjure up with new paragraphs, line breaks, tabs, and spaces).
- You can use only seven sets of buttons, which limits the amount of information that a user can return to your code via message boxes.
While you can get creative and enter complex messages in message boxes to make the most use of the buttons they offer, you'll usually do better to just create a custom dialog box instead. As you'll see in Chapters 14 and 15, custom dialog boxes are relatively simple to create, and they are more powerful and flexible than message boxes.
You'll also want to avoid writing procedures that present the user with a number of choices via a sequence of message boxes. Similarly, input boxes are useful for retrieving a single piece of information from the user, but beyond that, their limitations quickly become apparent too. If you find yourself planning to use two or more input boxes in immediate succession, create a custom dialog box instead. That way you display a single form for the user to fill in all the needed information, instead of several boxes. You'll see how to create forms in Chapter 14.
The Bottom Line
Display messages on the status bar. The information bar at the bottom of the window in many applications is a useful, unobtrusive way of communicating with the user. The status bar is frequently used by applications to indicate the current page, zoom level, active view (such as datasheet in Access), word count, and so on. However, you, too, can display information on the bar.
Master It Write a small sub in the Visual Basic Editor that displays the current date and time in the status bar.
Display message boxes. Message boxes are commonly used to inform or warn the user. By default, they appear in the middle of the screen and prevent the user from interacting with the host application until a button on the message box is clicked, thereby closing it.
Master It Write a small sub in the Visual Basic Editor that displays the current date and time using a message box.
Display input boxes. An input box is similar to a message box, except the former can get more information from the user. An input box allows the user to type in a string, which is more data than the simple information provided by which button the user clicked in a message box.
Master It Write a small sub in the Visual Basic Editor that asks users to type in their name. Use the InStr function to see if there are any space characters in the returned string. If not, it means either they are Madonna or they have typed in only one name—so display a second input box telling them to provide both their first and last names.
Understand the limitations of message boxes and input boxes. For even moderately complex interaction with the user, message and input boxes are often too limited. They return to the VBA code, for example, only a single user response: a button click or a single piece of text. So you can't conveniently use an input box to ask for multiple data—such as an address and a phone number—without displaying multiple input boxes. That's ugly and disruptive.
Master It In addition to the limitations on the amount of information you can retrieve from the user, what are the two other major limitations of message boxes and input boxes?