

THE FOLLOWING COMPTIA IT FUNDAMENTALS EXAM OBJECTIVES ARE COVERED IN THIS CHAPTER:
- 1.4 Identify the following alternative technologies and their purpose
- Gesture-based interaction
- Swiping
- Pinch-to-zoom
- Kinetics
- Gesture-based interaction
- 1.5 Explain the basic software features and functions of wireless devices
- Unlocking/security
- Bluetooth pairing
- Hands free
- Data transfer
- Wireless connection setup
- Verify wireless capabilities
- Turn on WiFi
- Locate SSID
- Enter wireless password (if applicable)
- Verify internet connection
- Email configuration
- POP3
- IMAP
- SMTP
- Screen orientation
- Synchronization configuration
- Airplane mode
- Stores for mobile applications
 As technology evolves, the natural progression is for it to get smaller, faster, and cheaper. As those three happen, manufacturers start bundling technologies together that previously resided on separate devices, such as a telephone and GPS. For evidence of all of those factors coming together, you need to look no further than mobile computing.
You can be pretty certain that the inventors of ENIAC or any other early computer would be absolutely astonished by the capability of the smartphones in the market today, ones that are easily several thousands of times more powerful than the room-sized behemoths of their day. And in another 40 or 50 years, who knows what types of devices will exist? The youth of that generation may look back on our smartphones as quaint curiosities, much like the youth of today look at black-and-white televisions or cassette tapes.
The popularity of mobile devices today is unquestioned, as mobile operating systems greatly outpace workstation operating system sales. And why wouldn't they? Today you can get a hand-held device that lets you surf the Internet, take pictures, play music and movies, and stay in touch with your friends. With that kind of functionality there is almost no need to be tied down to a desk, except for perhaps when you want a bigger screen or a real keyboard to do some work.
Earlier I mentioned that technology gets smaller as it progresses, which is true. For example, in the last 20 years or so, cell phone and laptop manufacturers have been in an arms race to miniaturize, in part to show how advanced their technology was. In the last few years though, there has been an interesting trend in actually making some devices bigger. For example, smartphone commercials tout having bigger screens as a reason to buy a particular model. Because of this, you are seeing an increased blurring of the lines between devices. Some phones are big enough now that you might wonder if they're tablets. And many tablets can make phone calls, so what's the difference between them and a phone anyway? This chapter covers the mobile devices that have shot to the top of sales charts and the front of our consciousness, specifically smartphones and tablet computers.
Using Wireless Devices
Even if you are a holdout who doesn't own a smartphone or a tablet, odds are that you know someone who has one. Or maybe you know several people who own them, and they give you grief for not being part of the twenty-first century. Regardless of whether you own one or not, you need to understand how they work and how to set one up to get proper functionality.
The CompTIA IT Fundamentals exam objectives say wireless devices; I will use the term mobile devices interchangeably with wireless throughout this chapter.
To understand how mobile devices work, you need to know a bit about hardware, operating systems, and networking, because they all come together in a small package. Those topics have already been covered in earlier chapters. Here, the focus is on two areas: specific usability features of mobile devices and setting up a wireless device for network and email.
Wireless Usability Options
With this new generation of devices came new ways of interacting with personal electronics. Their small size necessitated new ways, because traditional input devices such as the keyboard and mouse were far too large. The touchscreen and onscreen keyboard became the new tools for working with your device.
For the examples in this chapter, I am going to use iOS 8 on an iPhone as well as Android as you would see it on a tablet computer. Before getting into the specifics of wireless usability options, familiarize yourself with the home screen for the operating system. Figure 7.1 shows you a home screen in iOS 8 and Figure 7.2 shows you an Android home screen.

FIGURE 7.2 Android home screen
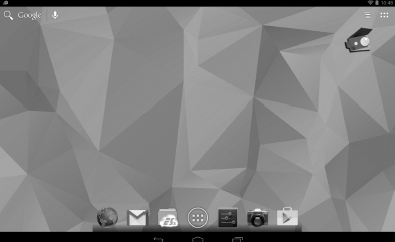

The Android screen shots you will see in this chapter are coming from Andy the Android emulator. This free emulator works on PCs and Macs, and you can find it at www.andyroid.net.
With iOS, the home screen contains several apps, and the one you will use to set most configuration options will be Settings. In Android, you can get to settings by tapping the Settings icon—it's the fifth one from the left on the bottom, the one that looks like it has slider bars on it. (From left to right, the icons are Chrome browser, Email, ES file explorer, Apps, Settings, Camera, and Play Store.)
Interacting with Mobile Devices
When most users first experience a mobile device, there is a lot of uncertainty. There are no keyboard and no mouse. How do you possibly interact with this thing? If you have an iPhone, there's only one button on the front (called the Home button). Android devices have three or four buttons. New users need to get used to the functionality of a touch screen in a hurry.
Mobile devices are built around a concept called gesture-based interaction, whereby users use their fingers and various movements to interact with their touch screen. The good news is the device doesn't require complicated interpretive dance patterns to work, although it has sensors built in that could detect your dance movements if you wanted it to. The three gestures you need to know are tap, swipe, and pinch, and there is a fourth closely related concept called kinetics.
Tap A tap of the finger is all it takes to get a lot done on a mobile device. It's a bit like clicking on a Mac or double-clicking on a PC. Tapping an icon will open that app. In this manner, your finger acts a lot like the mouse pointer does on a PC.
Swipe To swipe, you press your finger to the screen and then brush it in a direction. It's almost like the gesture of turning a page in a book. You will use this to move pages or scroll up or down. Swiping your finger up will scroll the page down, for example.
Pinch By placing two fingers apart and then pinching them together (while touching the screen, of course), you can zoom out. Placing two fingers together and then slowly spreading them apart will zoom in. (It's kind of a reverse pinch.) This feature doesn't work in all apps, but is particularly helpful when looking at maps.
Kinetics Kinetics refers to the sense of motion. iPhones and other devices have an amazing array of kinetic sensors built in. For example, the iPhone 6 has a gyroscope, accelerometer, linear acceleration sensor, magnetometer, altitude sensor, and gravity sensor. These sensors let your device act like a GPS and compass, and they also detect movements such as tilting or shaking the device that many apps take advantage of.
Screen Orientation
One of the nice features of the gyroscope is that it can change the screen orientation from portrait to landscape depending on how you hold your device. This can be particularly helpful when using the onscreen keyboard to type. If you look at Figure 7.3, you'll see that it shows a new email in the Mail app in portrait mode.

By keeping the screen facing you and rotating the device 90 degrees to the left or right, the phone automatically detects the rotation and switches to landscape mode, as shown in Figure 7.4.

The keys on the virtual keyboard are now a little larger, potentially making it easier to type. Some games also work better in landscape mode. Not all apps are built to use the gyroscope, so you won't get the rotation with everything.
Mobile Locking and Security
One final feature of interacting with mobile devices that new users need to get used to is security. Mobile devices are much easier to steal than desktop computers, so it's important to secure the device. When you try to access the device, you will get a screen similar to the one in Figure 7.5.

In order to use the device, you need to enter the correct password, which is generally a minimum of four digits. Newer phones such as the iPhone 5S and Samsung Galaxy S5 series (and newer) have thumbprint biometric scanners built into the Home button. Instead of using a passcode, you can be authenticated with your fingerprint or thumbprint. Exercise 7.1 shows you how to change the security settings on iOS 8.
Changing Security Settings on iOS 8
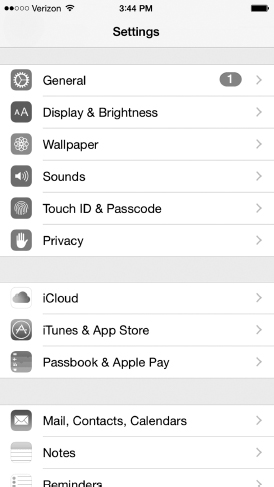
- Tap the Settings app to open it.
- Scroll down to Touch ID & Passcode (Figure 7.6) and tap it.
- Enter your current passcode and tap Done.
- On the Touch ID & Passcode screen (Figure 7.7) you can see the security settings. Tap Change Passcode to change your passcode.
FIGURE 7.7 Touch ID & Passcode

- Enter your old passcode and tap Next.
- Enter your new passcode and tap Next.
- Re-enter your new passcode and tap Done.
Even if you have enabled a biometric sensor on an iPhone, when you power the device on, you must always type in the passcode to access the device the first time.
Configuring External Connections
The overall process to set up a mobile device is pretty straightforward. You buy it from a mobile provider, charge it with its USB cable, turn it on, and follow the prompts to configure it and get connected to your cellular provider. The manufacturers and wireless providers have spent a lot of time to make the setup process accessible and easy to navigate. When it comes to setting up wireless devices, the main areas to focus on are the external connections that fall outside the scope of cellular connections. I will cover each of these in the following sections:
- Wireless
- Bluetooth
- Synchronization
- Airplane mode
Setting Up a Wireless Connection
When you get a mobile device, you generally have a cellular connection to a provider such as AT&T, Verizon, T-Mobile, or others. You pay for a certain amount of data each month, and if you go over that amount you will be charged extra—often, a lot extra. The other primary data connection you can make is to a Wi-Fi network. When you are using Wi-Fi, you are not using your wireless data plan, so essentially your data is unlimited. If you're doing a lot of downloading, using a Wi-Fi connection can save you money, plus it's generally a lot faster than cellular.
The first thing to do when setting up a wireless connection is to verify that your device has wireless capabilities. If not, then this whole process won't work. The vast majority of mobile devices support Wi-Fi, but you will want to confirm that yours does too.
After verifying that your device supports wireless, you want to turn on Wi-Fi. On the iPhone, tap Settings to open the Settings app (Figure 7.8). The second option down is Wi-Fi, and you can see that in this case it's turned off. Tap anywhere on the Wi-Fi line to open the Wi-Fi screen (Figure 7.9). There you see a slider bar to the right of Wi-Fi. Use your finger to slide that to the right into the On position (Figure 7.10). Once you do that, you will see the SSIDs of networks in range under the heading Choose A Network.


My phone is configured to automatically join my network (you can see that it's done so in Figure 7.10), but to join any other network, I would simply tap the SSID I want in the list of SSIDs. Networks with a padlock icon next to them are secured and require a password to join. Next to the padlock you will see a signal strength indicator and an information button. The information button is where you configure options like DHCP.
Once you enter the password and join the network, it will appear underneath Wi-Fi with a check mark next to it. The final step is to verify an Internet connection. To do this, go back to the home screen (push the Home button once to close Settings) and open up Safari. Visit a website, and you are finished!
The process is very similar on Android—open Settings, and you will see Wi-Fi in the left menu under Wireless & Networks (Figure 7.11). The list of networks appears on the right; you select the SSID you want to join and enter the wireless password as needed. Once it's connected (it will say Connected under the SSID), verify Internet connectivity by opening Chrome.
Setting Up Wireless Email
The Blackberry was one of the first “smart” phones to come out, and one of the most revolutionary features it had built in was an email client. Now, practically all smartphones and tablets have built-in clients for several email providers.
FIGURE 7.10 Wi-Fi is on, with available networks.


If you set up email to a standard service such as Yahoo! Mail or Gmail, you won't be asked to input parameters for the mail server name. When connecting to a corporate or other email account you will. You need to be familiar with three protocols that are part of the TCP/IP suite when setting up these types of email accounts:
Post Office Protocol 3 Post Office Protocol 3 (POP3) is an incoming email protocol, which uses port 110 or 945 when configured to use Secure Sockets Layer (SSL) security. POP3 allows for the downloading of email from the server to a client.
Internet Message Access Protocol A newer incoming email protocol is Internet Message Access Protocol (IMAP). The most current version is IMAP4, which allows you to download only selected messages (as opposed to all of them) and also lets you preview a message as opposed to needing to download all of it. IMAP also supports search functions with email and lets you store messages and interact with them on the server instead of just downloading to the client. IMAP uses port 143 or 993 with SSL.
Simple Mail Transfer Protocol The protocol used to send email is Simple Mail Transfer Protocol (SMTP). It doesn't have a lot of features like IMAP does, because it doesn't really need them. You press Send, and SMTP handles the transfer to the server. SMTP uses port 25, or 465 with SSL.
Most of the time, the same email server manages incoming and outgoing email and can handle all three protocols. You just need to tell your client which one to use to receive mail. Exercise 7.2 walks you through setting up an email account in iOS.
Configuring Email on an iPhone
- From the home screen, tap Settings and scroll down until you see Mail, Contacts, Calendars (Figure 7.12).
FIGURE 7.12 Mail, Contacts, Calendars

- Tap Mail, Contacts, Calendars. It will show you accounts as well as the configuration settings for email, contacts, and calendars.
- Tap Add Account (near the top) and it will give you a screen similar to the one shown in Figure 7.13.

- If you have email with any of the listed services, tap it to configure your client. For this example tap Other
 Add Mail Account. Either way, you will get a screen similar to the one shown in Figure 7.14. Here you can add your name, email address, password, and an optional description. Tap Next.
FIGURE 7.14 Adding a new account

- In the New Account screen (Figure 7.15), choose IMAP or POP. If your server supports it, IMAP is preferable. Here you also configure the names of the incoming and outgoing mail servers. Most organizations will have one server handle both functions. Once you have entered the correct information, click Next.
FIGURE 7.15 Configuring email servers

- The iPhone will make connections to the server(s) to verify the username and password. If successful, you will get a screen asking which content you want to receive, similar to the one shown in Figure 7.16. Make your selections and tap Save. It will add your account.
- Now you can use the Mail icon on the home page to retrieve email. Note that you can have several email accounts configured to receive email in this app.
- (Optional) To delete an account, repeat steps 1 and 2 in this exercise. On the Mail, Contacts, Calendars screen (Figure 7.17) tap the account you want to delete.
FIGURE 7.16 Email account content options


- (Optional) Tap Delete Account (Figure 7.18) to remove it from this client.
FIGURE 7.18 Deleting an account

The same principles that you used to add email in iOS also apply in Android. Of course, the process is just a little different. Exercise 7.3 walks you through how to do it.
Configuring Email in Android
- Tap Settings, and scroll down to the Accounts section on the left side. Tap Add Account (Figure 7.19).
- Tap the type of account you want to add. In this example I chose Personal (IMAP).
- Enter your email account name and tap Next.

- Enter your password and tap Next. You will get a screen similar to the one shown in Figure 7.20.
FIGURE 7.20 Incoming Server Settings

- Note that the port is 143 because I chose IMAP. If you tap anywhere on the setting next to Security Type, you can change the security to SSL/TLS. That will automatically change the port number to 993. Tap Next. Android will contact the server and verify the server settings.
- After verifying a connection to the server, you can choose account options like the ones shown in Figure 7.21. Choose the ones you want and tap Next.
FIGURE 7.21 Email account options

- You will get an account confirmation page, where you can edit the account name that gets displayed as well as your name that gets displayed on outgoing messages (Figure 7.22). Tap Next.
FIGURE 7.22 Account setup options

- The new account will appear in your accounts list in Settings. You can access your email through the Gmail app on the home page.
Configuring Bluetooth
Bluetooth isn't a technology you use for full-scale networking, but it works great for short-range connectivity with peripheral devices such as mice, keyboards, and hands-free communication devices.
To enable two Bluetooth devices to communicate with each other, you need to work through a process called Bluetooth pairing. Essentially, it's a setup process that tells both devices that it's okay to communicate with one another. This process is required as an extra security step—you wouldn't want someone you don't know connecting to your Bluetooth-enabled phone in an airport and downloading your email or pictures!
The exact process for Bluetooth pairing will differ by your mobile OS and the device you are connecting to. In general, though, these are the steps:
- Turn on the Bluetooth hands-free device. Some devices will be “discoverable” when they first turn on, and others you will have to make discoverable. Check your documentation to be sure.
- Use your mobile device to locate and select the Bluetooth device.
- Enter the Bluetooth device's passcode.
- Confirm pairing on the Bluetooth device by pressing a button or a combination of buttons.
Here's a specific example from when I paired my iPhone to the hands-free audio system in my car.
- First, I enabled the Bluetooth pairing in my car. It will often involve using menu or voice commands to begin the pairing process.
- When the car was ready, I went into Settings Bluetooth and slid the switch to enable Bluetooth, as shown in Figure 7.23. It found the car's multi-media system.
- I tapped the Car Multi-Media device, and it took me to the PIN screen where I entered the four-digit PIN, as shown in Figure 7.24. (The car's setup program told me what the PIN was; your device documentation will tell you the default PIN, or you can try 0000.) I then tapped Pair.
- My iPhone showed me that the device was connected and ready for use (Figure 7.25).
- If I want to un-pair the devices, I can tap the information icon next to the word Connected and then tap Forget Device.
For specific instructions on how to pair your devices together, check the instructions for the Bluetooth device you are pairing with.

Disable Bluetooth on your mobile devices unless you know you are going to use it. There are two reasons. The first is that enabling Bluetooth will run down your battery faster than if it's disabled. The second is as a security precaution. When Bluetooth is enabled, you may be vulnerable to Bluejacking or Bluesnarfing. Bluejacking is the sending of (usually) harmless messages to your device via Bluetooth–think of it as Bluetooth spam. Bluesnarfing occurs when someone connects to your device without your knowledge and has access to all of the data (pictures, contacts, emails, etc.) on your device. They can then hack your data or copy it to their device for later use.
FIGURE 7.23 Bluetooth device found


You can also perform data transfers between devices using Bluetooth by setting up an ad hoc network. Most often this will be used to transfer pictures, videos, or contacts from one device to another. To do this, you need to download a Bluetooth sharing app from your device's app store and then pair the devices. More details on this process are covered in Chapter 6, “Network Sharing and Storage.”
Configuring Synchronization Options
Synchronizing your device has two benefits. The first is that you can access your files online or from your device. The second is that it provides a backup of your files in case you need to restore your device. Hopefully you'll never need to use the second option, but having backups of your important data is always important.
iPhones and iPads can sync to iTunes on a desktop or laptop computer or to the iCloud. On the device itself, you can configure various options through Settings ![]() iCloud or Settings
iCloud or Settings ![]() iTunes & App Store. Figure 7.26 shows the sync summary of the iTunes app on a desktop computer. To get to this screen, you need to have the device plugged in. Then, click the icon that looks like a phone near the upper-left corner. You can see in Figure 7.26 that the phone icon is highlighted in blue.
iTunes & App Store. Figure 7.26 shows the sync summary of the iTunes app on a desktop computer. To get to this screen, you need to have the device plugged in. Then, click the icon that looks like a phone near the upper-left corner. You can see in Figure 7.26 that the phone icon is highlighted in blue.
Within this app you can see the summary or configure synchronization options for individual types of media or apps. You can also set the backup options to back up to the iCloud or the local computer. The choice comes down to whatever is more convenient for you. There are additional options on this page such as to sync automatically when the phone is connected and to sync over Wi-Fi.

Setting up sync is easy within Android as well. You will find it in one of two places. Either open the Backup & Reset app and look in Settings, or tap the Apps icon and then go to Settings, as shown in Figure 7.27. From there, tap 1ClickSync and you can configure your sync options for the Google Play store, Google+, or Google App (Figure 7.28). All of your data will be synched to Google Drive.
FIGURE 7.27 Settings apps on Android

FIGURE 7.28 1ClickSync options

Using Airplane Mode
Airplane mode isn't as much about setting up connections as it is disconnecting from everything. Enabling Airplane mode shuts off all of your wireless connections, including cellular, Wi-Fi, and Bluetooth. You can get to Airplane mode on an iPhone in a couple different ways. One is to open Settings, and it's the first option you'll see (Figure 7.29). When you slide it on, notice how all of the other connections are turned off.
FIGURE 7.29 Airplane mode on iOS 8

The other way is to access it from the Control Center. You can do this from both the lock screen and the home screen. Simply swipe your finger up from the very bottom of the iPhone's touchscreen, and you will get the Control Center, similar to what's shown in Figure 7.30.
FIGURE 7.30 iPhone Control Center

Tap the airplane icon in the upper-left corner to enable Airplane mode. Notice that you also have a few other handy features in the Control Center, such as the ability to control music, turn on your flashlight, and use your calculator or camera.
To enable Airplane mode in Android, open Settings and then tap More under Wireless & Networks (Figure 7.31). Tap the check box next to Airplane Mode and you're all set.
Getting Additional Apps
The first Blackberry smartphones didn't have additional apps to download—you simply got what the manufacturer gave you. Newer devices came along that gave you the option to customize, and part of the reason BlackBerry declined so quickly was its slowness to adapt to that change. Now, downloading apps to mobile devices is a pretty common thing for mobile users to do, whether it's to increase your productivity or maintain your sanity with a new distraction.
FIGURE 7.31 Airplane mode in Android

Each mobile platform has its own specific application store. Much like workstation apps are built for a specific OS, so are mobile apps. If you are using iOS, you get to the iTunes app store by tapping the App Store icon on the home screen. The app will look similar to the one shown in Figure 7.32. There are categories for the top free and paid apps and the ability to search for specific apps and update the ones currently on your device.

The Google Play app store is where to go for Android-based devices. You get to it by tapping the Play Store app from the home page. You will get a screen similar to the one in Figure 7.33. Here, you have six categories to browse for apps as well as some popular apps to choose from. You can also search by using the magnifying glass icon in the upper-right corner.

To install the app you want, tap it. You will be able to see more information on it including what it does and reviews from other users. Then tap Install or Get. If apps have additional in-app purchases they will tell you, like the example in Figure 7.34 does. If it's not a free app, it will tell you (instead of the Install or Get button, it will have a button with the cost), and then you can make the decision to purchase it or not.


Avoiding Unpleasant and Expensive Surprises
The explosion of mobile devices has given billions of people instant access to data at their fingertips. What used to be friendly arguments with no provable answer now quickly turn into a chorus of “Just Google it!” Constant access has also led to some unpleasant side effects, though.
Either you have seen stories like this on the news, or maybe it's happened to you or someone you know. The exact details change but the general premise is like this: Joe or Jane user gets a bill from their cellphone or credit card company with several hundreds or thousands of unexpected charges on it. Ultimately it gets traced back to their smartphone or tablet and the fact that the user unwittingly did something to rack up those huge costs. What happened?
It's usually one of a few things:
- Using too much data
- Roaming charges (especially internationally)
- In-app purchases
When you register a mobile device with provider, you will buy a data plan. Maybe you'll get only 2 GB of data per month or maybe you'll get 20 GB. But if you go over the allotted amount, the charge for extra data can be pretty expensive. Perhaps under normal circumstances you don't go over your data plan, but let's say you go on vacation. While in the car or at your destination you choose to download some music, check email, and surf the Web like you normally do. Only now you're using your minutes and data plan as opposed to using your Wi-Fi at home. You might not realize it at the time, but your idle surfing is costing you a lot of money.
If you're travelling internationally, the problem can get even worse. Check your plan to see what the provision is for travelling out of your home country. Some providers will automatically charge those minutes and that data as roaming, which will make it very expensive in a hurry.
The last one is in-app purchases. It might have been free to download the game and even to play it, but perhaps you can buy some gems or coins or something to level up even faster. Why wait around when you can become level 50 with just a few dollars? Maybe you have restraint when it comes to this, but maybe you don't. And maybe it's not you. Last year, one of my friends let her three-year-old son play Candy Crush Saga on her tablet while in the car. The next month a bill came for nearly $500 for in-app purchases. It wasn't what she considered money well spent.
So how do you protect yourself against unexpected bills? First, be sure to understand your wireless plan, including minutes, data maximums, and roaming charges. If you are going to travel, it might be worth it to increase your plan for a month or two as opposed to paying overuse fees.
Second, you can change settings on your phone to potentially minimize the damage. In iOS 8, you can go to Settings ![]() Cellular
Cellular ![]() Roaming to tell your phone how to behave, as shown in Figure 7.35. Turning off roaming is a good way to avoid unexpected surprises.
Roaming to tell your phone how to behave, as shown in Figure 7.35. Turning off roaming is a good way to avoid unexpected surprises.
FIGURE 7.35 iOS 8 cellular settings

Finally, configure your app store account and apps so that new apps and in-app purchases require a password—and make sure your child or friends don't know it! (My friend: “Well, I guess he saw me type it in enough that he figured it out.”) A few simple steps can potentially save you a lot of money—it's always a good idea to know how your device is being used and what you are and are not required to pay for.
Summary
This chapter gave you the essential background of how to use mobile devices and some of the unique features that users of these devices need to be familiar with. First, you learned how to interact with a device that doesn't have the traditional computer input methods. Examples include tapping, swiping, and pinching, as well as the kinetic sensors built into the devices. You also learned about screen orientation and locking and security.
Next, you learned how to configure external connections. Mobile devices come readily equipped to handle cellular connections. Beyond that, you can configure Wi-Fi connections, email, Bluetooth pairing, and synchronization. Airplane mode is used to turn all external connections off.
Finally, you learned about the two most popular app stores to enhance the functionality of mobile devices, including where to find apps and how to install them.
Exam Essentials
Understand the unique methods you can use to interact with mobile devices. Examples include tapping, swiping, and pinching, as well as interacting through the use of built-in kinetic sensors.
Know how to configure external connections. Most connections are configured through the Settings app. Examples include Wi-Fi, email, Bluetooth, synchronization, and Airplane mode.
Understand incoming and outgoing email protocols. The protocols used to receive mail are POP3 (port 110) and IMAP (port 143). The protocol used to send email is SMTP (port 25).
Know how to quickly turn off Wi-Fi and cellular connections on your mobile device. This is accomplished by enabling Airplane mode.
Know where to get new apps for mobile devices. For iOS devices, use iTunes, which is accessed through the App Store icon on the home screen. Android devices use the Google Play Store icon on the home screen.
Chapter 7 Lab
IT professionals need to know how to use a variety of operating systems in order to configure items properly and help clients fix issues. Even if you're not pursuing an IT career, knowing different operating systems can help you easily navigate through problems when you encounter something unfamiliar to you. After all, users do the same types of tasks on nearly all computers, regardless of the OS. The trick is to figure out how to do it on a system you are not as familiar with. This lab will have you install the Andy emulator on your computer and familiarize yourself with the Android operating system.
To install Andy, visit www.andyroid.net and click the Download button. Follow the prompts to install it on your computer. It will not damage your computer's operating system or other software. Once installed, you should have a Start Andy icon on your desktop. Use that shortcut to launch Andy. Here are some questions for you to answer:
- There are three buttons at the bottom in the black area of the window. What are they called and what do they do?
- What's the easiest way to do a Google search?
- How do you see the apps installed on this virtual device?
- What is the functionality of each of the seven icons on the bottom of the home page?
- How do you see what apps have recently been opened, and how do you close them?
- Where do you configure accessibility options for disabled users?
- How do you change security settings for this device?
- Install a new app of your choice. Was it easy or difficult? How do you launch the app? How do you delete the app icon from your home page? Does it delete the app?
- Create a new group for your app, and then move the app there. How did you do it?
Review Questions
- Using an Android phone, you want to scroll down. What do you do to accomplish this?
- Swipe up
- Swipe down
- Pinch fingers together
- Start with pinched fingers and separate them
- Ronnie is configuring a new iPad to receive email from the corporate email server, which supports POP3. What port number does POP3 use?
- 25
- 110
- 143
- 443
- Which motion while using an iPhone allows you to zoom in on a map?
- Tap
- Double tap
- Pinch
- Reverse pinch
- When configuring your manager's new iPad, she asks you what protocol is used by the email client to send email. What do you tell her?
- IMAP
- POP3
- SMTP
- SNMP
- Rachel is using her iPad to view pictures. She turns the iPad 90 degrees and the image turns as well. Which sensor allowed this to happen?
- Accelerometer
- Magnetometer
- Turnometer
- Gyroscope
- Which port does IMAP use by itself, and which port does it use when combined with SSL security?
- 143 and 993
- 143 and 945
- 110 and 993
- 110 and 945
- Francis is trying to change the settings on his iPhone. He opens the Settings app. In order to see them better, he turns his phone 90 degrees but nothing happens. What is the most likely cause?
- The gyroscope is broken.
- The Settings app does not support rotation.
- He needs to enable app rotation in Settings first.
- He needs to turn off the device and turn it back on to reset the rotation feature.
- What is the term used that refers to connecting two Bluetooth devices together for communications?
- Synching
- Netting
- Pairing
- Partnering
- Agi has an iPhone with a biometric scanner enabled. What methods can she use to unlock her phone?
- Fingerprint only
- Passcode only
- Fingerprint or passcode
- Fingerprint, passcode, or iris scan
- What term refers to having data stolen from your device via Bluetooth connection?
- Pairing
- Bluesurfing
- Bluejacking
- Bluesnarfing
- Your friend recently got a new Android phone and comes over to your house. What app does your friend use to set up a Wi-Fi connection with your wireless router?
- Wi-Fi
- Settings
- Networking
- Connections
- Which of the following are the right protocol and port number for sending email from a wireless device?
- SMTP and 25
- SMTP and 110
- IMAP and 25
- IMAP and 110
- You are setting up a new Wi-Fi connection on your Android phone. What step do you take after turning on Wi-Fi?
- Verify wireless capabilities.
- Enter the wireless password.
- Verify the Internet connection.
- Locate SSID.
- You want to enable backups of your new iPhone. Which two options do you have? (Choose two.)
- iDrive
- iCloud
- iTunes
- iBackup
- Sally is configuring an email account on an Android phone. Which two protocols are used to retrieve mail? (Choose two.)
- IMAP
- POP3
- SMTP
- SNMP
- Which of the following accurately describes what Airplane mode does on an iPhone?
- Turns off the Wi-Fi connection
- Turns off the Bluetooth connection
- Turns off the cellular connection
- Turns off all wireless connections
- Your co-worker Ryan is setting up email on his director's new iPad. Ryan does not know the name of the SMTP server, but the iPad needs to be set up in the next 10 minutes. What advice should you give him?
- Leave it blank.
- Enter the same server name as the IMAP server.
- Enter smtp.company.com.
- Configure the iPad to send email using IMAP instead.
- You need to find a new productivity app for your Android-based tablet. Where should you look?
- iTunes
- Google Drive
- Google Apps
- Google Play
- You are configuring an email account on an Android tablet and choose the IMAP protocol. What port number does IMAP use?
- 25
- 110
- 143
- 443
- Rebecca wants to get a copy of the newest game she heard about for her iPad. Where should she go to find and download it?
- iTunes
- iApps
- iPlay
- Google Play